Printable Version of Topic
Click here to view this topic in its original format
914World.com _ 914World Garage _ Orange '74 Resto, shot some PAINT!
Posted by: sendjonathanmail Oct 30 2008, 08:00 PM
We've been working on a '74 2.0 that we picked up a year ago in VA. Solid for the most part, floors are nice. Over the past 2 months we have been doing some work on it.
The goal is just a nice driver. It will be the original Phoneix Red (which is more orange than red). It will be powered by a 2.0 FI, if I get can the D-Jet figured out. I'll update this thread weekly or more often, whenever something notable gets done.
Heres what we started with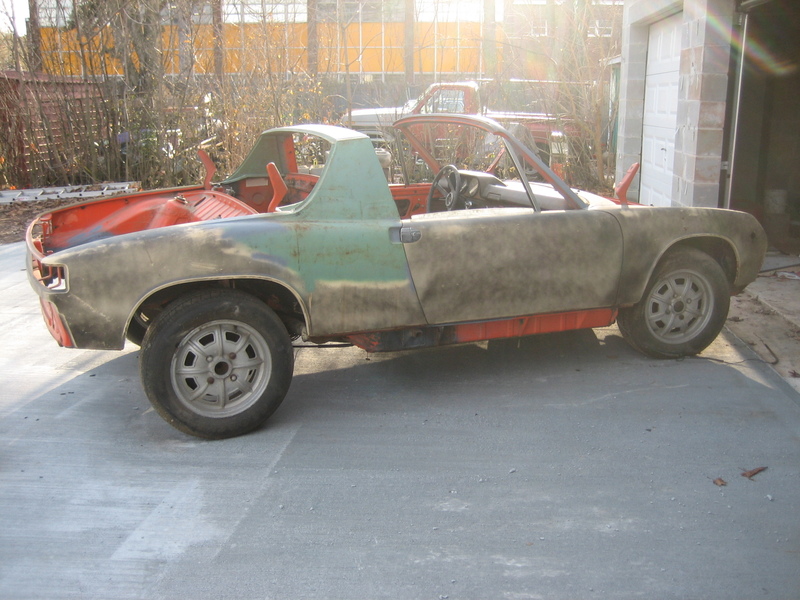
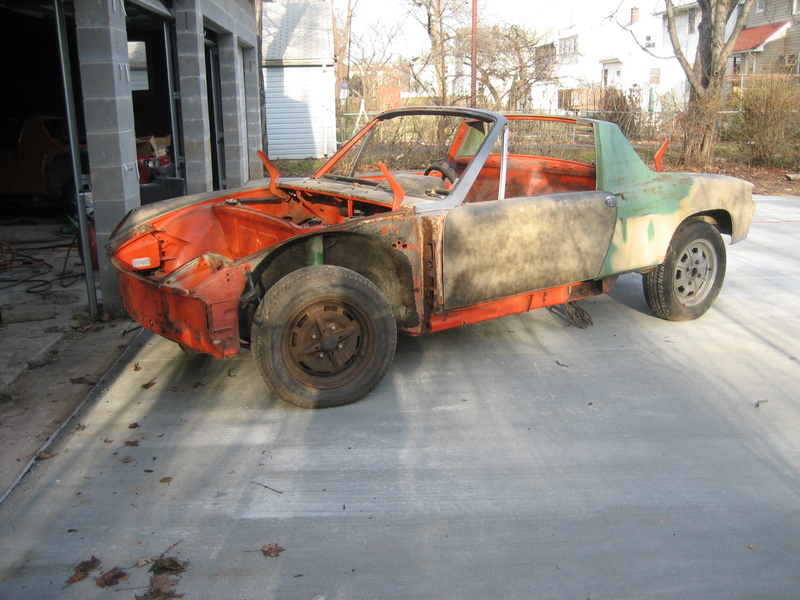
Posted by: sendjonathanmail Oct 30 2008, 08:04 PM
The PO had cut out a section of the drivers long and drivers door sill that needed replacement.
In this pic you can see the doorsill cut out, and the following pic is the long cutout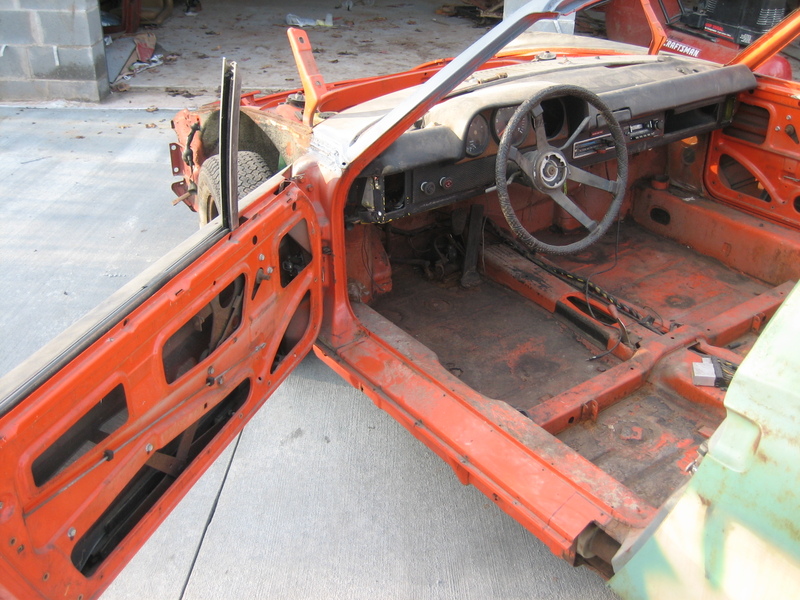

Posted by: sendjonathanmail Oct 30 2008, 08:06 PM
Voila, fixed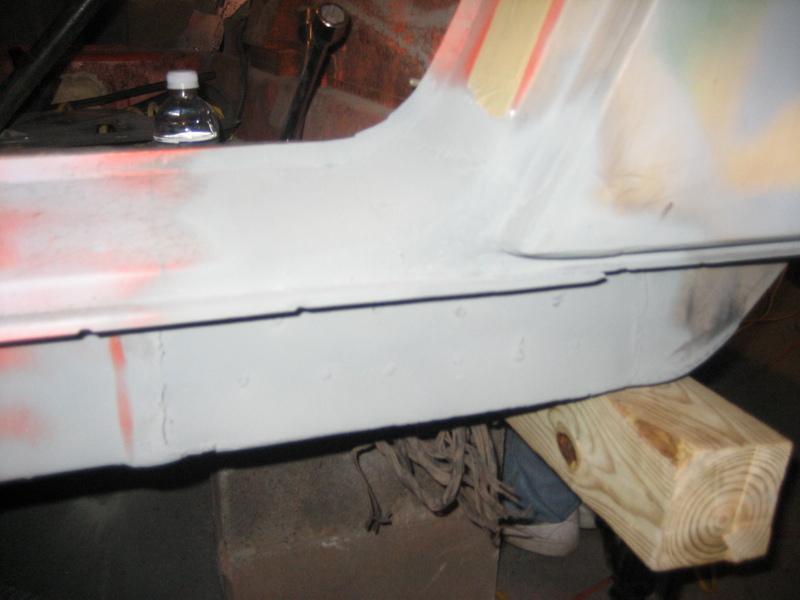
The hell hole, firewall and rear trunk have all been completed as well. I'll take some pics of those tomorrow
Posted by: JRust Oct 30 2008, 11:58 PM
Nice looking project! Good looking weld work  Keep it up
Posted by: sendjonathanmail Nov 2 2008, 09:37 AM
Closed up the firewall and the hell hole. The welds still need to be cleaned up.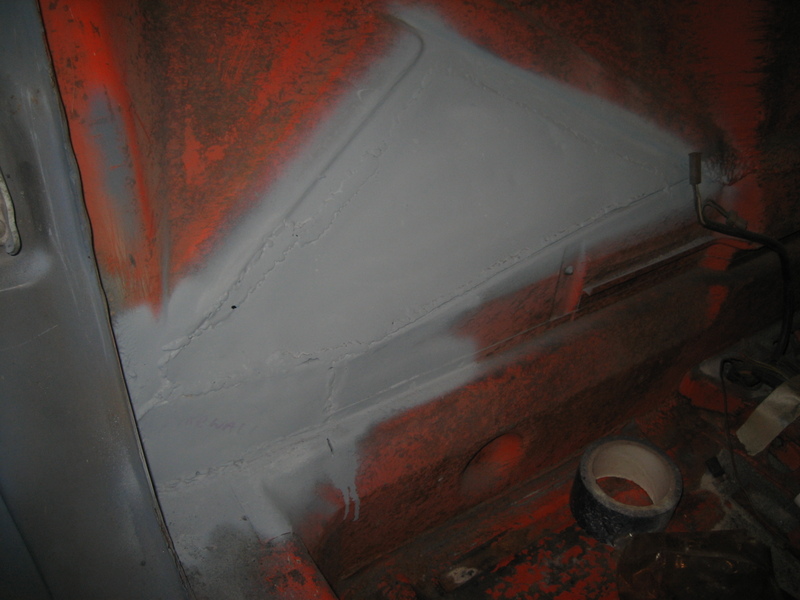
Posted by: sendjonathanmail Nov 2 2008, 09:42 AM
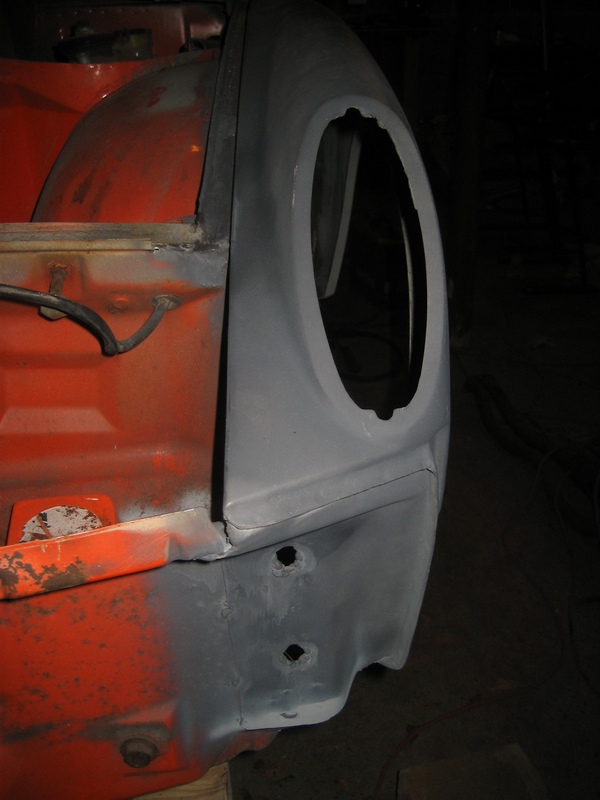
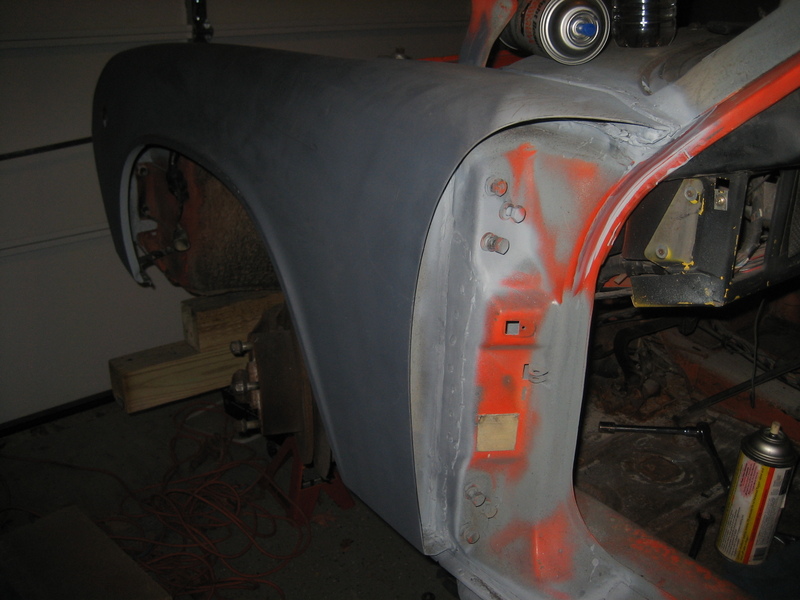
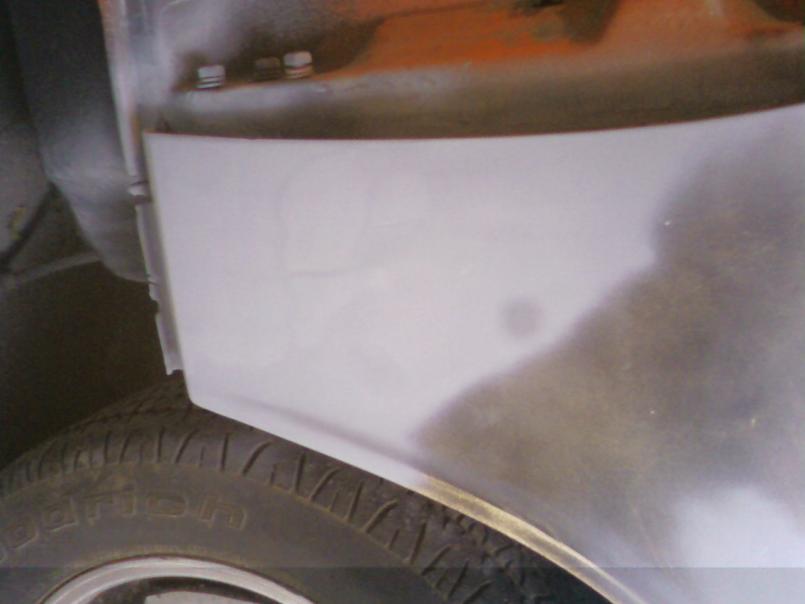
Also reattached the drivers fender. This is a replacement fender that the PO included with the car, came off of a green car.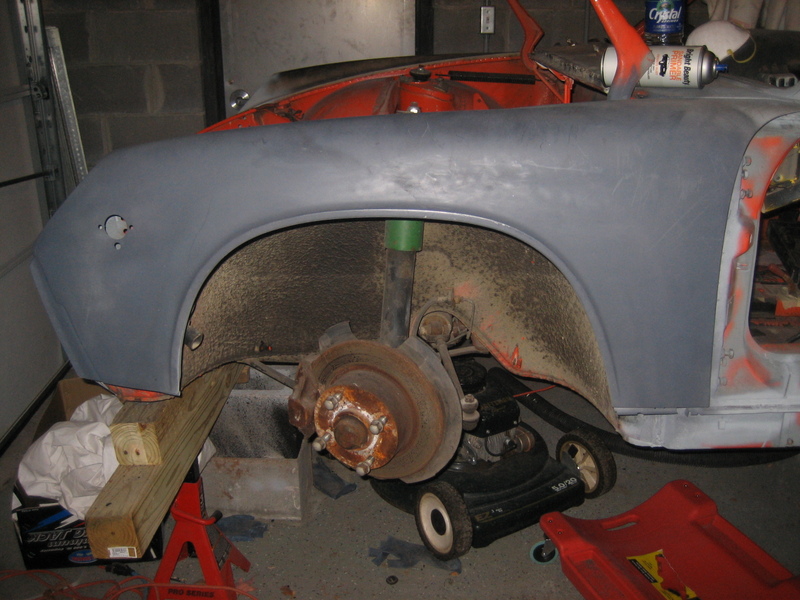
Next order of work is a questionable area in the passenger footwell 

Posted by: sendjonathanmail Nov 8 2008, 05:29 PM
Found a hole in the passenger footwell, and after cleaning out the seam sealer it became an even bigger hole. So anything questionable was cut out, and a patch was welded in. Also closed up the end of the longitudinal which was open.
These pics are taken from the pass. wheelwell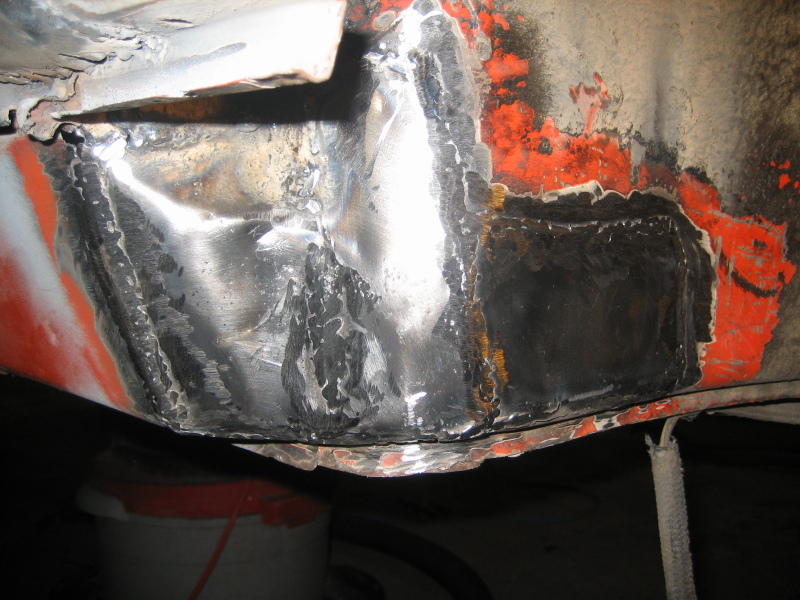

Posted by: jc914 Nov 9 2008, 03:10 PM
Keep up the good work and keep us posted
Posted by: FourBlades Nov 9 2008, 05:21 PM
Good looking work.  I had the same holes in my firewall. I would not
worry about grinding the welds too much. You will need to seam seal it, then
cover it up with the upholstrey anyway. I was surprised how much weld bead
is hidden once you put on the seam sealer.
John
Posted by: sendjonathanmail Nov 9 2008, 05:28 PM
Thanks guys. The welds on the firewall along with the welds in the trunk and in a few other places, I didnt bother grinding perfectly smooth. I still need to go to a local paint supply place to pick up some seam sealer, I've been meaning to do that.
Today I started stripping the pedal cluster area. There was alot of flaky rust, but after cleaning the area up with a wire wheel it seems very solid. This is one place I didnt want to sandblast so I wouldn't have sand stuck up behind the dash. Mostly everywhere else that was rusted on the car we sandblasted.
Posted by: i love porsche Nov 9 2008, 08:45 PM
great work! are you doing the welding? it looks good
hopefully you will keep the momentum you have, let me know if i can help at all
Posted by: sendjonathanmail Nov 10 2008, 06:40 AM
Thanks Aaron. Yes, all the welding is being done by us.
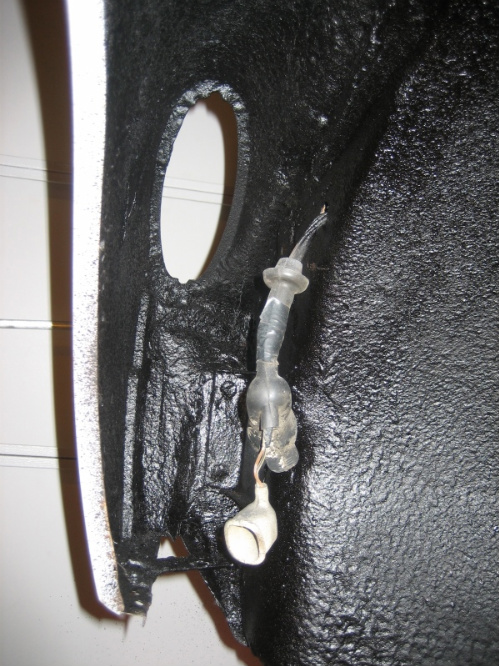
Posted by: sendjonathanmail Nov 22 2008, 05:45 PM
So I picked up some brushable seam sealer from a local paint/body supply store. I sealed up the trunk, firewall and the entire new fender. Still have to do the hell hole and some spots inside the car. Its slowly coming together 
Posted by: sendjonathanmail Nov 23 2008, 05:56 PM
Today I fabbed a new sill support triangle for the passenger side longitudinal. I first made a paper template then cut it and bent the edges to replicate the original. After lots of testing and trimming, im happy with the final product, and with the $16.50 that I saved. All thats left to do is drill the 2 holes and then 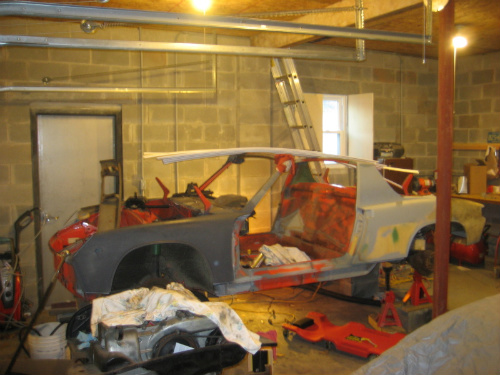
Posted by: jc914 Nov 23 2008, 06:11 PM
Keep up the great work keep us all posted with nice pictures!!!!!!!
Posted by: Spoke Nov 24 2008, 01:52 PM
Nice work.
If you have questions about D-Jet, I just tested mine w/o the engine and found all inputs to the brain to be functional. Test each part separately then it should work when put back together.
The PO's mechanic told me he couldn't get the D-Jet working so they replaced it with single center carb. 
When the mechanic moved, he gave me the FI parts from my car. I checked everything out and found the vacuum advance unit to be leaking very badly. This seemed to be the only thing I found wrong with it. Got a new one, tested all FI stuff off the engine; put it all on the engine and it fired up and ran well.
Posted by: sendjonathanmail Nov 25 2008, 12:34 PM
Thanks. I have a 2.0 (from a '76) that will be going. The FI system was taken off the motor, hopefully it doesn't prove too much of a challenge to put together. 
Posted by: Root_Werks Nov 25 2008, 12:46 PM
Posted by: Vacca Rabite Dec 4 2008, 07:24 PM
Have you decided if you are going to just cap off the smog injection ports and run it, or are you going to build the engine into something better?
I did not want to rebuild the 2056 I bought, but I am really I did. It was a very good experience, and taught e a TON about how these things work.
Zach
Posted by: sendjonathanmail Dec 4 2008, 08:36 PM
Hey Zach, for now we are going to cap the smog ports, assemble the D-Jet and run it. Hopefully the D-Jet doesn't prove to be too much of a challenge. The motor is up on a stand right now, and all the tin is cleaned up and on it, i'll get a pic up this weekend. Haven't had much time to work on the car lately with school and work.
Posted by: jd74914 Dec 4 2008, 09:16 PM
It looks great! What's left for rust repair?
If you go through it methodically the fuel injection isn't too big a challenge. Its pretty simple.
PS: You aren't supposed to be working your senior year.
Posted by: sendjonathanmail Dec 5 2008, 06:38 AM
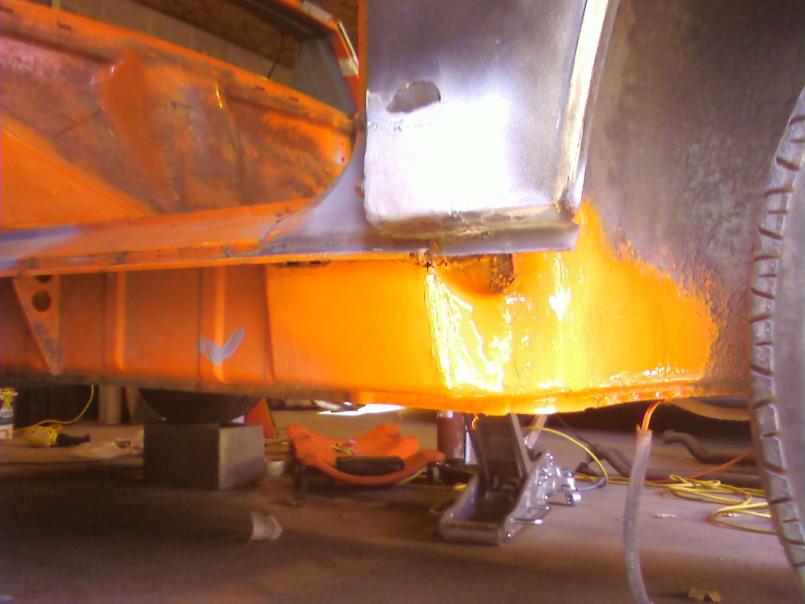
Most of the rust repair is done, now im just finishing up the front trunk gutter where the seal sits. I had to cut out a section and weld in a new piece. After that, all the rust should be taken care of.
I wish
Posted by: sendjonathanmail Dec 7 2008, 12:29 PM
Last weekend I cleaned up some rust in the pedal area with a wire wheel, and primed it. During the week I cleaned up the actual pedal cluster; pedals still feel tight. Yesterday I painted the pedal cluster rustoleum black. The pedal area recieved a few coats of orange 

Posted by: sendjonathanmail Dec 7 2008, 06:06 PM
I also finished seam sealing the hell hole, but this will get painted along with the rest of the car, not like the pedal area.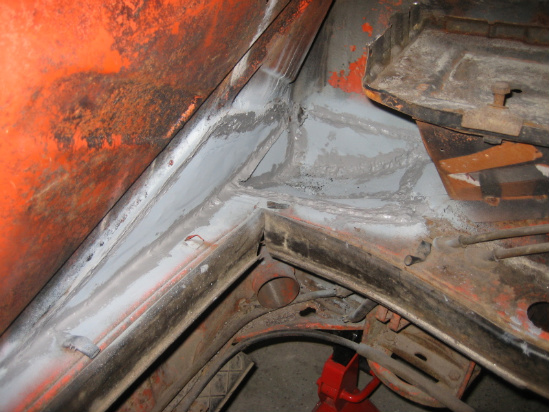
I need to get a heater for the garage
Posted by: sendjonathanmail Dec 13 2008, 10:01 PM
Today was an eventful day. Aside from going to an interview and being accepted to my 1st choice college  I was able to spend a nice part of the day working on the 914. Along with a friend, we worked on finishing seam sealing underneath the rear trunk panel that was welded in. After a trip to FLAPS to pick up a few cans of undercoating (we're using Dupli-color professional rubberized undercoating @ $7/can), we cleaned up the drivers front wheelwell and started spraying. The can says to shake for 3 minutes, but that left it too watery. A few more minutes thickened it up. It goes on evenly and covers well. My plan is to undercoat all 4 wheelwells, and touch up some areas underneath where the original undercoating has worn away.
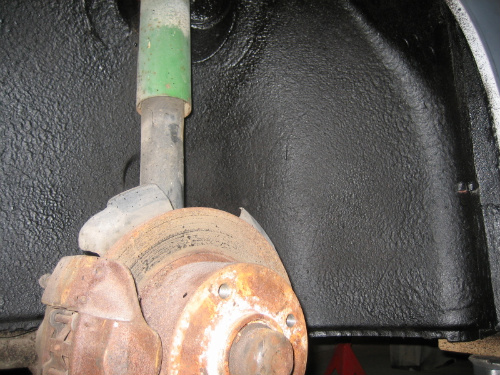
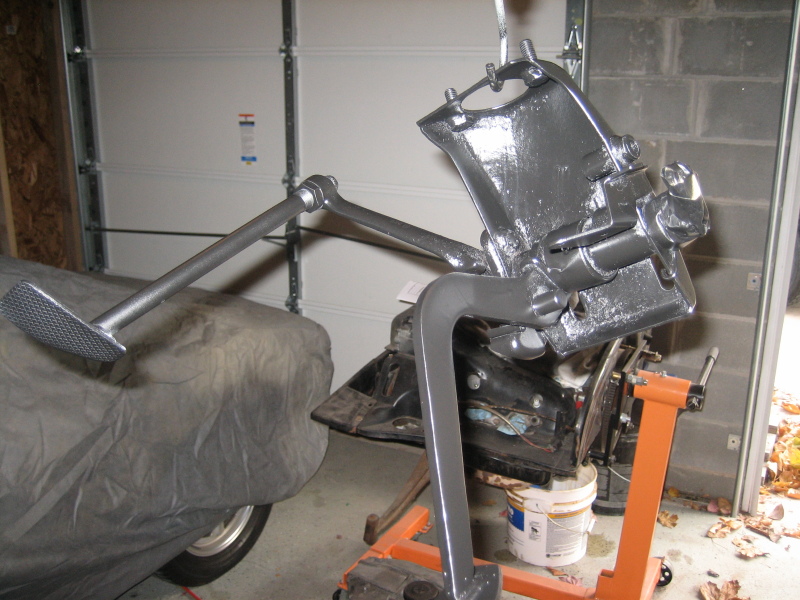
Also installed the pedal cluster 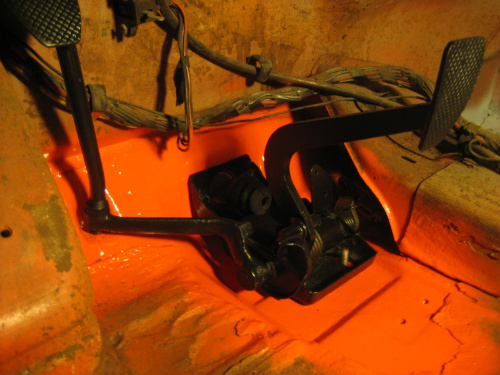
Posted by: sendjonathanmail Dec 15 2008, 01:04 PM
Yesterday I seam sealed the hell hole repair from the inside of the fender and I undercoated both rear wheelwells, paying particular attention to the area behind the door catch and under the sails. I also painted the long repairs on both sides and will be undercoating the longs. Pics to come.
Posted by: jd74914 Dec 16 2008, 07:10 AM

Today was an eventful day. Aside from going to an interview and being accepted to my 1st choice college
I was able to spend a nice part of the day working on the 914. Along with a friend, we worked on finishing seam sealing underneath the rear trunk panel that was welded in. After a trip to FLAPS to pick up a few cans of undercoating (we're using Dupli-color professional rubberized undercoating @ $7/can), we cleaned up the drivers front wheelwell and started spraying. The can says to shake for 3 minutes, but that left it too watery. A few more minutes thickened it up. It goes on evenly and covers well. My plan is to undercoat all 4 wheelwells, and touch up some areas underneath where the original undercoating has worn away.After painting everything, I used the duplicolor stuff. Its held up really well for the past 6K or so (this winter will be the real test).
Congrats on your college admission! If I may ask, where did you pick?
Posted by: FourBlades Dec 16 2008, 07:39 AM
Your car is looking good. I used the same undercoating.
Is this going to be your college car? That will be very cool because of how
rare these cars are now... 
John
Posted by: sendjonathanmail Dec 16 2008, 12:32 PM
Hey man, I decided on NJIT
Posted by: Cupomeat Dec 16 2008, 12:59 PM
Good choice on not using the teener as a DD. I used mine as a college car back in the early 90s and it didn't carry enough people to make it useful in school, wait maybe it was perfect  ... lol
Plus you can easily go home to drive the car on weekends which makes it more special.
BTW, When you said your pedal cluster was tight, what did you mean? Did you put the bronze pedal bushing in? I highly recommend that upgrade after going with the nylon bushings for my first rebuild.
Good thread, Keep up the good work!
Posted by: jd74914 Dec 16 2008, 01:27 PM
Hey man, I decided on NJIT. I wont be using the 914 as a DD just because of the parking situation.
Awesome; a friend of mine looked there a while ago but ended up going somewhere closer to home.
Good choice on not using the teener as a DD. I used mine as a college car back in the early 90s and it didn't carry enough people to make it useful in school, wait maybe it was perfect
... lolMy 914 is my college DD and the limited persons capacity is one of my favorite parts (largely for the reason insinuated above).
Posted by: sendjonathanmail Dec 16 2008, 07:02 PM
We are using the pedal cluster from my dads old car. He rebuilt the pedal cluster, but it didn't get much use before he stopped driving the car.
Heres the latest progress: I seam sealed the area in the passenger front wheelwell that was repaired, and painted it. Next step is to undercoat this wheelwell and passenger longitudinal. The paint we're using for the small repairs is Rustoleum orange, very close to the color of the car.

Posted by: sendjonathanmail Dec 20 2008, 07:29 PM
The last bit of rust repair that the car needed was a section on the front panel. The metal rotted away around the passenger side bumper mount, and also rotted out the adjacent corner of the headlight bucket. The offending metal was cut away and the bumper mount and the surrounding area were wire brushed and primed. A patch was cut and welded in.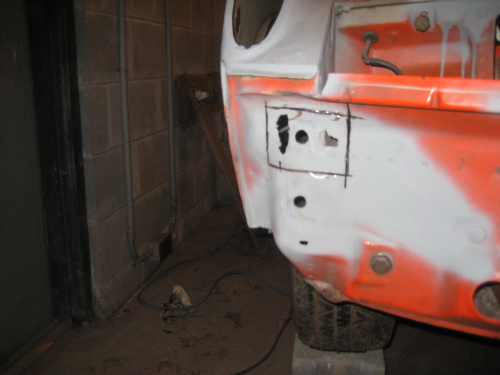
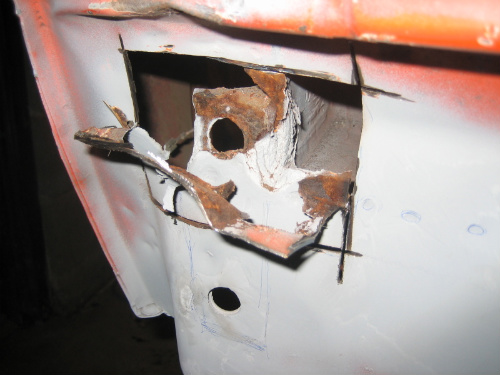
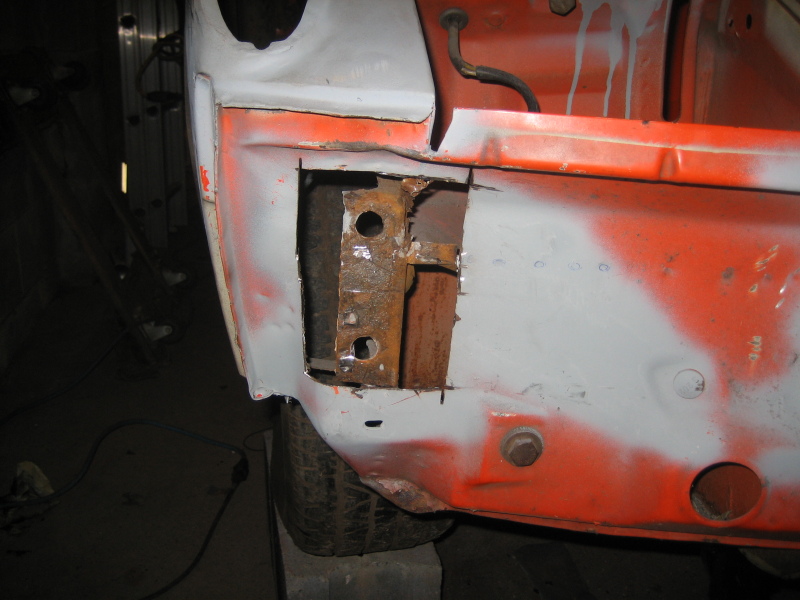
Still need to finish up welding inside the headlight bucket.
Posted by: sendjonathanmail Jan 3 2009, 05:38 PM
Hey guys, haven't had much time with the holidays and such. Back to work!
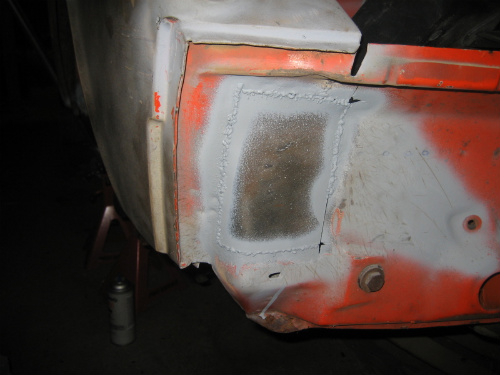
Finished up the headlight bucket over the holidays and seamsealed it so thats done. Also undercoated the passenger wheelwell. All the areas under the car where the undercoating was thin, were wirewheeled, and then painted, then the entire underneath was freshly undercoated.
Today my dad made and welded in a patch for a hole in the passenger fender dogleg.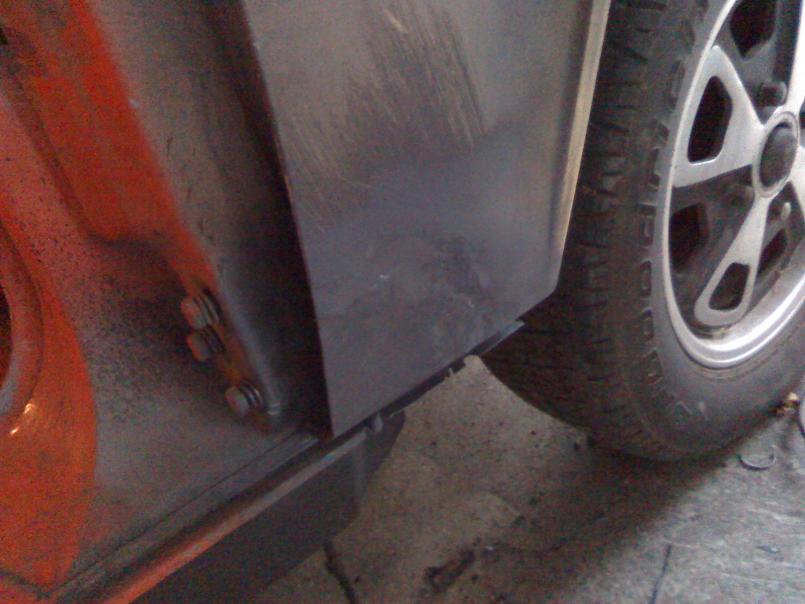
Also picked up a gallon of body filler and a gallon of Dupont 2K primer/activator from a local paint&body supply place. We are starting on bodywork soon!
Posted by: jd74914 Jan 4 2009, 09:43 AM
Awesome! Its looking good Jonathan.
Posted by: sendjonathanmail Jun 13 2009, 04:45 PM
Well, my dad and I have been working hard on the 914. Its been a while since my last update, so I figured I'd catch you guys up. We've been doing bodywork and working on small details. All the rust is taken care of, the undercoating is done, everything is seam sealed. Bodywork is almost done too, we are just about ready to spray the primer, then paint! We are still trying to decide whether to fill the sidemarker light holes.
Posted by: timofly Jun 13 2009, 06:18 PM
If you need parts, especially small ones, PM me. I have an orange (tangerine?) '74 that is in restoration. I am in Northern NJ and I've collected some things I won't need.
Don't worry about the D-Jet. Ours worked OK after sitting for 30 years! There seem to be parts available so far.
Posted by: sendjonathanmail Jun 13 2009, 06:34 PM
Thanks Timofly, I sent you a PM
Posted by: jd74914 Jun 14 2009, 08:54 AM
Its looking good Jon.
Posted by: sendjonathanmail Jun 17 2009, 08:32 PM
Thanks Jim. Lately i've had more time to work on the car; school's almost over, and I graduate next week so progress should me moving quickly now. Today I spent some more time sanding and sanding and sanding, its getting smoother
Sorry for the crappy cell pics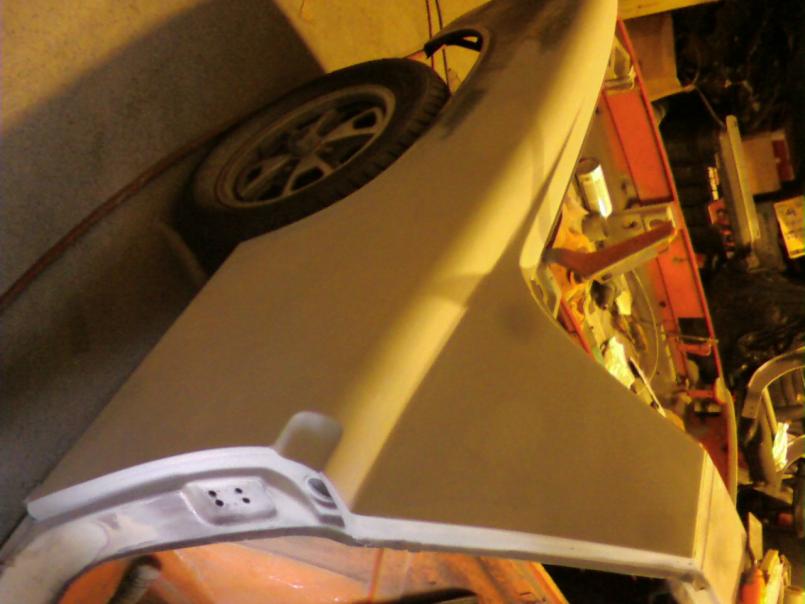
Posted by: sendjonathanmail Oct 21 2009, 09:10 PM
Well, its been a while since my last update. Haven't had too much time to work on it with school and such, but I've found time to do bodywork. Looks like this weekend i'll be priming it
Posted by: sendjonathanmail Oct 22 2009, 08:46 PM
Well, got some more done today. Started to mask so I can prime it this weekend! Went with Dupont Urethane 2k, got a gallon of it and reducer. Hope its enough?
Posted by: sendjonathanmail Oct 24 2009, 11:27 PM
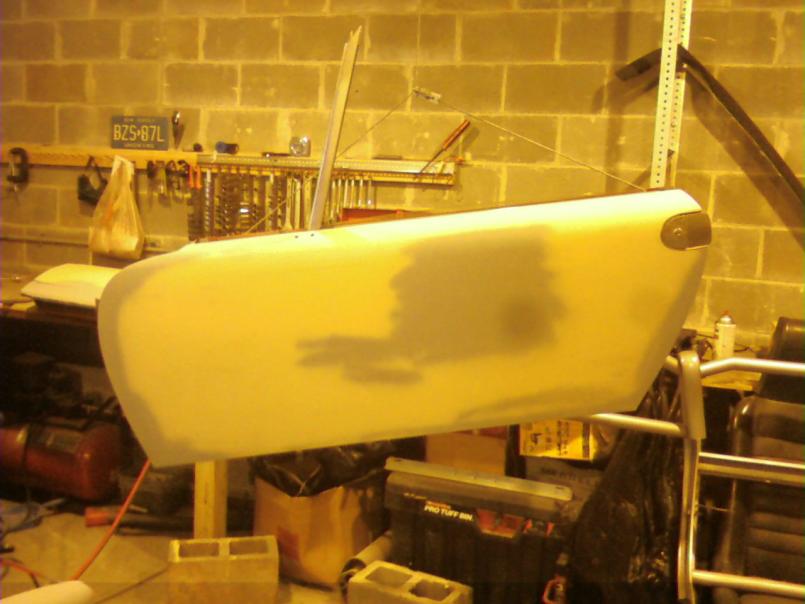
Well, I finally primed it! Spent the afternoon sanding and masking, then spent a few hours priming. Used Dupont 2K urethane primer in beige color. Gun was a HVLP Craftsman from Sears.
Cell pics for now (this is after all the wheel masking was removed), i'll get better ones tomorrow. 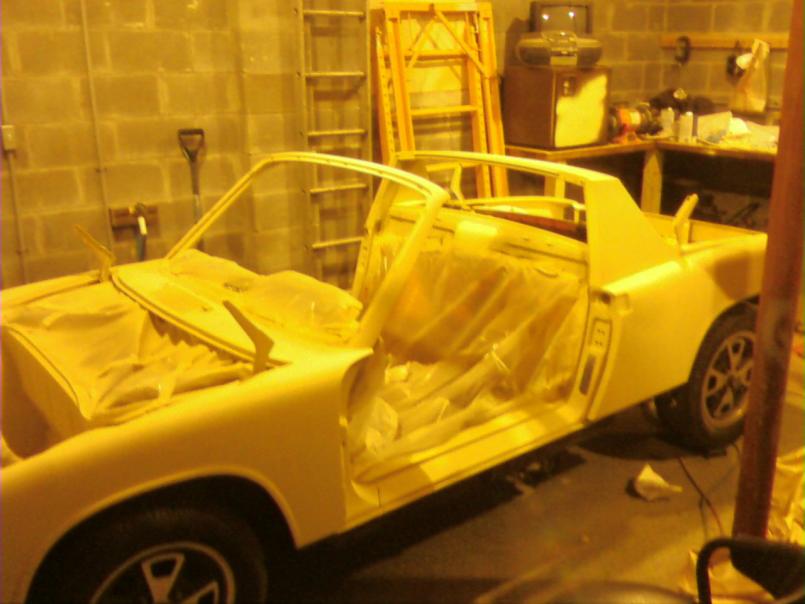
Attached thumbnail(s)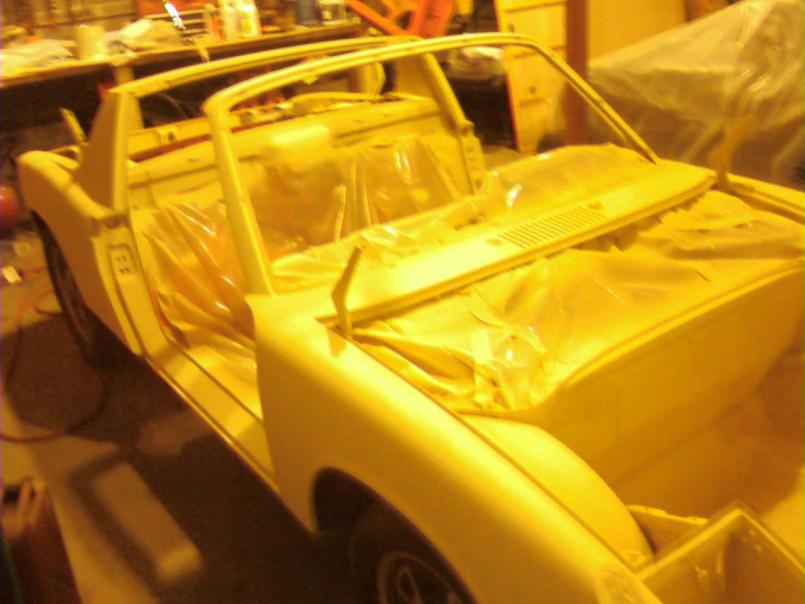
Posted by: sendjonathanmail Oct 25 2009, 06:44 PM
Ok, heres some pics outside in the sun. Can anyone recommend what brand paint to use over this? Color will be L32K Phoenix Red, primer is Dupont 2K urethane. Thanks
Posted by: sendjonathanmail Dec 5 2009, 10:21 PM
Ok guys, im getting ready to paint it finally! Color will be L32K Phoenix Red. Does anything need to be sprayed over the primer? The primer I used was Dupont 2K urethane primer in beige Can anyone recommend a certain paint brand, type, etc to use? I want to do a two-stage (base-clear) so I will also need a recommendation on a clear coat, thanks!
Posted by: itsaporsche914 Dec 6 2009, 07:28 AM
i just got my 76 vette back from the painter. put the bumper on yesterday. my painter was old school and painted 5 coats of single stage corvette red OUTSIDE! I DID NOT KNOW YOU COULD PAINT WITHOUT A BOOTH. he said hes always done it that way and hes done everything from mercedes, 356 and now my vette. the car is so deep and red it looks like it is bleeding. the reason i bought this up is the 2 stage or single stage question. also i read rick 918 posts on this and it seems he likes single stage. just my .02
Attached image(s)
Posted by: bwillis Dec 6 2009, 10:10 AM
Ok guys, im getting ready to paint it finally! Color will be L32K Phoenix Red. Does anything need to be sprayed over the primer? The primer I used was Dupont 2K urethane primer in beige Can anyone recommend a certain paint brand, type, etc to use? I want to do a two-stage (base-clear) so I will also need a recommendation on a clear coat, thanks!
You should form a relationship with a local paint shop. It takes a lot of the guess work out of a project like this.
With that said I've always used PPG products to avoid incompatibilities between brands and types.. If you start with a true "paint system" you'll have a better finished product.
HTH,
Ben
Posted by: Bartlett 914 Dec 6 2009, 11:40 AM
Hi Jonathon
Your car is looking great. It is amazing what a coat of paint including primer will do to give the feel of progress. Looks really good. I am not a painter so I cannot give advise. I agree that your paint dealer should have an answer. I have been reading on paint since I will be doing one within a year. I did read that primers may allow moisture through and start corrosion under the paint. Primer can be painted over with a sealer. If you are painting very soon then I suspect a sealer coat may be skipped. I hope true experienced painters will chip in if I am wrong.
Posted by: sendjonathanmail Dec 9 2009, 07:43 PM
Got trunks, engine compartment, and jambs painted today
Posted by: FourBlades Dec 9 2009, 08:11 PM
Dang! That looks really nice Jonathon!
You must be itching to paint the outside now.
I was too impatient to do it in the right order like you did and I painted the
outside first....I painted mine in my yard and it is fine if there is a light wind to
keep the bugs away, just don't do it at night with bright lights, unless you want
a textured finish....
John
Posted by: Gint Dec 9 2009, 09:13 PM
That's nice. Good work. I love fresh paint.
Posted by: championgt1 Dec 9 2009, 09:18 PM
 Nice!
Nice!
Posted by: Travis Neff Dec 9 2009, 09:24 PM
I love phoenix red - good job!~
Posted by: tod914 Dec 9 2009, 09:36 PM
Looking good Johnathan. You and your Dad need to make some of the get togethers next year.
Posted by: Spoke Dec 9 2009, 09:50 PM
Looks nice. Excellent work.
Have you made any progress on the 2L FI?
Posted by: budman5201 Dec 9 2009, 10:06 PM
i just got my 76 vette back from the painter. put the bumper on yesterday. my painter was old school and painted 5 coats of single stage corvette red OUTSIDE! I DID NOT KNOW YOU COULD PAINT WITHOUT A BOOTH. he said hes always done it that way and hes done everything from mercedes, 356 and now my vette. the car is so deep and red it looks like it is bleeding. the reason i bought this up is the 2 stage or single stage question. also i read rick 918 posts on this and it seems he likes single stage. just my .02
Hey guys it was great meeting you 2 the other day at the car show on indian bend. Your car turned out great!! Congrats!! Whats under the hood??
Chris
Posted by: sendjonathanmail Dec 9 2009, 10:40 PM
Looks nice. Excellent work.
Have you made any progress on the 2L FI?
I don't think im going to dig into the d-jet just yet...We want to get this thing on the road soon, so for now its going to run carbs. I have a single weber on there right now, and dual's (40's or 44's?) in the attic, not sure which is gonna be used.
Posted by: Vacca Rabite Dec 10 2009, 08:32 AM
How are tyou heating your shop enough to paint right now? Its cold!
Zach
Posted by: sendjonathanmail Dec 10 2009, 11:12 AM
The guy at the paint supply place gave me a reducer for colder temps, and my garage was 55-ish degrees inside yesterday, had a small heater running before I shot paint.
Posted by: Spoke Dec 10 2009, 11:31 AM
reducer for colder temps
I learned my lesson about the right reducer for the temperature.
I used the same PPG paint as you on my car with the cold-temp reducer. When I painted part of the car the first time the temps were in the 60s and it went on beautifully.
When I painted again after the accident, I used the same reducer and the temps in August were near 100F. I didn't realize at the time what a difference the reducer makes. I could hardly get 1/4 of a bowl of paint on before having to adjust the settings on the gun. I think the paint was setting up in the bowl.
This stuff should go on like glass but in Aug I ended up with all sorts of orange peel.
Posted by: sendjonathanmail Dec 10 2009, 11:41 AM
I had no problems spraying it yesterday, went on super smooth with no orange peel, have a few small runs but other than that it had great coverage, and lasted a while in the gun.
Posted by: Gint Dec 10 2009, 04:12 PM
Did I mention I love fresh paint? Nice!
Posted by: sendjonathanmail Dec 10 2009, 07:20 PM
Did I mention I love fresh paint? Nice!
Thanks Mike, this weekend im going to wetsand everything I painted and lay down another coat or two because it is thin in some spots, and I want to get rid of some drips. I also went out and bought a detail paint gun (basically a mini spray gun) to get into some of the harder to reach areas, like around the headlight buckets, in the engine bay, etc. My plan is to have even the hard to see places covered in a coat of phoenix red paint.
Posted by: Gint Dec 10 2009, 07:32 PM
How about some details about that mini gun? Pic? For that matter, what gun are you using to this point? I'm actually considering buying a gun and dabbling with some sprayin'. I have some furniture cabinets to do first, but I'd like to get into some automotive primer at least.
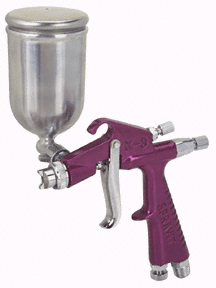
Posted by: sendjonathanmail Dec 10 2009, 08:07 PM
My main gun is a craftsman HVLP gravity feed gun that I got from Sears, it was around $130 a few months ago. It is an awesome gun, and has given me consistent results, it isn't a $400 devilbliss gun but for my purposes its fine. The gun that I bought today is from Harbor Freight, neat little mini gravity feed gun, will be the perfect thing to paint all those hard to reach nooks and crannies. 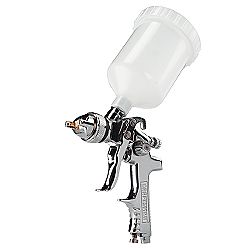
Posted by: bigkensteele Dec 10 2009, 08:32 PM
Fantastic work, Jonathan! Threads like this keep me inspired!
How about some details about that mini gun? Pic? For that matter, what gun are you using to this point? I'm actually considering buying a gun and dabbling with some sprayin'. I have some furniture cabinets to do first, but I'd like to get into some automotive primer at least.
I am in the same boat. I wanted something that would work for both woodworking and auto paints. The guy at the paint shop sold me on a 2 gun Divilbliss kit for around $160. One gun for top coats, and the other is for primer. He was pretty up front that they are not the greatest, but not bad for the money, and most importantly, you can get parts for them. Have not used them yet, but hoping to do some wainscoting over the week of Christmas.
My worry is on the air supply side. I have a 6hp/26gal compressor, and I am not sure it is up to it. Wondering if I can somehow run it in conjunction with my portable, maybe by using a T. I can put the regulator on the gun.
Jonathan, what are your compressor specs?
Posted by: sendjonathanmail Dec 10 2009, 09:22 PM
I have a craftsman 20-something gallon compressor, i'll check for sure tomorrow.
Posted by: al weidman Dec 10 2009, 11:32 PM
Fantastic work, Jonathan! Threads like this keep me inspired!
How about some details about that mini gun? Pic? For that matter, what gun are you using to this point? I'm actually considering buying a gun and dabbling with some sprayin'. I have some furniture cabinets to do first, but I'd like to get into some automotive primer at least.
I am in the same boat. I wanted something that would work for both woodworking and auto paints. The guy at the paint shop sold me on a 2 gun Divilbliss kit for around $160. One gun for top coats, and the other is for primer. He was pretty up front that they are not the greatest, but not bad for the money, and most importantly, you can get parts for them. Have not used them yet, but hoping to do some wainscoting over the week of Christmas.
My worry is on the air supply side. I have a 6hp/26gal compressor, and I am not sure it is up to it. Wondering if I can somehow run it in conjunction with my portable, maybe by using a T. I can put the regulator on the gun.
Jonathan, what are your compressor specs?
You're 6hp will work just fine. A 3hp with a 5 gallon tank will even work as long as you don't try to paint the whole car without letting up. Al.
Posted by: sendjonathanmail Dec 11 2009, 09:15 PM
Yep, I have no problems with my compressor, it keeps up and lasts a while before it has actually has to kick in, and I never feel a drop in pressure.
Posted by: sendjonathanmail Dec 13 2009, 10:01 PM
So I went back and did some light sanding to get rid of some drips, and resprayed to get it perfect, looks great now.
Posted by: MDG Dec 14 2009, 08:07 AM
Go Jonathan, go! Looking great. And may I compliment you on your color choice 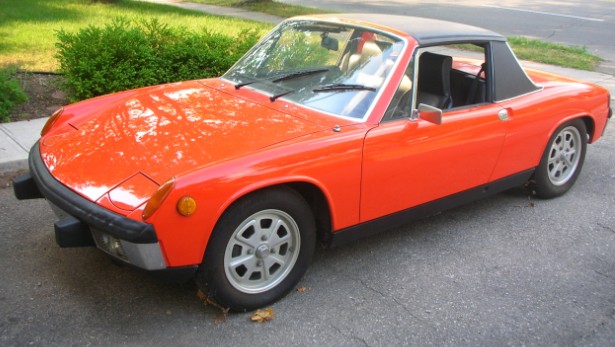
Posted by: Cupomeat Dec 14 2009, 09:13 AM
I love it!
Congrats and orange is the best color for 914s...
Posted by: sendjonathanmail Dec 14 2009, 11:41 AM
Mike, nice teener!
Posted by: MDG Dec 14 2009, 12:32 PM
Mike, nice teener!
back at ya'.
You'll love L32k; one of those colours that changes moods with the light from a nice warm red to an all out orange. Good luck on the rest of your shoot.
m.
Posted by: sendjonathanmail Dec 20 2009, 09:47 PM
Thanks and happy holidays everyone
Posted by: sendjonathanmail Dec 24 2009, 01:30 PM
Got some work done on the teener early in the day before the Christmas festivities. I degreased the lower firewall and undercoated it along with the suspension ears and engine mounting points. Made sure to get extra coverage under both "hell-hole" areas. I used 3M Pro undercoating, sold at autozone. The brake proportioning valve, came out to be replaced with a brake tee sold by Jwest. I also unmasked the engine bay wiring, since im done painting in there, and started laying it out. Some pics...
Merry Christmas everyone! 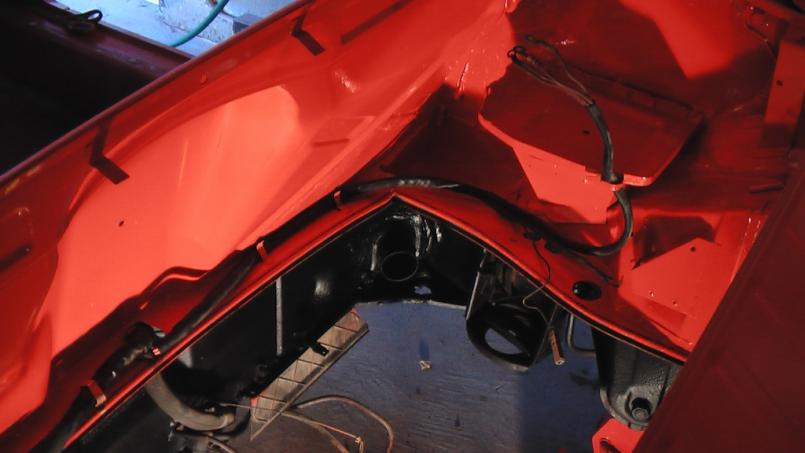
Posted by: sendjonathanmail Dec 24 2009, 01:33 PM
Here's another pic, didn't fit in my last post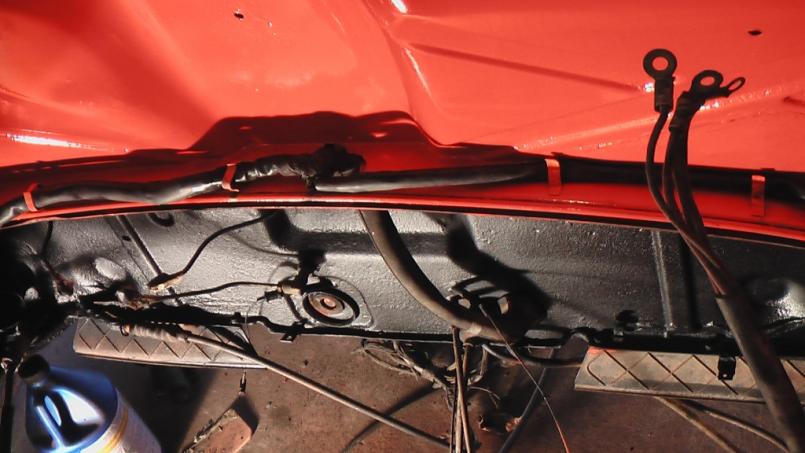
Posted by: dakotaewing Dec 24 2009, 01:52 PM
Jonathan -
Before you spray the the body, do yourself a big favor and put the car on jack stands, take your Fuchs off the car and put them inside your house. Cleaning the over spray is a bitch, compared to just taking the wheels off...
Just my .02...
By the way, the car looks great -
TE
Posted by: sendjonathanmail Dec 24 2009, 02:02 PM
Thanks Thom, actually the car is up on jackstands right now and the wheels are off. Im going to be refinishing them after the car is painted.
Posted by: Vacca Rabite Oct 22 2010, 06:28 AM
Any updates to this thread?
Zach
Posted by: Jon Fernandes Oct 22 2010, 07:36 AM
Any updates to this thread?
Zach
Unfortunately, I haven't worked on it all summer. We're in the process of moving so alot of stuff from our old house is packed into that garage, and the orange 914 is totally covered. Once it gets moved to the new place then i'll have all 3 914's in one spot and at home, making it much more convenient to work on. Im hoping sometime mid-winter to have the new garage ready.
Posted by: Silvia S. Feb 28 2011, 09:12 PM
get ready to start working again!
Posted by: Jon Fernandes Feb 28 2011, 09:29 PM
Im ready, whenever you're willing to lend a hand! 
Gotta clean out the garage first
Posted by: barada May 10 2011, 08:42 PM
Im ready, whenever you're willing to lend a hand!
Gotta clean out the garage first
Got any updates? I was following as I plan on painting my own car and was watching your results.
Phillip
Posted by: Jon Fernandes Jun 29 2011, 09:30 PM
Sorry, no updates  Busy with school, and building a new garage to move the 914's to. Hoping to get back to finishing the car in the coming months...stay tuned
Powered by Invision Power Board (http://www.invisionboard.com)
© Invision Power Services (http://www.invisionpower.com)