Printable Version of Topic
Click here to view this topic in its original format
914World.com _ 914World Garage _ LIGHT big black bumpers
Posted by: Vacca Rabite Nov 2 2008, 11:26 AM
I am gutting my BBBs. Man there is a lot of metal in there.
They probably won't weigh as little as the simple early bumpers when I am done, but they will weight a LOT less then the BBBs of old.
Pics to come...
Zach
Posted by: Vacca Rabite Nov 2 2008, 11:54 AM
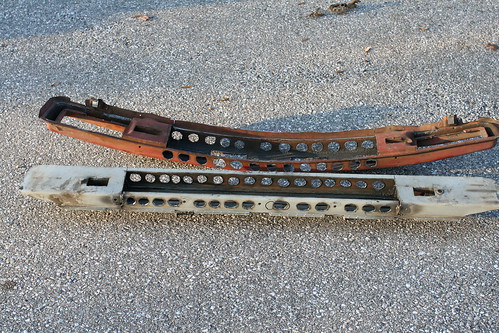
Pics of stage 1.
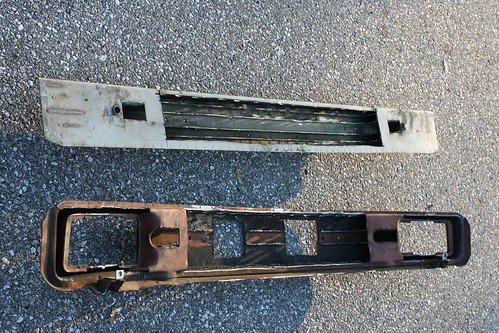
The subject: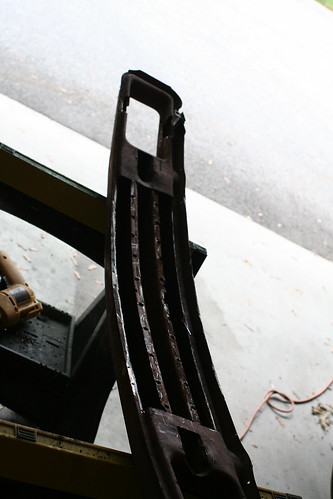
Whats going in there (Hella Supertones!):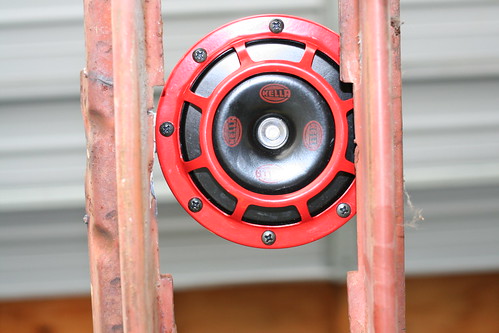
I am going to drill a lower hole in the horn stem to center the horn in the opening.
A custom grill will cover each fog light opening. I have yet to make that.
I need to convince Scotty to bring his plasma cutter to cut out the center channel in the bumper. No way I have to get in there right now other then really chewing up the outside skin.
When done, most of the bumper will only be 1 layer of steel , the center hollow and the back gone. It won't last in a crash, I guess. But neither would fiberglass.. Or early stockers.
Zach
Posted by: rick 918-S Nov 2 2008, 12:45 PM
I really like the arrow look of the late bumpers. Someone should pull a mold off a nice set and make light glas ones. 
Posted by: Vacca Rabite Nov 2 2008, 12:47 PM
If someone did that I would buy them.
I like the look of the later bumpers more then the early ones, but I am not a fan of how much they weigh.
Zach
Posted by: MrZir Nov 3 2008, 02:33 PM

If someone did that I would buy them.
I like the look of the later bumpers more then the early ones, but I am not a fan of how much they weigh.
Zach
Same here. I like the look of the later bumpers, but weight is the enemy. (on the car and on me.
 )
)
Posted by: jim912928 Nov 3 2008, 05:30 PM
leave the weight and just get a bigger engine! lol
Posted by: vsg914 Nov 3 2008, 06:32 PM
I drive a 75 and I hate the big UGLY bumpers. To each his own!
Posted by: Vacca Rabite Nov 3 2008, 07:26 PM
leave the weight and just get a bigger engine! lol
I did get a bigger engine!
But I also want to drop the weight.
Rich made a good suggestion in dropping the shocks and just using some channel to mount the bumper to the body, like the early mounts. That should drop a few pounds right there.
Posted by: hcdmueller Nov 3 2008, 07:35 PM
I have a 75 euro spec rear bumper sitting in my garage at home and it bolts to the car in the same manner as the early bumpers. I am not sure why they are different. They are still heavy as hell. Kind of defeats the purpose of the late bumper.
Posted by: Krieger914 Nov 3 2008, 07:32 PM
Hack the crap out of them. I got 11.5/ 7 off the rear/front. I had a hole saw and used my drill press. The heat shield is worth 3
Attached thumbnail(s)
Posted by: Krieger914 Nov 3 2008, 07:33 PM
The front
Attached thumbnail(s)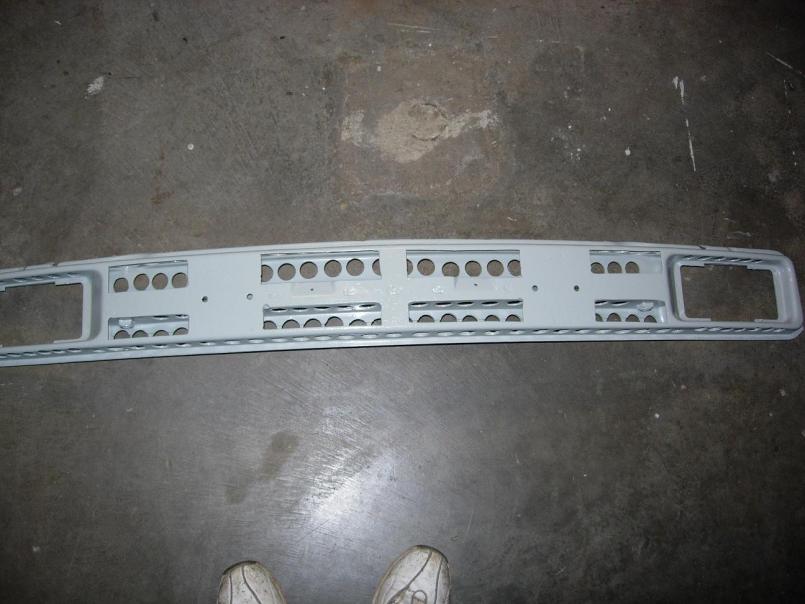
Posted by: r_towle Nov 3 2008, 08:25 PM
Zach
Loose the front and rear face in between the two rectangular fog light holes....
All that can be left is the top and bottom flange...with alot of holes...
I proposed to gut the shocks (the insides of the shocks...) but tack weld the tube together at the right lenght and drill the holes in the mounting brackets...
Again...all you need is the top and bottom flange...with holes
and the fog light holes (you dont even need those..)
Rich
Posted by: Dave_Darling Nov 4 2008, 02:14 AM
I really like the arrow look of the late bumpers. Someone should pull a mold off a nice set and make light glas ones.
Rich Bontempi. Not sure if the front has an air-dam integrated into it, but I know that there is at least some approximation of the front RBBB in fiberglass. Also not sure on the rear bumper; but it can't hurt to ask him....
--DD
Posted by: Vacca Rabite Nov 9 2008, 03:30 PM
More progress on my BBBs
Tools on the job: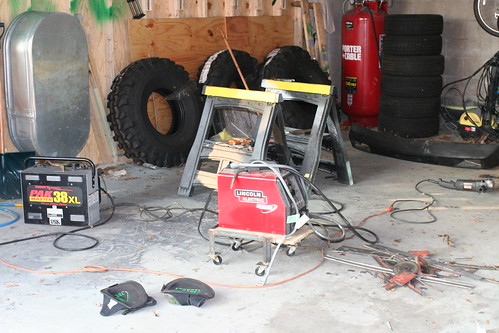
A growing pile of scrap: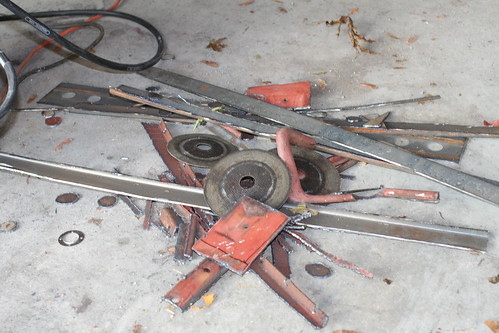
Welding the bumper lip back on after cutting it off to gut the insides: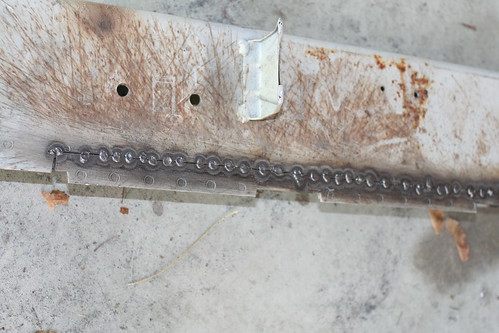
And introducing...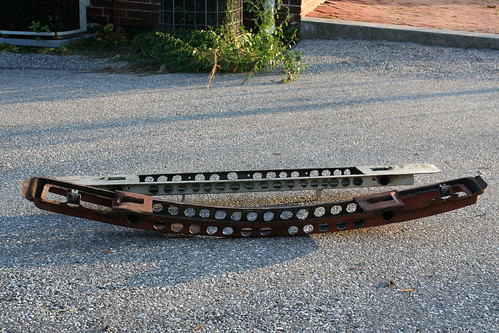
Zach
Posted by: r_towle Nov 9 2008, 07:15 PM
weight at final????
Rich
Posted by: Vacca Rabite Nov 9 2008, 07:34 PM
weight at final????
Rich
I've not weighted them yet. Kinda of afraid to. It was a lot of work to find out I only shaved 5 lbs.
Zach
Posted by: Vacca Rabite Nov 9 2008, 09:26 PM
I manned up and got out my scale.
the front bumper steel insert now weighs 15 pounds.
the rear bumper steel insert now weighs 17 pounds.
This is not counting the rubber and shocks. Just the steel insert.
(from a post by Borderline on stock early bumper weights)
FRNT BUMPER STK 17.5
REAR BUMPER STK 17.5
So, my INSERTS weigh less then the early stock bumpers.
I thought Joe Sharp had done a comparison of stock early, stock late, and FG bumpers. Now I can't find it. I want to know where my inserts stack up...
Zach
Posted by: solex Nov 10 2008, 12:18 PM
Zach,
Just went through this thread (with great interest), thanks for doing it.
What is the weight of the covers themselves also how do you plan on re-attaching them to the frames?
How much weight did you end up removing?
Dan
Posted by: plymouth37 Nov 10 2008, 01:17 PM
I thought Joe Sharp had done a comparison of stock early, stock late, and FG bumpers. Now I can't find it. I want to know where my inserts stack up...
Zach
Here you go: http://www.914world.com/bbs2/index.php?showtopic=52602&st=0, I had it bookmarked from when I swapped in 'glass bumpers. Nice work, nothing sexier than swiss cheesed car parts!
Posted by: Vacca Rabite Nov 10 2008, 07:17 PM
I'm posting this in my thread for direct comparison.
Rears
It says 52 (BBB), 15 (Early Stock), 4 (FG).
Front
48 (BBB), 17 (Early Stock), 4 (FG)
:PERMAGRIN: Joe
I need to get weight on the rubber cover and the bumper shocks. I KNOW I can remove weight from the shocks (fabbing up a new mount seems like an easy task, and would have to weigh less). The bumper cover is not heavy.
Posted by: Vacca Rabite Nov 10 2008, 07:24 PM
Zach,
Just went through this thread (with great interest), thanks for doing it.
What is the weight of the covers themselves also how do you plan on re-attaching them to the frames?
How much weight did you end up removing?
Dan
I dunno on the total diet yet, as I have not finished.
The bumpers will mount either on the stock shocks as per normal, or I will fab a fixed mount that will attach to the bumpers the same way.
The cover I can't see weighing more then 5 pounds, but I have not weighted it. It is not heavy. It will mount on the bumpers just like it would stock.
Zach
Posted by: johannes Nov 11 2008, 03:47 AM
I have done the same on the front a few month ago. A shame I didn't make any picture. I'll do pictures next time I remove them.
I mesured a 7 kilograms difference on front bumper (about 15 lbs). I also removed the bumper "tits". I found smooth "titless" bumpers on ebay. I found out that they are a bit different in the way they are attached to the metal part.
I didn't start to put the rear bumper on a diet. Only attached the "titless" rubber on it. I'll work on the metal part later.
I feel the rear bumber is even heavier and I expect to remove more than 8 kg from it.
Posted by: Vacca Rabite Nov 26 2008, 05:44 PM
I have done more today, and will post pics when done.
I used some of the scrap from gutting the bumpers to make new mounts, and removed the shocks. The shocks felt HEAVY, but I won't know till I weight them.
The front bumper is mounted and looks good, the rear will be done as soon as I refill on some beer and get warm.
Zach
Posted by: Rob Ways Nov 26 2008, 05:53 PM
Hopefully those holes don't whistle, otherwise you'll be the worlds biggest friggen kazoo! 
Posted by: Vacca Rabite Nov 26 2008, 10:21 PM
Well, the bumpers will have the rubber cover over them. I doubt there will be a whistle.

No bumper skin on yet, this is all just mock up. This took all freak'n day to fab up and put together. I work slow, but I feel that I hot a lot done.
One of my supertones, mounted int he bumper where the fog light used to go. Steel grill is protecting it.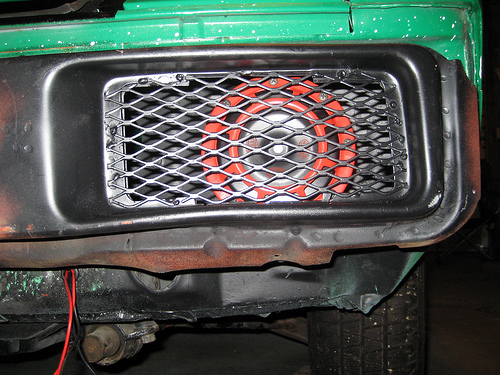
Pilot driver light mounting. I had to reverse the mounting bracked, and I welded in a nut to the other side of the bumper. The bolt holding the light to the bumper is an m10. 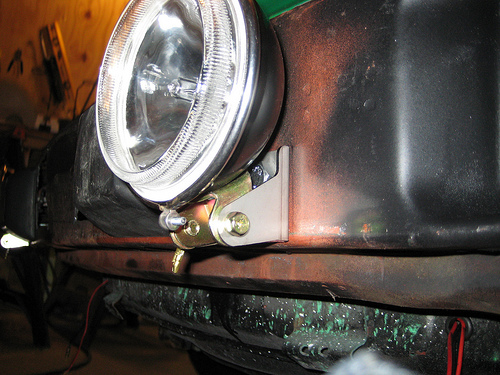
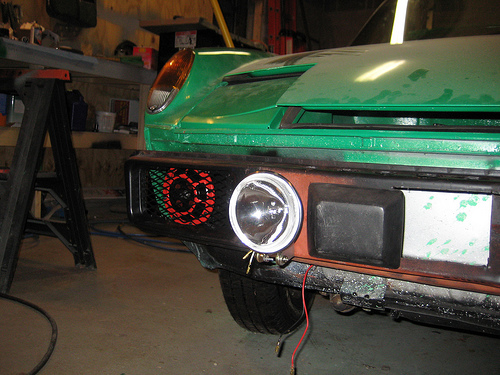
Tit, light, horn. Will look better when the skin is on. Lots of holes in these bumpers now... 
Mounting bracket. Note the biiig hole that the shock used to go through. I am probably going to weld it shut, unless I can think of a good reason not to. The brackets were all fabbed from scrap salvaged from the bumper gutting process. The sheet steell is pretty thick, and made a nice bracket.
Horn mounting from the back.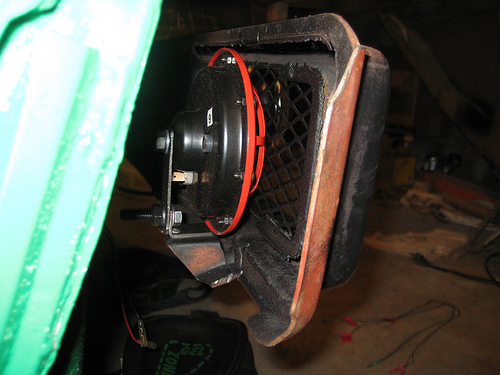
So, yeah. I got the back bumper fabbed on too, but that was WAY easier, as I was not adding any other crap on to it.
So, pretty much, I can put the skins on, and the bumpers are done. Yay! Got to order some of those plastic bumper attachment tabs though... I chiseled throu mine to get the bumpers off. No patience.
My face is burned from cold, or maybe the kerosene heater. My hands hurt. I'm dehydrated. I want a cigar, but its too cold to smoke one. And, I feel like I am getting sick.
Think I'll go have some single malt...
Zach
Posted by: scotty b Nov 27 2008, 08:00 AM
 Nice to see Zach !
Posted by: r_towle Nov 27 2008, 09:01 AM
now I want to see what you do with the rubber bumper pad..
Is it going over the lights or just the bracket....cause molded in lights would be sweeeeeet.
Rich
Posted by: Vacca Rabite Nov 27 2008, 09:34 AM
By the way, the 4 shocks weighed in at about 20 pounds all together. The brackets I made clocked in at 1 pound.
I netted 19 pounds by removing the shocks.
Zach
Posted by: Sleepin Dec 1 2008, 02:35 PM
Good post Zach! I always wondered if this could be done, and to what extent!
Posted by: johannes May 20 2012, 11:46 AM
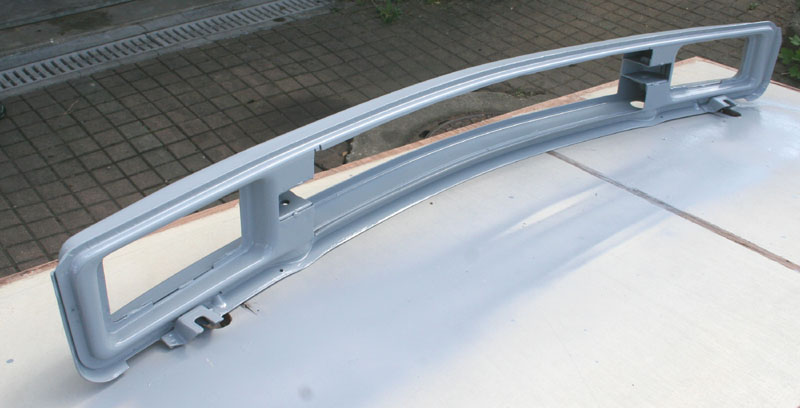
I had time to remove the front bumper and paint the metal insert.
As said before (man ! three years have past) I shaved about 6kg from the front bumper alone.
More to come. Rear bumper will have a diet next week. 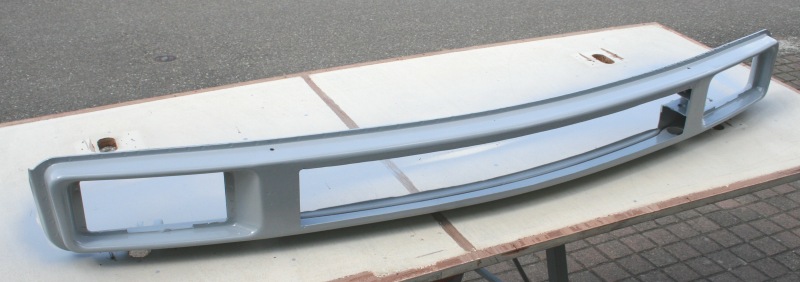
Posted by: Vacca Rabite May 21 2012, 07:24 AM
Nice!
I thought about doing what you did with the front bumper, but was afraid that cutting all the front metal would let the pad flap and deform at speed. Have you noticed that at all?
Zach
Posted by: johannes May 21 2012, 11:36 AM
Nice!
I thought about doing what you did with the front bumper, but was afraid that cutting all the front metal would let the pad flap and deform at speed. Have you noticed that at all?
Zach
I haven't noticed any problem with that setup. I have a small licence plate bolted thru the pad, but I don't think this changes anything. The pad fits perfectly, it's well streched and I can't feel any flexing.
I also feel this minimal setup will stil provide much protection to the car than the earlier (pre 75) bumper.
BTW , I love my new rims...


Powered by Invision Power Board (http://www.invisionboard.com)
© Invision Power Services (http://www.invisionpower.com)