Printable Version of Topic
Click here to view this topic in its original format
914World.com _ 914World Garage _ the sinister urge
Posted by: RJMII Nov 3 2008, 02:49 PM
I'm starting to re-assemble my car.
Posted by: Root_Werks Nov 3 2008, 06:36 PM
You'll run into 100+ things you'll need while putting it all back together. Most of what you listed is easy stuff to get thankfully. Post some pics for us! 
Posted by: RJMII Nov 3 2008, 07:31 PM
What it looked like when I traded my Toyota 4Runner for it. I traded some dude in Colorado straight across. we met in Douglas, WY and checked each others' rides out. We liked what we saw, handed each other the signed and clean titles, and drove away happy. Well, I drove away happy. =o) I'm going to just figure he stayed happy, he didn't come looking for me.
Attached image(s)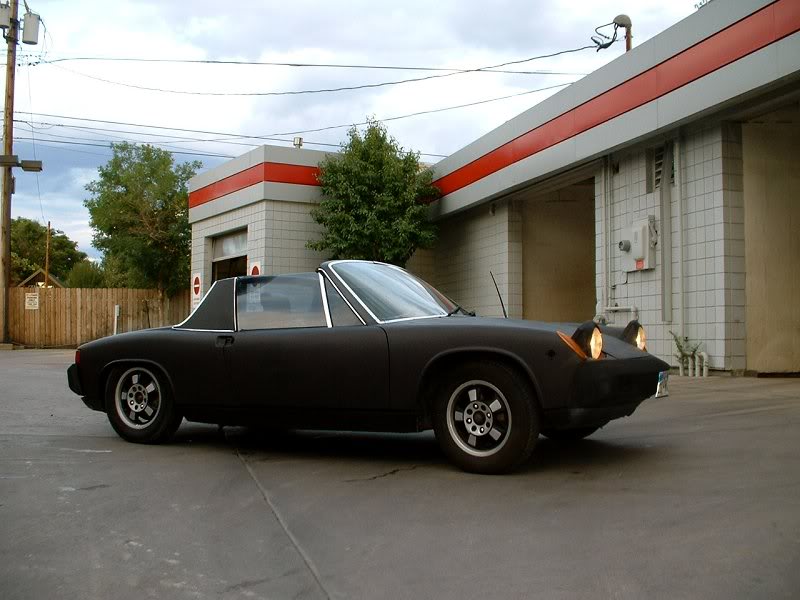
Posted by: RJMII Nov 3 2008, 07:37 PM
my parts car: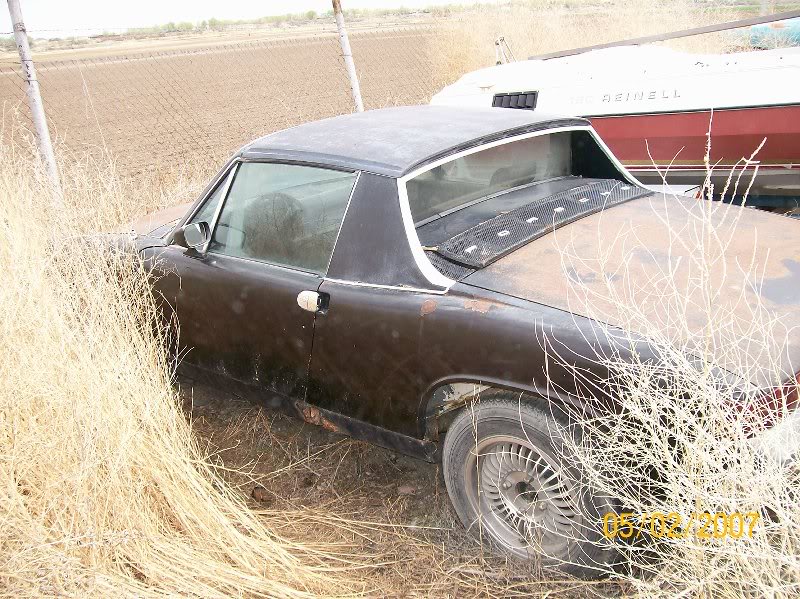
Working over the front suspension to go with the 911 SC brakes and boxster wheels: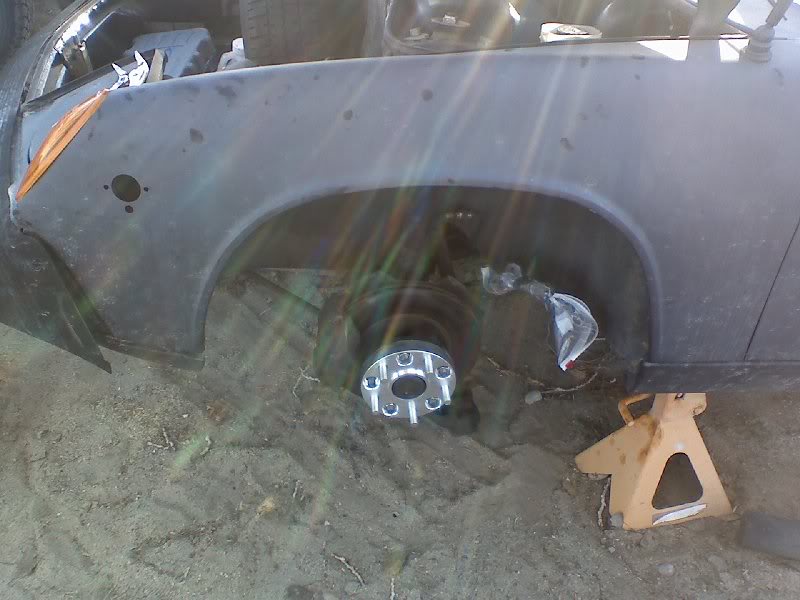
H4 Headlight HID conversion: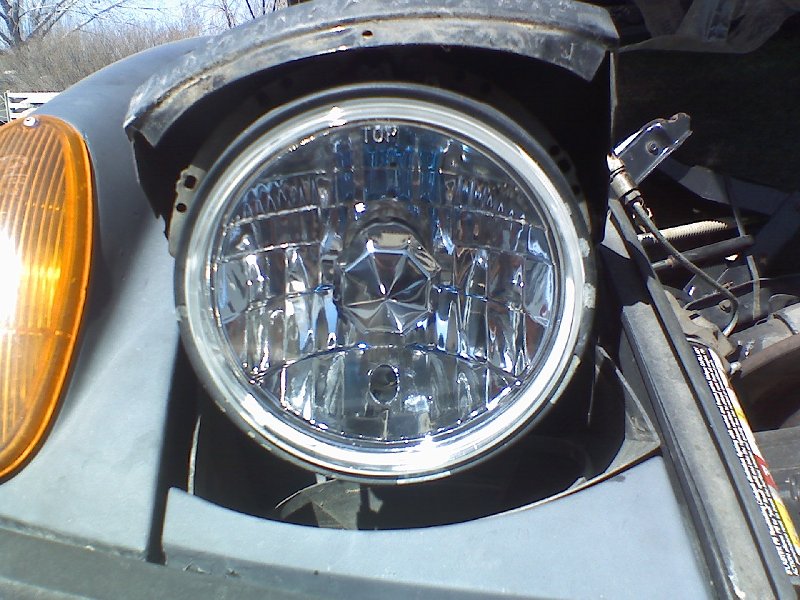
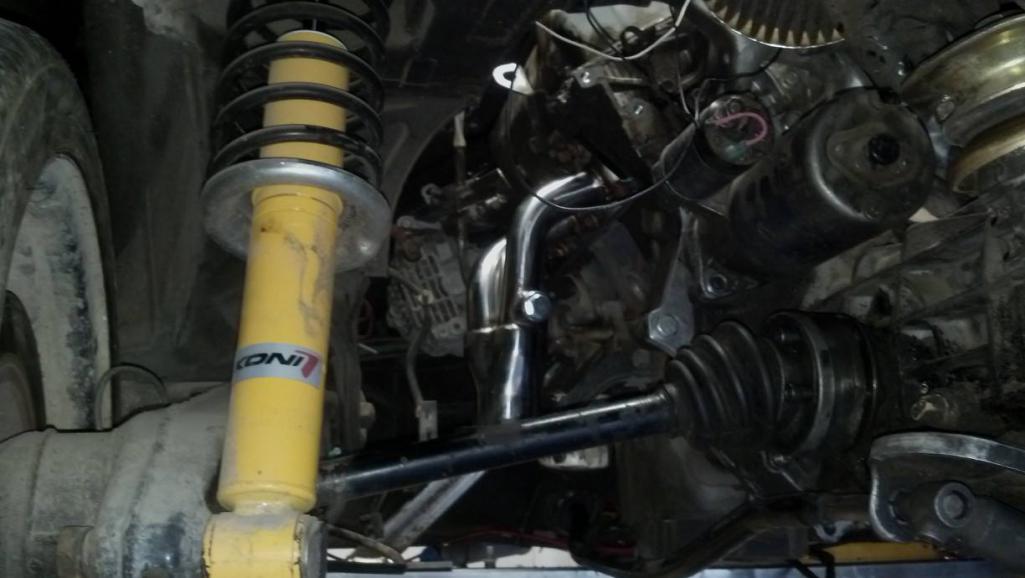
Working over the rear suspension with the Koni yellows: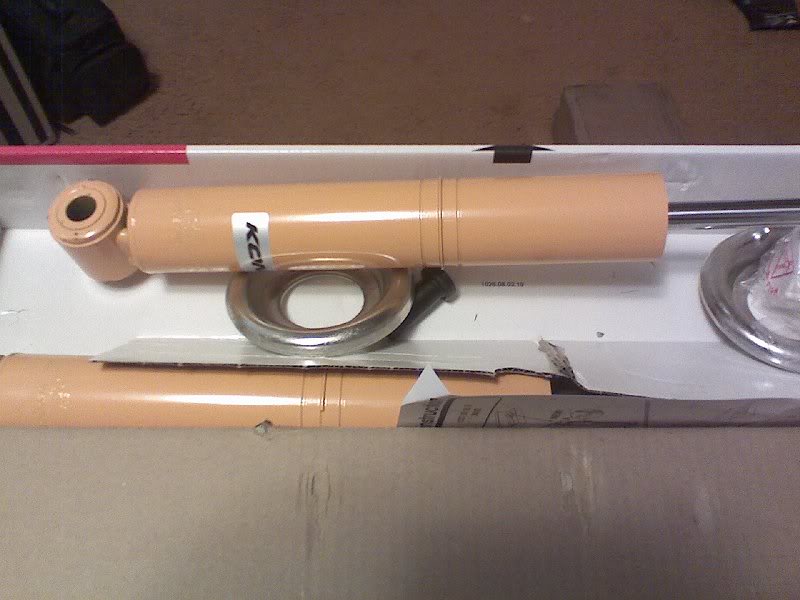
Posted by: RJMII Nov 3 2008, 08:15 PM
Rear wheel on with 1" spacer. going to go with maybe 1/8" spacers and beating my fender witha baseball bat. (actually going to use ahdoman's suggestion, thanks again Steve!)
http://good-times.webshots.com/photo/2227885570101286046vVqJlB
Getting the engine ready... building mounts, bolting to transaxle etc: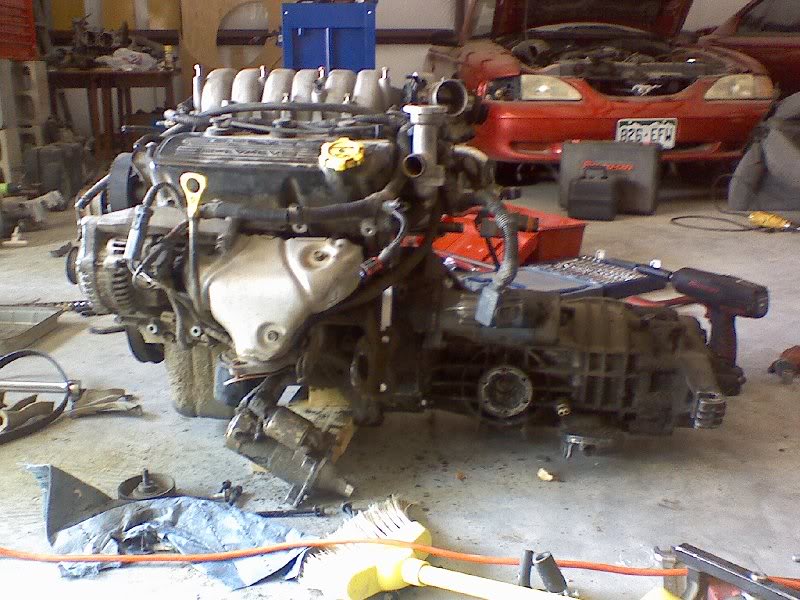
http://good-times.webshots.com/photo/2761024220101286046lraRHR
Toying with the idea of a turbo:
http://good-times.webshots.com/photo/2062411460101286046OUOZyU
Getting the 1.7 drivetrain next to the v-6 drivetrain for some measurements to build the engine mounts: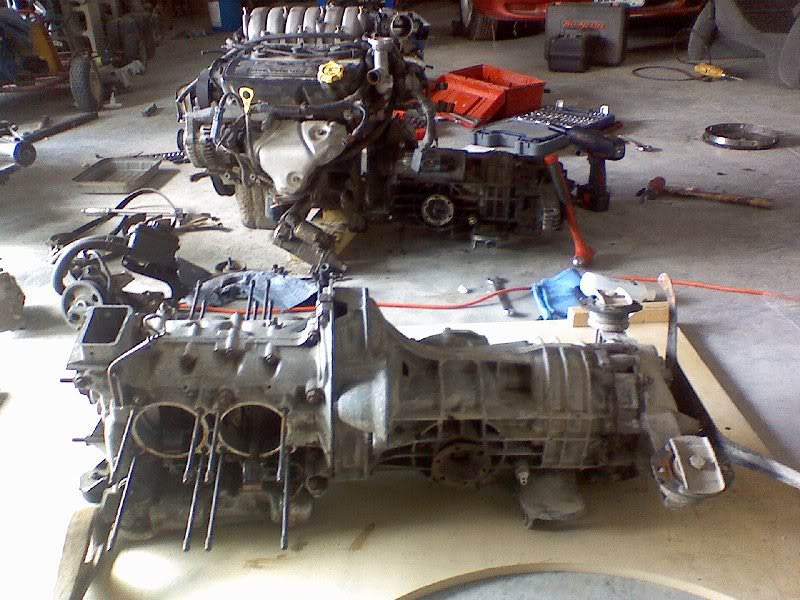
http://good-times.webshots.com/photo/2904261060101286046KCJYKv
Posted by: RJMII Nov 3 2008, 09:39 PM
car in the shop now:
http://good-times.webshots.com/photo/2969633230101286046oZMdwb
easier than the tranny jack:
http://good-times.webshots.com/photo/2111483310101286046Ytnhao
Sawzall did its job:
http://good-times.webshots.com/photo/2836557310101286046woCqOP
Posted by: RJMII Nov 3 2008, 09:49 PM
I just like the way it looks in there:
http://good-times.webshots.com/photo/2360607180101286046lZXfDK
turbo and all... (notice I switched from the Garrett T4 to the Mitsu TD05-BIG 16G turbo)
http://good-times.webshots.com/photo/2282322170101286046XMHbXJ
http://good-times.webshots.com/photo/2779474140101286046MKQNqo
Posted by: RJMII Nov 3 2008, 09:53 PM
2.5 inch mandrel bent exhaust pieces for intake plumbing and exhaust plumbing...
http://good-times.webshots.com/photo/2337059840101286046biRKMA
This is the wastegate/turbo outlet plate. the 2.5 inche exhaust pipe fits quite nicely coming out of there.
http://good-times.webshots.com/photo/2723286040101286046XDWrNJ
not to mention the throttle body is 2.5 inches diameter also... not restrictions between the turbo and throttle body, that's for sure.
http://good-times.webshots.com/photo/2573195420101286046fBvVmN
Posted by: RJMII Nov 3 2008, 09:57 PM
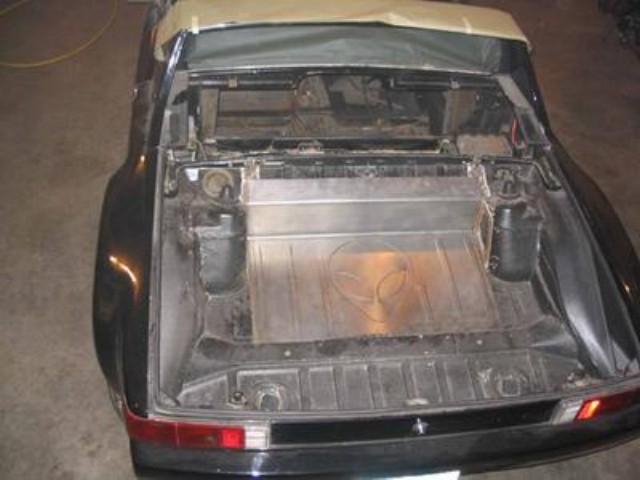
so... right now I'm at the point of going to get the cherry picker again with my bro, and cutting that engine shelf out of there and putting all of the useful stuff back in... in functional form! test fitting is about done, now it's the finite wiring and plumbing to do.
the radiator is going right next to the engine. It worked for my other turbo project while I was in Laramie going to school, only this time we're going with the blow through fans, and a sucker fan to get air to flow up and out of the engine lid when sitting and idling. (not that I plan any stops like that in this car...)
Posted by: SGB Nov 3 2008, 10:09 PM
Um...
Good start! Jeeez-pers. 
Posted by: echocanyons Nov 3 2008, 10:17 PM
Cool Project!
I stopped in Worland several years back and was super suprised to see a 914 in the showroom of.....hmmm.....I forget maybe an electronics or car audio store.
If I remember right, the store was on a main street or something.
You don't remember thhat do you, or maybe it was your car, there can't be too many 914's in that town.
Posted by: RJMII Nov 3 2008, 10:22 PM
I found a picture of the engine mount being fitted:
http://good-times.webshots.com/photo/2626690490101286046XKjPoy
see? I'm wanting to disassemble and paint all of the bare metal stuff, make it look nice. =o)
Posted by: RJMII Nov 3 2008, 10:25 PM

Cool Project!
I stopped in Worland several years back and was super suprised to see a 914 in the showroom of.....hmmm.....I forget maybe an electronics or car audio store.
If I remember right, the store was on a main street or something.
You don't remember thhat do you, or maybe it was your car, there can't be too many 914's in that town.
YES! I remember that. LOL My dad and I blocked off mainstreet to back the trailer up. We rolled the car through those double doors.
My friend James was in charge of the display and he wanted a car that would fit between the doors. We built up an extension for the window and set the car up into the window, then loaded the front trunk with car stereo stuff. That was my first 914 Turbo project... poor thing had rust so bad, and I had no idea how to fix it. Kevin down in CO bought the remains of it from me and took a sawzall to it. (this was after we'd turbo'd it and were starting to have fun) it had that acid drip finish to the rear suspension console, hell hole, longs, etc... and I needed $$ for school.
I should go talk to Dan and see if he wants to do that again this year. lol (Dan = owner of Hedge Music)
Posted by: RJMII Nov 4 2008, 12:33 AM
and... what I get to the machine shop with while working on the 914:
http://good-times.webshots.com/photo/2408532840101286046vsGUuY
72mpg parts hauler. =o) (as long as the parts aren't heavy)
Posted by: RJMII Feb 18 2009, 11:39 AM
I was doing some engine work today.
If you notice in an above picture how the throttle body is right smack dab in the middle of the roof line (when stored in the trunk); you'll see why I did this morning's bit of work. =o)
Picture one:
the symmetry of the lower intake seems as it could easily be turned around.
http://rides.webshots.com/photo/2888705060101286046wgudpN
Look at the layout of those holes. ahhh... makes me wonder if the heads are identical.
http://rides.webshots.com/photo/2254151910101286046kREBUU
Now, were you paying attention?
compare the first picture with this one. see the cam pulley orientation?
http://rides.webshots.com/photo/2673983950101286046uyCKqR
Posted by: RJMII Feb 18 2009, 11:42 AM
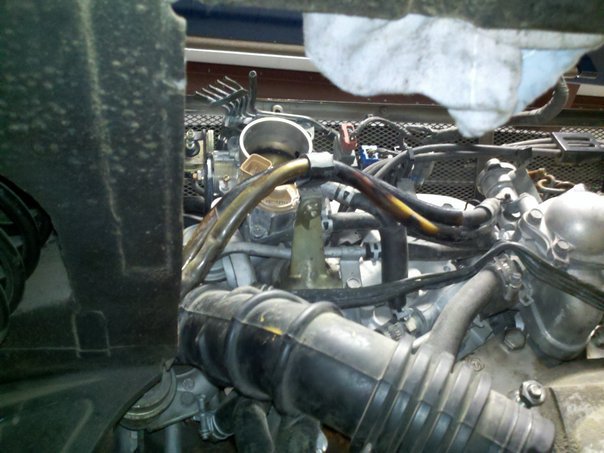
Here it is with a test fit, to see where that TB ends up being.
http://rides.webshots.com/photo/2350993090101286046WxJDwC
See the yellow circle?
http://rides.webshots.com/photo/2968892130101286046hQiOWW
Wuallah! Now it's over there...
http://rides.webshots.com/photo/2193349090101286046ZXAHML
Posted by: RJMII Feb 18 2009, 11:43 AM
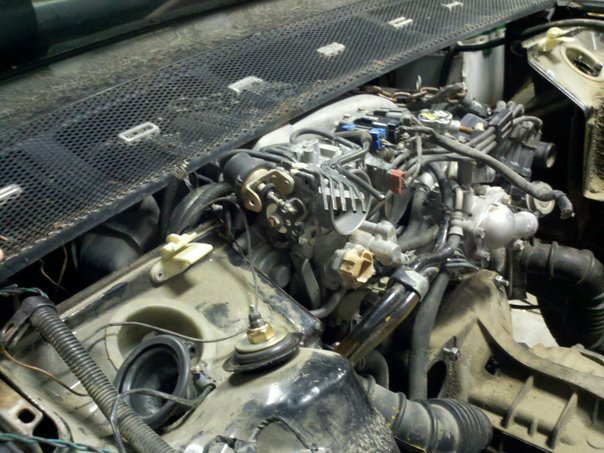
And here it is, with the top half back on and the oil filler cap out from underneath the intake. (it makes it easier to top off with the oil if I don't have to pull the upper intake every time I check my oil...)
http://rides.webshots.com/photo/2493216130101286046qnTLqY
front view:
http://rides.webshots.com/photo/2502632460101286046wEeVoB
Posted by: andys Feb 18 2009, 12:14 PM
RJMII,
What V6 motor is that?
Andys
Posted by: RJMII Feb 18 2009, 08:50 PM
mitsubishi 6G73. 2.5 liter V-6 SOHC 24 valves; and now getting turbo'd. =o)
Posted by: RJMII Feb 18 2009, 09:01 PM
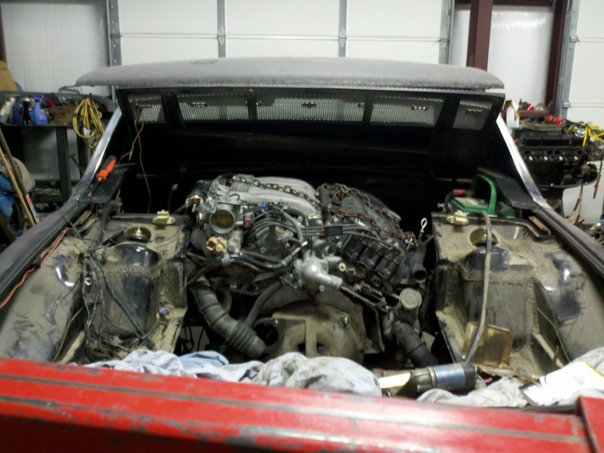
I got the engine back in; here are the results. =o(
http://rides.webshots.com/photo/2145575840101286046elvTrR
It doesn't quite fit.
http://rides.webshots.com/photo/2819027320101286046bkgZAK
Posted by: RJMII Feb 18 2009, 09:02 PM
The piece of metal across the top of the firewall;
Is it structural? Can I trim it to make room for the my throttle control lever?
Posted by: Solo914 Feb 18 2009, 09:40 PM
The piece of metal across the top of the firewall;
Is it structural? Can I trim it to make room for the my throttle control lever?
Nope, but that is where the engine compartment front seal attaches.
Kyle
Posted by: RJMII Feb 18 2009, 10:02 PM
The piece of metal across the top of the firewall;
Is it structural? Can I trim it to make room for the my throttle control lever?
Nope, but that is where the engine compartment front seal attaches.
Kyle
I don't recall pulling a front seal from there. Would anyone happen to have a picture?
I'm planning on going with a full grate style engine lid, and I don't recall the front seal...
Posted by: rick 918-S Feb 18 2009, 11:28 PM
The piece of metal across the top of the firewall;
Is it structural? Can I trim it to make room for the my throttle control lever?
I cut mine. Just box it back in. It will be fine. This is the best picture I could find. If you look close you can see the cut out and rounded corners.
Attached image(s)
Posted by: RJMII Apr 7 2009, 03:49 PM
Starting to look like a water cooled conversion...
Got the dirty old radiator in there for fitment. =o)
Attached thumbnail(s)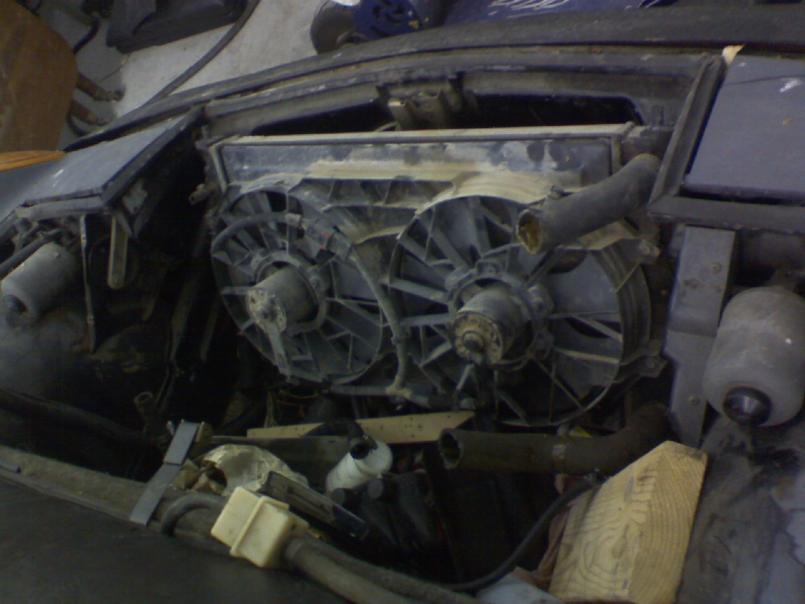
Posted by: RJMII Apr 7 2009, 03:53 PM
I had my favorite machinist cut and weld the intake manifold. Now I need to modify the throttle lever a little, and it looks like it will work.
It's incredibly tight, but it will work.
Attached thumbnail(s)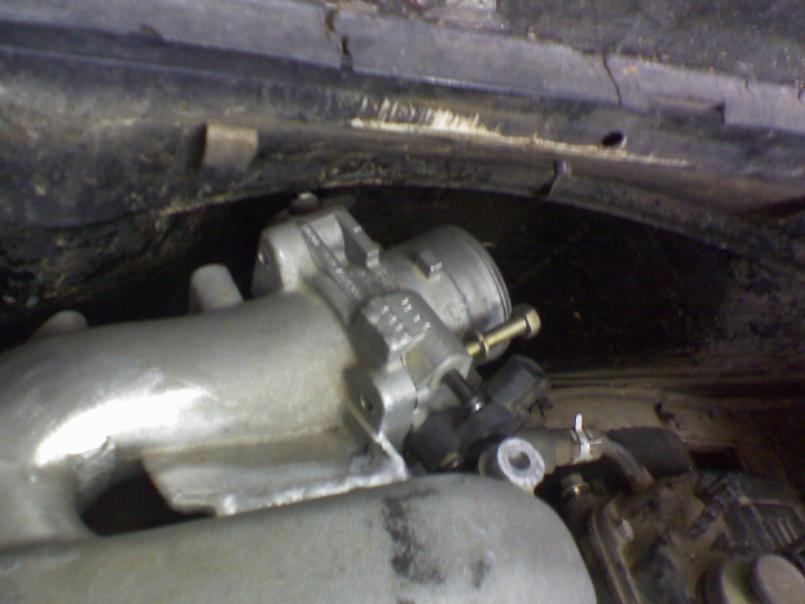
Posted by: schreiber Apr 7 2009, 04:06 PM
Helluva build thread. Keep up the good work!
Posted by: Zardozz Apr 7 2009, 04:44 PM
That's almost as crazy plumbing as mine. I'm impressed, keep it going.
Posted by: RJMII Apr 20 2009, 01:44 PM
downpipe from turbo to exhaust...
Attached image(s)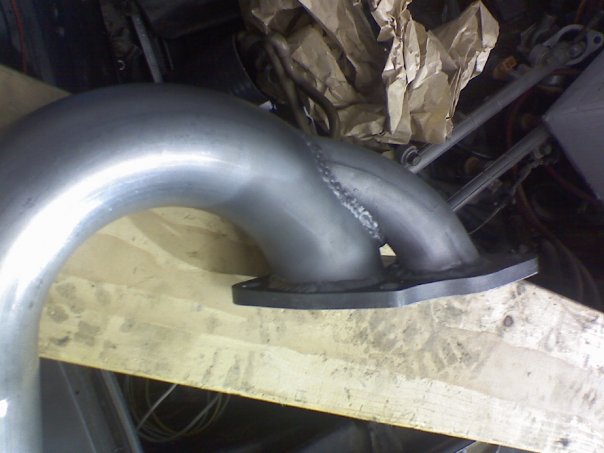
Posted by: RJMII Apr 21 2009, 09:25 PM
The engine is back out of the car, also. Time to put a dimple for the throttle lever, run some turbo lube and coolant lines, and get the down pipe situated a little bit better. The welder/machinist/fabricator did the build w/out the car present and got it off by just enough that we need to tweak it.
the shift bushings are in, too. =o)
Attached image(s)
Posted by: RJMII Apr 22 2009, 07:38 PM
Transmission mounts. stock ones. I was under my car!
Attached thumbnail(s)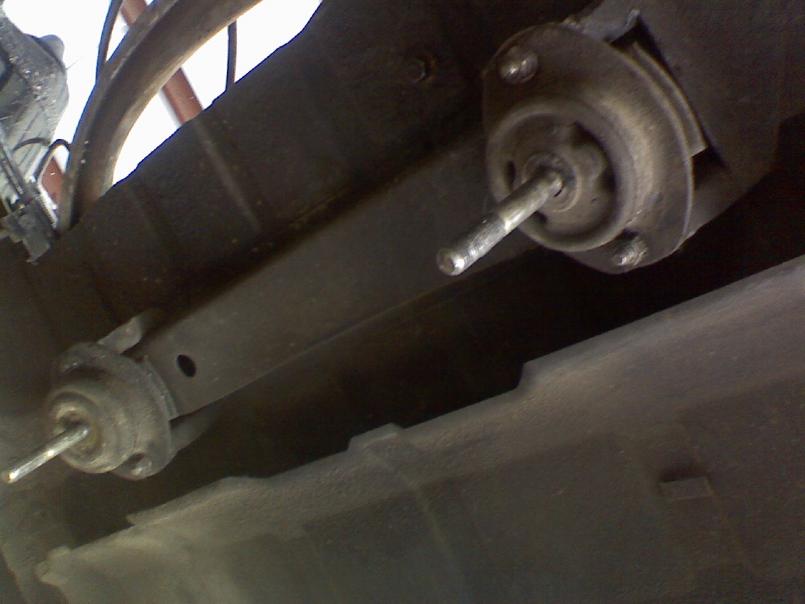
Posted by: RJMII Apr 22 2009, 07:40 PM
Transmission mounts... 911 sport units. Twenty minutes later. What can I say? It's tough to get off the creeper to get stuff that I left on top of the car. lol
Thanks Felix! (Neo9146)
Attached thumbnail(s)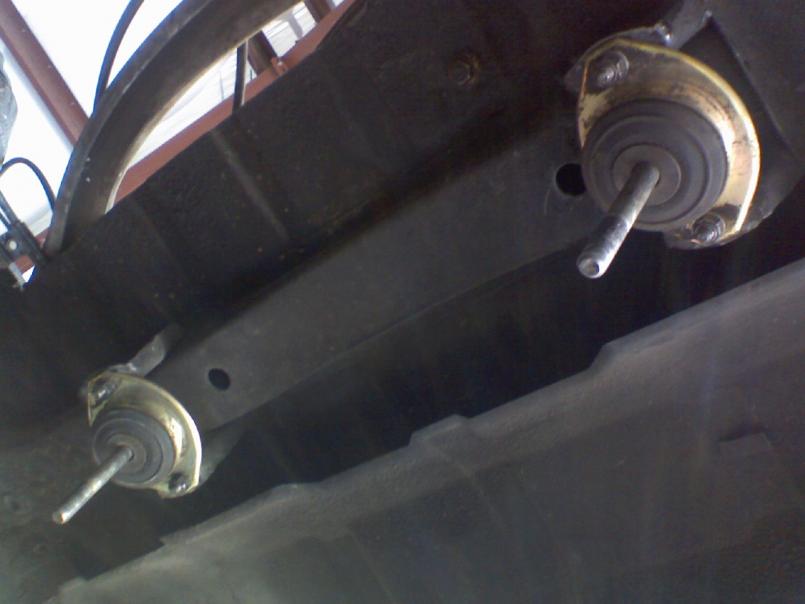
Posted by: RJMII Apr 22 2009, 07:42 PM
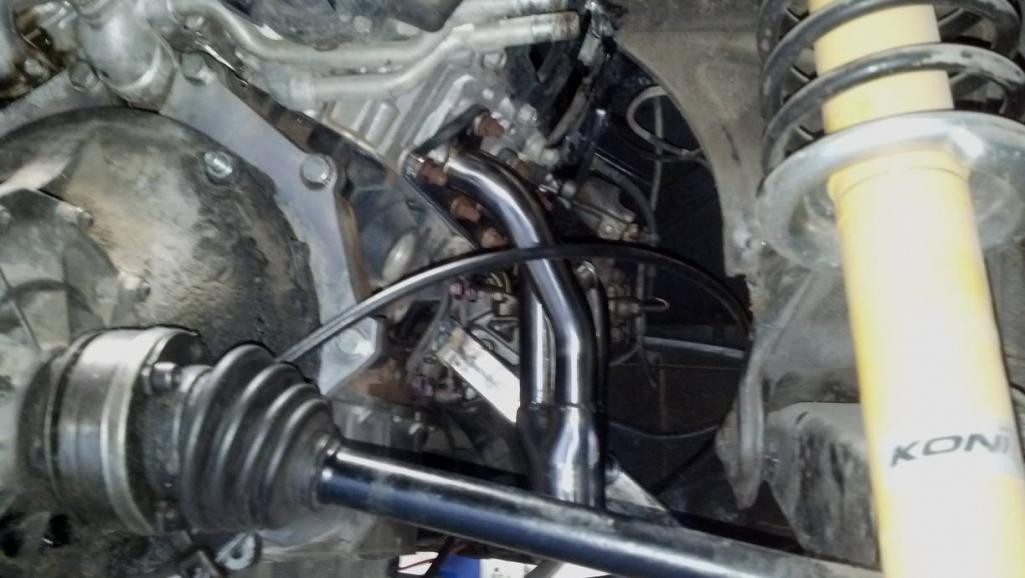
Slowly getting there. =o) The downpipe needs tweaked a little to fit right. It was built without the car present and the fabricator got it close.. almost perfect, but not quite.
Attached thumbnail(s)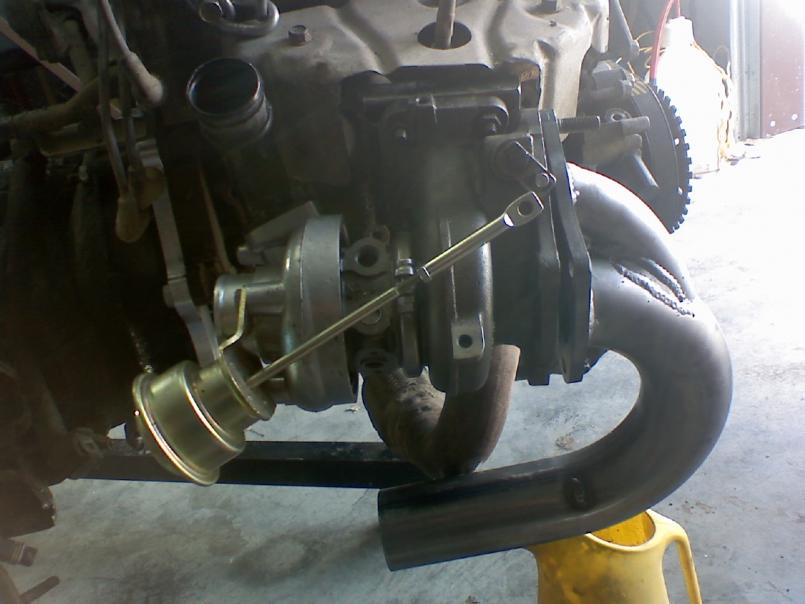
Posted by: RJMII Apr 22 2009, 07:44 PM

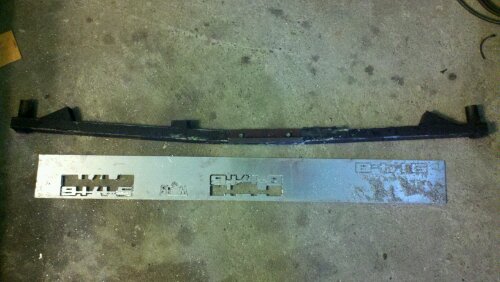
Back ugly bumper off. anyone want to buy it? it's in good condition, but it's still a 76 bumper.
I've got a pair of Chrome ones on my 73 parts car. =o)
the front one is off, too... but that part of the shop wasn't lit enough to get a picture with my cell phone.
Attached thumbnail(s)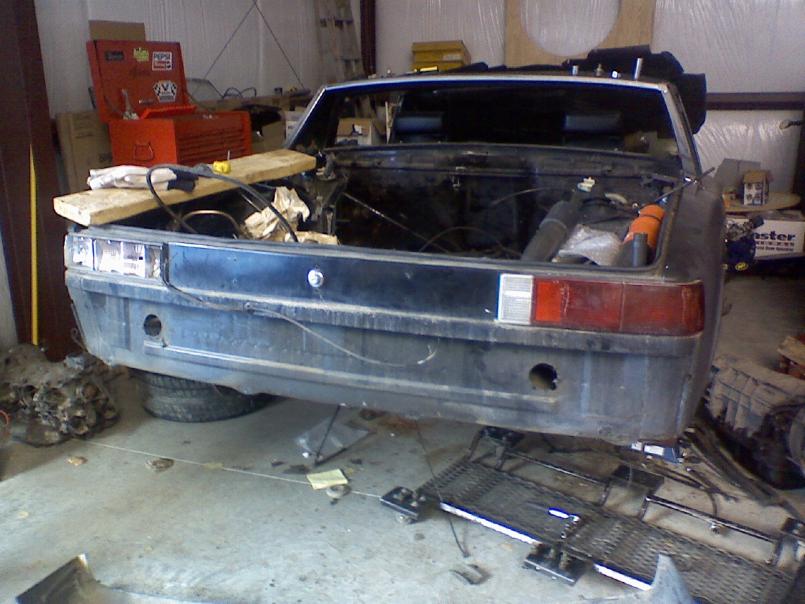
Posted by: RJMII Apr 22 2009, 07:46 PM
---> that's going to get some holes sometime SOON. woot! airflow for cooler engine temps.
The pic is still dark... I suppose I could open photoshop, but it's been a long day. I just want to put my feet up in about 3 posts and watch some TV.
Attached thumbnail(s)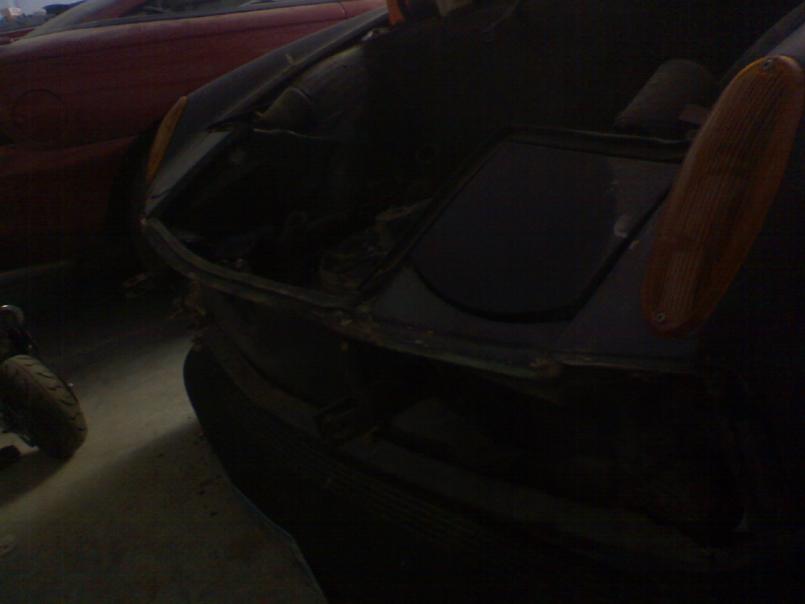
Posted by: RJMII Apr 22 2009, 07:48 PM
every 914 owners dream... an empty jackstand. =o)

Hopefully I'll get pics of the blue ones under the car into this situation soon, too!
Attached thumbnail(s)
Posted by: RJMII Apr 30 2009, 01:20 AM
Starting fitment of the plumbing between the turbo and the throttle body.
Attached thumbnail(s)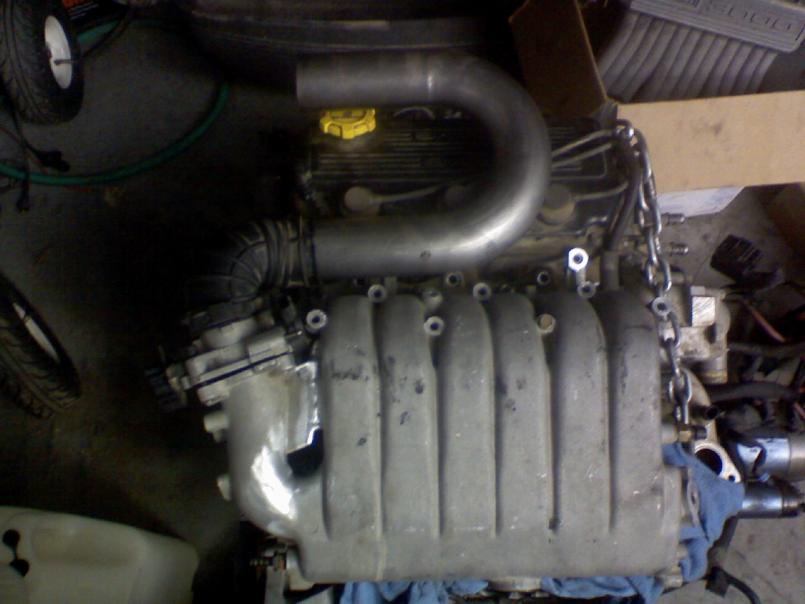
Posted by: RJMII Apr 30 2009, 01:21 AM
Slowly getting there. The Orange reducer is hiding a bad angle... this is getting fixed.
Attached thumbnail(s)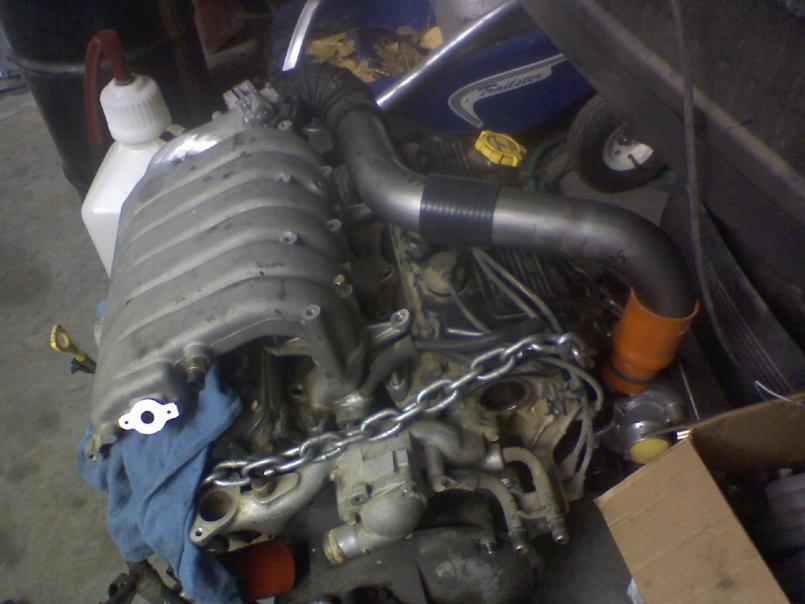
Posted by: RJMII Apr 30 2009, 01:23 AM
better angle...
If you look at the orange, the pipe that is inside there coming off of the turbo points away from the engine a little bit more. The other U-tube that is getting cut tomorrow will remedy that awkward airflow pattern and smooth things out a bit.
The black tube between the throttle body and that first curve was quite a find, too! It fits perfect and will work great with the location of the throttle body in relation to the firewall.
Attached thumbnail(s)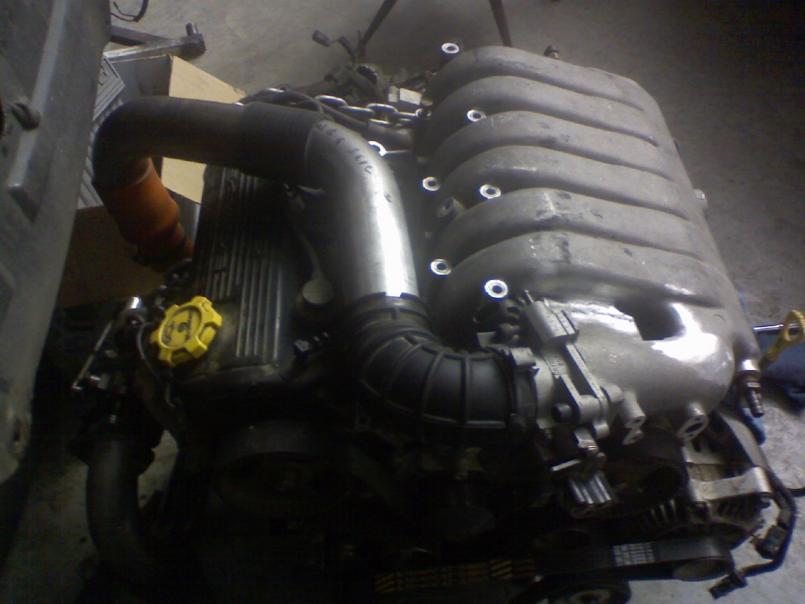
Posted by: RJMII Apr 30 2009, 04:04 PM
I scored a set of 360cc injectors. These are stock injectors from a 3000GT VR4.
Top one is the old one (180cc, IIRC)
bottom one is VR4 injector. 360cc.
Attached thumbnail(s)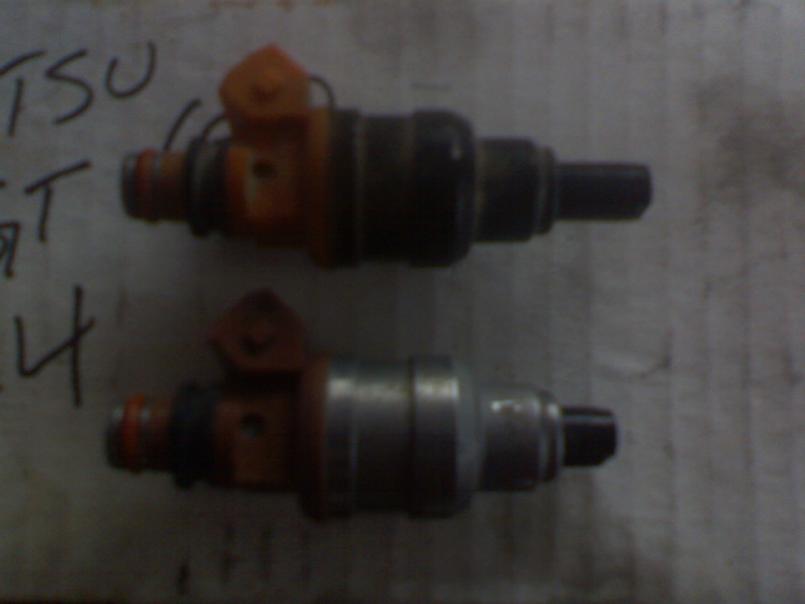
Posted by: RJMII Apr 30 2009, 04:07 PM
...and installed in the fuel rail and lower intake.
Attached thumbnail(s)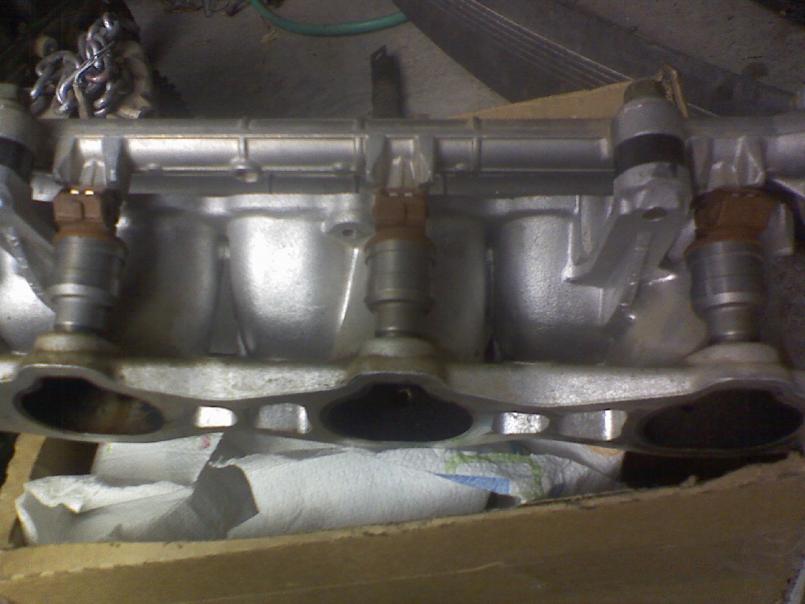
Posted by: RJMII May 1 2009, 08:23 PM
got the angle fixed for the pipe between the turbo and throttle body; and started fabbing up the air filter side of the turbo.
Attached thumbnail(s)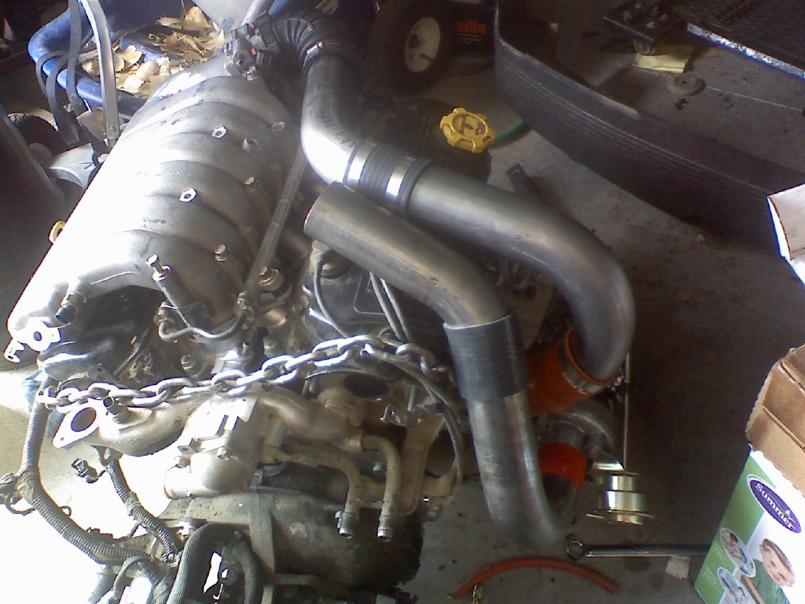
Posted by: JRust May 1 2009, 08:41 PM
Looking good Jim! Keep up the good work
Posted by: nsr-jamie May 2 2009, 10:49 PM
Wow ! That is cool !! Now I know what you are working on, cool !! That is going to be one cool car when you get it all done. Also the first time I have seen a conversion like that.
Glad you got those injectors too.
Cheers 

Posted by: dlo914 May 2 2009, 11:58 PM
Not going to run an intercooler?
Posted by: RJMII May 3 2009, 11:06 AM
Daniel, the plan is to go with a water to air intercooler after I get the car running. I can go up to 7psi before needing an intercooler, so getting it running first, then going to add the I/C.
Frozen boost has one that has 2.5" I/O and does a 90 degree turn. It will get placed in there on top of that valve cover and I'll reconfigure the piping then. Probably later this summer after I get working again now that the semester is over and I'm done with surgeries.
Posted by: RJMII May 11 2009, 09:27 PM
I got the air filter, and the silicone connector for the cold air intake to mount to the turbo.
The cooling lines are now run to the turbo.
Currently the engine is dangling in the air with the oil pan off so we can poke a hole in the side of it for oil return line from the turbo.
Also today 10 foot of Green stripe 1.25" hose showed up via UPS. (Thank you, Jamie Rust!)
The hose fits rather tightly on my connection points at the engine, and I'm thinking (hoping) that since the engine and radiator both came out of the same vehicle, they'll fit about the same at the radiator end.
Attached image(s)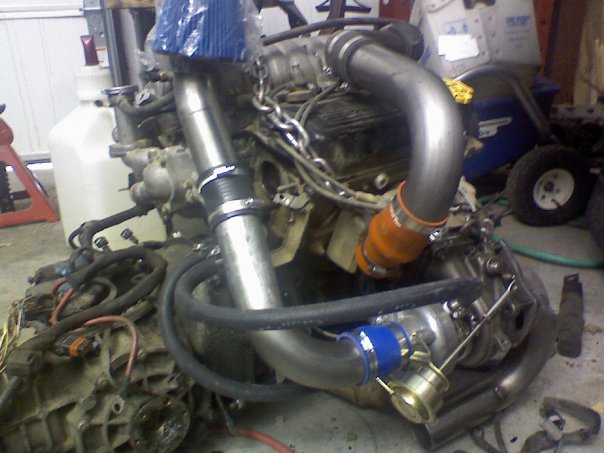
Posted by: RJMII May 30 2009, 10:51 PM
Here's a hole in the oil pan for the oil return line from the turbo.
Attached thumbnail(s)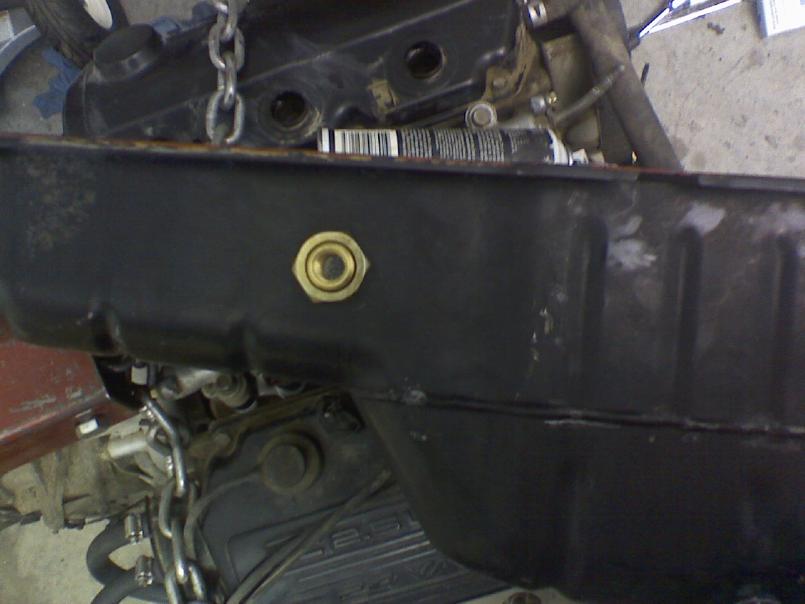
Posted by: RJMII May 30 2009, 10:51 PM
Oil return line installed. (It needs reconfigured a little, though)
Attached thumbnail(s)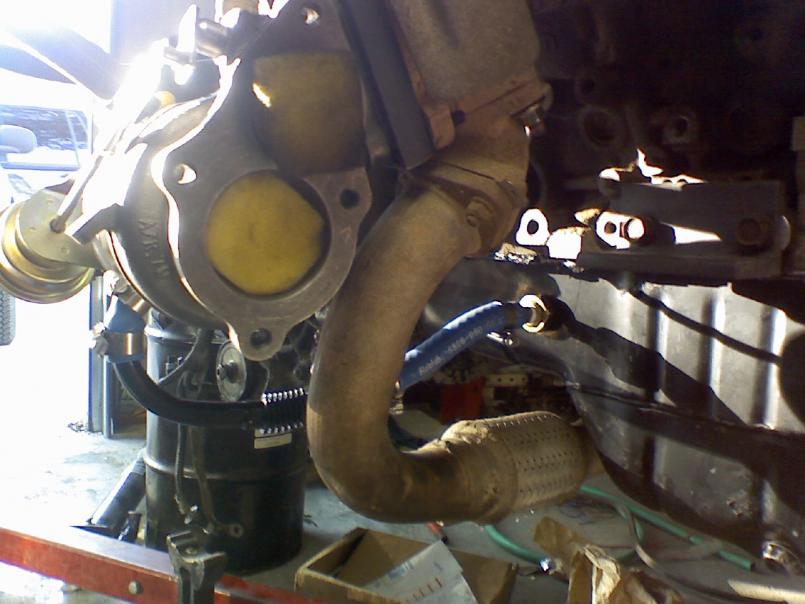
Posted by: RJMII May 30 2009, 10:51 PM
Oil feed line installed. =o) all of the shiny copper pieces on the hydraulic line that go to the hard line. The return line is also visible in this shot.
Attached thumbnail(s)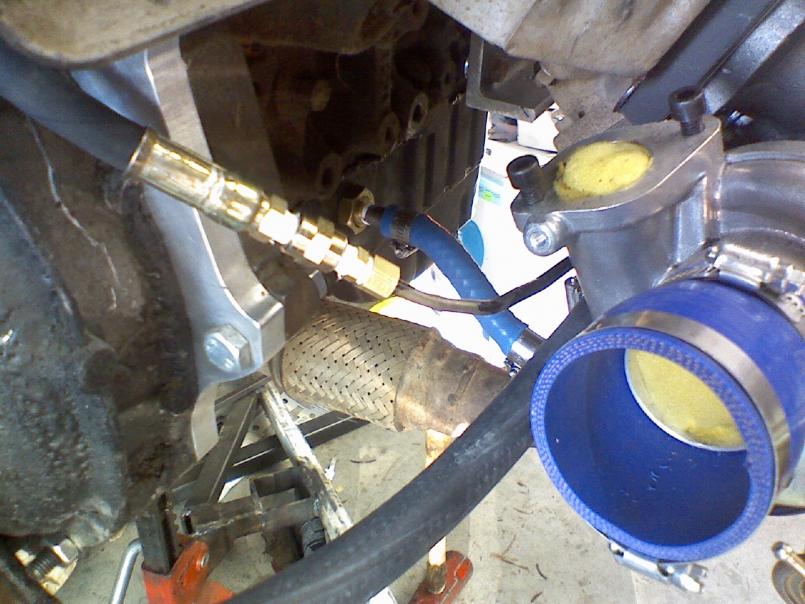
Posted by: RJMII May 30 2009, 10:51 PM
Test fitting the intake tubes with the engine in the car. The firewall situation was easily resolved with a hammer. We now have full throttle with no interference!
Attached thumbnail(s)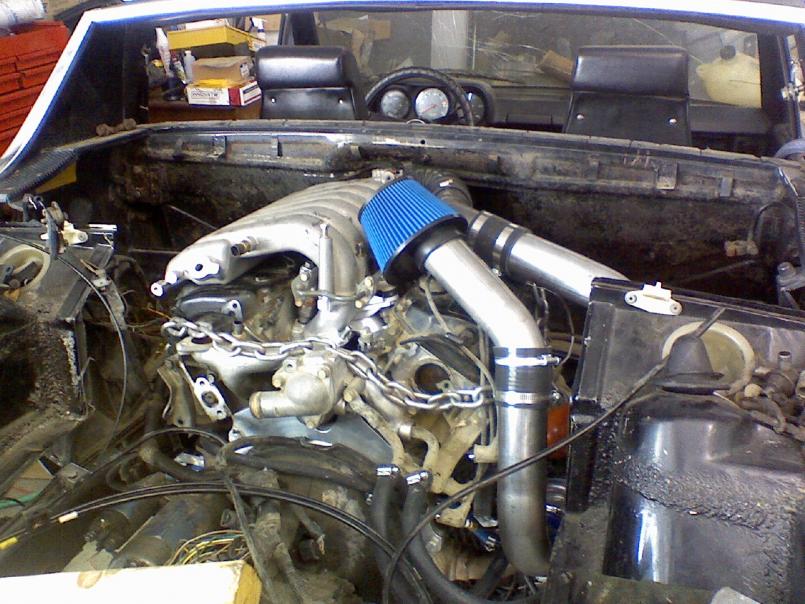
Posted by: RJMII May 30 2009, 10:52 PM
While I was drilling holes for wires, throttle cable, engine mount bolts, etc... I decided to go ahead and add the reflector to go with the Euro style lenses.
Big black bumpers are also GONE. (ta da dump)
Attached thumbnail(s)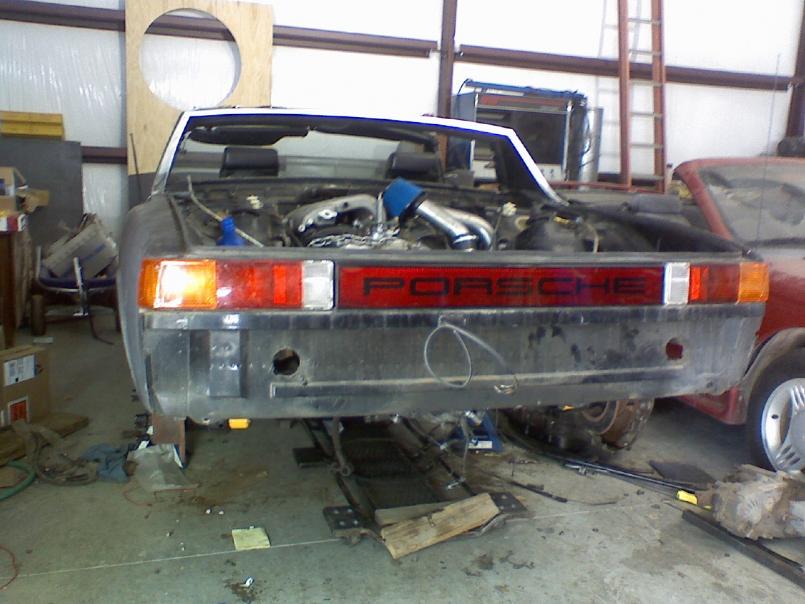
Posted by: RJMII May 30 2009, 10:52 PM
The wires are all sorted, and ready to be routed and connected. =o)
If you look closely, you can see how I knotted them together.
Attached thumbnail(s)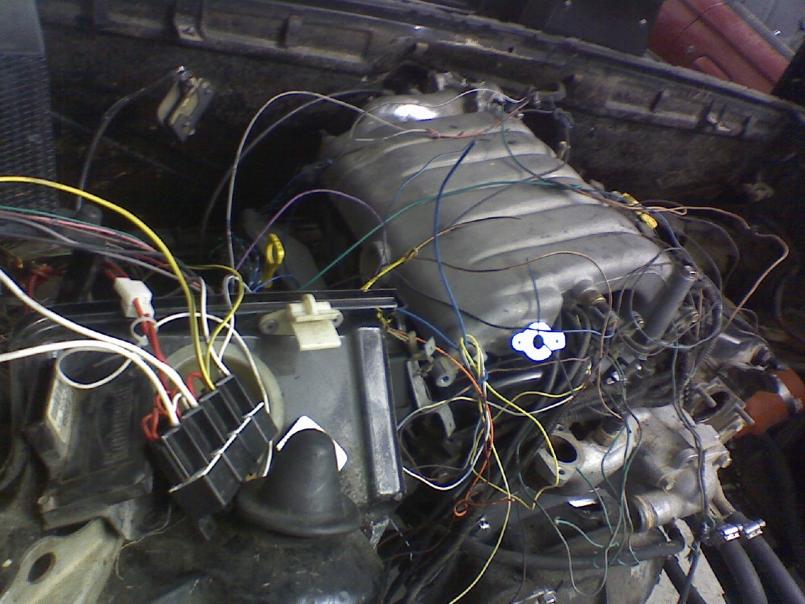
Posted by: RockinOldSchool May 30 2009, 11:32 PM
So did you swap in HIDs after you took the pic? Or are you calling the blue halogen bulbs HIDs?
If you do have actual HIDs, which ballasts are you running and are you using a hi/low or low only kit?
Just curious, because I've been running a 4300k hi/low kit in my car for about a year and a half now, and have not been able to get them to aim properly with the adjustment solenoids on the back of the bulb. About to give up and put a low only kit in.
A big advantage to the kit I bought was that it also came with casper shields, so it can be used with the h4 halogen assemblies without blinding oncoming traffic.
Posted by: RJMII May 30 2009, 11:57 PM
I'm just running the cheap Xenon bulbs for now; the plan was to go with HID bulbs that have the servo in them that changes the angle. The engine swap took priority. When I drive the car out of the shop, I'll start playing with things like bumpers and headlights again. =o) then again... lol I already have the bumpers, might as well put them on.
Posted by: RockinOldSchool May 31 2009, 12:02 AM
I'm just running the cheap Xenon bulbs for now; the plan was to go with HID bulbs that have the servo in them that changes the angle. The engine swap took priority. When I drive the car out of the shop, I'll start playing with things like bumpers and headlights again. =o) then again... lol I already have the bumpers, might as well put them on.
I'll save you the time. On the hi/low kits with the servo (that's the one i have), the servo sticks off the back of the bulb so far that it presses against the headlight cover pinning the headlights at a SEVERE downward angle. I'd recommend a set of low only and a good set of driving lights. I'm swapping the hi/low kit for low only and putting hids in my driving lights as well.
Of course I tend to only use my headlights on backroads and the highway anyways. I just use my parking lights and driving lights around town since the driving lights put off enough by themselves.
Posted by: RJMII May 31 2009, 08:40 PM
I'd be interested in the hi/low kit... I'm modding the heck out of a few things already, so why not put a couple of bumps to make room for some lights?
Posted by: 3d914 May 31 2009, 11:28 PM
Jim,
This is a radical 914. Very cool! What are your estimates on HP with the turbo? I looked at numerous V6's for my project but never considered this one. Looks like a good choice though. Can't wait to hear how you like the results.
ENjoy!
Posted by: RockinOldSchool Jun 1 2009, 01:05 AM
I'd be interested in the hi/low kit... I'm modding the heck out of a few things already, so why not put a couple of bumps to make room for some lights?
I hear you on the mods. I'm working on building a 2.4l turbo I4 using a Mitsu 4g64 with an Evo IX Mivec Head and an aftermarket turbo. Then I'll need to hunt down a new tranny. Shooting for 300+ at the wheels. That's a pretty mild tune for that engine though, so I could always retune for more later if I feel the need. lol
The bumps would actually have to be in the headlight covers themselves, so you'd see it when the lights are down. I'll shoot you a message if I decide to get rid of them.
Posted by: 6freak Jun 1 2009, 08:29 AM
While I was drilling holes for wires, throttle cable, engine mount bolts, etc... I decided to go ahead and add the reflector to go with the Euro style lenses.
Big black bumpers are also GONE. (ta da dump)
I have a rear bumper ! tits rotted off but its strait with a strait bumper top just needs some love a little sanding and some paint
Posted by: RJMII Jun 1 2009, 11:02 AM
Gerard, thank you! We are aiming for 300-350hp.
John, ae you putting the 4g64 in a 914? if you do it right you can keep your front trunk. My first 914 had a 2.2 turbo I4 from a Shelby daytona and the radiator we ran fit in the engine compartment. I'd go with a push through config on the fan...
Mike, thank you! I got the turn signal switch installed that you sent, and you can see in the pics how the lenses look. Ihve chrome bumpers from a 73... I need to figure out how to remove them from my parts car.
Posted by: 6freak Jun 1 2009, 11:20 AM
Gerard, thank you! We are aiming for 300-350hp.
John, ae you putting the 4g64 in a 914? if you do it right you can keep your front trunk. My first 914 had a 2.2 turbo I4 from a Shelby daytona and the radiator we ran fit in the engine compartment. I'd go with a push through config on the fan...
Mike, thank you! I got the turn signal switch installed that you sent, and you can see in the pics how the lenses look. Ihve chrome bumpers from a 73... I need to figure out how to remove them from my parts car.
They look pretty good ...glad the turn signel worked ..keep up the good work so you can make it too the WCR in Tahoe.......seeya there! only 11 months away
Posted by: RockinOldSchool Jun 1 2009, 11:35 AM
Gerard, thank you! We are aiming for 300-350hp.
John, ae you putting the 4g64 in a 914? if you do it right you can keep your front trunk. My first 914 had a 2.2 turbo I4 from a Shelby daytona and the radiator we ran fit in the engine compartment. I'd go with a push through config on the fan...
Mike, thank you! I got the turn signal switch installed that you sent, and you can see in the pics how the lenses look. Ihve chrome bumpers from a 73... I need to figure out how to remove them from my parts car.
Ah so YOU'RE the person that got the signal switch. I was disappointed when I showed up at Mike's on Saturday for the sawzall party and saw that it was already gone. Mine broke last week. I've noticed people REALLY don't pay attention to arm signals anymore...

I want to put the 64 in the silver car in my avatar. I'm getting a Evo IX Mivec head for free that I want to mate up to the 64 long block and possibly destroke it with the crank out of the same Evo (Lower the CR so I can run a IX turbo). Still learning as I go here. I was a Nissan guy before I got into the VW/Porsche side of things. So Mitsu engines are new territory for me. Been doing LOTS of reading on the Evo and 4g64 forums.
Where was the radiator mounted and how was it oriented with the turbo 2.2?
Posted by: RJMII Jun 1 2009, 12:24 PM
John,
I've got the turn signal switch I pulled still... the cancelling part fell off. You can have it if you want it; maybe you can get enough pieces from this one to fix yours?
The radiator in the 2.2 turbo setup was parallel to the engine. The mount for it was incorporated into the engine bar. It was on the 'front' side of the engine. (front being the orientation of where front was when it was installed int he daytona) the radiator was out of a mid 90's dodge minivan. It fit perfect and they are easy to find. In the 914 it happened to be the driver side, and the turbo was on the battery/passenger side.
In the I4 car that you borrowed the 64 out of; as you are looking at the car from the front, is the transaxle on the pass side or the driver side?
Posted by: RockinOldSchool Jun 1 2009, 01:20 PM
I've got the turn signal switch I pulled still... the cancelling part fell off. You can have it if you want it; maybe you can get enough pieces from this one to fix yours?
That'd be great! I'm not worried about it cancelling, as the wheel I have has no cancellation ring. I'm used to just flicking it off manually after I turn. The stalk on mine snapped on both sides where it wraps around the steering column. And unfortunately JB Weld isn't strong enough to hold it. lol
In the I4 car that you borrowed the 64 out of; as you are looking at the car from the front, is the transaxle on the pass side or the driver side?
I haven't sourced the 64 yet. My friend that's stationed in Italy had his Evo IX engine die on him right before he shipped. So he left it here and in return for installing a new engine in it for him, he's giving me the original engine and letting me drive the Evo til he comes back.
The head and valvetrain are fine, but the block and one of the rods are trashed. So I'm ripping the Mivec head off that and seeing if the crank can be salvaged as well.
I'm just in the research stage right now. The guy with the Evo mentioned that it's possible to use the 63 Mivec head on the 64 and that it just isn't done often. He said the biggest concerns are making sure the oil pathways are there to feed the head for the Mivec control and the CR if I want to turbo it (stock 4g64 CR is 10:1, definitely too high).
Posted by: RJMII Jun 1 2009, 11:39 PM
Ah, with that Evo engine you are going to end up with your turbo on the driver side, and the intake on the passenger side.
send me your mailing address. =o) I've got to ship some parts out this week anyways.
Posted by: RJMII Jun 2 2009, 01:49 AM
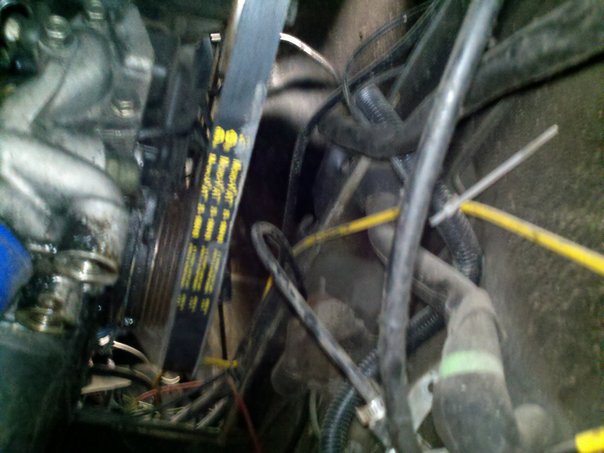
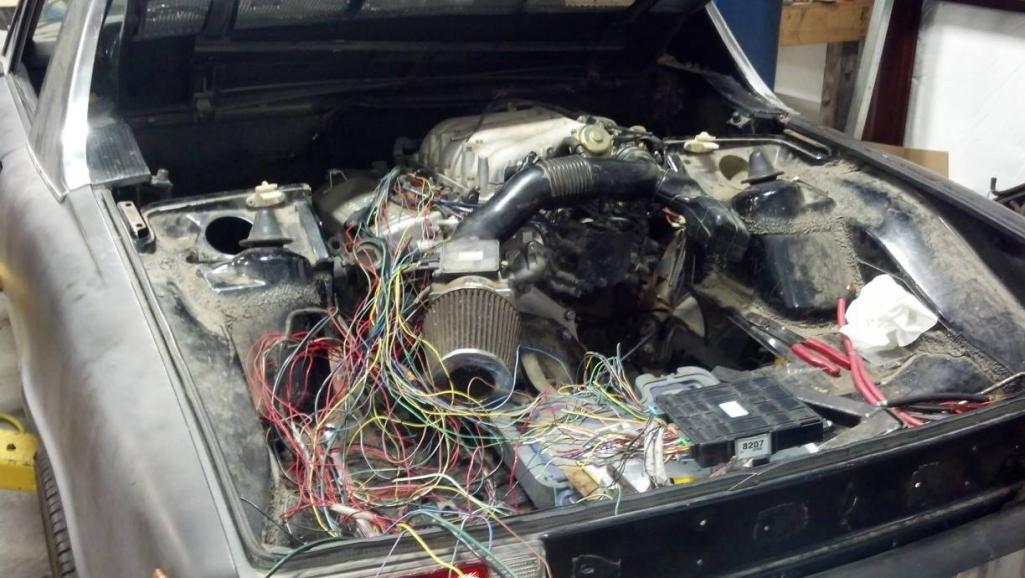
progress picture number one from today.
spaghetti!
Attached thumbnail(s)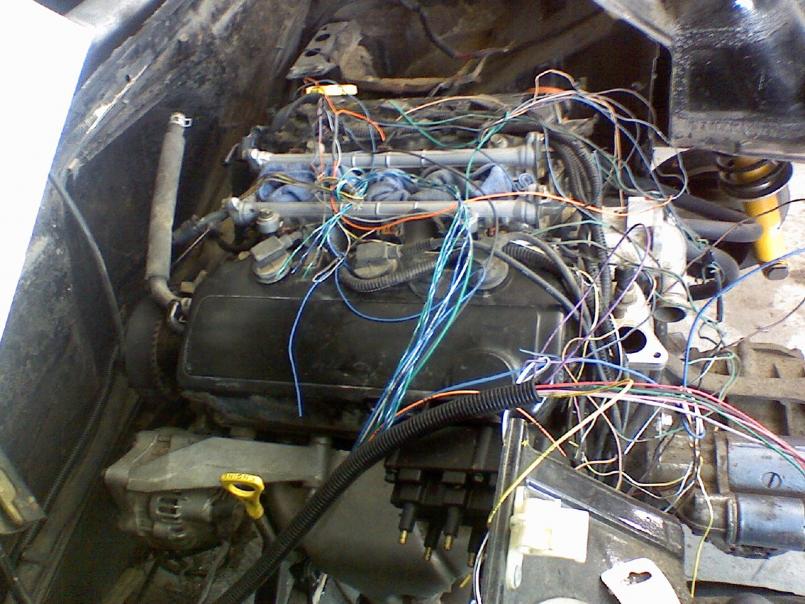
Posted by: RJMII Jun 2 2009, 01:51 AM
Progress pic number two today!
all taped up and routed nicely. the majority of the wires are going to be hidden by the intake plenum.
Attached thumbnail(s)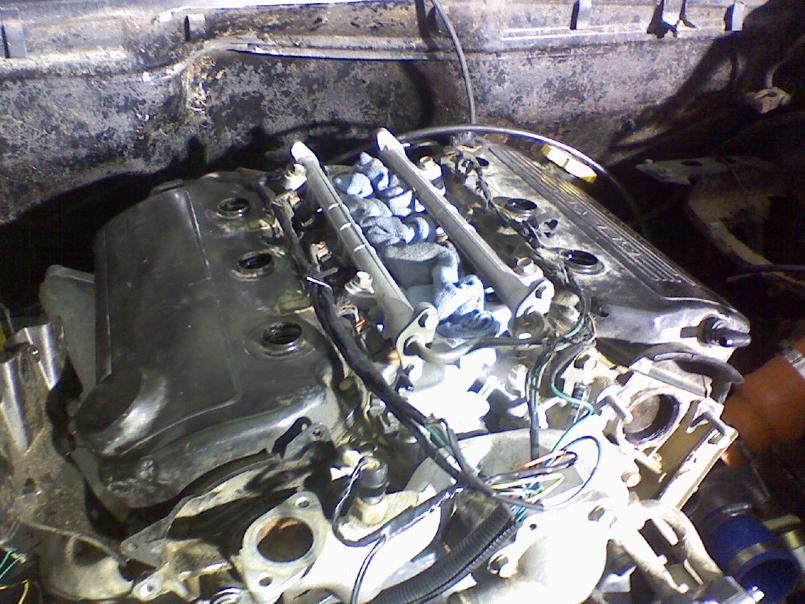
Posted by: mojorisen914 Jun 2 2009, 02:47 AM
It's about damn time you got out there and did something on the car 
It's coming together nicely, Jim. I landed in KY Monday morning. I'll give you a call sometime Tuesday.
Posted by: RJMII Jun 2 2009, 02:52 AM
It's about damn time you got out there and did something on the car
It's coming together nicely, Jim. I landed in KY Monday morning. I'll give you a call sometime Tuesday.
Yeah, no kidding!
I've spent the past 4 or 5 days (minus Sunday) out in my dad's shop. Tonight my mom wandered out to the shop and said something to the effect of "You've been working on your car a lot, and doing a lot of other stuff, you must be feeling better."
It sure feels good to have recovered enough from that last surgery to finally get out there and do something.
... try to call around noon my time. =o)
Posted by: RJMII Jun 4 2009, 03:22 PM
test fitting the exhaust. hmm...
straight out, or pay a little extra and have it come out on the driver side...
hmm...
Attached thumbnail(s)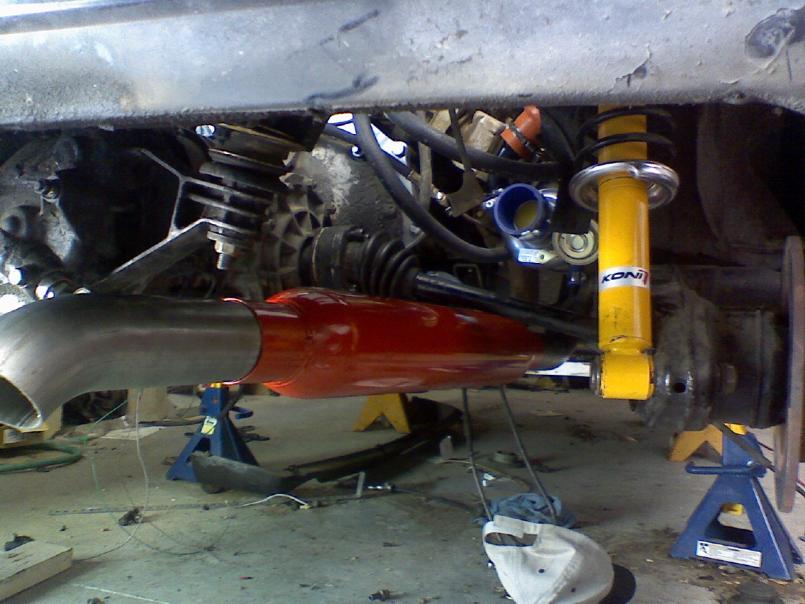
Posted by: RJMII Jun 4 2009, 03:39 PM
I'm test fitting the radiator...
trying to get it at the correct angle for just in case I come across a front sway bar setup for cheap. I don't want to run interference between the two.
Attached thumbnail(s)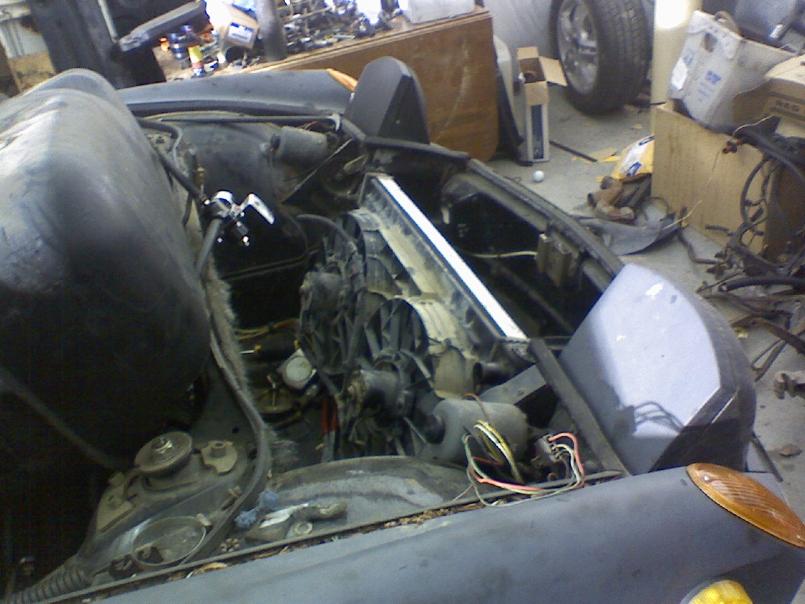
Posted by: 6freak Jun 4 2009, 03:44 PM
test fitting the exhaust. hmm...
straight out, or pay a little extra and have it come out on the driver side...
hmm...
That tail pipes gonna scrape ...Wow thats low
 keep up the good work
Posted by: JRust Jun 4 2009, 05:00 PM
"I'm test fitting the radiator...
trying to get it at the correct angle for just in case I come across a front sway bar setup for cheap. I don't want to run interference between the two"
Dude the front sway bar setup goes under your gas tank & thru. Your radiator won't get in the way of that at all. Unless you do some weird aftermarket sway bar I guess 
Posted by: RJMII Jun 4 2009, 06:41 PM
6freak/Mike...
here is another angle. The exhaust is actually higher up than the floor pan and engine mount. =o) if it scrapes, I'm in deep...
Attached thumbnail(s)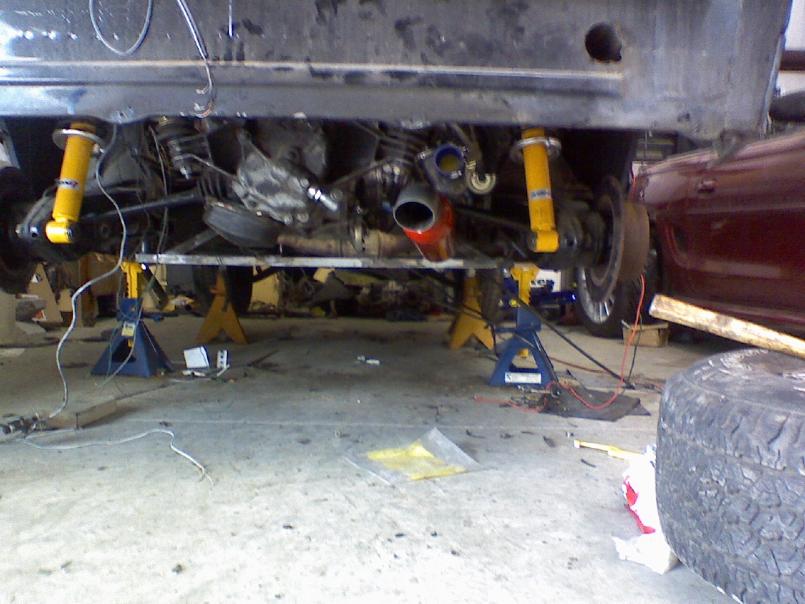
Posted by: RJMII Jun 4 2009, 06:43 PM
Time to go put this on...
Attached thumbnail(s)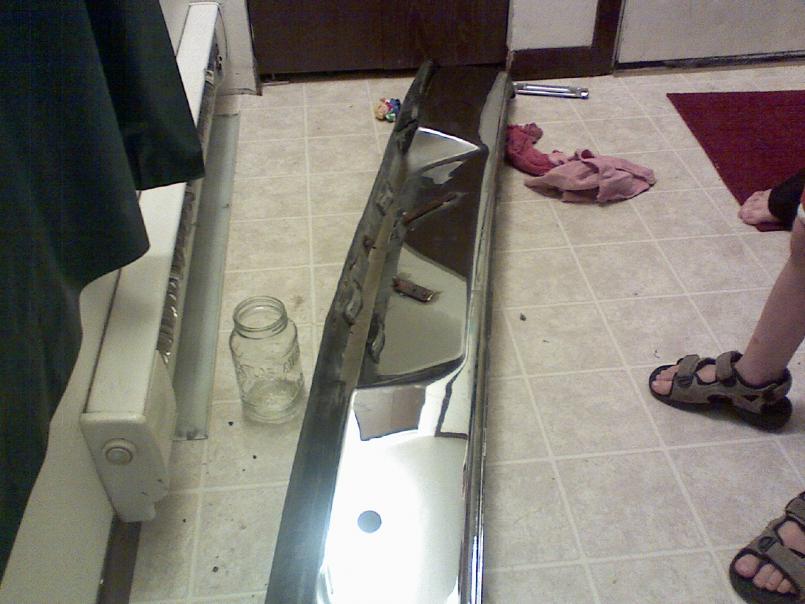
Posted by: dkjens Jun 4 2009, 07:05 PM
A friend of mine had a Mitsubishi GT3000 (regular non turbo 2-wheel drive). It got up and moved pretty nicely and I often thought it a viable project to install engine and transmission complete in a 914. The tranny worked great and the gearing was nice.
This looks nice, keeping my eyes on this thread.
Posted by: RJMII Jun 4 2009, 08:57 PM
working on bumper fitment...
This thing was a pain to align with rusty bolts. I'm going for new ones tomorrow, and trimming the 76 bumper edges off so the chrome one will fit. =o)
Attached thumbnail(s)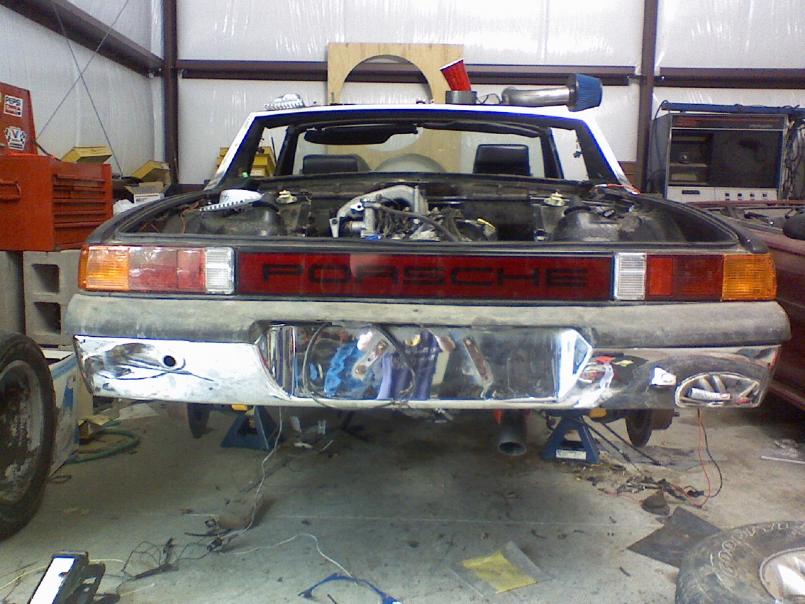
Posted by: RJMII Jun 4 2009, 09:13 PM
A friend of mine had a Mitsubishi GT3000 (regular non turbo 2-wheel drive). It got up and moved pretty nicely and I often thought it a viable project to install engine and transmission complete in a 914. The tranny worked great and the gearing was nice.
This looks nice, keeping my eyes on this thread.
Thanks!
Once I get this all configured, I'll probably start drooling over the twin turbo VR4 engines. not that the transaxle will handle it...
I'm working on a website for Dr Evil; one of the features I'm programming into it is a gear ratio calculator so I can put my power band in and figure out which ratios I want.
Posted by: 6freak Jun 5 2009, 08:57 AM
6freak/Mike...
here is another angle. The exhaust is actually higher up than the floor pan and engine mount. =o) if it scrapes, I'm in deep...
that looks better ...Maybe not as low as that other pix made it look

OK i will give you the green lite on that you may continue
 ...only 10 months tell WCR
Posted by: RJMII Jun 16 2009, 06:41 PM
My brakes are installed, adjusted, and bled! New master cylinder is in place. (19mm unit to go with the 911SC front brakes)
Deck lids are somewhat in place, so we can roll it around in the shop and have it look like a car again.
The front bumper now has a huge hole in it...
Attached thumbnail(s)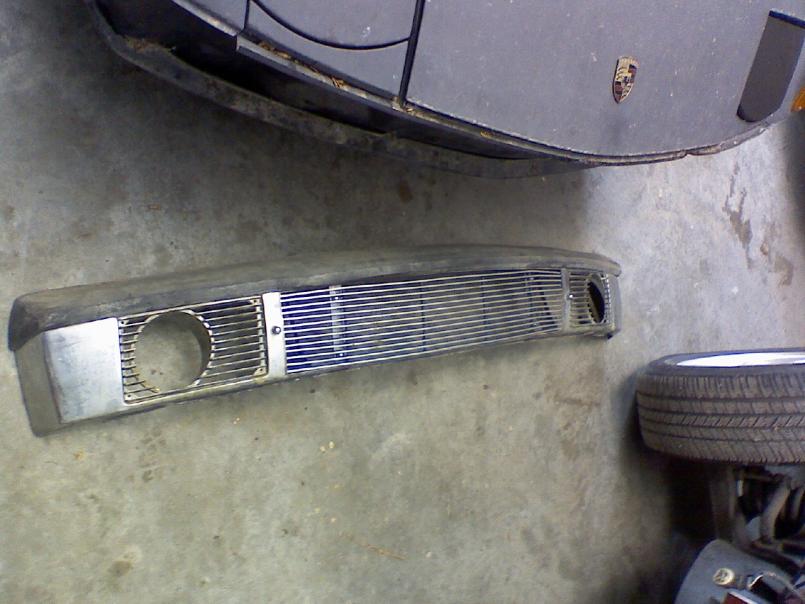
Posted by: RJMII Jun 16 2009, 06:47 PM
where it's sitting right now. =o) on the ground!
Attached thumbnail(s)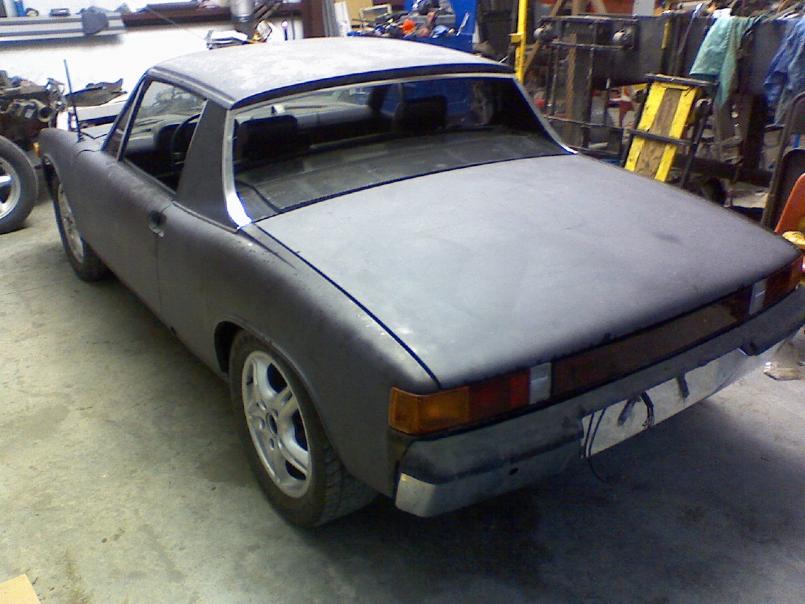
Posted by: RJMII Jun 16 2009, 06:51 PM
While I was working on the brakes I came across an issue of the rotor acting warped.
It didn't seem warped unless it was on the car, installed properly.
My bud at www.pmbperformance.com gave me a couple of pointers and got me headed in the right direction; the brakes are all installed now and working properly.
thanks again, Eric!
Attached thumbnail(s)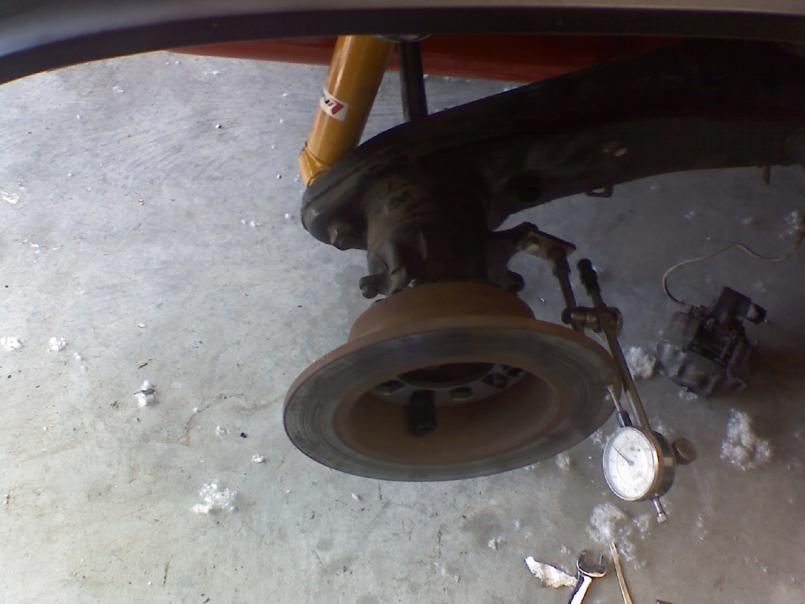
Posted by: RJMII Jun 16 2009, 06:52 PM
One last shameless plug for PMB... lol
My new clutch cable!! woot!
Attached thumbnail(s)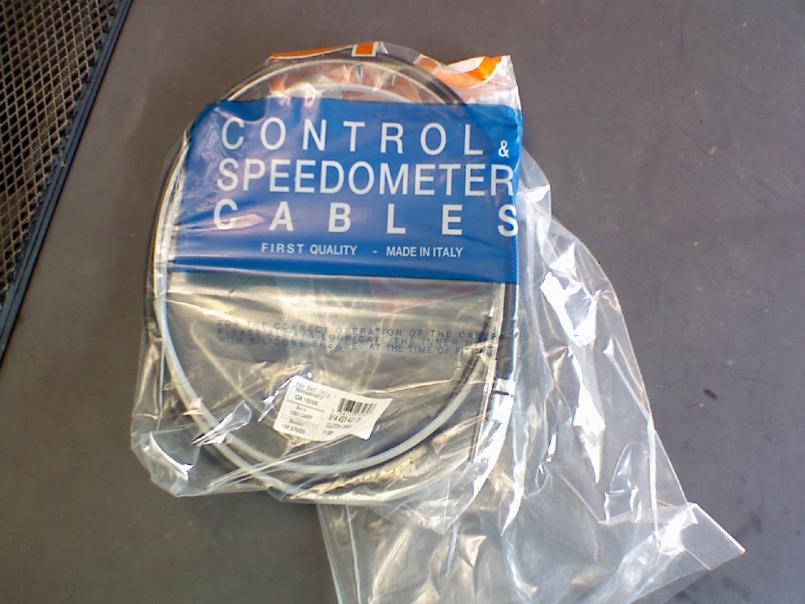
Posted by: ghuff Jun 16 2009, 08:39 PM
This thread is full of total fucking win.

PS im trying to acll you back, just retarded busy at work
Posted by: neo914-6 Jun 17 2009, 02:12 AM
While I was working on the brakes I came across an issue of the rotor acting warped.
It didn't seem warped unless it was on the car, installed properly.
My bud at www.pmbperformance.com gave me a couple of pointers and got me headed in the right direction; the brakes are all installed now and working properly.
thanks again, Eric!
care to share the pointer or are they "secrets"

I have a rub on one spot on the rotor and it's new or turned, along with rebuilt PMB v calipers. I can adjust the caliper for more clearance but don't think that's the proper fix plus I don't have that type of caliper...
Posted by: RJMII Jun 17 2009, 03:00 AM
you see how I've got the rotor mounted backwards? I was testing with the dial indicator how far out of whack my rotor was... .009"
I turned it around, and there was some interference where the welds on the hubs were for the stud reinforcement. The welds were causing my rotors to not seat properly, and made it scuff.
Posted by: RJMII Jun 18 2009, 05:27 PM
removing spot welds and peeling off that 76 bumper-ness; whatever that part is called where the bumper cover hangs onto the body.
Look at the previous owner's artwork... pleh.
Attached thumbnail(s)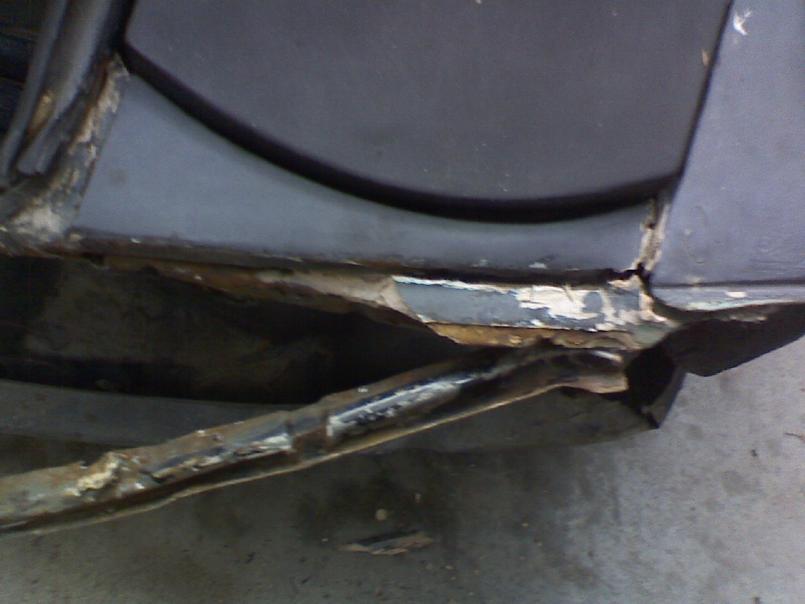
Posted by: RJMII Jun 18 2009, 05:28 PM
I had to put the bumper on to see just how bad the artwork stuck out.. more pleh.
Attached thumbnail(s)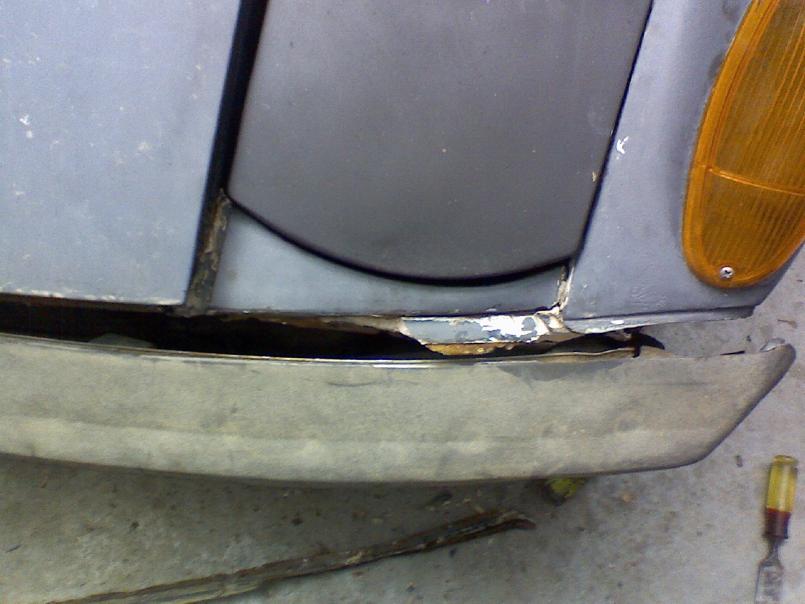
Posted by: RJMII Jun 18 2009, 05:29 PM
Yes, the hammer is holding the bumper on. Just the hammer, gravity, the front valance, and that @#$%# bondo. =o)
Attached thumbnail(s)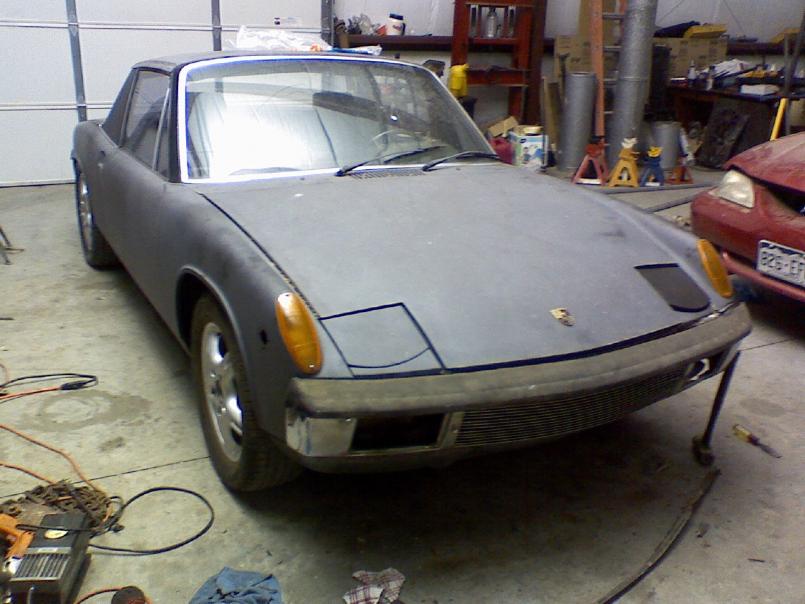
Posted by: RJMII Jun 19 2009, 10:43 PM
I got some of that bondo chiseled off... time to figure out how to get that corner to expand.
Attached thumbnail(s)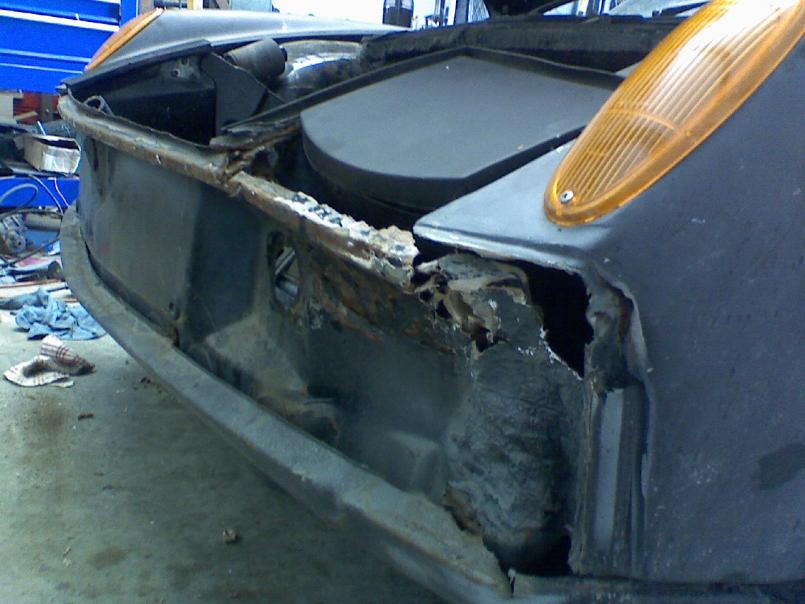
Posted by: JRust Jun 19 2009, 11:11 PM
Dude I would seriously consider replacing that front corner. How far back does the damage go? Look like the fender has a good 1/2" there in front. I know you have a parts car. How is that piece on it?
Posted by: RJMII Jun 20 2009, 10:31 AM
The one on the parts car is in a whole lot better condition than that one. Since I've got the parts car there... I'm going to go ahead and pound on this one a little. I am sure I can't screw it up more than the PO did. . .
and when it doesn't turn out right, I've got the part... out in a field... behind a bunch of other cars... on the parts car.
Posted by: RJMII Jun 20 2009, 11:17 PM
got a little done on the car today. Changed the clutch cable, hooked up the speedometer cable, ran vacuum/boost lines from the back of the car to the front of the car for the ECU and the fuel pressure regulator, ran a power wire from the back of the car to the front of the car, mounted the radiator, and called it good for the day.
Posted by: RJMII Jun 20 2009, 11:18 PM
oh, I also finished installing all of the new fuel lines under the fuel tank, and installed the fuel tank. I had to remove the roof and both deck lids to get to the areas I was working.
... and the back pad to fish the lines through the center tunnel... working on finding pictures for the day (If I have any)
Posted by: RJMII Jun 22 2009, 09:02 PM
making holes...
Attached thumbnail(s)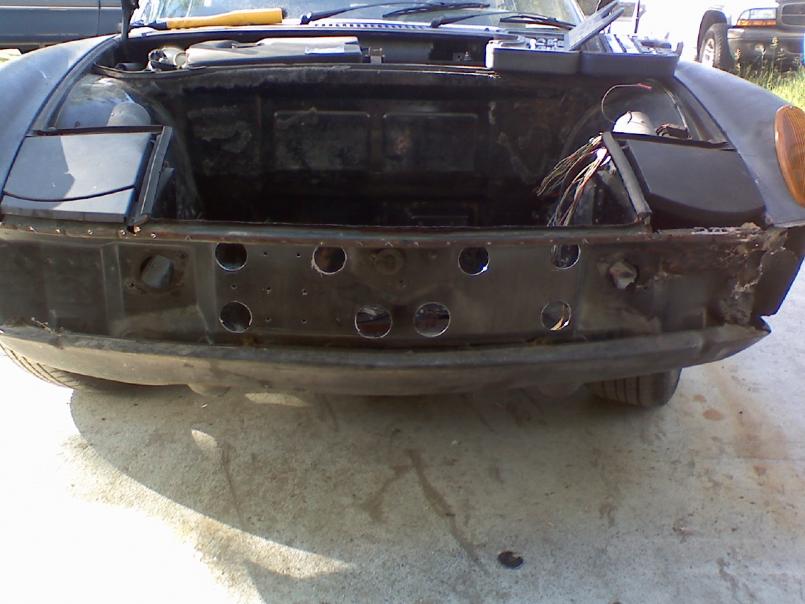
Posted by: RJMII Jun 22 2009, 09:03 PM
from the inside
Attached thumbnail(s)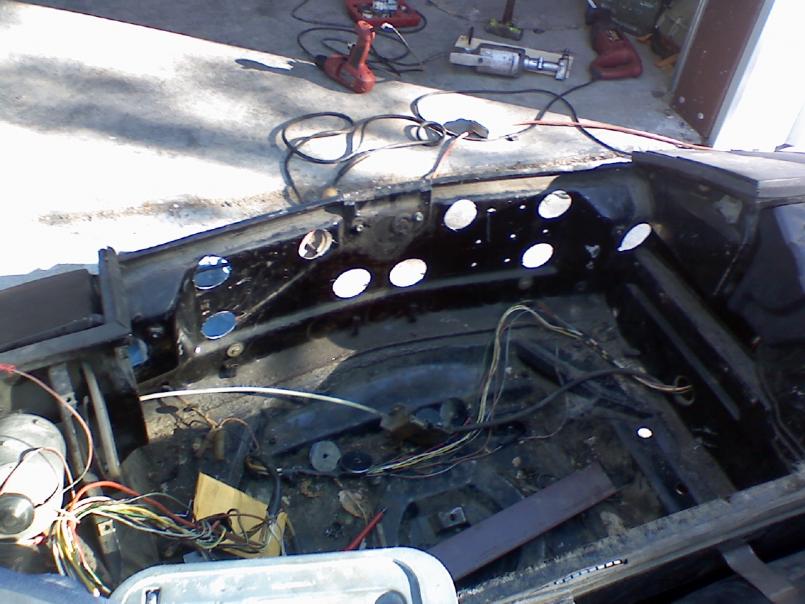
Posted by: RJMII Jun 22 2009, 09:04 PM
bigger holes
Attached thumbnail(s)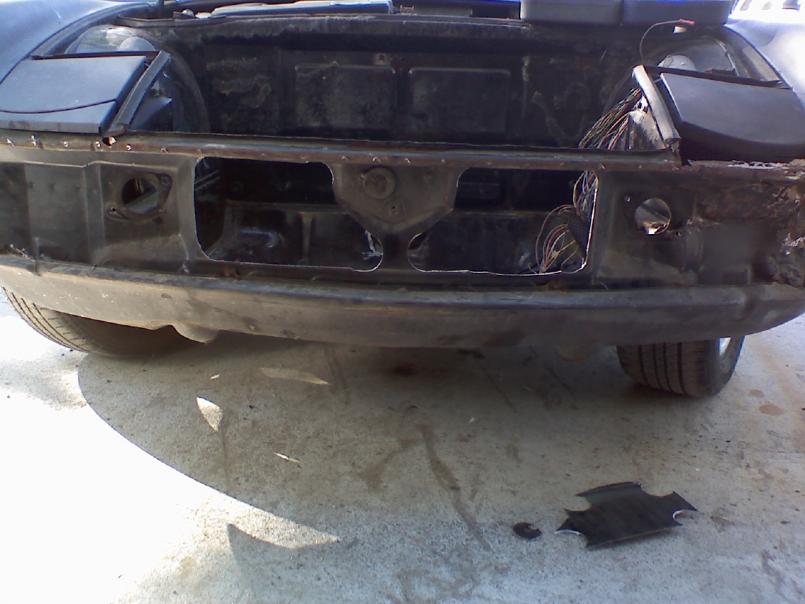
Posted by: RJMII Jun 22 2009, 09:05 PM
from the inside
Attached thumbnail(s)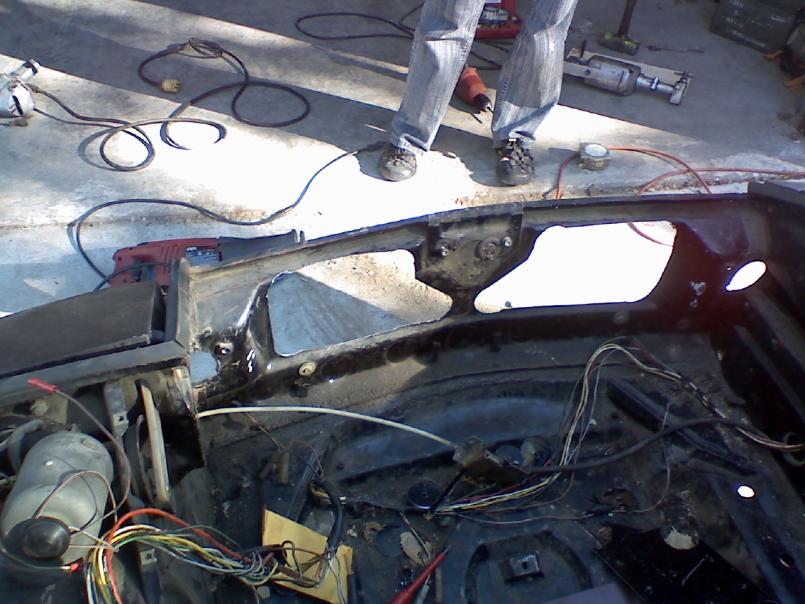
Posted by: RJMII Jun 22 2009, 09:10 PM
My wife got a picture of my dad and I getting the car ready to push back into the shop.
It was such a nice day today that I rolled the car out to work on it.
Attached image(s)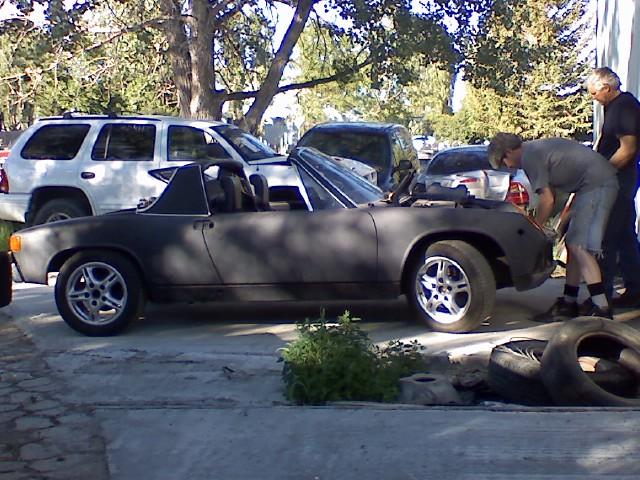
Posted by: RJMII Jun 23 2009, 07:47 PM
progress
Attached thumbnail(s)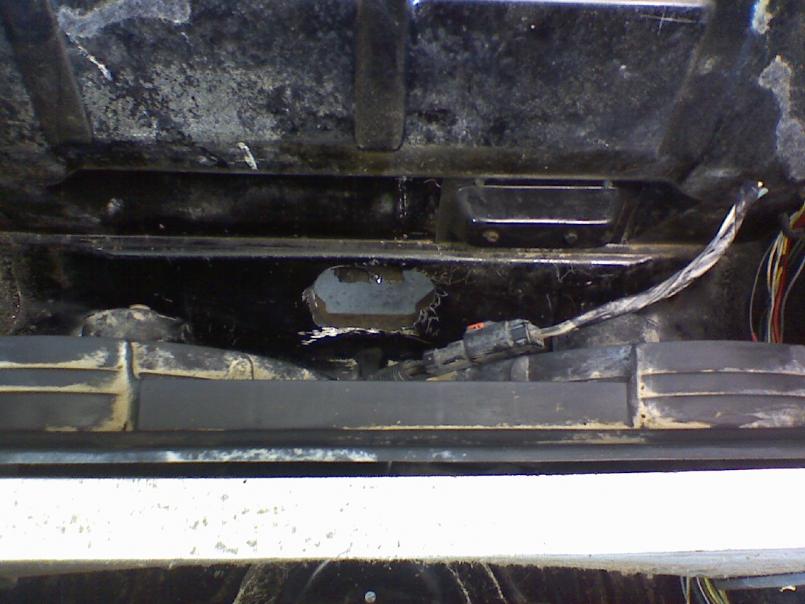
Posted by: RJMII Jun 23 2009, 07:48 PM
pregress
Attached thumbnail(s)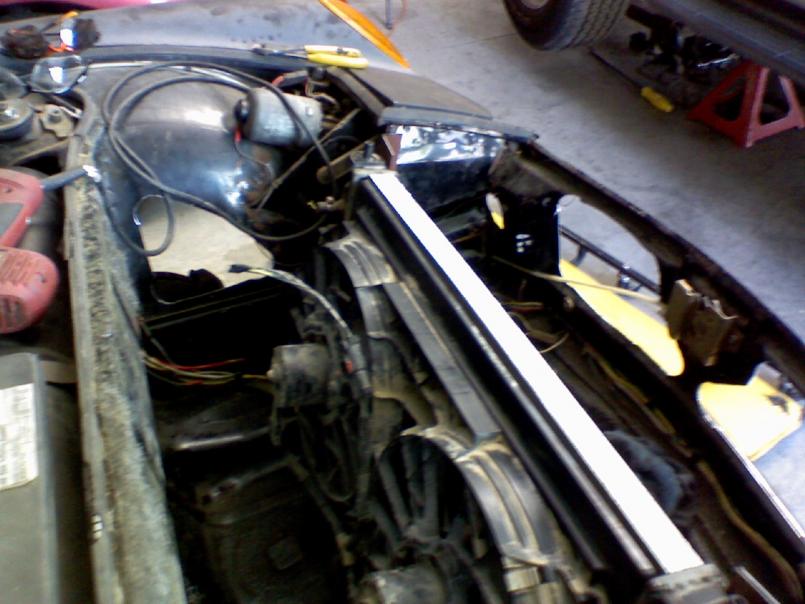
Posted by: RJMII Jun 23 2009, 07:49 PM
progress
Attached thumbnail(s)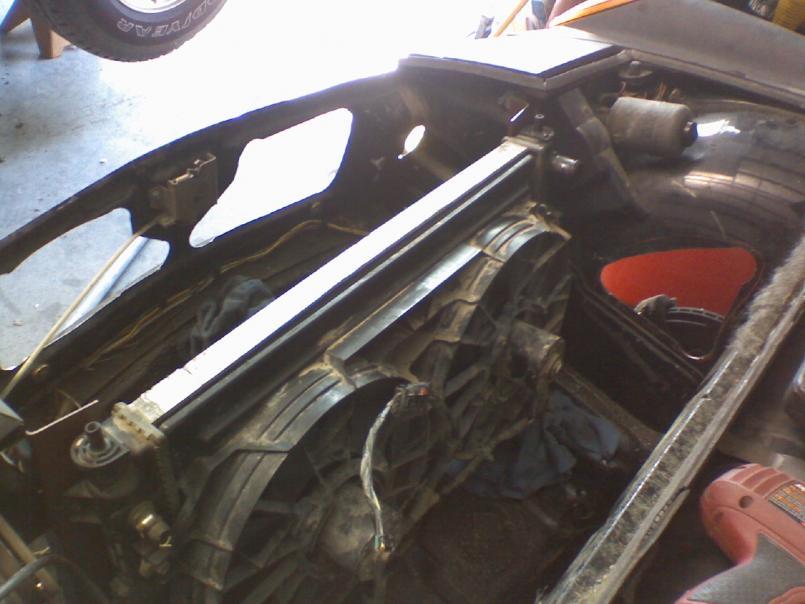
Posted by: RJMII Jun 23 2009, 07:51 PM
1/0 battery cables. =o) That ground cable is going to the side of my engine block, the starter WILL be getting enough electrons.
Attached thumbnail(s)
Posted by: RJMII Jun 23 2009, 07:52 PM
front end shot.
Attached thumbnail(s)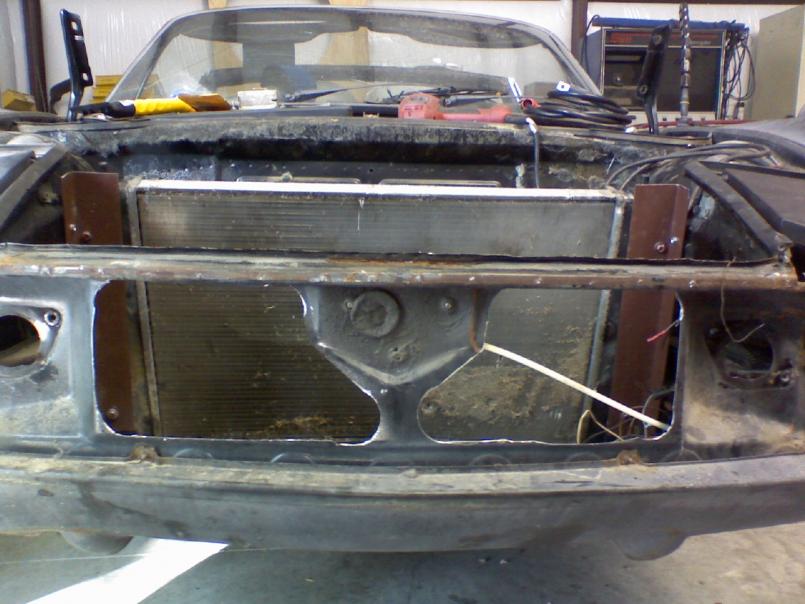
Posted by: RJMII Jun 23 2009, 07:54 PM
I started pushing the corner out and straightening some sheet metal.
Attached thumbnail(s)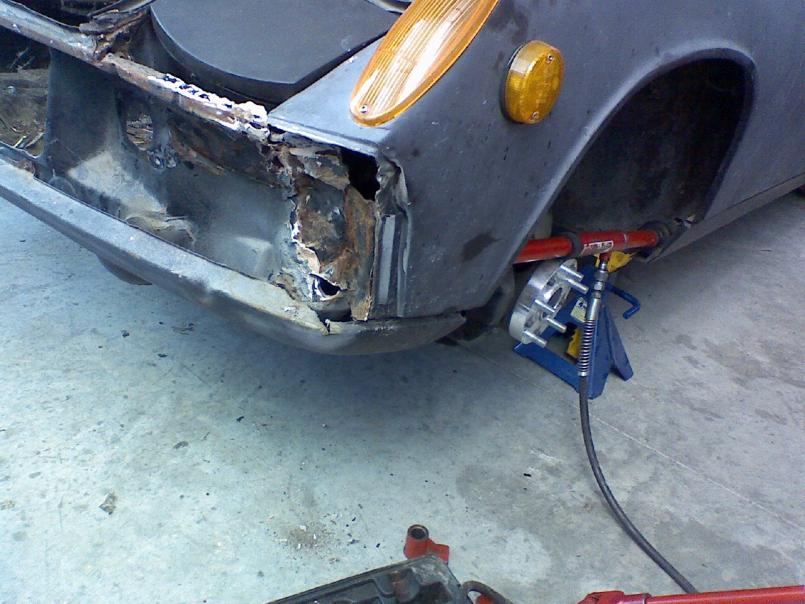
Posted by: RJMII Jun 23 2009, 07:55 PM
... and this chunk of bondo popped out of the metal. Looks like I might have enough to go on for straightening it out to 'functional'
Attached thumbnail(s)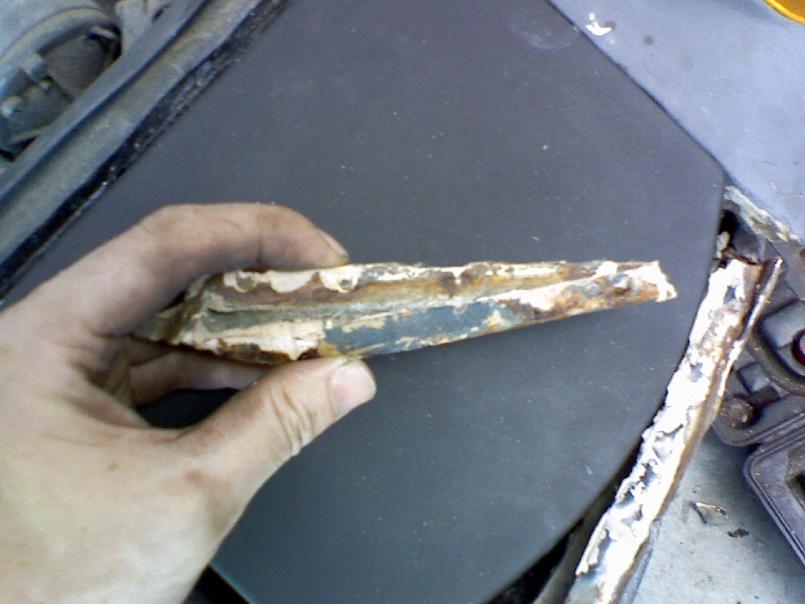
Posted by: RJMII Jun 25 2009, 10:21 PM
https://www.youtube.com/watch?v=_BH7ekW1ZVY
http://www.youtube.com/watch?v=_BH7ekW1ZVY
The starter does indeed turn the engine over. =o)
Posted by: RJMII Jun 30 2009, 08:47 PM
Posted by: JRust Jun 30 2009, 08:58 PM
Oh I get it! Today you did nothing 
Posted by: RJMII Jun 30 2009, 09:29 PM
noT a single THing.
Posted by: ghuff Jul 1 2009, 01:13 AM
Good call on the 1/0 cabling. These cars like most VAG products and euro cars of the era suffer from poor electronics.
Hell even my 01 GTi has a piss poor grounding system and electrics.
I cleaned up a bunch of grounds on my 914 when I was cleaning metal, and since they were disconnected I cleaned the spade connectors/ring terminals. The car ran noticeably better than it did before.
I imagine with a modern ECU that is sensitive to voltage drops and a little more complex than D-jet/L-Jet you would have some issues.
Next stop is to add some more grounds and clean more grounds.
Posted by: JRust Jul 1 2009, 01:27 AM
noT a single THing.
Hey when I posted that your video was just a blank white box

Nice to hear it run. Now lets see it propel you down the road
Posted by: RJMII Jul 1 2009, 01:38 AM
noT a single THing.
Hey when I posted that your video was just a blank white box
Nice to hear it run. Now lets see it propel you down the road
heh. I have to pull the transmission away from the adapter plate and see what is binding inside of there. it will propel me, if I start it in gear and don't plan on shifting.
oh yeah, I had to adjust my youtube tag again. the first vid in this thread has the _ and the second vid doesn't. rather weird, but it's working now. (side note: thank you again to the admin that provided me with some assistance in getting me on the right track.)
Posted by: RJMII Jul 1 2009, 01:46 AM
Good call on the 1/0 cabling. These cars like most VAG products and euro cars of the era suffer from poor electronics.
Hell even my 01 GTi has a piss poor grounding system and electrics.
I cleaned up a bunch of grounds on my 914 when I was cleaning metal, and since they were disconnected I cleaned the spade connectors/ring terminals. The car ran noticeably better than it did before.
I imagine with a modern ECU that is sensitive to voltage drops and a little more complex than D-jet/L-Jet you would have some issues.
Next stop is to add some more grounds and clean more grounds.
All of my computer electrics and sensors ground directly to the block, or to a nice clean spot that I made for grounding point where my rear trunk spring use to be.
Next is to zip tie a spaghetti mess next to the engine...
That reminds me; I cleaned up spaghetti mess in the front trunk. I changed the wiring harness and now have functional lights for all four corners again. High beams, low beams, turn signals, flashers, brake lights, back up lights, tail lights...
the ground points all seem to be doing well from cleaning them. =o)
Posted by: RJMII Jul 2 2009, 10:26 PM
I ran into problems with my clutch not disengaging.
The transmission had to come out, then the bolt with the ball on the end of it needed shimmed out a couple of washers, and I had to change the retainer plate that goes on the back of the clutch arm. (or whatever it's called)
I've been up since 4, and it is now 9:30. I managed to get the transmission back in, all of my wiring cleaned up, the car pushed out fo the shop, and had it started and idling a little.
I'm having fun getting MS-II to have the right settings for all of my Chrysler sensors. MegaSquirt comes ready to go with GM sensors...
so the deck lids are back on in case it rains, and here is a pic from the day.
Oh, and I drove it five foot. =o)
Attached thumbnail(s)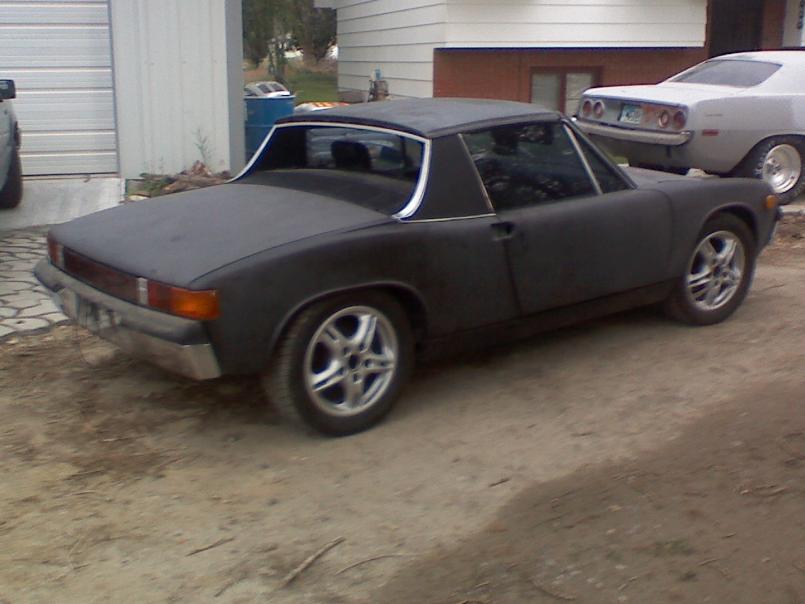
Posted by: RockinOldSchool Jul 2 2009, 10:31 PM
Oh, and I drove it five foot. =o)
Can't wait to see a vid of it out on the road!

Posted by: JazonJJordan Aug 24 2009, 12:28 PM
? wait...does it have a black eye?? Must be a fighter getting back up and V6 turbo fighting mad! Keep up the great work!
Yes, the hammer is holding the bumper on. Just the hammer, gravity, the front valance, and that @#$%# bondo. =o)
Posted by: RJMII Aug 24 2009, 12:41 PM
Right now both of the eyes are out; I need to get some more hardware/screws etc from the parts car to put it all together.
current status:
The car is on jackstands waiting for some wheels and tires. It is also waiting for a silicone elbow to go to the throttle body from the piping where the intercooler should be. The rubber one blew apart from heat and pressure. wuahahaha
Then I'll get the video of it taking off. (with a not so optimal tune, but it still takes off)
I guess I've been too busy driving it around town tuning it to post updates.
Posted by: RJMII Sep 8 2009, 07:28 PM
Posted by: SGB Sep 8 2009, 08:21 PM
AWESOME!!!
Posted by: jsayre914 Sep 8 2009, 08:36 PM

great work
Posted by: dlee6204 Sep 8 2009, 08:36 PM
AWESOME!!!

Posted by: RJMII Sep 19 2009, 12:00 PM
I ran into a few problems a couple of days ago.
After a long day of having my 4 year old with me, we got into the car to get ready to come home.
He was sitting in the booster seat in the passenger side, and I had just set the laptop up to get a datalog on the way home. I set it down on the floor board in front of him and while setting it down it somehow made contact with his feet and it shorted something out and screwed up my firmware and fuel map.
I didn't realize it had screwed something up, and we started heading home from my parents' house, and got off of their street and turned right to head into town. Just as we were pulling out of first gear the (screwedup fuel map) caused a backfire and my car started running quite loudly in a big hurry. (it had blown the exhaust off just after the down pipe)
There was a shop rag in the car, I used it as an insulator to grab the exhaust and toss it in the front trunk. (It's only 3 foot long)
I got the exhaust back on, the car ran like crap... I had to reflash the firmware and have been trying to get it tuned back in since.
Last night I did a tuning session out on a farm road (that is paved) I was slowly working my way up through more and more pedal. On one of the runs I hit 16.7 PSI with NO detonation! (and This was all at less than 70% throttle)
It had the boost, but it was getting too much fuel in the mid-RPM range, so it was a *ahem* slow acceleration.
Posted by: RJMII Sep 19 2009, 12:34 PM
The ambient air pressure last night was 66.95kPa; and the highest peak of the blue line was 202.8kPa... the math came out to be around 16.7psi.
The purple line is TP(Throttle position) It looks like I need to adjust the TP sensor calibration. (I floor it with the clutch pushed in to burn off any excess fuel from running a rich spot. This takes a split second and gets rid of the fuel that might cause wet walling)
..and the yellow line is the RPM. This graph shows me going from about 0-60ish in first and second gear. The bottom of the slant on the yellow line before the first peak is at 3878 seconds, and the top of the peak after the shift is at 3885 seconds.
Attached image(s)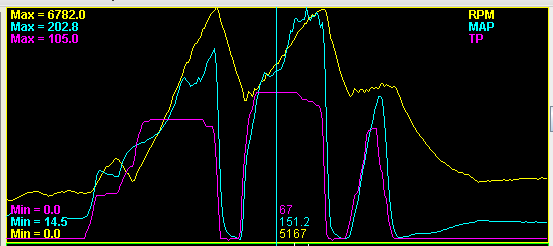
Posted by: RJMII Sep 19 2009, 11:19 PM
my car is currently aircooled and not going anywhere w/out a trailer. =o( 
Attached thumbnail(s)
Posted by: rick 918-S Sep 19 2009, 11:26 PM
happened?
Posted by: RJMII Sep 19 2009, 11:40 PM
I took my wife to the movie tonight. It was a perfect evening for a ride with the top off, we had a baby sitter, so we went to the movie.
We were driving along and heard a 'thunk' under the car, something must have snagged the cooling line or hit it just right to knock it loose enough to cause some damage. It had rubbed a little before and I secured it... but appearantly not enough to keep whatever I ran over from poking a hole in it.
We were almost home when we heard the kerthunk, and I looked under the car to see it peeing. We came right home and parked it, so no overheating, just a big, ugly, green, mess.
Posted by: RJMII Apr 21 2011, 04:09 PM
I should update this thread...
The coolant leak pictured above was easily repaired once we got the car pulled back to the shop.
In November of 09 I hit a boost spike in the single turbo engine. This caused a minor amount of damage to the seals in the turbo, so it started seeping oil into the intake from the turbo.
This didn't really get noticed until it blew and started dumping oil into the intake and the engine lost oil pressure, taking out something in the bottom end. It now has this clatter in the bottom end. It still propels itself, but rather than drive a knocking smoke cloud generator, it just sits outside as a decoration.
In Sept of 2010 I located a 3000GT VR4 engine from a 95 (it has 4 bolt mains, an internal crank position sensor, two turbos, cam position sensor, and I can easily get 450hp by changing to headers, slightly larger turbos and bigger injectors)
There are a few little bits and pieces I need, and have acquired a few already, including a BOV to avoid pressure spikes.
I'd really like to drive this thing again this summer, so I'm putting all I can into getting my health in order to where I can get back to milling and to where I can rebuild my spare transmission to turn around and sell.
Posted by: RJMII Jul 11 2011, 07:13 PM
well after lots of personal shit stuff happening that has really screwed with my head and ability to focus, I decided to put together pieces parts that i've been gathering together. It's been great therapy. Driving it again will be even better therapy.
Here's a teaser picture or two.
Attached image(s)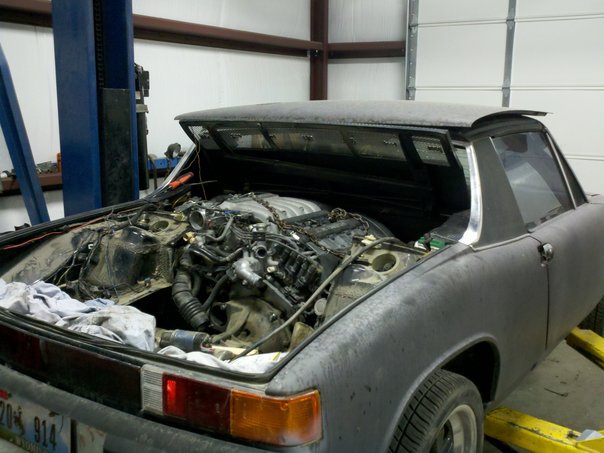
Posted by: kg6dxn Jul 11 2011, 07:17 PM
That engine looks massive! More pics please...
Posted by: RJMII Jul 11 2011, 07:23 PM
That engine looks massive! More pics please...
pic your angles.
I'll get some tomorrow
Posted by: iamchappy Jul 11 2011, 07:42 PM
Dont give up the ship, your still in the R & R stage, shit happens and will continue to happen but it all gets worked out in the end.
I worked through many problems myself and still am, i am close but wont really know for a few hundred miles more. If things dont work.... well, back to the drawing board and try to come up with a better idea.....
Posted by: FourBlades Jul 11 2011, 08:56 PM
I love the 3000gt engine. I had a dodge stealth the first year they came out and later had a 3000gt. Never had a turbo car because they were $ back then.
That will be wicked fast when you get it dialed in.
John
Posted by: Dr Evil Jul 11 2011, 09:01 PM
Not too tight, just use one of these to get the engine in 
Attached image(s)
Posted by: RJMII Jul 11 2011, 10:25 PM
Dont give up the ship, your still in the R & R stage, shit happens and will continue to happen but it all gets worked out in the end.
I worked through many problems myself and still am, i am close but wont really know for a few hundred miles more. If things dont work.... well, back to the drawing board and try to come up with a better idea.....
the problems aren't with the car...
R&R stuff and solving issues with the car makes it relaxing and good therapy.
FourBlades: I've been drooling over the MS-III upgrade for my MegaSquirt... dialing it in is goin to be fun.
Evil; YES! I knew I was missing a tool while putting that in there.
Posted by: RJMII Jul 12 2011, 04:41 PM
pics
Attached image(s)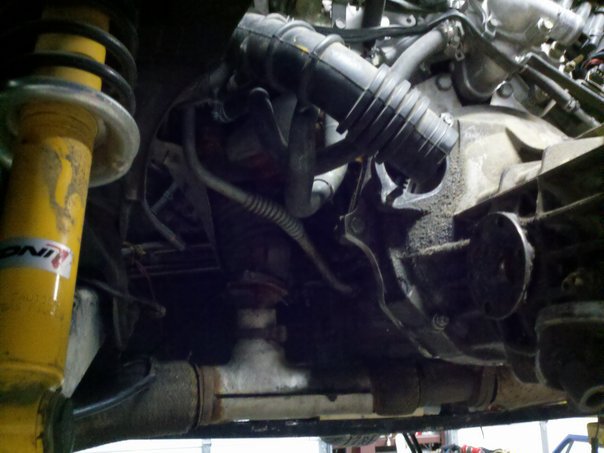

Posted by: RJMII Jul 12 2011, 04:43 PM
more pics
Attached image(s)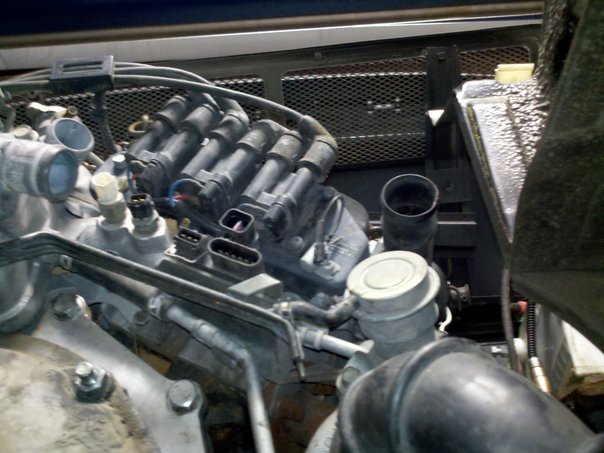
Posted by: RJMII Jul 12 2011, 04:45 PM
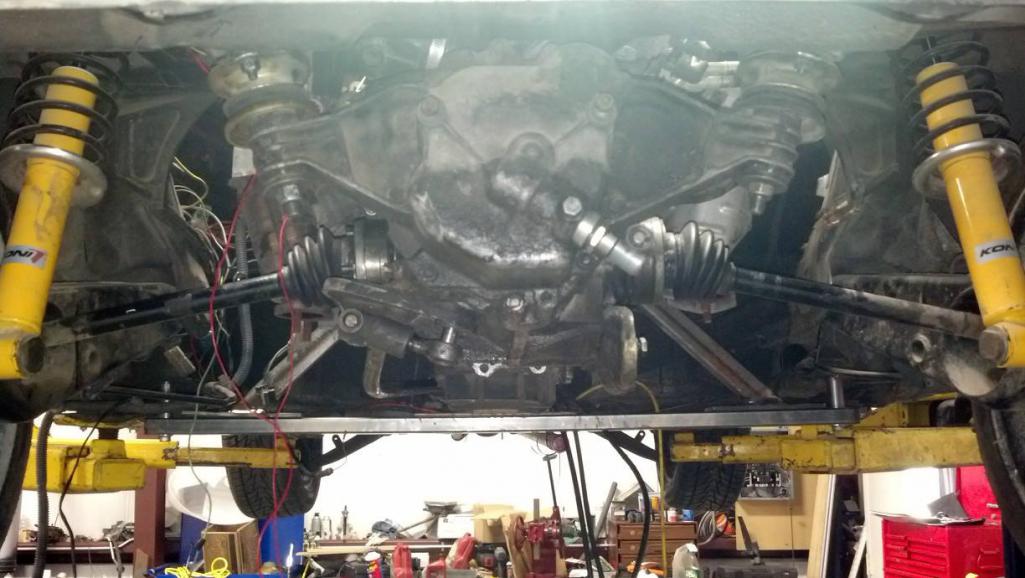
and last pics for today.
The engine lid and trunk lid both close, and there are a few pics of how much room I have in front of the engine and to the sides. The really wide valve covers just make the engine look like it was super tight fit.
We had the engine and transmission on jackstands and lowered the car down onto it with the hoist.
Attached image(s)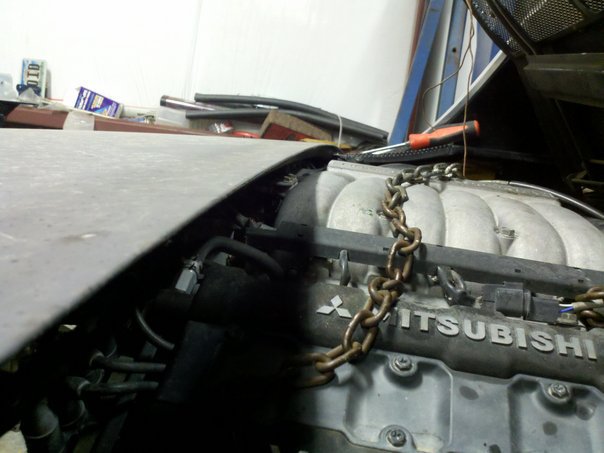
Posted by: AgPete139 Sep 12 2011, 01:46 PM
Any updates?
Posted by: JRust Sep 12 2011, 02:02 PM
Any updates?
IT is up for sale in the classifieds. I don't think Jim has had much time to work on it. He's had alot of personal stuff going on. So the 914 is way down on the totem pole.
Posted by: RJMII Apr 11 2012, 09:32 PM
This is the engine mount that was holding the 2.5 in place. It had diagnal pieces going up to the sides of the blocks. I think the torque might have bent the bar a little... the aluminum from making some emblems is in there as a 'straight edge reference'
This one is a little thicker walled: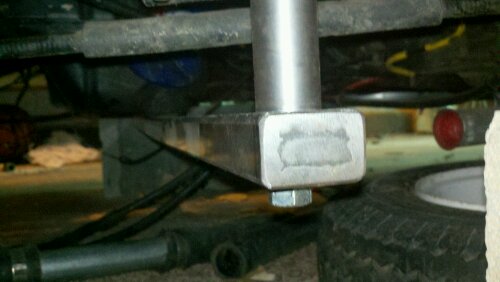
And what happens when you put too much weight on a 911 sport mount without the cupped washers:
(I need 4 cupped washers, if anyone has some extras)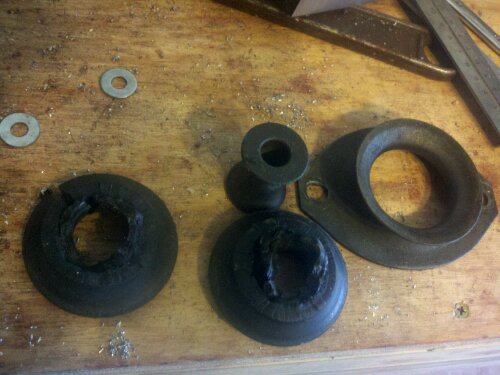
Posted by: nsr-jamie Apr 11 2012, 09:49 PM
So you are not going to sell the car? I hope you get to finish the project. It would be great to see. Take it easy.
Posted by: RJMII Apr 11 2012, 10:33 PM
So you are not going to sell the car? I hope you get to finish the project. It would be great to see. Take it easy.
Nope.
I am Keeping the car. Posted by: kg6dxn Apr 11 2012, 10:53 PM

Get er done!!!
Posted by: Dr Evil Apr 12 2012, 07:17 AM
Good to hear, Jim 
Posted by: RJMII Sep 17 2013, 08:44 PM
did a little bit of work... :-)
Attached thumbnail(s)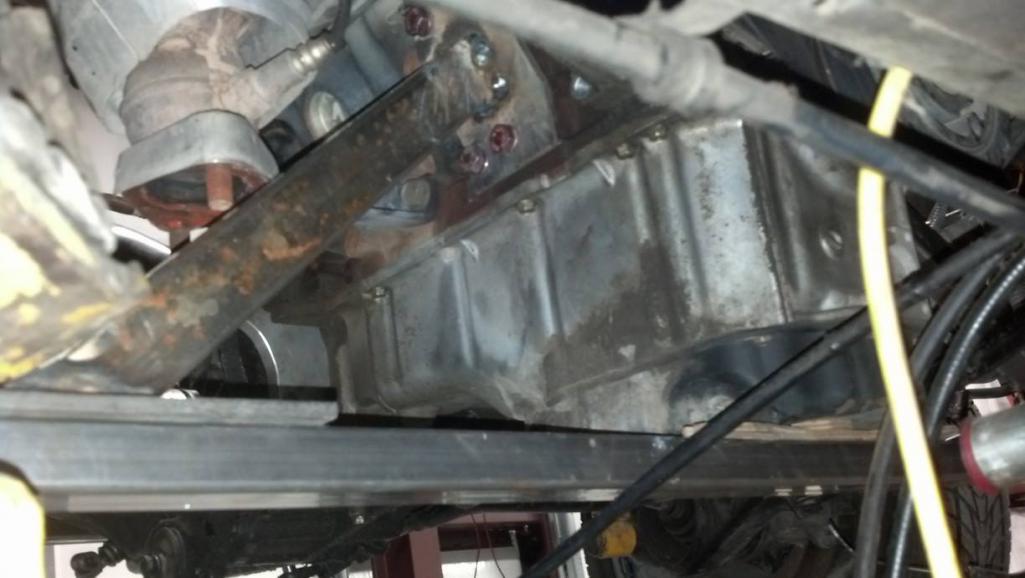
Posted by: rick 918-S Sep 17 2013, 08:55 PM
RRC 14?
Posted by: RJMII Sep 17 2013, 08:58 PM
Spaghetti is looking a bit less saucy and more conducive to electron exchanges.
Attached thumbnail(s)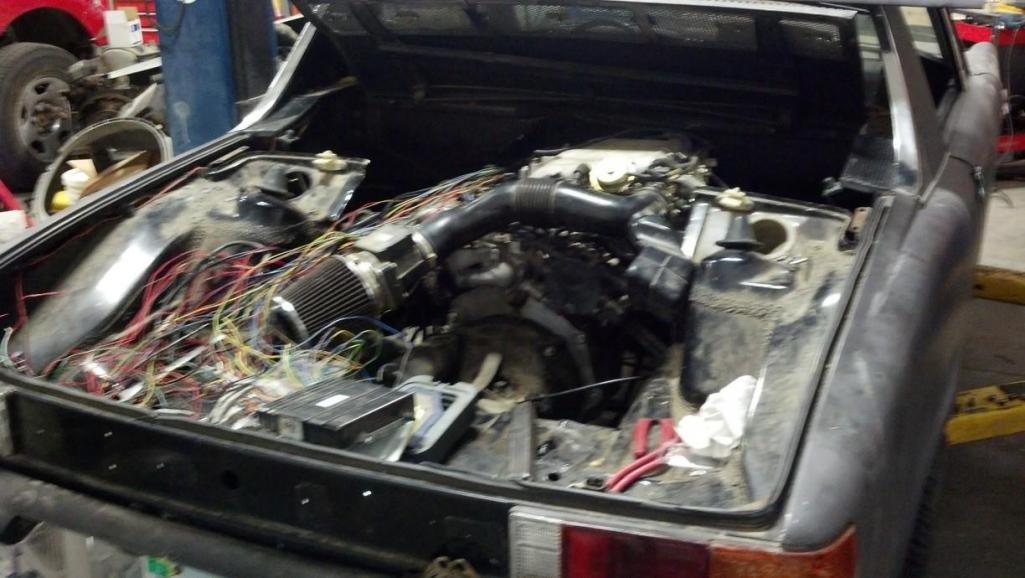
Posted by: RJMII Sep 17 2013, 09:01 PM
RRC 14?I hope so.
maybe even that route 66 deal or something... who knows.
Posted by: 76-914 Sep 17 2013, 09:26 PM
I'm glad to see your back, Jim.
Posted by: KELTY360 Sep 18 2013, 07:15 AM
Was just wondering how you're doing the other day.
Posted by: RJMII Sep 20 2013, 03:48 PM
such exhausting work play!
Attached thumbnail(s)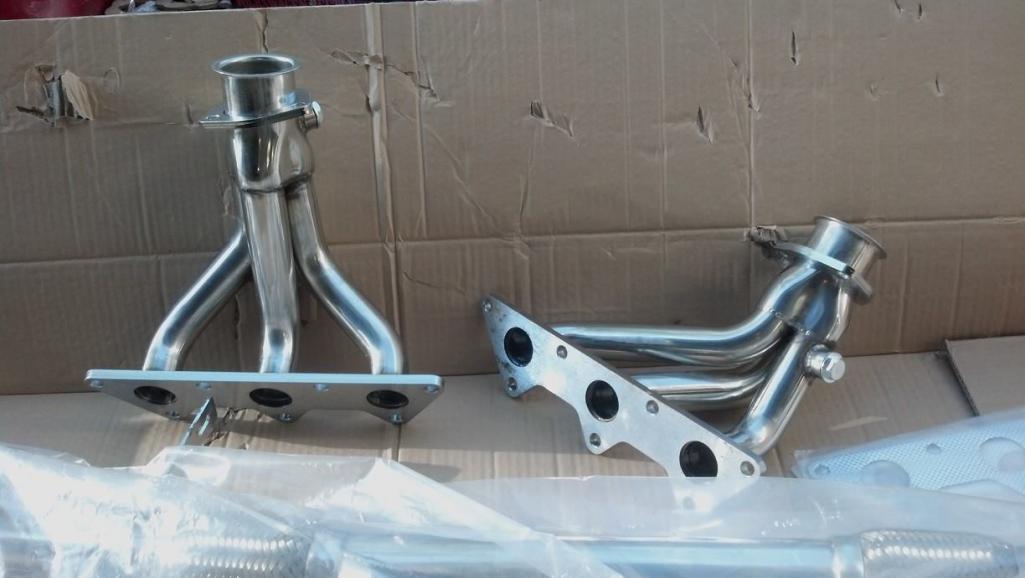
Attached image(s)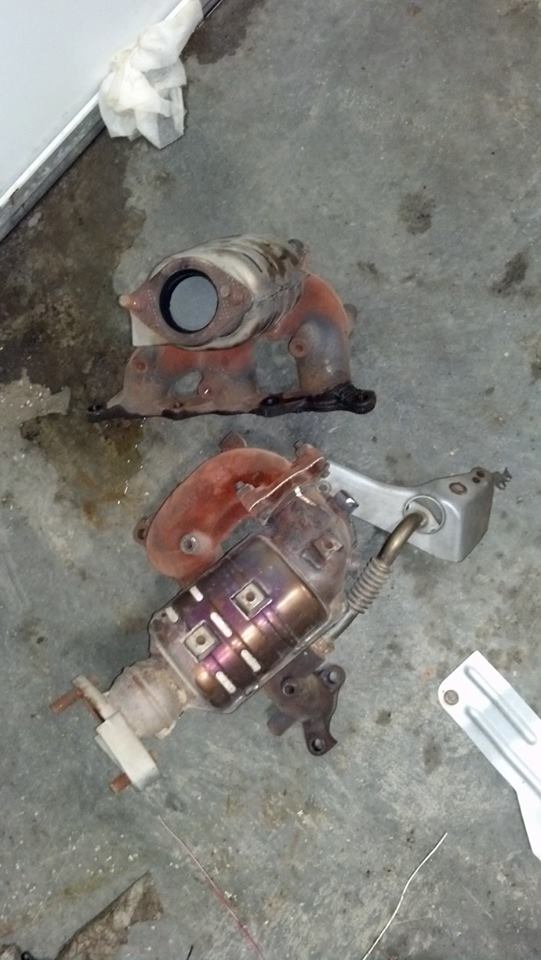
Posted by: RJMII Sep 21 2013, 10:28 AM
In integration of the Mitsubishi ECU into the 914 I've run into an issue with the vehicle immobilization module. Is the module and anti theft setup analogue and able to be bypassed by shorting a couple of wires together?
The engine ECU came out of an automatic transmission vehicle with the sport stick, so I am wiring it hardwired to be sport stick mode.
Can it be hardwired into neutral safe *and* sport stick mode at the same time?
Posted by: RJMII Sep 21 2013, 10:29 AM
Latest engine is out of stratus RT / eclipse GTS.
Posted by: kg6dxn Sep 21 2013, 11:29 AM
Most of the immobilizer stuff is based on an inductive chip inside the key. There is a sensor built into the ignition switch. If you can find a Mitzu tuner, they may be able to flash out the immo circuit. If you have the original ignition switch, you could also wire it up to work.
I swapped in the entire steering column. I also had the immo flashed out just in case. Either way, mine starts and drives.
You may have an issue with the automatic ECU. You are bound to get a CEL code. It may or may not effect drive-ability. Many ECU have zero torque features in neutral. This means you can rev it but it wont run good under load. Some automatic ECUs need a VSS signal for shift point programming. I'm not familiar enough with your setup to say for sure. Is there an manual (5 speed) version of your ECU? You may end up needing one.
Posted by: RJMII Mar 19 2014, 10:32 PM
I'm back. :-)
The ecu issue was resolved with megasquirt 3 extra. It arrived just before I lost my ability to work on anything again.
Will post pics of exhaust install and car back on ground in the morning.
Posted by: KELTY360 Mar 19 2014, 11:05 PM
Good to see you back Jim. Hope you're feeling well.
Posted by: RJMII Mar 20 2014, 12:52 PM
Please tell me this 8mp photo is vetting autoresized... uploaded strait from my phone
Attached thumbnail(s)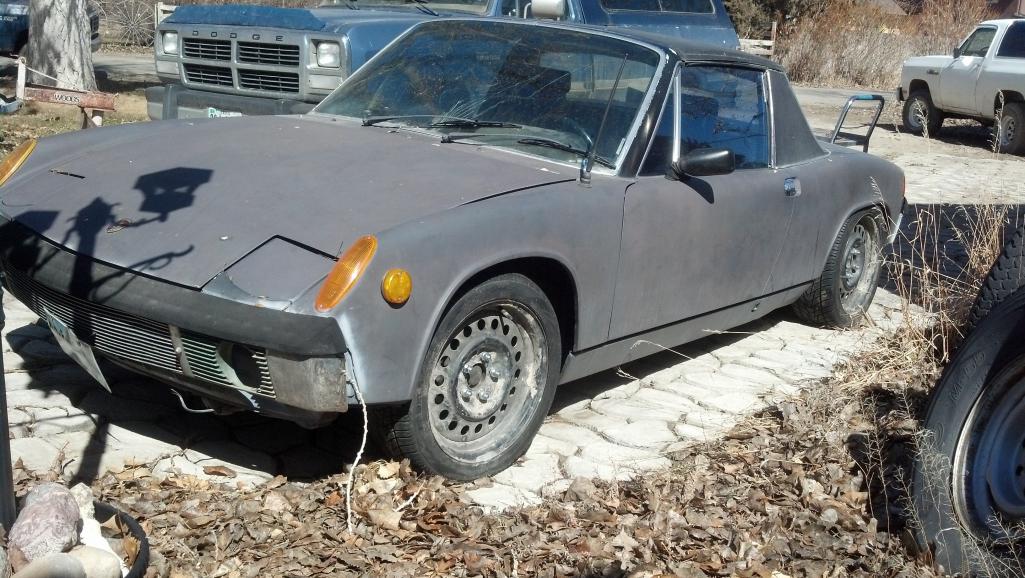
Posted by: RJMII Mar 20 2014, 03:06 PM
the axle came loose while pushing the car out of the shop... it wrapped itself in that one ot starter cable and broke the starter off. :-(
Attached thumbnail(s)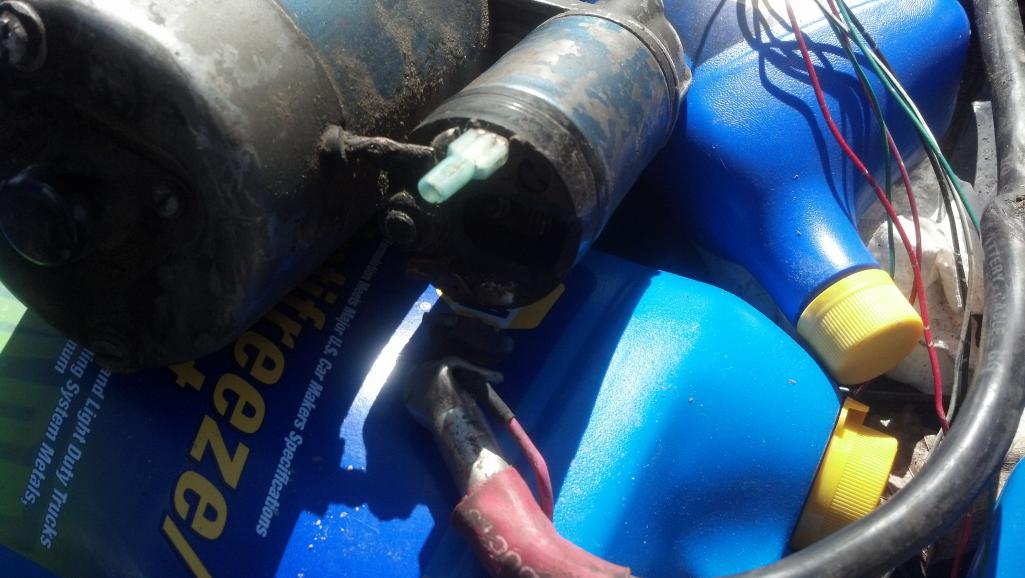
Posted by: RJMII Apr 17 2014, 07:29 PM
I've been working on it!! Parts from last summer have been getting installed, and I've driven it around the driveway. I'll try to post a video when I get a chance.
Posted by: Rotary'14 Apr 17 2014, 07:35 PM
I've been working on it!! Parts from last summer have been getting installed, and I've driven it around the driveway. I'll try to post a video when I get a chance.
Congrats! my forever project runs too! It's a good feeling.
You're lucky you weren't called out by the old project police!
Posted by: RJMII Apr 18 2014, 02:38 PM
Those "old project police" can get a bit concerned about their jack stands.
Right now I"m running into charging issues. I have the 02 Stratus RT / 02 Mitsubishi Eclipse GT 3.0 V6 engine, and the ECU/PCM used to control the alternator.
Does anyone have enough knowledge about these alternators to know what to do with the 4 wires in the clip? It has 4 little wires.
It has the BIG wire; it's pretty ***** obvious where it goes... to the positive terminal on the starter, right?? (actually, it does, because I have a 0 guage battery cable going from there to the battery)
also: What pictures, updates, etc would you like to see? I've done a ton of tinkering, and can take pics. =-) I just don't know what would be of interest. requests?
Posted by: RJMII Apr 18 2014, 04:28 PM
MS3 extra first start: [youtube=vyDJSzJZ9PA]http://youtu.be/vyDJSzJZ9PA[/url]
uh oh; my six month break has me forgetting what the youtube code is. :-(
Posted by: Chris H. Apr 18 2014, 04:44 PM
Nice! It feels good when it fires up doesn't it Jim?
Posted by: 76-914 Apr 18 2014, 04:52 PM
Congrats and good on you, Jim. Sounds sweet.
Posted by: RJMII May 16 2014, 08:43 PM
my megasquirt data log; can be seen in the tuner studio data log viewer.
was nice to have some time to relax and do something fun.
Attached File(s) 2014_05_16_18.39.49.msl ( 2.63mb )
Number of downloads: 45
2014_05_16_18.39.49.msl ( 2.63mb )
Number of downloads: 45
Posted by: rick 918-S May 17 2014, 06:03 AM
Fix it for you!
https://www.youtube.com/watch?v=vyDJSzJZ9PA
Posted by: RJMII Jun 9 2014, 10:48 PM
Wiring in some more parts my dad gave me. Coil on plug setup from an engine swap he did. They came off of 3.5v6 from 300M special. :-)
Attached thumbnail(s)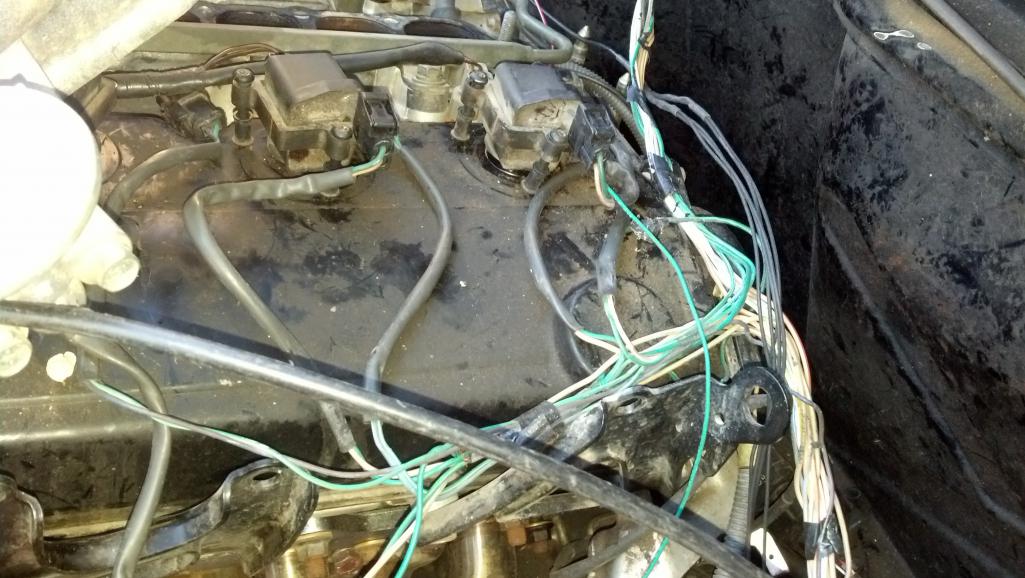
Posted by: RJMII Jun 9 2014, 10:51 PM
The turbo from the 2.5 turbo setup is such a tease... at least when I get to that point again where I can afford parts, it will be easy to plumb.
Attached thumbnail(s)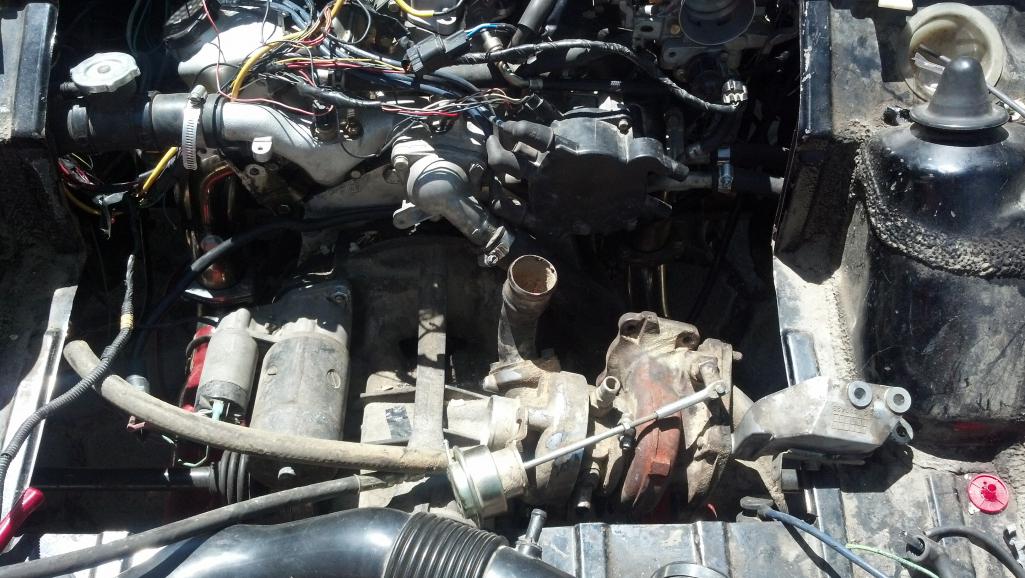
Posted by: RJMII Jun 9 2014, 10:55 PM
Charging issues resolved. I pulled the alternator and regulator from the 2.5 turbo engine and mounted it on the 3.0 in the car. It's almost done, just needs the field wire connected.
Next is the stereo... j/k. I'll drive it first. ;-)
Posted by: RJMII Jul 7 2014, 10:26 PM
I drove it...
I had to pull the COPS. MSIII extra didn't want to run the high current coil on plug setup, so Im back to running the dizzy with the single coil... and looking for honda COPS. they are the 3 wire style, and then I'll be going full sequential with coil on plugs.
for now, I *am* playing with the stereo design, because I have almost all of the parts gathered for that.
Posted by: JRust Jul 7 2014, 10:55 PM
Congrats on driving it again . I know thats been a long time coming. Heck with the stereo man. Get your car dialed in for Route 66
Posted by: RJMII Jul 7 2014, 11:08 PM
I'm waiting on the 3 wire cops; I think I fried my igniter in my coil again. I need to pull it apart and take a DVOM to it; or buy the 3 wire cops and wire them in and be done with the dizzy.
Yeah, for sure on Route 66. :-) maybe even RRC-14.
Posted by: rick 918-S Jul 8 2014, 05:07 AM
Nice! Stay at it!
Posted by: 76-914 Jul 8 2014, 09:30 AM
Mucho congrats!
Posted by: RJMII Jan 13 2015, 07:38 AM
Snow...
:-(
Seems all of my build pictures have disappeared from the external server.. I'll upload them to the thread here over the next couple of years.
Attached thumbnail(s)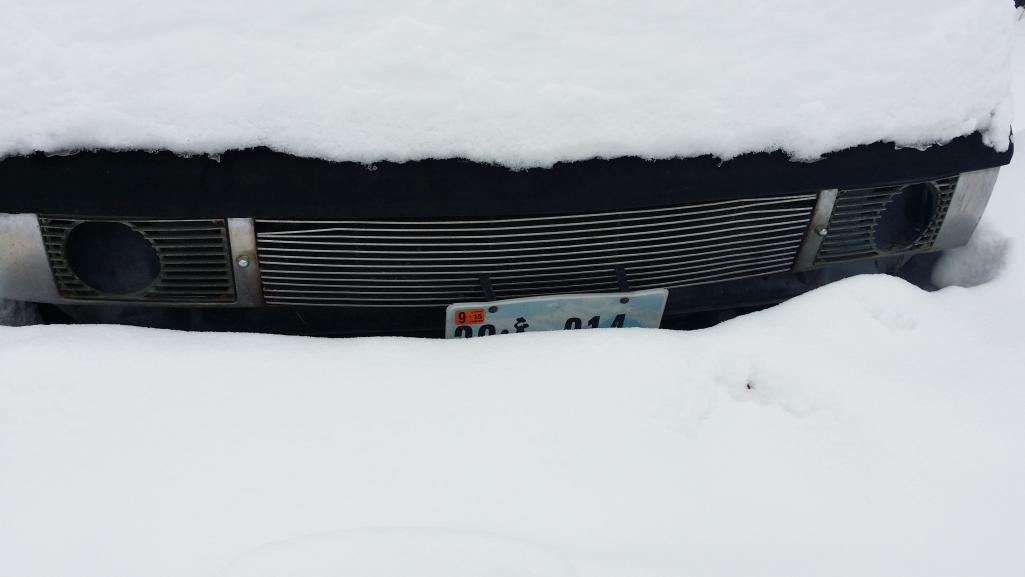
Posted by: rick 918-S Jan 13 2015, 07:55 AM
For your winter listening pleasure
https://www.youtube.com/watch?v=aNZwv0-feVo#t=30
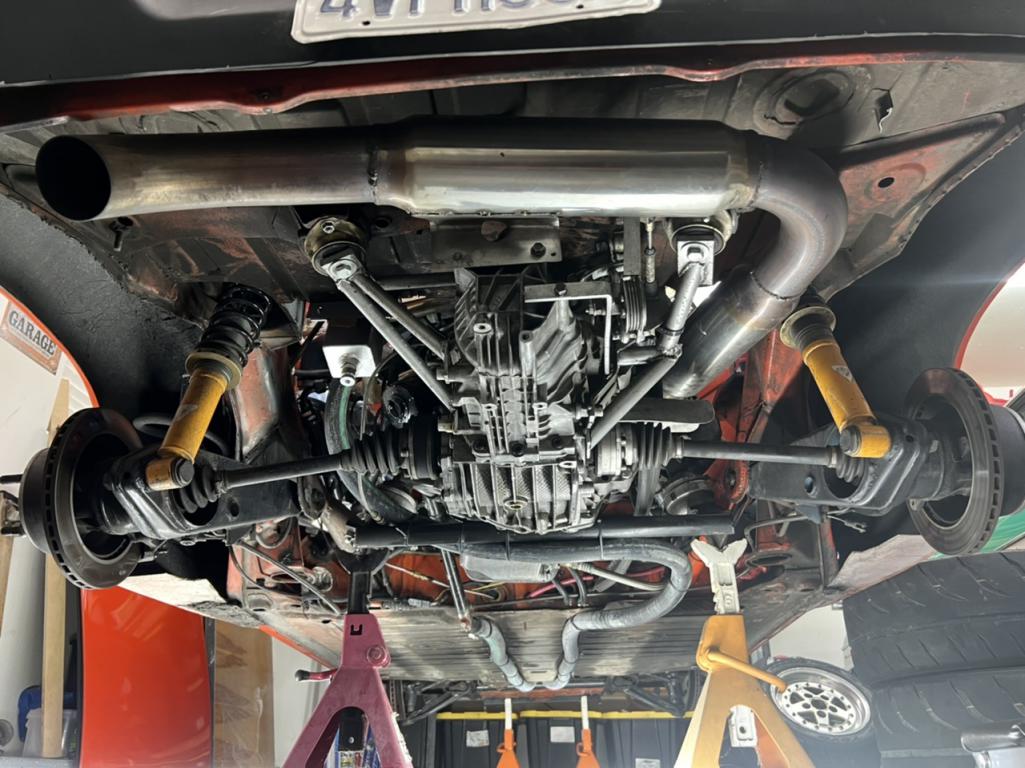
Posted by: RJMII Jul 19 2022, 04:25 PM
so...
in the time since I posted last, a few things changed.
I've gone through 30 ish hospital trips, just as many doctor trips, multiple visits to Huntsman's infusion clinic...
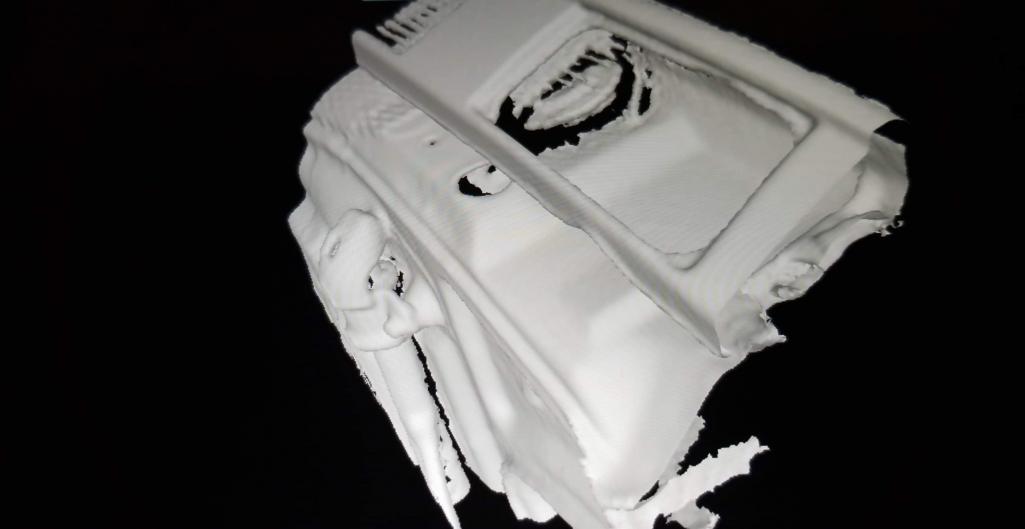
also have changed my skillset and tooling. 6 different cnc machine setups, 4 different 3d printers, and 3 different 3d scanner setups.
this car has sat, started getting parted out, found some surface rust and leaves... and is currently on the hoist in my dad's shop.
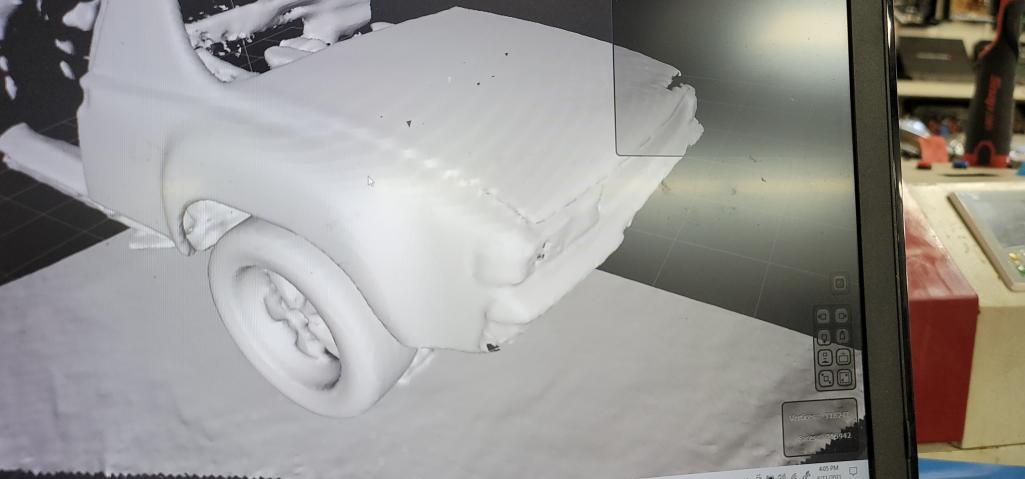
I had the privilege of 3d scanning a flared car at PMB to get some measurements and am currently selling of some parts to fund building a set of custom parts for this car.
mostly interior parts, and the stuff for running cars. I can't drive much right now anyway, so I'm just using the car as therapy and something to keep my mind off the hospital trips.
Attached thumbnail(s)
Posted by: RJMII Jul 19 2022, 04:28 PM
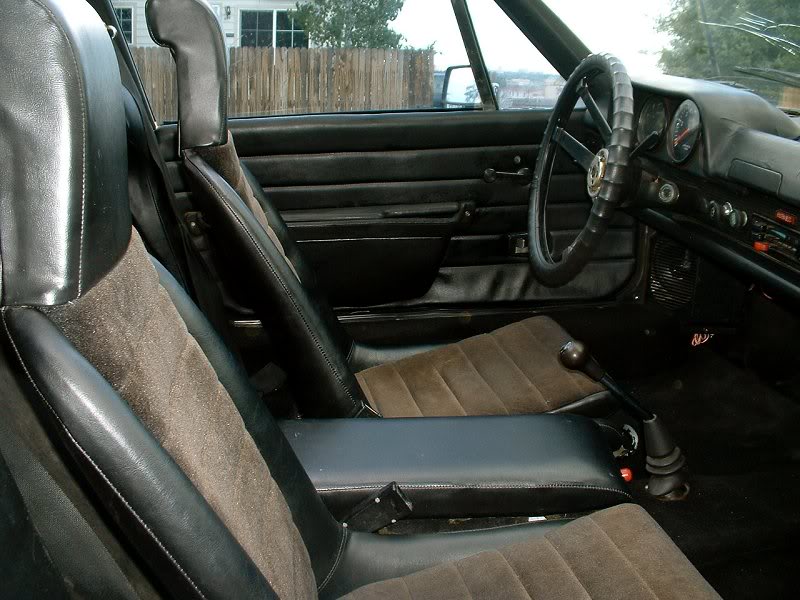
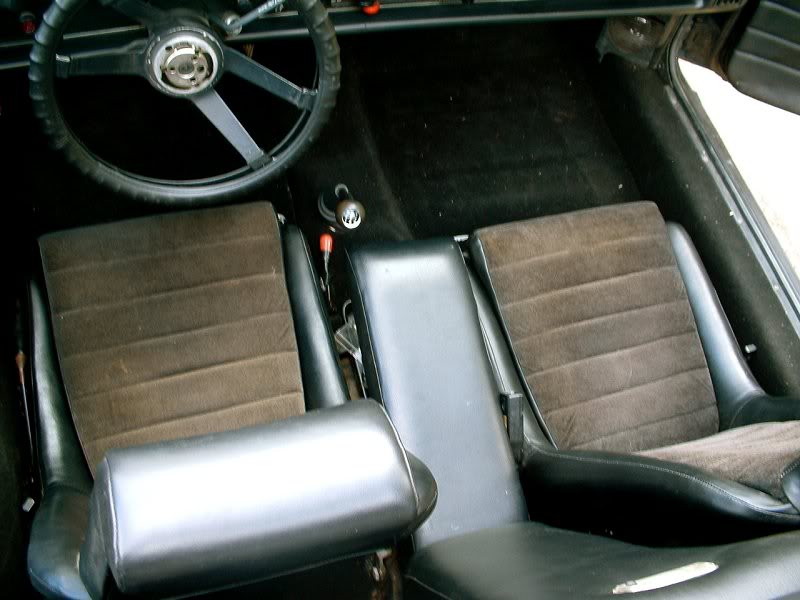
it is nice to have the seats back in my car where they belong...
Attached thumbnail(s)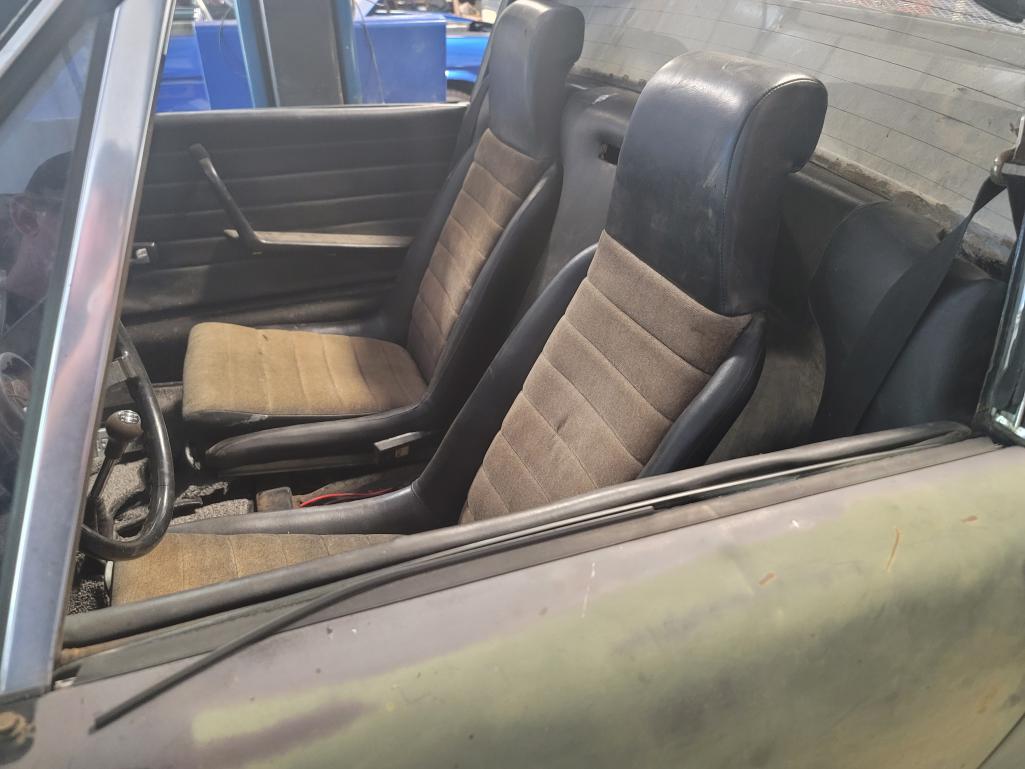
Posted by: RJMII Jul 19 2022, 04:48 PM
and my current 3d printer is big enough to print this in 3 chunks.
Attached thumbnail(s)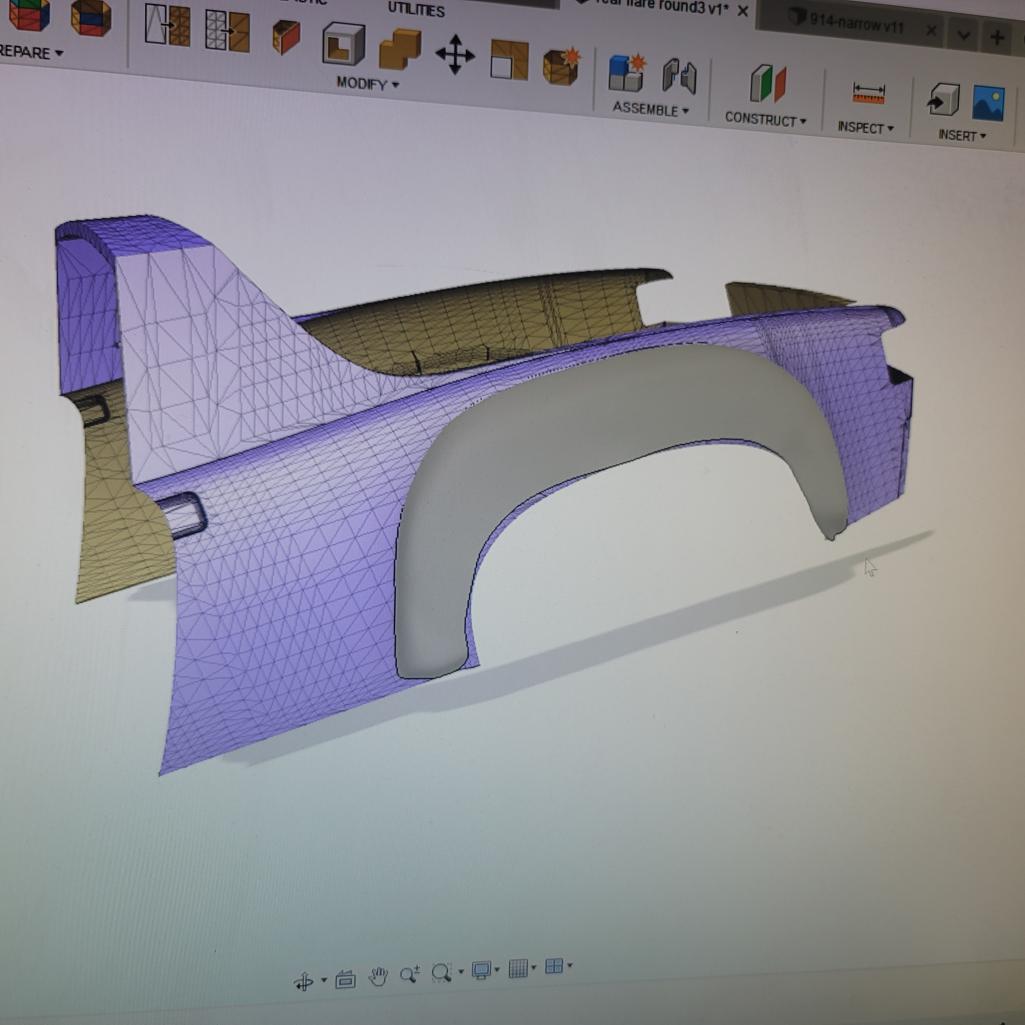
Posted by: RJMII Jul 19 2022, 04:50 PM
doing 1/4 scale prototypes first...
and not posting pics of final design until I have it on the car.
Attached thumbnail(s)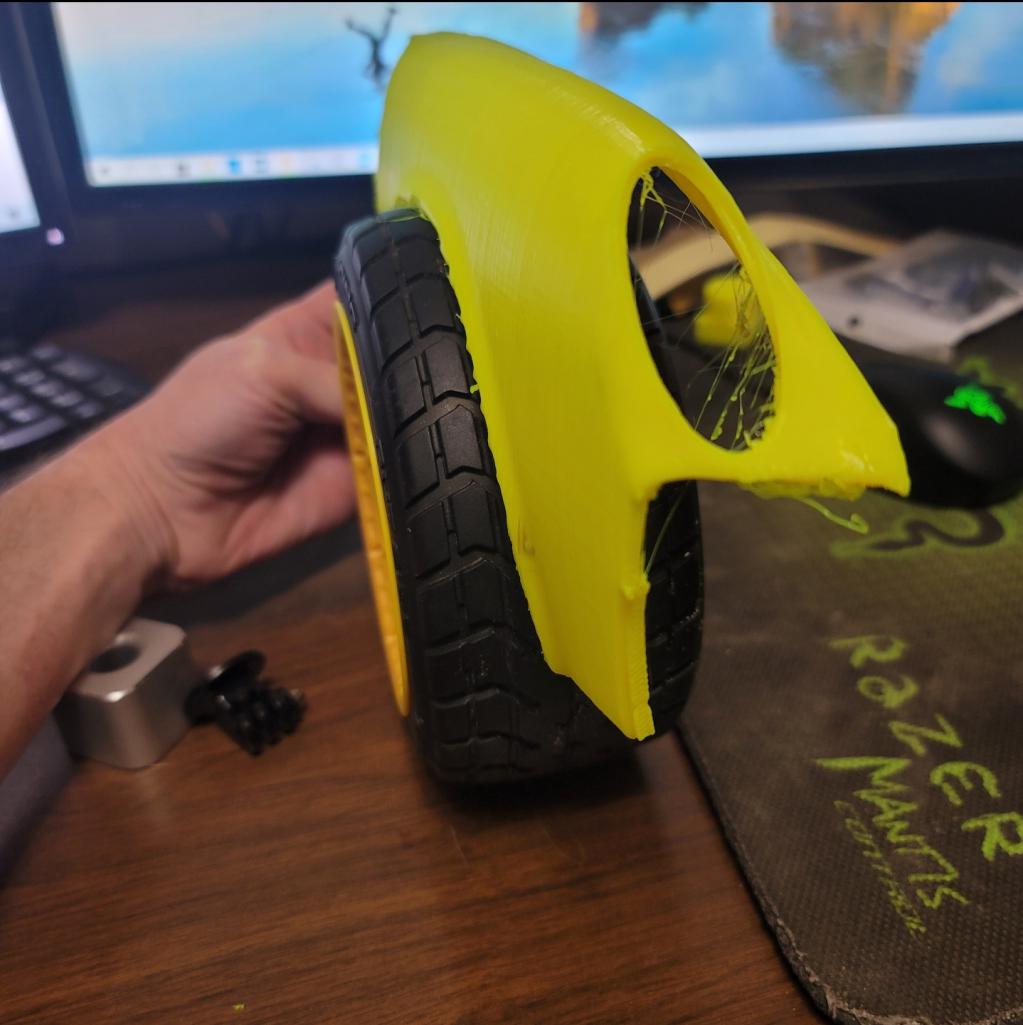
Posted by: RJMII Jul 19 2022, 05:28 PM
and this is coming out...
Attached thumbnail(s)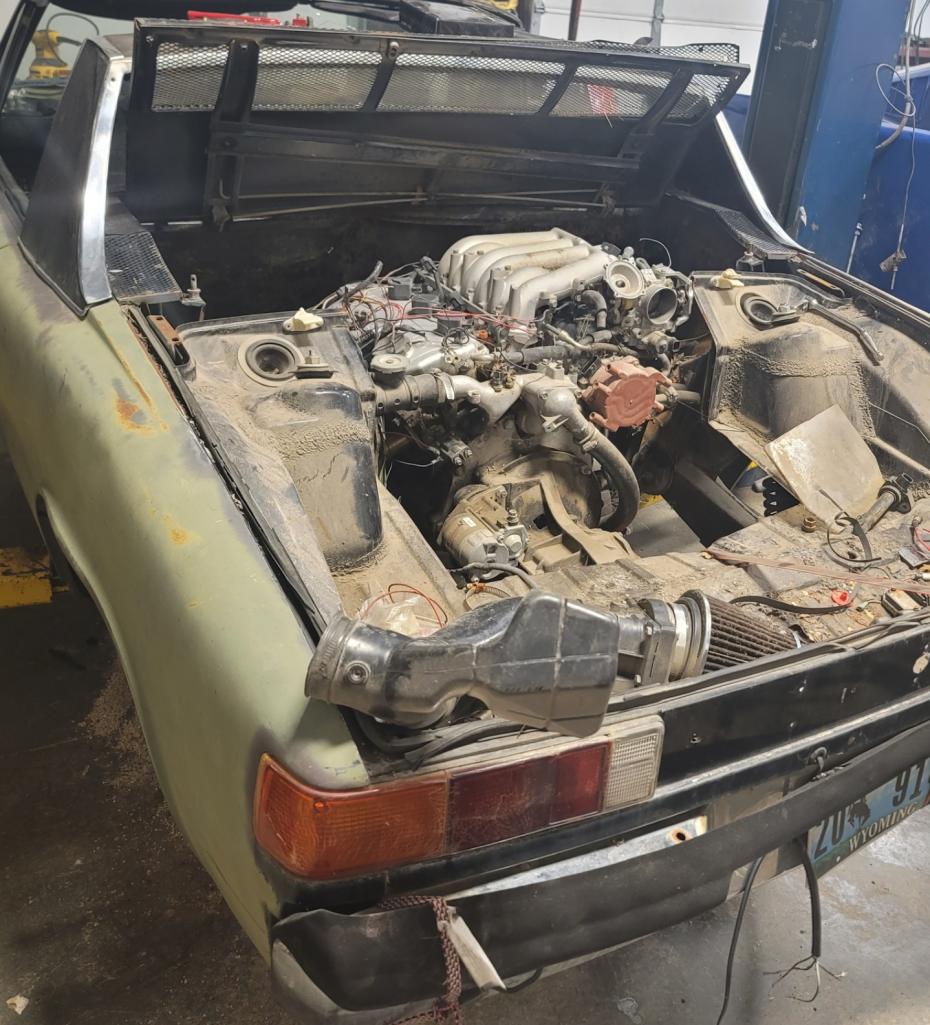
Posted by: RJMII Jul 19 2022, 05:29 PM
to make room for this.
Attached thumbnail(s)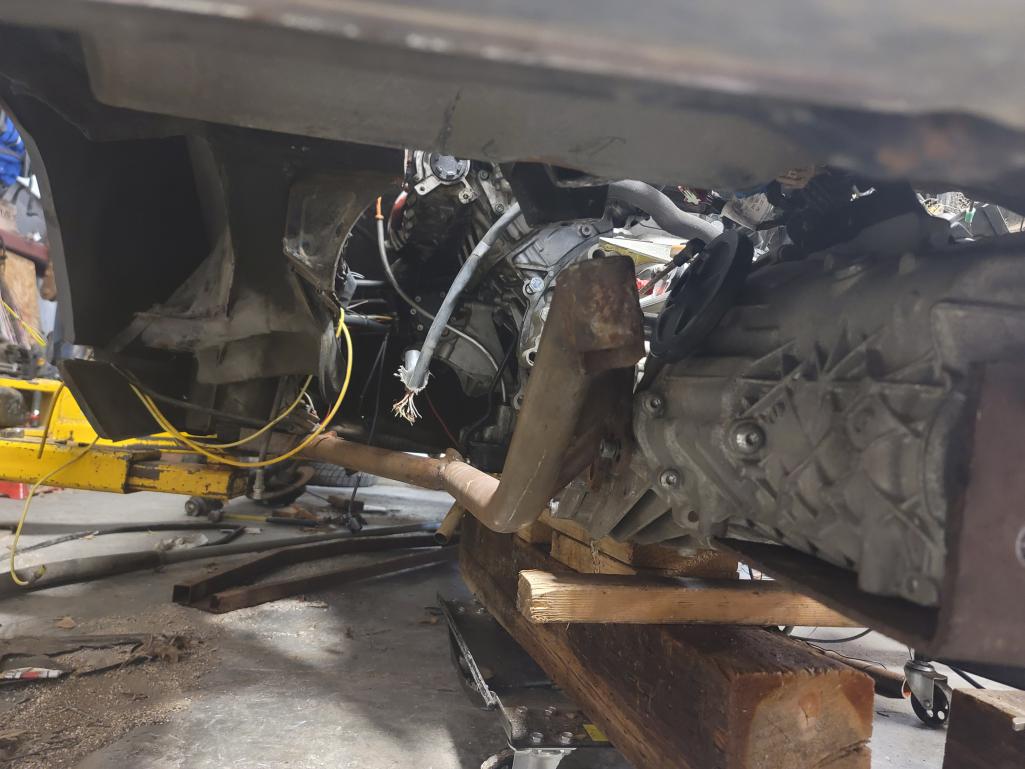
Posted by: RJMII Jul 19 2022, 08:38 PM
completely having to redo most everything...
engine, transmission, ECU (fried the MS3X), cooling, suspension, car color...
Attached thumbnail(s)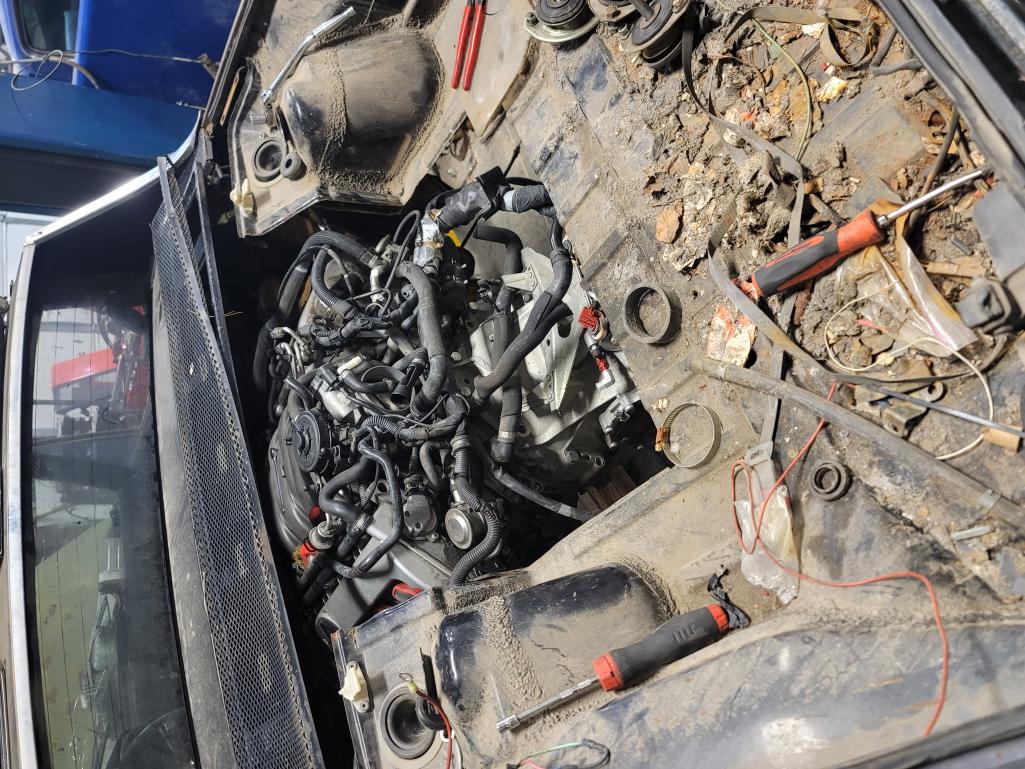
Posted by: tygaboy Jul 19 2022, 08:41 PM
completely having to redo most everything...
You say that like it's a bad thing!

Posted by: RJMII Jul 19 2022, 08:46 PM
completely having to redo most everything...
You say that like it's a bad thing!
noooo it's a fun thing.

I'm getting too good at disassembly and reassembly of my cars
Posted by: RJMII Jul 19 2022, 08:49 PM
picture from the last time I drove my car... 2016, iirc
Attached thumbnail(s)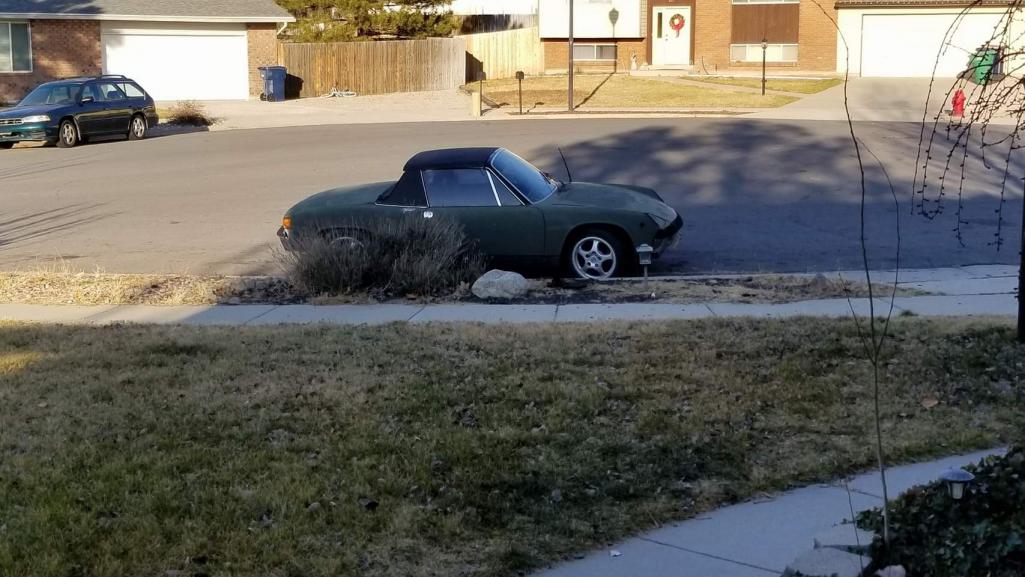
Posted by: RJMII Jul 20 2022, 10:55 AM
how do LS guys route their shift cables for the 06 ish Boxster S 6 speed?
Posted by: VaccaRabite Jul 20 2022, 11:40 AM
very glad to see you working on your car again!
Zach
Posted by: Andyrew Jul 20 2022, 02:39 PM
how do LS guys route their shift cables for the 06 ish Boxster S 6 speed?
I run mine through the shifter hole and to the right of the oil pan.
Attached thumbnail(s)
Posted by: RJMII Jul 20 2022, 06:01 PM
how do LS guys route their shift cables for the 06 ish Boxster S 6 speed?
I run mine through the shifter hole and to the right of the oil pan.
is that the same version of 6 speed I have? I think I keep getting them confused.
if I route my cables with the stock Boxster brackets, the cables go right at the heads and headers of my engine.
Posted by: RJMII Jul 20 2022, 06:11 PM
this transmission...
Attached thumbnail(s)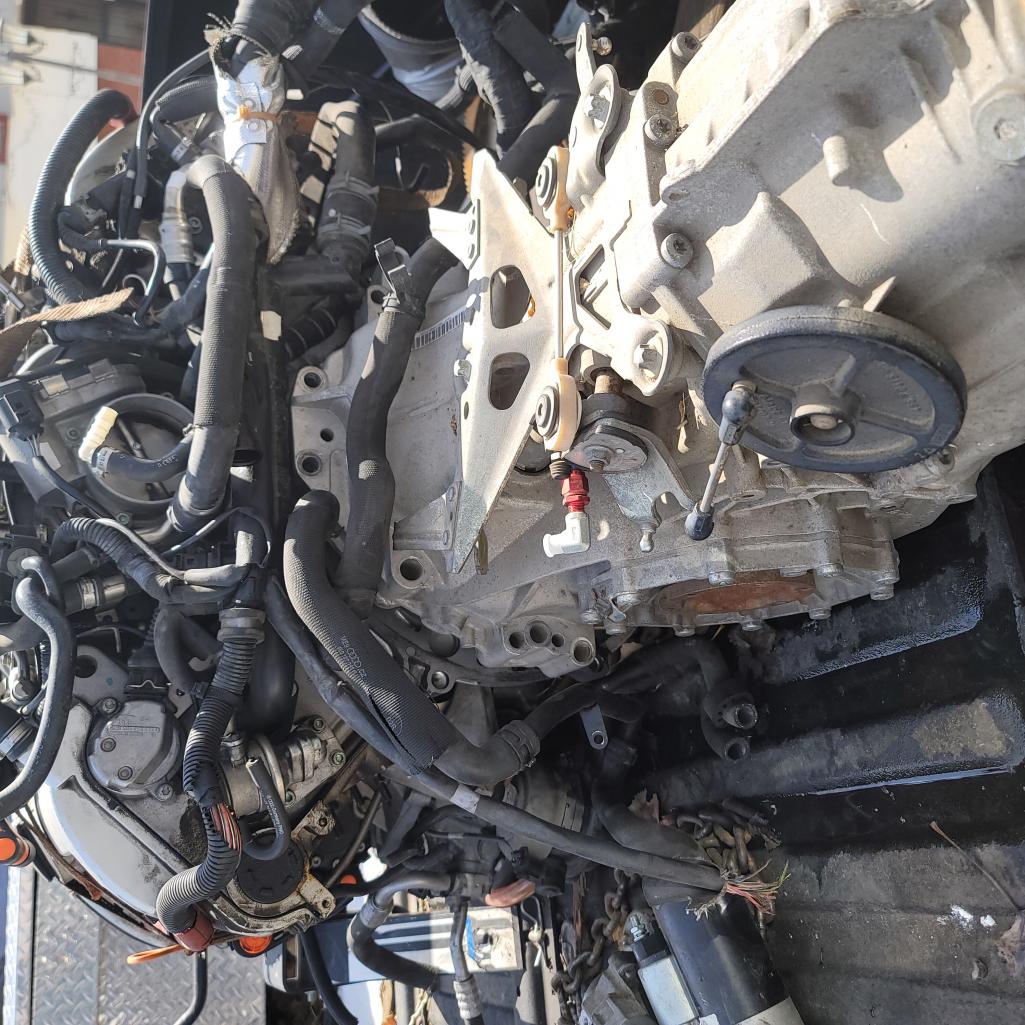
Posted by: Andyrew Jul 20 2022, 11:28 PM
No I have the 5 speed in the car.
Powered by Invision Power Board (http://www.invisionboard.com)
© Invision Power Services (http://www.invisionpower.com)