Printable Version of Topic
Click here to view this topic in its original format
914World.com _ 914World Garage _ How to install Steel Fender Flares on a 914:
Posted by: Root_Werks Nov 9 2008, 07:07 PM
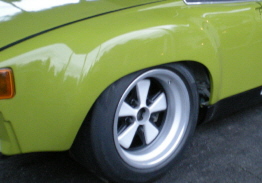
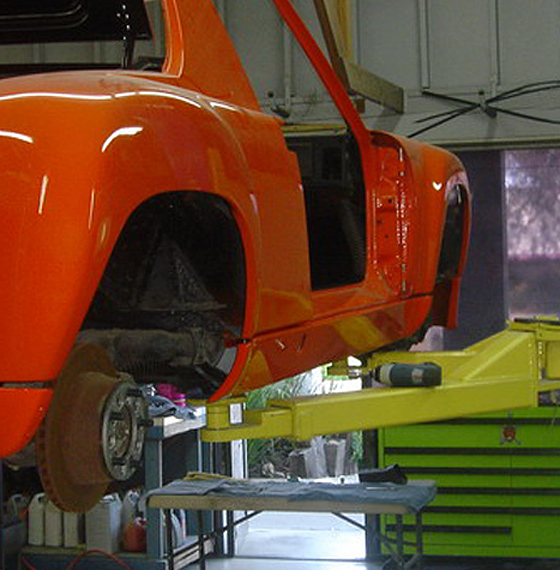
I got home Saturday just around noonish and notice this hanging out at my house:
Attached image(s)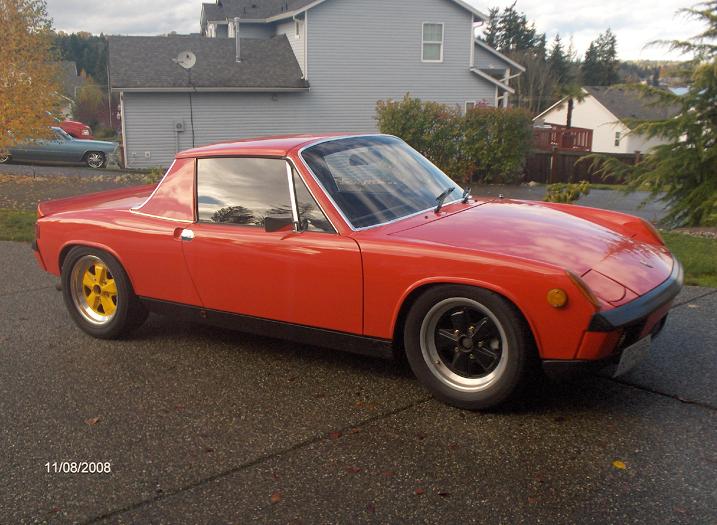
Posted by: Root_Werks Nov 9 2008, 07:09 PM
Next thing I know, Steve Peters is pulling flares out of the trunk of his 914. "What say we put on some flares Eh!" 
Attached image(s)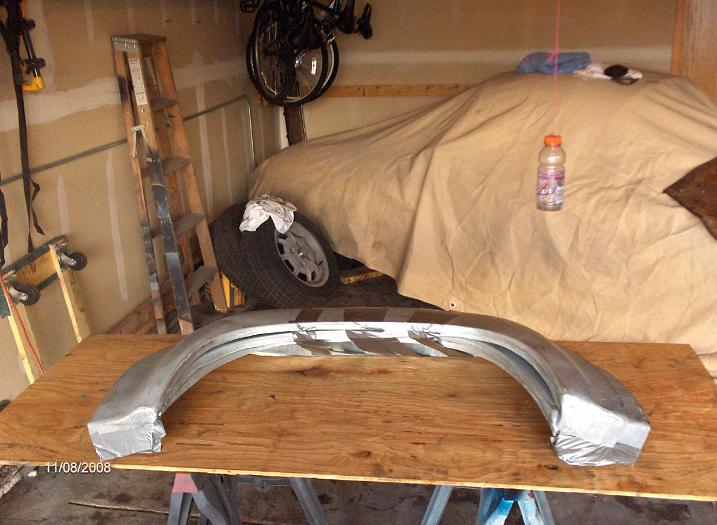
Posted by: Root_Werks Nov 9 2008, 07:10 PM
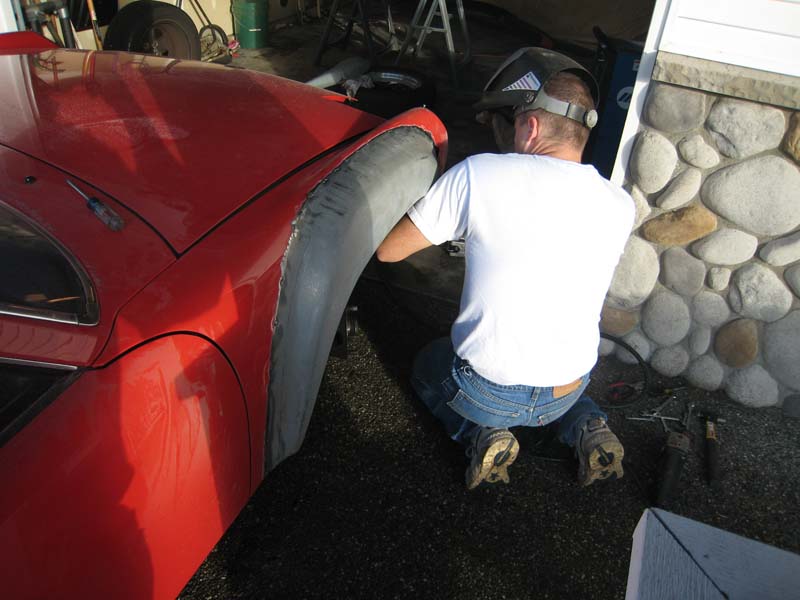
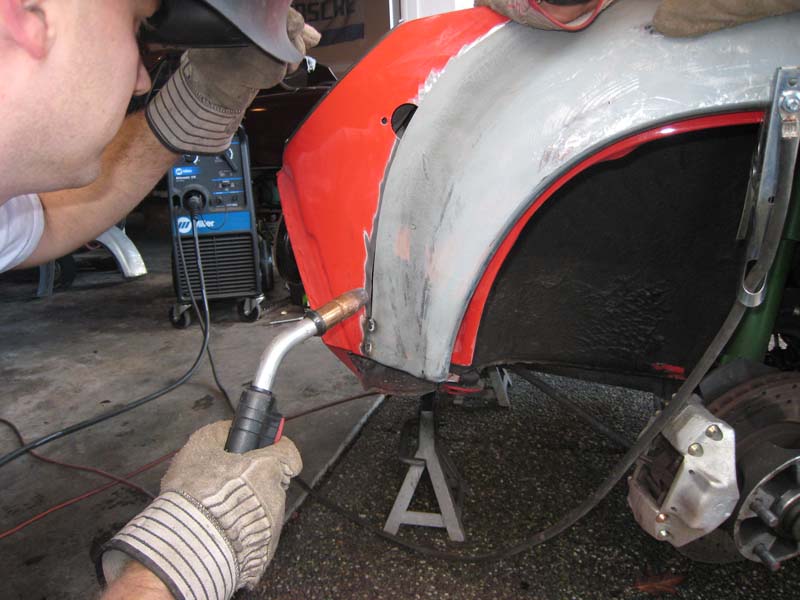
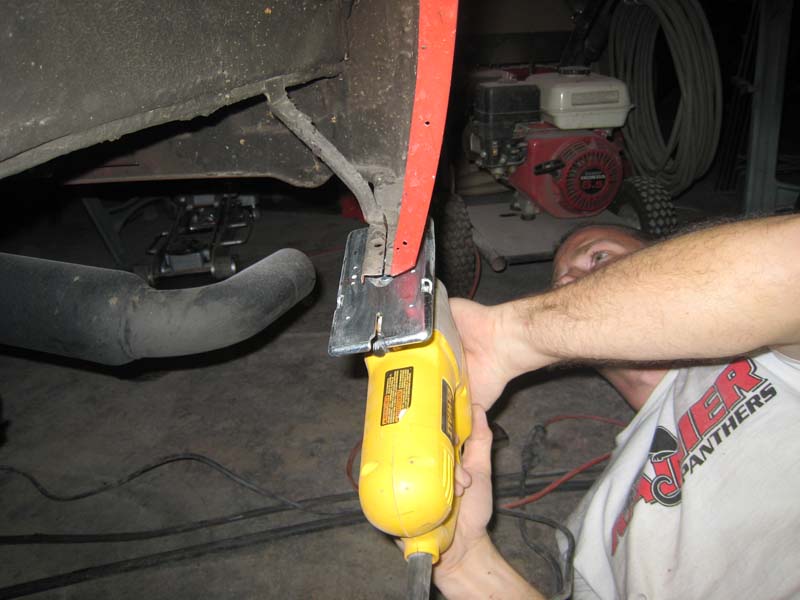
By one-o-clock, we had already made our first fitting and cuts. Here is Steve grinding away some of that most beautiful paint from his 914.
Attached image(s)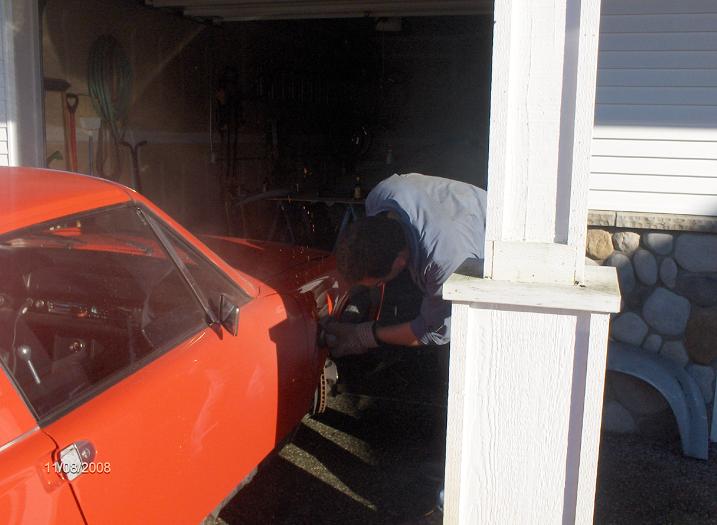
Posted by: Gint Nov 9 2008, 07:33 PM
Apparently it's too damn easy to get across the border up there.  We just sent Bruce back yesterday after he sneaked across too.
Posted by: r_towle Nov 9 2008, 07:35 PM
Look what happens with slack border controls.
They come by, take over your driveway, shop AND tools...pretty presumptuous.
Rich
Posted by: Todd Enlund Nov 9 2008, 07:40 PM

I got home Saturday just around noonish and notice this hanging out at my house:
I think the yellow/black goes on the front bumper on a GT, not the Fuchs
I stopped by Chez Bovey yesterday and he described how you do the flares. My plan of attack is similar

Posted by: JRust Nov 9 2008, 08:04 PM
Pics of the installed flares  . Maybe once I finish the creamsicle I'll have the money to do it
Posted by: RJMII Nov 9 2008, 08:21 PM
Pics of the installed flares
. Maybe once I finish the creamsicle I'll have the money to do it I doubt it... you'll probably find a bumble bee halfway through the creamsicle...
and still be wondering why your 215 is running hot.


So you going to post more pics of the flare install there Mr Original poster dude?
Posted by: computers4kids Nov 9 2008, 10:20 PM
Pics of the installed flares
. Maybe once I finish the creamsicle I'll have the money to do it I doubt it... you'll probably find a bumble bee halfway through the creamsicle...
and still be wondering why your 215 is running hot.
So you going to post more pics of the flare install there Mr Original poster dude?
Jamie...you have no more secrets
Posted by: Phoenix 914-6GT Nov 9 2008, 10:25 PM
Need more pictures
I got to see Dan working his magic and I must say he made this look way too easy. 
Posted by: messix Nov 9 2008, 10:44 PM
i took way more pictures than that.... where are they
Dan ... Steve..... 
Posted by: Root_Werks Nov 9 2008, 11:30 PM
Sorry guys, I realized after starting this thread that 99% of the pictures were taken on Steve's camera. He is going to e-mail them to me. I'll finish this up in the next day or so. There is A LOT to see.
Posted by: Root_Werks Nov 9 2008, 11:32 PM
Oh hey Troy and Jon, we finished up around 9PM! One solid 8 hour shift. Crazy! After we got done we cleaned up and went to a local dinner and drowned our sore muscles. 
Posted by: messix Nov 9 2008, 11:32 PM
TEASE 
Posted by: Phoenix 914-6GT Nov 10 2008, 12:01 AM
Oh hey Troy and Jon, we finished up around 9PM! One solid 8 hour shift. Crazy! After we got done we cleaned up and went to a local dinner and drowned our sore muscles.
You could have come where I told you and done that for free

Nice work Dan. You work fast.
Posted by: pete-stevers Nov 10 2008, 09:48 AM
I emailed a bunch o pics to dan last nite...but fell asleep at the computer, so he only got half of them
really dan made the install look so easy even after he drank all my beer
Posted by: pete-stevers Nov 10 2008, 09:51 AM
the simplicity of the install i will let dan wax eloquoently
Dan did say the aa flares are of fantastic quaility and the fitment was better than the factory flares... he has installed both
and furthermore....i think Pat garvey would be darn proud of us!!
Posted by: Eric_Shea Nov 10 2008, 11:29 AM
Was that beer from within a 50 mile radius of your house?
Come on gals... let's post some pics!
Posted by: pete-stevers Nov 10 2008, 11:36 AM
Was that beer from within a 50 mile radius of your house?
Come on gals... let's post some pics!
it was jamacan red stripe, and i think taj mahal beer...or something of the sort
definataly not local stuff...
Posted by: Root_Werks Nov 10 2008, 11:39 AM
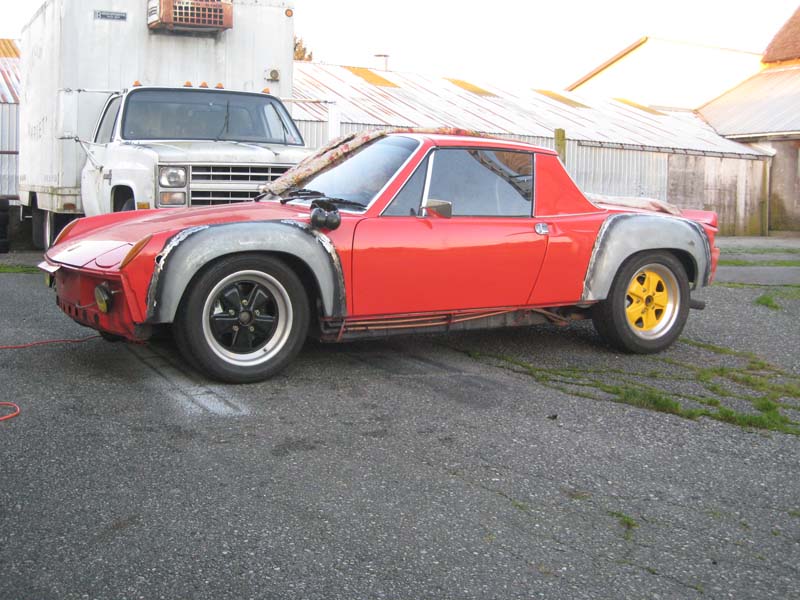
Lets see how big or small these pictures are. This is the first of the cuts after steve ground the paint off the general cut line area. We start by fitting the bottom lips and tacking them onto the 914. From there you cut up, tack, cut, tack until the entire flare is tacked on with a perfect 1/32-1/16 inch gap to weld up.
Attached image(s)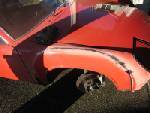
Posted by: Root_Werks Nov 10 2008, 11:41 AM
Hey Steve, these pictures are like 4kb each and pretty small. Any chance you can e-mail me some 40-50kb size pictures? They distort when I make them big.
Posted by: pete-stevers Nov 10 2008, 11:57 AM
they are shrunk to the size the site "likes" just try loading one as is
Posted by: Root_Werks Nov 10 2008, 11:58 AM
Like this?
Attached image(s)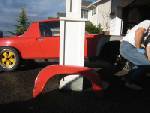
Posted by: Root_Werks Nov 10 2008, 11:58 AM
Holy crap, these are coming out really tinny. 
Attached image(s)
Posted by: DNHunt Nov 10 2008, 12:01 PM
Jeez, you guys are working on matchbox cars
Posted by: Root_Werks Nov 10 2008, 12:11 PM
Jeez, you guys are working on matchbox cars
Yeah, those little pictures are making my head look bigger than usual.

Posted by: Root_Werks Nov 10 2008, 12:12 PM
Here is one re-sized: Not pretty.
Attached thumbnail(s)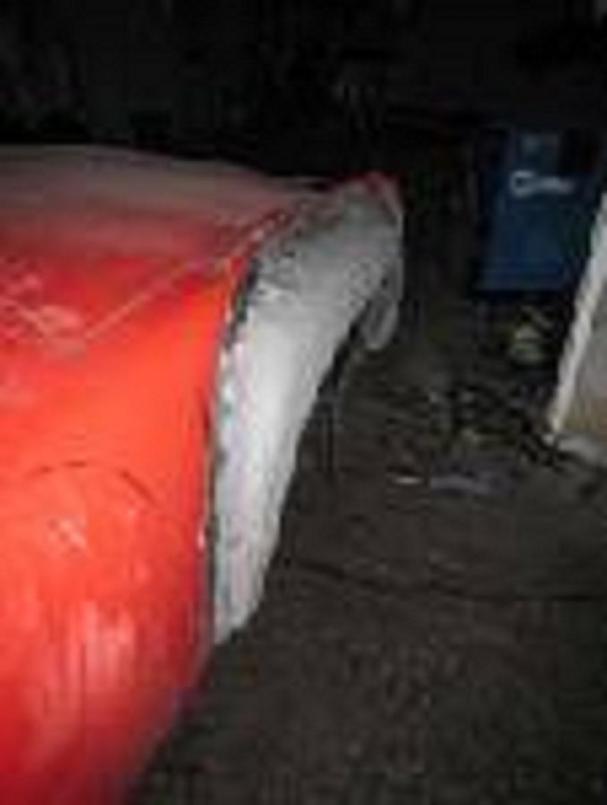
Posted by: pete-stevers Nov 10 2008, 01:01 PM
let me try
Attached image(s)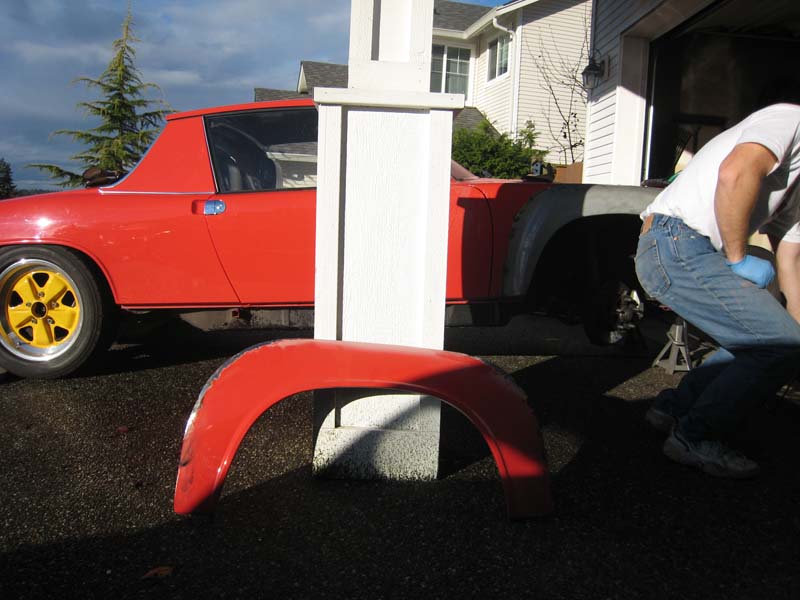
Posted by: pete-stevers Nov 10 2008, 01:03 PM
sum more
Attached image(s)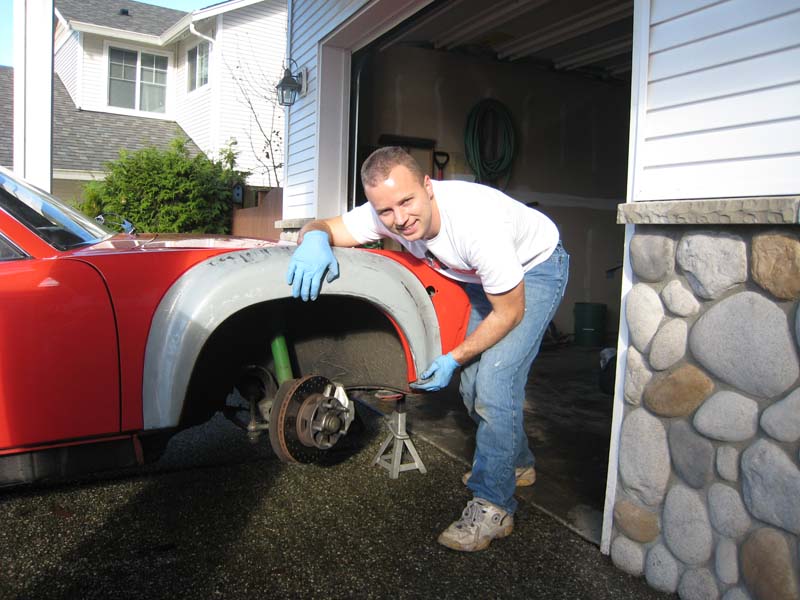


Posted by: Phoenix 914-6GT Nov 10 2008, 01:02 PM
they are shrunk to the size the site "likes" just try loading one as is
Steve, email the pictures you want posted and I will resize them so they will be viewable.

Never mind, looks like you got it figured out
Posted by: pete-stevers Nov 10 2008, 01:04 PM
werks for me
Attached image(s)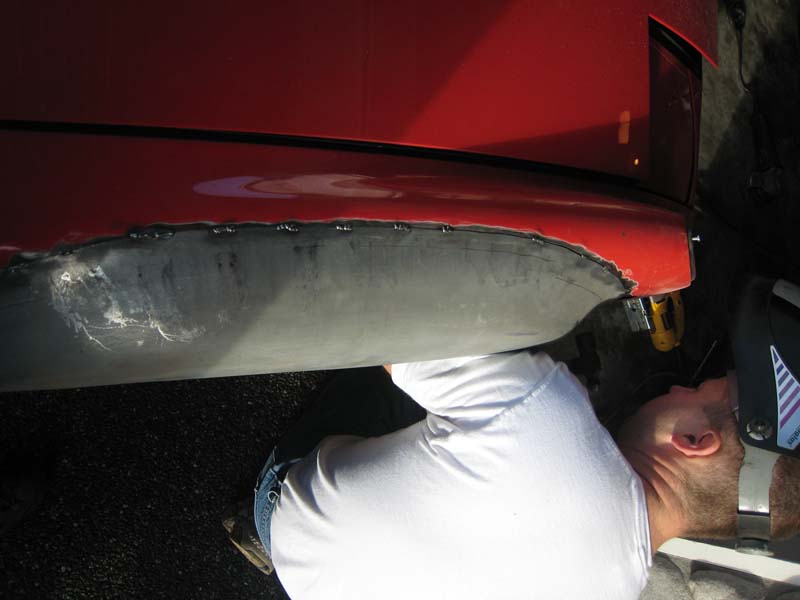
Posted by: pete-stevers Nov 10 2008, 01:05 PM
more
Attached image(s)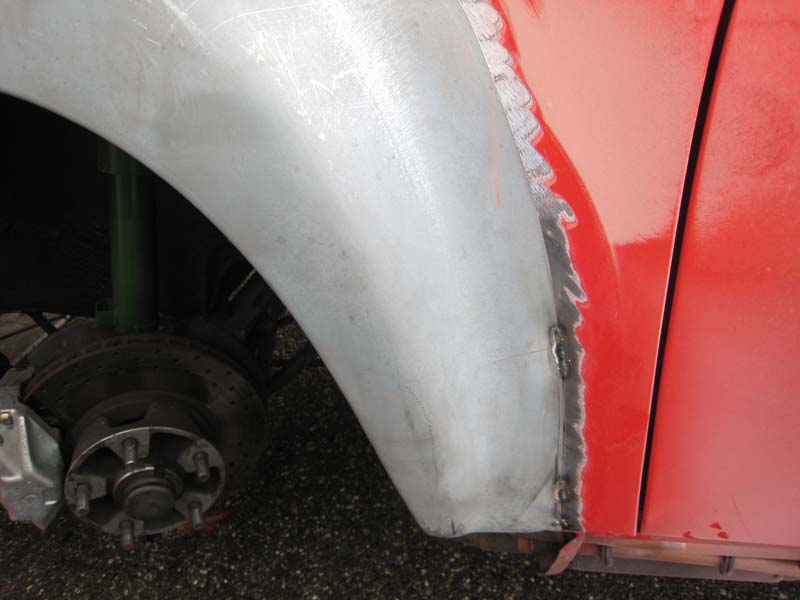


Posted by: Root_Werks Nov 10 2008, 07:14 PM
Thanks Steve!
Last couple of pictures there you get a better idea of the process. Cut the bottom corners, fit, tac weld and check the rest of the fit. Then cut up another 12-18 inches, tac that keeping your blade width gap and keep cutting, tac, cut, tac until you're all the way around. I worked from each side up to the middle.
Steve, keep posting. There are the shots of the right front fender after we ground it down I wanted to show. It almost needs no body work at all. Looks perfect.
Posted by: pete-stevers Nov 10 2008, 08:07 PM
here are some more
Attached image(s)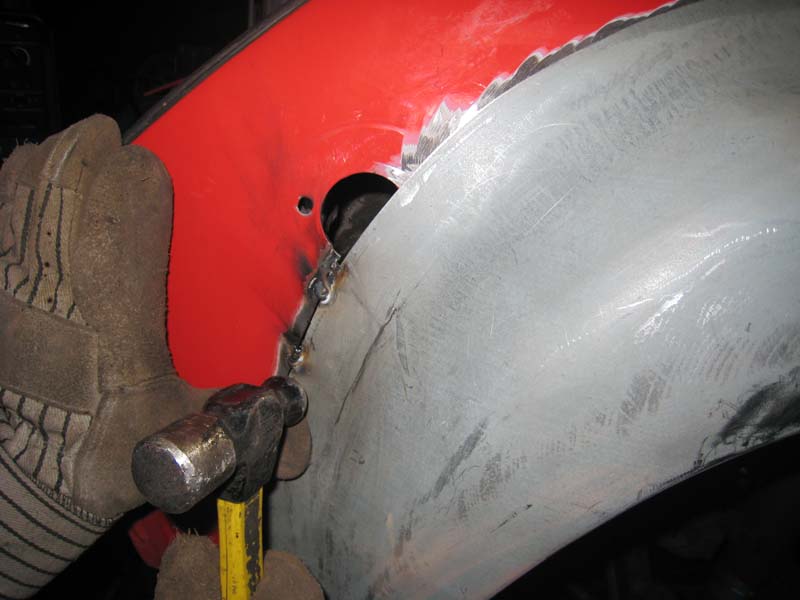


Posted by: pete-stevers Nov 10 2008, 08:11 PM
here is the one you are looking for dan...once the welds where ground down it is almost as smooth as.....
Attached image(s)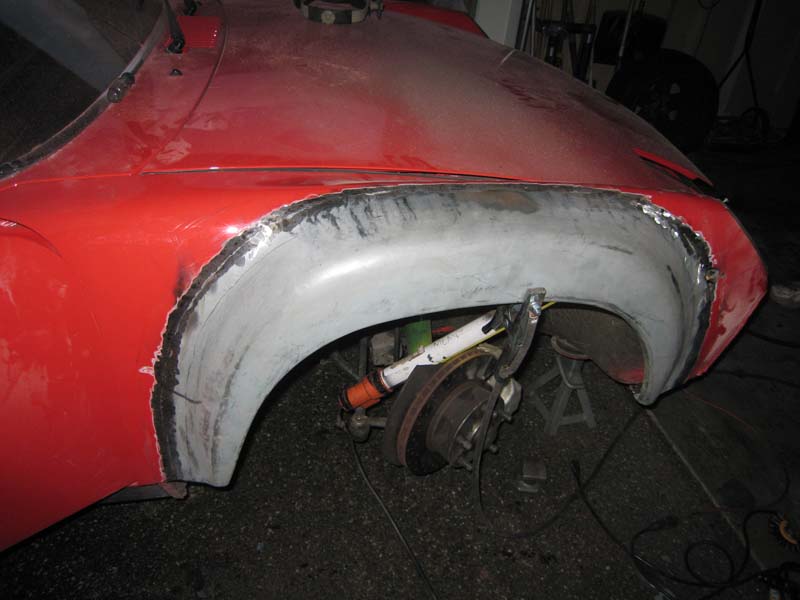
Posted by: sixnotfour Nov 10 2008, 08:14 PM
your babies but will be.(Congrats to you both BTW)
Nice work, steve ,you "had" a nice narrow car.
someday we will all have flairs, hmm Ive heard something similar to that before.
also paint it a decent color would ya
Attached image(s)
Posted by: Root_Werks Nov 10 2008, 08:38 PM
That's funny, I was mentioning to Steve how cool your frog green 914 looks in person. That color is amazing!
Steve, you gotta do something cool with the color now. Any idea yet?
Posted by: Chuck Nov 10 2008, 08:49 PM
How did you get the bottoms to fit? I've seen that as an issue on a few other installation threads with the angle of the steel on the car.
Posted by: Gint Nov 10 2008, 09:31 PM
Nice work!
Whatever Steve is using for email is probably shrinking the pics that he emailed to Dan.
Posted by: Root_Werks Nov 10 2008, 09:41 PM
How did you get the bottoms to fit? I've seen that as an issue on a few other installation threads with the angle of the steel on the car.
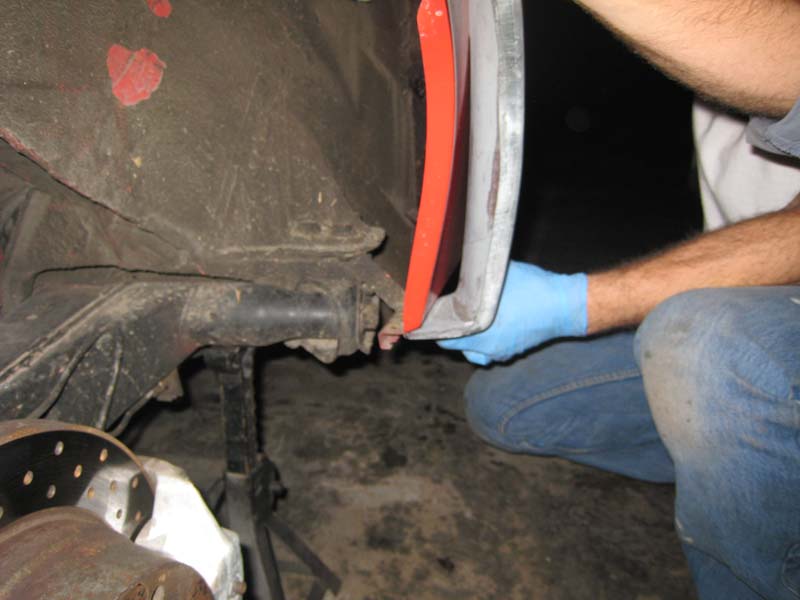
The AA flares have a 90 corner while the 914 stock fenders have that small double angle. When I cut for the bottom parts I grab the angle and flatten it out to match the bottom line of the factor fender which then matches up with the bottom of the flare.
We are lucky to own cars that someone like George H. has done all this R&D on a product so wonderfully produced as this. I am not a big AA fan, but I tell you, I love these flares.
Posted by: effutuo101 Nov 10 2008, 10:58 PM
Nice work Dan! I hope to be in line soon.
Posted by: Chuck Nov 10 2008, 11:14 PM
How did you get the bottoms to fit? I've seen that as an issue on a few other installation threads with the angle of the steel on the car.
The AA flares have a 90 corner while the 914 stock fenders have that small double angle. When I cut for the bottom parts I grab the angle and flatten it out to match the bottom line of the factor fender which then matches up with the bottom of the flare.
Do you have any photos of this?
Posted by: TC 914-8 Nov 11 2008, 12:02 AM
Good Lookin' work Dan, I wish I had steel flairs. I guess the only good thing about the fiberglass flairs on my car, is you put them on.
Some day I'll make it to your side of the sound, you guys all live too close, you have your own club inside the club.
Enjoy,
Tony
Posted by: pete-stevers Nov 11 2008, 12:50 AM
How did you get the bottoms to fit? I've seen that as an issue on a few other installation threads with the angle of the steel on the car.
The AA flares have a 90 corner while the 914 stock fenders have that small double angle. When I cut for the bottom parts I grab the angle and flatten it out to match the bottom line of the factor fender which then matches up with the bottom of the flare.
Do you have any photos of this?
Attached image(s)
Posted by: pete-stevers Nov 11 2008, 12:55 AM
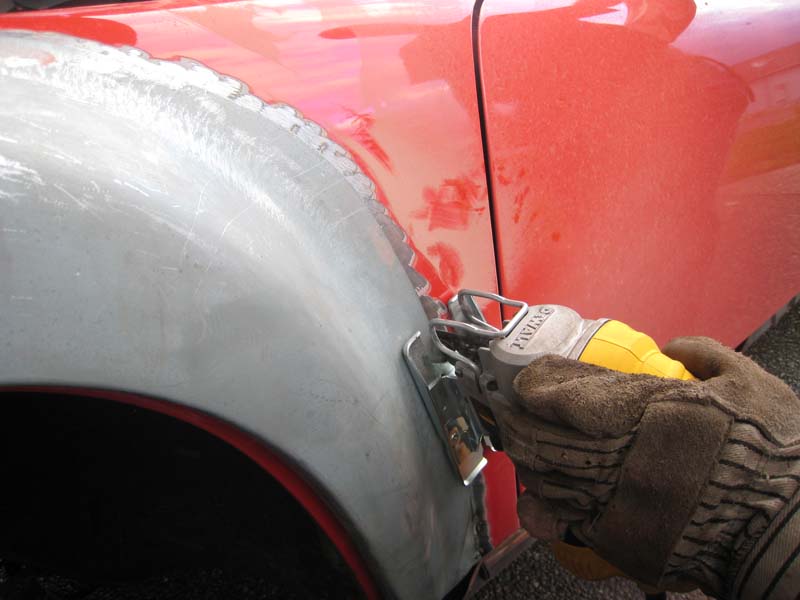
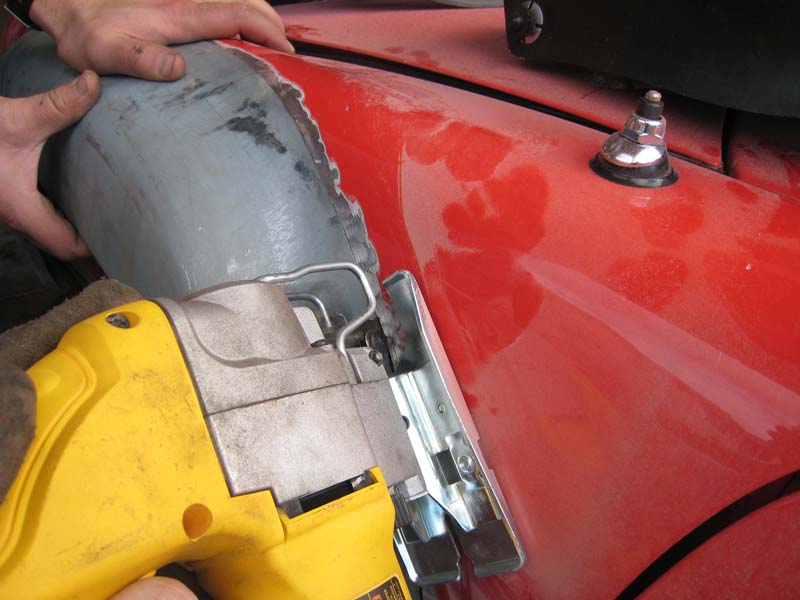
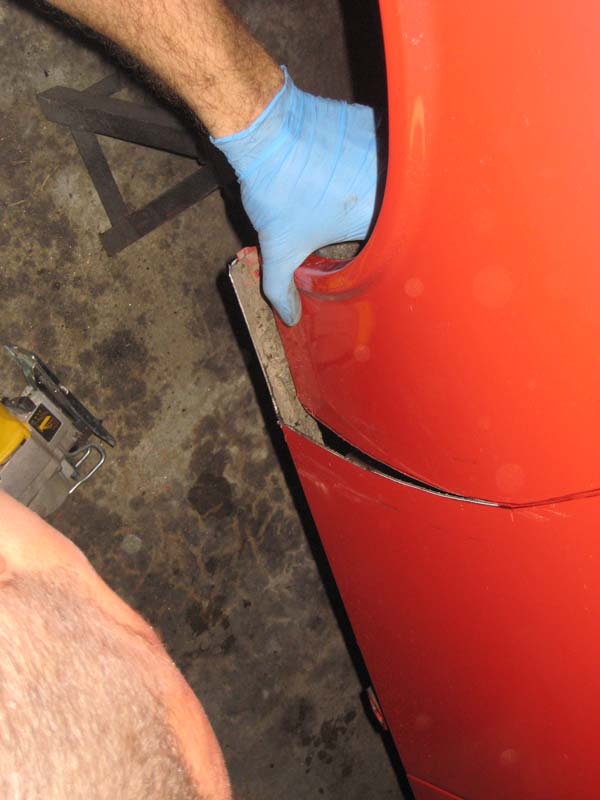
what i can see is you set the flare where it fits on the bottom
tack it in place and apply pressure for fitment at the top, cutting the steel of the orig fender right along that line, the gap from the saw blade is just perfect for a weld bead...and from what i could see is there is little issue with fitment of any sort using this method.
Posted by: jd74914 Nov 11 2008, 06:37 AM
Nice work!!
But wear safety glasses!
Posted by: Chuck Nov 11 2008, 02:30 PM
Thanks! 
Posted by: cardiaceagle Nov 12 2008, 03:43 AM
Looks great...
Any raised eyebrows on the return trip at the border?...
regards...
Posted by: pete-stevers Nov 12 2008, 09:49 AM
nope...i told her i went down to a freinds place to weld on some flares...
she said "what"
so i point to the flares, and said we welded those on...
she asked if i bought any parts, i said nope, i brought them with me,
she shook her head and smiled
and waved me through
.....................
prolly thought i was nuts
Posted by: cardiaceagle Nov 12 2008, 12:46 PM
nope...i told her i went down to a freinds place to weld on some flares...
she said "what"
so i point to the flares, and said we welded those on...
she asked if i bought any parts, i said nope, i brought them with me,
she shook her head and smiled
and waved me through
.....................
prolly thought i was nuts
if they ask you to open the trunk...
don't ask "which one?"...
I should of just got out and opened the back one...
no smiling border guards that day...
regards
Posted by: Phoenix 914-6GT Nov 12 2008, 12:50 PM
 That could be bad I guess.
Posted by: LarryR Nov 12 2008, 11:44 PM
Any more progress pics? looks good.
Posted by: Root_Werks Nov 13 2008, 08:19 AM
I know Steve has more pics he will probably post. He is going to work on feathering in the flares as well and hopefully updates the thread.
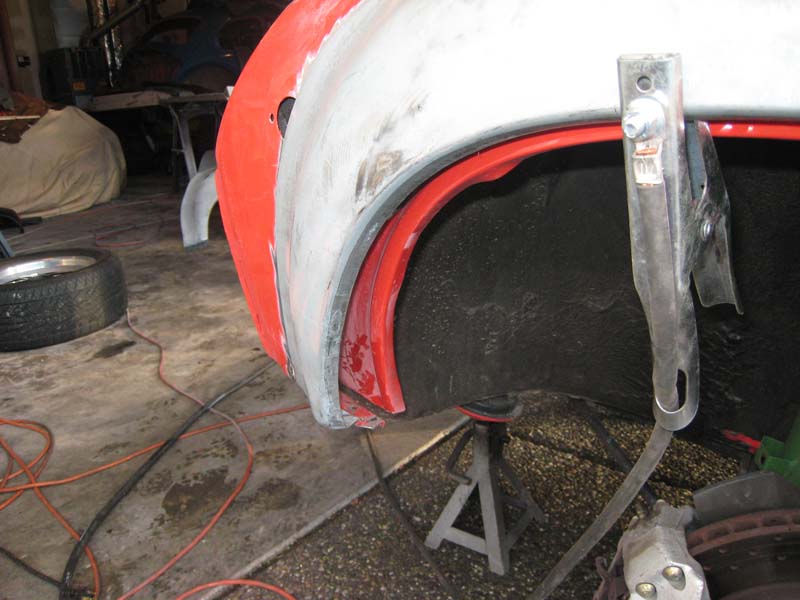
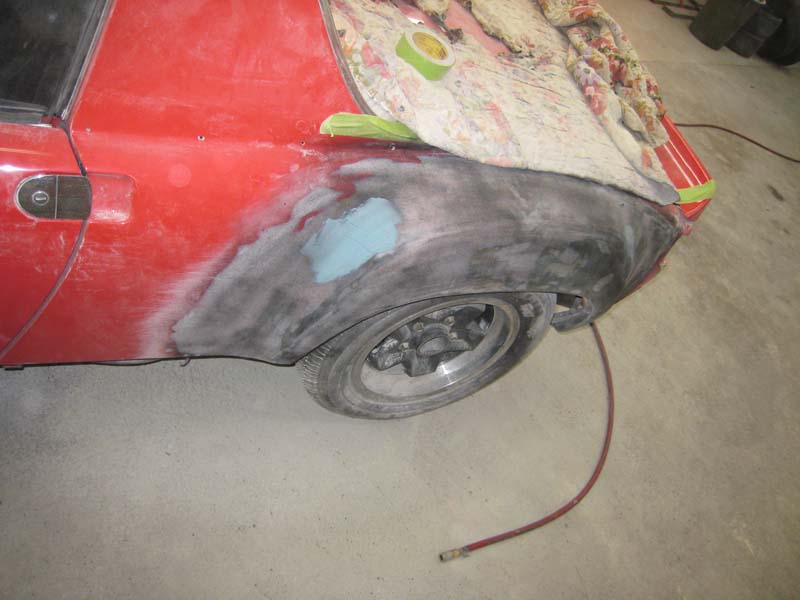
We ran into trouble on the rear flares. The Right Rear had been repaired with quite a bit of filler. Steve ground away a clean line for me to cut/weld on but not without covering my garage with bondo dust. This made fitting that flare pretty tough. Lots of slow progress of small cuts, tac welds, some even recuts. Wound up turning out great in the end, but not without work.
Hey Chris, go buy some flares and call me.
Posted by: KELTY360 Nov 13 2008, 09:35 AM
nope...i told her i went down to a freinds place to weld on some flares...
she said "what"
so i point to the flares, and said we welded those on...
she asked if i bought any parts, i said nope, i brought them with me,
she shook her head and smiled
and waved me through
.....................
prolly thought i was nuts
I think you were lucky. I heard they were cracking down on flare smugglers.

Posted by: stevesc_us Nov 13 2008, 01:32 PM
Any more progress pics? looks good.
Larry,
The picture of your car in your avatar looks awesome. Any other pics of your car to share with us? I assume those are steel flares. What's the engine displacement?
Posted by: pete-stevers Nov 13 2008, 07:50 PM
Had a chance to get out to the shop today
ground down the welds, looked great, except the rr fender
this quarter was hit by a bunch of drunk kids long ago
and had lots of work into it from the previous repair
so there is one high spot an a few low spots
but the other quarters look fairly darn clean
Attached image(s)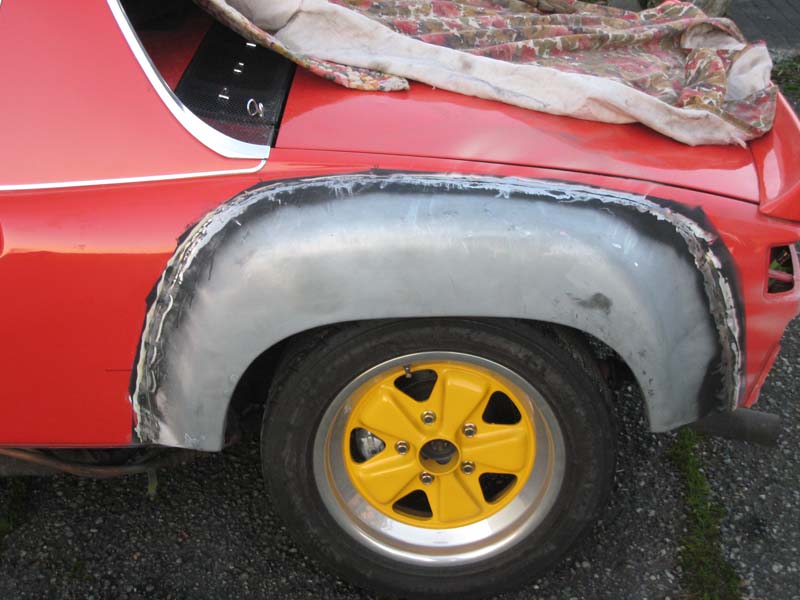
Posted by: charliew Nov 14 2008, 12:54 PM
Looks great. Did you guys use the easy grind type of wire? and was it .023? or .030? Also the only car I've had a chance to check out the front fender seems to be more to the rear than centered but that fit the rockers he had. I am concerned that the front fender might need to be moved a little forward and the rockers lengthened to fit. Any thoughts?
Posted by: Root_Werks Nov 14 2008, 01:35 PM
Looks great. Did you guys use the easy grind type of wire? and was it .023? or .030? Also the only car I've had a chance to check out the front fender seems to be more to the rear than centered but that fit the rockers he had. I am concerned that the front fender might need to be moved a little forward and the rockers lengthened to fit. Any thoughts?
.023 Easy Grind.
Posted by: PanelBilly Nov 14 2008, 02:13 PM
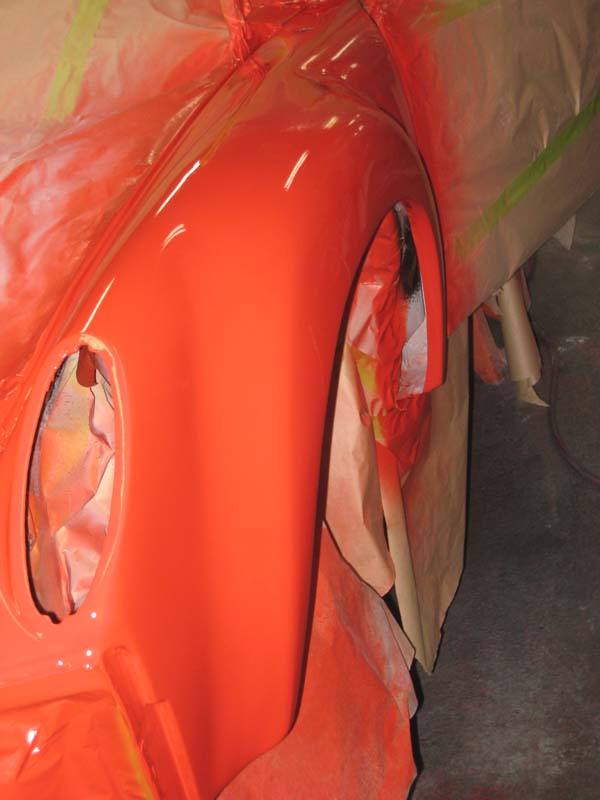
Put a few hours into metal work....well may more than a few,
spray with filler, sand, paint, sand, buff and look what you get.
Posted by: pete-stevers Nov 14 2008, 02:52 PM
i believe dan has the answer to the for-aft of the front fenders....
Posted by: maf914 Nov 14 2008, 03:27 PM
Dan,
Thanks for sharing your technique, tack at the bottom and then cut and tack your way up and around. That is a really clever method. How did you ever come up with that?
With this method you are centering the flare, fore and aft, relative to the existing wheel opening, correct?
Is there any issue vertically, for example where the top of the flare blends with the top of the fender?
Posted by: PanelBilly Nov 14 2008, 04:34 PM
The top of the flare is below the top of the fender, so that's not a problem. I wish I had used this method. I clmped them in place and then cut out the entire unit. Then I needed to use cleo clamps to hold it in place while tacking.
Posted by: Root_Werks Nov 14 2008, 05:08 PM
Yup, the biggest thing is getting the bottom edges all lined up perfectly. It really helps to have a couple of pairs of hands. I am usually doing it myself putting the smallest of tacs on so I could place the flare, cut, then eventually even cut through the original tac. With Steve there he was able to hold the flare while I cut and then tacked. Made things go faster that way.
Then Troy showed up and all hell broke loose.
Posted by: messix Nov 14 2008, 05:12 PM
Yup, the biggest thing is getting the bottom edges all lined up perfectly. It really helps to have a couple of pairs of hands. I am usually doing it myself putting the smallest of tacs on so I could place the flare, cut, then eventually even cut through the original tac. With Steve there he was able to hold the flare while I cut and then tacked. Made things go faster that way.
Then Troy showed up and all hell broke loose.

Posted by: pete-stevers Nov 15 2008, 07:40 PM
the bugger drank all my beer
Posted by: effutuo101 Nov 15 2008, 08:02 PM
And you where suprised? You need to spend more time with Troy. He is all about the barley pops. 
Posted by: messix Nov 15 2008, 09:20 PM
not me.... i'm all for the distilled libations!
Posted by: pete-stevers Dec 13 2008, 10:24 PM
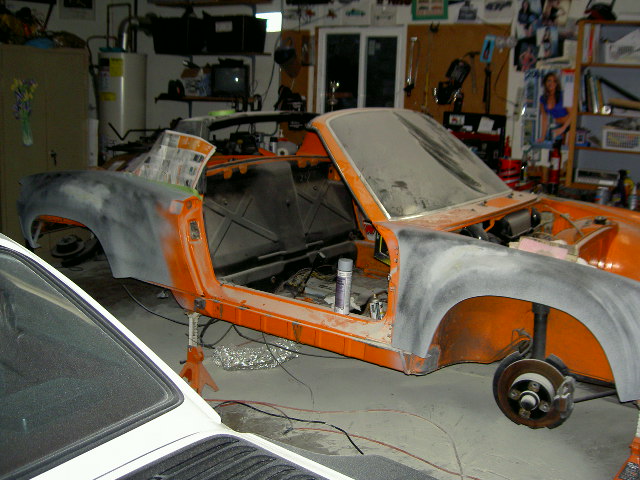
here is a shot of the car with a bit of filler on it...
I should let you know, this is the first time i have EVER attempted body work of this magnitude....
the rear driver quarter has taken the most work this far!
Attached image(s)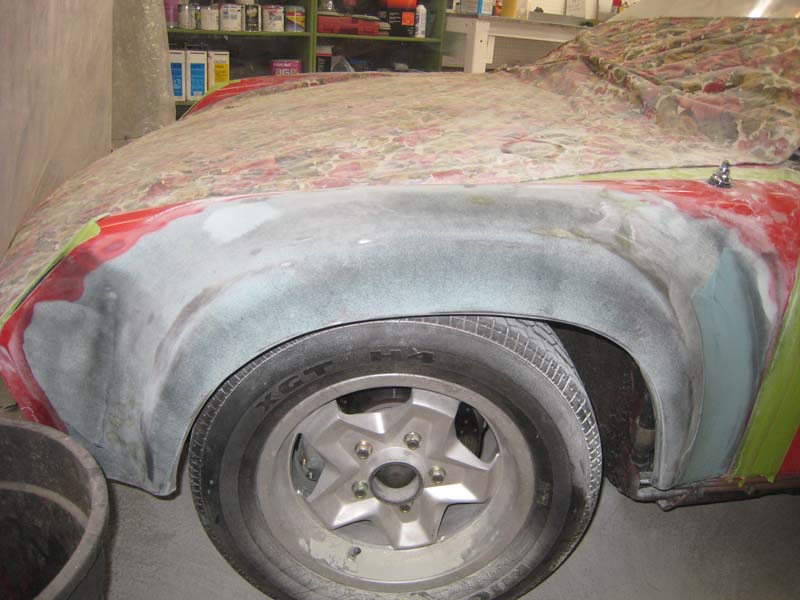
Posted by: pete-stevers Dec 13 2008, 10:31 PM
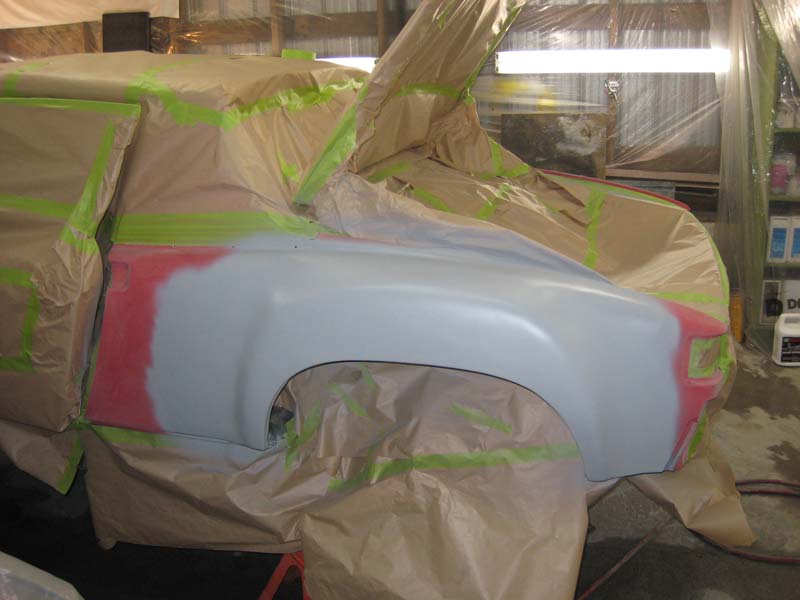
once i got most of the shaping done, with many guide coats and much blocking, i decided to prime with a heavy ppg k201.
After letting it cure i will block and clean up any other imperfections.....and there are more than just a few 
Attached image(s)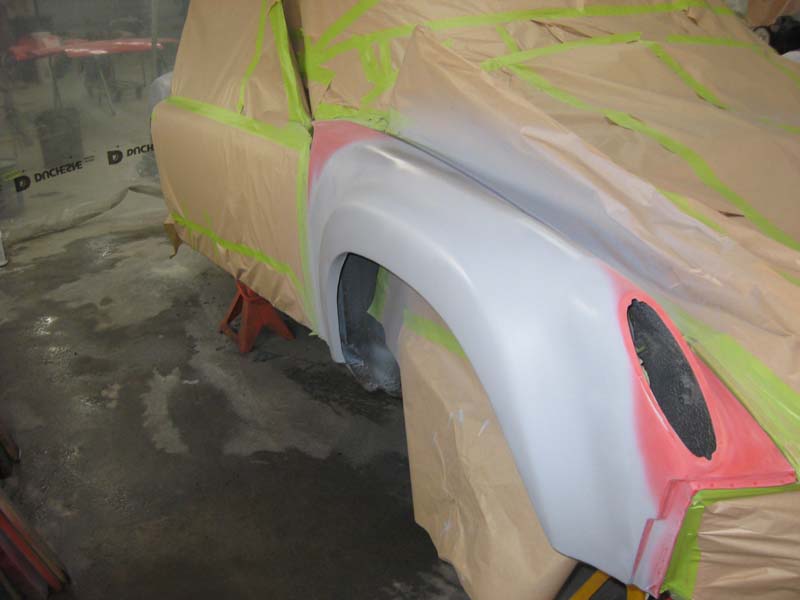
Posted by: effutuo101 Dec 14 2008, 11:36 AM
Nice work! keep it up.
Posted by: pete-stevers Dec 14 2008, 11:49 AM
for all the taping and prep i could have almost painted the entire car...
i am re painting the targa, duck tail, front hood, bumpers,valences and the centers on the fuches as well. she will look like a different machine when i am done!
Posted by: Root_Werks Dec 14 2008, 02:11 PM
Great job Steve! Man, from here, it looks like a million bucks! Keep the progress going and pictures coming.
Posted by: Phoenix 914-6GT Dec 14 2008, 02:55 PM
 Looks awesome Steve
Posted by: pete-stevers Dec 14 2008, 03:18 PM
Looks awesome Steve thanks....but
don't be deceived...there is still a lot of details that need to be taken care of on those quarters.. after this is all done i will be installing some more flourecents in this area of the shop!! i think that will alow me to see highs and lows with a bit more light bouncing around.
Posted by: ConeDodger Dec 14 2008, 04:05 PM
Wow Steve! I love the learn as you go approach. I will be starting work on a tub next year and I will be stripping and cleaning up body work as I go too. I have all of the tools I have just never used them. You have inspired me!
Posted by: PanelBilly Dec 14 2008, 04:37 PM
How did the underside turn out? Are you planning on coating it with anything?
Posted by: pete-stevers Dec 14 2008, 04:52 PM
i sprayed the welds with etch coat, and k201, next i will shoot it flat black
opps after the k201 i will put a couple layers of under coat on the top side
in case i ever run stickies
Posted by: Gint Dec 14 2008, 05:57 PM
Looking good Steve!
Posted by: jc914 Dec 14 2008, 06:10 PM
Great job Steve it look perfect
Posted by: pete-stevers Dec 15 2008, 06:43 PM
pardon me..the primer was a PPG k38
the primer was not fully cured due to the cold
but damn that stuff can cover,
i blocked the two worst quarters today, they turned out way better than expected
i will shoot one more coat of primer, block it and then color
outside it was minus 10, with a windchill of minus 18....i am damn thankful for the heater in the shop...to celebrate i had a beer, it was slushy.
Posted by: messix Dec 15 2008, 08:27 PM
trust the touch of your hand and the guide coat more than your eye. sanding is your friend  [this is supposed to be steve sanding]
Posted by: Wes V Dec 16 2008, 09:27 AM
trust the touch of your hand and the guide coat more than your eye.
I don't agree. (but some of it's just in the wording)
Don't trust your hand. (unless you are a major pro)
Only trust the guide coat sanding if you have a straight sanding board and are doing the sanding real lightly. You should just "glide" over the high points.
The one thing I recommend is to get a shop light and direct it down along the surface, not directly at it! Then turn off all the other garage lights. You can then see the hills and valleys on the surface.
Wes Vann
Posted by: elwood-914 Dec 16 2008, 11:14 AM
Great thread!! You guys make it look too easy. Makes us want to do ours too.
Thanks.
Posted by: pete-stevers Dec 16 2008, 12:51 PM
my opinions on the sanding so far...it is tough to use a board for the sanding
a round sanding block is necessary, and hard and soft block as well
the touch method works well
as well as a guide coat
but blocking a semigloss primer is great as well, the low spots shine out
and blowing of the dust every now and again reveals the lows
and you just keep blocking out the highs until the lows are "flat"
depending on how low you are you can shoot a guide
and check it again....by blocking it off
plus i have 2 500 watt lights, which really help highlighting
......................
i am determined to do this without the help of a pro
i think the whole idea of hotrodding is to do as much as you possibly can yourself or with the help of other like minded individuals...like Dan and the rest of you guys
Posted by: sixnotfour Jan 2 2009, 10:47 PM
new year ![]()
Posted by: scotty b Jan 3 2009, 09:28 AM
my opinions on the sanding so far...it is tough to use a board for the sanding
a round sanding block is necessary, and hard and soft block as well
the touch method works well
as well as a guide coat
but blocking a semigloss primer is great as well, the low spots shine out
and blowing of the dust every now and again reveals the lows
and you just keep blocking out the highs until the lows are "flat"
depending on how low you are you can shoot a guide
and check it again....by blocking it off
plus i have 2 500 watt lights, which really help highlighting
......................
i am determined to do this without the help of a pro
i think the whole idea of hotrodding is to do as much as you possibly can yourself or with the help of other like minded individuals...like Dan
and the rest of you guys You're doing it all right Steve. Anytime you have a radius you should use a round block. Using a hard edge block will actually cut grooves into the bondo/primer as you move across it. Sand in a criss cross pattern,ALWAYS guide coat, keep the panel clean so you can keep an eye on your guide coat, and re guide coat if you have any doubts. Run your hand lengthwise ( fingers to heel ) not cross ways, to feel the panel, also slide your hand in long strokes, short strokes will not do you much good.
Posted by: pete-stevers Jan 14 2009, 05:19 PM
i am planning to do the final block with 800 wet
Is there any problem with blocking the color with 1200 wet in between coats of color??
Posted by: scotty b Jan 14 2009, 05:43 PM
i am planning to do the final block with 800 wet
Is there any problem with blocking the color with 1200 wet in between coats of color??
Assuming it is a solid color 600-1000 tops. The higher grade you sand it to the less the clear has to adhere to, the easier it is to run the clear. NEVER EVER sand a metallic base, you WILL ruin it. I see no need in all honesty in sandiong the base anyway unless there is something in it. You'll get a better result wet sanding the clear then reclearing it
Posted by: effutuo101 Jan 14 2009, 05:52 PM
for the little work I have done.
Posted by: charliew Jan 15 2009, 01:59 PM
I guess I missed it did you guys try some flared rockers to see how they lined up to start with? The curves of the flares and fenders are the easy parts. It's the almost flat areas that are tough. It takes good lighting and the experience to know how to use the angles of the lighting to pick up the very long minute waves. You can't stand back and look too much, always be looking and feeling for waves. On the last guide coat I like to put water on the surface to get it as shiney as possible to check the surfaces. If you are going to remove all the orange peel it will show every wave you miss on the final guide coat. Also the darker the color the more the waves will show up. I close my eyes when I am trying to determine where a small imperfection in the surface is and start with long sweeps of my hand till I feel something then keeping it centered in the sweeps get them shorter and shorter till I can either see or mark the spot. The closer you can get the filler to perfect the less guide coats you will need and the less shrinkage you will see in a coupla years. Also the final finish of the filler should be about 220 grit so as to not have deep scratches to fill with the primer as that can also shrink and show up when the hot solvents sink in from the top coats. If you try to level spots with clear they will usually shrink and show up later. If you use a lot of top coat it will take several months to get fully dry. Try to put a dent in it where it won't show with your fingernail (under a fender lip) a few months down the road and see how far it dents. Usually the dent will come out over time.
When the last coat of clear is on and wet you will know how good of a job you did and whether you might need to leave a little orange peel or not when you are leveling and buffing. If you don't have a real good setup to paint top coats you might want to use some fisheye eliminator. It prevents small oil specks from making pimples in the paint. Urethanes being sortof like plastic don't melt into each other as each coat goes on. If you get through and see a dryspot that looks rough and will need extra leveling you can use some ppg blending solvent to melt the paint down. Be careful and just dust it on and see how it goes, you can add more but too much and it will run or sag. It looks like magic but it will help level overspray or dryspots really well.
When you are color sanding if you go through the clear you can put some more on that spot and use the blending solvent on the edge of the new clear to melt the little overspray drops in before you resand it. Be sure and use a tack rag as the blending solvent also has clear it it.
When you sand clear between coats to remove nibs or lint, some clears will lift or wrinkle if they are not fully dry especially on the edge where you sand through. Clear is a weak paint and will delaminate easily if you leave to smooth of a surface for it to adhere to I use 400 or a gray scotchbrite pad to scuff the surface real well. It will try to seperate where you are bolting something on it or flexing it.
Also something I try to remember when I am spraying top coats is that they are highly prone to attract dust as the electrostatic charge is always there. I have used a jumper cable connected to the underside of the body to try and ground the body to stop it as much as possible. I'm not sure that it helps because of the multiple coats and the filler but I do it anyway.
Posted by: pete-stevers Jan 26 2009, 08:51 PM
i have finished blocking the second layer of primer...
now it is time to double check all painting surfaces
i will shoot the undercoating on the inners
clean the shop up with a vaccum
triple check
and paint next week, probably fri.
i have trial fitted the rockers and done a bunch of glass work on them
to make them work, good thing glass is so easy to work with....because there where a lot of fitment issues with them, as far as lining up goes.
the glass bumpers and valences will be painted black
and then it is on to painting the centers on the wheels.
eights out back, sevens up front
Posted by: scotty b Jan 26 2009, 08:57 PM
Hose the floor down, and if at all possible wet the walls. This will do LOADS to keep the dust out of the paint.
Posted by: pete-stevers Jan 28 2009, 12:39 PM
Thanks scotty...i was going to do that as well....
Posted by: pete-stevers Jan 30 2009, 08:09 PM
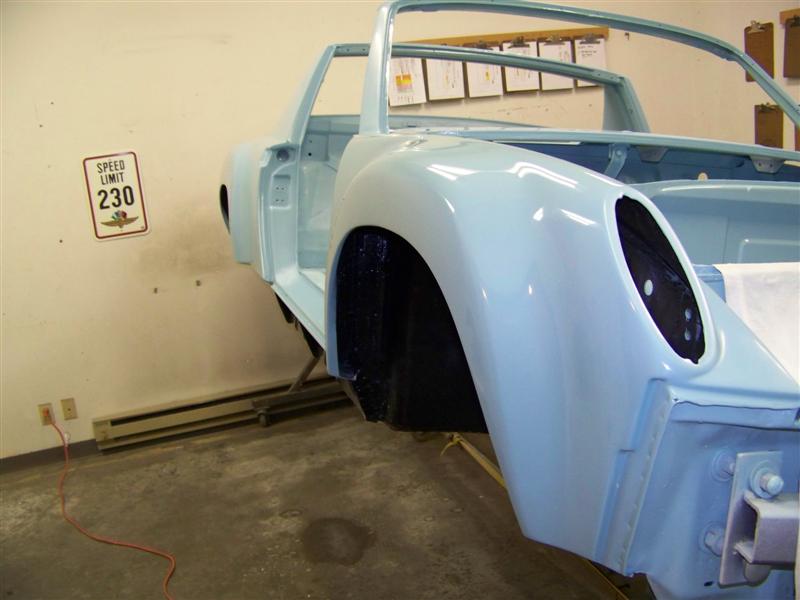
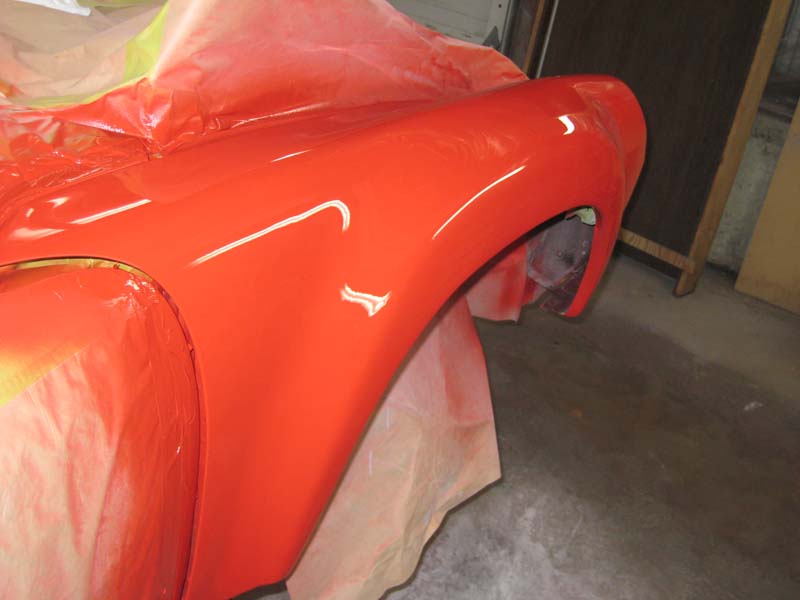
Well i got a little farther today
sprayed a layer of undercoat in the innner fenders
and got a three layers of base on
Attached image(s)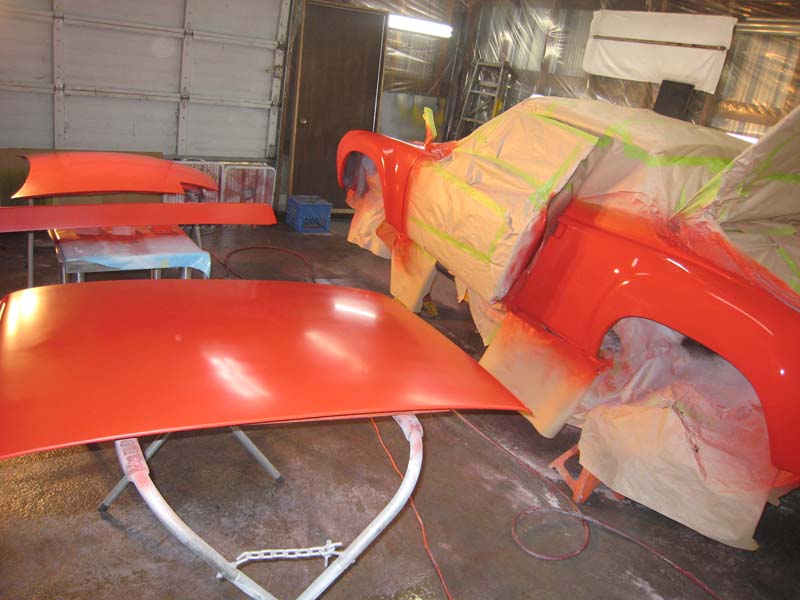
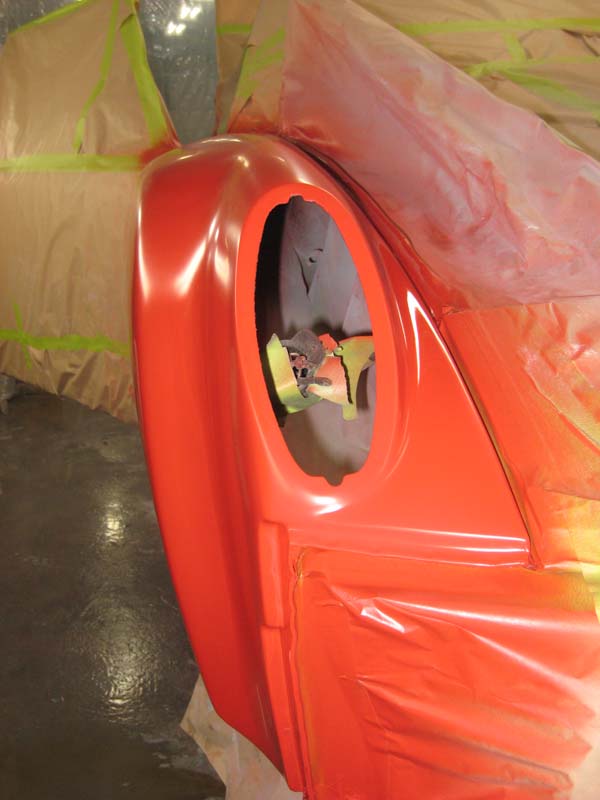
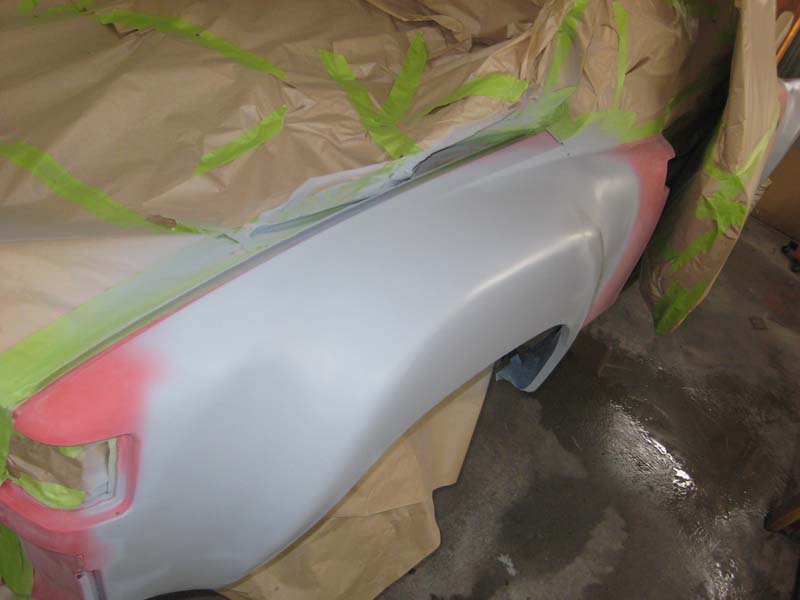
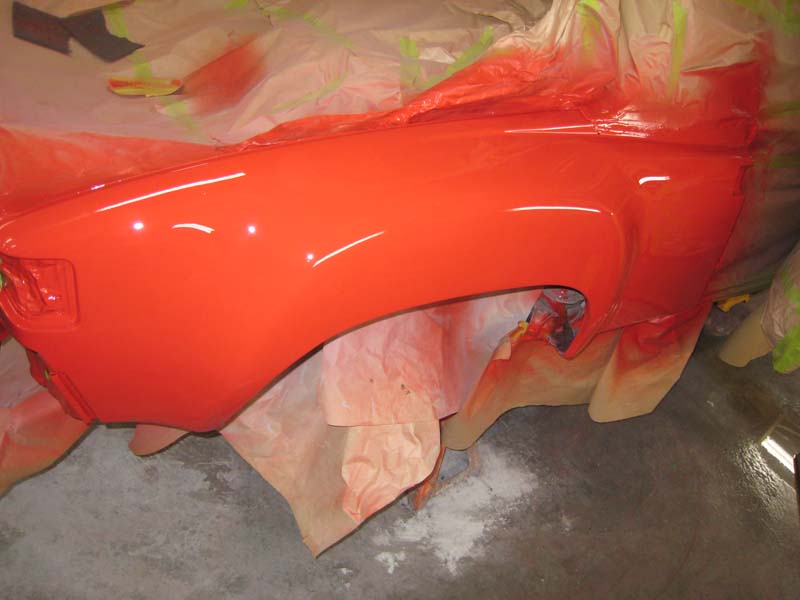
Posted by: pete-stevers Jan 30 2009, 08:11 PM
this is the quarater that caused the most trouble due to previous damage
but this one turned out good
Attached image(s)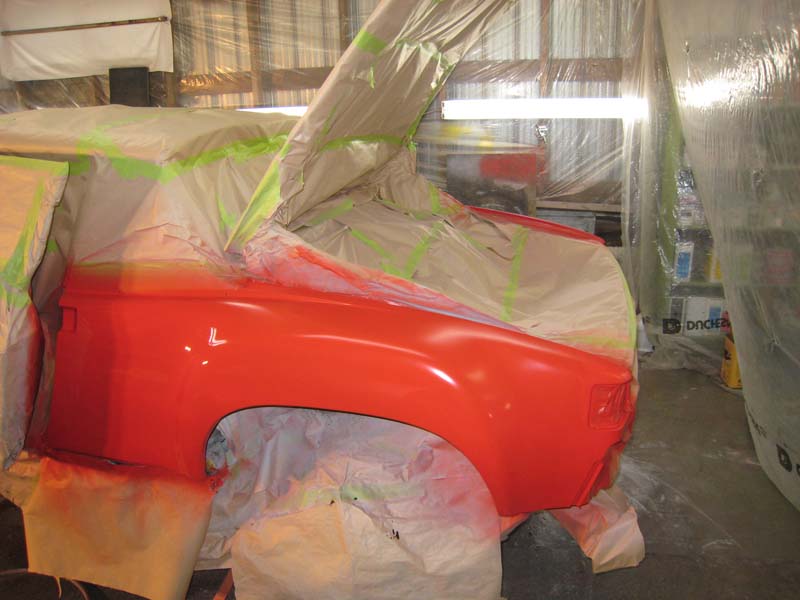
Posted by: pete-stevers Jan 30 2009, 08:14 PM
and here is my big bad...can't even look at scotty b in eyes
i guesse i am going to have to wet sand the base...
i am guessing 800 and then another layer of base ...eh?
and then clear....
Attached image(s)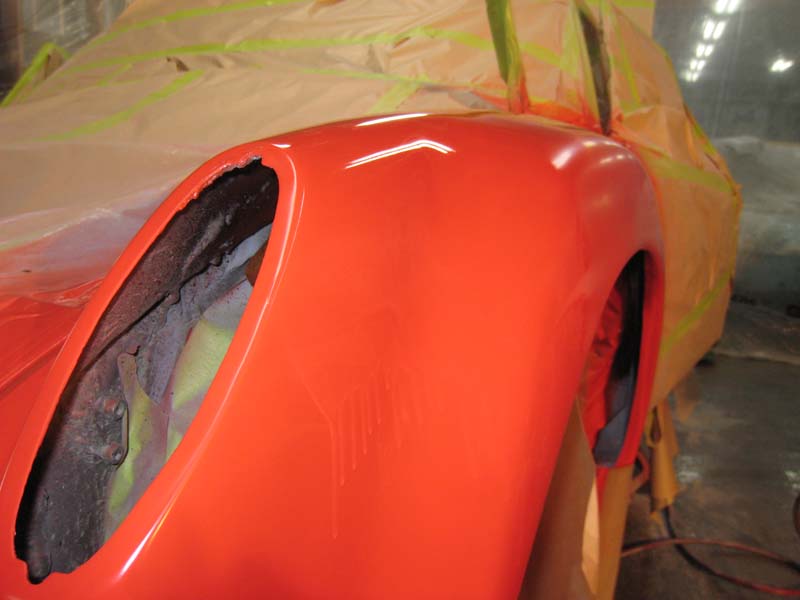
Posted by: pete-stevers Jan 30 2009, 08:16 PM
All of this would not be possible without Sher talking her parents into taking Our four year old for the day,
With Sher on bed rest, it makes it a lot tougher to get out to the shop and work....
so i got her some of these
Attached image(s)
Posted by: greenie Jan 30 2009, 08:22 PM
Great job Pete, I can't wait to see it!
Don't invite PanelBilly up, it will add many hours.
So what was the toughest part of the project so far?
Posted by: pete-stevers Jan 30 2009, 08:25 PM
toughest part so far is the filling,puttying and blocking of the quarters
i enjoy the painting part....except for the runs...
but i enjoy the solitude working in the shop!
Posted by: greenie Jan 30 2009, 08:44 PM
toughest part so far is the filling,puttying and blocking of the quarters
i enjoy the painting part....except for the runs...
but i enjoy the solitude working in the shop!
The shaping/blocking is very tough for me, I think I'm finished and the next night I'm starting over ( maybe it's the
).The solitude is the best part, (although it is very dusty solitude) many hours to think.
Keep at it.
Attached image(s)
Posted by: Gint Jan 30 2009, 10:12 PM
That looks pretty good to me Steve!
Posted by: charliew Jan 30 2009, 11:02 PM
That appears to be a non-metallic color so you should be able to sand it out and maybe only touch up that area. On all the basecoat clear coats I've used the clear needs to go on within a certain amount of time or it needs to be scuffed and another base layer put on for good adhesion of the clearcoats. I was thinking it was twelve hours max between the base and clearcoat. Maybe you can just scuff it with gray scotchbrite and then clear.
Posted by: scotty b Jan 31 2009, 10:02 AM
and here is my big bad...can't even look at scotty b in eyes
i guesse i am going to have to wet sand the base...
i am guessing 800 and then another layer of base ...eh?
and then clear....
Let it completely setup then sand it with 600. I would persoanlly take it back down to the primer and them reshoot/ blend the area out. A lot of tmes when you get a run like that, you can sand it till it looks fine and even feels fine but there is still a very slight ridge still there that will show when cleared. If you decide to sand it back to the primer just go a bit outside of the run, and feather your sanding out. Reshoot the color and fan it out from the center so it will blend in with the existing color. ( hope that makes sense, I'm not real good at explanicating stuff ) If you want to be doubly safe scuff the whole car and clean it, blend that area out then reshoot the whole car with one coat. This will ensure a good color match, and will also get your chemical bond back before applying the clear.
I would advised if this sits for more than 24 hours running over it with a grey scotch brite pad.
Also for all of you doing your own paint jobs, don't go overboard with your pre-paint final sanding. As I stated before, 600 is great for putting base over. What happens when you go higher is you create a slicker surface with less scratches for the paint to grab hold of. This will result in runs. 600 for base and 600 is fine for clearing over too. Remember your clear will be a thicker material than your base. And the same for single stage paint. Single stage paint jobs really only need 400 then you can apply paint.
Posted by: pete-stevers Feb 1 2009, 12:38 PM
i fixed up the runs in the base
and shot three layers of clear
got a few more runs, but it is in the clear
and unfortunately the targa will need to be re cleared due to all sorts of fish eye
i thought i has washed it well but i think it was polishing wheel dust...
Posted by: Phoenix 914-6GT Feb 1 2009, 12:45 PM
Damn runs. Well keep at it Steve. You'll get there soon and it will look amazing. You're doing nice work so far.
Posted by: pete-stevers Feb 1 2009, 02:15 PM
the runs in the clear don't bother me as much as the fish eye on the targa but that too is in the clear,
i think my main trouble was actually lighting, most of the runs happened on the side where i have a 500 watt light shining, it is to stark and harsh to see what is going on while spraying, i will be installing a few more flourescents in the room at a later date.
Posted by: Sher Feb 1 2009, 02:54 PM
Well, here it goes - my first post as a new member of the club!
I'm excited that my first post can be about how proud I am of my husband. You've done a terrific job on this project, Steve. It's been a big undertaking, but you've done well. I love seeing how excited you get with each coat of paint! Keep up the good work! We're going to have some fabulous drives in your car this summer
Posted by: Todd Enlund Feb 1 2009, 03:10 PM

Posted by: sixnotfour Feb 1 2009, 05:38 PM
Sher , being a proud wife you should know that,

And,
Hi Sher
Jeff H.
Posted by: charliew Feb 2 2009, 12:24 AM
There is a accelerator you can add that will make the paint dry faster and that would help stop the sags or runs. Also are you sure you got fisheyes or solvent popping from the top flashing off before the solvent got out? I once cleared a gas tank and moved it out in the sun to see better and I think it got hot and the surface dried too quick and it solvent popped really bad. There is also a fisheye eliminator and I use it in every cup of base or clear. Fisheyes are really a mess to fix.
There is also a panel clear that dries very fast and that keeps bugs and trash out of the paint and also helps eliminate runs. The best way is to have really good light and just put it on really even and wait between coats, I always do the edges first with clear and then the big areas so I am sure I got the edges, Paint doesn't like to be as thick on the edges.
I use a optima gun for base and clear made in germany and it just fogs the paint on.
Posted by: PanelBilly Feb 2 2009, 05:56 PM
I can't wait to see the finished product!
Posted by: pete-stevers Feb 2 2009, 05:58 PM
i am going to repray the targa and hood...
and i have to buff out a frickin fly, and a few runs
untill then she stays taped up..
Posted by: Sher Feb 2 2009, 10:32 PM
So you want to see some pics? Here's afew from yesterday ...
Attached image(s)
Posted by: sixnotfour Feb 2 2009, 11:58 PM
thats hot
Posted by: Phoenix 914-6GT Feb 3 2009, 12:09 AM

Posted by: Gint Feb 3 2009, 08:04 AM
Hi Sher! Shar says hi too.
Posted by: scotty b Feb 3 2009, 07:34 PM
Steve let the clear set up completely, take a NEW unused razor blade, wrap ONE layer of masking tape over each end. hold the razor 90* to the panel, and drag it over top of the run(s) This will scrape the run down to a point. The tape will keep it from going all the way to the good clear surrounding it. As soon as it starts to scrape you can watch the run dissapear as the scraping will become wider with each pass. Once the run is scraped as far as you can easily get it, take a small hard block ( piece of solid wood works well ) cut it down to a small square, and start wet sanding what it left of the run.Constantly wipe it dry, re wet it and check it to see how it looks. You may very well and up breaking through the clear, but that can be wet sanded out, re-cleared and blended in without harming the base. If you aren;t trying to het it A+ perfect you can buff it soon after wet sanding and may have a lkittle bit of a distortion oin the clear, but most will never notice it.
IF there is a ball at the end of the run it gets a bit trickier. If that is the case begin scraping only the ball until it looks like it is even with the run, then proceed. If there is a ball it is now VERY important to let it dry completely, the ball if not dry will tear away from the paint creating a bigger problem.
Posted by: Bleyseng Feb 3 2009, 09:09 PM
Well, here it goes - my first post as a new member of the club!
I'm excited that my first post can be about how proud I am of my husband. You've done a terrific job on this project, Steve. It's been a big undertaking, but you've done well. I love seeing how excited you get with each coat of paint! Keep up the good work! We're going to have some fabulous drives in your car this summer
Sherida, I wanna see all 4 of you in that 9146 this summer!
Paint looks good Steve!!! Guess I get to see it in person soon..

Posted by: Todd Enlund Feb 4 2009, 12:27 AM
Steve let the clear set up completely, take a NEW unused razor blade, wrap ONE layer of masking tape over each end. hold the razor 90* to the panel, and drag it over top of the run(s).
Neat trick. Thanks for sharing!
Posted by: pete-stevers Feb 4 2009, 08:18 PM
what grit should i be blocking this clear down with if i am going to re-clear the whole shooting match, this time i am going to use a gun witha bigger orfice.
Posted by: scotty b Feb 5 2009, 06:45 PM
what grit should i be blocking this clear down with if i am going to re-clear the whole shooting match, this time i am going to use a gun witha bigger orfice.
Wash the car with plain water to remove any grit that is on it, wet sand it with 600, squeegeeing it while you sand to make certain you have a good coat of scratches for the clear to bite to. As you progress along the car, keep washing the prvious areas off to help with the cleanup, this will prevent sanding smudge from drying on the car and being a PITA to clean off later.
What size tip are you using and what size do you plan to go up to? Remember the larger the tip the faster the clear comes out, the faster it comes out the easier it is to run. You will need to speed up your motions and or turn in your trigger adjustment. For me I use a 1.4 for collision and quickies and a 1.3 for the nicer jobs. The 1.3 atomizes ALOT better and lays out slicker. The 1.4 leaves more peel which is actually helpful on a collision job.
Posted by: gothspeed Apr 15 2010, 02:57 PM
This thread is very inspirational ...... !!!
Posted by: Root_Werks Apr 15 2010, 05:04 PM
Oh hey, here's that old thread!
Wonder if Steve will chime in with some current pics of his car?
I think this was the 3rd??? AA flare set I installed. Very well done flares.
Posted by: charliew Apr 17 2010, 05:45 PM
Dan I think the way you installed the flares was a very good process and Steve also did a very good job on the body work and paint. I think one of the hardest things to do is waiting between coats and not rushing things. Urethanes are hard to work with when you don't have a good paint area. I think it takes 20-30% more material to get the job done without a paint booth. I have decided that if it is not a overall paint job I will be mostly using a panel clear. It dries much faster and that keeps the lint and bugs out a lot better. Darker colors hide trash a lot better but the panels will show waves a lot easier. As paints get more expensive paint booths will seem cheaper.
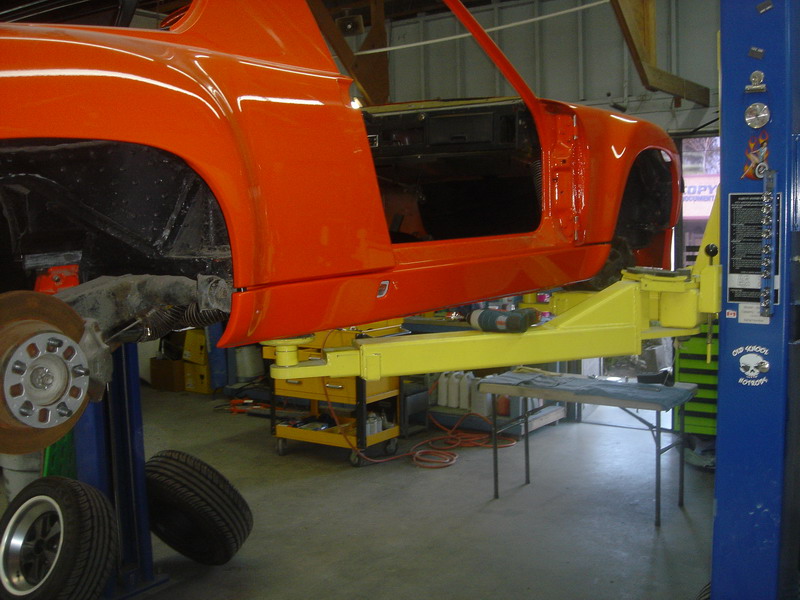
Posted by: pete-stevers Dec 6 2010, 01:57 PM
i just thought it would be good to show a picture of the car completed, a couple of years late but here it is
(i was just referencing this thread and noticed it didnt have a decent pic of thecar completed...that is the reason for the resurection.)
Attached image(s)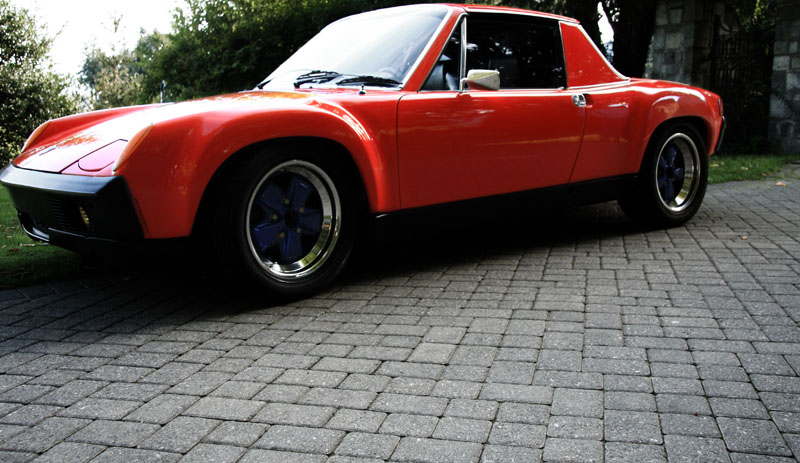
Posted by: Andyrew Dec 6 2010, 02:12 PM
Pic?
Posted by: SirAndy Dec 6 2010, 02:14 PM
Pic?
Blends in nicely with the background ...
Posted by: Root_Werks Dec 6 2010, 02:19 PM
You're lucky you got me when you did Steve. I'm not allowed to touch other peoples cars anymore.
Posted by: pete-stevers Dec 6 2010, 02:40 PM
..i think i could do it by myself next time!!!
but you have enuf projects to keep you busy!!! never mind the rest of us needy folks!!
Posted by: Root_Werks Dec 6 2010, 04:43 PM
Steve, that really turned out nice!
Posted by: bcheney Dec 6 2010, 05:27 PM
What a beautiful car. It looks fantastic! The Orange and Blue is very interesting...especially for me as I am a University of Florida alumnus!
Posted by: Bleyseng Dec 7 2010, 09:43 AM
Wow, looks great Steve.
Posted by: skota Dec 7 2010, 12:54 PM
Awesome work, being new here I was hopeing to see how the wide fenders where being installed.
has my wheels turning. 
Posted by: gothspeed Dec 16 2010, 08:53 PM
Looks great thanks for posting!!
Posted by: gothspeed Jan 26 2011, 09:45 AM
How did you get the bottoms to fit? I've seen that as an issue on a few other installation threads with the angle of the steel on the car.
How did you get the bottoms to fit? I've seen that as an issue on a few other installation threads with the angle of the steel on the car.
The AA flares have a 90 corner while the 914 stock fenders have that small double angle. When I cut for the bottom parts I grab the angle and flatten it out to match the bottom line of the factor fender which then matches up with the bottom of the flare.
Do you have any photos of this?
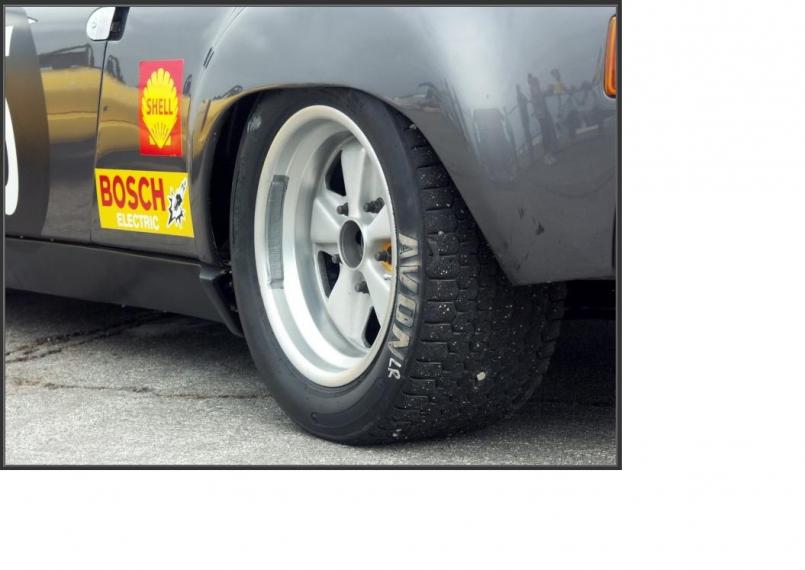
Does anyone have any 'finished' pics of these flares and that lower double angle junction?
EDIT: I found a few representative examples of that junction. Some of which show the bevel being followed through the flare itself. It would be nice to see how it was done on the 916. Some pics of that would be nice.
Does anyone live in Atlanta Georgia, who has access to the 916
?
Posted by: mepstein Jan 26 2011, 03:48 PM
How did you get the bottoms to fit? I've seen that as an issue on a few other installation threads with the angle of the steel on the car.
How did you get the bottoms to fit? I've seen that as an issue on a few other installation threads with the angle of the steel on the car.
The AA flares have a 90 corner while the 914 stock fenders have that small double angle. When I cut for the bottom parts I grab the angle and flatten it out to match the bottom line of the factor fender which then matches up with the bottom of the flare.
Do you have any photos of this?
Does anyone have any 'finished' pics of these flares and that lower double angle junction?
EDIT: I found a few representative examples of that junction. Though it would be nice to see how it was done on the 916. Some pics of that would be nice.
Does anyone live in Atlanta Georgia, who has access to the 916
?George has 2 factory flared cars
Posted by: gothspeed Jan 26 2011, 03:53 PM
I wonder if george would be so kind as to post some pics of that bottom detail ............ I have looked through as many 916 pics as I could find on the web and none show a definitive example of this junction.
Any light anyone can shed on this junction would be very appreciated !!
Posted by: Root_Werks Jan 26 2011, 05:00 PM
What I use to do:
Attached image(s)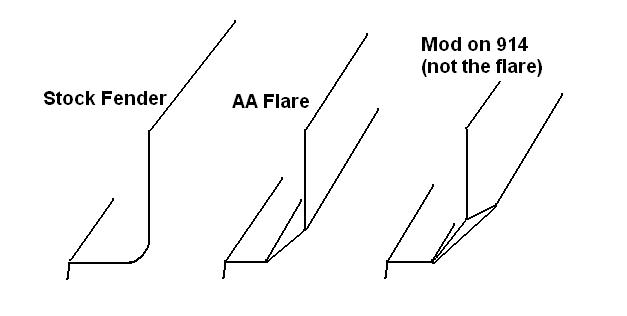
Posted by: roadster fan Jan 30 2011, 02:00 PM
Hey Dan are you saying that you would metal finish the car body to that shape to match the AA Flare?
Jim
Posted by: gothspeed Jan 30 2011, 02:23 PM
What I use to do:
I did a search for 'rockers' and found a lot of cool pics and ideas as to how to finish that flare/rocker area. The lower body bevel to flare junction did not seem so straight forward at first, but after seeing some of the pics, there was indeed quite a few ways to address that area.
A few guys even brought out the rocker to match the body and hence the flare lines. It looks very clean and complete that way, so that is what I am gonna do with mine. Here are some of the pics from those other threads that I found very appealing.
Attached image(s)
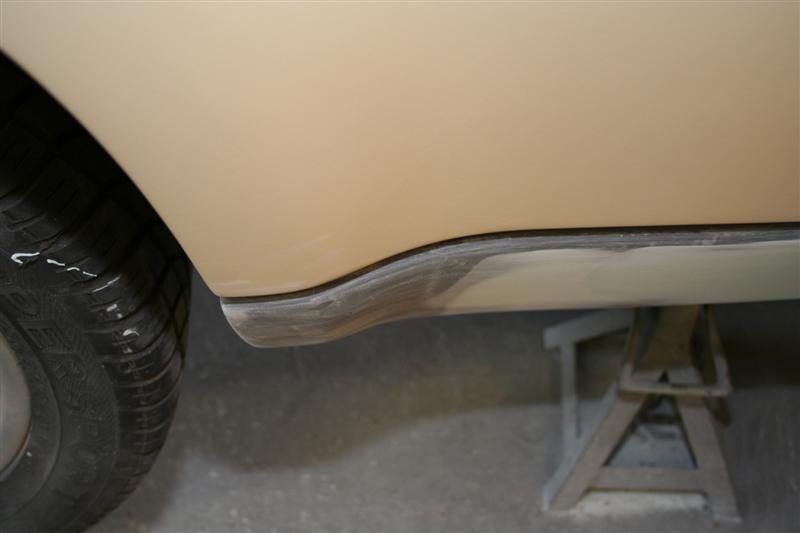
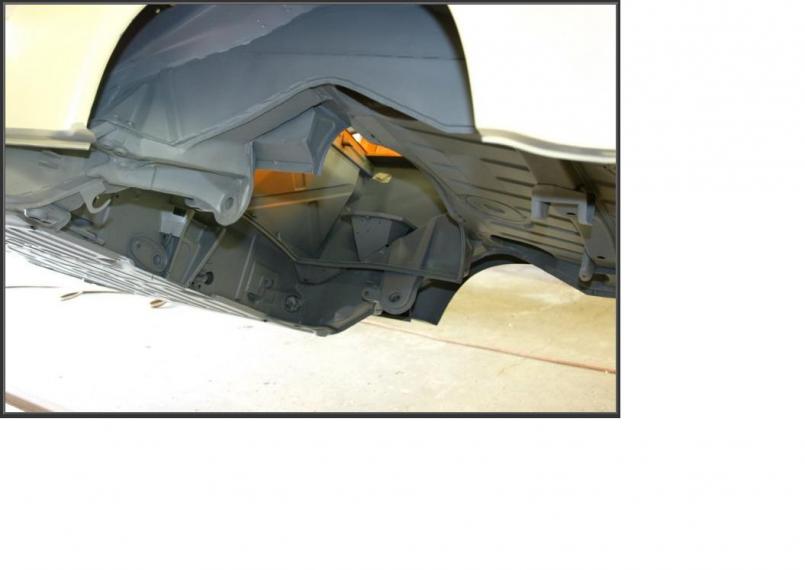
Posted by: sixnotfour Jan 30 2011, 04:34 PM
Armando ,chose to carry the tapered edge along the flare
Attached image(s)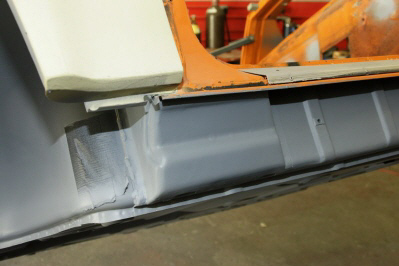
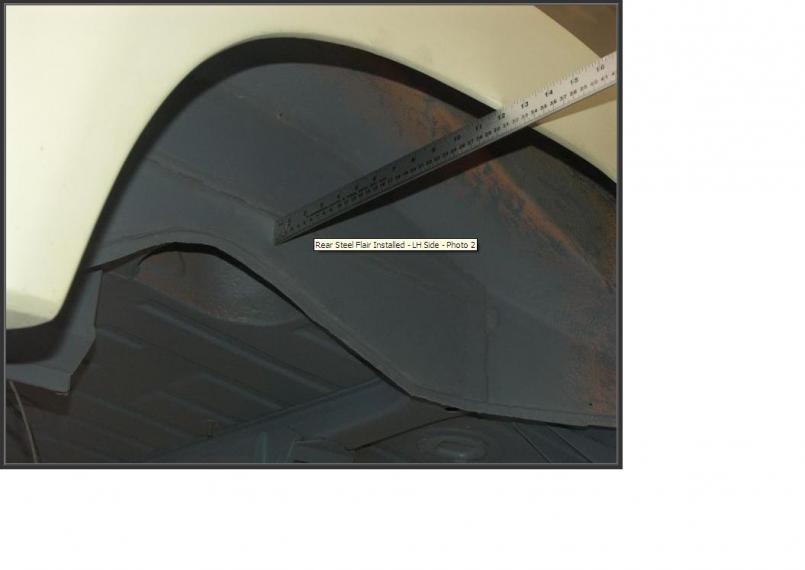
Posted by: sixnotfour Jan 30 2011, 04:44 PM
This how I did mine , this not my car though.
flat across the wheel opening tapering to the angled fender panel.
see were the black spacers are looks right.
Attached image(s)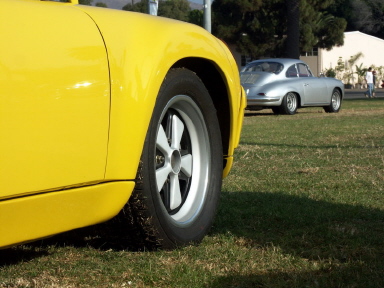
Posted by: Root_Werks Jan 30 2011, 06:16 PM
Hey Dan are you saying that you would metal finish the car body to that shape to match the AA Flare?
Jim
Yup, mostly because I'm not a welder or autobody person by profesion. So I opt for the most direct method of making the two pieces match up as best as possible. It's really, really hard to tell there is a transition from the fender to the flare. Especially after you in stall the rockers.
I'm also looking at some of the pictures posted by other members, very nice finish work. Not something I would have the skills to do.
Posted by: kfish914 Jan 30 2011, 07:39 PM
I love this thread... has any one installed the AA steel flares from the group buy??
I would like to see pictures of how they look and here any extra tips besides this thread on the install.
Posted by: gothspeed Jan 31 2011, 01:29 PM
I love this thread... has any one installed the AA steel flares from the group buy??
I would like to see pictures of how they look and here any extra tips besides this thread on the install.
Yeah, I got my flares from the goup buy!! So far I think the best way to do that transition, is to continue the bevel in the same width and angle into the flare ....... then flat all the way to where the original fender was mounted ....... this will allow the rocker to body gap to remain 'constant' and also be able to use the same plastic spacer ....... this will give it some chance of looking like a factory job.
That yellow one above has nice rockers!! Though the 'body to rocker' gap diminishes as it goes into the flare. I think keeping the gap 'constant' will give it a much better look.
Posted by: mepstein Jan 31 2011, 01:44 PM
Scotty B installed my flares last April. He fits and finishes the flare to the body and then will fit and finish the rocker cover to the car.
Attached image(s)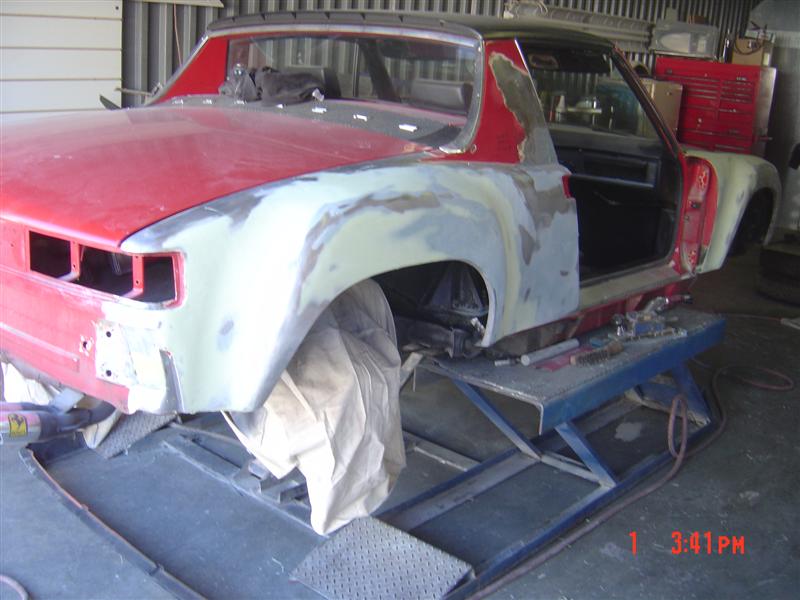
Posted by: gothspeed Jan 31 2011, 02:23 PM
Scotty B installed my flares last April. He fits and finishes the flare to the body and then will fit and finish the rocker cover to the car.
That is the way to do it!!! I would not trust a fiberglass rocker to determine proper location of flares (assuming fiberglass is what you will be using). I have seen many variations in fiberglass parts, not to mention most fiberglass parts need touch up to get them 'just right' in either case.
Powered by Invision Power Board (http://www.invisionboard.com)
© Invision Power Services (http://www.invisionpower.com)