Printable Version of Topic
Click here to view this topic in its original format
914World.com _ 914World Garage _ Rear Fender
Posted by: watsonrx13 Feb 11 2004, 06:17 PM
I've got the burnt 914 that needs the left rear fender removed and replaced. I have a parts car that has a good fender. I also want to replace the sail panel. How should I remove the fender? However you recommend, I'll use the exact same method for removing the parts car item. Once I remove the fender, I'll need to replace the door striker and some inner engine compartment sheet metal. Please be very specific and provide pics if possible. Thanks again for all of your help.
Attached image(s)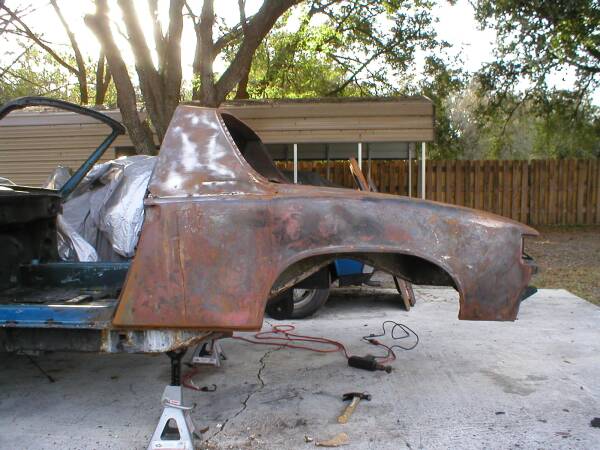
Posted by: Racer Chris Feb 11 2004, 07:38 PM
You really need to drill out all the spot welds. It takes a couple of hours, but is well worth the effort. On the parts car you can use a regular drill bit if you want, but on the car being repaired you don't want to drill through the inner layer. Use a special spot weld drill or a Black and Decker Bullet drill. Spot weld drills are available at auto paint supply stores.
A good way to help find all the spot welds is to sand the paint off the area. There will be small dimples where the paint doesn't come off. Those are the spot welds. There are a lot of them on the leading edge of the targa panel.
Posted by: watsonrx13 Feb 11 2004, 09:04 PM
Is the fender and the targa panel a single piece?
Are there spot welds where the outer targa panel meets the inner targa panel meet?
Can I use my regular 3/8" hand drill?
Thanks for the info.
Posted by: kafermeister Feb 11 2004, 09:16 PM
Yes. The outer targa panel, fender are one piece. In fact, the door jam should be kept with the quarter to make things simpler. The hard part is the fresh air pickup (vent?) in the door jam.
Send me a PM to remind me and I will take some pics of rear quarters tomorow that have been removed via the spot welds so you can see what's involved.
Rick
Posted by: Racer Chris Feb 12 2004, 12:22 AM
IIRC, the factory used lead in the area of the air exit tube on the door jamb to smooth things out.
IIRC, the air tube is brazed to the door jamb.
Posted by: John Kelly Feb 12 2004, 08:02 AM
Hi Rob,
Is the existing quarter panel unrepairable? In the picture, it looks like one to be straightened maybe?
John www.ghiaspecialties.com
Posted by: kafermeister Feb 12 2004, 08:13 AM
IIRC, the air tube is brazed to the door jamb.
I believe you're correct.
Posted by: watsonrx13 Feb 12 2004, 02:54 PM
John,
The panel is repairable, but there is a lot of rust underneath. Also, I need to remove to repair the inner engine compartment side wall and behind the striker is very rusty. The panel I'm replacing it with is almost perfect. Maybe after I remove it, John, you can give me some pointers on straightening it out.
kafermeister,
Whenever you can post the pics will be great, I'm planning to remove the bent one this weekend.
Posted by: kafermeister Feb 12 2004, 05:06 PM
Okee dokee. This is a fender that another listmember sent to me for the Kafermeister Special. I've marked some of the pics with red lines in areas where I'm not too sure where the original Karmann fender stops and the rest of the tub starts.
The following images are 237k or less in size. I have full size images that arround 1mb each. I can get those to anyone who wants them. I can also take more detailed pictures of specific things if it would help.
Rick
Pic #1
Attached thumbnail(s)
Posted by: kafermeister Feb 12 2004, 05:07 PM
Pic #2
Attached thumbnail(s)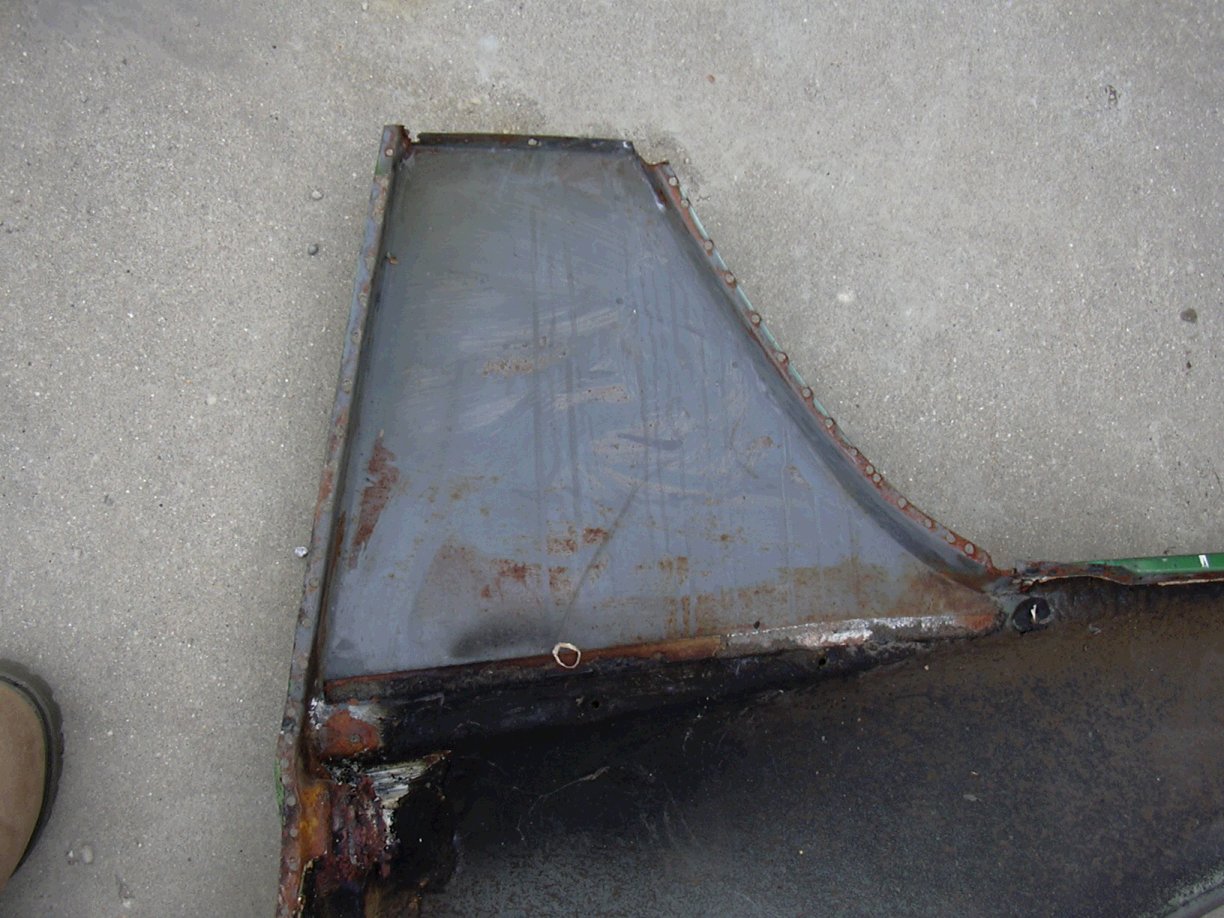
Posted by: kafermeister Feb 12 2004, 05:08 PM
Pic #3 of 15
Attached thumbnail(s)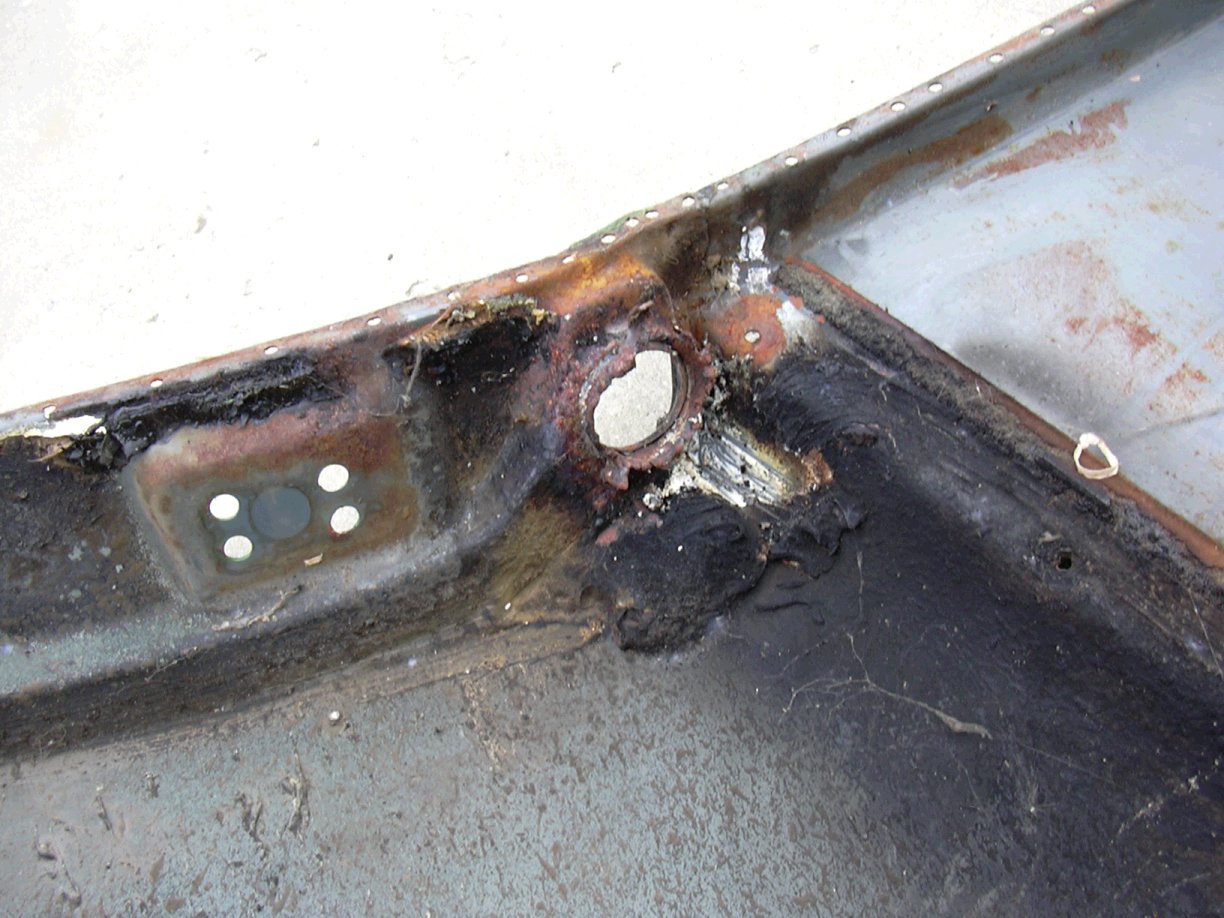
Posted by: kafermeister Feb 12 2004, 05:09 PM
Pic #4 of 15
Attached thumbnail(s)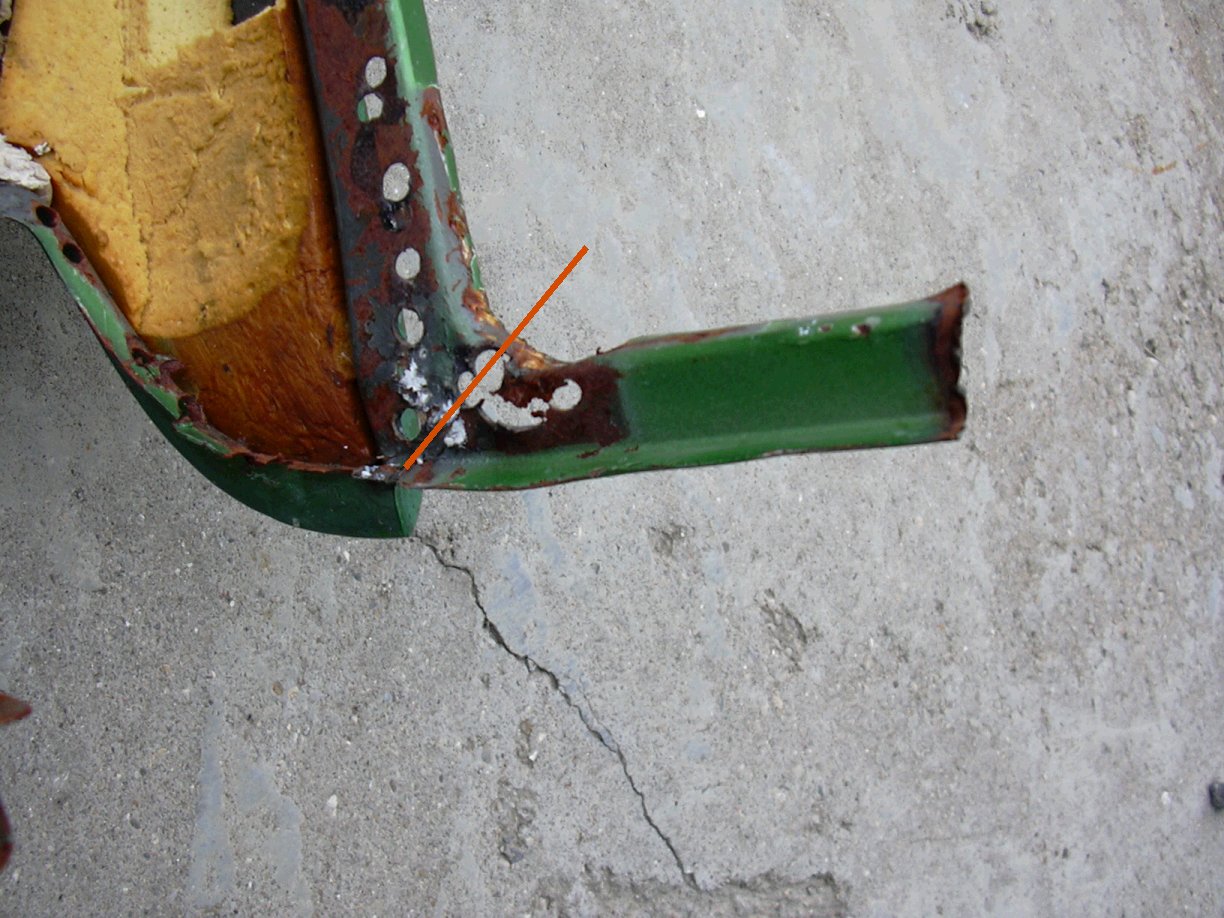
Posted by: kafermeister Feb 12 2004, 05:09 PM
Pic #5 of 15
Attached thumbnail(s)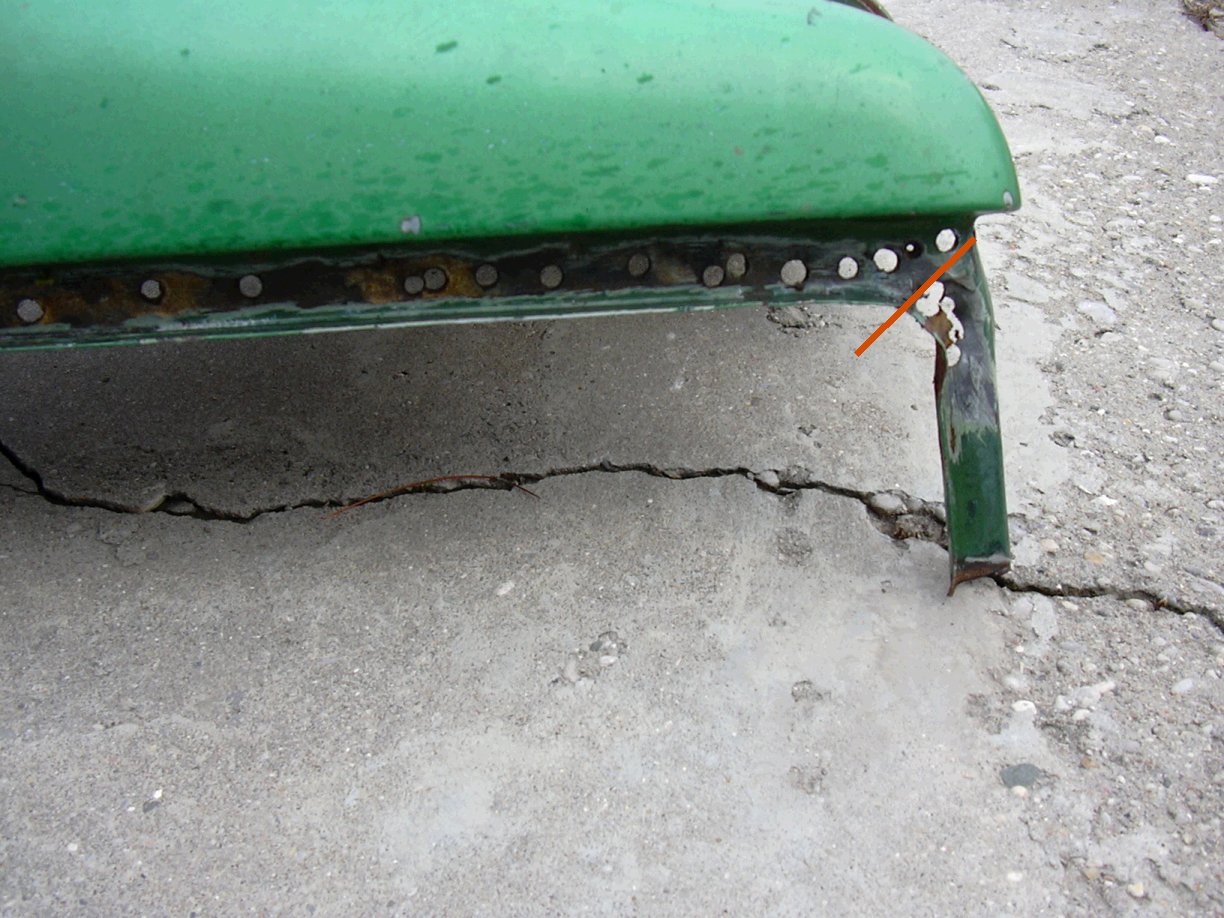
Posted by: kafermeister Feb 12 2004, 05:10 PM
Pic #6 of 15
Attached thumbnail(s)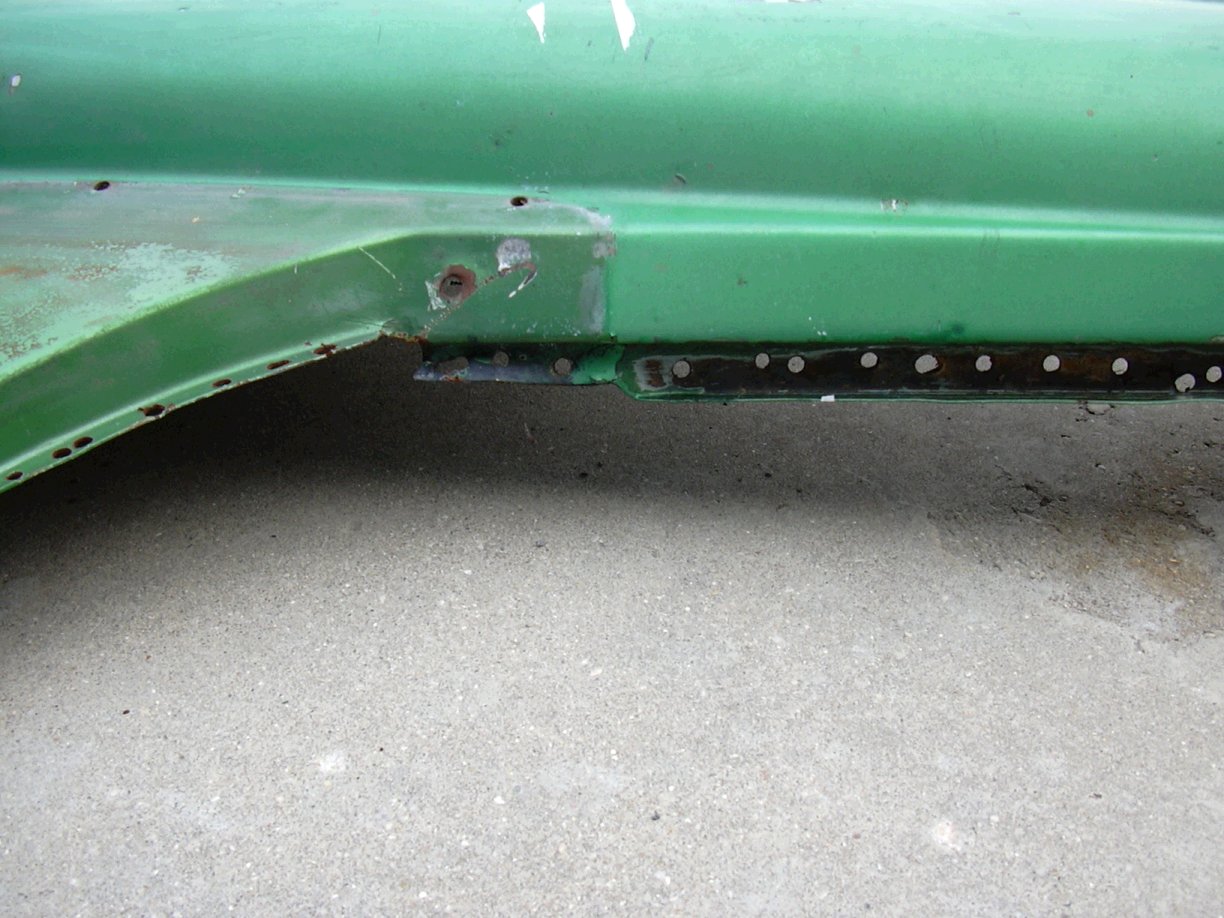
Posted by: kafermeister Feb 12 2004, 05:10 PM
Pic #7 of 15
Attached thumbnail(s)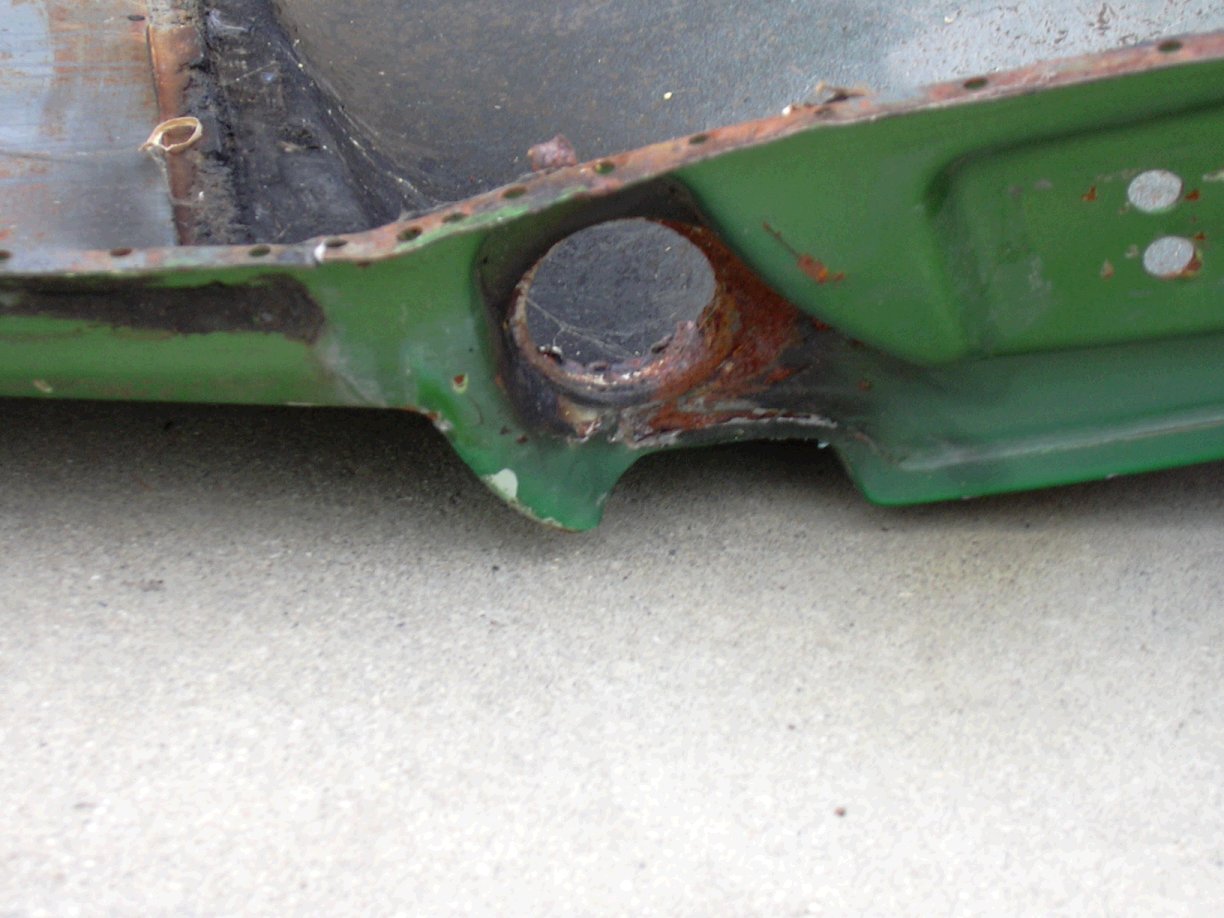
Posted by: kafermeister Feb 12 2004, 05:11 PM
Pic #8 of 15
Attached thumbnail(s)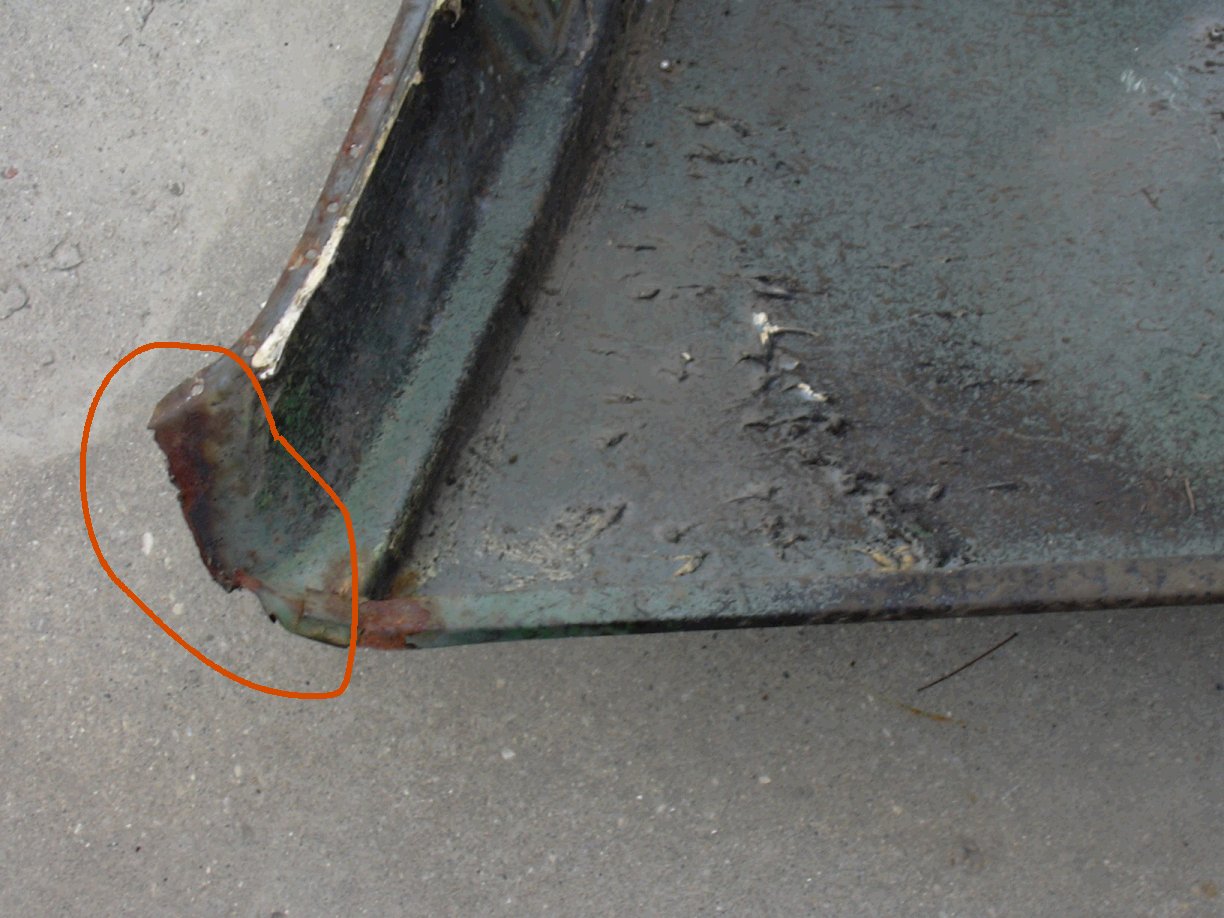
Posted by: kafermeister Feb 12 2004, 05:11 PM
Pic #9 of 15
Attached thumbnail(s)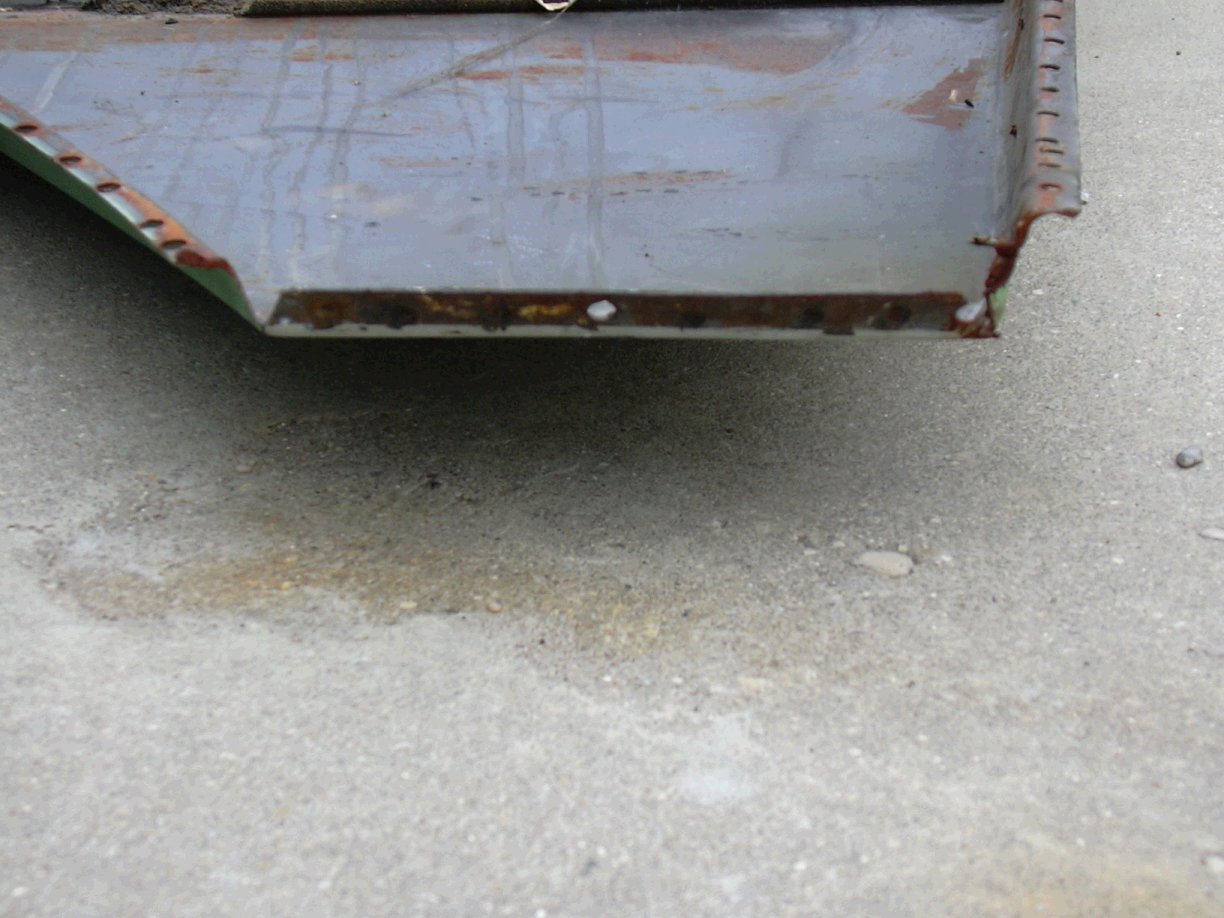
Posted by: kafermeister Feb 12 2004, 05:12 PM
Pic #10 of 15
Attached thumbnail(s)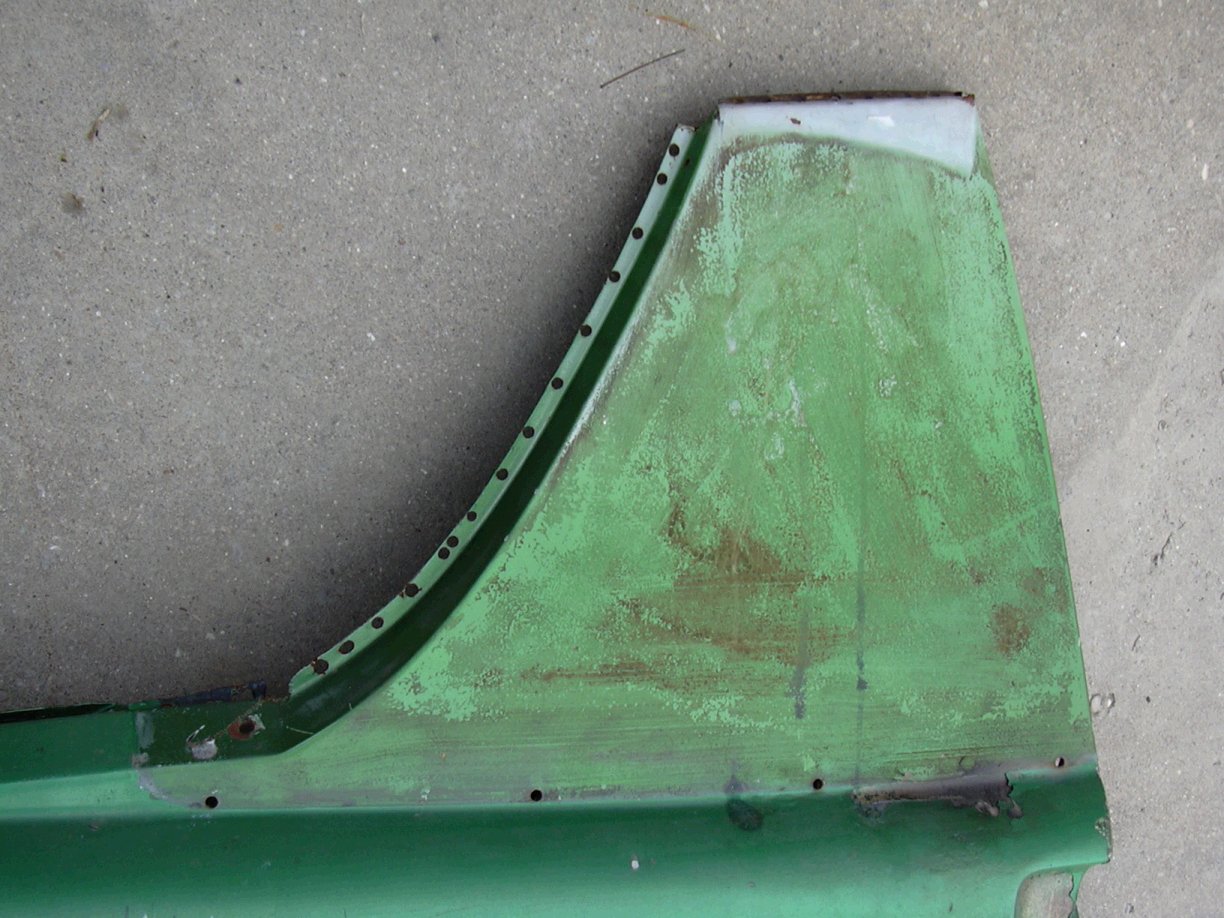
Posted by: kafermeister Feb 12 2004, 05:13 PM
Pic #11 of 15
Attached thumbnail(s)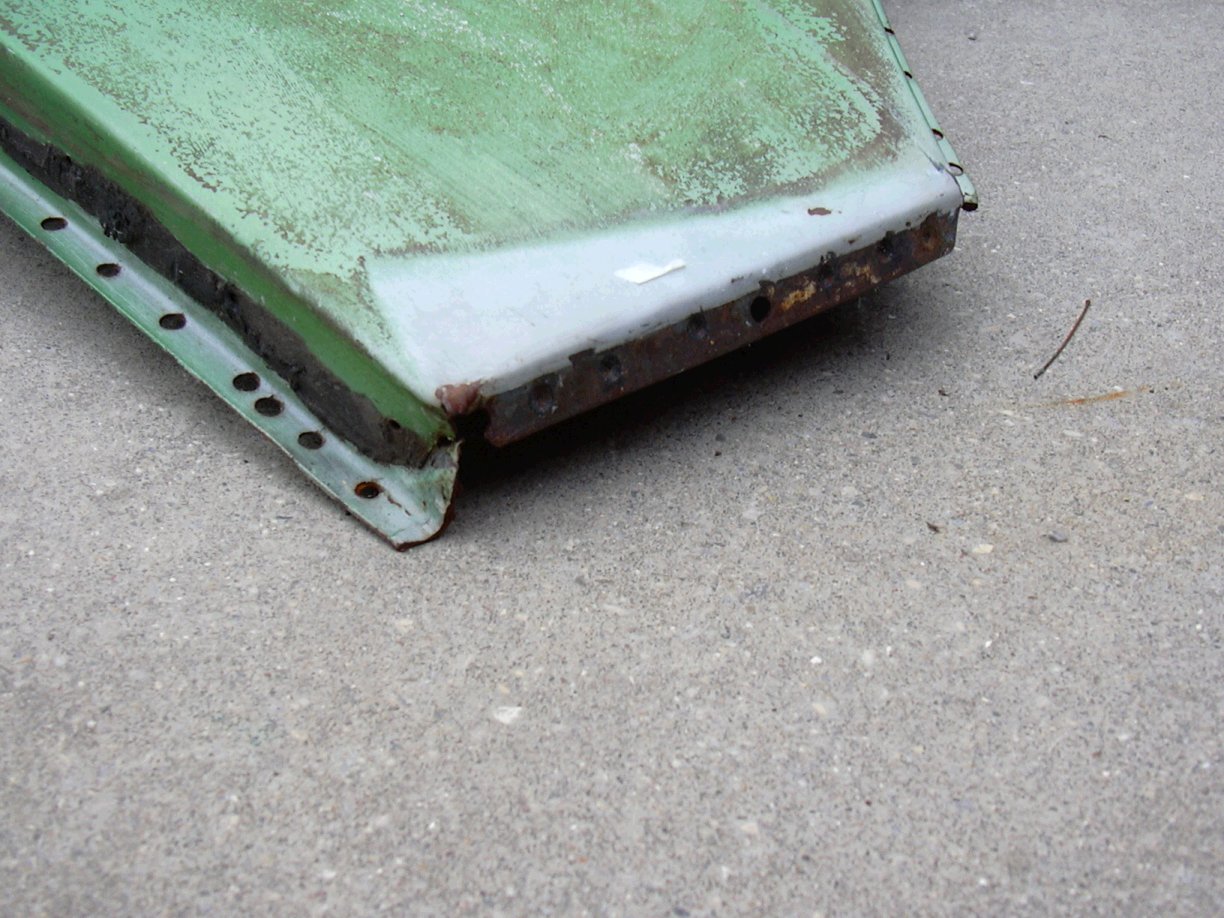
Posted by: kafermeister Feb 12 2004, 05:13 PM
Pic #12 of 15
Attached thumbnail(s)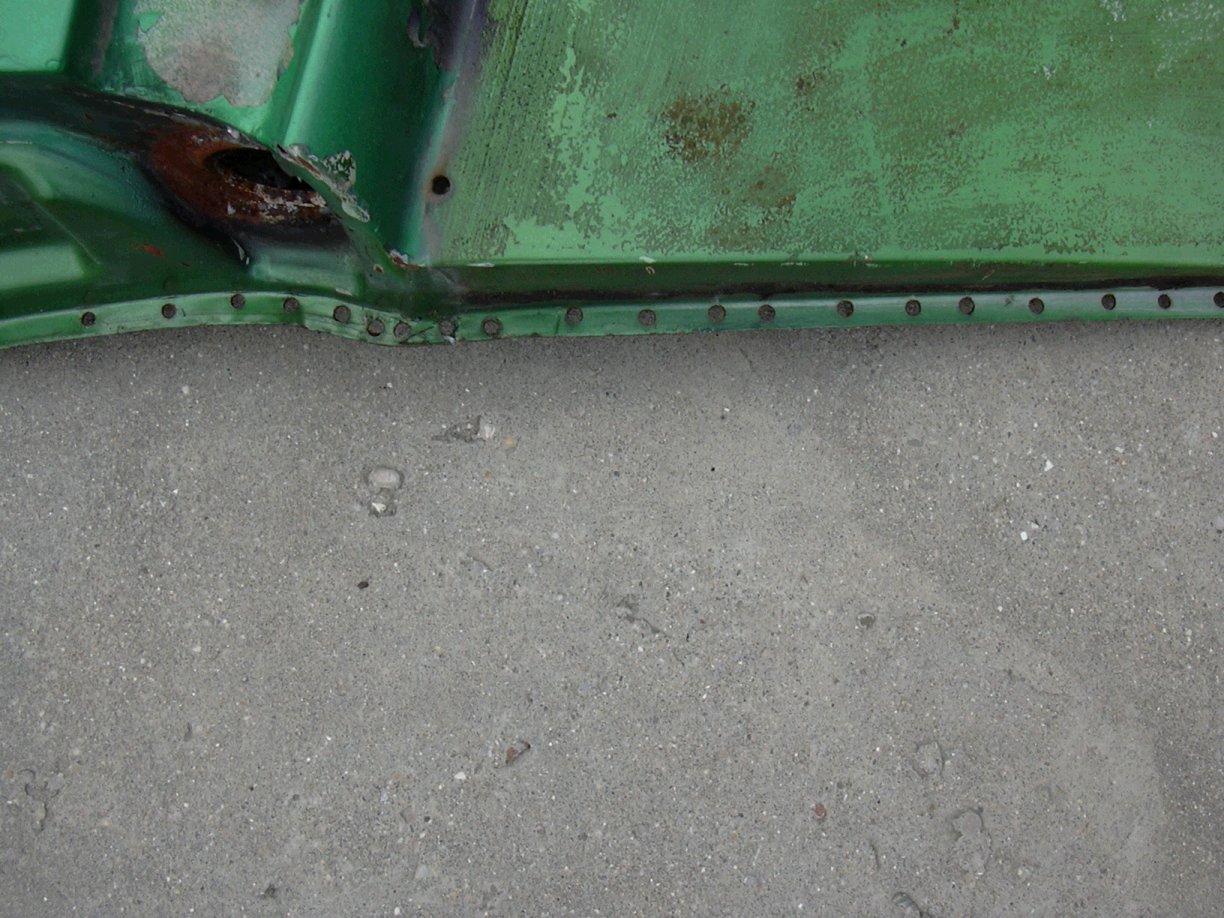
Posted by: kafermeister Feb 12 2004, 05:14 PM
Pic #13 of 15
Attached thumbnail(s)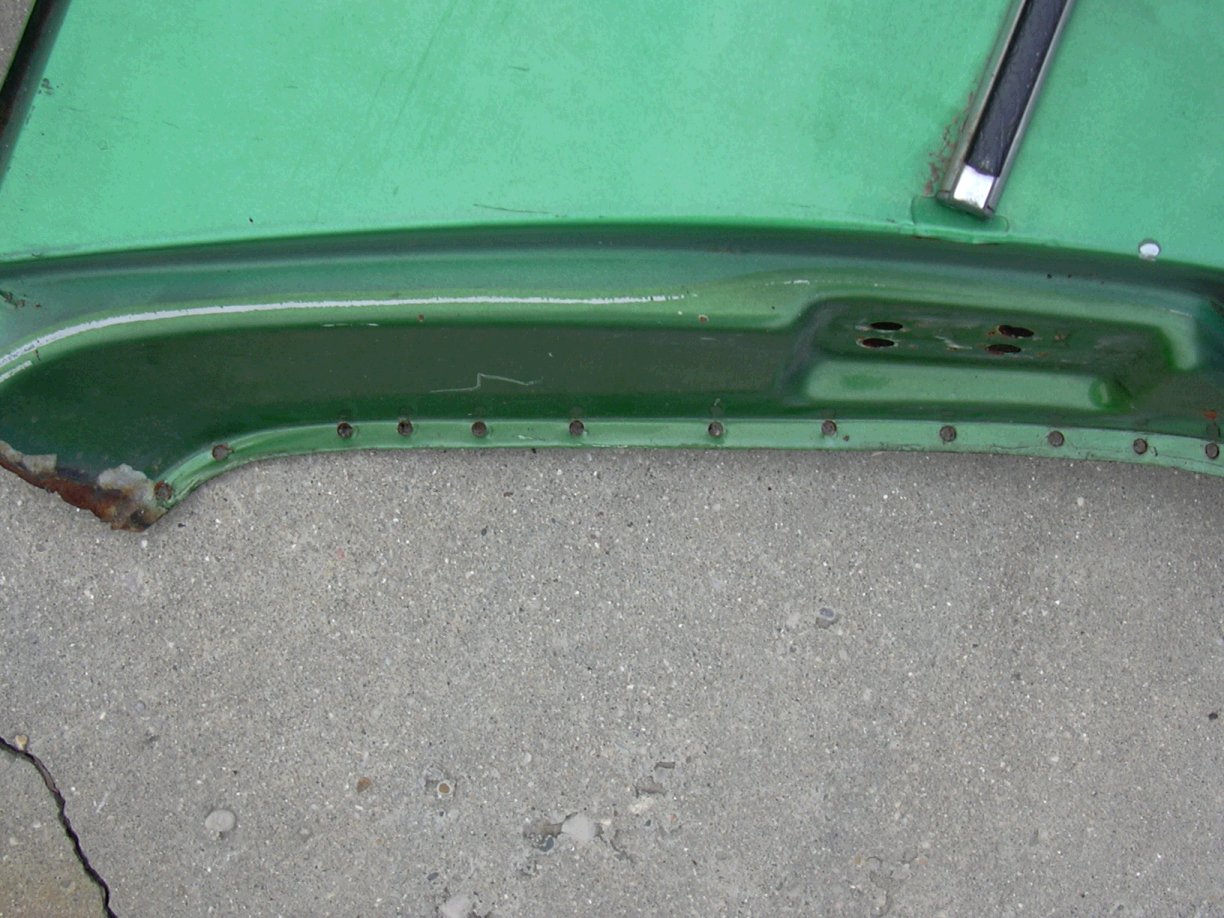
Posted by: kafermeister Feb 12 2004, 05:14 PM
Pic #14 of 15
Attached thumbnail(s)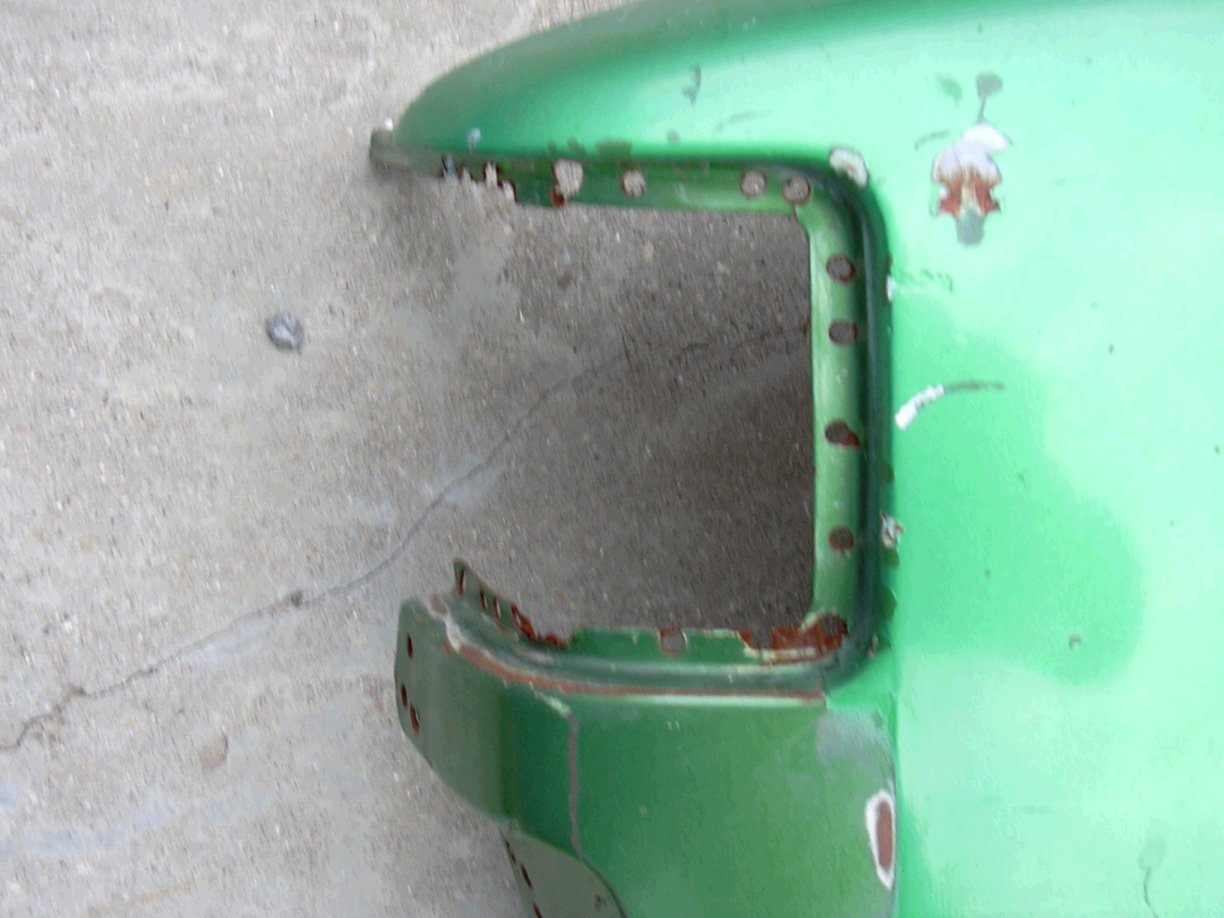
Posted by: kafermeister Feb 12 2004, 05:15 PM
Pic #15 of 15
Attached thumbnail(s)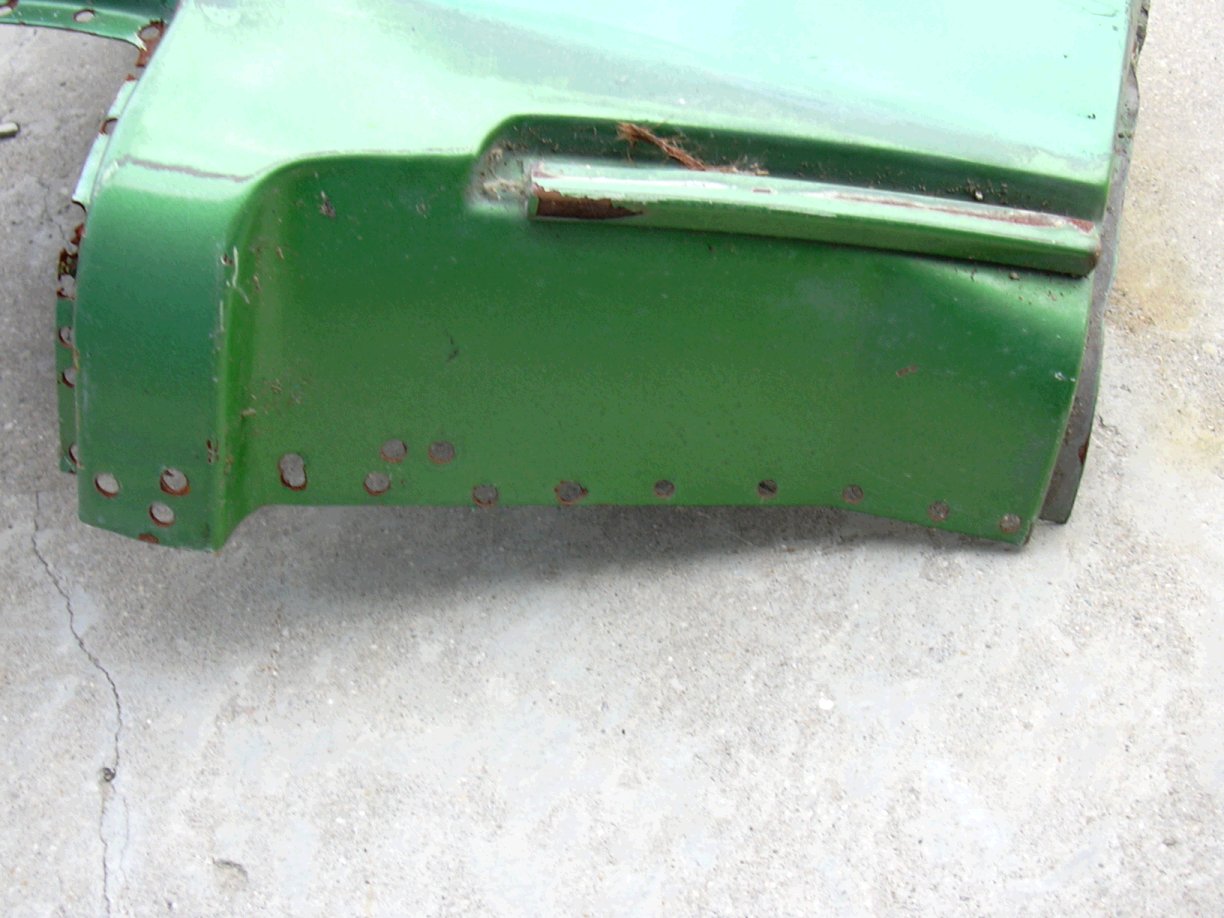
Posted by: watsonrx13 Feb 12 2004, 05:19 PM
Rick, thanks for the pics, it will definately help me this weekend. I'll take plenty of pics myself and post to this when I'm finished. I noticed that the panel where the door striker is, is part of the rear fender, I wasn't aware of that piece. Thanks again.
Posted by: kafermeister Feb 12 2004, 05:28 PM
Your welcome. I will send you a PM with links to the original images.
The part where the striker sits was originally a seperate piece. It's just simpler to keep it with the quarter. Saves you from having to guess how deep to set the quarter over it. BTW, depending on which year car you have, there may be a brace that binds the striker/nut-plate thingie to the tub itself.
Posted by: Gint Feb 12 2004, 06:53 PM
Thanks for posting those pics! I might try to remove the fender on the parts car (tub). These will come in handy.
Posted by: watsonrx13 Feb 12 2004, 08:06 PM
Hey Gint, between your 'rustoration' and my 'resurrection' and the complete support of this web site, we're going to prove that anyone, with the time and the drive, can restore these cars.
Posted by: ThinAir914 Feb 12 2004, 08:46 PM
Exactly what is it that is circled in picture #8?
Posted by: Joe Ricard Feb 12 2004, 08:51 PM
wow
Posted by: Joe Ricard Feb 12 2004, 08:53 PM
Well that didn't work.
Posted by: seanery Feb 12 2004, 08:58 PM
now it does! 
Posted by: kafermeister Feb 12 2004, 09:17 PM
Picture #8 is showing an area where you may choose to leave more metal. There is a natural seam in that general area. You may want to find it and determine how to split it based on your particular needs.
Rick
Posted by: watsonrx13 Feb 16 2004, 04:01 PM
Well, the intent this long 3 day weekend was to remove the left rear fender. Unfortunately I wasn't able to find the Black and Decker Bullet drill bit. I've checked NAPA, Sears, Tool Wholesale (local company) and the locak auto paint store. Any recommendations to where I can check next? I don't want to purchase the 'hole-saw' type, evidently they break easily. Once I get the bullet bit, I'll show the removal of the fender.
BTW, it wasn't a lost Porsche weekend. I worked on the V8 conversion project. I removed the dealer installed A/C system. This included removing the condesor, in the front trunk, the dryer, in the right fender well, the under dash fan control unit, in the passenger compartment, and all of the A/C hoses, that run from the front to the engine compartment. Here's a shot of the hoses hidden beheath the right side valance.
Attached image(s)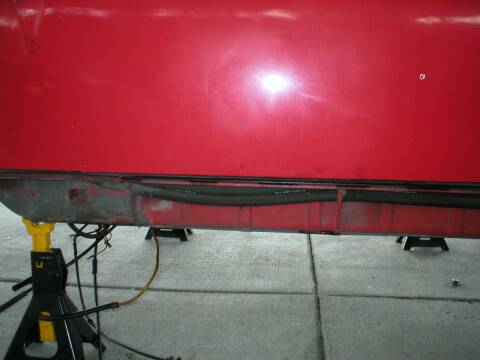
Posted by: sj914 Feb 17 2004, 03:32 AM
Looks like you got some 30 year old cheese in pic #4. 
Posted by: sj914 Feb 17 2004, 03:33 AM
What does the B&D bullet drill bit look like?
Posted by: watsonrx13 Feb 24 2004, 03:25 PM
Well, the removal of the left rear fender continues. I've drilled out all of the spot welds, using the 3/8" spot weld drill bit
(bought at http://www.eastwoodco.com for $19.99 + shipping) and a 1/4" regular drill bit (for the spot welds where the 3/8" wouldn't fit, see pics).
Here's a pic with 95% of the fender apart. It also shows where I used the 3/8" and the 1/4" drill bits.
There are 2 places that are still connected, the air tube and where the fender meets the rear tail light housing.
Attached image(s)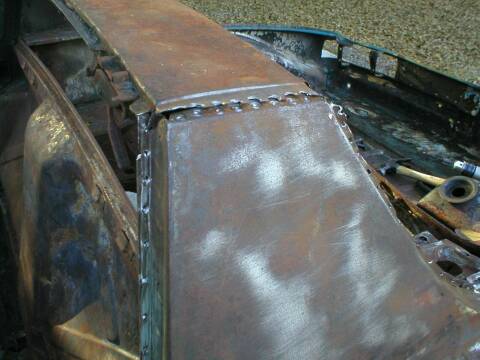
Posted by: watsonrx13 Feb 24 2004, 03:26 PM
Chris (Racer Chris) you mentioned that the air tube is brazed, how can I un-braze it?
Close up of the air-tube.
Attached image(s)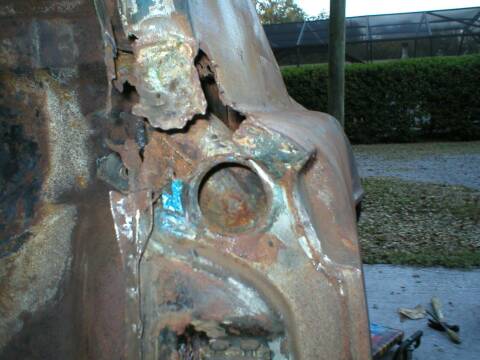
Posted by: watsonrx13 Feb 24 2004, 03:26 PM
The rear tail light housing has some previous repairs and the spot welds are hidden underneath the PO welding job.
Any recommendations for removal?
Attached image(s)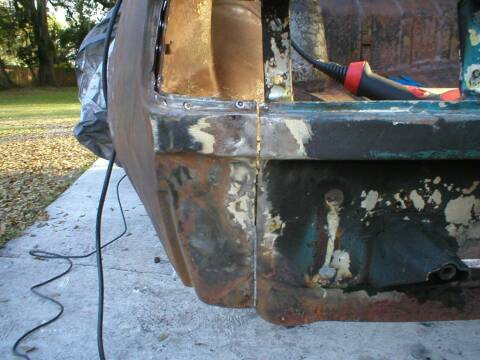
Posted by: waterboy Feb 24 2004, 03:54 PM
classic thread!! 
Posted by: kafermeister Feb 24 2004, 07:16 PM
Rob, are you removing the fender from this car for use on another tub?
Rick
Posted by: Joe Ricard Feb 24 2004, 07:26 PM
Just so we get this cleared up. any reference to PO and welding of Robs car is not me. I can't make bubble gum stick together. This would be 3 owners or 2 PO ago when the GT stiffening and floor pan weld repairs were done.
I just drove the piss out of it. 
Posted by: watsonrx13 Feb 24 2004, 09:13 PM
Thanks for clearing that up Joe, from now on I'll refer to the bad repairs as the PPO (pre-previous owner - haha).
Rick, I'm trying to remove this fender as if I will use it again, it'll be good practice when I remove the fender from the donor car. Any recommendations for 'gracefully' removing the fender from the air tube?
Also, what is the purpose of this air tube, anyway?
Posted by: Joe Ricard Feb 25 2004, 11:23 AM
I'm going out on a limb here but I think it is for the air coming into the car from the vents or heater to escape. Otherwise your ears would pop. unless the car is 30 years old and all the rubber has shrunk.
Posted by: kafermeister Feb 25 2004, 01:32 PM
Rick, I'm trying to remove this fender as if I will use it again, it'll be good practice when I remove the fender from the donor car. Any recommendations for 'gracefully' removing the fender from the air tube?
Also, what is the purpose of this air tube, anyway?
This is what I will be doing on my car when I install the rear quarters. I am going to trim all remnants of air-tube from the 'new' quarters. I will be removing all remnants of old fender from the car itself. When I put the two together, I was merely going to tac-weld the tube to the door jam.
How does this sound to you?
Posted by: watsonrx13 Feb 25 2004, 05:38 PM
Rick, are you saying that you're going to weld up the opening of the air-tube in the door jamb?
Posted by: kafermeister Feb 25 2004, 09:38 PM
I'm not sure if what I was saying came across correctly. I am not going to weld the opening shut.
I intend to remove completely the old *pieces* of the tube itself from the 'new' fender/door jam. I will actually be reusing the original tube that is currently on my car. Hopefully, the install will look original when I'm done.
..better?
Posted by: watsonrx13 Feb 26 2004, 05:29 PM
Rick, thanks for clearing that up.
Is there any problem with welding up the air-tube?
sj914, here's a pic of the 3/8" spot weld drill bit I bought from Eastwood Company:
Attached image(s)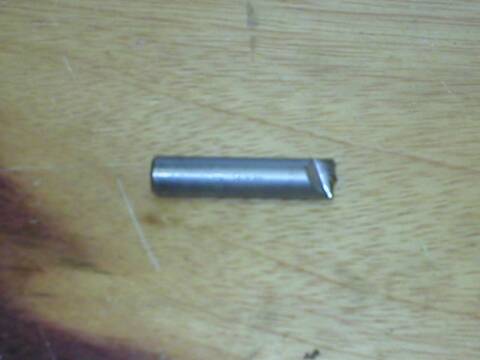
Posted by: kafermeister Feb 27 2004, 06:23 PM
Well, I suspect that welding it up would create other issues. Air pressure (think ears popping), steaming windows in humid weather, and just poor circulation in general.
...although I don't really know.
Rick
Posted by: watsonrx13 Feb 28 2004, 06:01 PM
Success.... The driver's rear fender is removed. I cut around the air-tube and cut a section from the rear to finally remove the fender.
Attached image(s)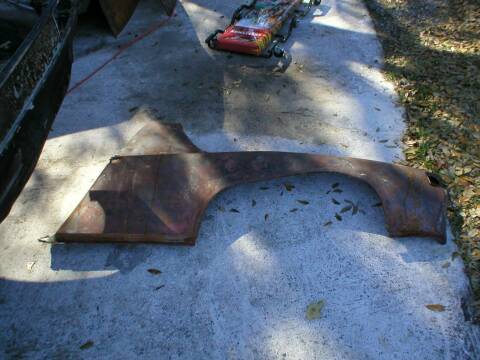
Posted by: watsonrx13 Feb 28 2004, 06:02 PM
Here's a shot after removal. There was alot of surface rust and the plate that the door stricker bolts to will need to be replaced.
Attached image(s)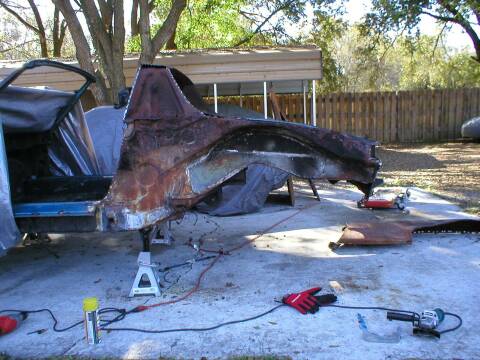
Posted by: watsonrx13 Feb 28 2004, 06:02 PM
The jack post appears to already have been replaced, but there's a lot of extra material and rust behind it. I'll remove and repair it also.
Attached image(s)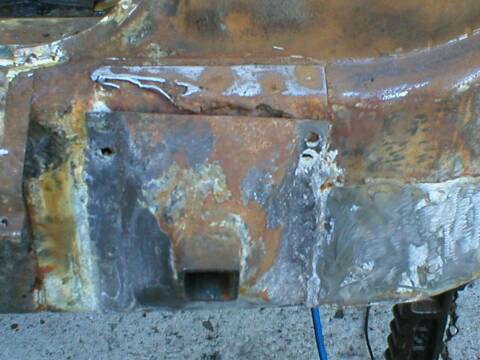
Posted by: watsonrx13 Feb 28 2004, 06:03 PM
Here's a shot of the inner targa panel after I cleaned the surface rust.
Attached image(s)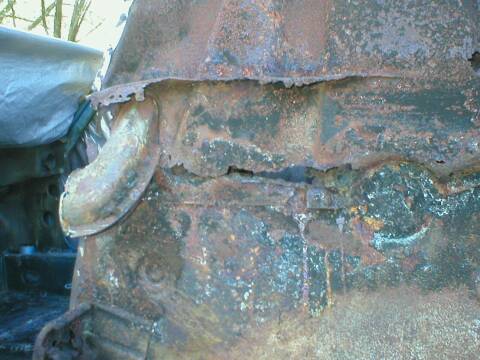
Posted by: watsonrx13 Feb 28 2004, 06:04 PM
This shows the reason I removed the fender, rust from the engine compartment. I"m planning to remove and replace with a piece from the donor car.
Attached image(s)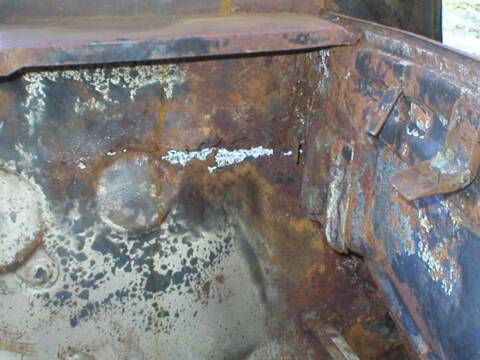
Posted by: McMark Feb 28 2004, 06:11 PM
It is abundantly clear that I have never seen a 914 with rust.
Posted by: Gint Feb 28 2004, 07:25 PM
You have a job ahead in that one Rob. 
Posted by: kafermeister Feb 29 2004, 02:02 PM
Congrats Rob. Looks like it's coming along.
Rick
Posted by: Joe Ricard Feb 29 2004, 03:52 PM
Honestly I had no idea. and to think people in California would have cut it up to a zillion pieces and never shed a tear.
People like Rob are my hero because he has the drive to fix this car.
Rob the more you uncover the worse I feel about you getting this car from me. Who woulda thunk that this is the same car. Obviously well covered till you burn off the disguise of bondo. 
Posted by: Joe Ricard Feb 29 2004, 03:57 PM
front trunk
Attached thumbnail(s)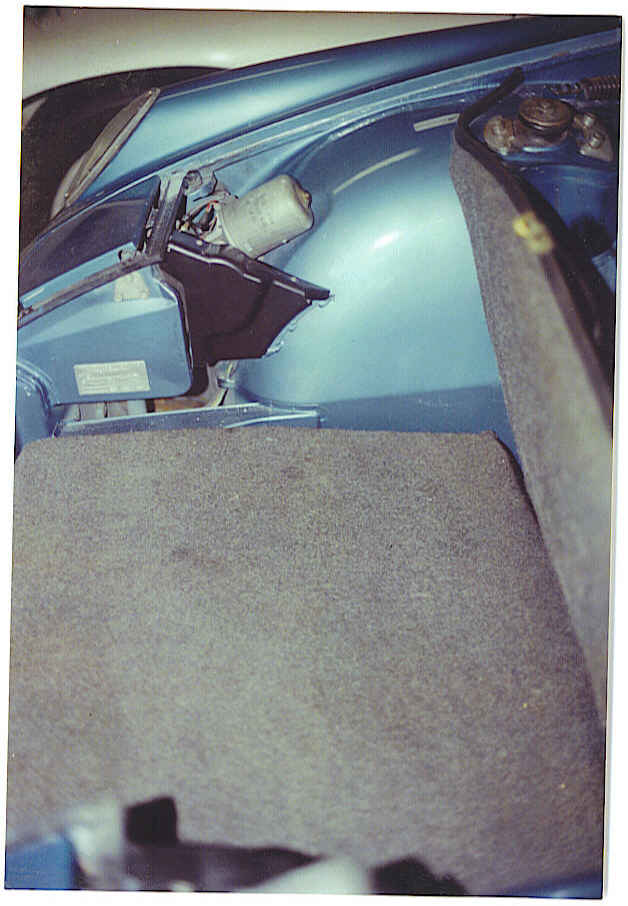
Posted by: Gint Feb 29 2004, 04:04 PM
I saw your pics in a different thread Joe. I almost bought that car before you did.
Posted by: Joe Ricard Feb 29 2004, 05:01 PM
Yea, cool deal. Would have been as long of a trip for you as it was for me. Mississippi to Cleveland OH. Left Friday afternoon return home Sunday 10 am round trip. I must be crazy. Now I am going to Everrett Wa. and driving the yellow car back.
So GINT what car did you get. Or why did you decide against the blue one?
Posted by: Gint Feb 29 2004, 05:23 PM
We're all crazy...
I didn't want the stiffening kit that was installed. And you can't really just remove those. I even had a faxed copy of the title. I was real close to buying it. I ended up buying the Sepia Brown car from MalmZ that's on my Porsche web pages. Then after all of the work I put into that car, I sold it and bought my /6
Posted by: watsonrx13 Mar 29 2004, 05:49 PM
Well, here's a shot of the first layer of primer. I've repaired the 2 large areas of rust and filled in the air-tube hole. I still have to finish welding in the bottom piece of the inner targa panel. It has taken me a month to get to this point. I'll continue this thread until I install the new fender, stay tuned.
Attached image(s)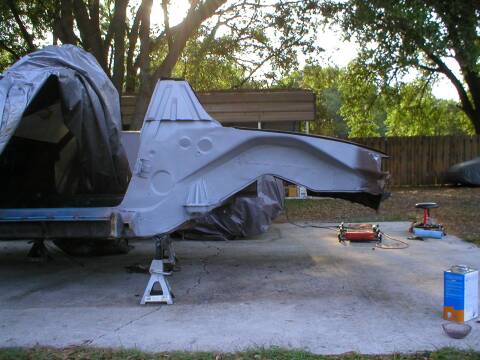
Posted by: watsonrx13 May 9 2004, 08:16 PM
Here's a shot of the rear fender trial fitted. I have to replace the longitudinals and some more welding before I can finally attached the fender.
Here's the post of what I had to do underneath the fender. http://www.914world.com/bbs2/index.php?act=ST&f=2&t=10932
Attached image(s)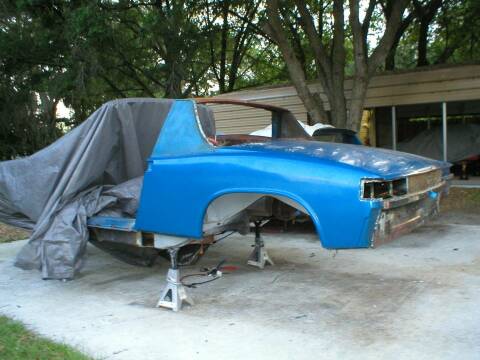
Posted by: watsonrx13 Jun 6 2004, 06:09 PM
Well, after I test fitted the rear fender and trunk, I removed both and began stripping the driver's rear fender. Here's what I found. The PO had done some repair, evidently cut out some rust, caused by the holes for the chrome strip at the bottom of the vinyl sail panel. There was about 3/8" of bondo covering this repair.
Attached image(s)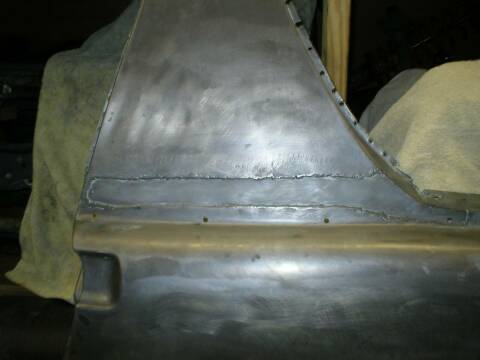
Posted by: watsonrx13 Jun 6 2004, 06:09 PM
Here's a shot the piece I tach welded in. I tach welded in 2 separate pieces, which allowed me to keep the upper and lower pieces aligned.
Attached image(s)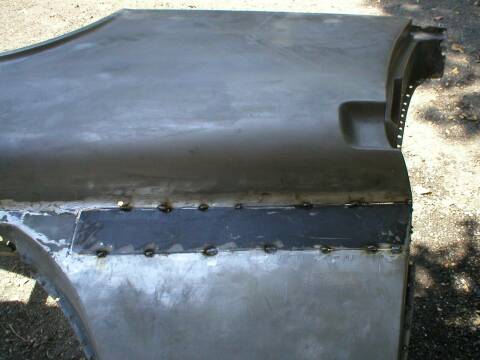
Posted by: watsonrx13 Jun 6 2004, 06:11 PM
Here's a shot of the drilled out spot-welds around the rear taillights.
Attached image(s)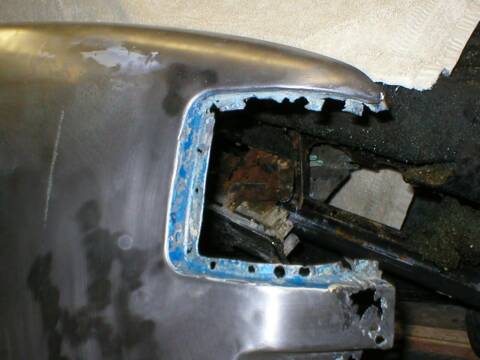
Posted by: watsonrx13 Jun 6 2004, 06:11 PM
Here's a shot of the piece I tach welded in.
Attached image(s)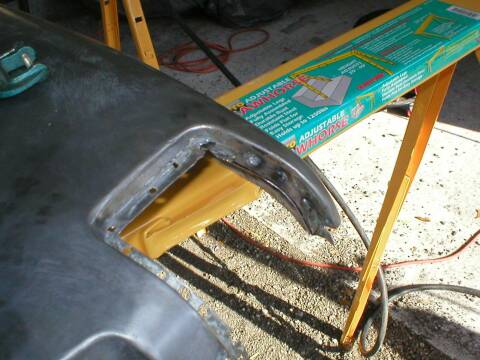
Posted by: watsonrx13 Jun 6 2004, 06:12 PM
Here's a shot of the piece underneath the taillights. This is where several spot-welds were drilled out.
Attached image(s)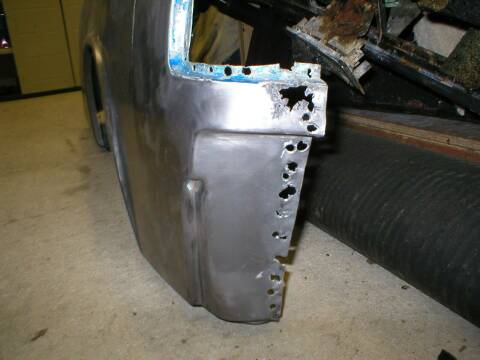
Posted by: watsonrx13 Jun 6 2004, 06:12 PM
Here's a shot of the piece I tach welded in, I have also covered it with AllMetal, a metalic body filler. You'll also see I used the AllMetal on the upper piece also. I still have some more minor repairs, along with filling in the air-tube.
Stay tuned.
Attached image(s)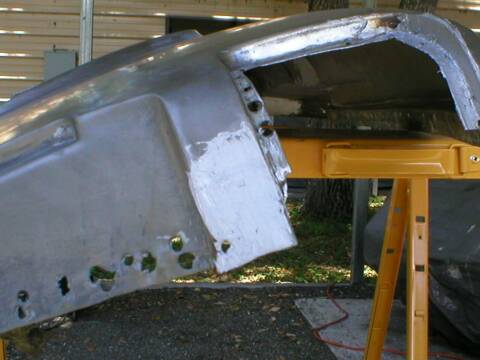
Posted by: seanery Jun 6 2004, 06:44 PM
looking good rob!
Posted by: ThinAir914 Jun 6 2004, 07:02 PM
Thanks so much for keeping us updated with such great info and wonderful pictures. For those of us who hope to someday be doing similar things to our teener, this is an invaluable resource!
Posted by: East coaster Jun 6 2004, 08:39 PM
I never heard of the "all metal" filler, but will it hold up to the welding your going to do right next to it when you weld the fender on?
Posted by: watsonrx13 Jun 8 2004, 04:00 PM
Good point EC, I haven't used the filler before I weld a panel on. I was only attempting to fill in the gaps before I weld, but based on your issue, I'll take the filler off, then weld the panel on and finally use the filler afterwards.
Thanks for the observation.
Powered by Invision Power Board (http://www.invisionboard.com)
© Invision Power Services (http://www.invisionpower.com)