Printable Version of Topic
Click here to view this topic in its original format
914World.com _ 914World Garage _ One more out of the ashes.
Posted by: heavydriver Jan 9 2009, 09:18 PM
She has been in pieces since 1993. This, however, is her year.
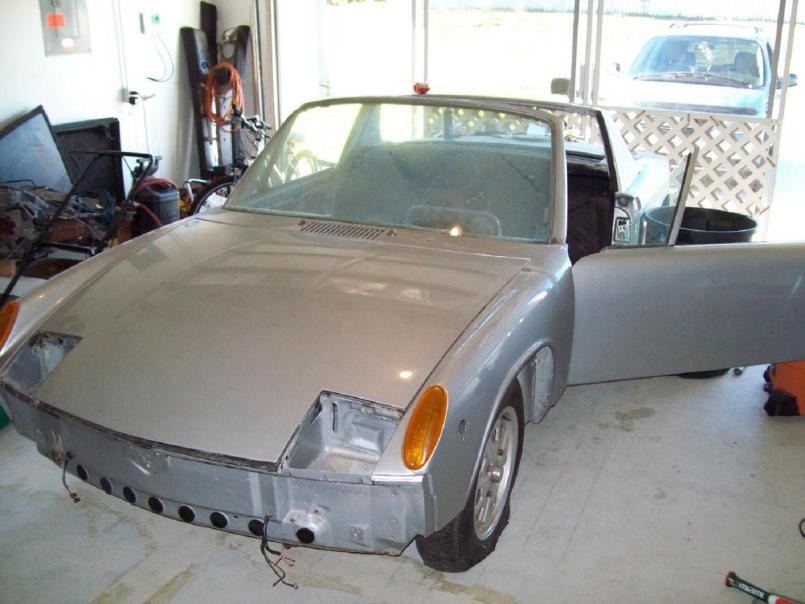
May I introduce you to Betty.
Well the big unveil will have to wait until I figure out how to get the pic attatched. oops.
Posted by: heavydriver Jan 9 2009, 09:23 PM
Any ideas on how to shrink a 1.03 meg pic into .5 meg ? ![popcorn[1].gif](style_emoticons/default/popcorn[1].gif)
Posted by: heavydriver Jan 9 2009, 09:30 PM
 ok, technical difficulties are over.
TA DA....
Posted by: heavydriver Jan 9 2009, 09:45 PM

Here is the proud owner-to-be.
Posted by: heavydriver Jan 9 2009, 09:51 PM
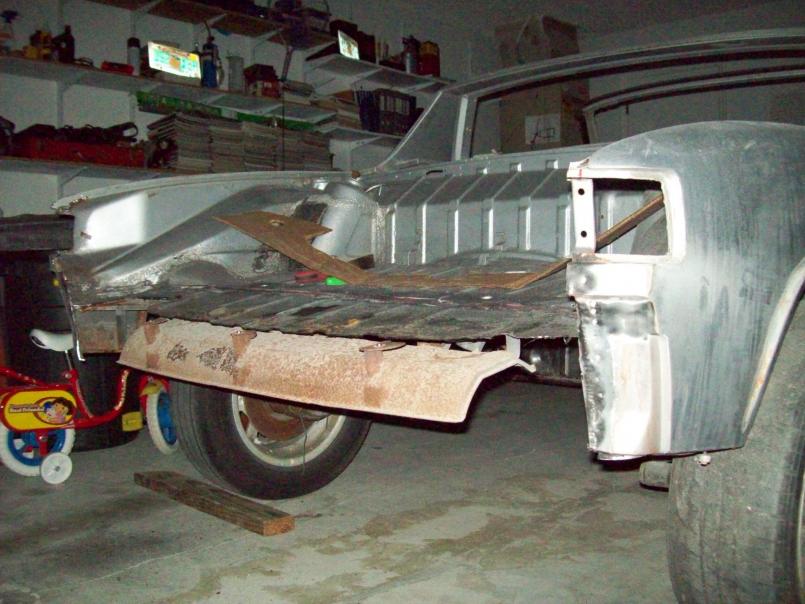
First up is the cabin. Fairly good though rusty at the seams.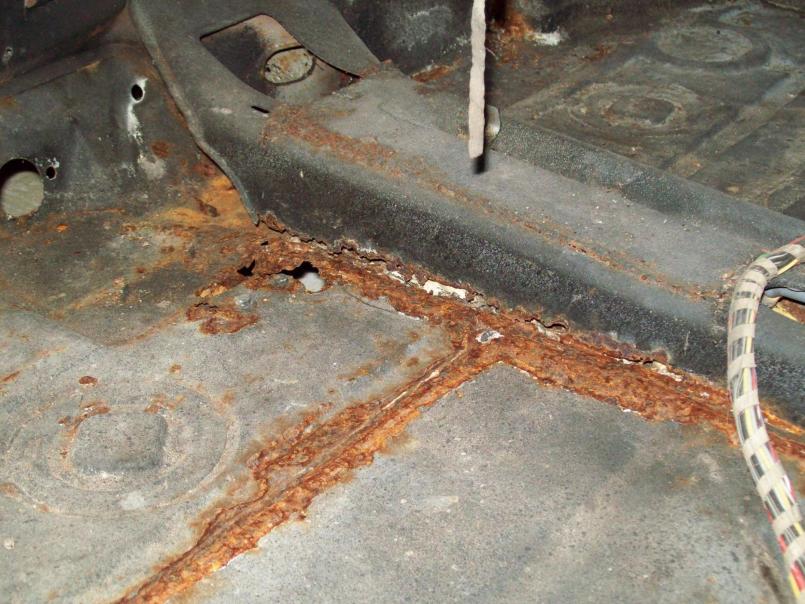
Posted by: heavydriver Jan 9 2009, 09:52 PM
Other side...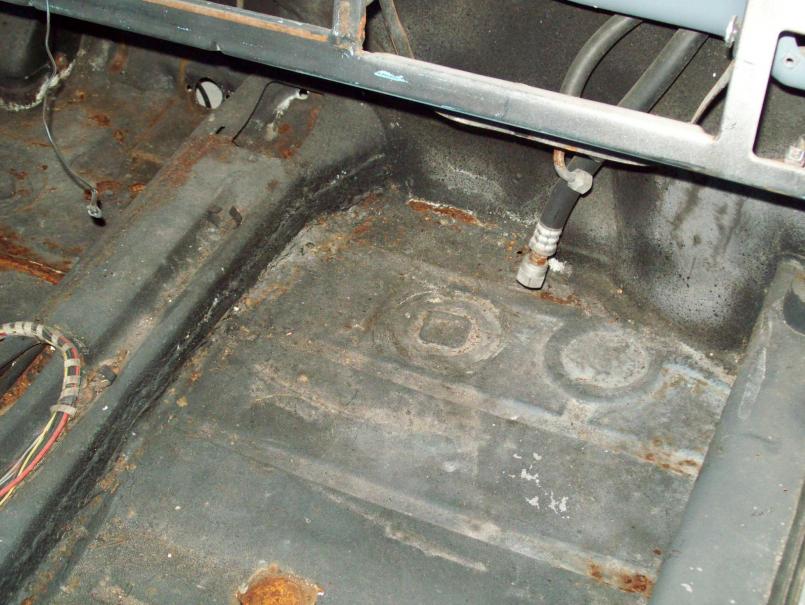
Posted by: heavydriver Jan 9 2009, 09:54 PM
Rear half on drivers side.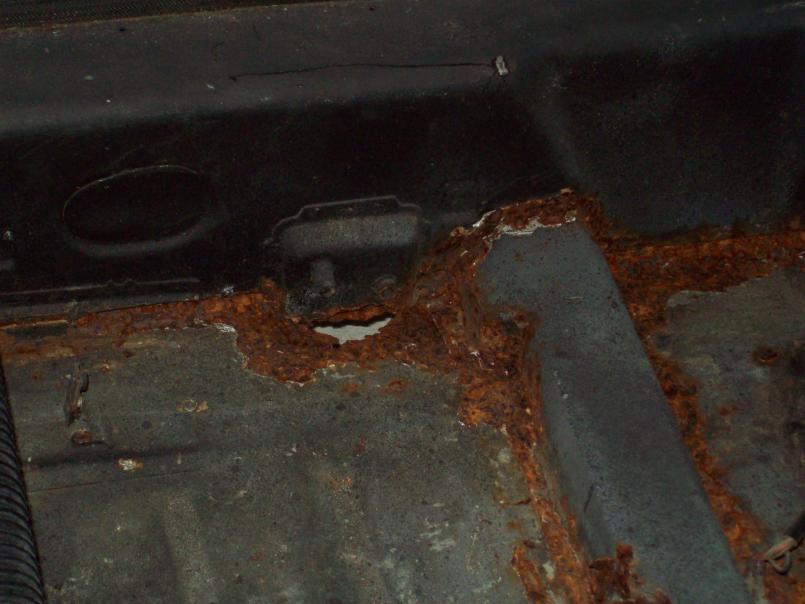
Posted by: heavydriver Jan 9 2009, 09:55 PM
Rear half on the pax side. 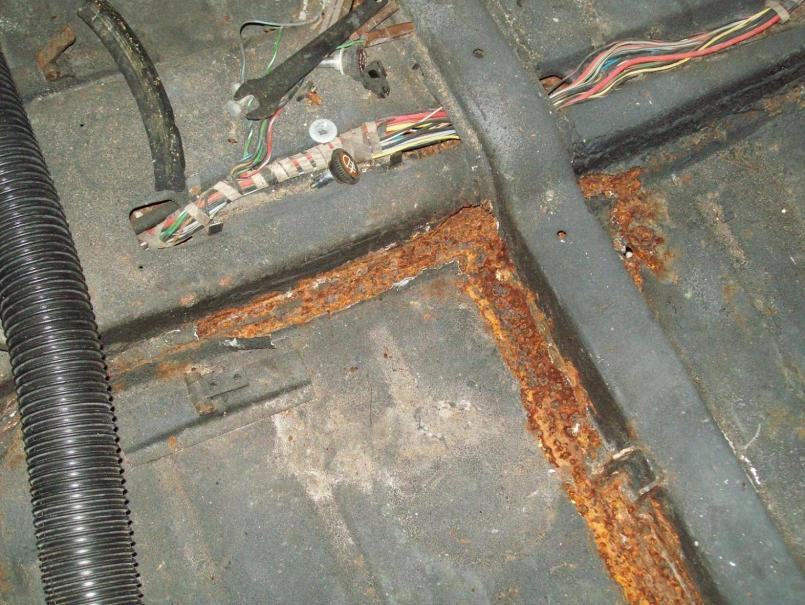
Posted by: heavydriver Jan 9 2009, 09:58 PM
The taillight panel and rear trunk floor have a little rust.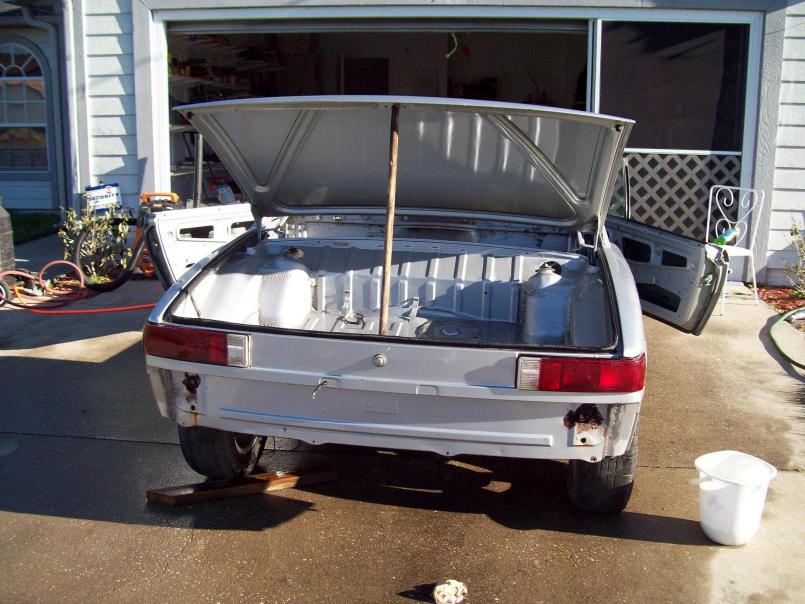
Posted by: heavydriver Jan 9 2009, 10:00 PM
There might be some bondo on her....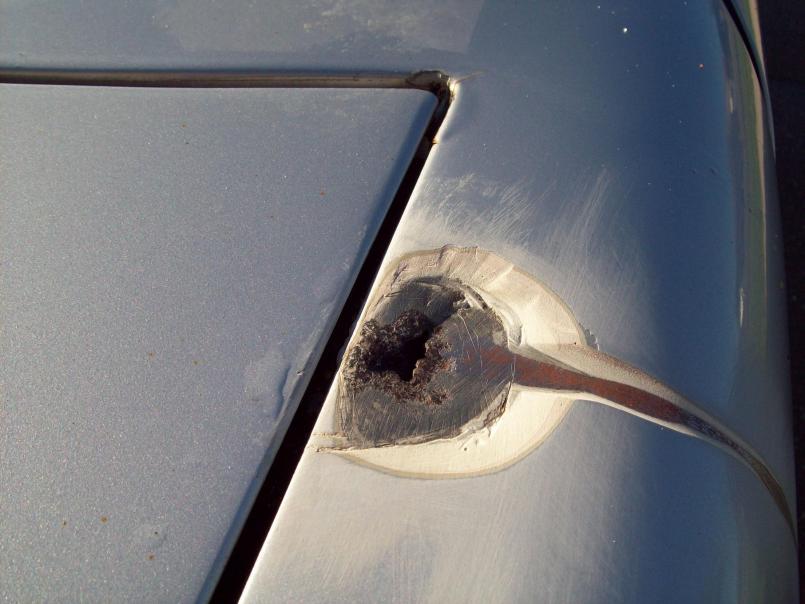
Posted by: heavydriver Jan 9 2009, 10:02 PM
This area, however, seems to be ok.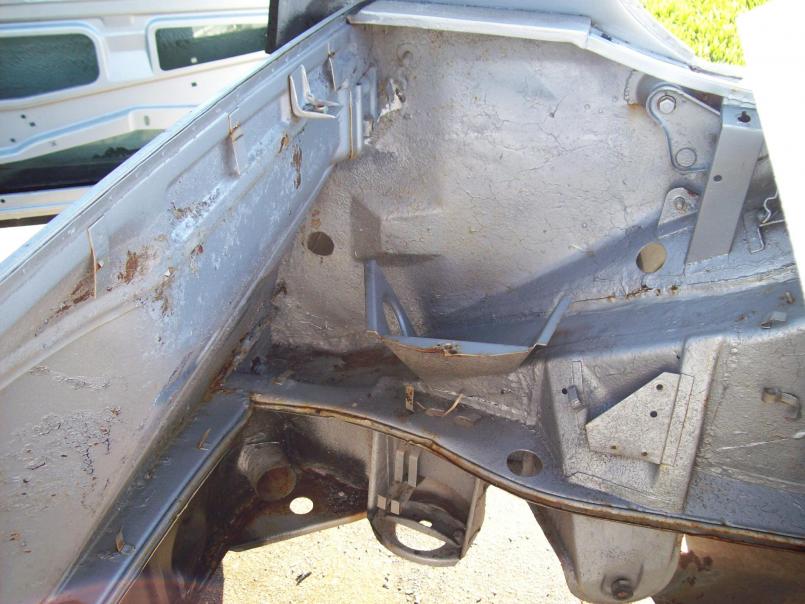
Posted by: heavydriver Jan 9 2009, 10:05 PM
She has some warts but she is not in that bad a shape for spending 10 of the last 15 years outside under a tarp.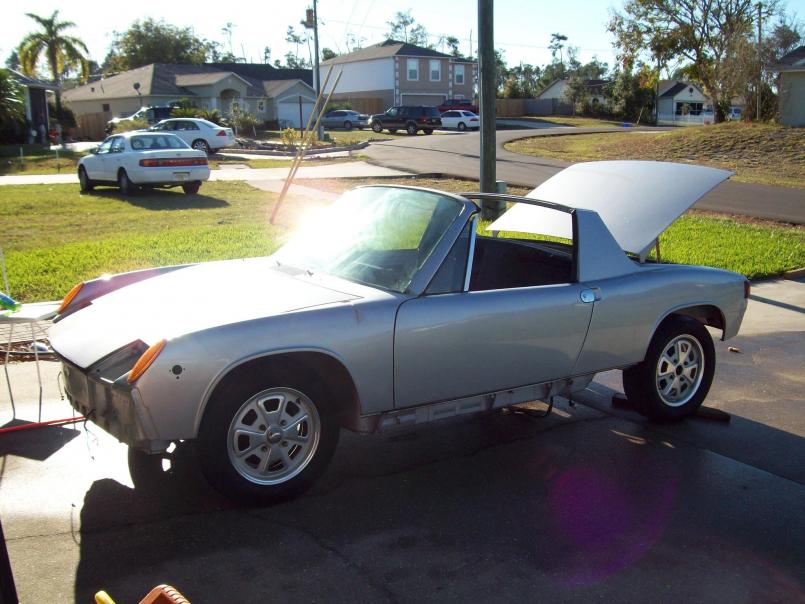
Posted by: heavydriver Jan 9 2009, 10:06 PM
P. S. do not start a project like this without a pit crew that is not afraid of getting dirty!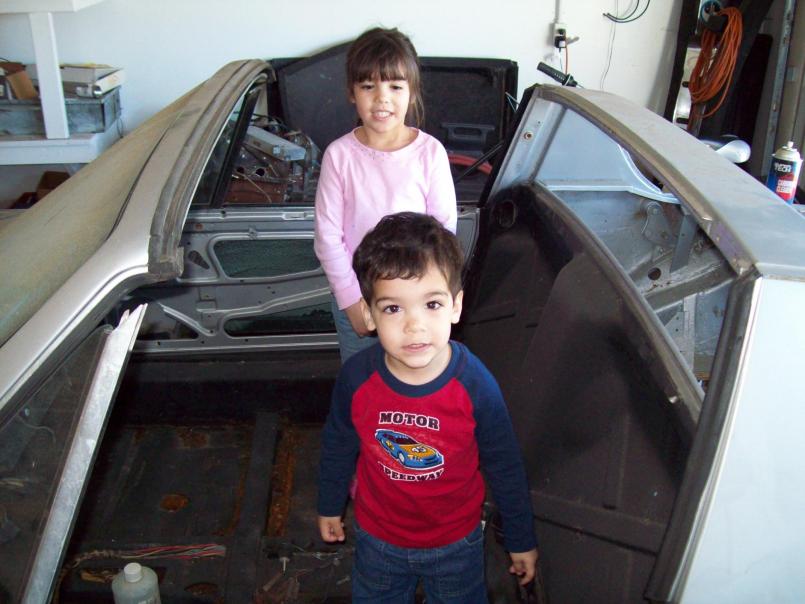
Posted by: my928s4 Jan 9 2009, 10:13 PM
Awesome another project thread, my favorite !
Look forward to updates on your progress. Enjoy the journey.
Cheers
Posted by: heavydriver Jan 10 2009, 02:16 PM
Got some more cleaning done today. We removed the windshield, the dash, and this rat's nest called a wiring harness. We would have made more progress on the stripping front except that the floor ate my wire wheel. Apparently my car has undercoating on the inside as well as the outside. I'm off to get some sand for the blaster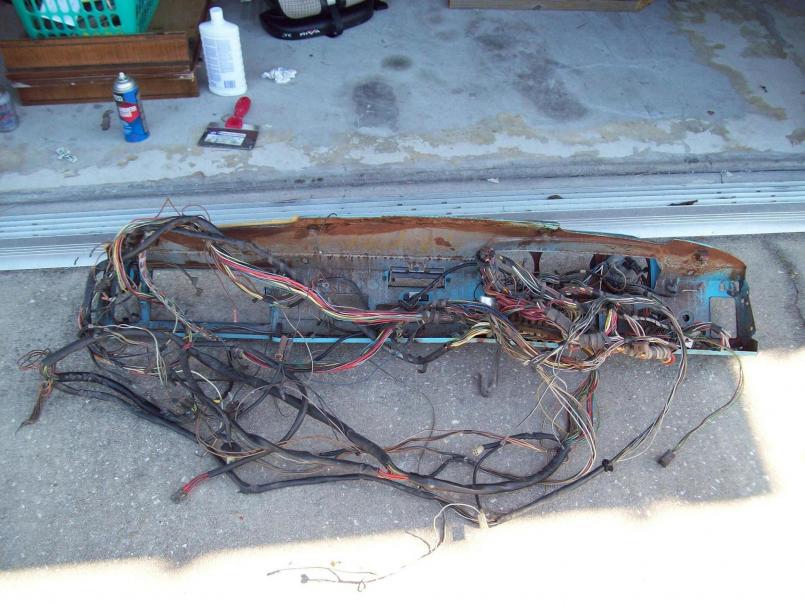
Posted by: heavydriver Jan 15 2009, 10:33 AM
Been doing some more grinding, and I wish I hadn't. The tunnel is a Frankenstein creation if innumerable pieces, and the floor edges look like Swiss cheese. It does not look like I can get the tunnel out in one piece. 
So, does anyone out there have a tunnel and a crossmember (it is gone as well) laying around that will fit my '73 ?
Looks like the car saw my enthusiasm and raised me some complications.
Others have brought back worse examples, I will win this fight. 
Posted by: Vacca Rabite Jan 15 2009, 10:43 AM
They do that.
Why remove the tunnel? You do not need to do that to replace the floor. Clean it up and take pictures so we can see what you have.
Zach
Posted by: heavydriver Jan 15 2009, 11:40 AM
Are you saying to drop the floor while leaving the tunnel in place ?
I'll get some more pics up tonight.
Posted by: FourBlades Jan 15 2009, 11:48 AM

Leave the tunnel in place if you can. I removed mine because the rear part was
totally shot and beyond repair. I got a rear half from someone sawzalling a car
and grafted my front to it. Then I spliced it all back together. This is lot of work
so I would not do it that way unless you have too. If your tunnel is ok where it
connects to the floor, then just drill all the spot welds out to remove the floors.
You probably need to replace the brake and clutch tubes. I removed my heater
tubes because that is the last thing you need in FL...
John
Posted by: heavydriver Jan 15 2009, 12:12 PM

Leave the tunnel in place if you can. I removed mine because the rear part was
totally shot and beyond repair. I got a rear half from someone sawzalling a car
and grafted my front to it. Then I spliced it all back together. This is lot of work
so I would not do it that way unless you have too. If your tunnel is ok where it
connects to the floor, then just drill all the spot welds out to remove the floors.
You probably need to replace the brake and clutch tubes. I removed my heater
tubes because that is the last thing you need in FL...
John
The left side flange on the tunnel is gone. The right side has multiple overlapping patches and has been seam welded to the floor. It has also been opened up on top in front of the shifter area.
I was a little angry before my previous post. Having calmed down, and taken a second look, the tunnel can "probably" be fixed. The floor will be changed, though.
P. S. On a day like today I would have used the heater tubes.
Posted by: heavydriver Jan 15 2009, 01:15 PM
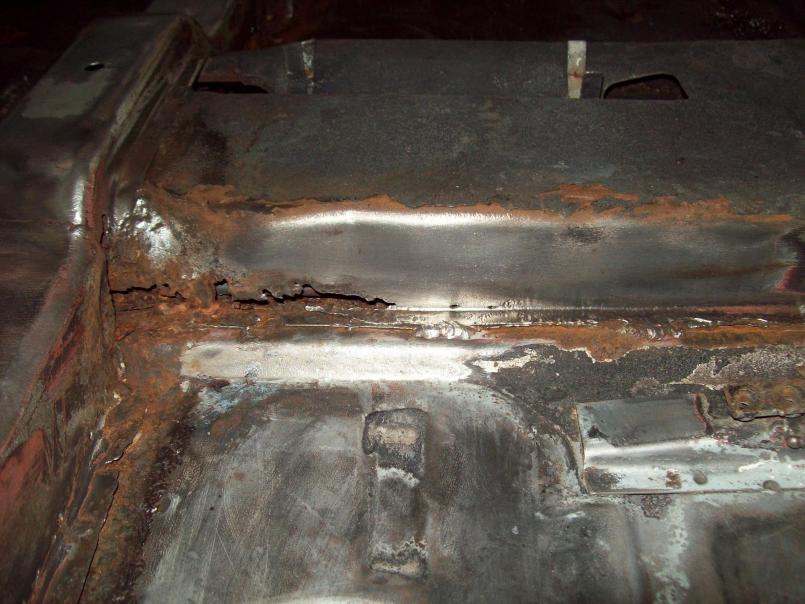
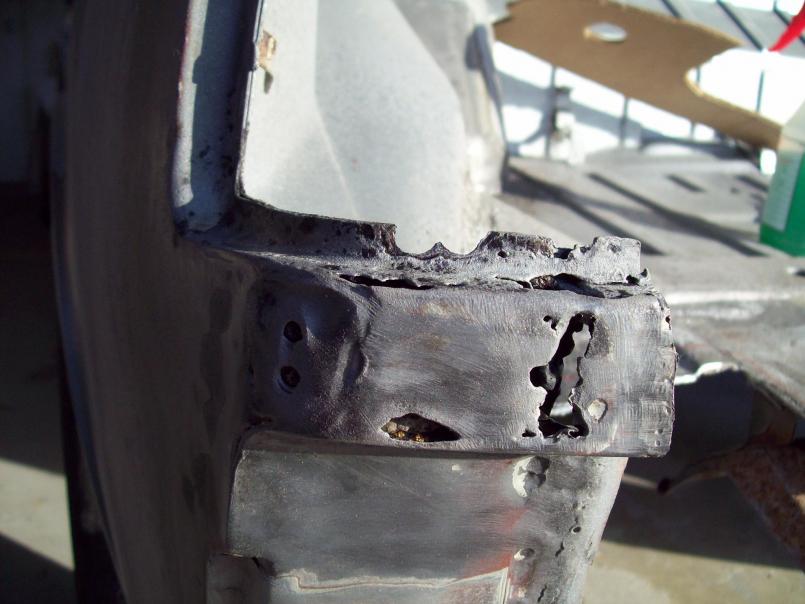
Here are the somewhat cleaned up edges of the tunnel. I am thinking that they can be reflanged and a new floorpan installed. I am open to ideas from those who have btdt.
Posted by: heavydriver Jan 15 2009, 01:16 PM
Posted by: heavydriver Jan 15 2009, 01:17 PM
Posted by: heavydriver Jan 15 2009, 01:17 PM
Posted by: heavydriver Jan 15 2009, 01:18 PM
Other side.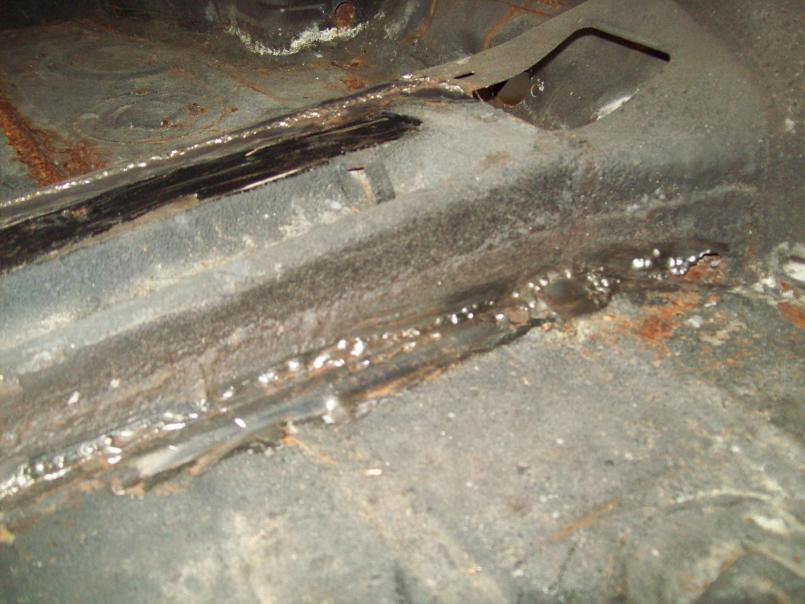
Posted by: heavydriver Jan 15 2009, 01:19 PM
Posted by: heavydriver Jan 15 2009, 01:20 PM
Posted by: Vacca Rabite Jan 15 2009, 01:21 PM
I know this first hand. Cutting while mad at your car for being way more rusty then it should have been leaves you with much larger repair jobs then need be. When it is all said and done, the tunnel will be covered in carpet, and no one - not even the snootiest CW judge - is going to take apart your interior to make sure that your tunnel is factory looking.
The good news is that anyhting you cut away can be welded back into place later. its just that welding can take a while to do right, so the more welding you have to do, the more time you spend on or under the car rather then in it driving about.
If you need to make a new flange for the tunnel, do that and tack it in place before you remove the floor (don't weld it to the floor, obviously). This way you are not left playing the guessing game about where the flange needs to be so that you are not deflecting the floor when it gets welded in.
I have owned my car for 3 years and change and have never driven it, mainly cause I see something and jump in with both feet before looking for the more efficient route, or just fix something that was not really broken to begin with.
Zach
Posted by: heavydriver Jan 15 2009, 01:23 PM
The only good sections are the forward and aft sections of the tunnel. The crossmember is just like the tunnel so pics would be redundant.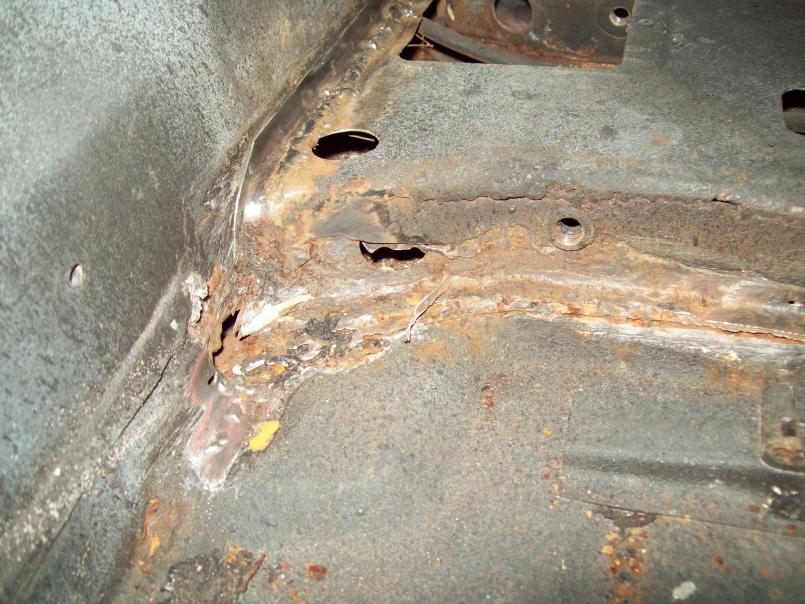
Posted by: heavydriver Jan 15 2009, 01:25 PM
I would have cleaned up the floors a little better but I stopped when I decided to change them. Right now the sheetmetal wanted list includes the floors and the inner and outer firewalls. ugh.
Would any of the central Fl. guys have a pair of door braces they can loan me for a few weeks ?
Posted by: heavydriver Jan 15 2009, 04:40 PM
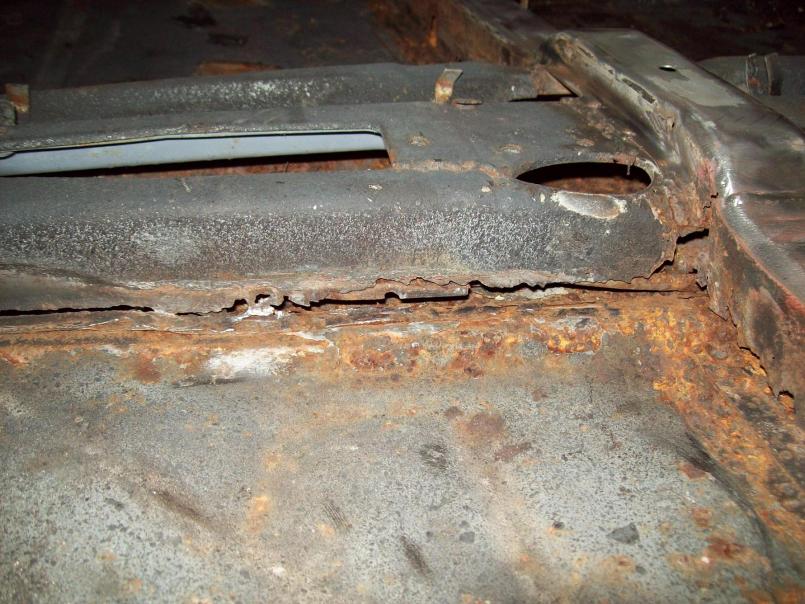
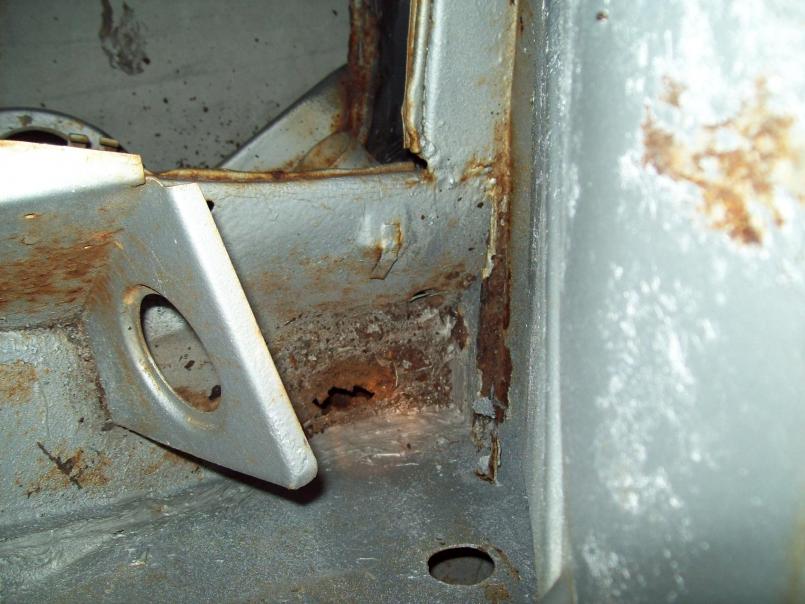
I was grinding away on the floor pan seam when I decided to rip off an undercoating bubble at the right rear corner. As soon as I did it rained rust. You can poke a screwdriver clean through the frame. Is this a common problem area with these cars ? 
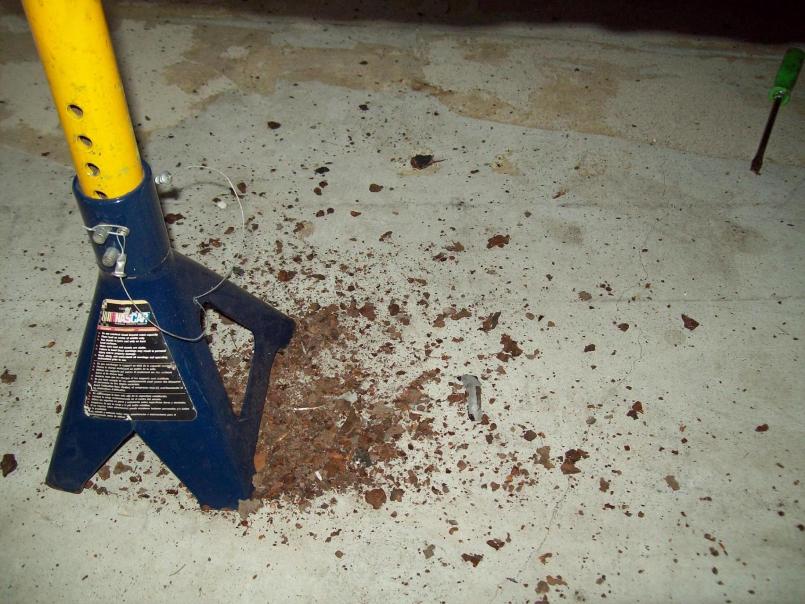
Posted by: Vacca Rabite Jan 15 2009, 04:55 PM
Yes. 
Pics of the damage. If its in the long, that is the backbone of the car. Fixable, but an ill omen. Have you probed the hell hole with a screw driver to make sure it is sound? Are your jack points in good shape?
Zach
Posted by: heavydriver Jan 15 2009, 05:17 PM
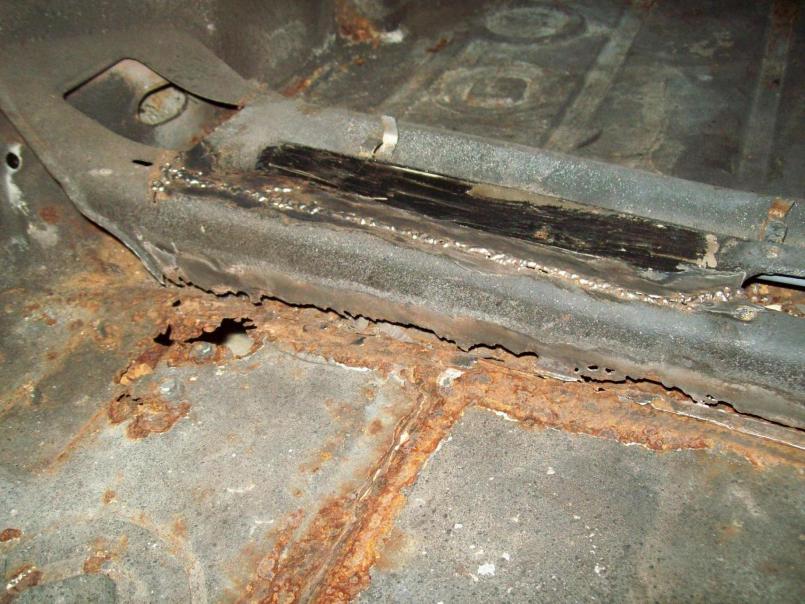
Here you go, one ventilated backbone. The opening goes through to the garage floor. If I clean off the rust can I just leave the hole for future drainage.

Posted by: Vacca Rabite Jan 15 2009, 06:03 PM
No, don't leave that open. You will need to clear all the rust of out it and weld it back shut. Most of us have been there and done that (it how I learned how to weld.) Spray the inside with ospho or some other rust converter.
If you leave the open, you will be allowing water laced with battery acid into your longs. When the longs go, your car becomes a donor or a very expensive rebuild.
That spot is the Achilles heel of our cars. Almost everyone has rust issues there due to leaky batterys and pooling water.
I am betting that the fire wall rusty patch will also fold if you probe it. Pretty common. Cut it out and patch it up. LOTS of threads here on it.
Zach
Posted by: heavydriver Jan 15 2009, 06:54 PM
Well this alters the plans a little. Next step is to build a jig ala Jeff Hail, it will be good for support and welding practice. 
Posted by: heavydriver Jan 31 2009, 03:01 PM
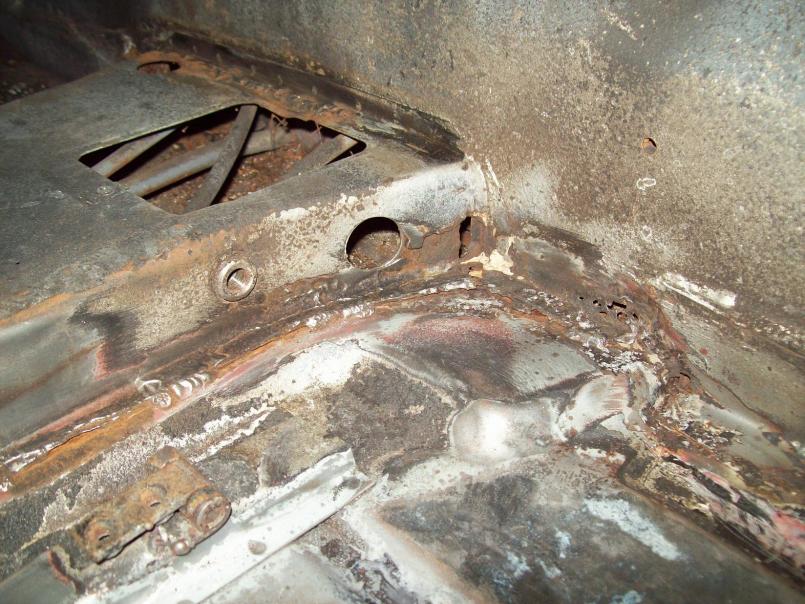
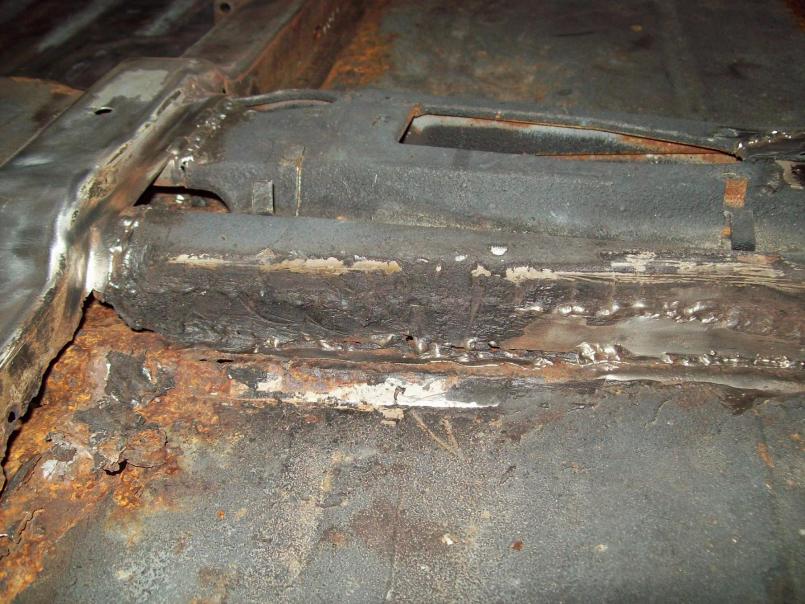
Small progress. The hellhole wound appears to be small on top but the lower corner forward of the engine mount is gone. The cancer may also be present behind the engine mount. There are some pinholes along the pass outer long, and the lower outer firewall seems to have been repaired a few times in the past.
Questions............
Fix or replace the lower outer firewall ?
Pass long repairable, yes ?
Here is the evidence.......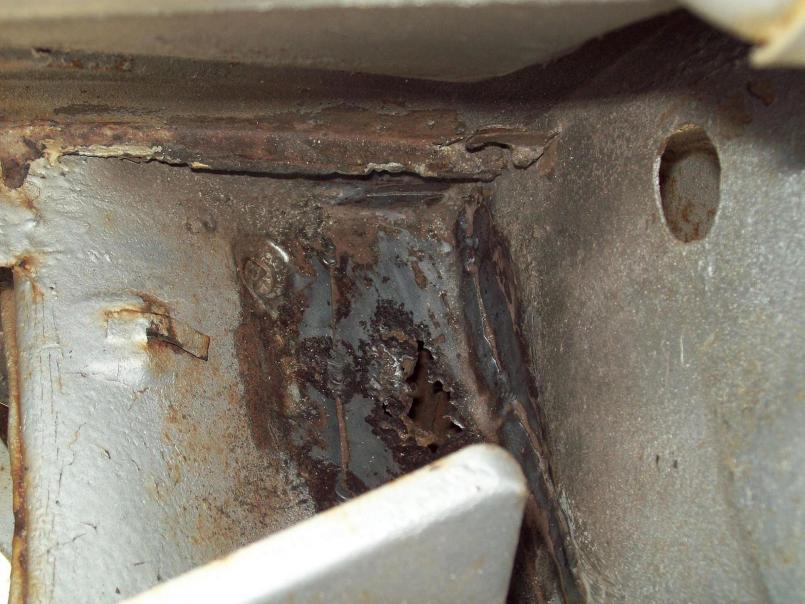
Posted by: heavydriver Jan 31 2009, 03:03 PM
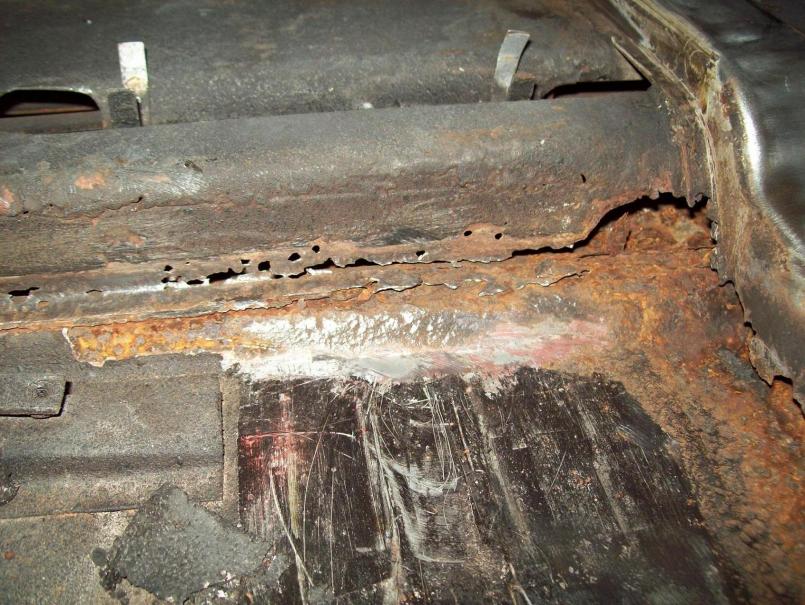
more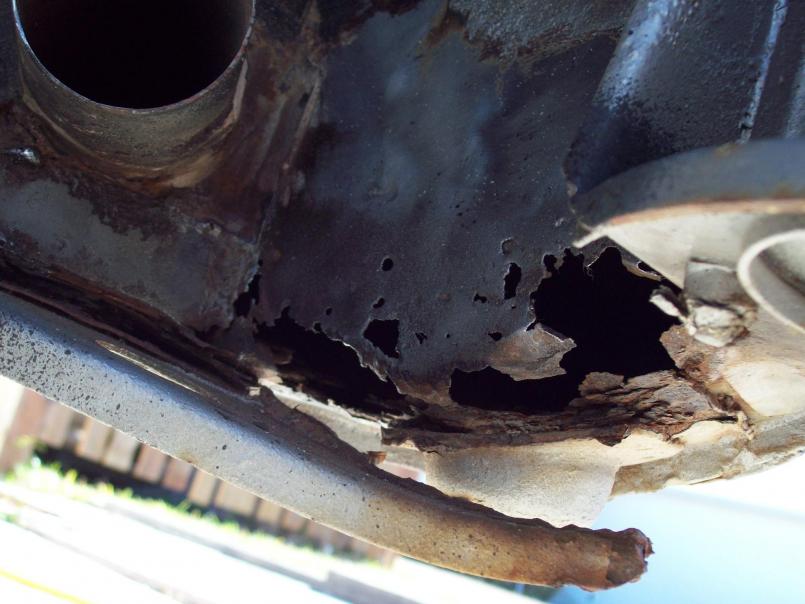
Posted by: heavydriver Jan 31 2009, 03:04 PM
next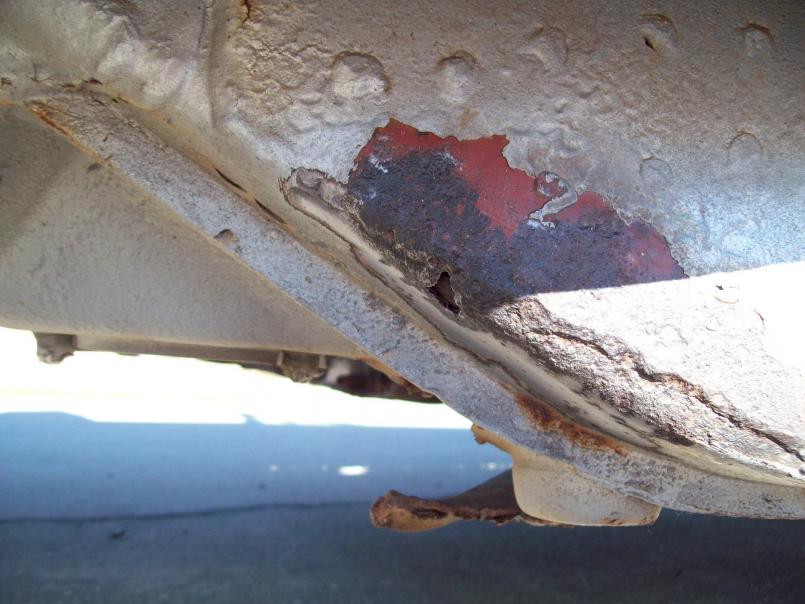
Posted by: heavydriver Jan 31 2009, 03:05 PM
tada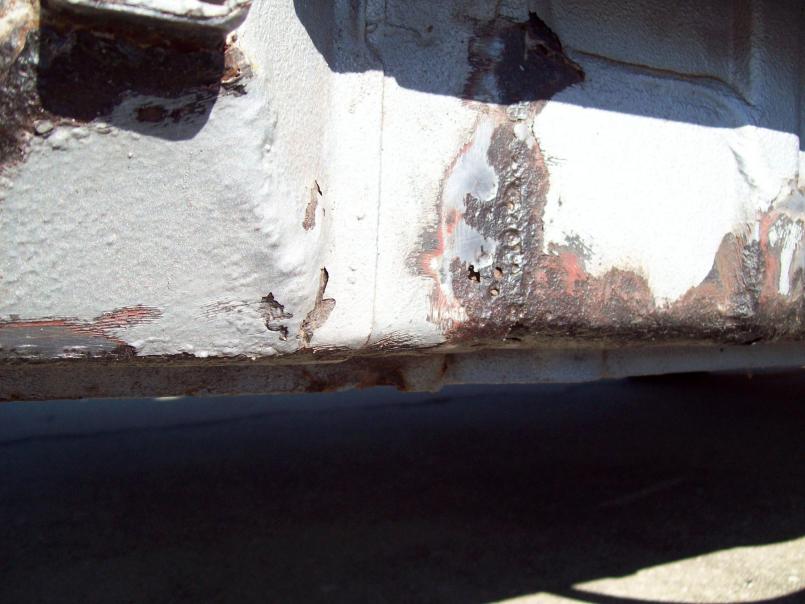
Posted by: heavydriver Jan 31 2009, 03:06 PM
last for now.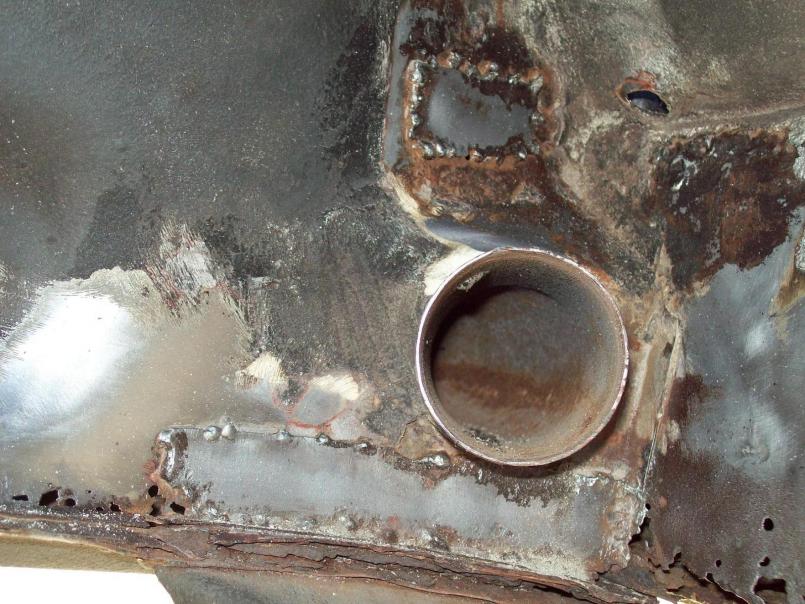
Posted by: scotty b Jan 31 2009, 04:44 PM
Congratulations you have a PROJECT.!!
A few things to keep in mind. Cut the hell hole out, do not just patch over it. You have eough damage there that you can be assured it is much worse then what you can see. Before you cut the floor, tunnell or get to deep inot the hell hole BRACE the car. The last thing you want tis to get the thing all welded up only to find out it has twisted from the welding. Before you brace it gat the doors lined up correctly and make sure the car is stabilized for the bracing. This wil ensure it STAYS square. Check the Classics for some great threads on doing these repairs.
Ask questions and post pics. There are one or two poeple that have performed these repairs 
Posted by: ssstikircr Jan 31 2009, 05:17 PM
Just think.... you will be an eprt welder by the time you atre done.

Posted by: heavydriver Jan 31 2009, 09:11 PM
Just think.... you will be an eprt welder by the time you atre done.
yup, as soon as my uncle sam check gets here I go straight to Northern Tool for a welder.
In the meantime more grinding and stripping.
Posted by: heavydriver Feb 9 2009, 08:51 PM
Well, I busted all my knuckles in the engine bay and decided to take a break. I moved to the right side quarter panel for some easy paint removal. So far so good, only 2 dings near the taillight. 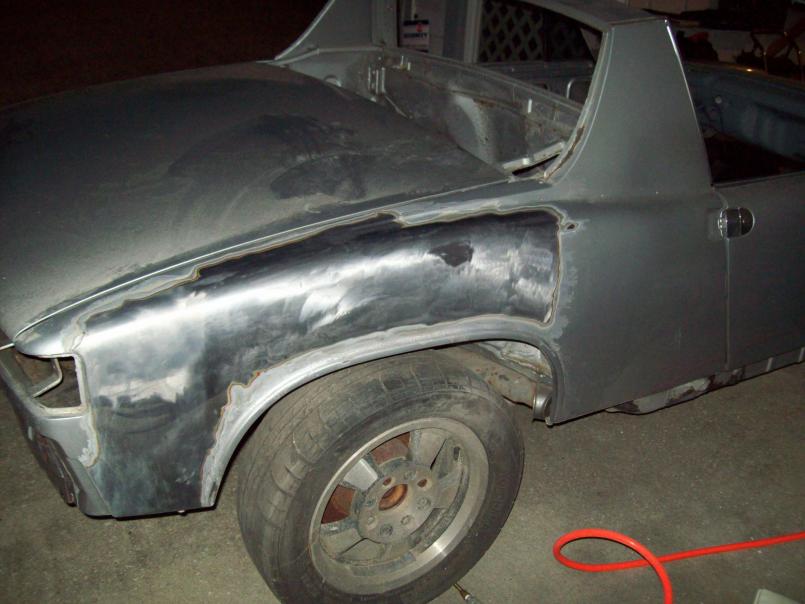
Posted by: heavydriver Feb 9 2009, 08:54 PM
The panel appears to be well protected by 12 - 14 layers of stuff. I think that this car was given a full body coat of bondo at some time.
Posted by: heavydriver Feb 11 2009, 08:56 PM
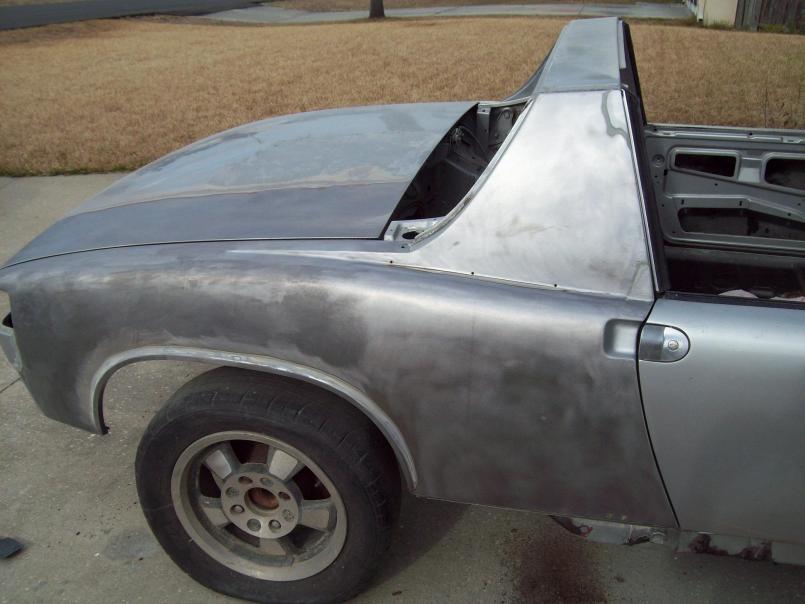
The right quarter is mostly stripped I am very happy at the lack of damage. Just 2 spots at the lower right by the door and the lower right corner of the sail panel.
Posted by: carr914 Feb 12 2009, 06:30 AM
If you need some 1st hand pointers & tips, stop by Stratton's in Winter Park. They are doing my formerly rusty 914-6. They may (I hope) have the new floor panels installed and the car should be on a rotisserie.
T.C.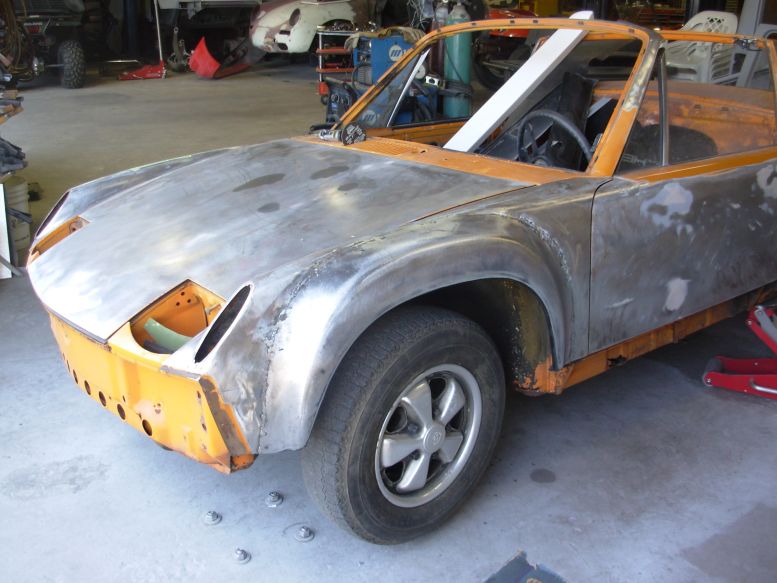
Posted by: heavydriver Feb 12 2009, 06:39 AM
Thanks, she has been apart so long I am gonna need all the visual help I can get to reassemble her.
Posted by: heavydriver Feb 12 2009, 06:39 PM
Now I start to find some damage. Looks like someone tried to open the trunk with a meat tenderizer, while denting the left quarter. Oh well, can't expect perfection, at least there is no rust so far.
There was enough paint and primer on the trunk to cover the entire car.
A question for those of you who have done this before. After you hold a sander for six hours how long till your hands stop buzzing ?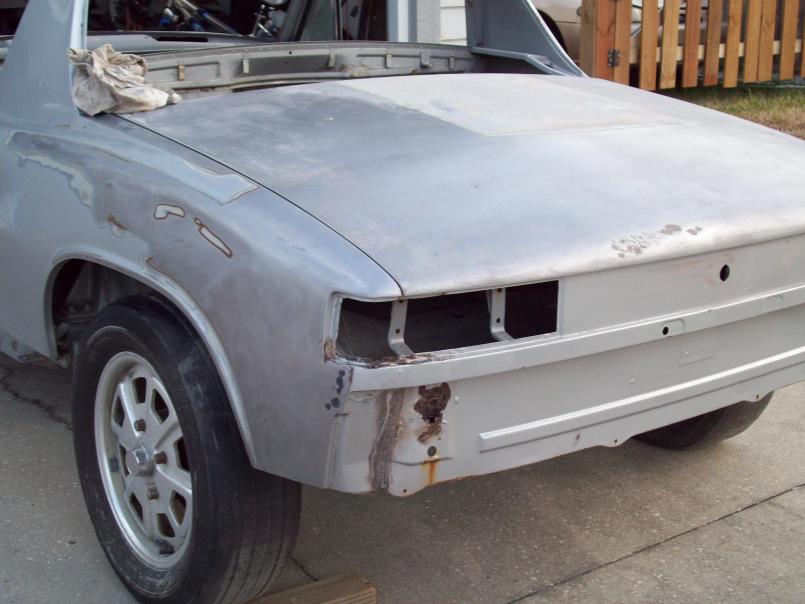
Posted by: heavydriver Feb 12 2009, 06:40 PM
btw was a luggage rack an option on these cars ? It appears I have 4 bondoed holes in the lid that fit this purpose.
Posted by: A&PGirl Feb 12 2009, 07:22 PM
Not option, accessory. I have my rack in the shed.
If you think your bondo/bad patchwork is bad, you don't want to get within 10ft of my car. 
Posted by: heavydriver Feb 12 2009, 08:18 PM
[quote name='A&PGirl' date='Feb 12 2009, 05:22 PM' post='1133368']
Not option, accessory. I have my rack in the shed.
If you think your bondo/bad patchwork is bad, you don't want to get within 10ft of my car.
It's still early I still have the front half to strip down yet. 
Posted by: zig-n-zag Feb 12 2009, 08:25 PM
Some cyclists use gelled gloves to soak up the vibrations............
Posted by: heavydriver Feb 25 2009, 02:44 PM
time for some advice.......
I have a replacement taillight panel to install. It appears that the PO seam welded a taillight panel some time ago. The welds are horrible and it is hard to make things out.
Does the taillight panel fit forward of the quarter panel ? I think that is the way it goes but some confirmation would be nice.
The panel that I am installing also has the aft 3 inches or so of trunk floor, which also needs to be replaced. Will lining up the corrugations on the floor be enough to ensure proper placement of the bumper mounts ?
If any of the central Florida guys who have done this before would like to assist a noob in his first bodywork I will fill you full of burgers and chips. I live in Deltona and plan to do the r/r on the 7th of March.

Posted by: heavydriver Mar 8 2009, 07:52 AM
Here we go, out with the old and in with the new. The panel came out ok but nothing is ever as simple as it should be. Whoever installed this last left a gap between the trunk floor and the trunk side wall. The spot welds were like little spacers.
Short story is that there will now be some cancer repair to be accomplished prior to installing the new tail panel. Yeah.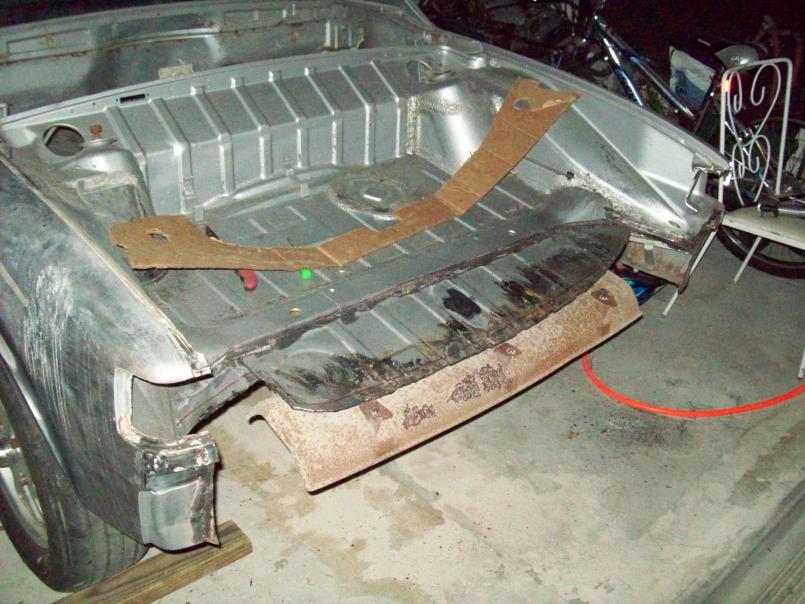
Posted by: heavydriver Mar 8 2009, 07:52 AM
Posted by: heavydriver Mar 8 2009, 07:53 AM
Posted by: heavydriver Mar 8 2009, 07:55 AM
Thats it for now. Tune in next week when we will uncover more hidden gems brought to us courtesy of someone's bad workmanship.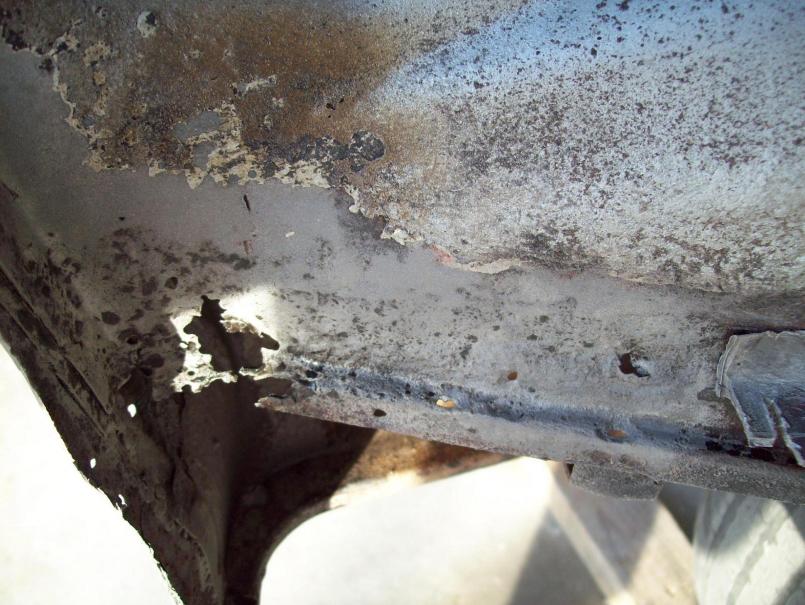
Posted by: veltror Mar 8 2009, 09:25 AM
Nice to see somebody else has some grief to deal with......
Posted by: ConeDodger Mar 8 2009, 10:20 AM
As the cute robot in the movie says Disassemble! Let's see how you weld now!!! Nice work so far, and a worthy cause. I am planning one for my boy but it will have a 3000 RPM pill in the MSD box 
Posted by: heavydriver Mar 8 2009, 06:55 PM
Nice to see somebody else has some grief to deal with......

You say this about me !!!!!! I am not worthy to sweep out the back room of your garage. I will take this as a high compliment.
Posted by: heavydriver Apr 16 2009, 08:48 AM
Time for a technical question. The rear quarter panels appear to have both an inner and an outer panel. what should the order be for reassembly ? The current taillight panel appears to be sandwiched between the two others. Is this correct ? If not what should it be ? HELP.
Powered by Invision Power Board (http://www.invisionboard.com)
© Invision Power Services (http://www.invisionpower.com)