Printable Version of Topic
Click here to view this topic in its original format
914World.com _ 914World Garage _ Resurrecting EVIL !
Posted by: scotty b Feb 17 2009, 06:29 PM
![]()
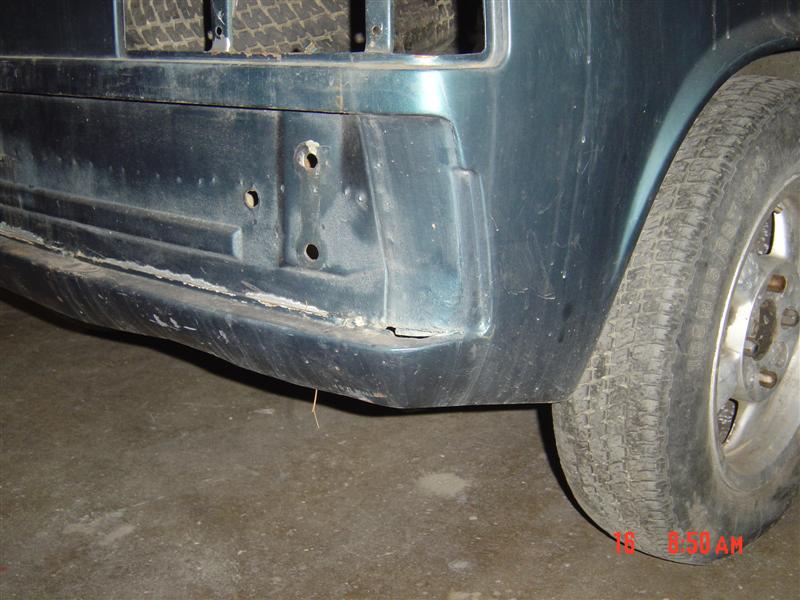
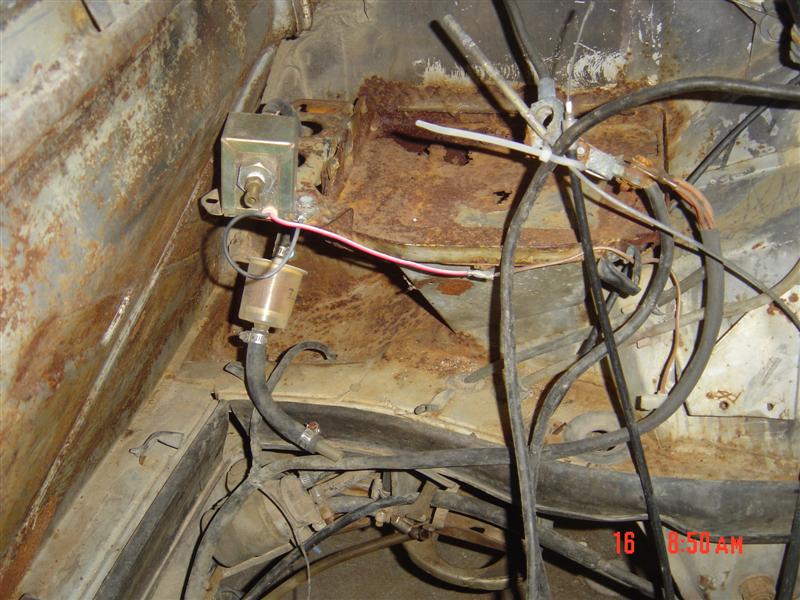
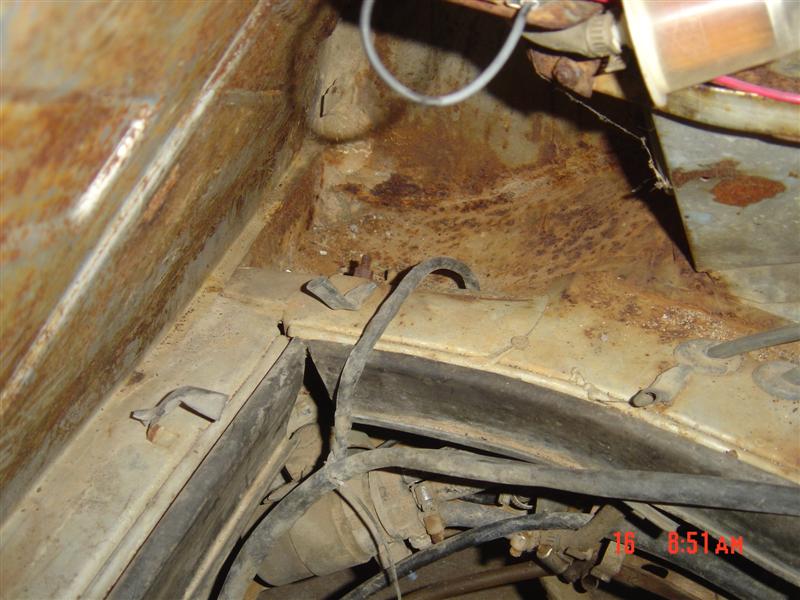
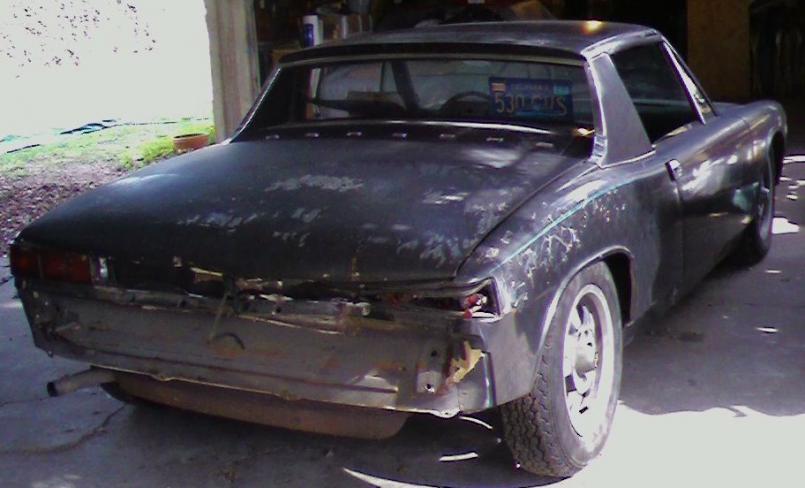
![]() Yup it's time for THAT thread. Here's what we start with
Yup it's time for THAT thread. Here's what we start with
Attached image(s)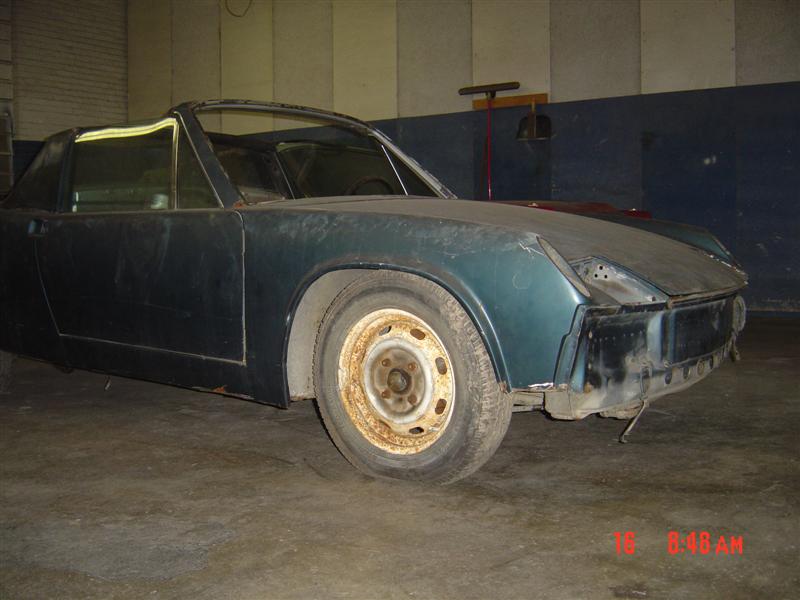
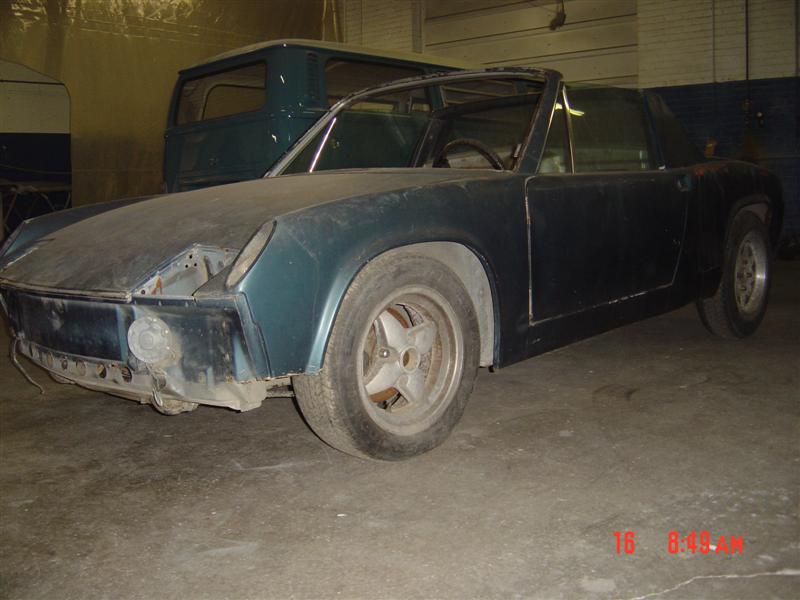
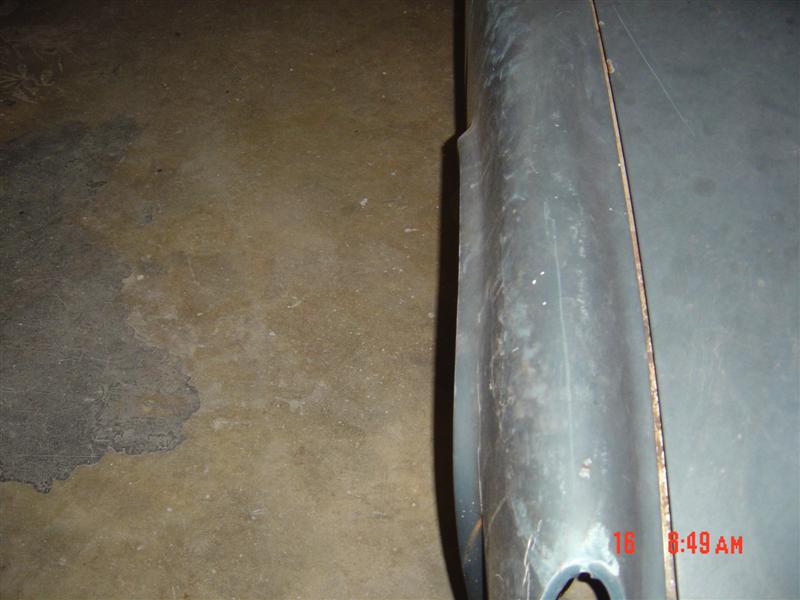
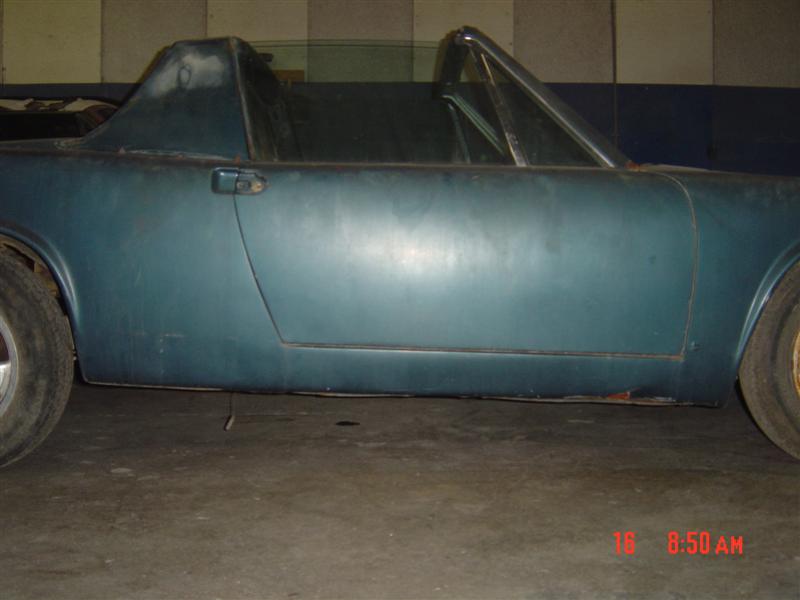
Posted by: scotty b Feb 17 2009, 06:32 PM
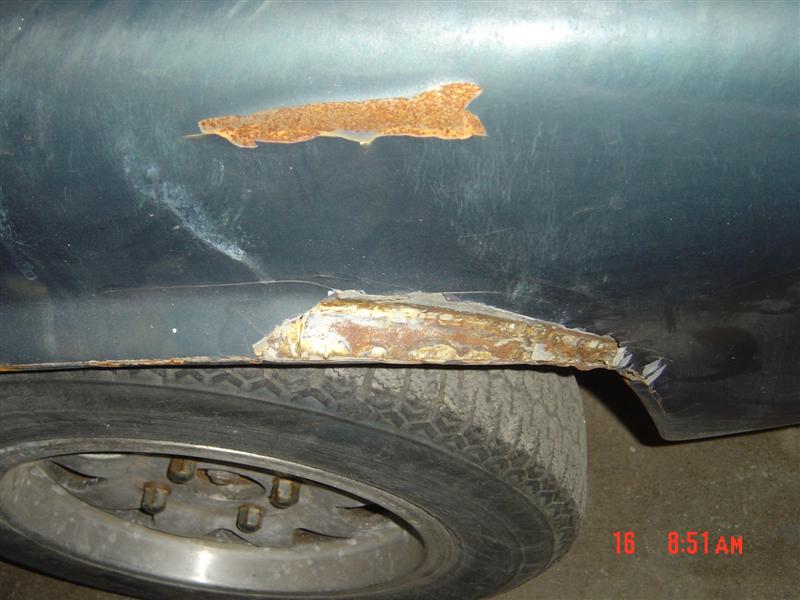
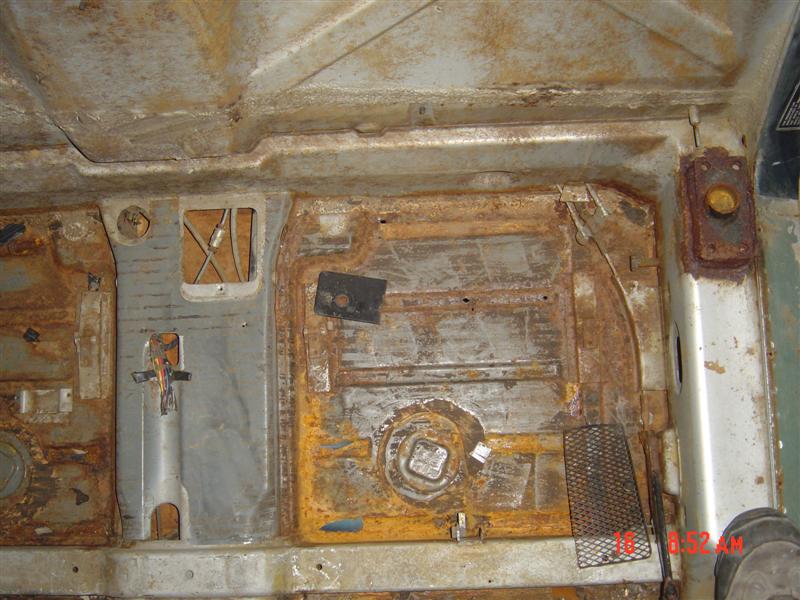
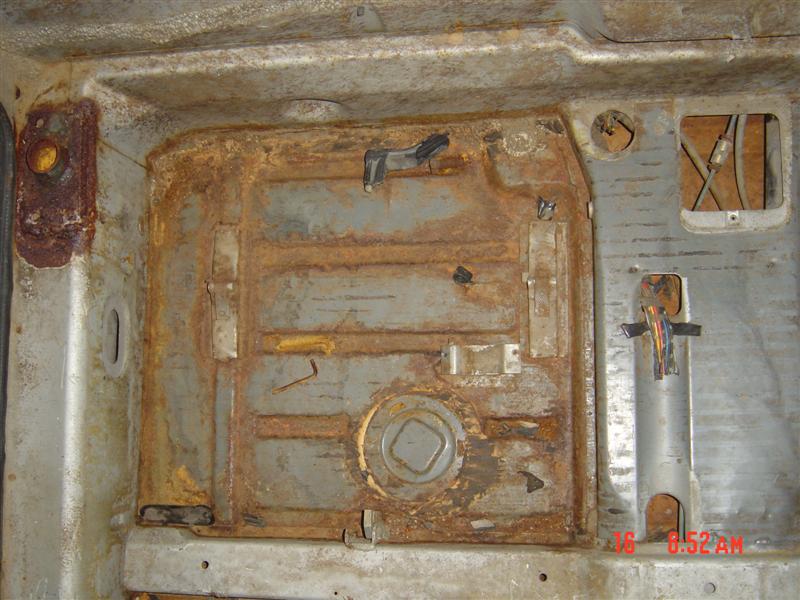
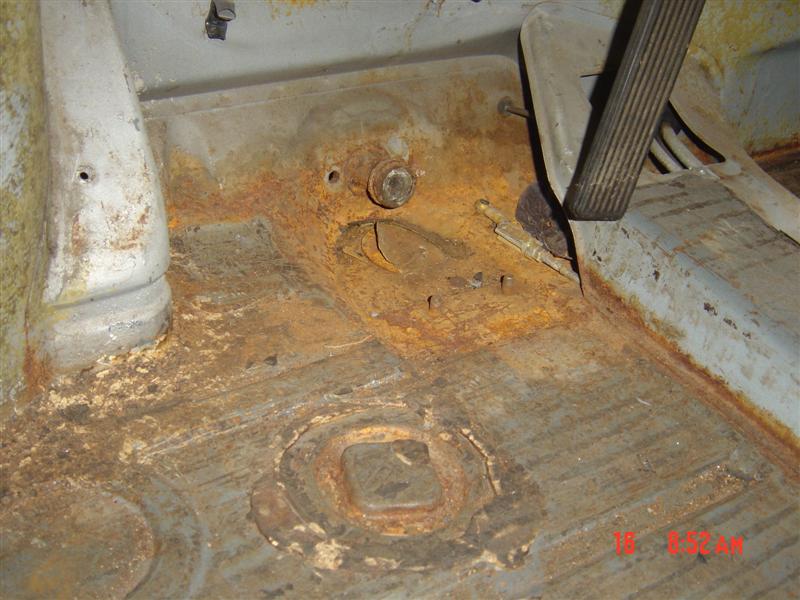
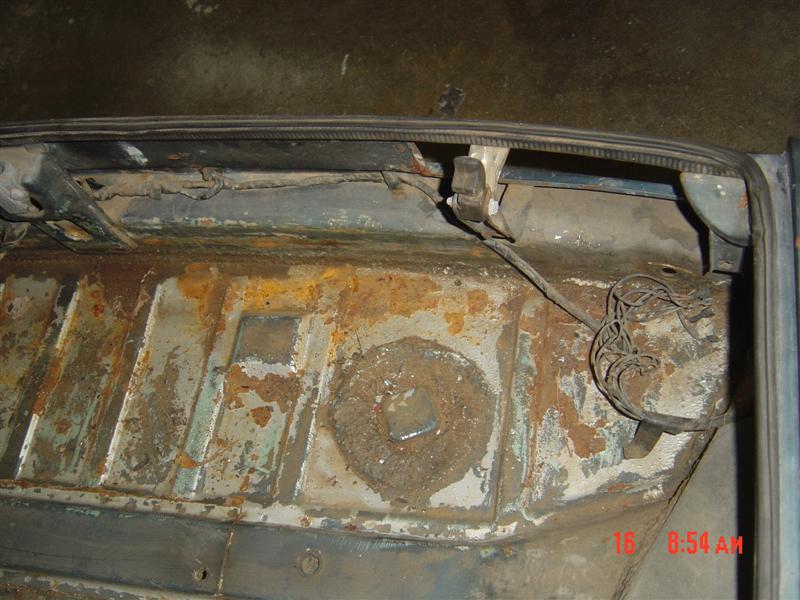
The mysterious flaps that people have enquired about before. What lies benath the layers of mud is frightening ![]()
Attached image(s)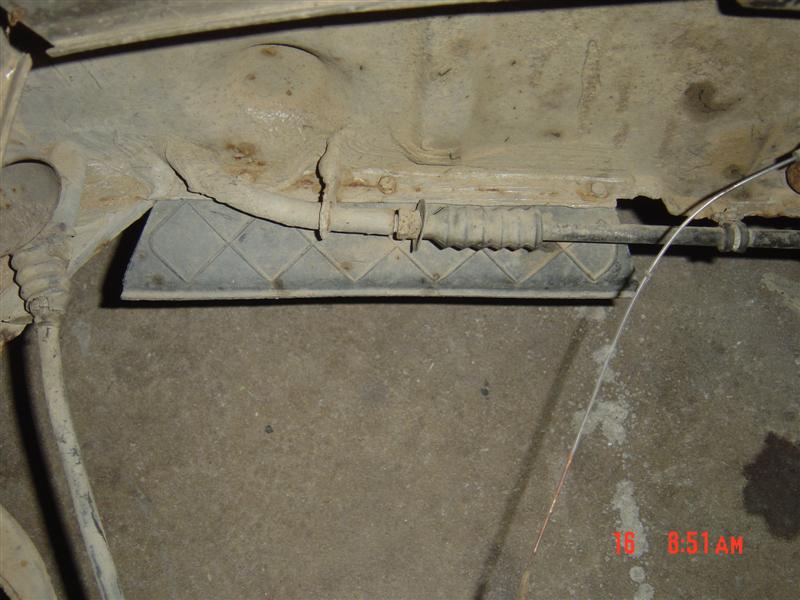
Posted by: degreeoff Feb 17 2009, 06:34 PM
Hell piece of cake! that rust is hardly started to pit!
Posted by: scotty b Feb 17 2009, 06:35 PM
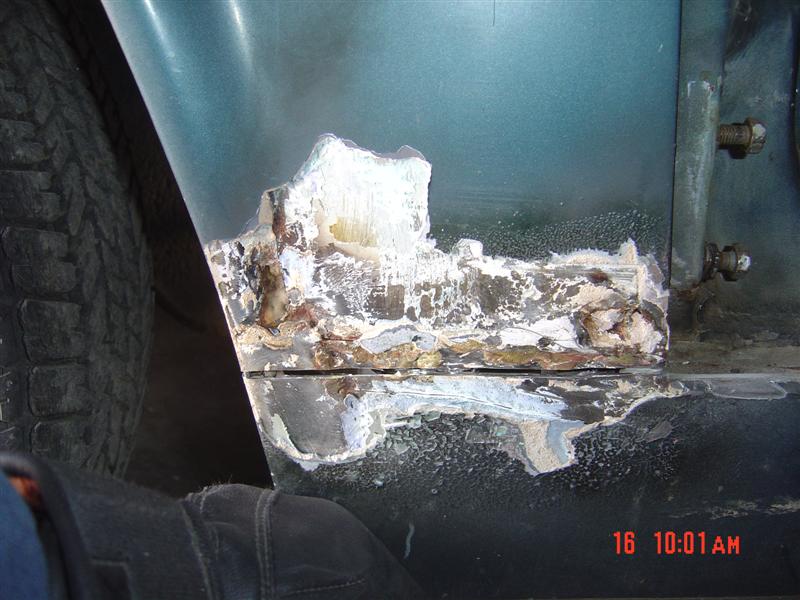
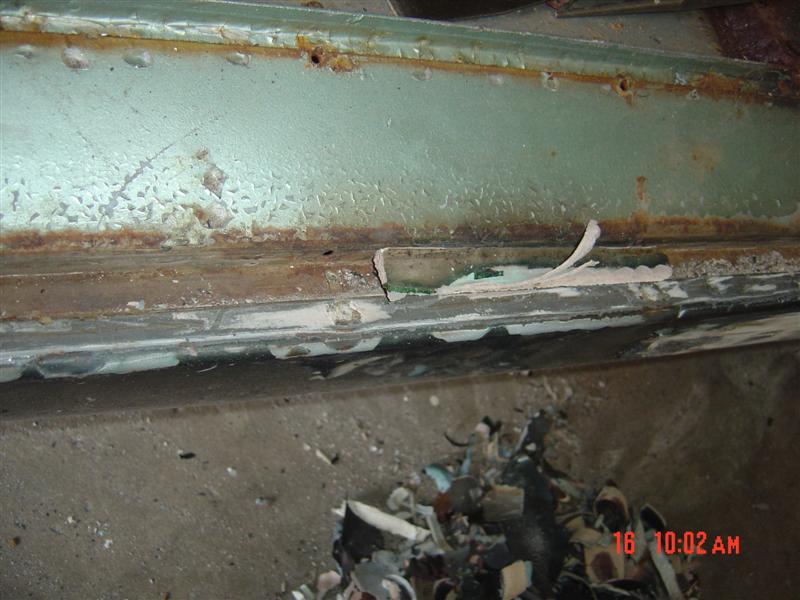
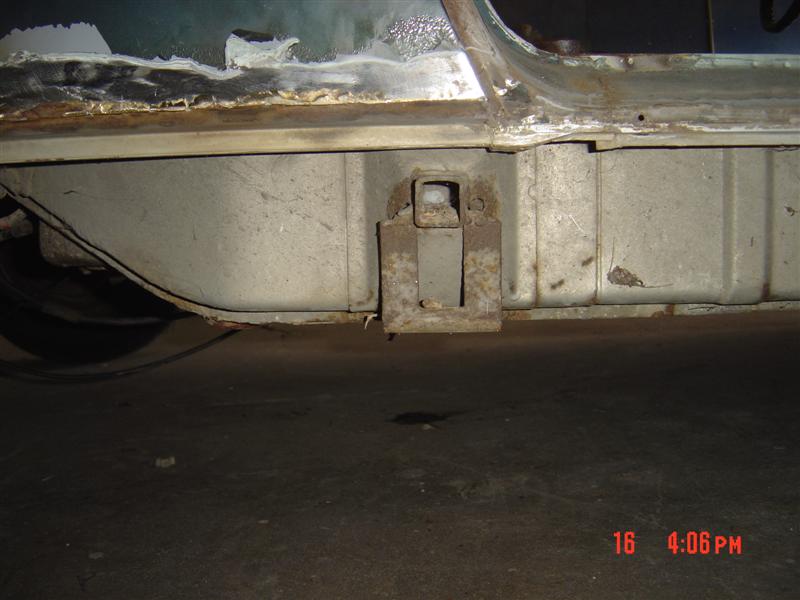
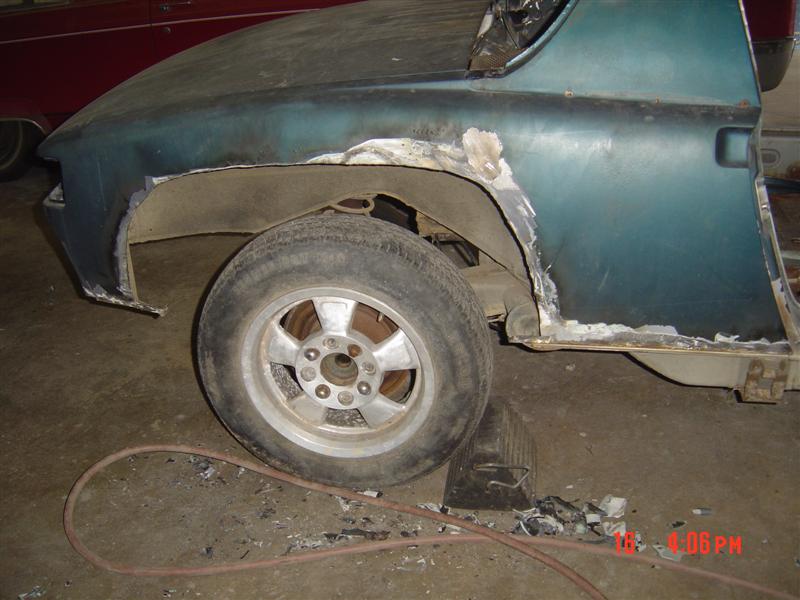
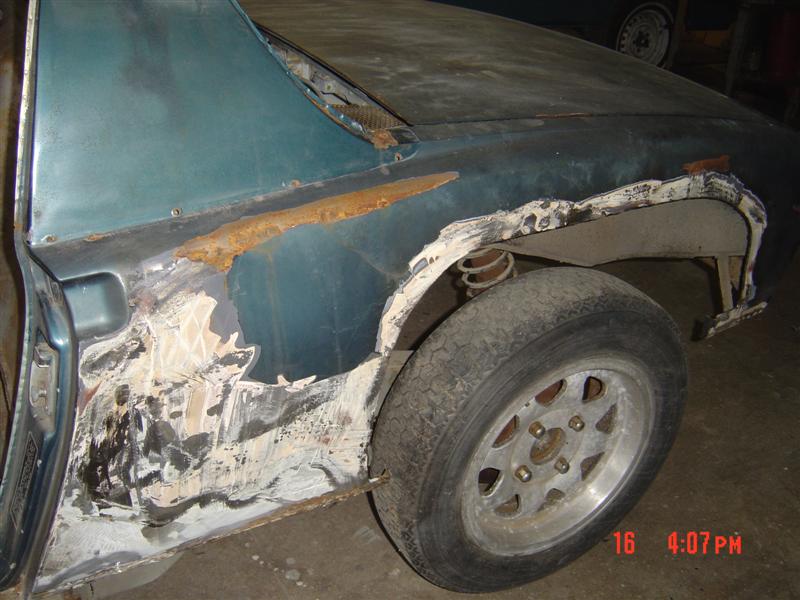
Beneath the FACTORY rockers that were cut up and brazed on ![]()
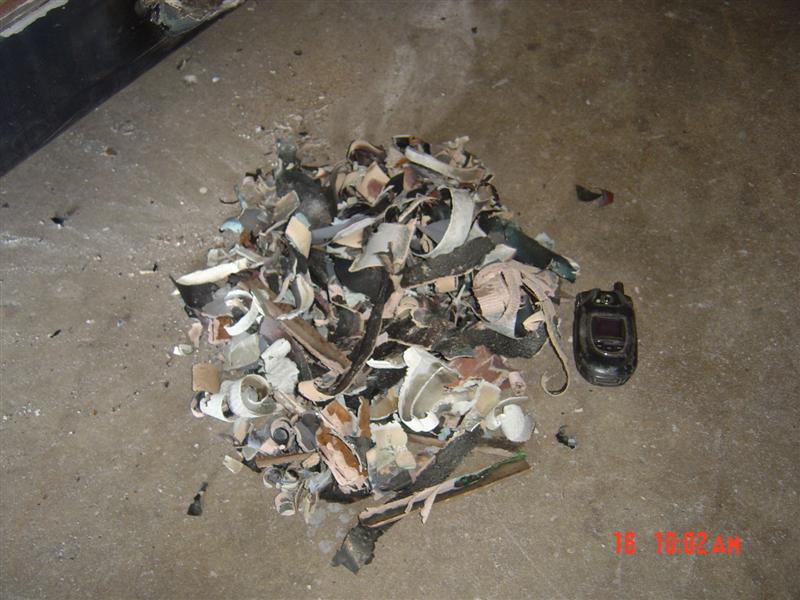
![]() A SMALL part of what I scraped off of the drivers rocker and front part of the 1/4 panel
A SMALL part of what I scraped off of the drivers rocker and front part of the 1/4 panel
NICE LONGS MAN !!!!
Attached image(s)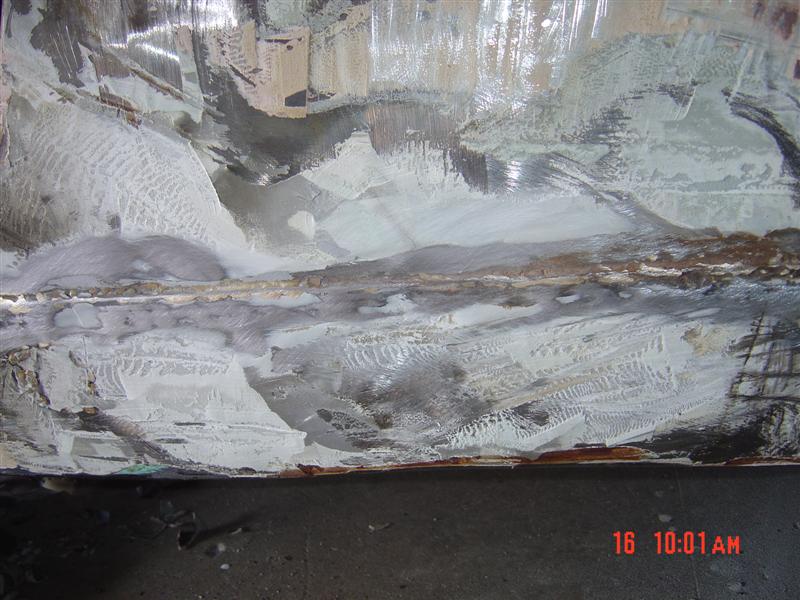
Posted by: degreeoff Feb 17 2009, 06:36 PM
Post whore!.....I just noticed the awful blended rockers...I retract my last statement.......
Posted by: scotty b Feb 17 2009, 06:37 PM
I gotta get me one of these Califonia cars ![]()
Attached image(s)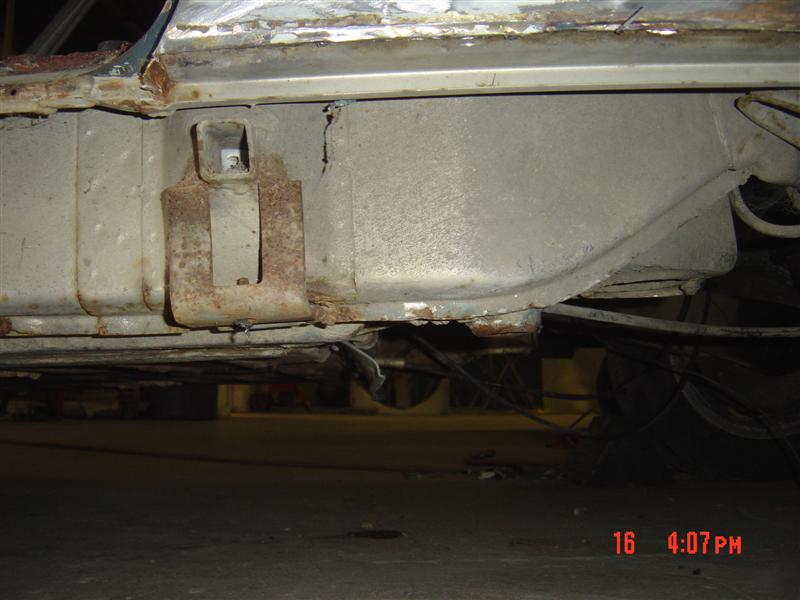
Posted by: scotty b Feb 17 2009, 06:38 PM
Post whore!.....I just noticed the awful blended rockers...I retract my last statement.......
Yeah I'm not sure how I feel about the rockers being blended in. Part of me thinks, that done well it might look pretty damn good
Posted by: degreeoff Feb 17 2009, 06:39 PM
I retract my retracted statement....damn!
Posted by: scotty b Feb 17 2009, 06:52 PM
![]()
I retract my retracted statement....damn!
Posted by: Joe Sharp Feb 17 2009, 06:56 PM
Scotty, we'd cut that car up out here. You need to have us look for a tub for ya.
Posted by: scottb Feb 17 2009, 07:01 PM
scott,
when you are ready for the windshield install, let me know. i have some moulding i promised mike prior to his "incident"........ i will ship it to you when ready.
cheers,
scott
Posted by: PanelBilly Feb 17 2009, 07:05 PM
Is there something special about this car that I've missed? Looks like any other one that was abused and rigged up to be abused again.
Posted by: scotty b Feb 17 2009, 07:05 PM
Scotty, we'd cut that car up out here. You need to have us look for a tub for ya.
You've GOT to be shitting me right ?? This thing is PRISTINE for east coast cars. If I had 20 of them to do, I'd have a good living.
Posted by: Joe Sharp Feb 17 2009, 07:14 PM
We shipped Grasshopper a roller and the total cost including shipping was under $1200.
Posted by: Pat Garvey Feb 17 2009, 07:15 PM
Scotty,
Is this a customer car? Are you being paid to do the work?
God, I hope so!
Pat
Posted by: scotty b Feb 17 2009, 07:18 PM
Scotty,
Is this a customer car? Are you being paid to do the work?
God, I hope so!
Pat
It's Mike's ( Dr Evil to you
Posted by: PanelBilly Feb 17 2009, 07:21 PM
Scotty,
Is this a customer car? Are you being paid to do the work?
God, I hope so!
Pat
Excuse me, if this is a customers car, a PAYING customer, then I reconize that it is indeed a rare model worth every penny spent.
Posted by: jimkelly Feb 17 2009, 07:26 PM
you will be transferring everything possible over from his 6 - correct?
if you need any help mounting the tach -let me know ![]()
jim
Posted by: scotty b Feb 17 2009, 07:34 PM
you will be transferring everything possible over from his 6 - correct?
if you need any help mounting the tach -let me know
jim
Yes and HELL NO !!!!
Posted by: Dr Evil Feb 17 2009, 08:27 PM
Oooo, that is in good shape. Total cost = $1150 shipped. Cant beat that ![]() Yes, I would not ask Scotty to do a free/swap for work deal on this project. He is, deservedly, getting some of the insurance $$ from the crash. He is still working for slave wages, though. I have a reputation to keep
Yes, I would not ask Scotty to do a free/swap for work deal on this project. He is, deservedly, getting some of the insurance $$ from the crash. He is still working for slave wages, though. I have a reputation to keep ![]()
![]()
Posted by: Dr Evil Feb 17 2009, 08:37 PM
If that fuel pump works I might could use it on the bus for the 4bbl ![]()
I should have a bunch of weekends that I can come down and drop off the car and work on the bus while you are doing the 914, etc ![]() I dont work a weekend for the next 2mo or so.
I dont work a weekend for the next 2mo or so.
Posted by: scotty b Feb 17 2009, 08:42 PM
Bus is coming home this week. Glass guy called today and said he'll be down tomorrow. I'm running out of room at work ![]() I guess that's a good thing
I guess that's a good thing ![]()
Posted by: Dr Evil Feb 17 2009, 08:50 PM
Oh, so you are certain they will be able to install the glass AND that they havent shortened it too much?
Posted by: scotty b Feb 17 2009, 08:57 PM
Oh, so you are certain they will be able to install the glass AND that they havent shortened it too much?
NO. I have zero expectations on that windshiled or any other ever going in that bus unbroken and permanently
Posted by: shoguneagle Feb 17 2009, 09:35 PM
Glad to see the "Great and Most Evil Dr. Evil" is getting everything settled regarding his 914.
Steve Hurt
Posted by: Chevota79 Feb 18 2009, 01:09 AM
HA. I was waiting for this to surface. I must have donated this car to you over 6 months ago. I could not even go 2 months with out some sort project and ended up buy a '72 driver.
Good Luck!!
BTW I had nothing to do with all that special body work ![]()
Posted by: scotty b Feb 18 2009, 06:47 PM
BTW I had nothing to do with all that special body work
Glad to know. I called someone a few interesting names in regards to ruining those rocker panels
Posted by: Chevota79 Feb 18 2009, 06:56 PM
I actually got that car from a guy on this board with plans on restoring it but due to being in my senior year of college with no time I decided to let it go. It did look like there was quit a bit of custom bondo going on there. Actually kinda glad it is your problem now ![]()
I think his name was Richard Linsdal?
BTW
What was the deal with the home made flares? Didnt they have 1/2" solid rod inside the lip.
Posted by: Dr Evil Feb 18 2009, 07:00 PM
Keeping it in the family ![]()
Scotty, I am wanting some rockers that flare out at the bottom at the ends. I know you can do that ![]()
Posted by: scotty b Feb 18 2009, 07:17 PM
BTW
What was the deal with the home made flares? Didnt they have 1/2" solid rod inside the lip.
Ha, that was interesting. The original lip was cut completely off, then the fender was bent outwards and the lip was brazed back on with a slight extension....I think......
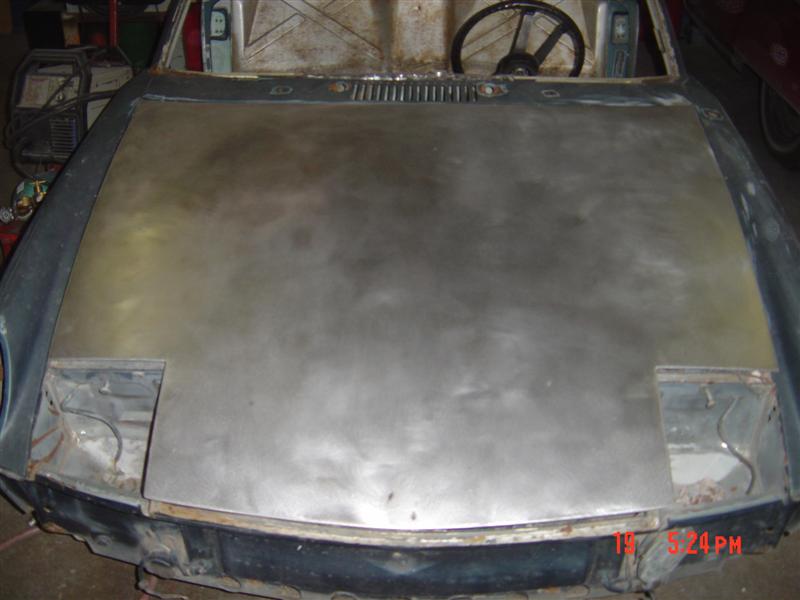
Mike do you want the antenna hole welded up? What about the windshield squirters ? Right now I'm going to get the interior cleaned up and painted and start stripping the hood. That will keep me busy until the other car gets here
Posted by: scotty b Feb 19 2009, 06:02 PM
Guys I don't give a damn what your paint rep says DO NOT PAINT OVER FLASH RUST !!! This is what happens. I stripped close to half of this hood with a razor blade. ![]() The larger pieces are just a few that came off that way. Two are upside down so you can see the rust attatched to the paint.
The larger pieces are just a few that came off that way. Two are upside down so you can see the rust attatched to the paint. ![]()
Attached image(s)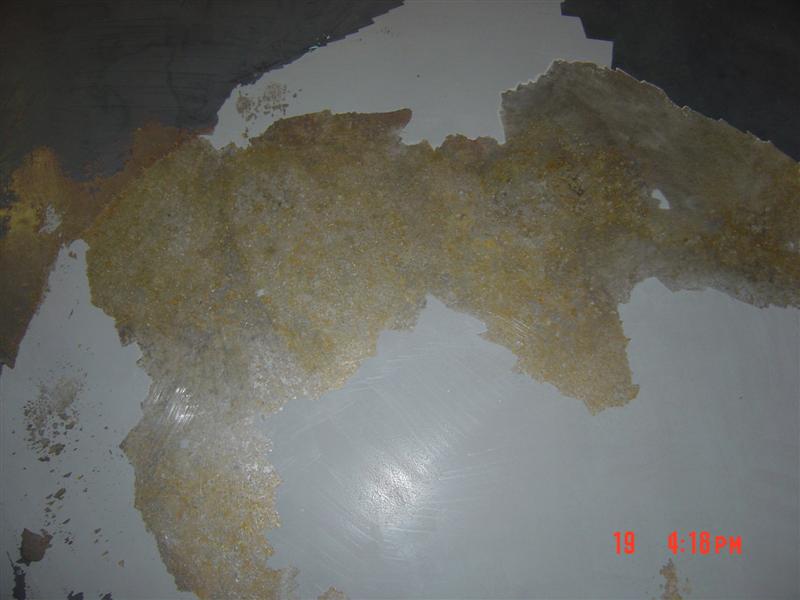
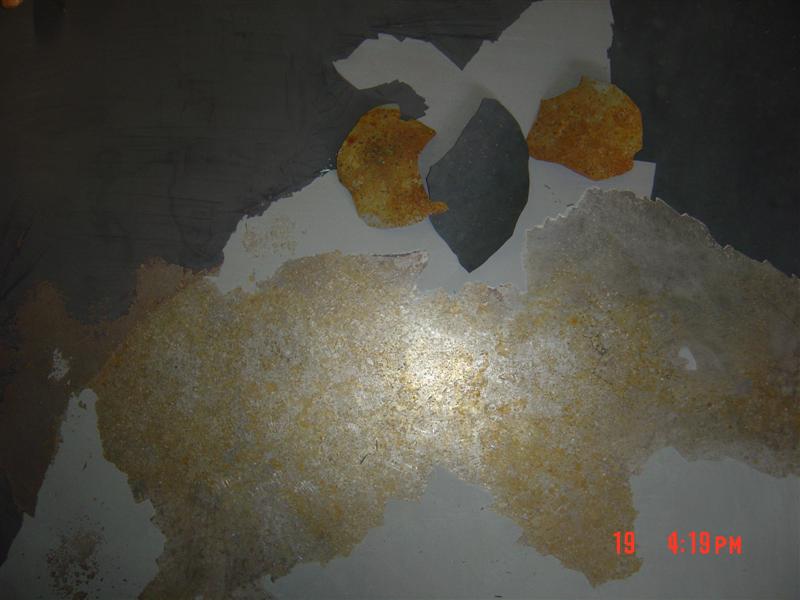
Posted by: Dr Evil Feb 19 2009, 06:13 PM
Ik, I want the antenna hole welded as well as the side marker light holes please ![]()
Posted by: scotty b Feb 19 2009, 06:27 PM
Ik, I want the antenna hole welded as well as the side marker light holes please
Done. How about the windshield squirter holes
Posted by: Dr Evil Feb 19 2009, 06:34 PM
I want the squirter holes, I use them for the windshield and have mine converted to power.
Posted by: Justinp71 Feb 19 2009, 10:54 PM
WooWhooo!!!
Another one coming to life....
![]()
Posted by: Solo914 Feb 20 2009, 12:00 AM
Guys I don't give a damn what your paint rep says DO NOT PAINT OVER FLASH RUST !!! This is what happens. I stripped close to half of this hood with a razor blade.
Alright, so whats your recommendation, wirebrush, rustmort(conversion), metal etch primer and then go from there???
Just curious, as it looks like I am taking on the painting of my dad 911sc as a side project.
Kyle
Posted by: Phoenix 914-6GT Feb 20 2009, 12:15 AM
![]()
Posted by: Elliot Cannon Feb 20 2009, 12:19 AM
I wonder if the Doc will still be interested in 914s when he is a rich Beverly Hills plastic surgeon?? ![]()
Posted by: Spoke Feb 20 2009, 06:01 AM
Can't wait to see Scotty's magic on this one.
Posted by: atomix8 Feb 20 2009, 02:30 PM
Looking good Scotty... Can't wait to see Evil back on the road!
And for those who aren't from the east coast...I wasn't too surprised to find this behind my fiberglass: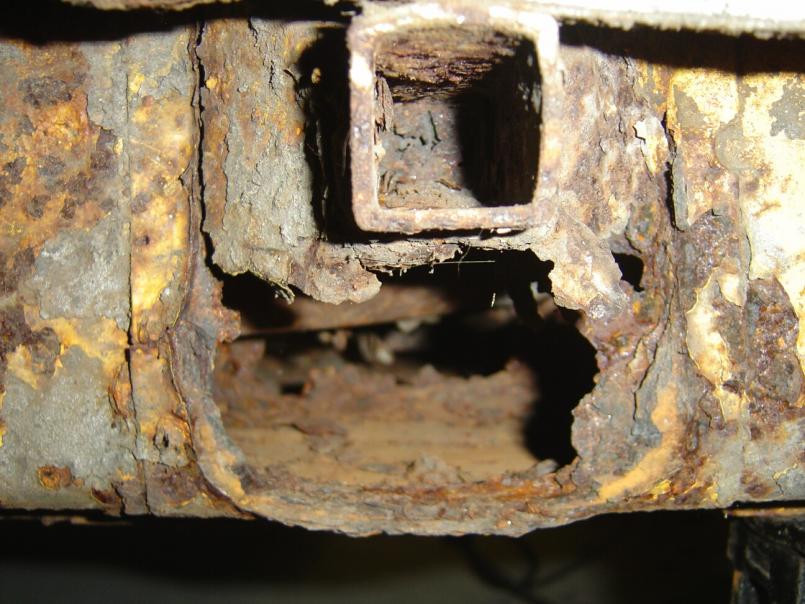
And that was the good side ![]()
Posted by: slackin' at work Feb 20 2009, 02:58 PM
you're a brave man, scotty.
I have a "nice" tr6 needing some work when your done with the docs car.
however it is NOT from CA.![]()
Posted by: Dr Evil Feb 20 2009, 03:06 PM
This is so weird to me, having someone else doing the work on my car. Its a real change as I always do everything except body and paint.
Posted by: pete-stevers Feb 20 2009, 04:49 PM
lookin good so far, ![]()
Posted by: Dr Evil Feb 20 2009, 06:30 PM
I removed the oil tank tonight. I had to cut it out as the frame twisted enough to make it impossible to remove normally ![]() It was not a big deal. I tried to pull the wiring harness so that I could check and fix anything, but the center tunnel was so bent and the /6 mount being in the way made it a job I am going to need Scotty to do. The mount needs to be removed at least. I am thinking of towing it down next weekend. I can get a tow dolly for free supposedly and I have a tow package on my VUE. I just need to install the trailer wiring.
It was not a big deal. I tried to pull the wiring harness so that I could check and fix anything, but the center tunnel was so bent and the /6 mount being in the way made it a job I am going to need Scotty to do. The mount needs to be removed at least. I am thinking of towing it down next weekend. I can get a tow dolly for free supposedly and I have a tow package on my VUE. I just need to install the trailer wiring.
Posted by: Justinp71 Feb 20 2009, 10:14 PM
Are you going to do the same body/ tire package as before? I think it was a narrow bodied w/rolled fenders and 16 or 17's...
Posted by: Dr Evil Feb 20 2009, 11:07 PM
Ya, same package. 17x 7.5 front, and 17x 9 in the rear.
Posted by: scotty b Feb 21 2009, 09:33 AM
[quote name='Solo914' date='Feb 19 2009, 10:00 PM' post='1135983']![]() --><div class='quotetop'>QUOTE(scotty b @ Feb 19 2009, 04:02 PM)
--><div class='quotetop'>QUOTE(scotty b @ Feb 19 2009, 04:02 PM)  </div><div class='quotemain'><!--quotec-->
Guys I don't give a damn what your paint rep says DO NOT PAINT OVER FLASH RUST !!! This is what happens. I stripped close to half of this hood with a razor blade. ![]() The larger pieces are just a few that came off that way. Two are upside down so you can see the rust attatched to the paint.
The larger pieces are just a few that came off that way. Two are upside down so you can see the rust attatched to the paint. ![]()
[/quote]
Alright, so whats your recommendation, wirebrush, rustmort(conversion), metal etch primer and then go from there???
Just curious, as it looks like I am taking on the painting of my dad 911sc as a side project.
Kyle
[/quote]
Sand, metal etch primer, sealer, bondo, sealer, paint. I start stripping with 36 grit to speed things up, then finish sanding the panle clean with 80 grit. IMO 36 is too much gouge to start painting over. I like to knock that down with the 80. Etch primer is the BEST way but to keep costs down you can use the now popular epoxy primer. just talk to your paint rep about which product he recommends over top of bare metal. If the panel sits bare for a while make sure to run over it again wiuth the 80 grit on a da.
Posted by: Dr Evil Feb 23 2009, 03:24 PM
Looking at a possible trip down this Sat to drop off the wreck. I have teh VUE wired up for towing, now and this weekend is free (minus gas and lodging fees ![]() ).
).
Posted by: scotty b Feb 25 2009, 06:55 PM
FOUND IT !!! there's ALWAYS one somewhere. This time it was tucked into the far back end of the drivers long ![]()
Attached image(s)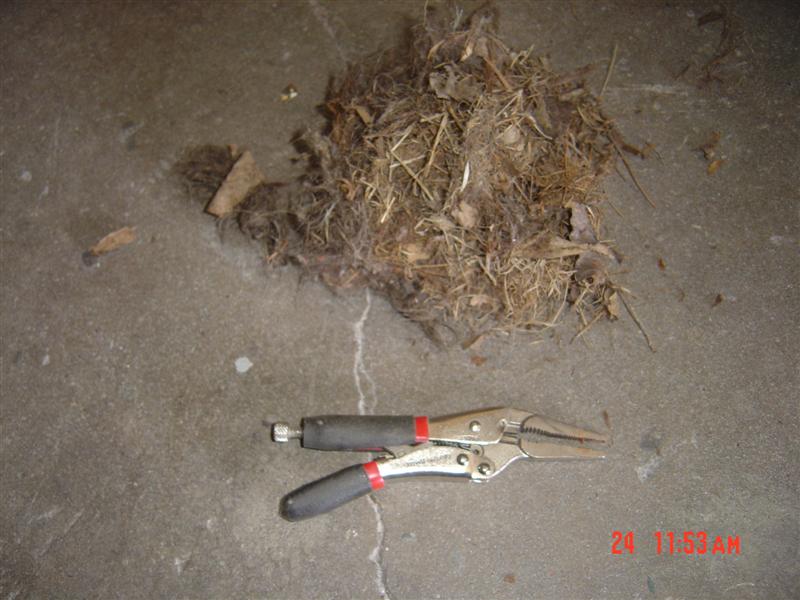
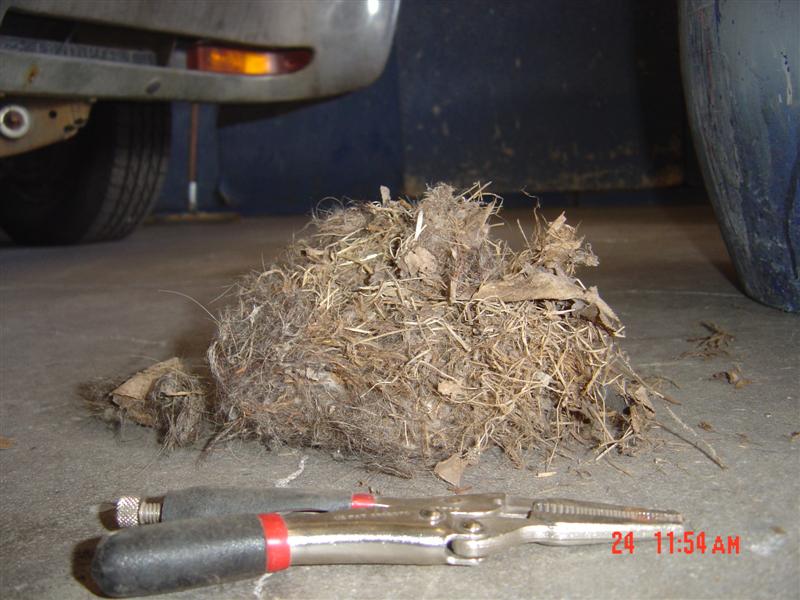
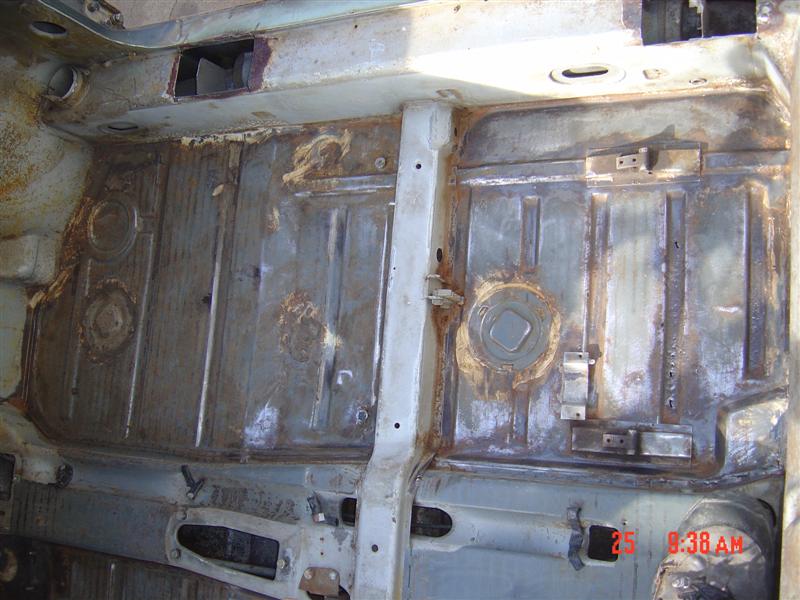
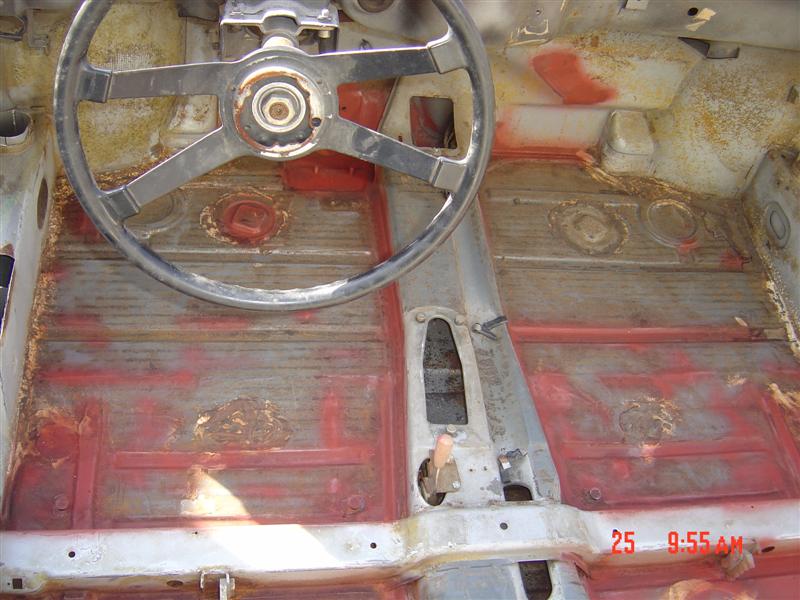
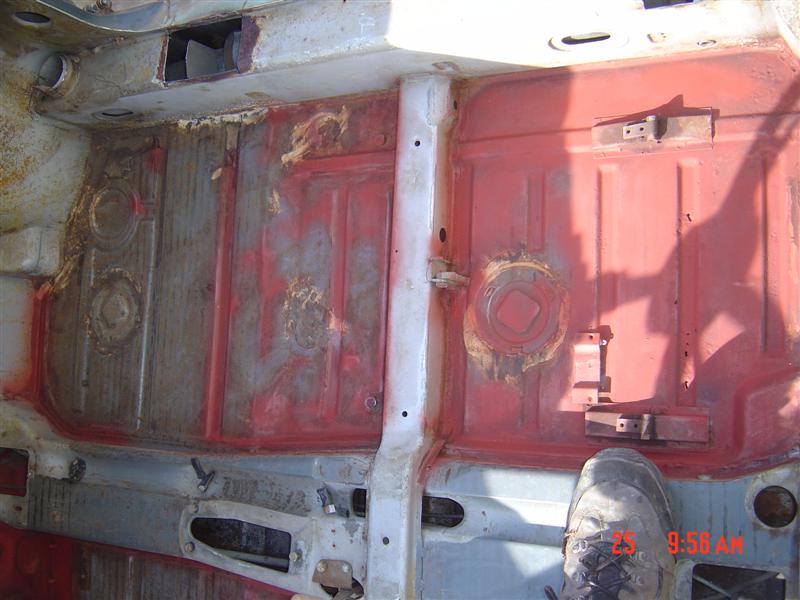
Posted by: scotty b Feb 25 2009, 06:57 PM
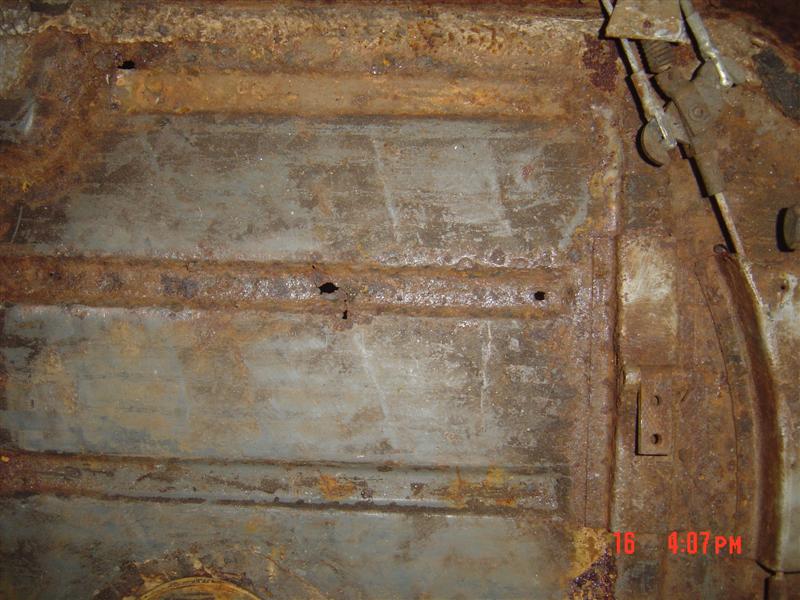
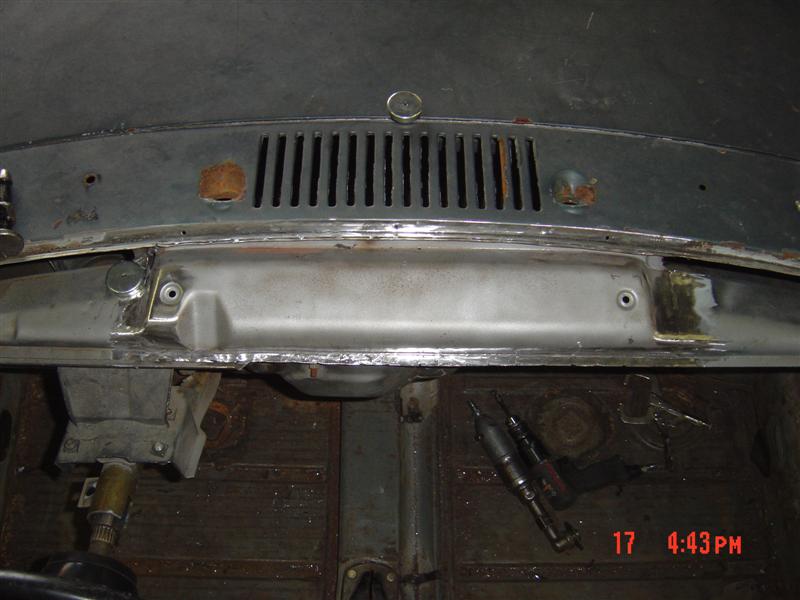
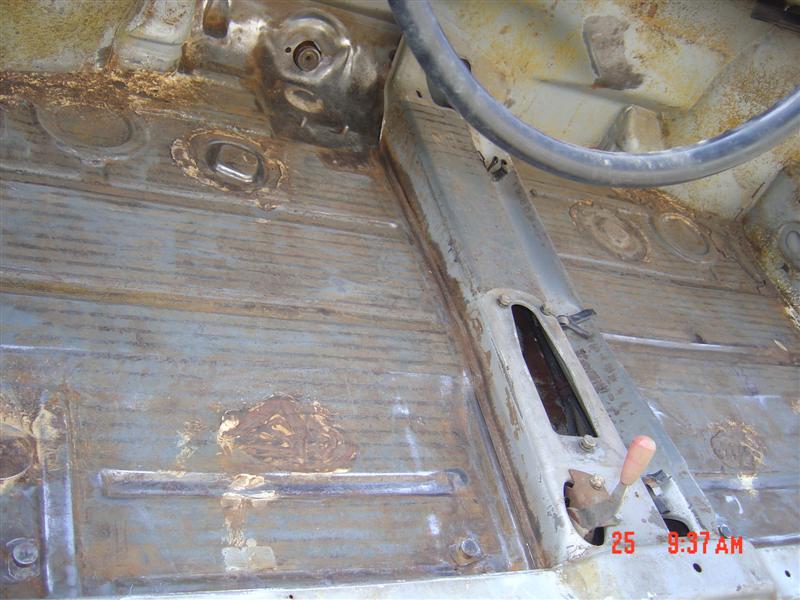
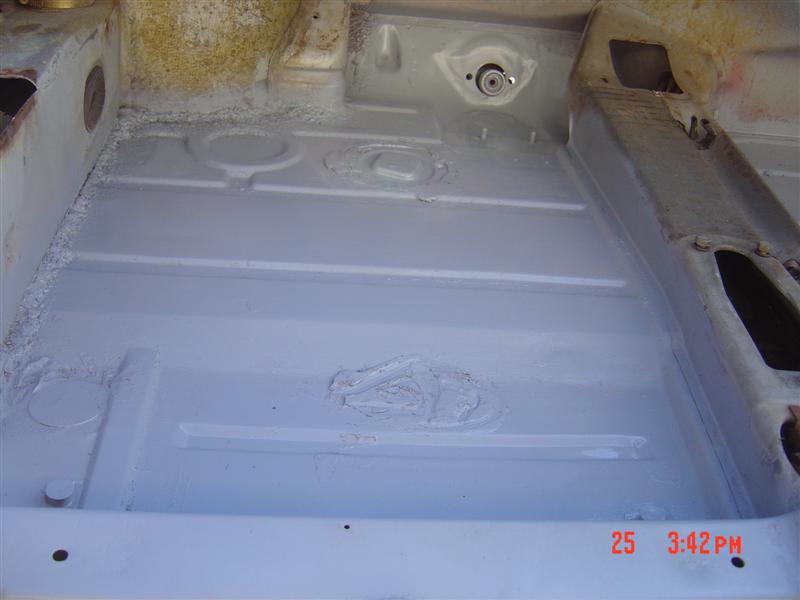
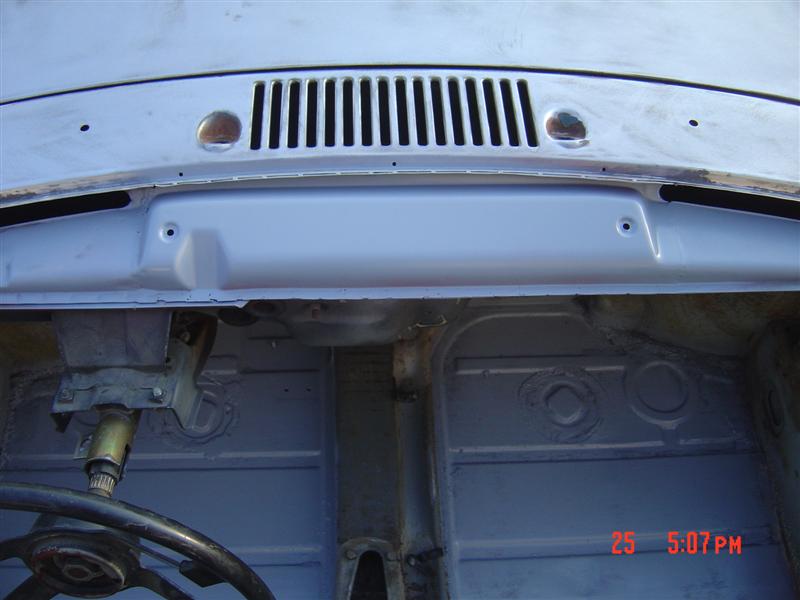
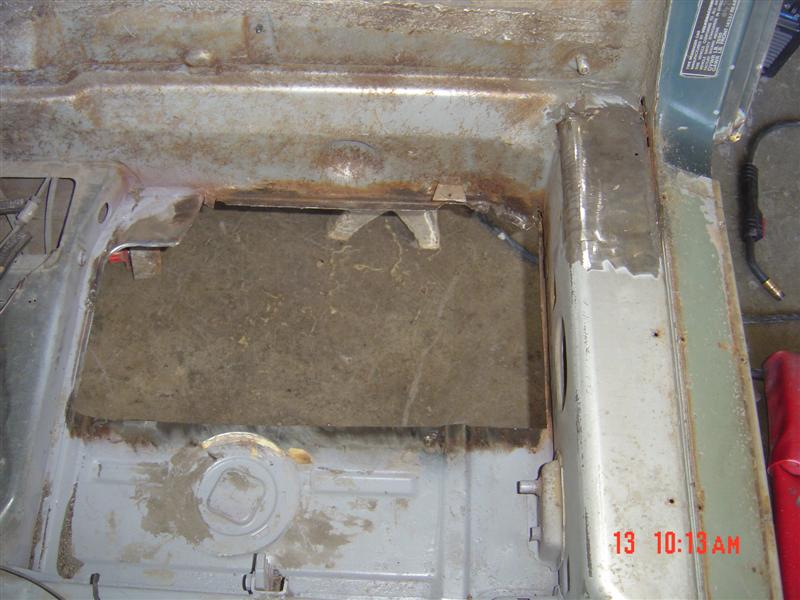
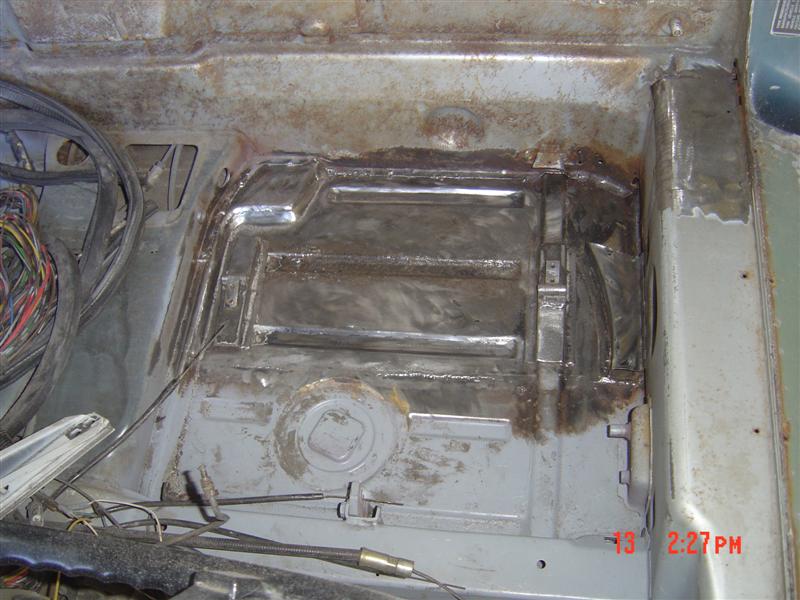
I hit the rusty spots on the floor with a wire brush, went over the whole thing with 150 grit, etched, and sealed it. Drivers rear will need some metal in it.
Attached image(s)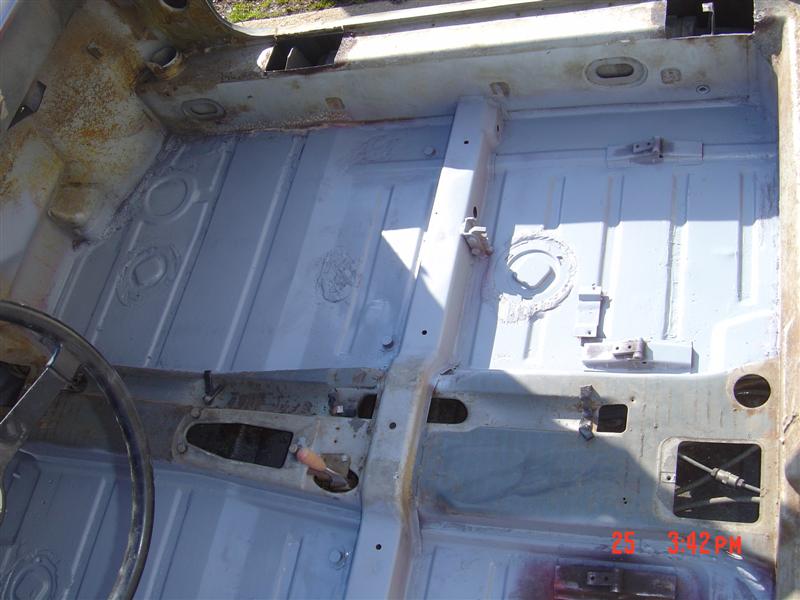
Posted by: scotty b Feb 25 2009, 06:59 PM
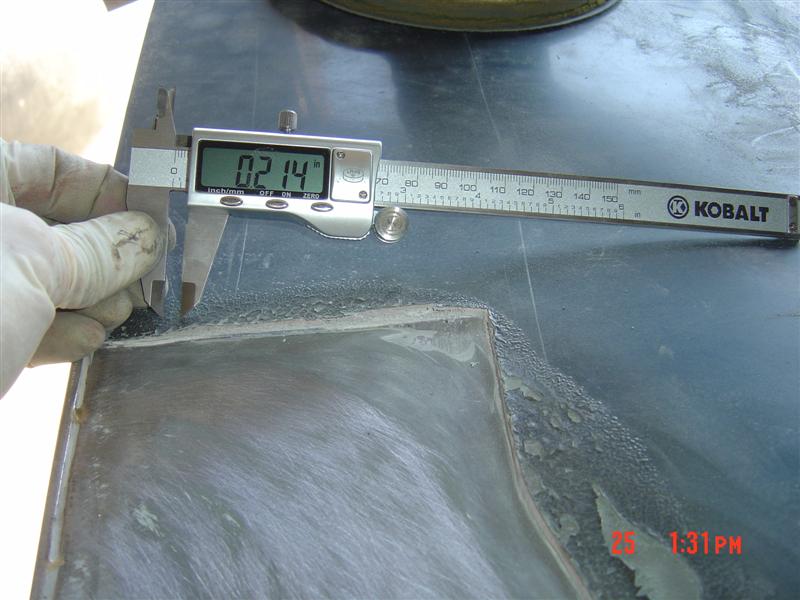
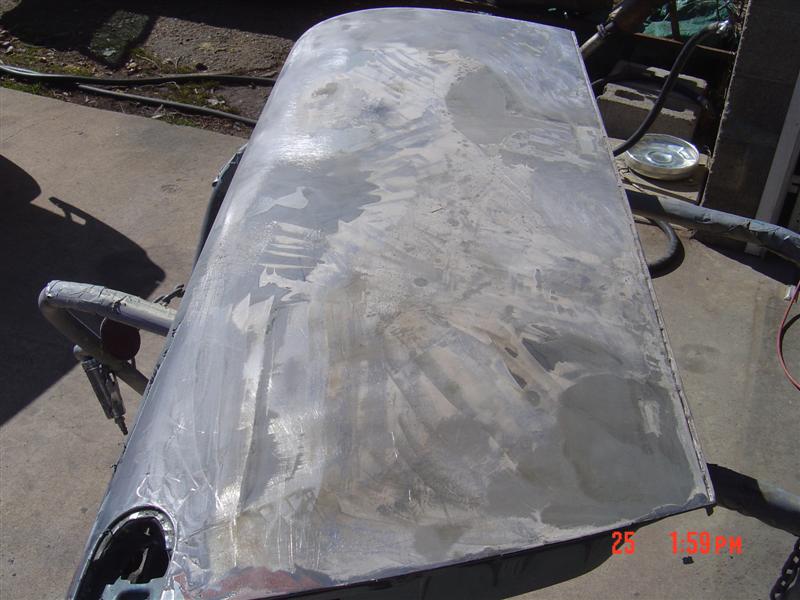
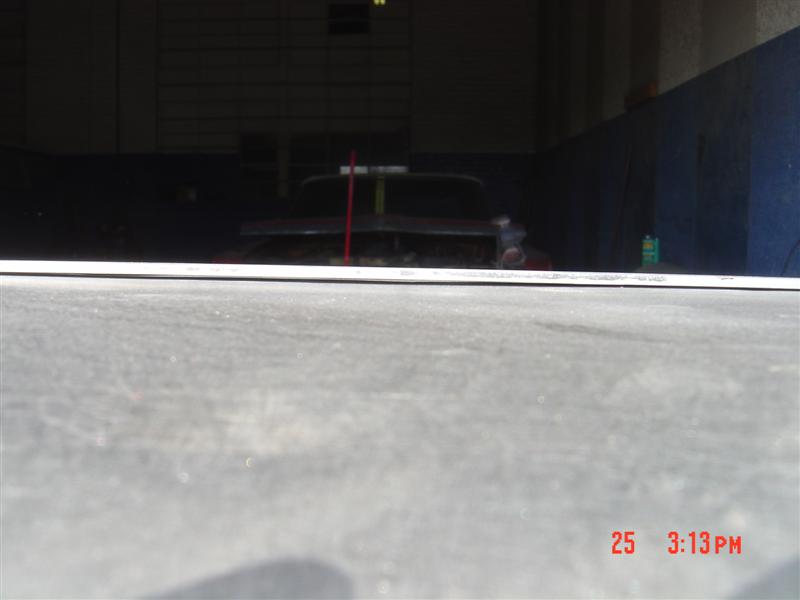
Interesting door mod I unearthed ![]() TOO MUCH BONDO KIDS !!! there are no signs of any physical damage so I tend to believe the oil cans in the door are due to the brazing
TOO MUCH BONDO KIDS !!! there are no signs of any physical damage so I tend to believe the oil cans in the door are due to the brazing
Attached image(s)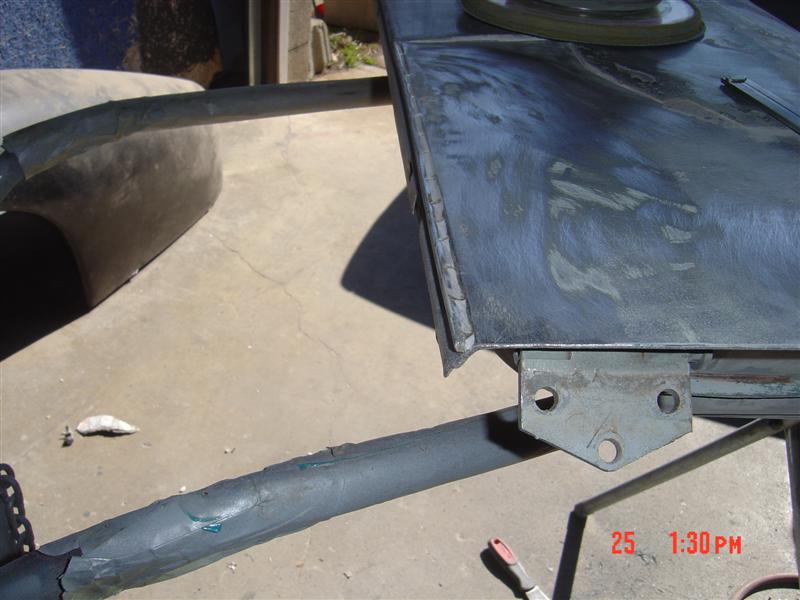
Posted by: scotty b Feb 25 2009, 07:01 PM
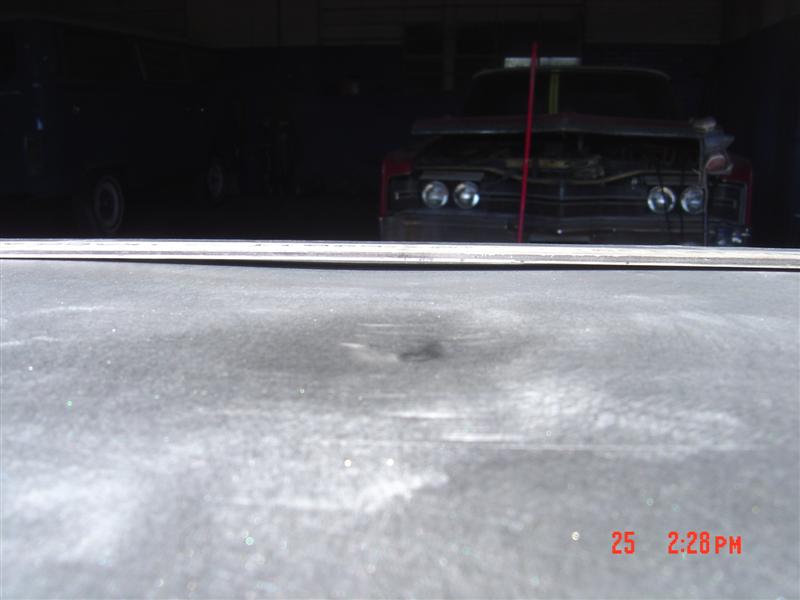
These are the 2 oil cans in the door. I tried to find an angle that shows it best, but there wasn't any really good shot. It is actually a bit werse than it looks here.
Attached image(s)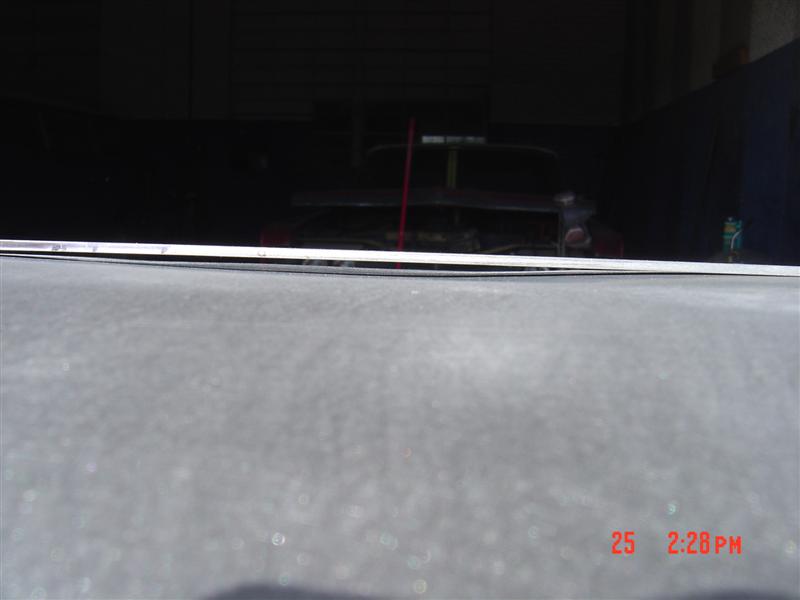
Posted by: scotty b Feb 25 2009, 07:03 PM
After a little help from my friends
Attached image(s)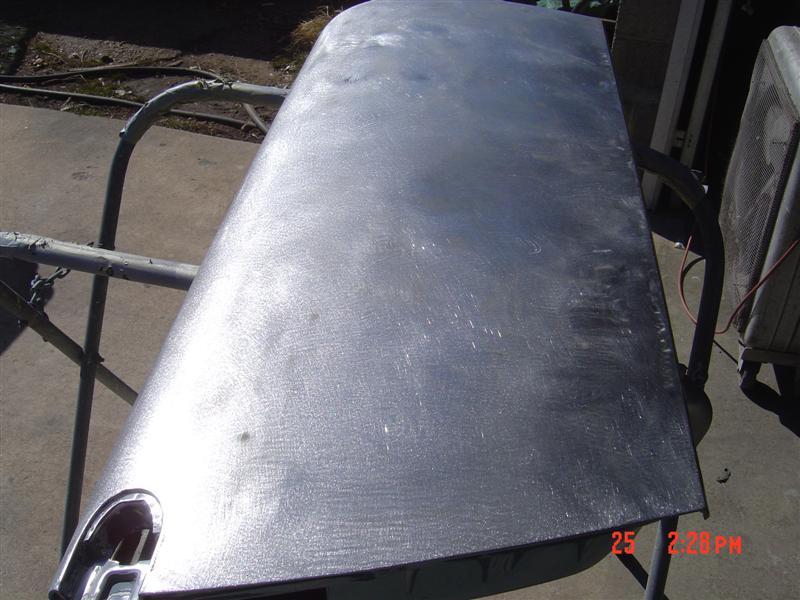
Posted by: scotty b Feb 25 2009, 07:04 PM
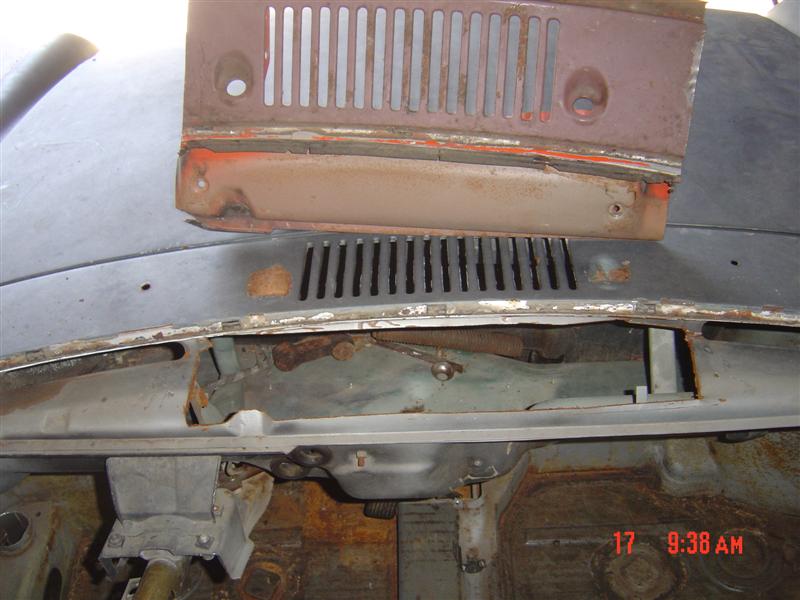
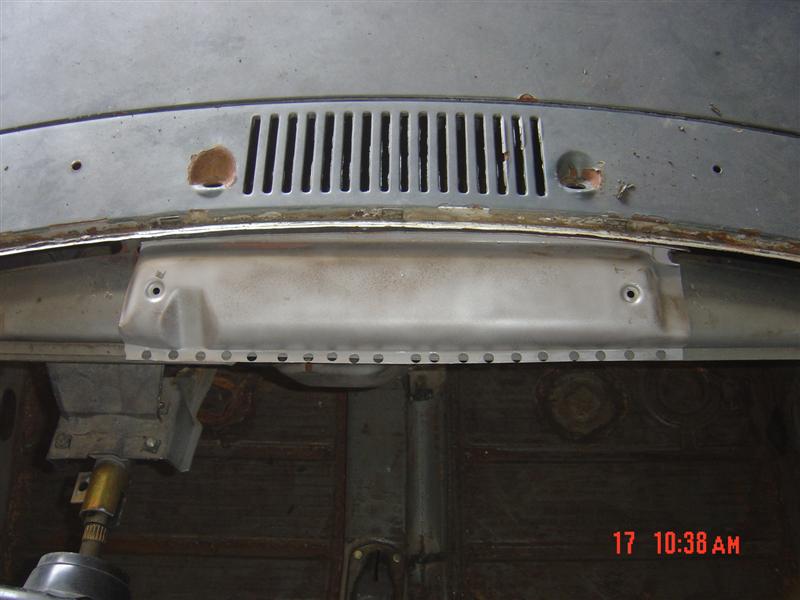
The remnants of 3 hours of my day. I didn't get any pics but I also stripped the roll bar ( one big dent ) both sail panels ( no issues ) and the cowl ( no issues )
Attached image(s)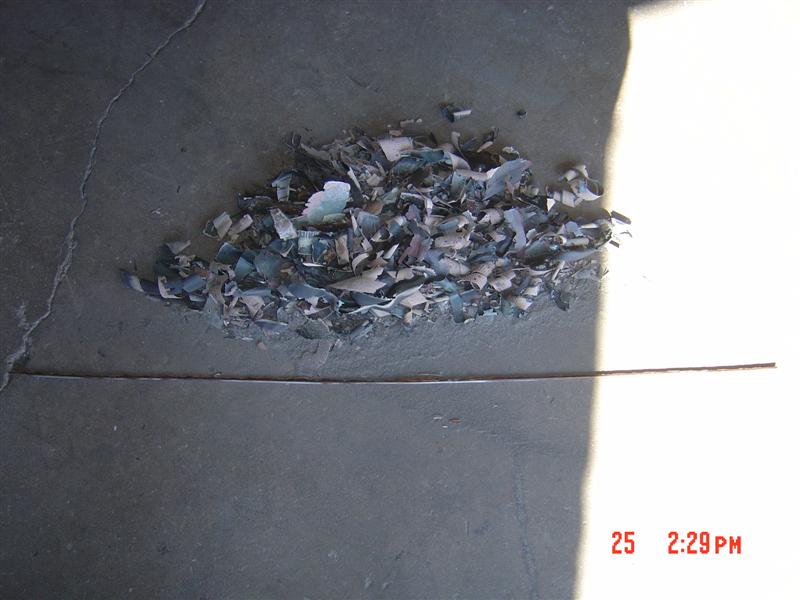
Posted by: Dr Evil Feb 25 2009, 10:13 PM
This pleases me ![]()
Posted by: Vacca Rabite Feb 26 2009, 07:49 AM
By the way, I'm cleared for Saturday morning wrecker loading duties. I'll meet you at your place at 9. If Scott has not already mailed it, just have him give you the 12 pin connecter I need for my car's engine harness.
Zach
Posted by: FourBlades Feb 26 2009, 10:20 AM
Scotty,
Can you give us some tips on shrinking with the torch? Like how big an area
do you heat, how do you know it is hot enough to quench? How many times
did you heat it and quench it?
I never really could shrink my door dents as much as I wanted.
What was the red stuff you put on the floors?
Thanks,
John
Posted by: Dr Evil Feb 26 2009, 10:57 AM
When you say "oil cans in the door", is that slang? What does it mean?
Posted by: Dr Evil Feb 26 2009, 11:44 AM
Tow dolly has been reserved and will be picked up at 9am on Sat ![]() Looks like the wreck is on its way down.
Looks like the wreck is on its way down.
Posted by: davesprinkle Feb 26 2009, 12:43 PM
When you say "oil cans in the door", is that slang? What does it mean?
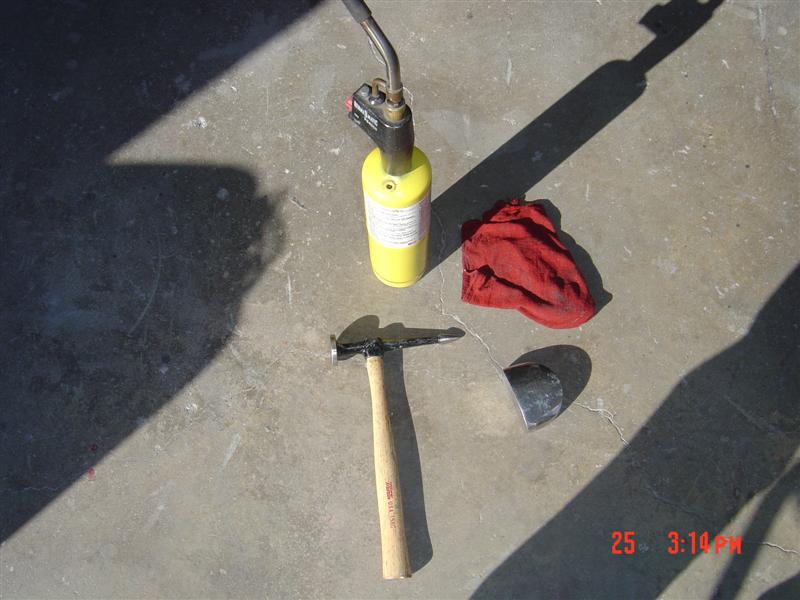
It's a flaw in a sheetmetal panel caused by being stretched. Typically located in a large, predominantly flat section (like a door panel). Its name refers to its behavior when pushed -- it will pop in or pop out, much like the bottom of an oil squirt-can. Fixing an oil can dent properly requires that the metal be shrunk. (Or you can go with the "trailer" fix -- just pop it in and mud it up.)
Posted by: Dr Evil Feb 26 2009, 02:41 PM
When you say "oil cans in the door", is that slang? What does it mean?
It's a flaw in a sheetmetal panel caused by being stretched. Typically located in a large, predominantly flat section (like a door panel). Its name refers to its behavior when pushed -- it will pop in or pop out, much like the bottom of an oil squirt-can. Fixing an oil can dent properly requires that the metal be shrunk. (Or you can go with the "trailer" fix -- just pop it in and mud it up.)
Ah, that makes sense.
Posted by: scotty b Feb 26 2009, 07:49 PM
Dave hit it on the head. As for my method I just played around until I figured it out, so It's kind of hard for me to explain. I just knew how the metal reacts from heat. You need to be able to read dent, basically tell where the outer edges are, figure out WHAT cuased it, and then reverse it. An easy way is the whack the oil can a few times in different locations with a pick hammer backed with a block of wood. This will lock the dent back into place. Next heat and cool ( with a wet rag ) around the outer perimiter of the original oil can. This will shrink the metal back down to hold it tight. Then you can go back to the pick hammer spots and dolly them flat. This will get you alot closer, but if you want a " no filler " repair it will take much more time, and some better tools. John Kelly makes a shriking disc that works well, but takes time to know haow to use it. Time I haven't spent with it yet ![]() Most of what I know I figured out on my own, and becuase of that I am not good at explaining how I do it, I just do
Most of what I know I figured out on my own, and becuase of that I am not good at explaining how I do it, I just do ![]()
I tried to teach a couple of my friends how to snowboard once. they looked at me like I was speaking Gaelic, they went and took a 30 minute class ![]()
Posted by: scotty b Mar 4 2009, 06:05 PM
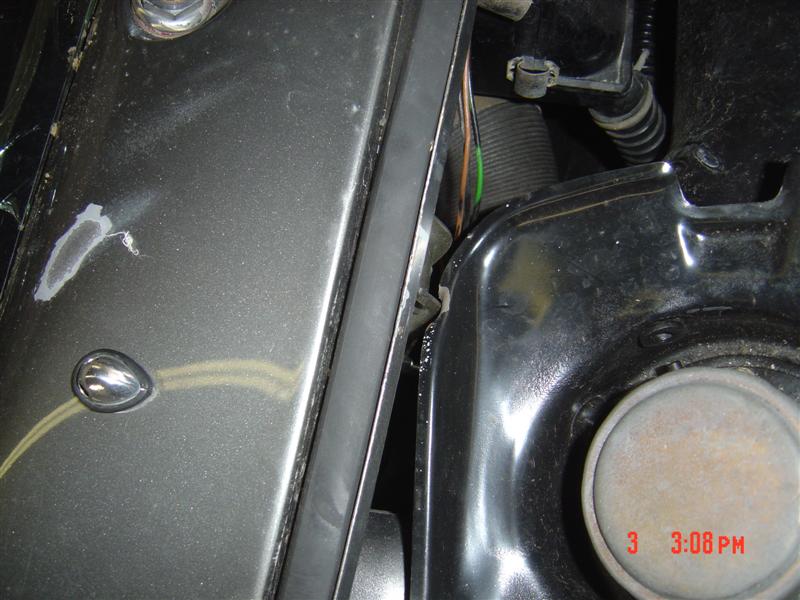
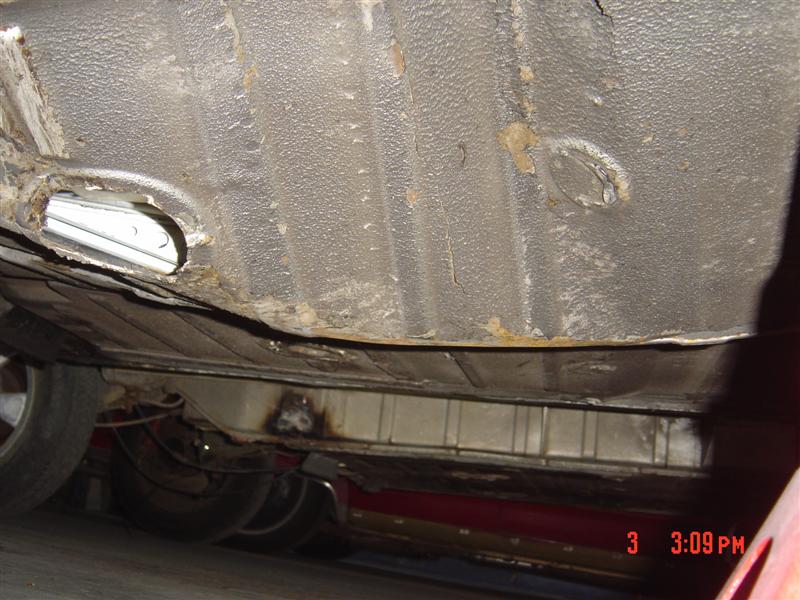
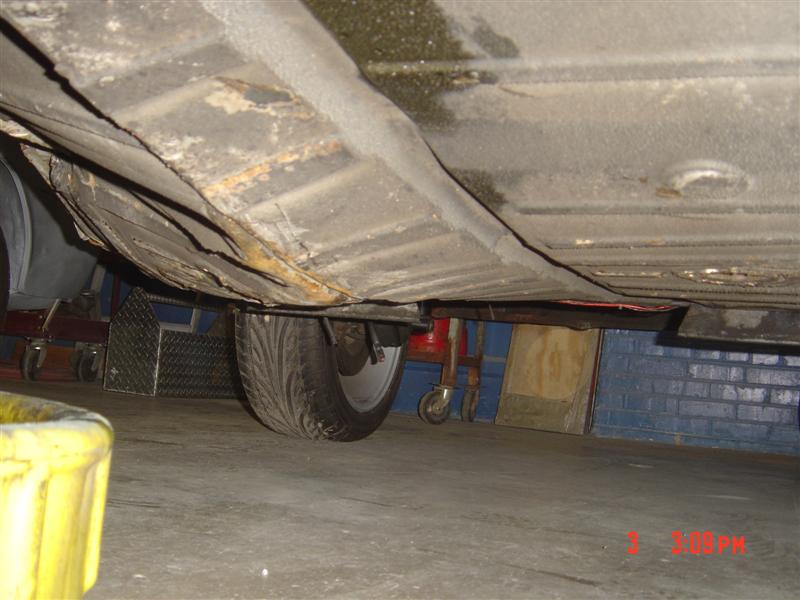
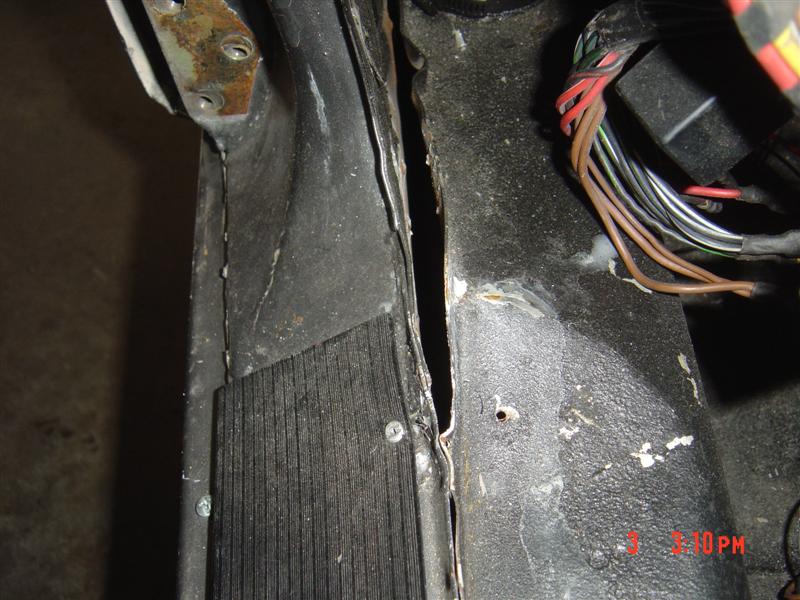
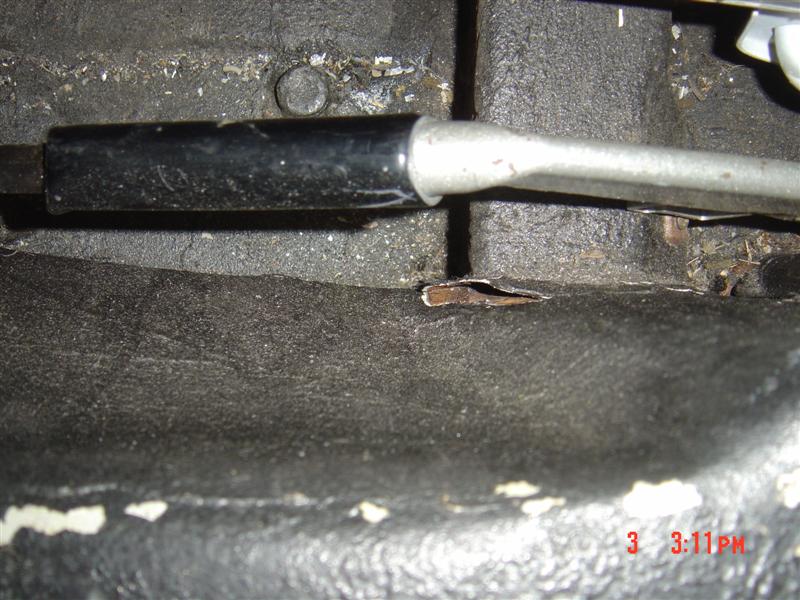
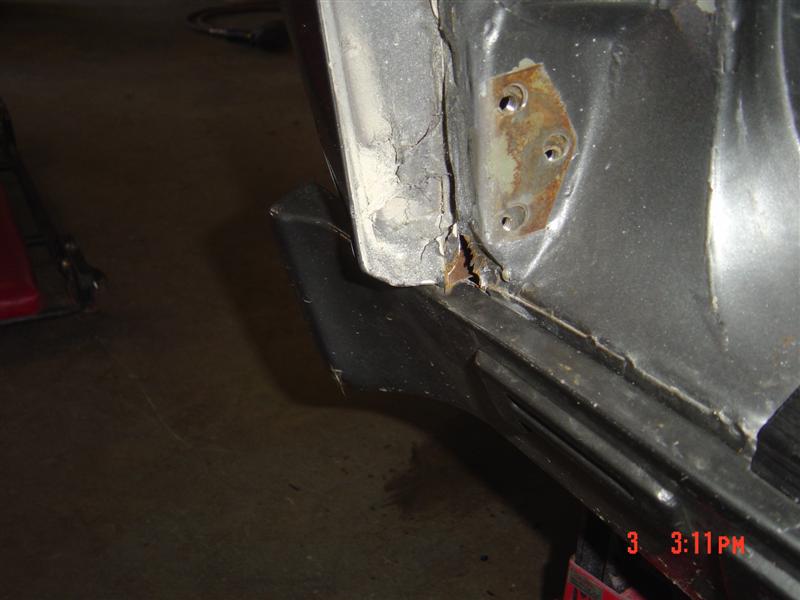
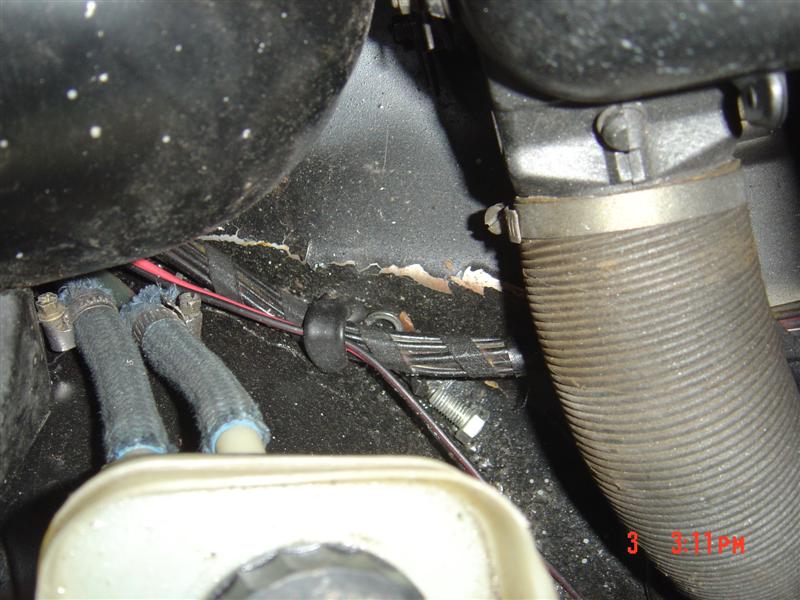
As most of you probably nkow Mike got the wreck down to me last weekend. I thought I'd post some pics of it and also to show you all how a car reacts, and transfers the impact during an accident.
Keep in mind as you look at these that this was a fairly low speed accident BUT it was against an immovable oblect, not another car that would have contibued to move after being struck.
Attached image(s)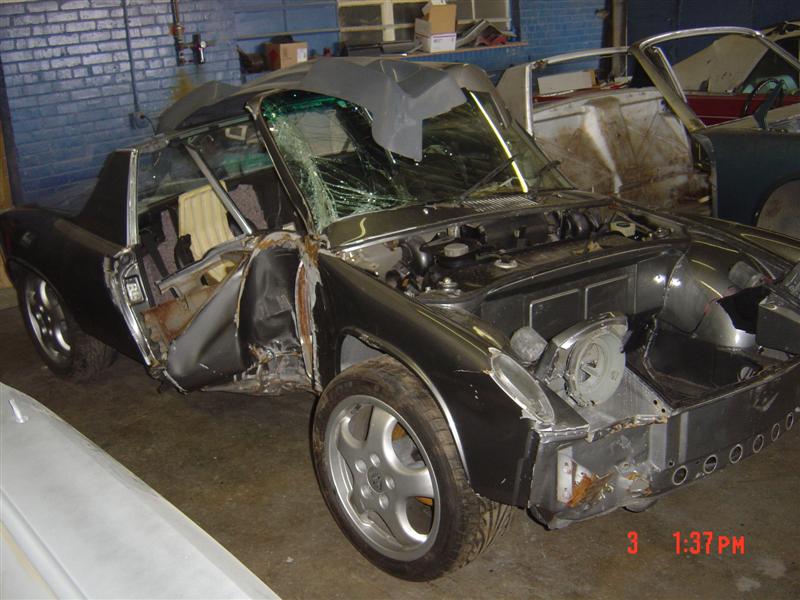
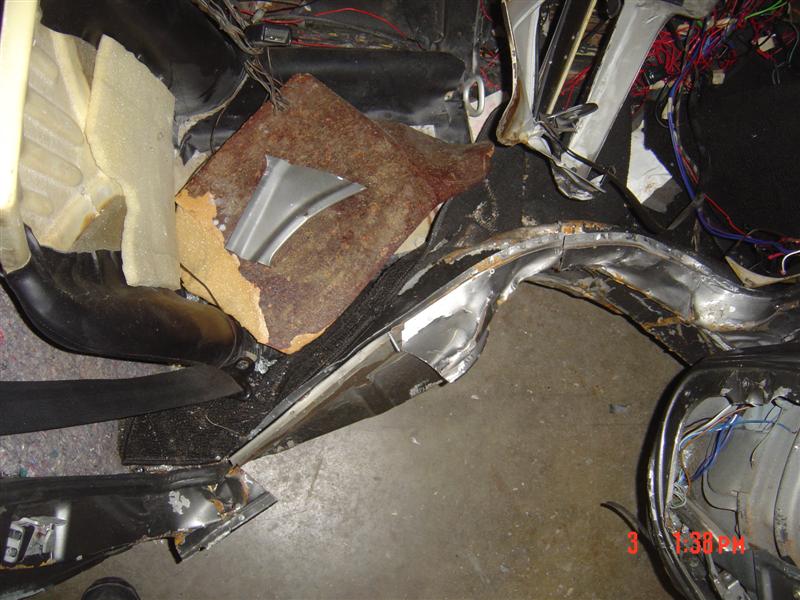
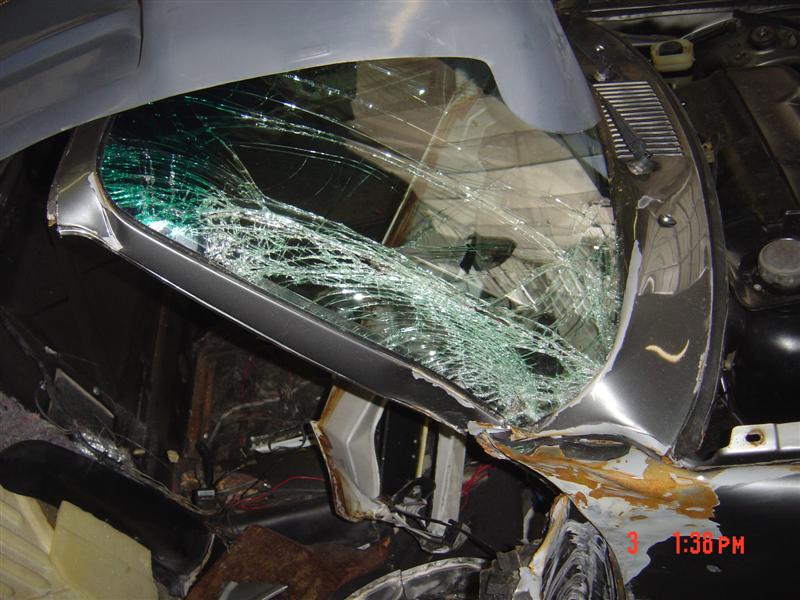
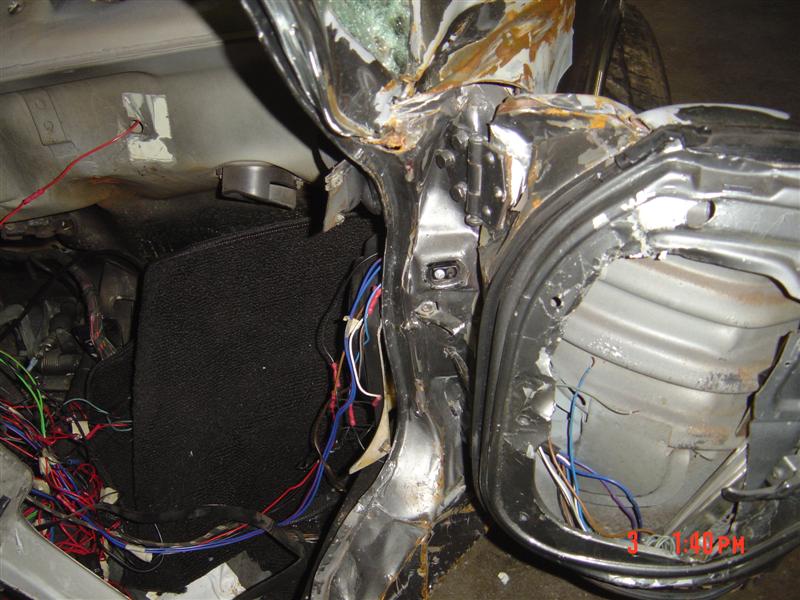
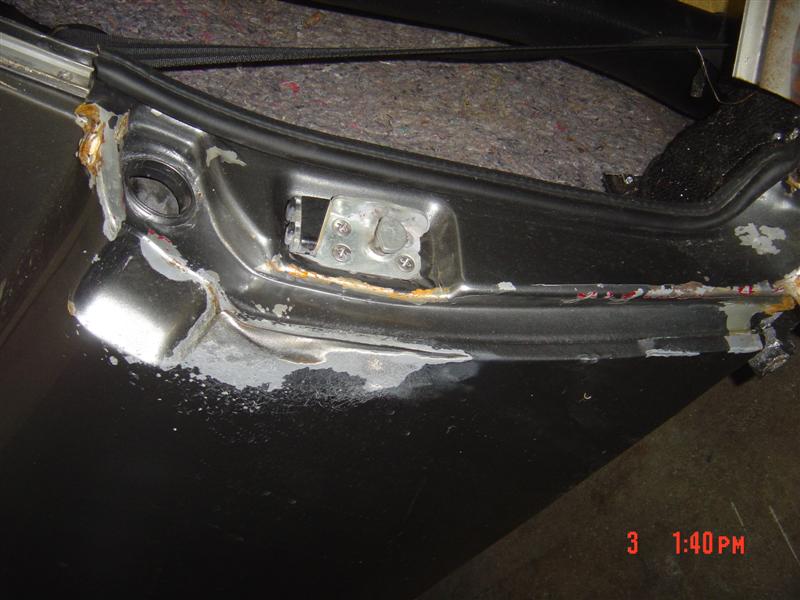
Posted by: scotty b Mar 4 2009, 06:07 PM
![]()
Attached image(s)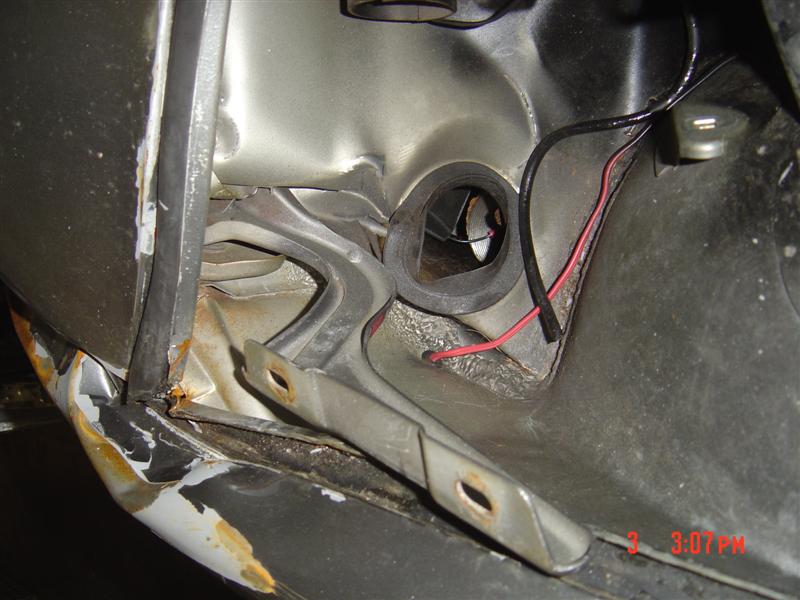
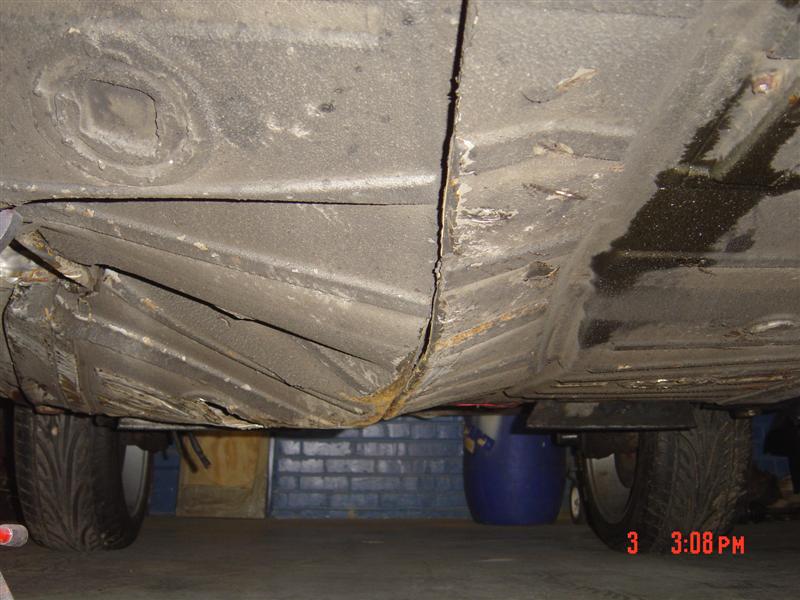
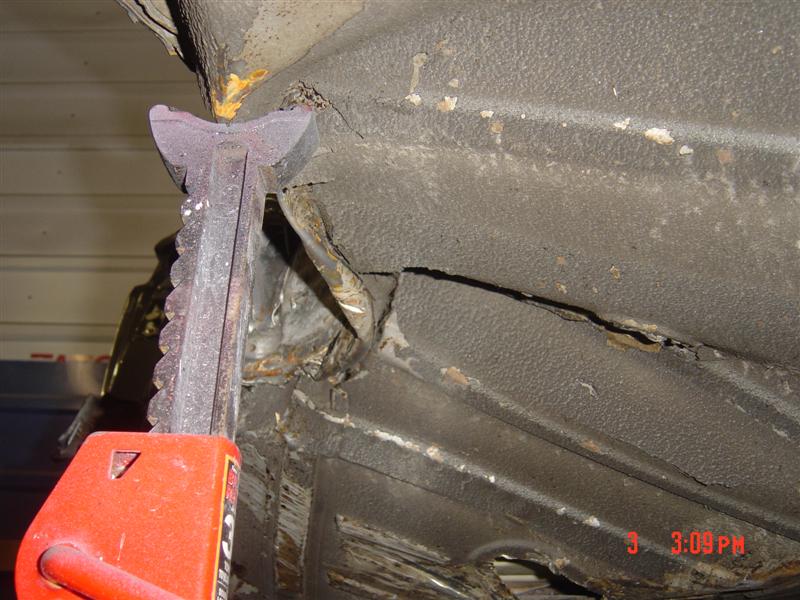
Posted by: scotty b Mar 4 2009, 06:08 PM
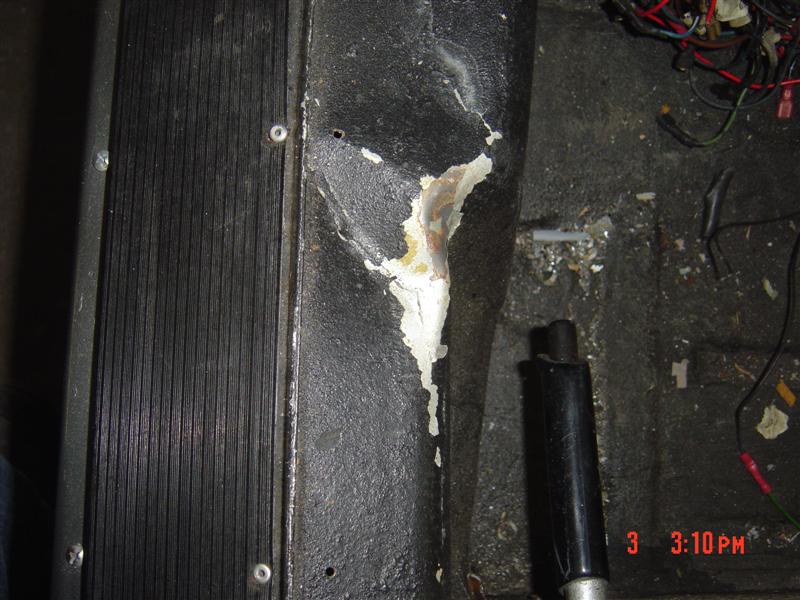
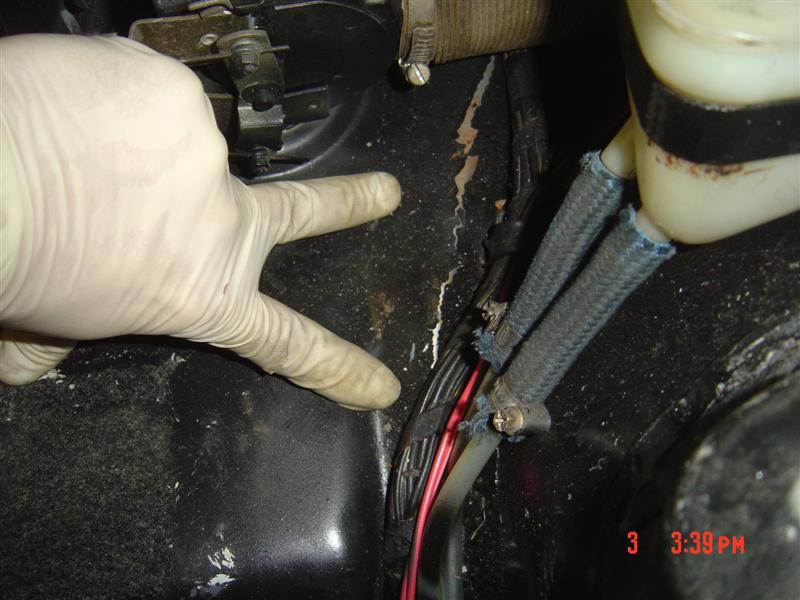
This is where it starts to get interesting. As you will notiuce alot of the next set of pics are of the DRIVERS side. There is one where my hand is pointing out 2 spots that in the pic are hard to see, but they are where the trunk floor had buckled.
Attached image(s)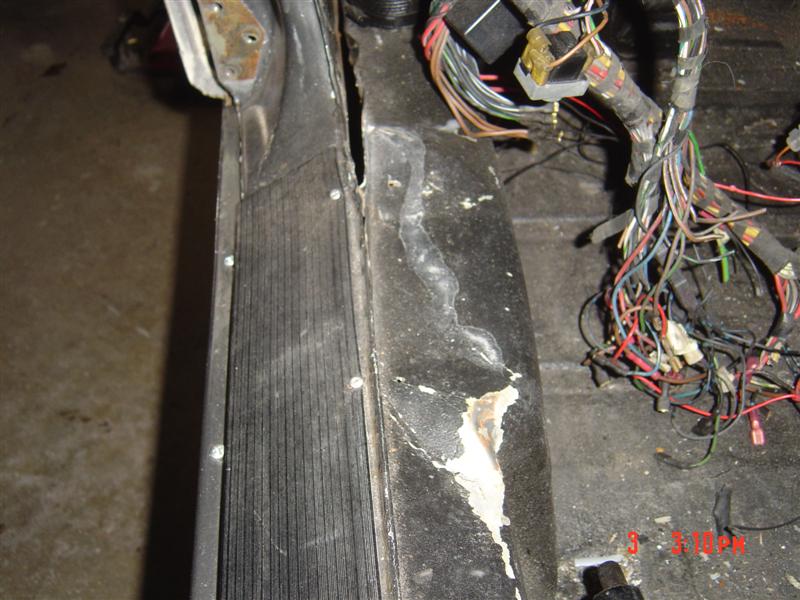
Posted by: scotty b Mar 4 2009, 06:11 PM
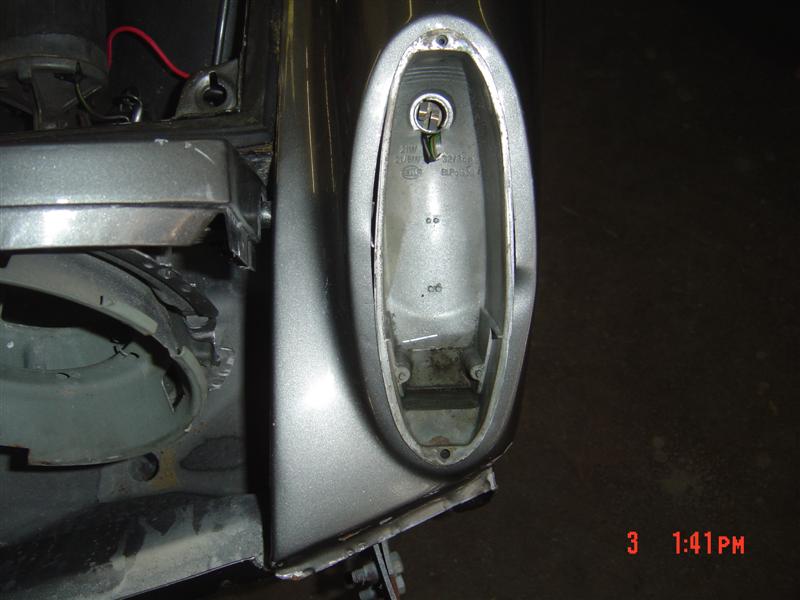
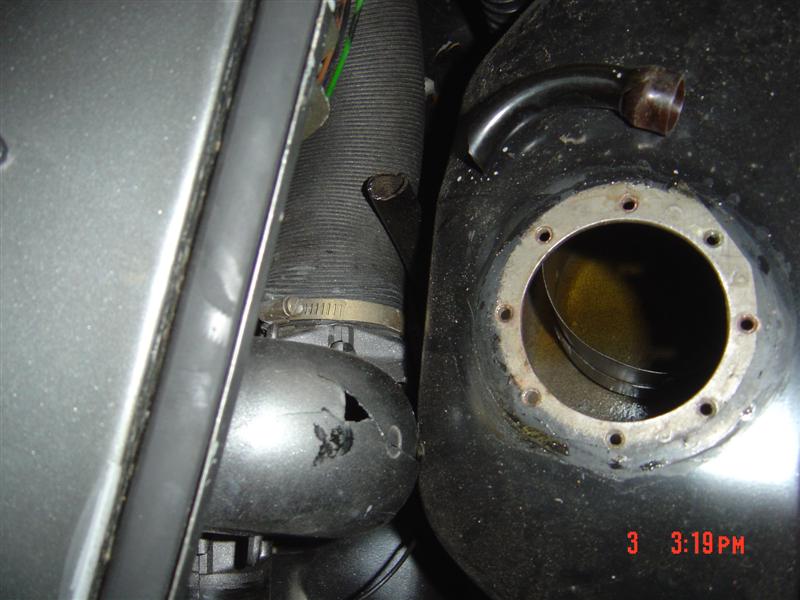
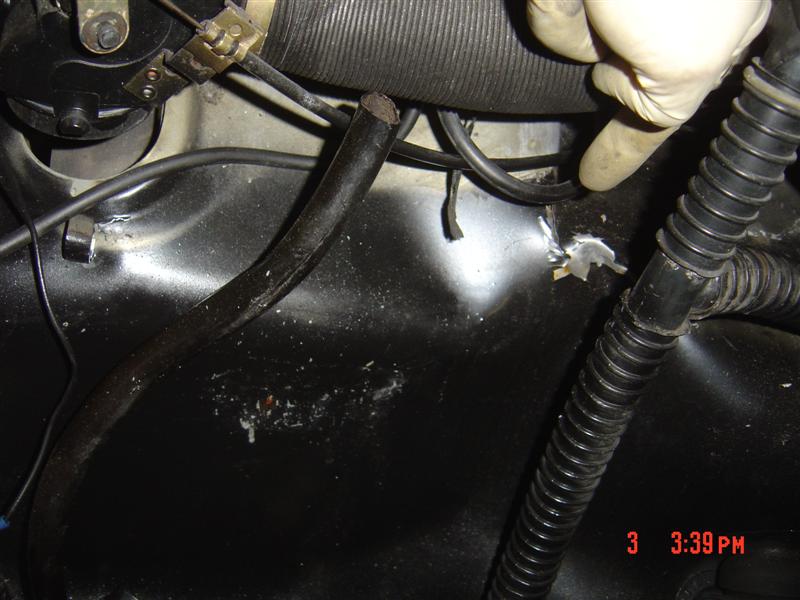
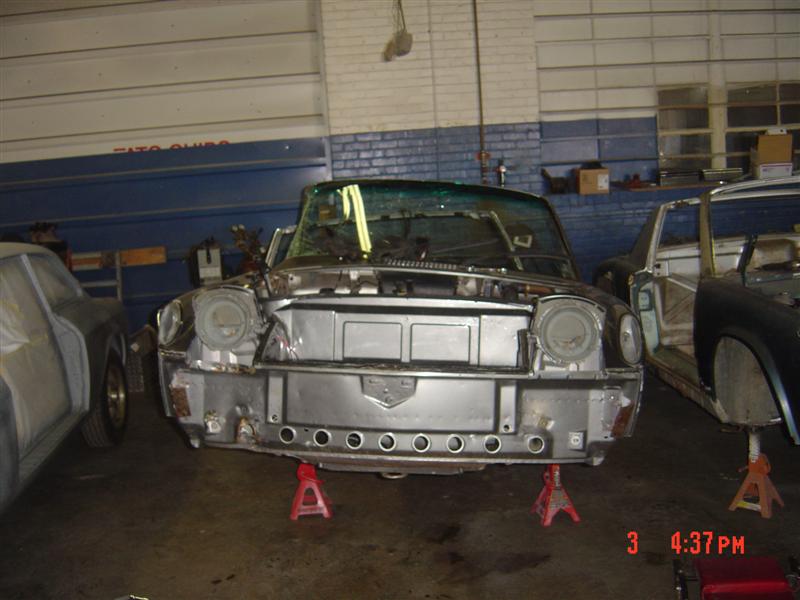
![]() In the pic of the car on jack stanmds the stands are at the same height. That is how much the car twisted at only 35 m.p.h.
In the pic of the car on jack stanmds the stands are at the same height. That is how much the car twisted at only 35 m.p.h.
Attached image(s)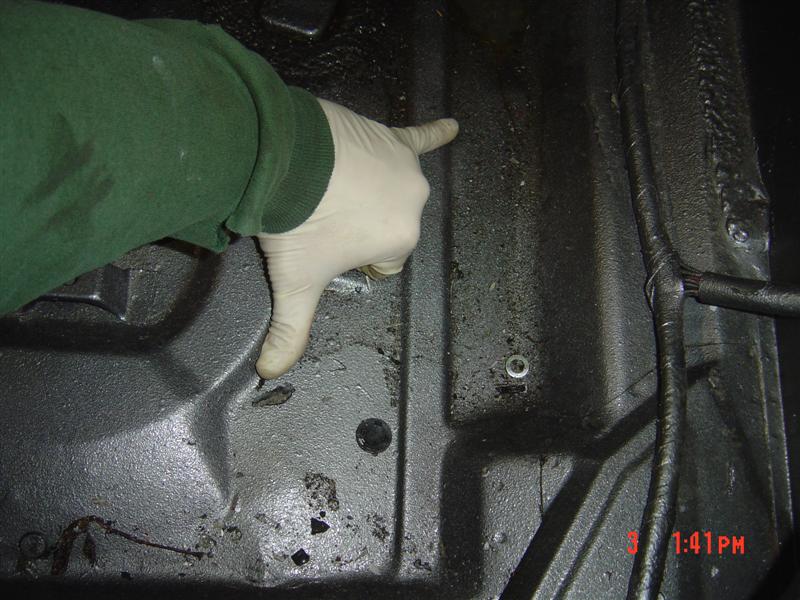
Posted by: Dr Evil Mar 4 2009, 06:11 PM
How embarrassing ![]()
Posted by: MDG Mar 4 2009, 06:13 PM
I remember seeing pics of this when the accident happened. I can't remember who the passenger was (maybe he doesn't remember either) but Hicheemama he's lucky!!
Nice to see parts of this car being brought back to life. Glad everyone was okay
Posted by: scotty b Mar 4 2009, 06:14 PM
How embarrassing
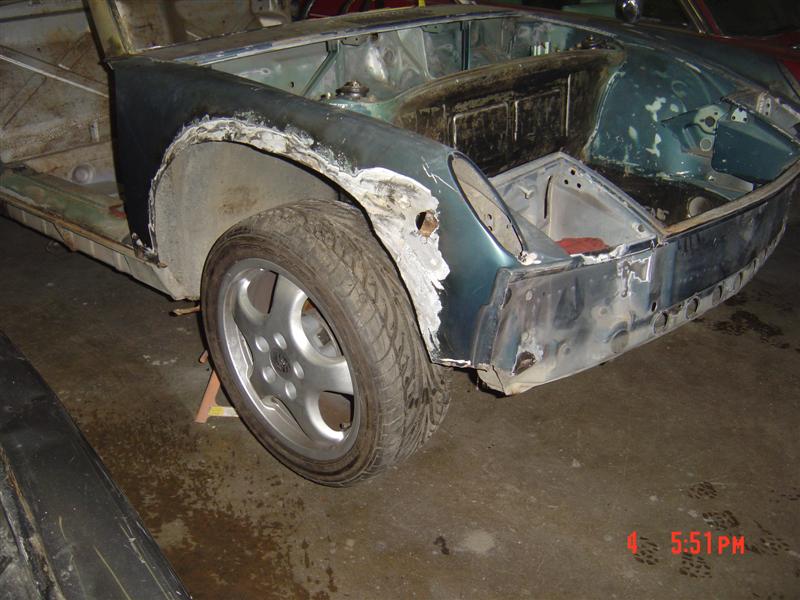
Not trying to embarrase you Mike I just thought alot of guys would find the inertia aspect interesting. Now for the happy pic. The front end, sway bar and steering is all swapped over, and I have about half of the front trunk / gas tank hole sanded and ready to prime and color
Attached image(s)
Posted by: scotty b Mar 4 2009, 06:17 PM
Oh and um I set the wreck on fire today. ![]() Pretty good one too. I was cutting the center tunnel to get access to the wiring harness and fuel lines and apparently there was quite a bit of fuel IN the tunnel
Pretty good one too. I was cutting the center tunnel to get access to the wiring harness and fuel lines and apparently there was quite a bit of fuel IN the tunnel ![]() Doesn't bode well for saving the lines as it would appear one of them is cracked. I will still get them out to make certain that is the issue and not some odd fuel drain back.
Doesn't bode well for saving the lines as it would appear one of them is cracked. I will still get them out to make certain that is the issue and not some odd fuel drain back.
Posted by: Dr Evil Mar 4 2009, 06:17 PM
My passenger was Chris (Type11969 ). He is doing well, but he had to endure some dental work....which no one would enjoy ![]()
Posted by: Dr Evil Mar 4 2009, 06:21 PM
Oh and um I set the wreck on fire today.
The fuel lines are replaceable, they are converted brake lines and cost me about $10. However, the wiring harness is important to me as I dont have a replacement, I know you do, though.
I am glad that you posted the pics. No worries. People need to see what can happen when you use a brake T, drive too fast, brake coming out of a turn, on cold tires after a morning mist
Posted by: MDG Mar 4 2009, 06:21 PM
I would never make light of a lost car and an injured friend; hopefully enough time has passed that you can start to shrug it off and move on, but, um, the front shot of Mike's car on the stands looks like Mater from cars ![]()

Posted by: Dr Evil Mar 4 2009, 06:31 PM
![]() Funny
Funny
Posted by: Dr Evil Mar 4 2009, 06:40 PM
Was the front end in ok shape? Was that rear shock collapsed?
Posted by: scotty b Mar 4 2009, 06:43 PM
Was the front end in ok shape? Was that rear shock collapsed?
Front end appeard to be fine. I saw no signs of anything being bent. As for the rear I haven't taken it off yet ( probably tomorrow ) but yes it appears to be collapsed. I was under the back end today looking at how the mount is attatched and looked at that strut up close. Damn shame
Posted by: MDG Mar 4 2009, 06:44 PM
in a gut-wrenching sort of way.
You have to be impressed with 35 year old engineering; all those crumpled panels probably absorbed enough impact to have kept this from being worse on the driver and passenger.
Between you and ScottyB I'm sure your new one will be even better!
Posted by: GS Guy Mar 4 2009, 08:34 PM
Ouch!
Hope you're saving the rear flares for the new car Scotty! Those were some great looking flares when I went to pick up my tranny stack.
Hmmmm..... looks like a prime LS1 swap candidate! ![]()
Oops - I guess it's getting the sixer... ![]()
Jeff
Posted by: flippa Mar 4 2009, 08:52 PM
"Scotty, we'd cut that car up out here. You need to have us look for a tub for ya."
What????? Cut that car up????? You West Coast guys kill me; this thing is a cream puff!!!
Nice job guys, the car will be mint when it is done. Looking forward to watching this one. ![]()
![]()
![]()
![]()
![]()
![]()
![]()
Sorry, just love the sheep.
THese things amaze me how whell they hold up in an accident. Hit on the passanger's door like that @ 35 mph the only serious loss was a few teeth (and the poor car).
Looks like Rich Toole's son's car; took the hit in the same spot. Your car looks a bit more twisted than his was.
Mike, what was it you hit that stopped the car, a tree or utility pole?
Posted by: Spoke Mar 4 2009, 09:11 PM
Damn, that was one nice car. Your next one will be even nicer once Scotty does his magic.
You shouldn't be embarrassed; you just got caught out on one of PA's fucked up roads. There are no burms on most PA roads, there was never any forward planning, poor construction and sub-base, and nonexistent maintenance. There are roads around here where if you put a wheel on the white line, you'll be off the road.
A friend at work had a momentary lapse of attention, put one wheel to the right of the white line and instead of being on the burm, he was in a ditch and caused $2500 suspension damage.
Posted by: davesprinkle Mar 4 2009, 10:51 PM
A shrinking disk will take that right out...
Attached image(s)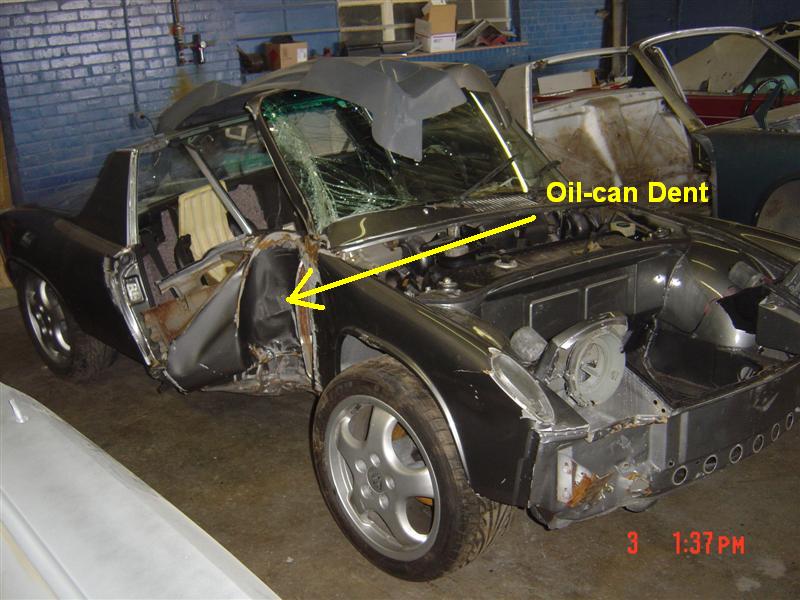
Posted by: Dr Evil Mar 9 2009, 11:17 PM
Updates?
Posted by: scotty b Mar 10 2009, 05:09 PM
Updates?
Nope. Working on someone elses car this week
Posted by: Dr Evil Mar 10 2009, 05:18 PM
Guys gotta eat ![]()
Posted by: jcambo7 Mar 11 2009, 01:01 AM
![]()
![]()
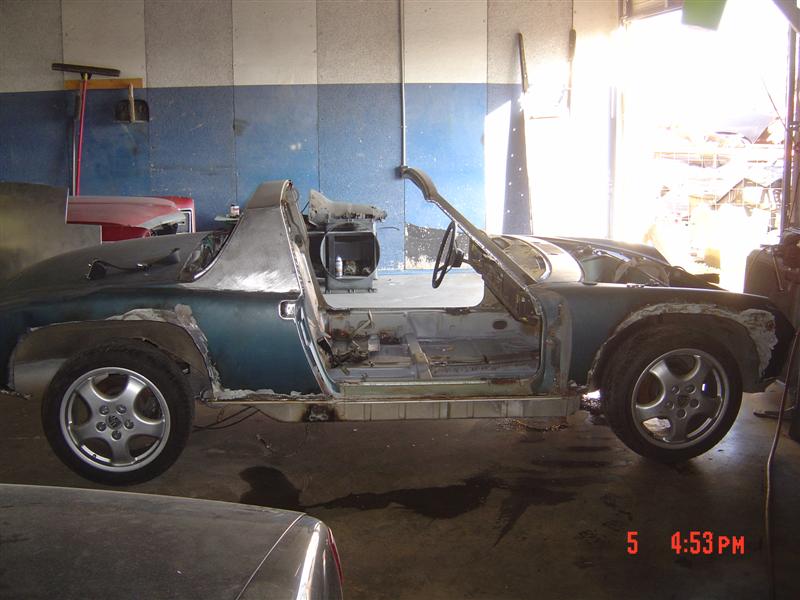
Posted by: scotty b Mar 11 2009, 04:58 PM
Couple from last week I hadn't downloaded. I kinda like the rally look
Attached image(s)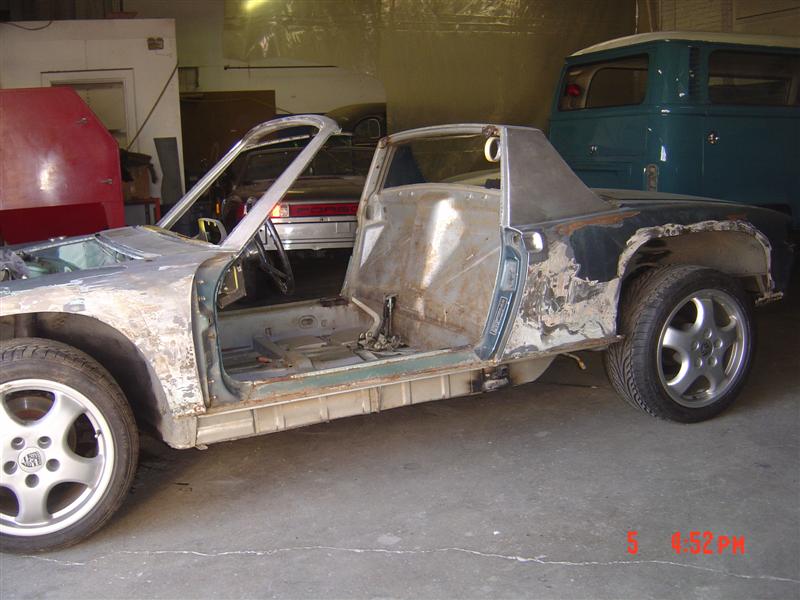
Posted by: pktzygt Mar 11 2009, 06:01 PM
That accident was way worse than mine, and I'm over it now. It's kinda fun to start fresh though.
Scotty, I hope this project will be long gone by the time I get back to good 'ol Virginia in October, but I'd like to stop in to look at your work.
Dr Evil, I will definately be stopping by with a tranny for you to work on.
Posted by: scotty b Apr 26 2009, 02:41 PM
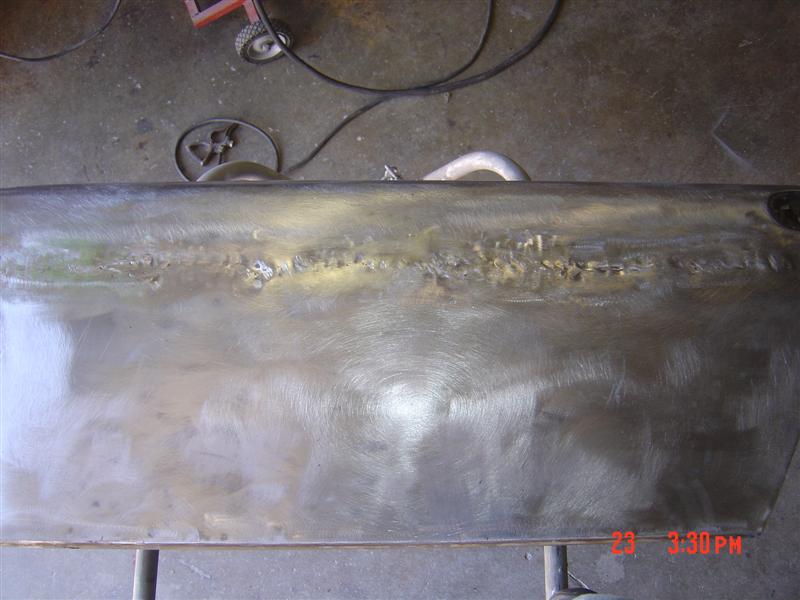
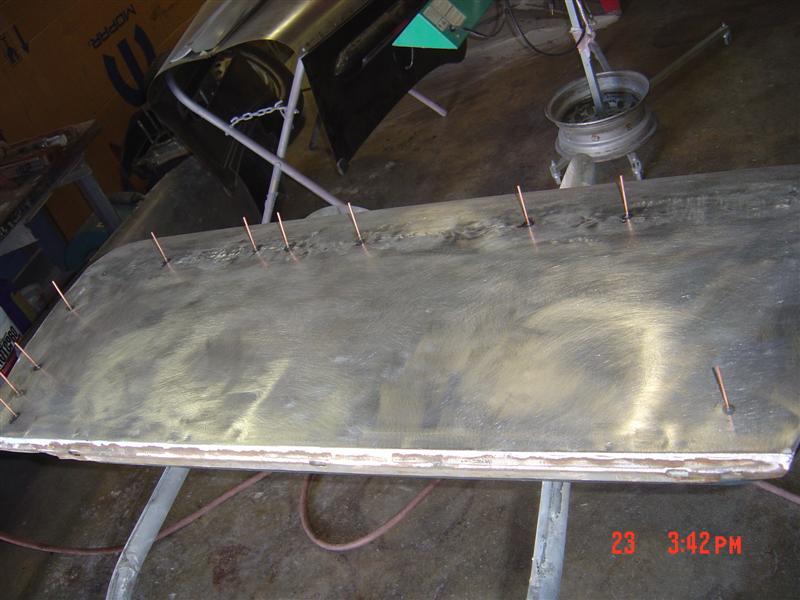
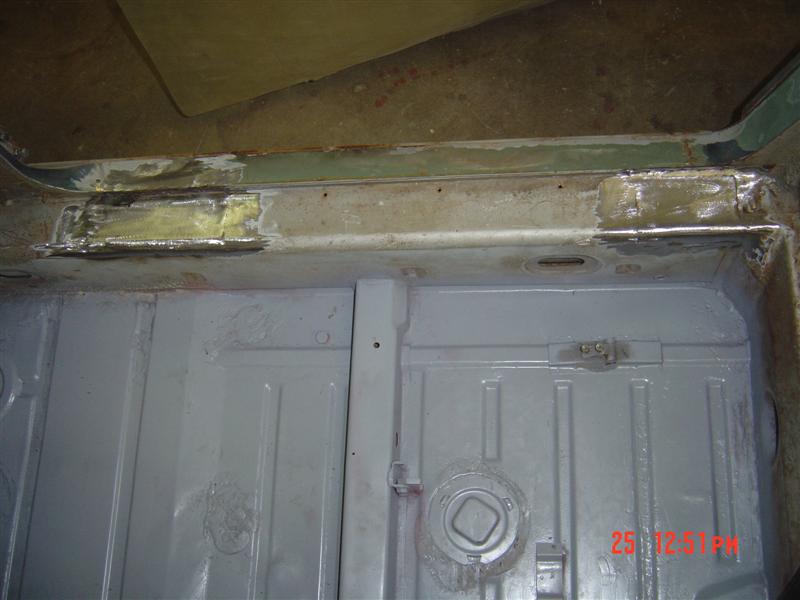
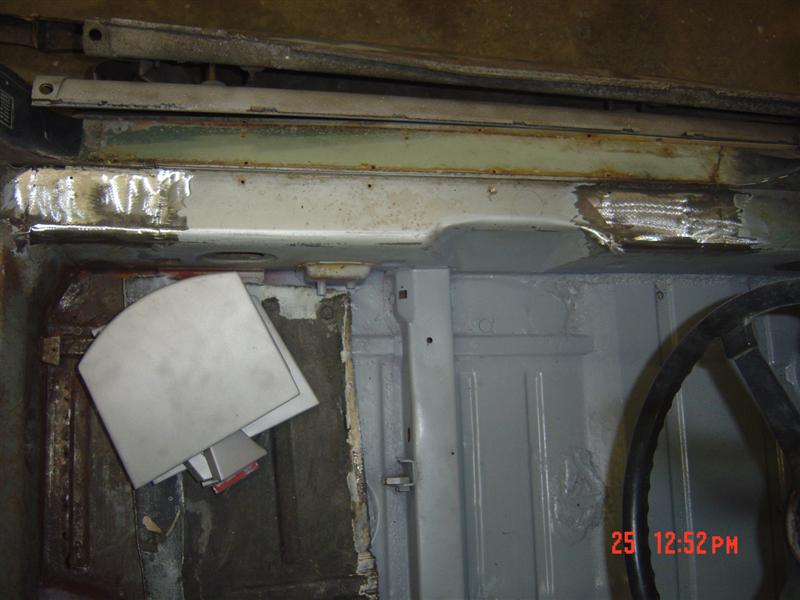
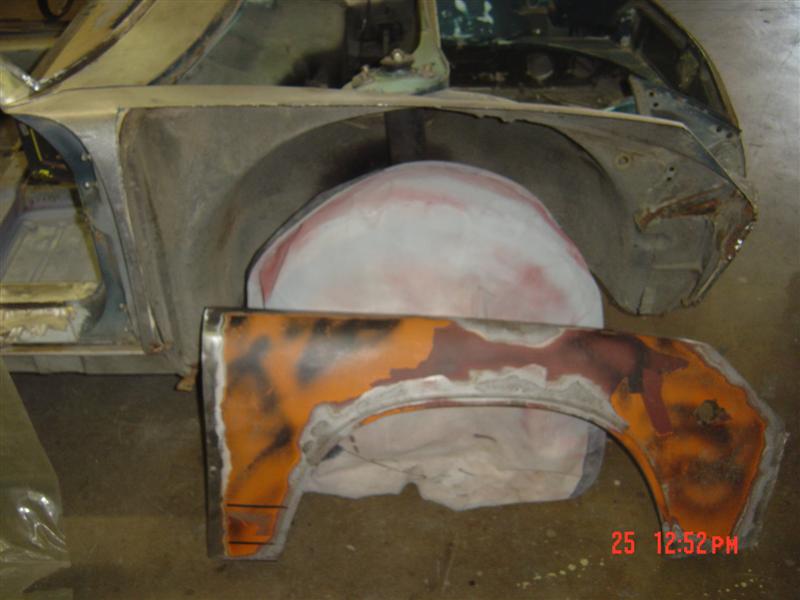
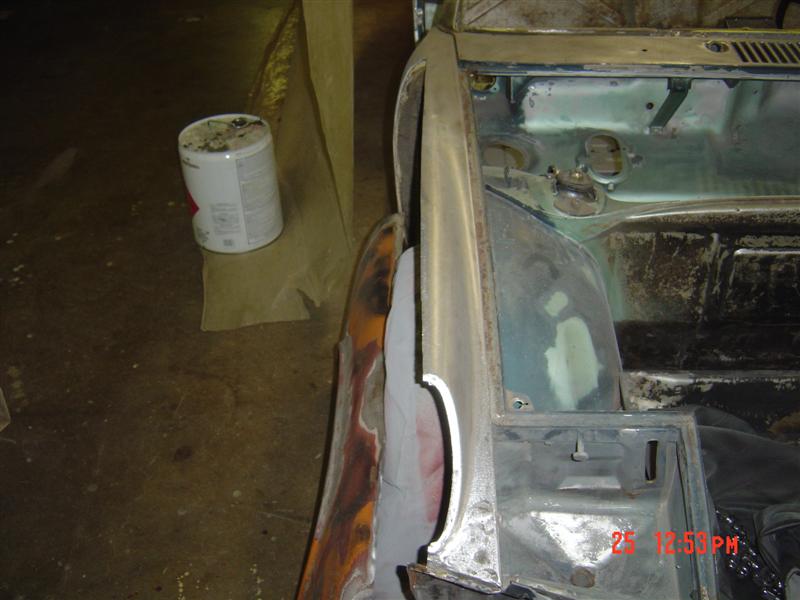
Why I wasn't at Hershey. It was all Mikes fault ![]() Drivers door stripped, old holes welded shut and a few pins to pull on. Roll bar holoes filled and pass fender cut to be replaced. If anyonme has a good drivers side contact Mike. We will be needing the same as the pass side.
Drivers door stripped, old holes welded shut and a few pins to pull on. Roll bar holoes filled and pass fender cut to be replaced. If anyonme has a good drivers side contact Mike. We will be needing the same as the pass side.
Attached image(s)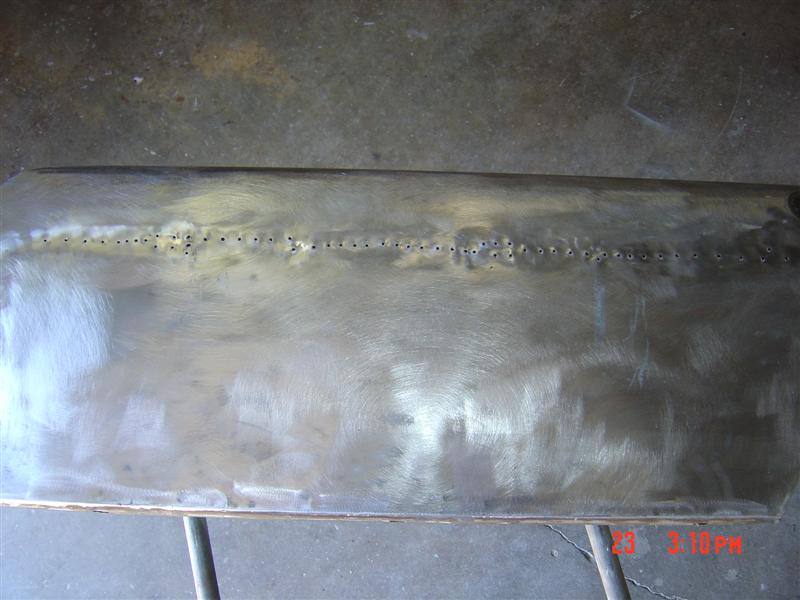
Posted by: jimkelly Apr 26 2009, 02:49 PM
you find removing a front front easier/better this way - versus removing it at the spot wleds ??
Posted by: scotty b Apr 26 2009, 02:55 PM
you find removing a front front easier/better this way - versus removing it at the spot wleds ??
Yes. My replacement also had pretty nasty edges. Mikes new car had good metal on it and there just wasn't any need to drill out all the welds. By putting my weld line on the top of the fender ( where there is more strength ) I will reduce the warping and also will aid in the finish work.
Posted by: Dr Evil Apr 26 2009, 05:08 PM
I had the fenders up here... I was hoping to give the m to you at the swap ![]() It looks like I have another excuse to come down
It looks like I have another excuse to come down ![]()
Posted by: scotty b Jun 12 2009, 03:06 PM
Got a little done yesterday before the welder went belly up ![]() RIP Hobie ya P.O.S. It's Miller time.
RIP Hobie ya P.O.S. It's Miller time.
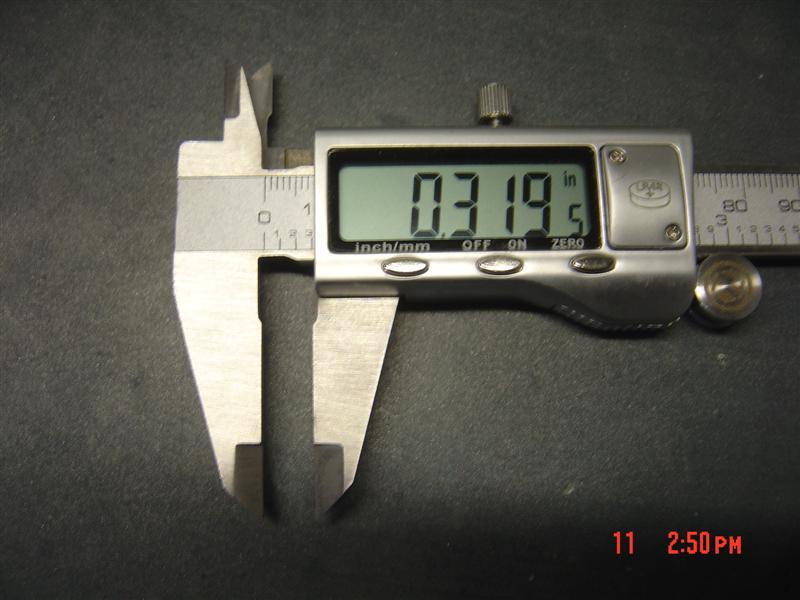
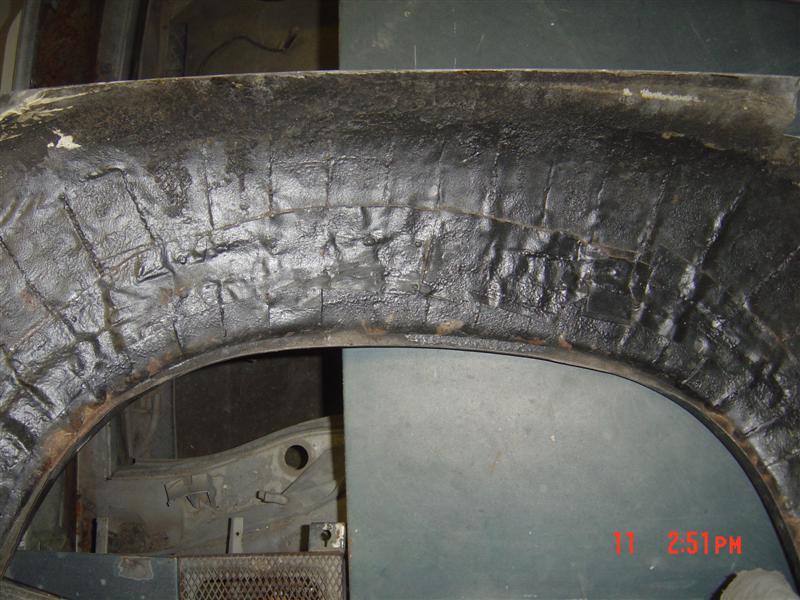
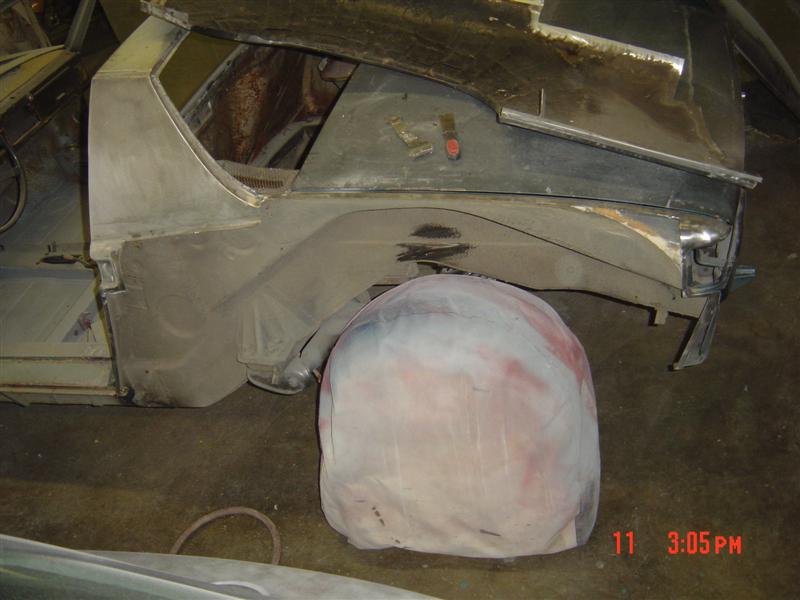
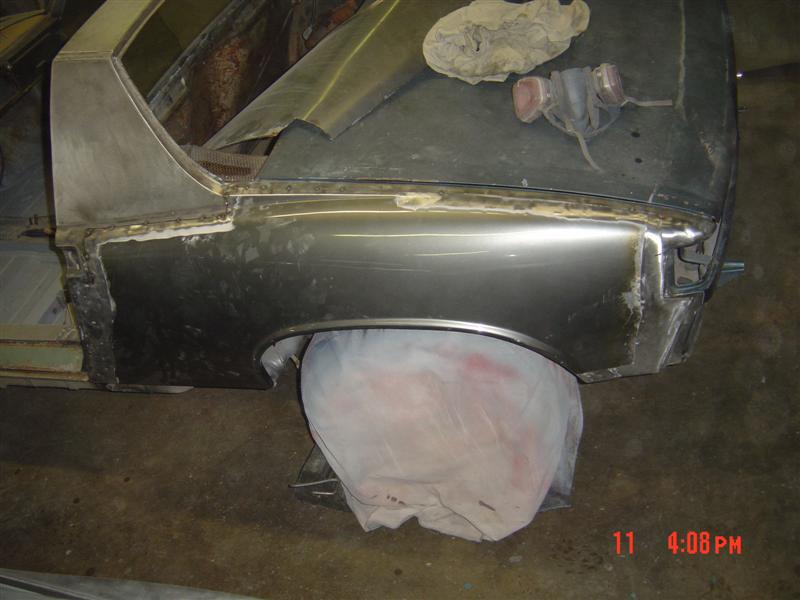
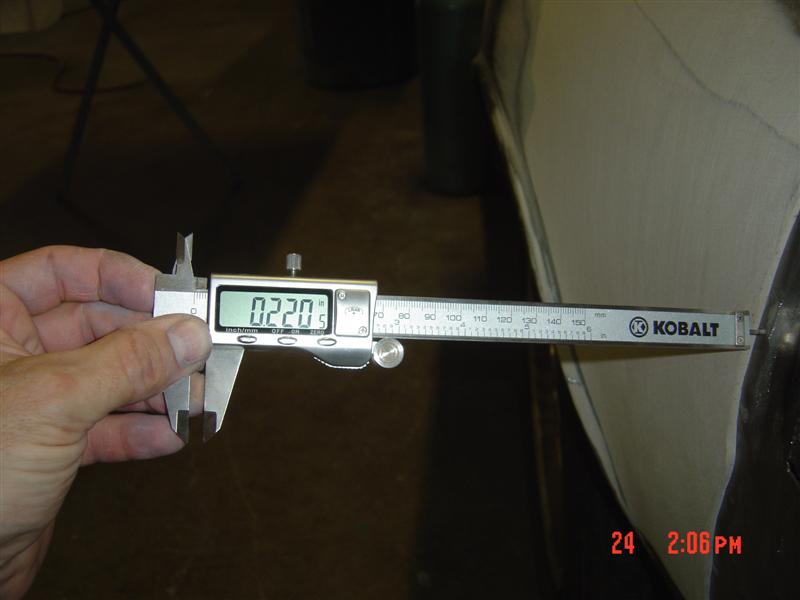
Just in case you weren't aware there was a " little " mud on those rear quarters Mike ![]()
Attached image(s)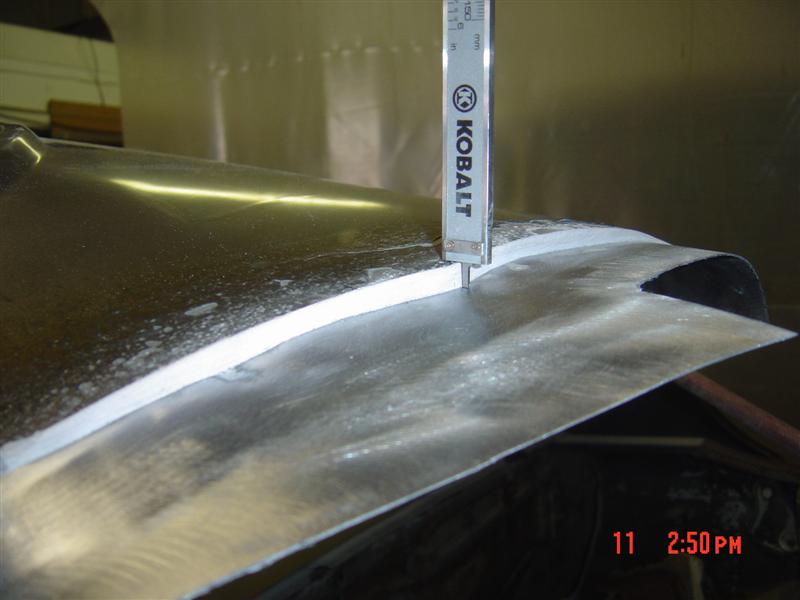
Posted by: kwales Jun 12 2009, 05:40 PM
Holy crap...
With .319 inch worth of mud, you should just remove the inner layer of steel and go with non-rusting "mud" fenders.....
Posted by: Dr Evil Jun 12 2009, 06:14 PM
Yikes. Ah, those crazy mexicans and their magic mud ![]() Are the fenders salvageable or will they need another 20# of mud?
Are the fenders salvageable or will they need another 20# of mud?
Posted by: crash914 Jun 12 2009, 07:34 PM
shit, I just saw this thread...
Mike I have both doors,
yours if you want them....
free of course...
Posted by: crash914 Jun 12 2009, 07:48 PM
From this car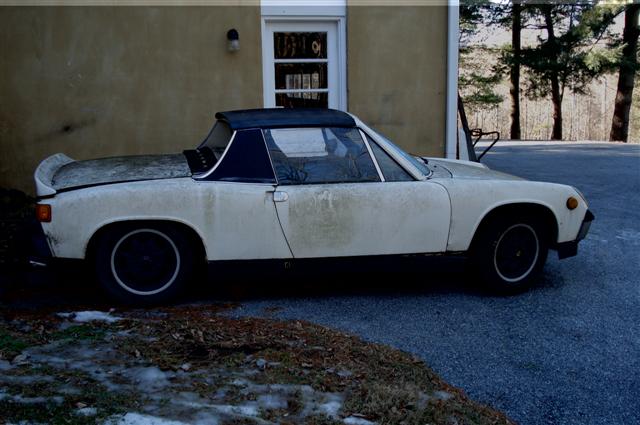
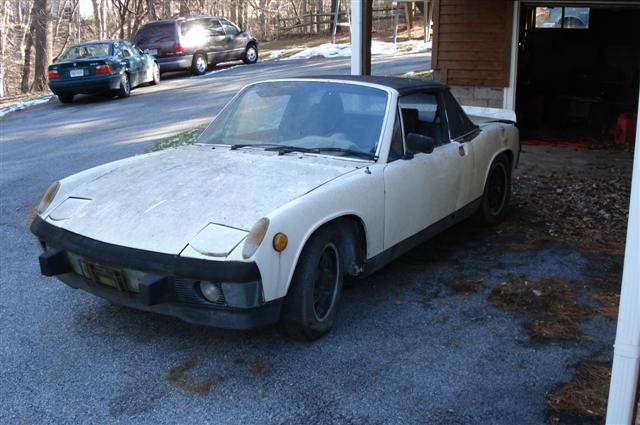
white of course...
Posted by: scotty b Aug 1 2009, 10:25 AM
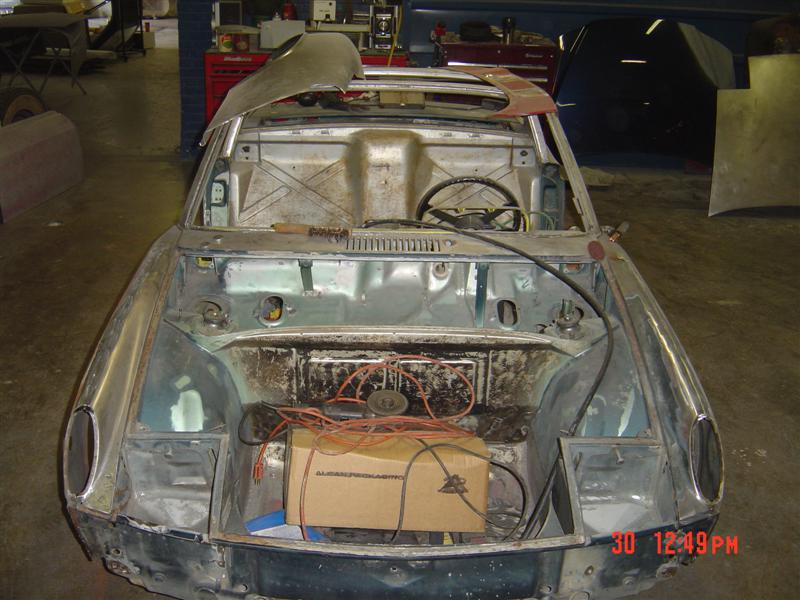
Little more progress in the last few weeks. I actually have the other rear tacked on but my batteries went dead in the camera ![]()
Attached image(s)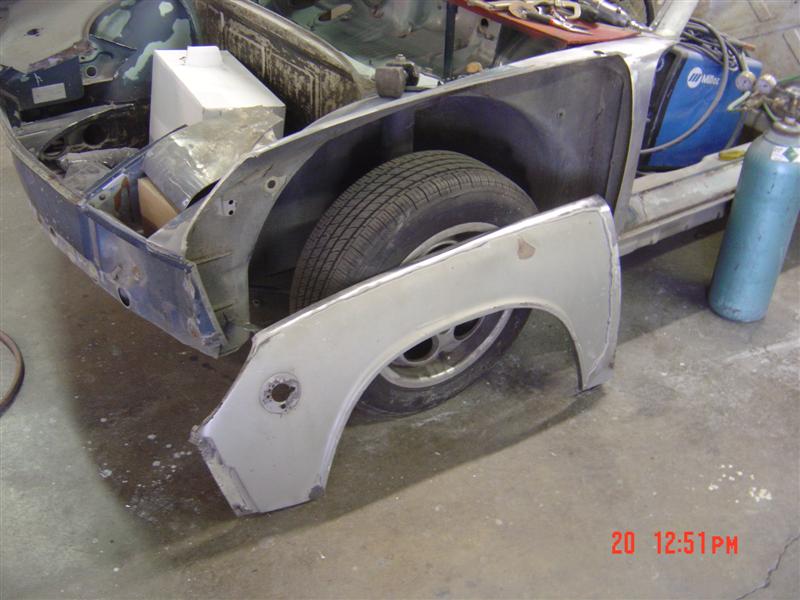
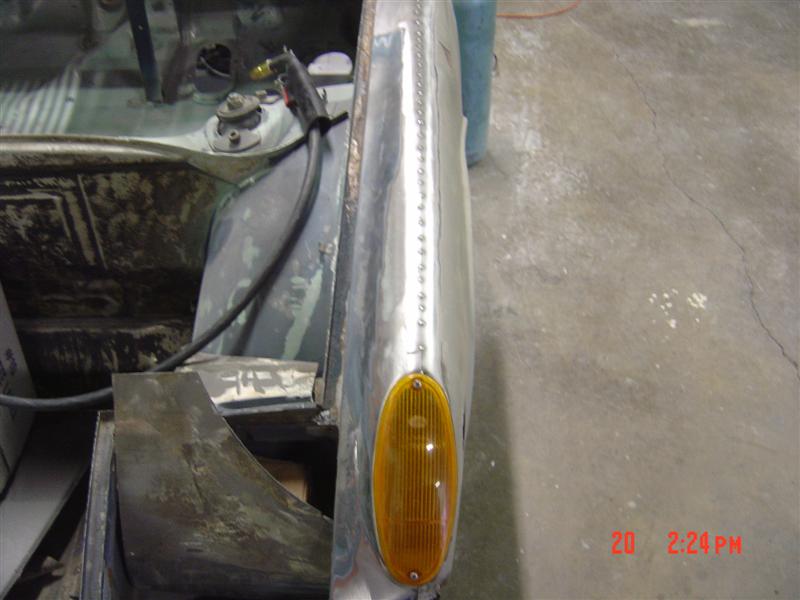
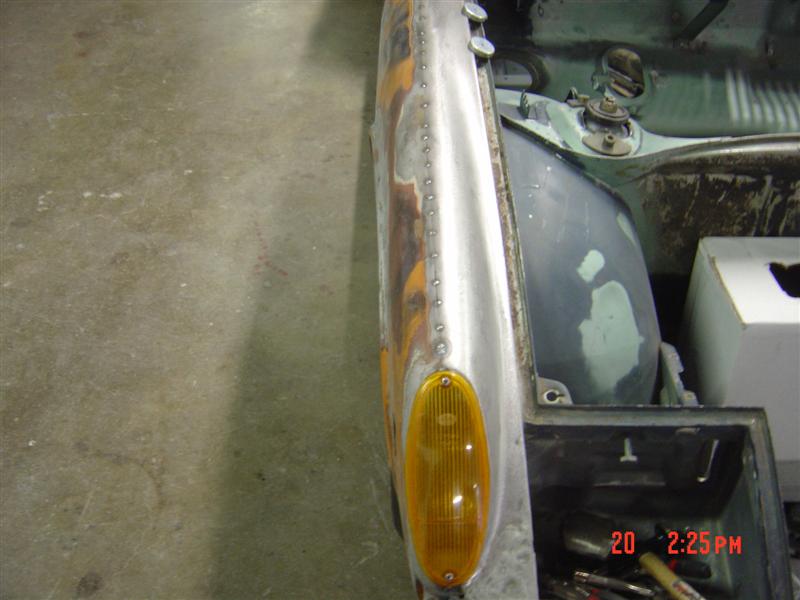
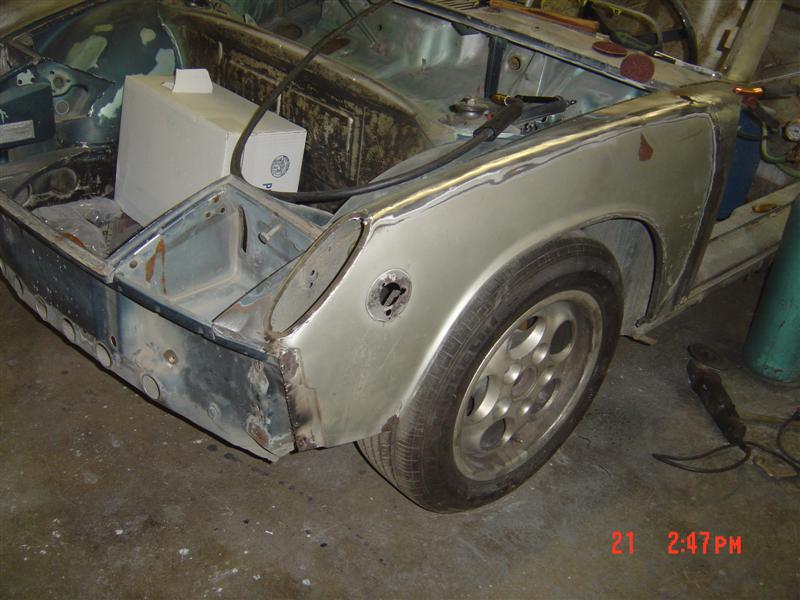
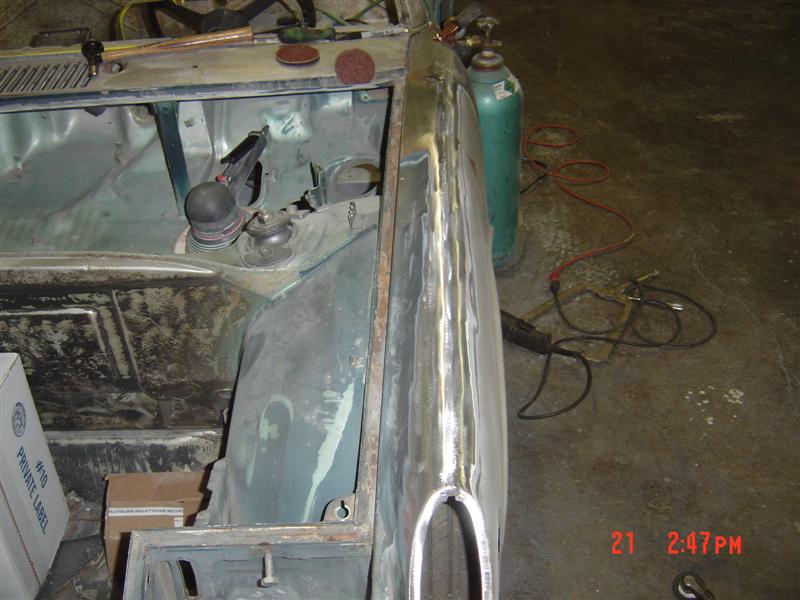
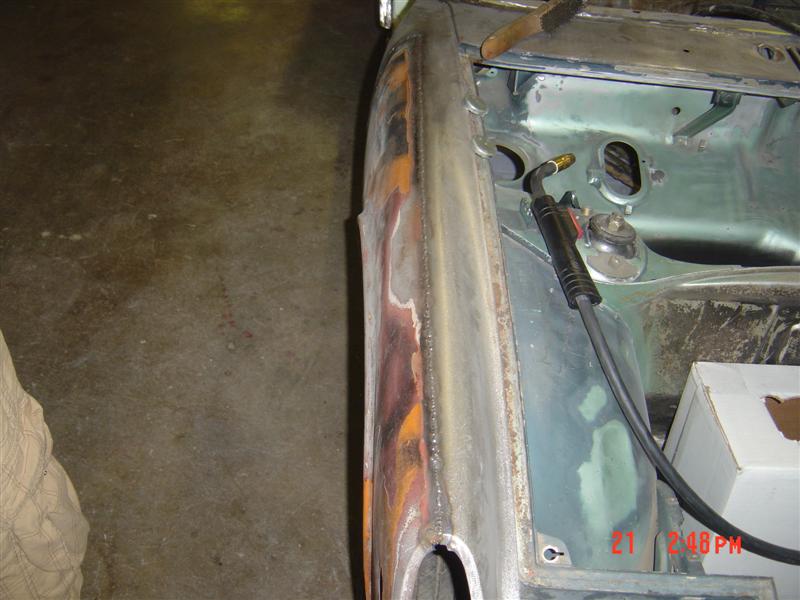
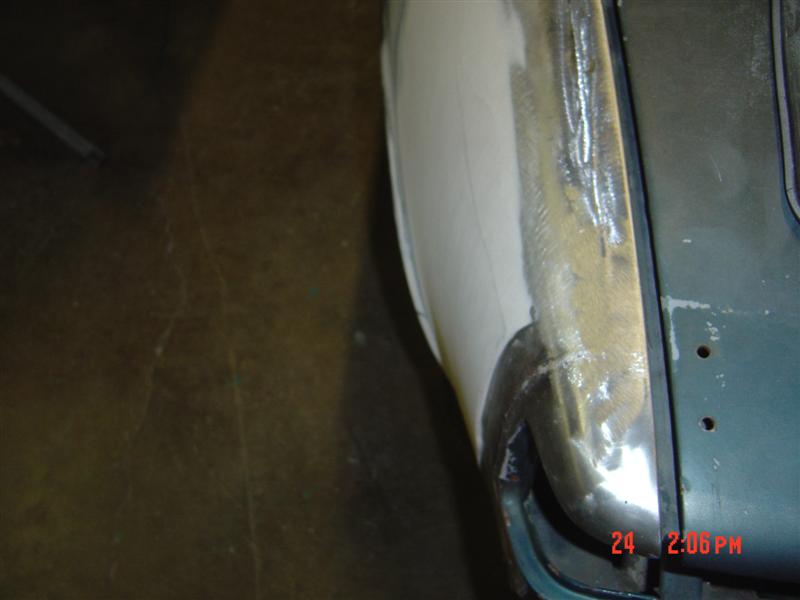
Posted by: scotty b Aug 1 2009, 10:30 AM
Mo. Cut the existing mud down as much as I could. Much better but still thick ![]()
Attached image(s)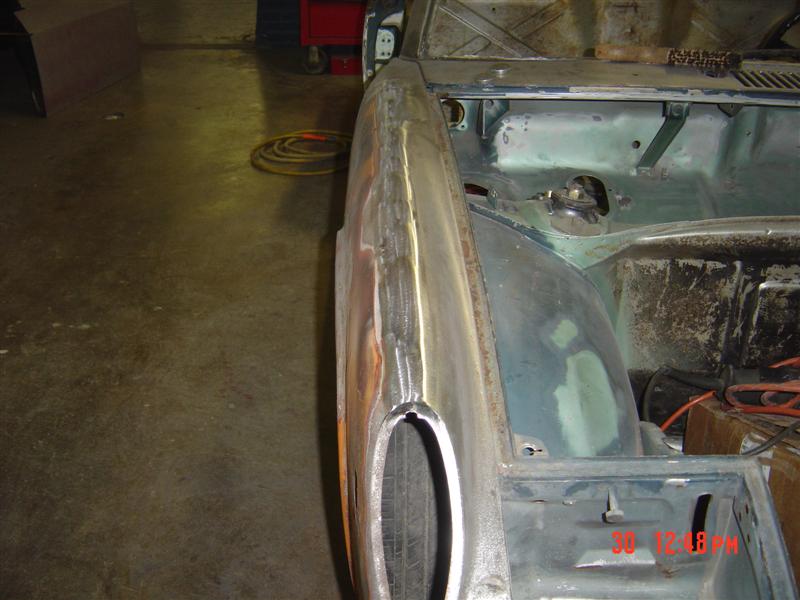
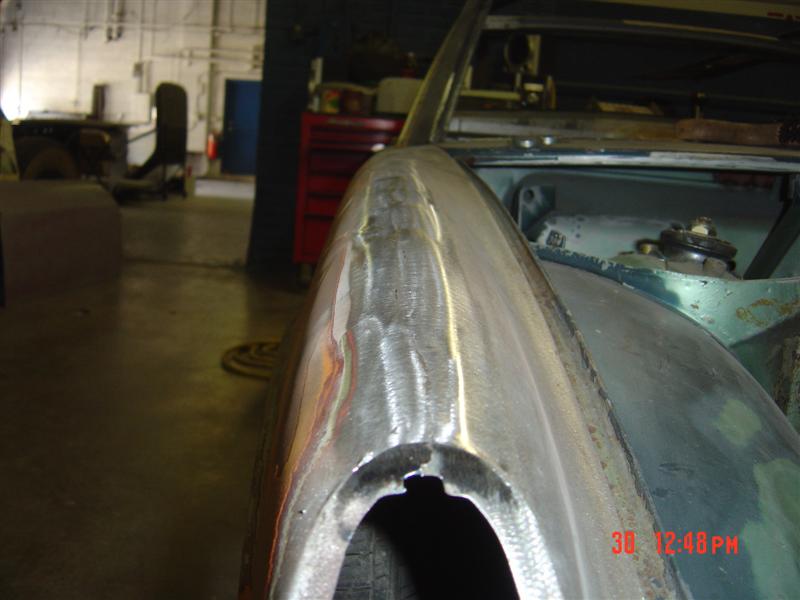
Posted by: scotty b Aug 1 2009, 10:34 AM
Don't know why but I like this shot for some reason. I wish it was cleaner but Andy grabbed the camera from me.
Attached image(s)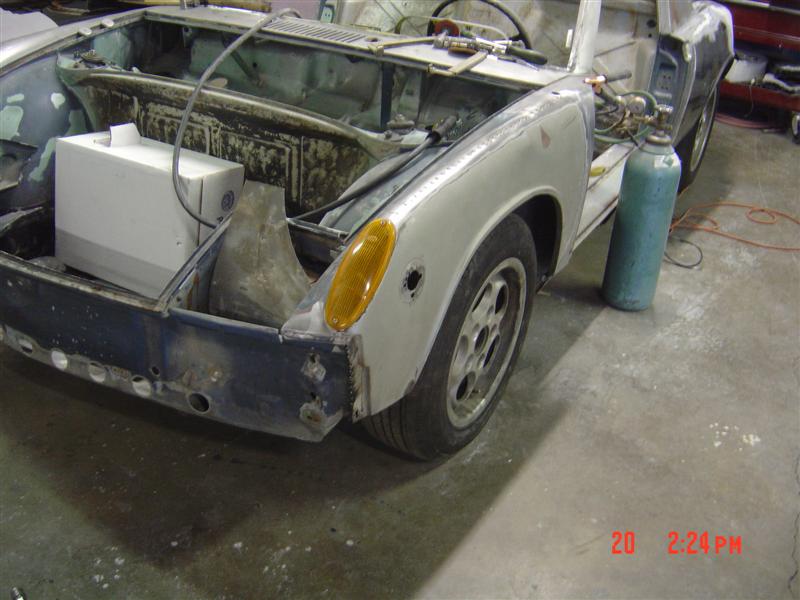
Posted by: SirAndy Aug 1 2009, 11:50 AM
but Andy grabbed the camera from me.
Posted by: ghuff Aug 1 2009, 12:02 PM
Holy shit I do want you working on my car. That is fucking amazing work.
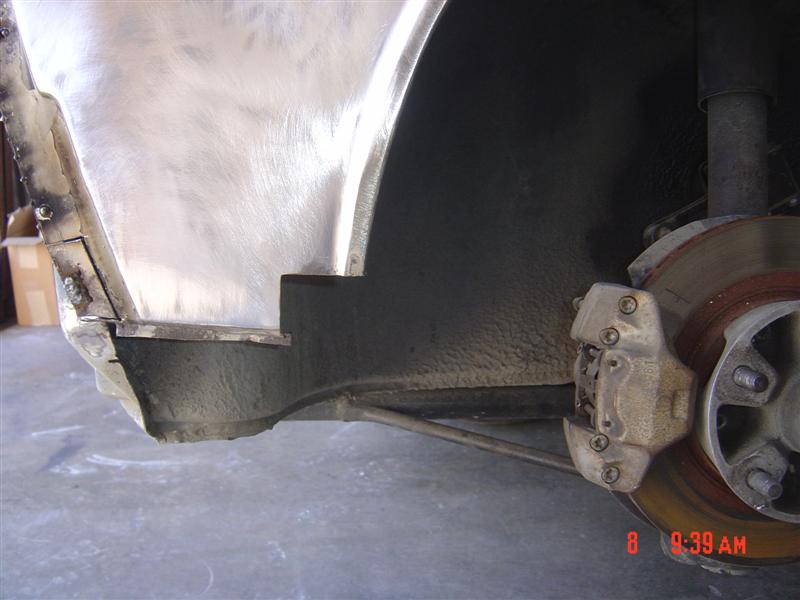
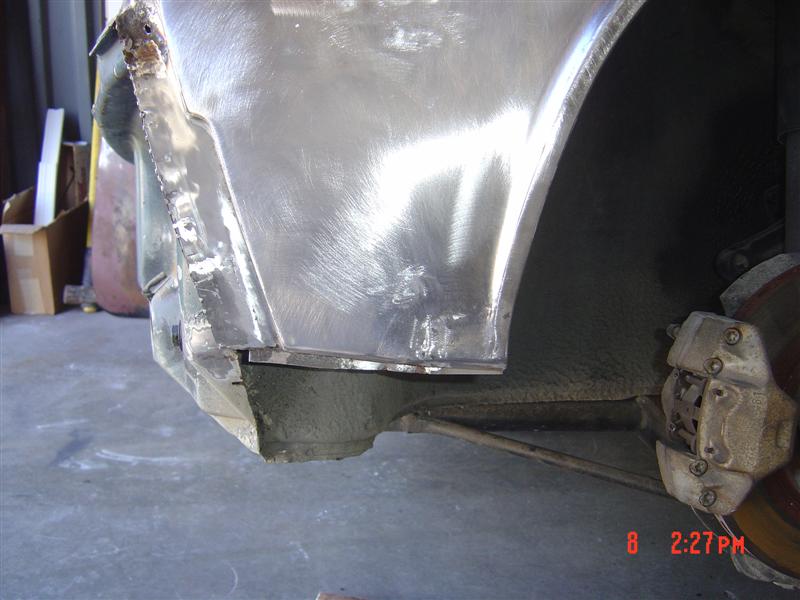
Posted by: scotty b Oct 10 2009, 08:08 PM
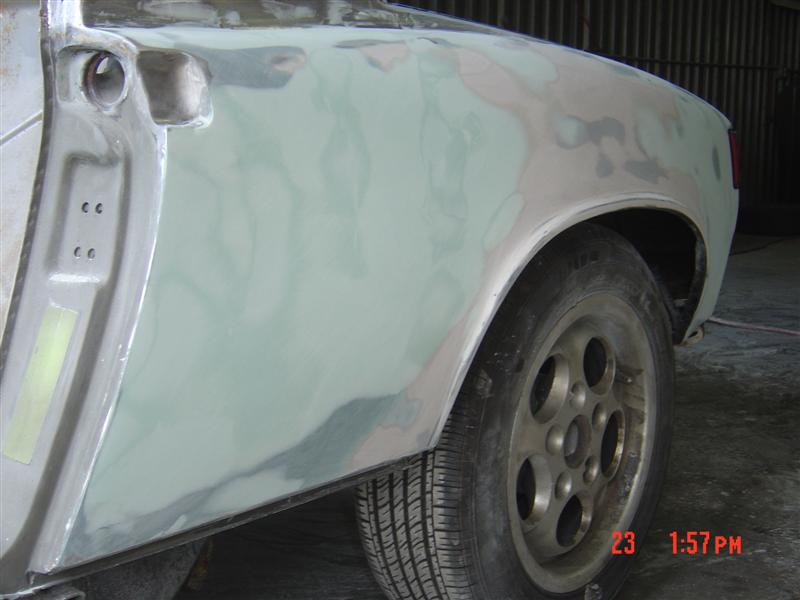
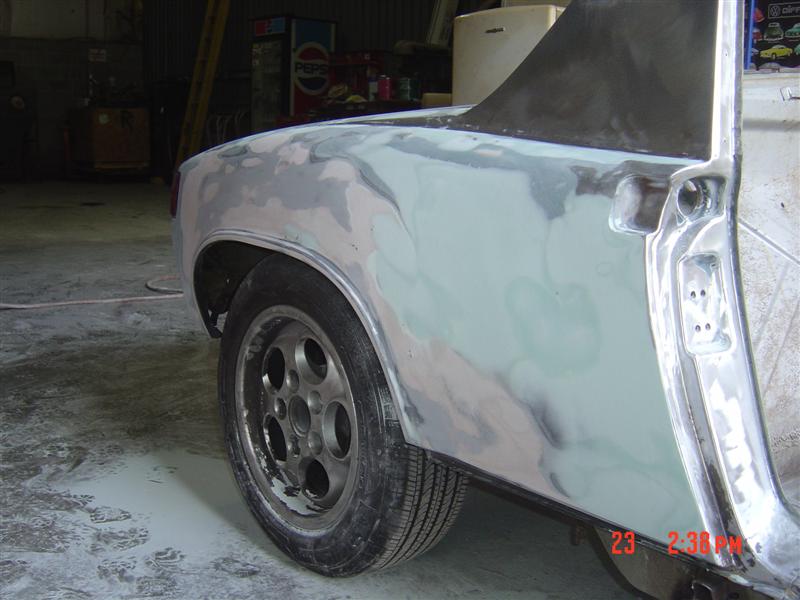
Finally got some more time in on Mikes car. Got the quarters welded in, patched up the bottoms of the quarters, filled side markers and antenna holes, and a few other small spots I didn't take pics of and pulled a few dents. Most likely will get the rears mudded and shaped in next week, finish stripping the rest of the body and prime it, and get the drivers floor patched up.
Attached image(s)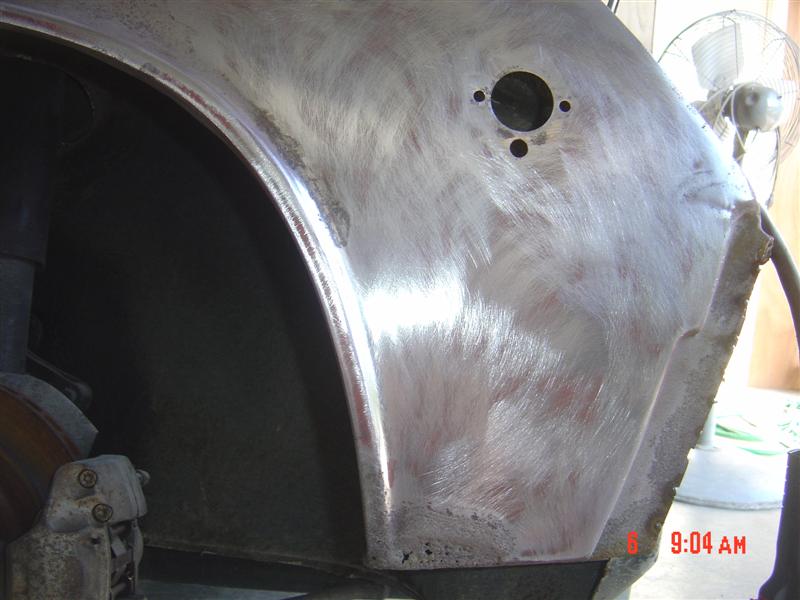
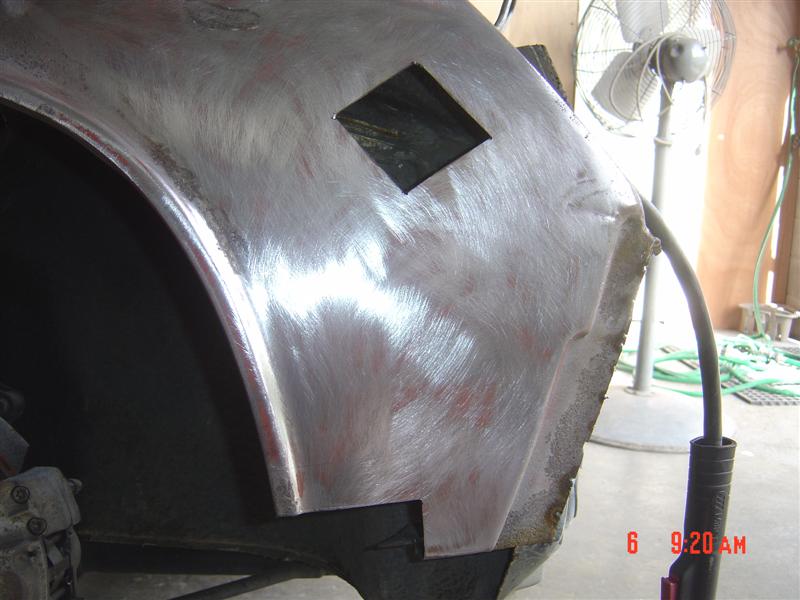
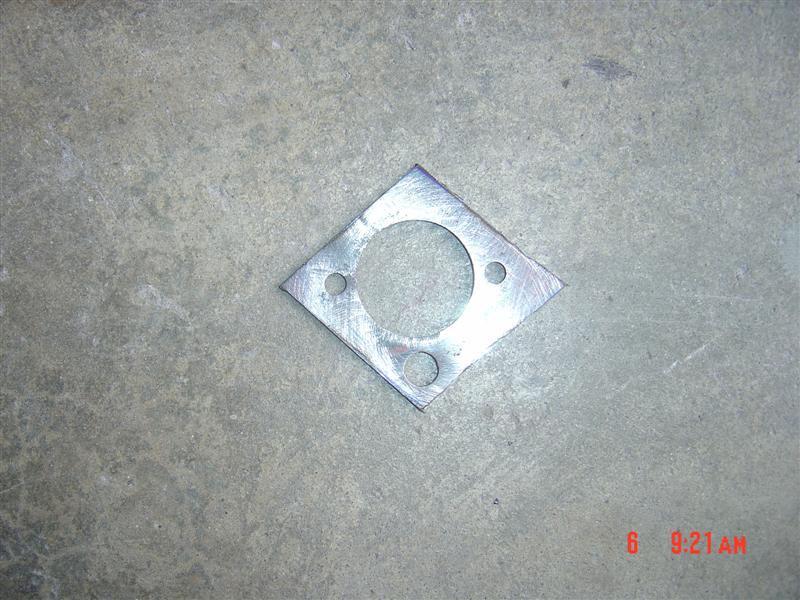
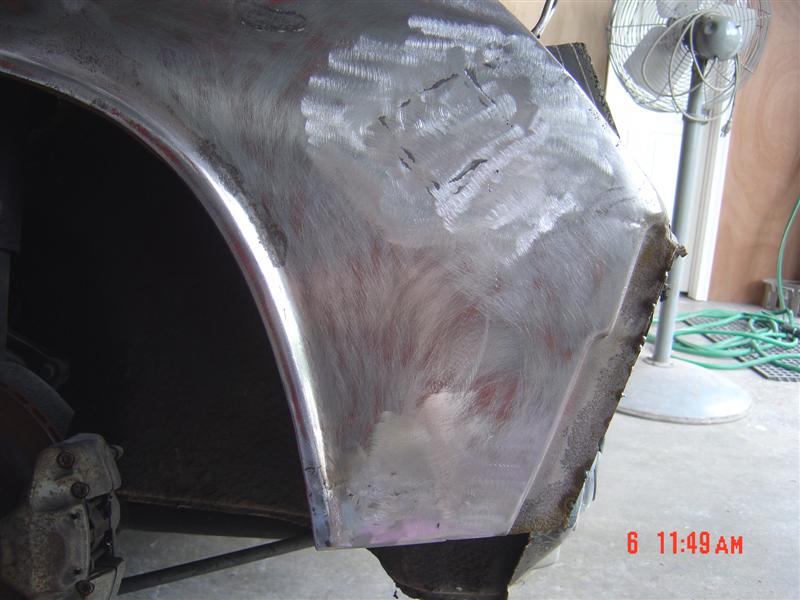
Posted by: jsayre914 Oct 10 2009, 08:38 PM
N I C E
![]()
Posted by: scotty b Oct 25 2009, 04:47 PM
![]()
Attached image(s)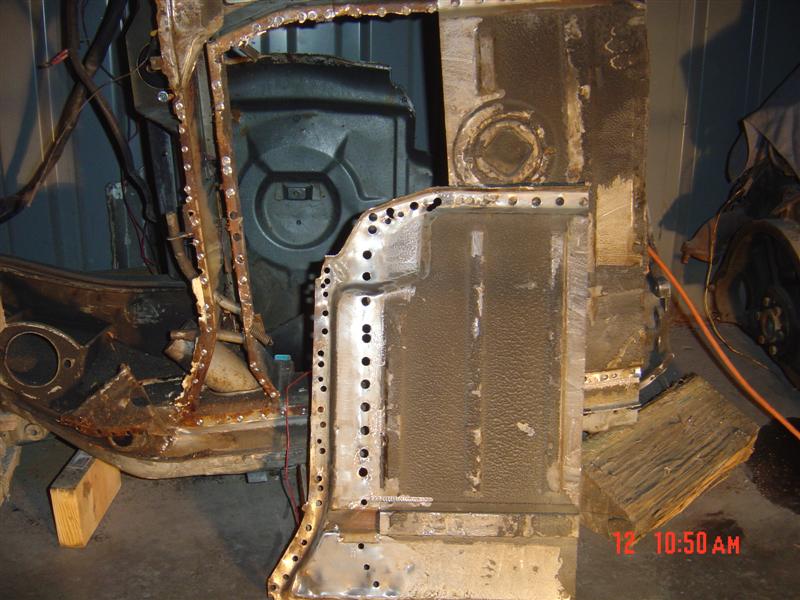
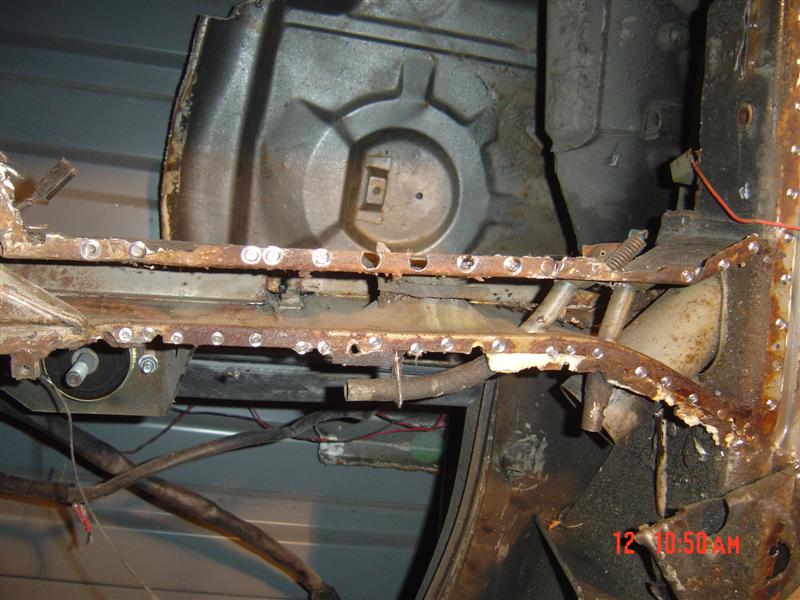
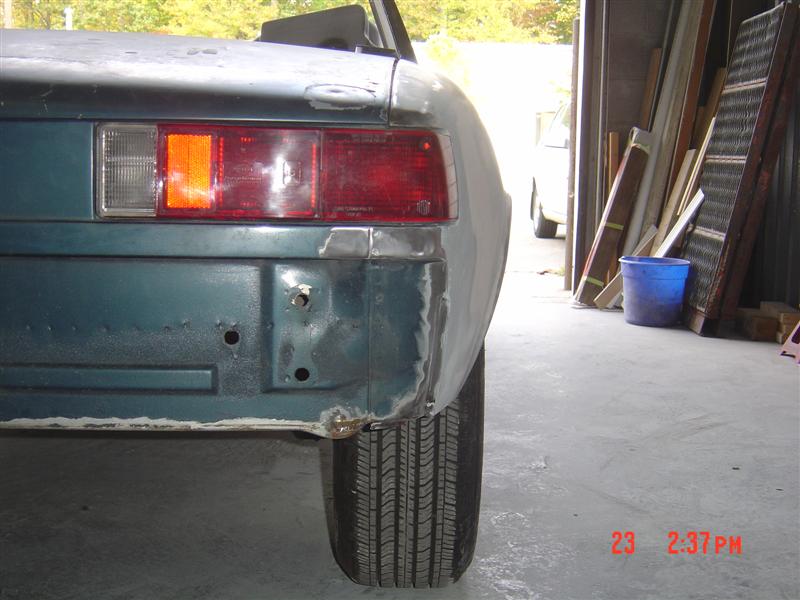
Posted by: scotty b Oct 25 2009, 04:48 PM
![]()
Attached image(s)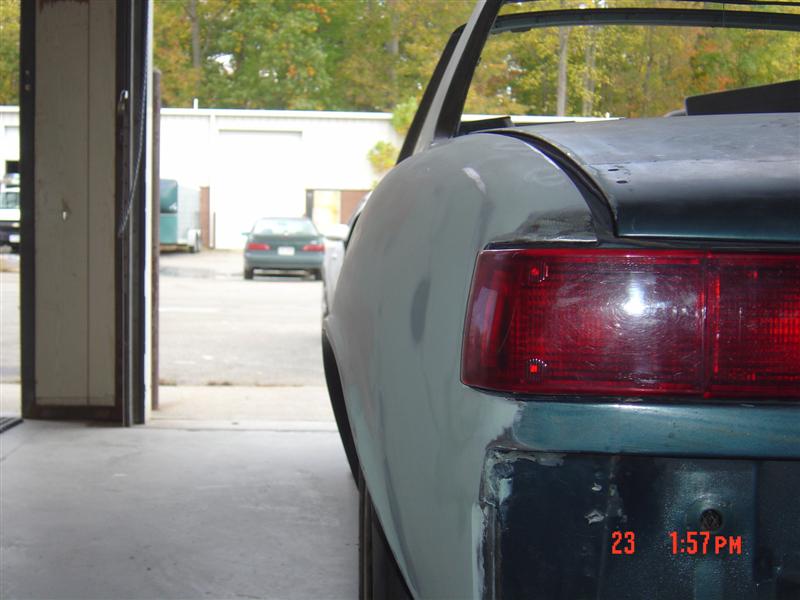
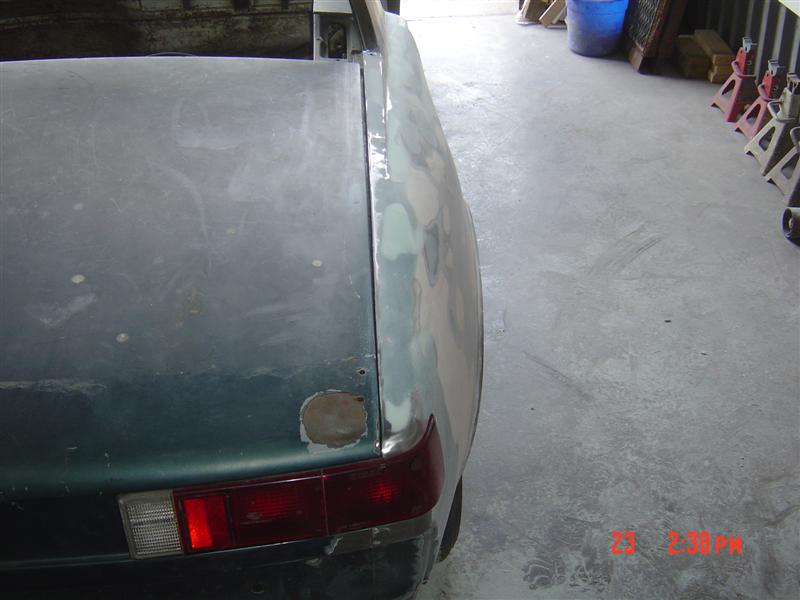
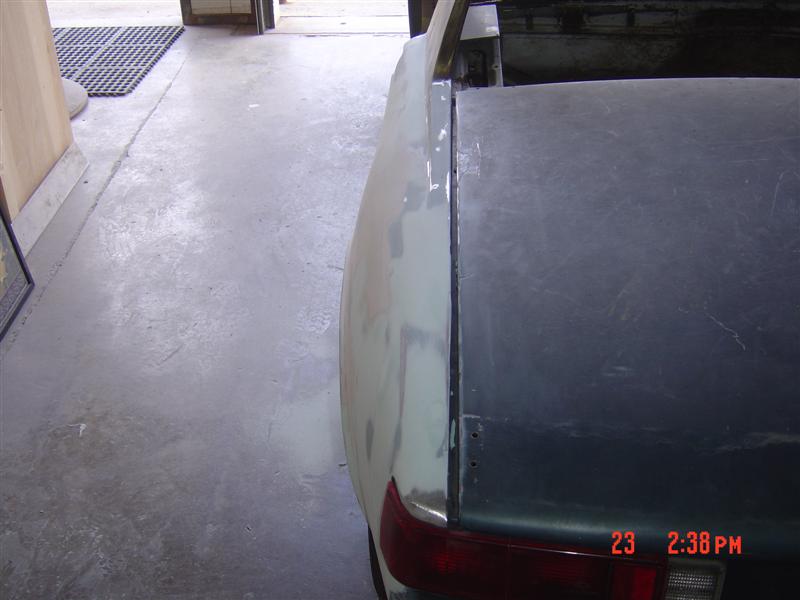
Posted by: Dr Evil Oct 25 2009, 11:59 PM
This makes me smile ![]()
Posted by: Vacca Rabite Oct 26 2009, 07:36 AM
Is it ready for paint now? Or is there still more welding to be done?
Posted by: plas76targa Oct 26 2009, 09:08 AM
Lookin good Scotty!
( I want my house to sell, I want my house to sell, .... )
Posted by: byndbad914 Oct 26 2009, 07:49 PM
yeah, dude, nice work Scotty! I am always amazed at what good body guys can do... I am more of the 1/4" thick bondo type of guy by the time I get done ![]()
I really cannot believe how often I see cars like that - there are some really nice looking cars that the owner really has no idea how crappy it really is. I saw a really nice 69 Camaro awhile back and then I got kinda looking at it and realized that there was nearly 1/4" of bondo at the front edge of the doors and the fenders were like that too. I would think an owner would catch that; it isn't hard to see that kinda crappy work at the seams.
Man, looking back at those wreck photos reminds me why the floor in my racecar looks like this! Hard to see in this shot but I have two 2" diam cross tubes (one at my feet, one at the rear firewall), then two 1-3/4" tubes that cross right at the front and rear of the seats. If I hit something it will hurt, but hopefully whatever I hit won't make it all the way to my body.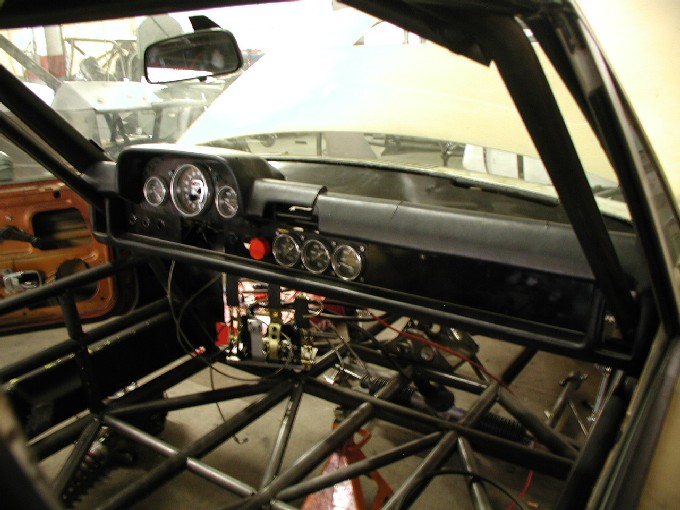
The Baja Shop guys that built it told me I was crazy to have so much cross bar in a car, then I explained to them how cement retaining walls and 150mph top speeds don't go together well should I decide to perform some sort of anal-cranial inversion on the track.
Posted by: Dr Evil Oct 26 2009, 08:00 PM
The flairs look a little uneven ![]()
Posted by: scotty b Oct 26 2009, 08:02 PM
Is it ready for paint now? Or is there still more welding to be done?
No more welding, but plenty more body work. I started fitting the front bumper today
Posted by: Dr Evil Oct 26 2009, 08:06 PM
Ya, those front ones suck, so do the rears ![]() I am glad I am paying a professional
I am glad I am paying a professional ![]()
Posted by: Dr Evil Oct 26 2009, 08:17 PM
Scotty, you know I want flared rockers as well, right? I think we spoke about it and you were going to fab some out of the steel ones since I didnt want them to say PORSCHE.
Posted by: scotty b Oct 26 2009, 08:31 PM
Funny you should bring this up. I was thinking about it today, and couldn't remember what we talked about ![]() . Do you want the front of them flared too ? Also do you want the rear of them made like the factory flared ones or do you want the rocker to actually follow the buldge in the quarter ?
. Do you want the front of them flared too ? Also do you want the rear of them made like the factory flared ones or do you want the rocker to actually follow the buldge in the quarter ?
Posted by: Dr Evil Oct 26 2009, 09:28 PM
I want them to follow the line of the flair but point straight down. Hard to explain, I may have to draw it.
What about my flairs, they look uneven ![]()
Posted by: scotty b Oct 26 2009, 09:46 PM
I want them to follow the line of the flair but point straight down. Hard to explain, I may have to draw it.
What about my flairs, they look uneven
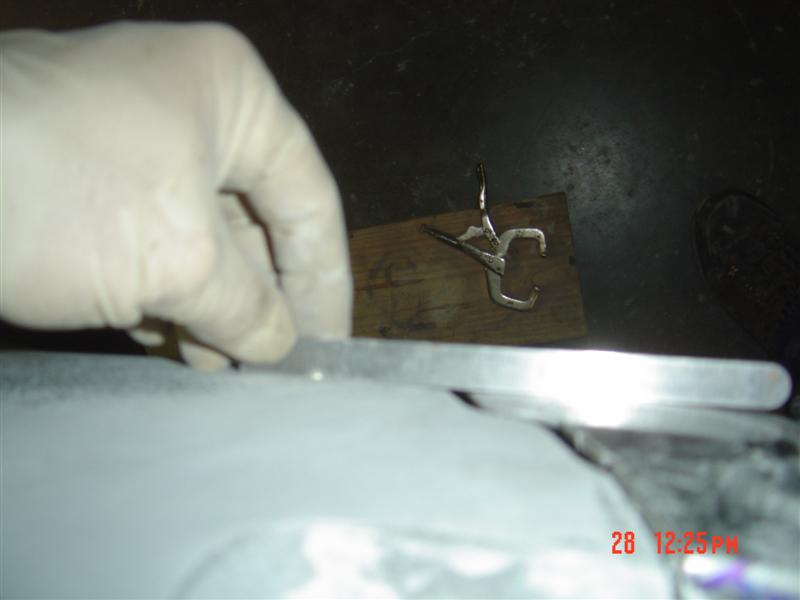
Camera angle I guess. I put the contour gauge on them and they are spot on to each other. And yeah I may need a drawing of that explanation
Posted by: Dr Evil Oct 26 2009, 09:55 PM
Nah, I was just ![]() you just like the guy with the Ferrari clone
you just like the guy with the Ferrari clone ![]()
Posted by: ghuff Oct 27 2009, 09:50 PM
Scottyb = BAMF at bodywork.
I'm already starting a scottyb fix my 914 fund.
Posted by: Todd Enlund Oct 27 2009, 10:50 PM

That dash pad is awesome!
Posted by: scotty b Oct 28 2009, 06:33 PM
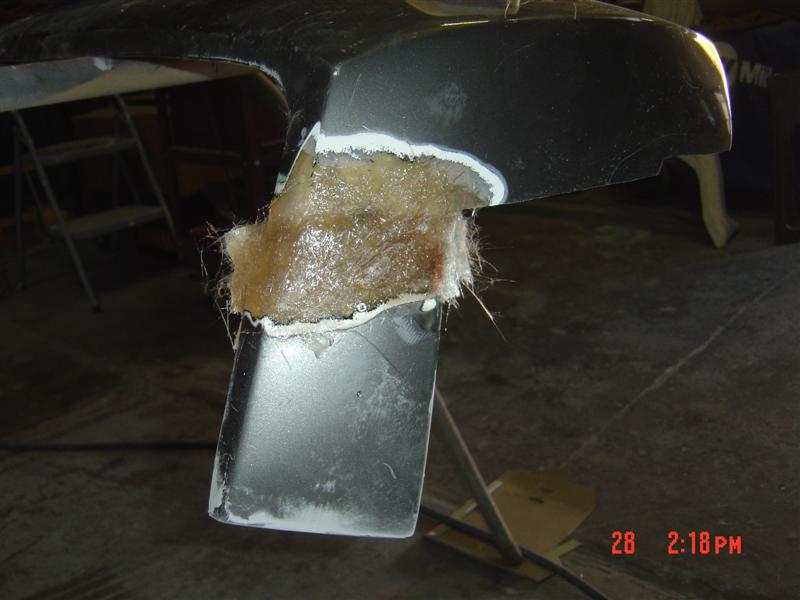
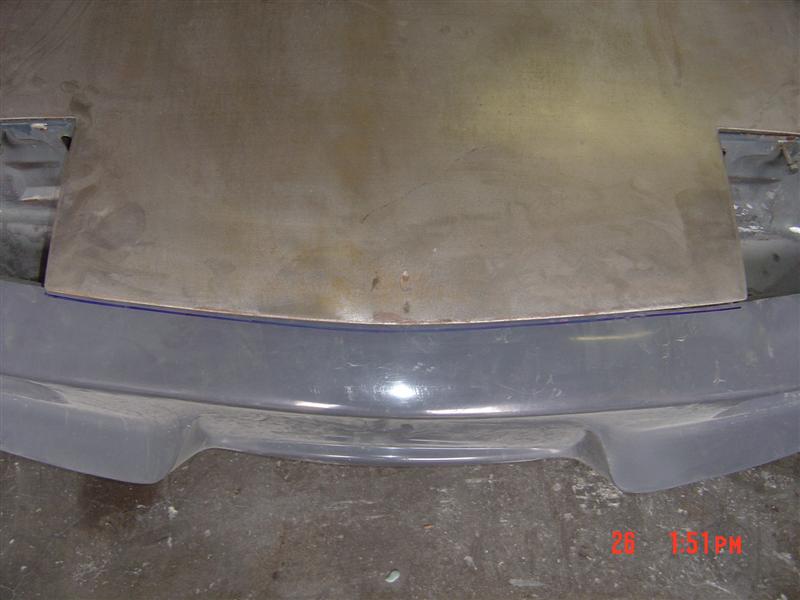
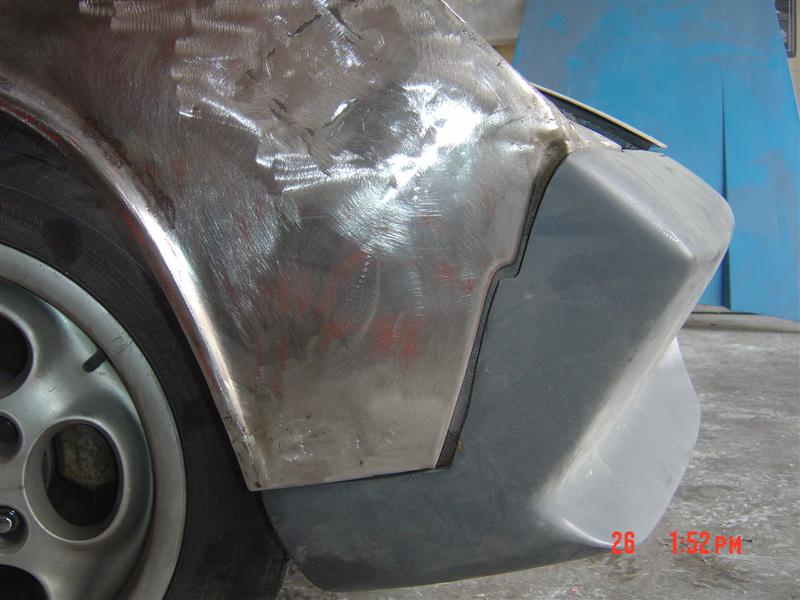
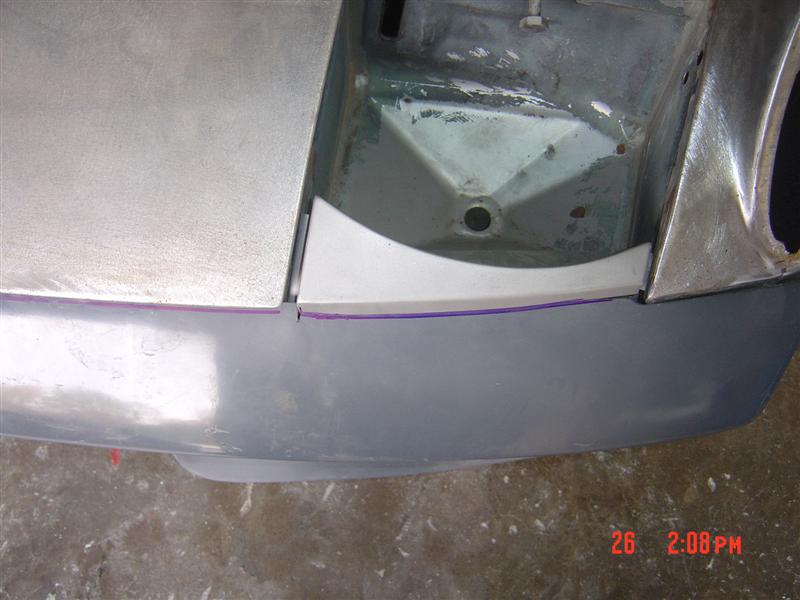
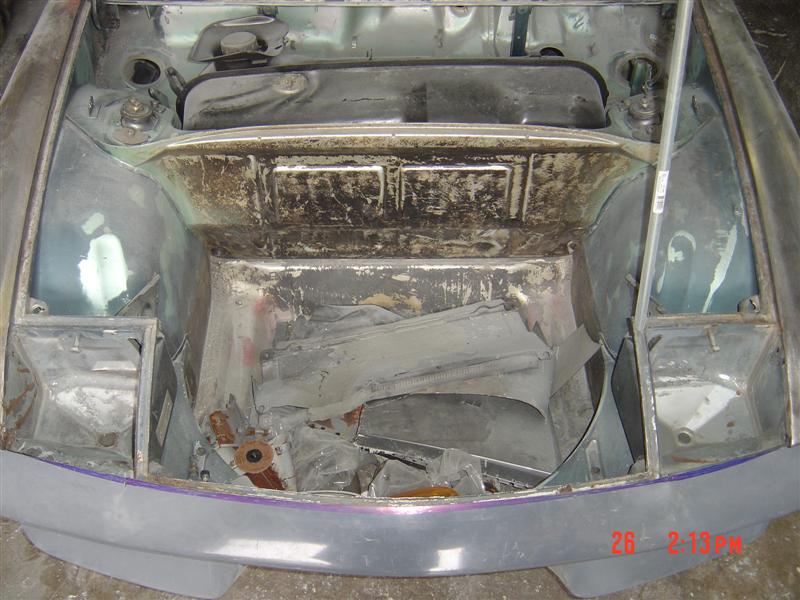
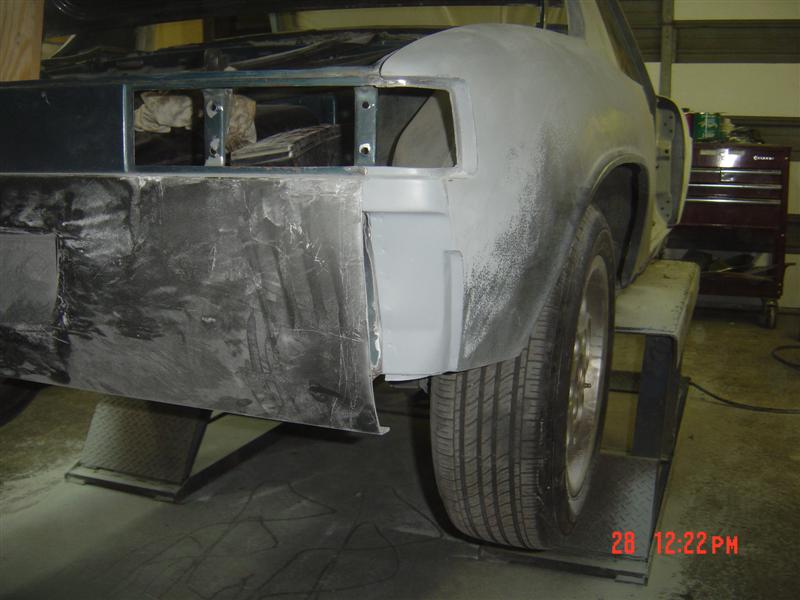
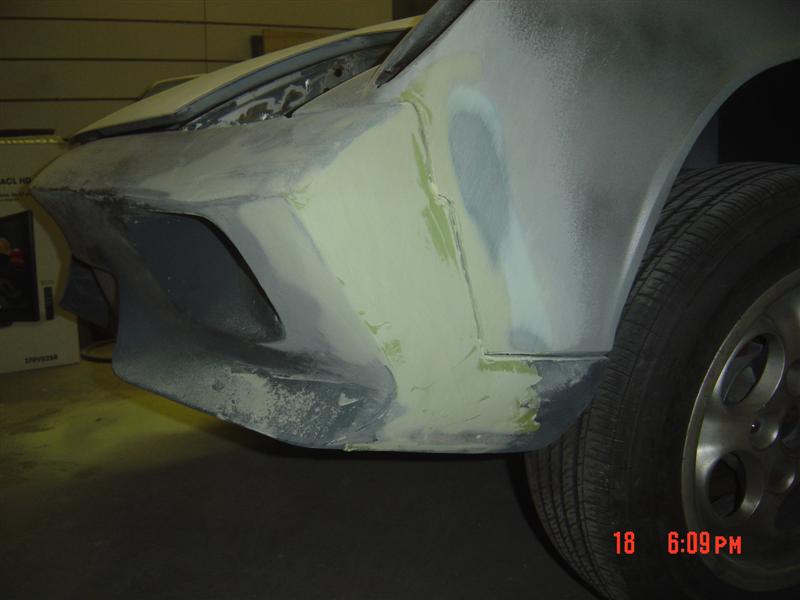
I'll start a new thread with more pics of making a GT bumper fit but for now here are a few of the initial problems and the fixes so far.
Attached image(s)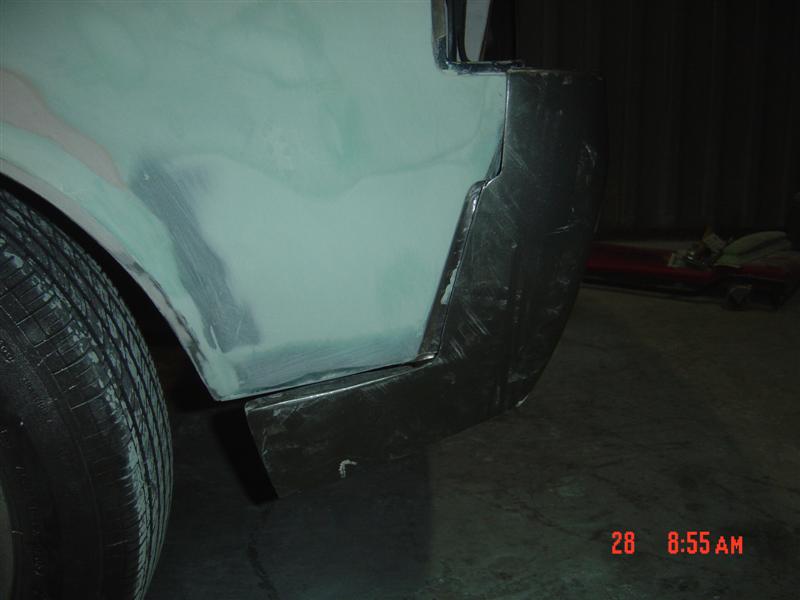
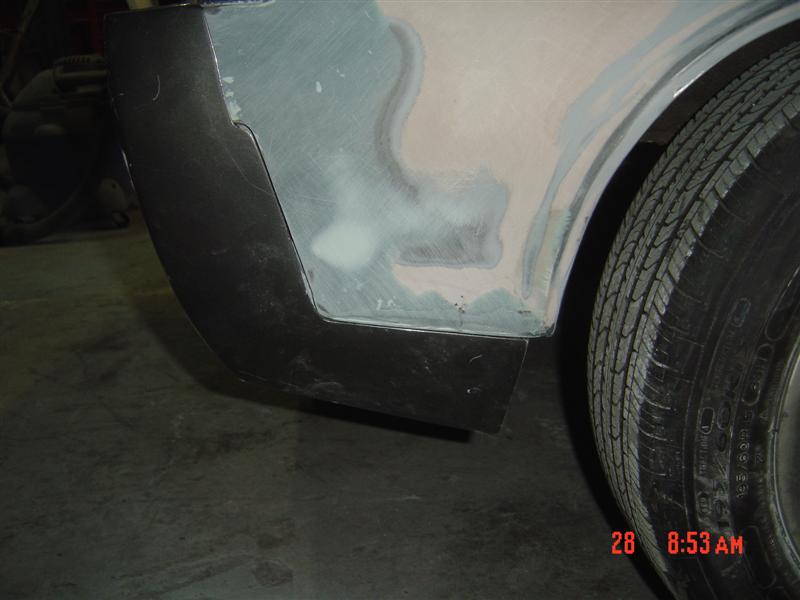
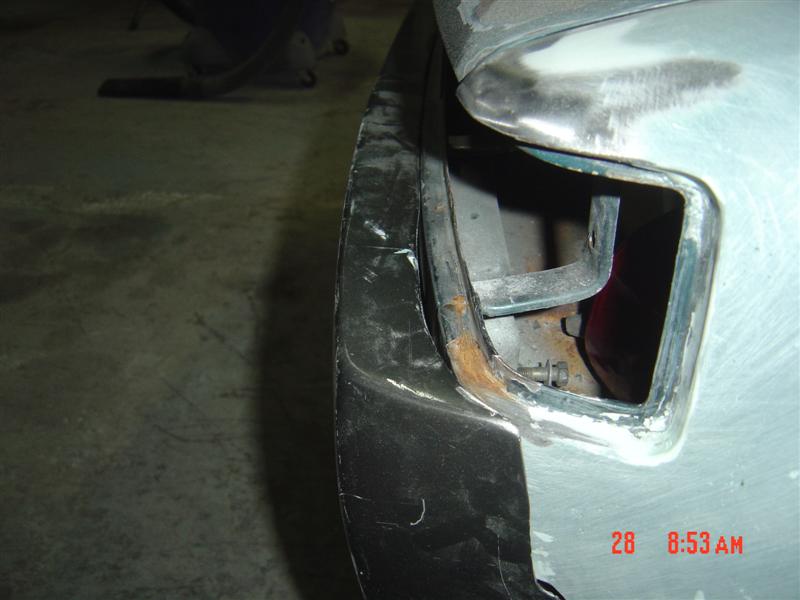
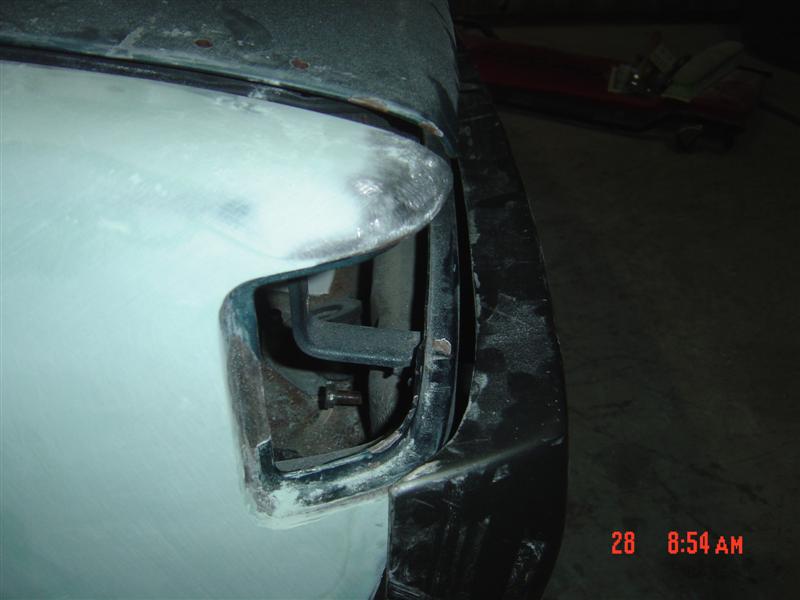
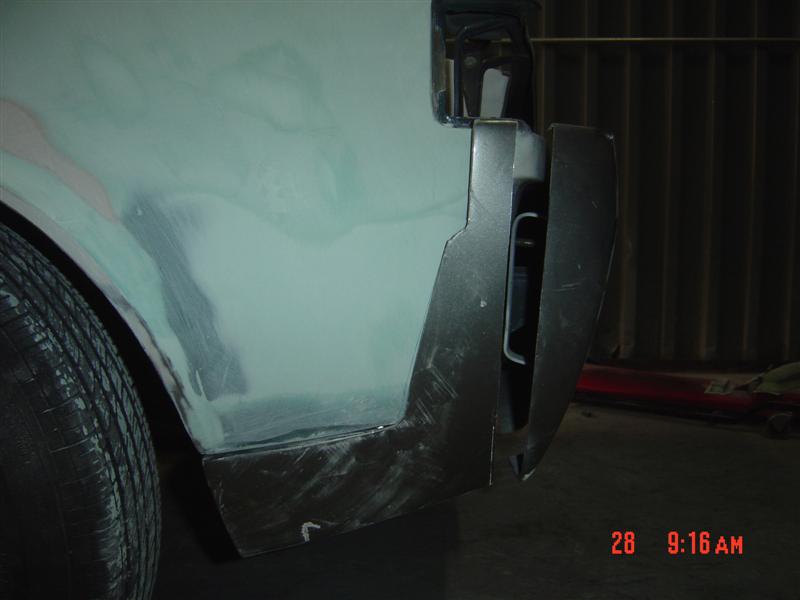
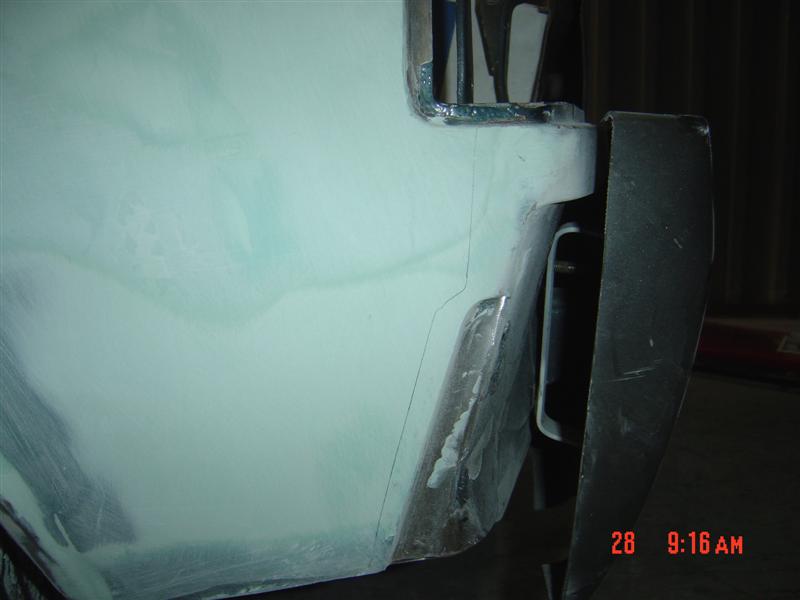
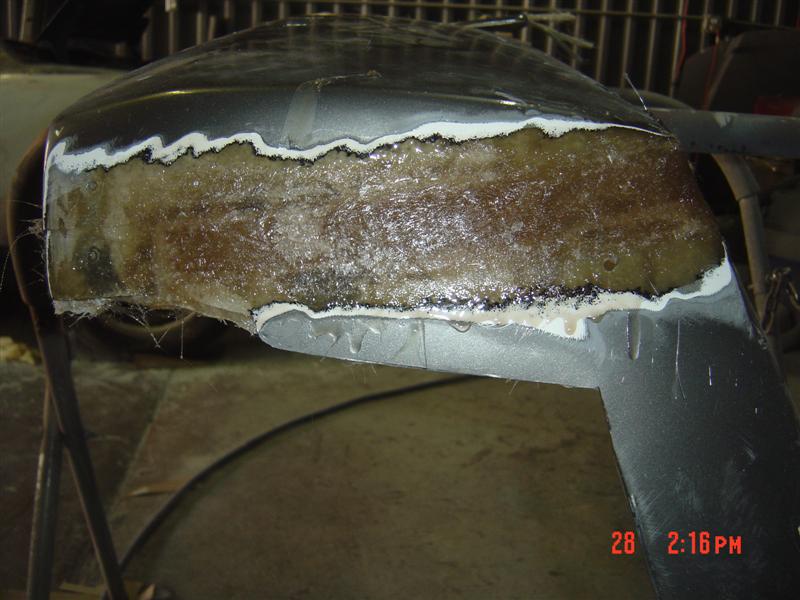
Posted by: scotty b Oct 28 2009, 06:37 PM
![]() Front won't go any further until all of the body work is done on the front fenders. Then I will cut the sides off, reposition them to match the body and glass them back on. Passenger side is sticking out form the side of the car almost 1/4 inch. Didn't show wel in the pic I took of it
Front won't go any further until all of the body work is done on the front fenders. Then I will cut the sides off, reposition them to match the body and glass them back on. Passenger side is sticking out form the side of the car almost 1/4 inch. Didn't show wel in the pic I took of it ![]()
Attached image(s)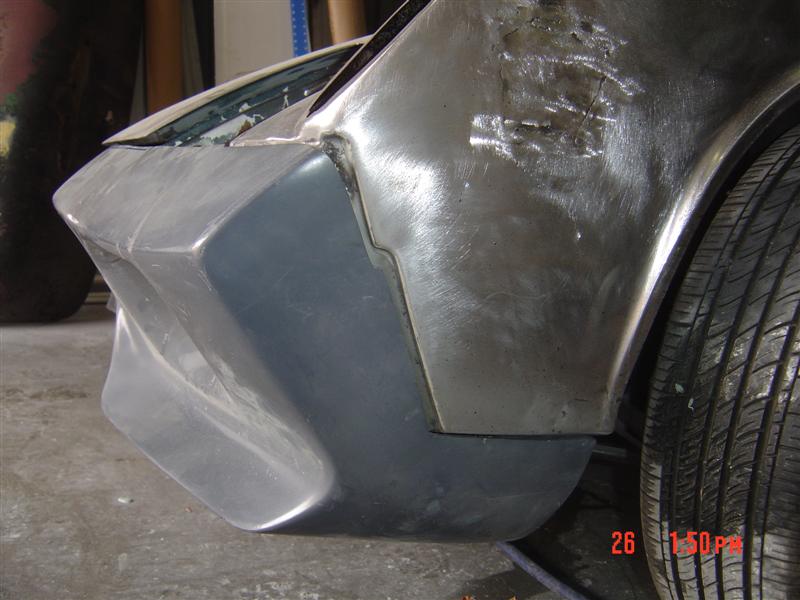
Posted by: Dr Evil Oct 28 2009, 09:24 PM
WOW, thats a lot of work ![]()
Posted by: Vacca Rabite Oct 28 2009, 09:29 PM
When I see what a pro can do, and I look back at all the work that I did to my car - learning on the fly, scratching my head and doing it sometimes twice before I thought it was passable. Sometimes I wish I had the green stuff to just hand it to a guy like Scotty and say "post up some pics and call me when its done."
This thread makes me a little jealous.
Zach
Posted by: Dr Evil Oct 28 2009, 09:35 PM
It is nice. It beats the hell out of taking down to Mexico ![]() "OK no pro-lem!"
"OK no pro-lem!" ![]()
Posted by: scotty b Oct 28 2009, 09:40 PM
Si. Come bac nex week pic up Doctor Ebil. Make nice juss for ju
Posted by: scotty b Oct 28 2009, 09:42 PM
When I see what a pro can do, and I look back at all the work that I did to my car - learning on the fly, scratching my head and doing it sometimes twice before I thought it was passable. Sometimes I wish I had the green stuff to just hand it to a guy like Scotty and say "post up some pics and call me when its done."
This thread makes me a little jealous.
Zach
But you learned something new. And there is that sense of accomplishment.
No I'm not being a smartass....for once
Posted by: hot_shoe914 Nov 14 2009, 01:42 AM
I think I figured out who I want to redo my LE. Now I just gotta figure out how to come up with tens of thousands of dollars to pay the man! How would you like a 32' motorhome Scotty? ![]()
![]()
Posted by: Dr Evil Nov 14 2009, 12:32 PM
You might be surprised. He might be interested in that motor home ![]()
![]()
Posted by: zymurgist Nov 14 2009, 12:50 PM
When I see what a pro can do, and I look back at all the work that I did to my car - learning on the fly, scratching my head and doing it sometimes twice before I thought it was passable. Sometimes I wish I had the green stuff to just hand it to a guy like Scotty and say "post up some pics and call me when its done."
This thread makes me a little jealous.
Zach
But you learned something new. And there is that sense of accomplishment.
No I'm not being a smartass....for once
Yeah Zach, with all that free time you have, maybe I could get you to weld on Babydoll!
Posted by: Dr Evil Nov 14 2009, 12:59 PM
Good luck, he doesnt even have time to weld on my bus to get it off of his property ![]()
Posted by: Vacca Rabite Nov 14 2009, 02:42 PM
Good luck, he doesnt even have time to weld on my bus to get it off of his property
In other news, I just signed myself up for even more driving and stress that will allow me to finish my graduate studies 3 months earlier. It means I have to drive to Columbia MD a few times a week for classes, but it if means I get to see people and hang out and not be a zombie a little sooner, I am so down with it.
Zach
Posted by: crash914 Nov 15 2009, 06:28 AM
Hey Zach, I am only a few miles on the way to Columbia, end of 29. feel free to stop by and raid my stash....
Posted by: Dr Evil Nov 15 2009, 07:39 AM
Zombie
Posted by: RobW Nov 15 2009, 08:30 AM
Zombie
BTDT
4 years of P/T MBA + F/T job + stay at home wife + having 2 kids
Posted by: scotty b Jan 5 2010, 07:52 PM
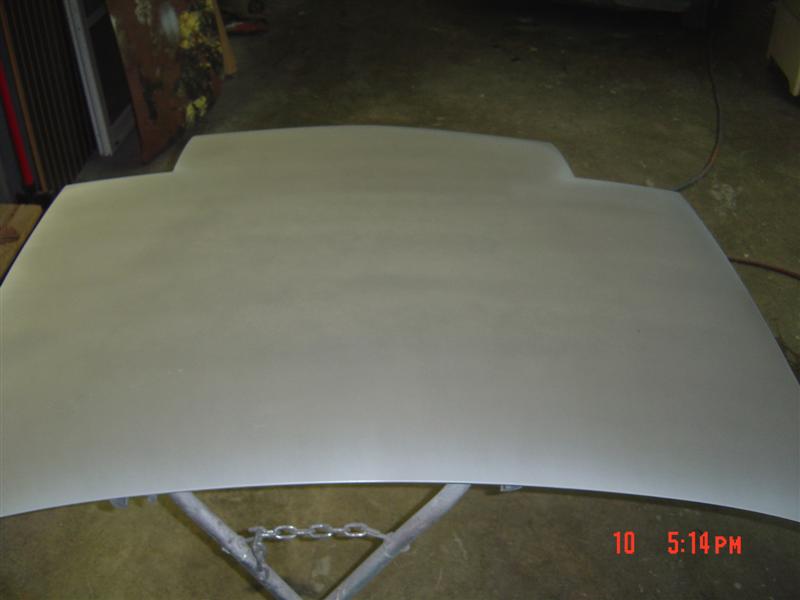
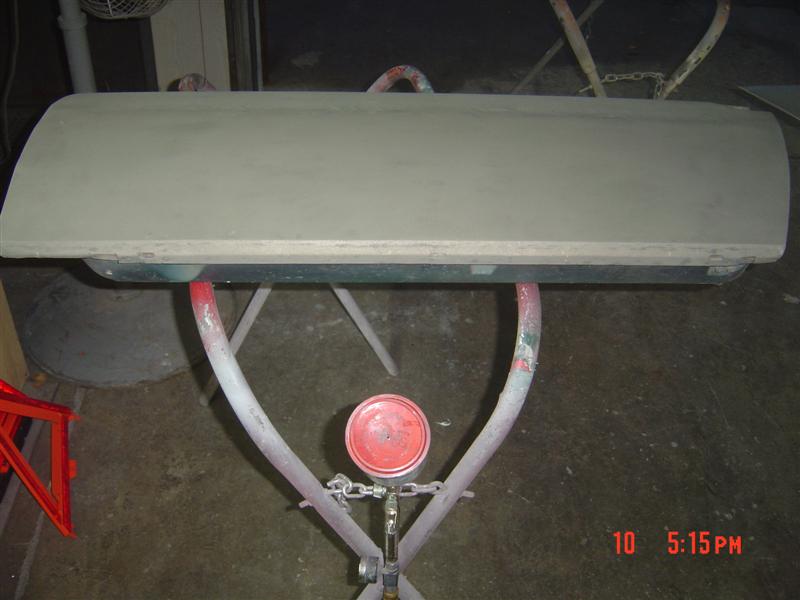
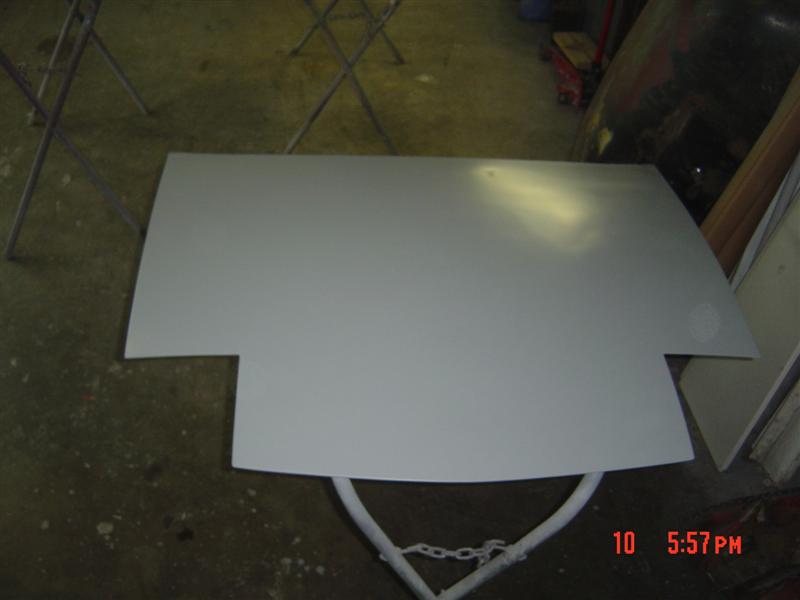
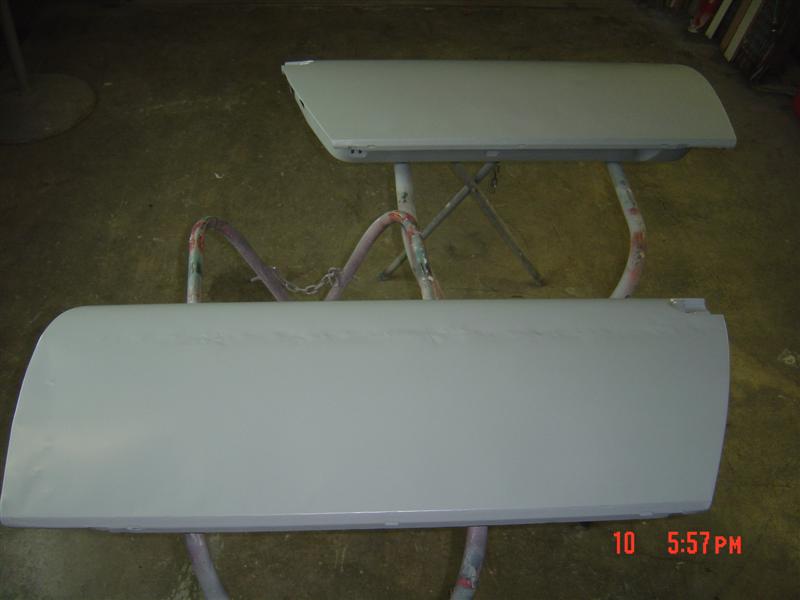
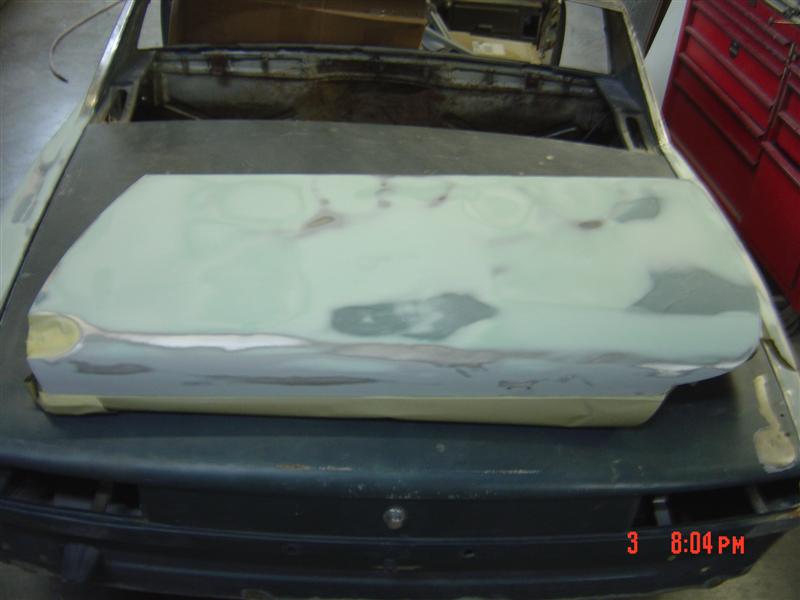
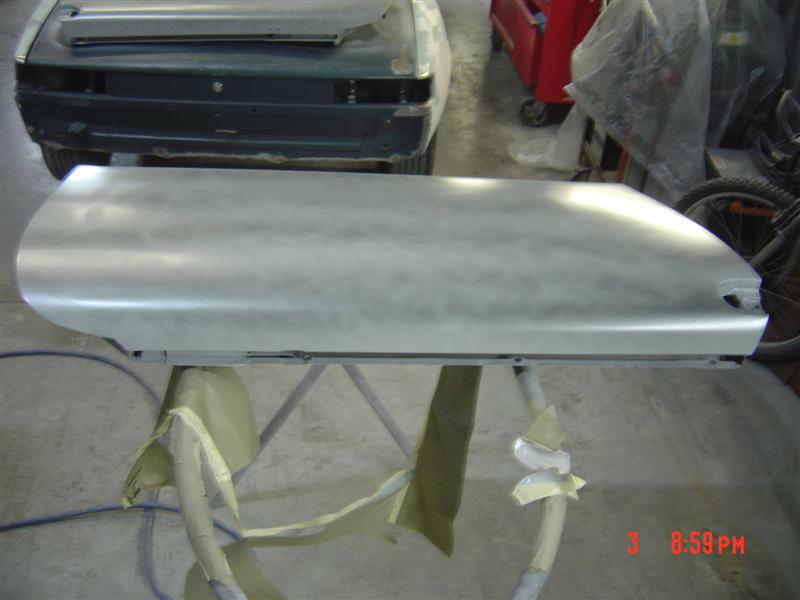
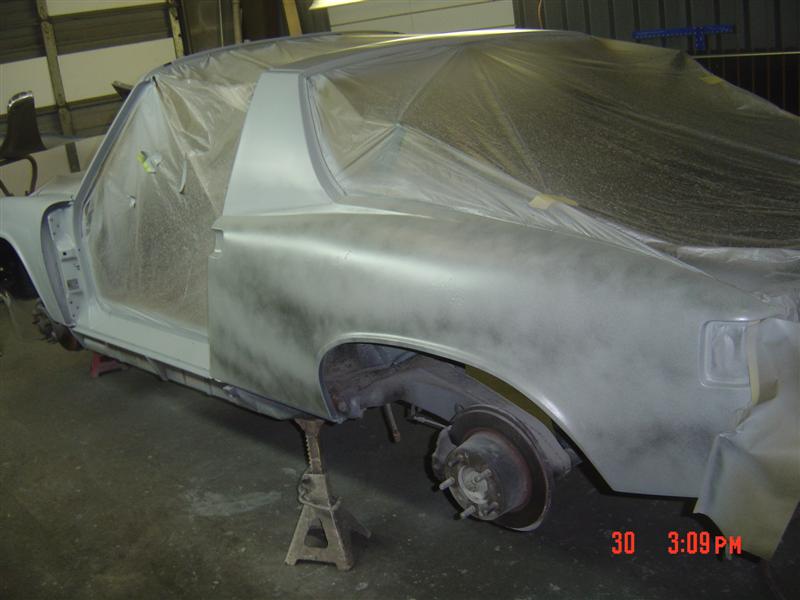
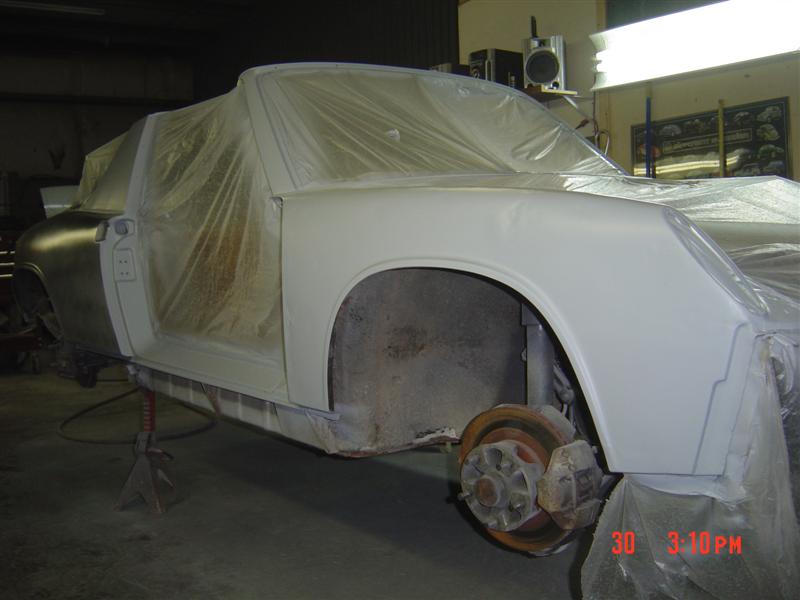
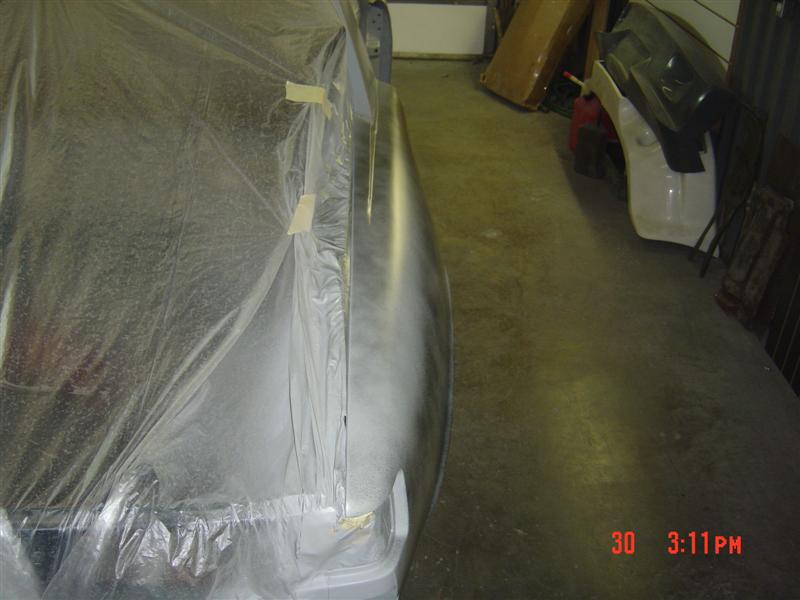
doors and rear trunk lid got etched, sealed, body worked and a couple coats of high build on them. Hood got etched and sealed. Body got etched and sealed. SO now the doors, rear trunk, rear quarters are all ready for the final blocking then comes the prime, block....prime....block stage. Body work on the front end and roll bar is next, hope to knock it out in a couple weeks. Then back to the bumpers ![]()
Attached image(s)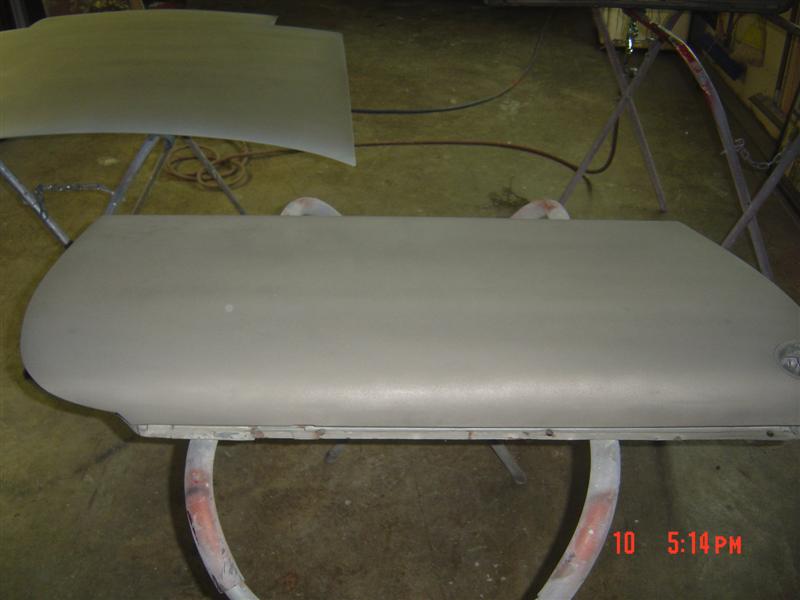
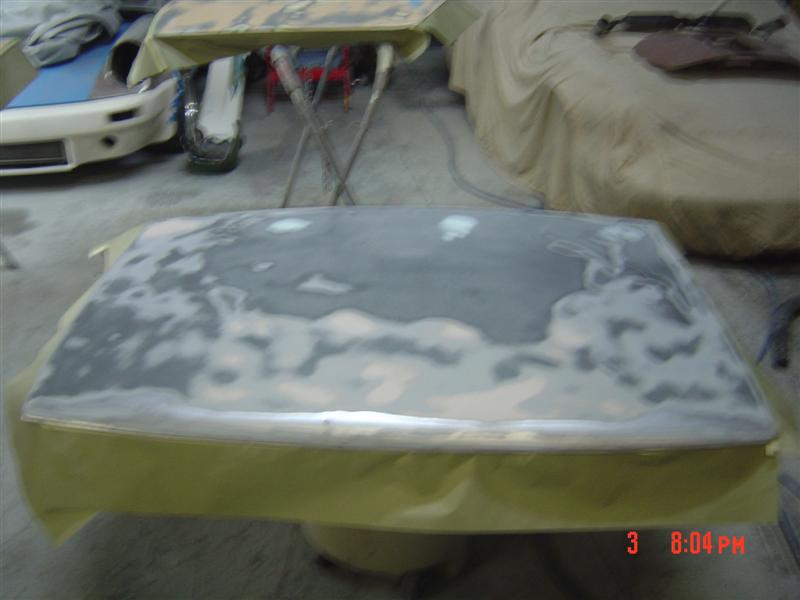
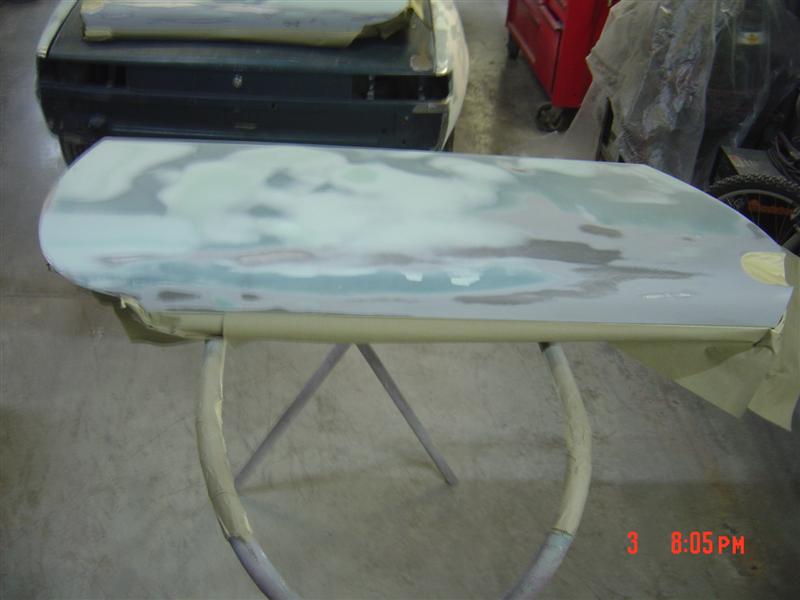
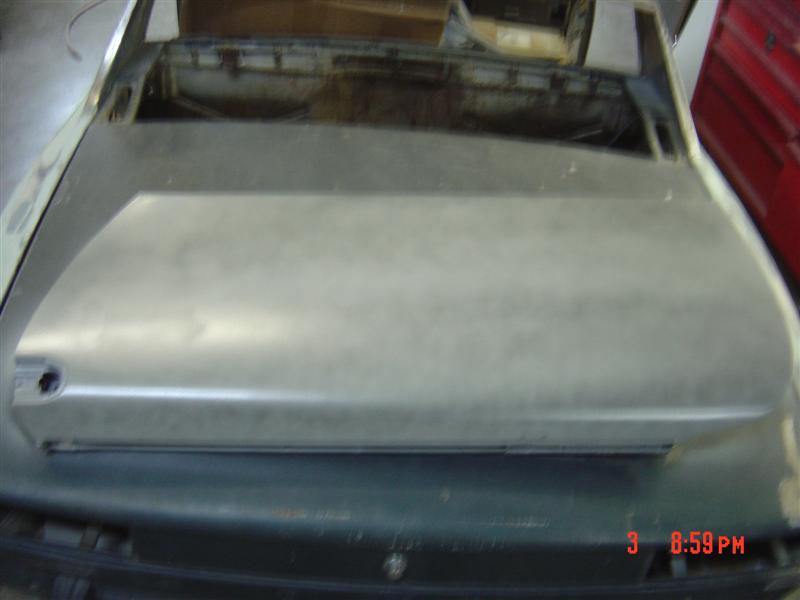
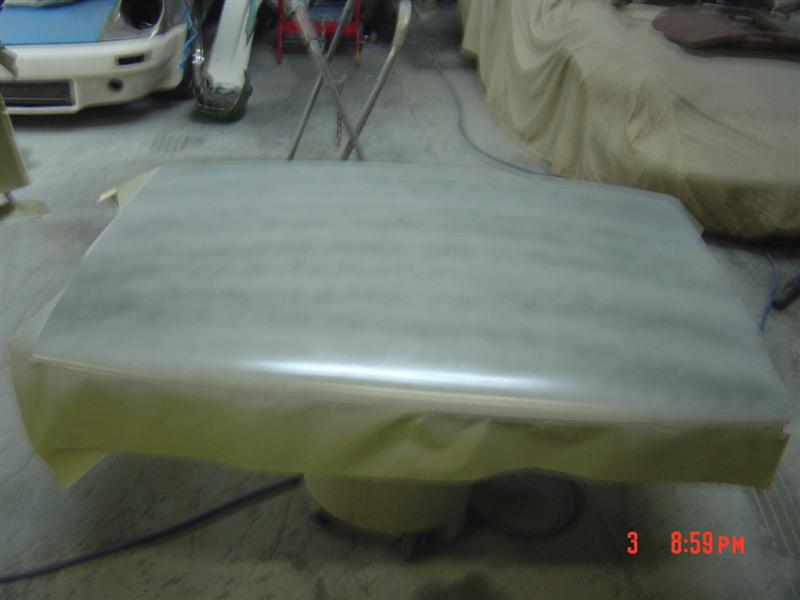
Posted by: scotty b Jan 5 2010, 07:55 PM
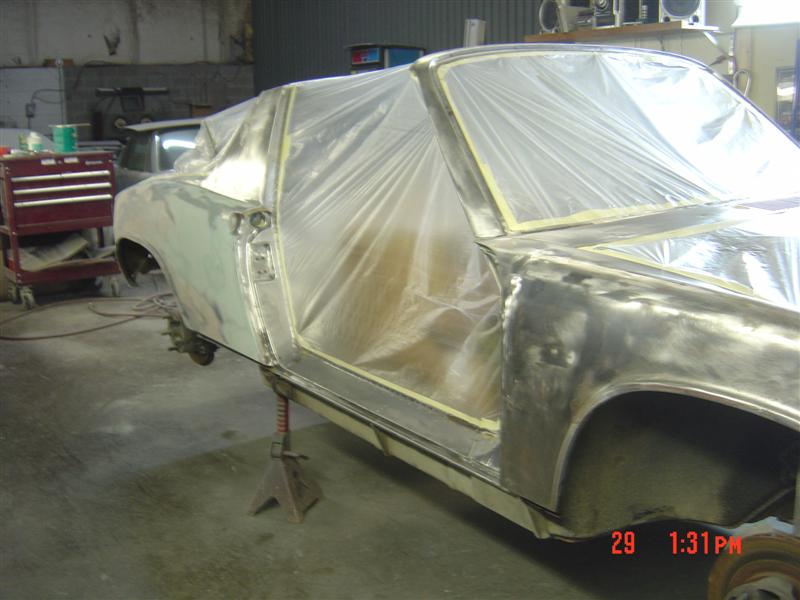
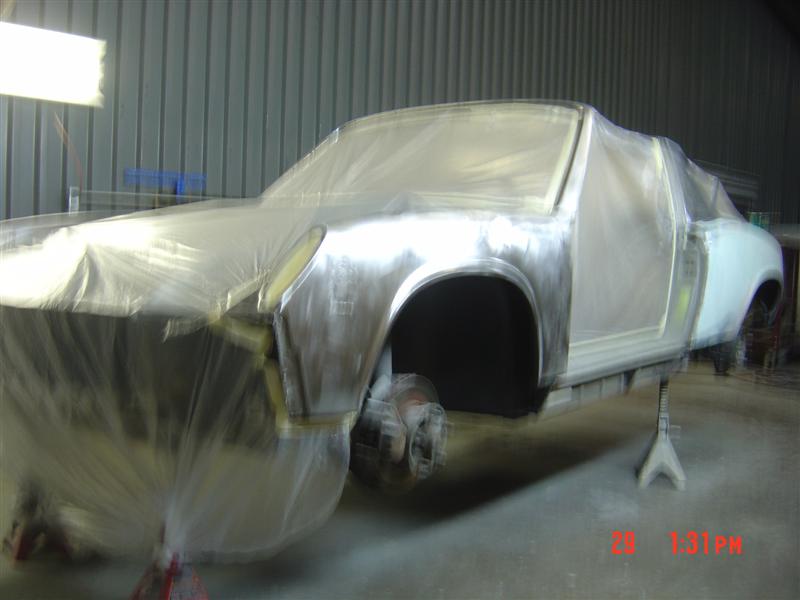
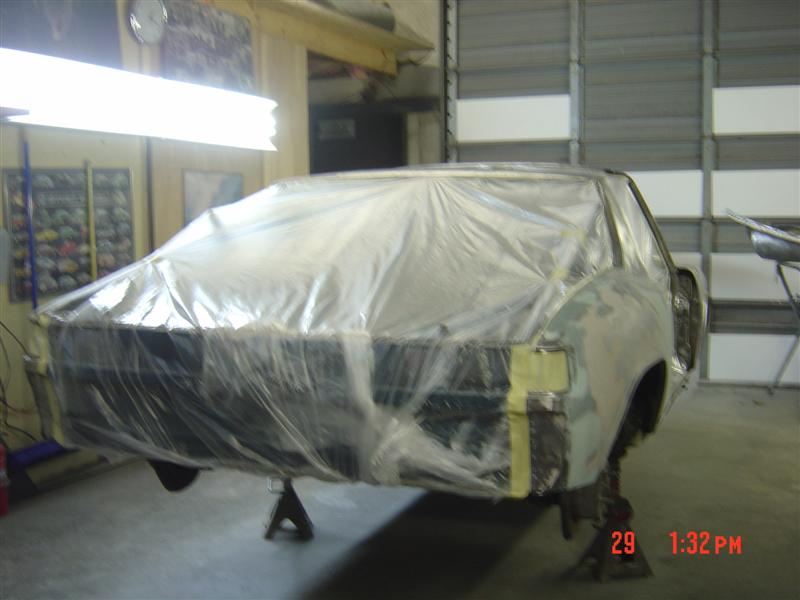
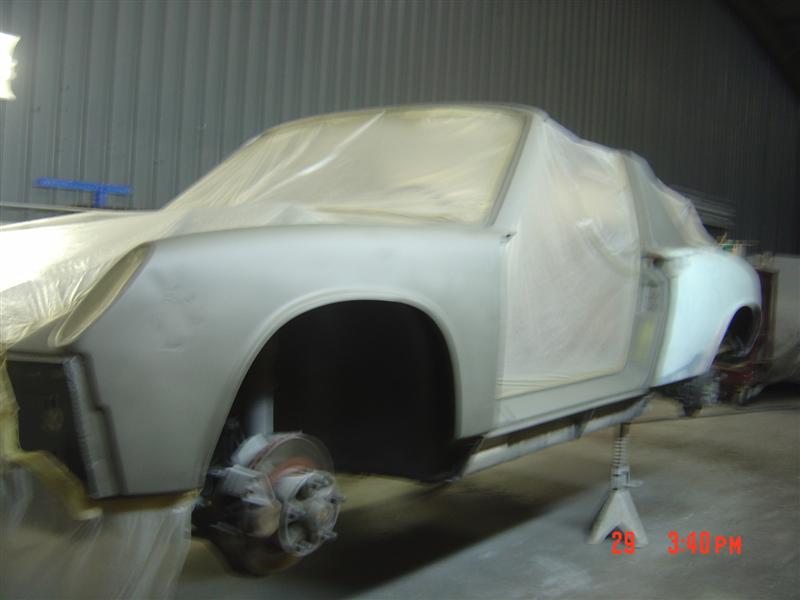
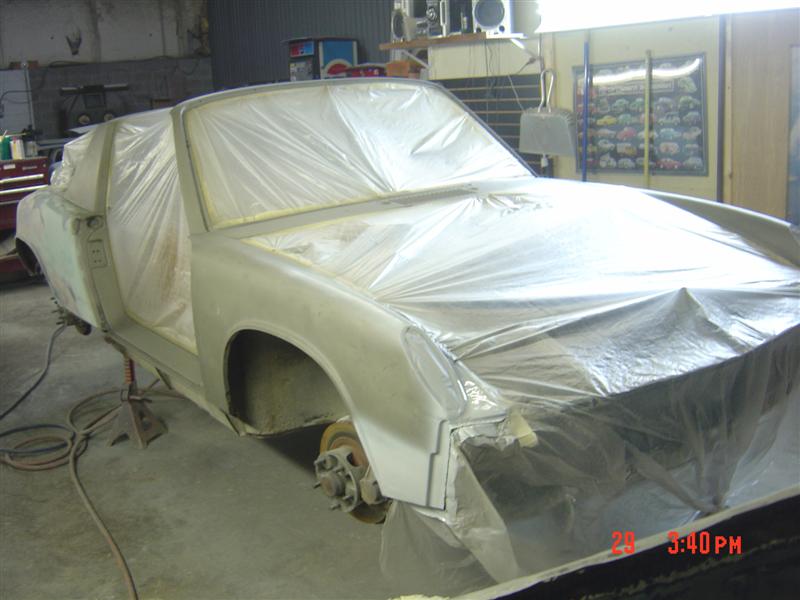
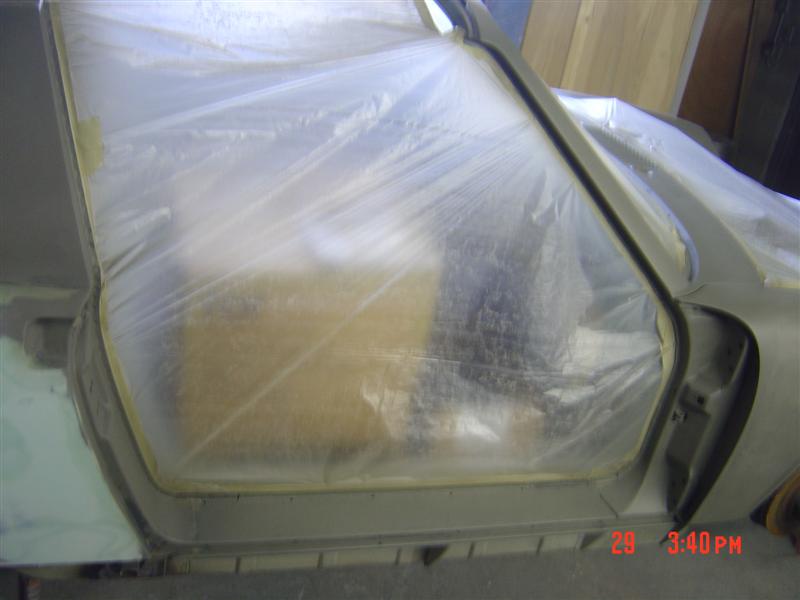
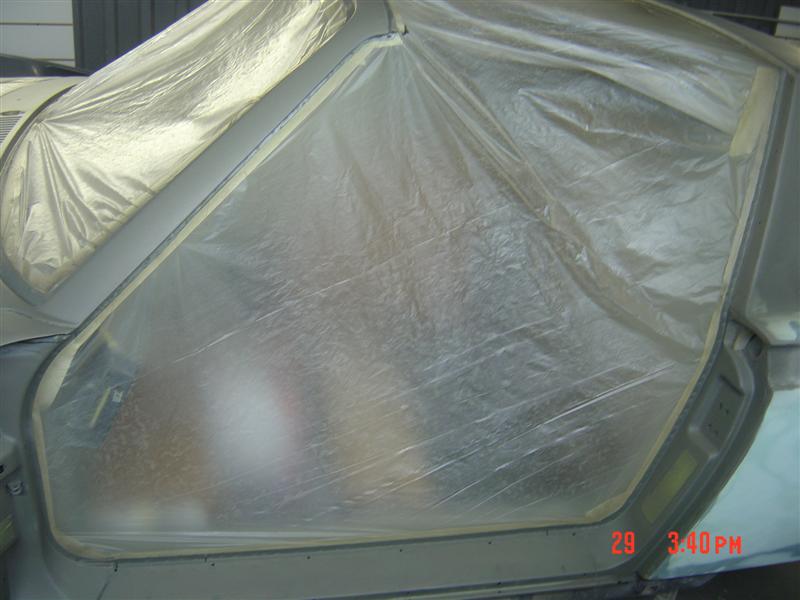
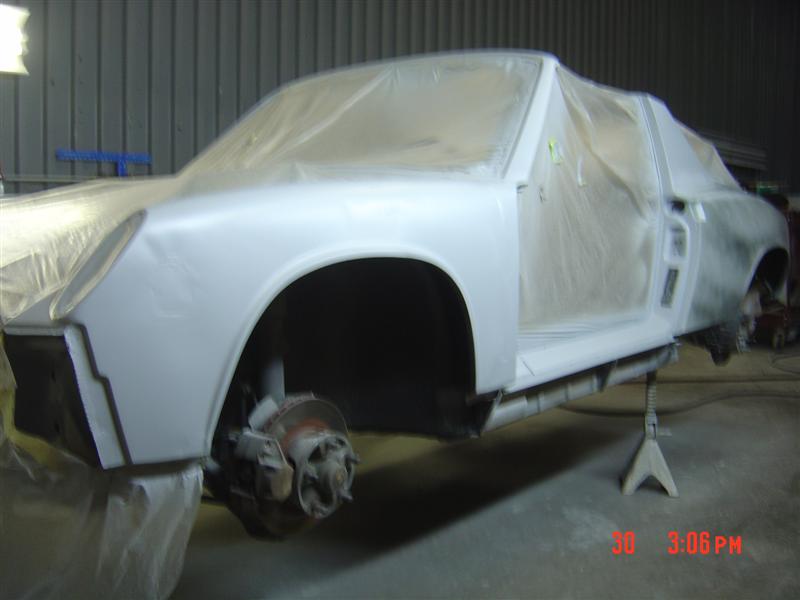
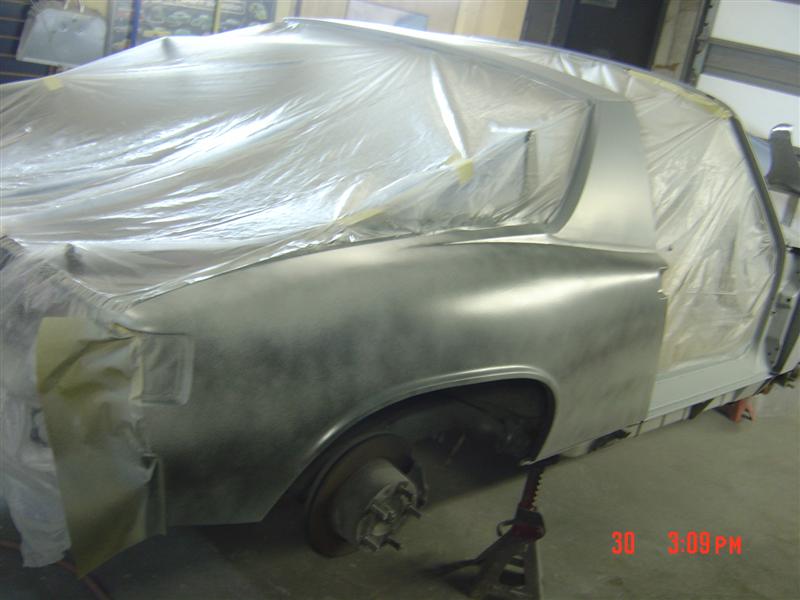
I guess I should stop making fun of Andy's picture taking huh ? ![]()
Attached image(s)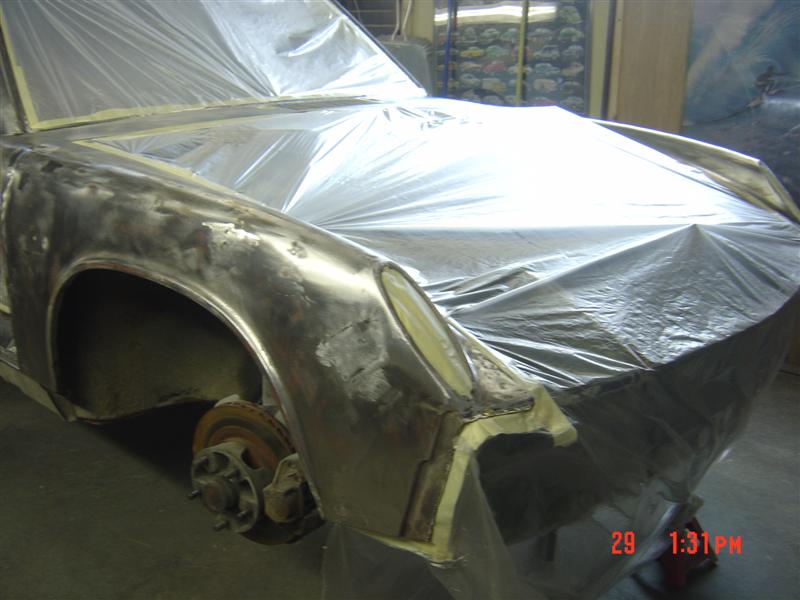
Posted by: scotty b Jan 5 2010, 07:57 PM
Damn, some of those pics are making me dizzy ![]()
Attached image(s)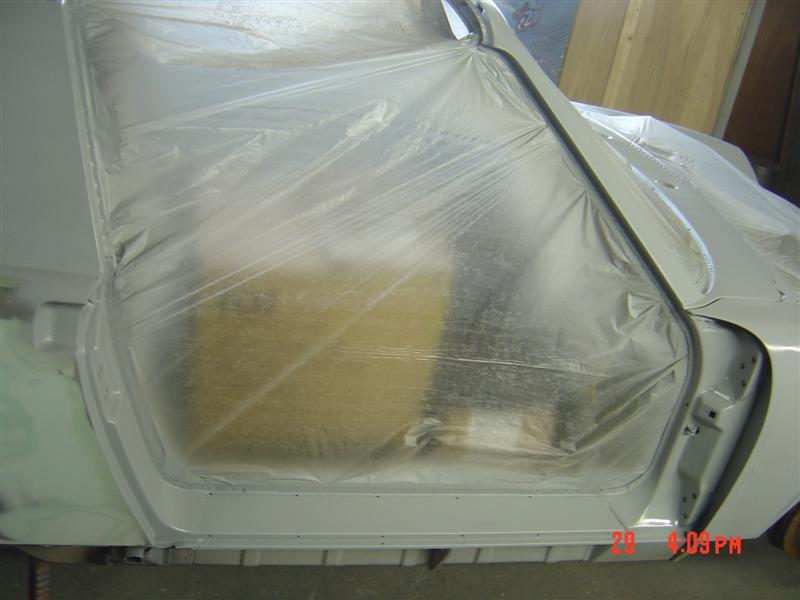
Posted by: Dr Evil Jan 5 2010, 08:06 PM
![]()
Posted by: watsonrx13 Jan 7 2010, 07:38 AM
Scotty, very nice job.
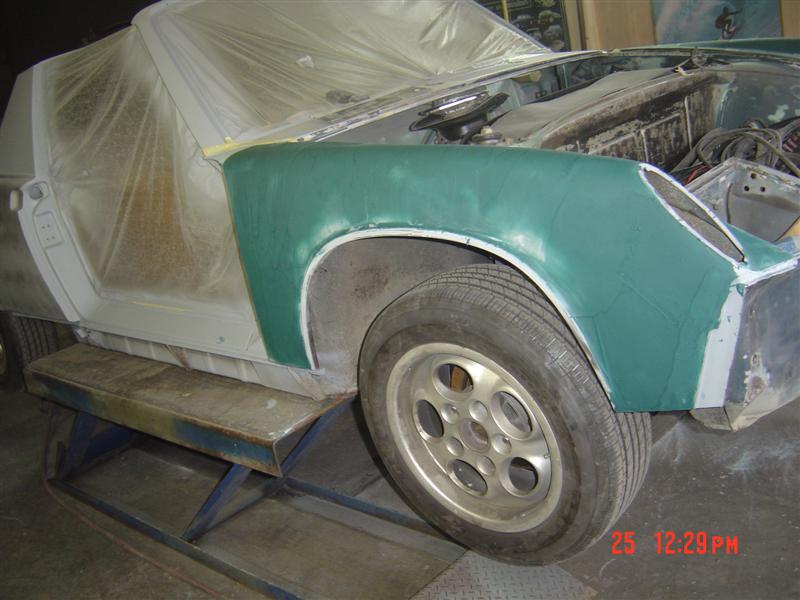
Can you tell me what product you used that is green on post #135, pic dated 8:04pm?
-- Rob
Posted by: sendjonathanmail Jan 7 2010, 05:38 PM
Can you tell me what product you used that is green on post #135, pic dated 8:04pm?
-- Rob
Glazing putty?
Posted by: scotty b Jan 8 2010, 06:41 PM
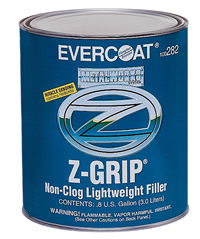
Darker green is short strand fiberglass filler. Second coat is Z grip, filler
Attached image(s)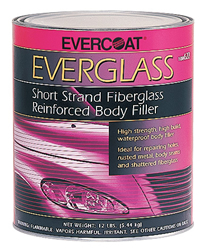
Posted by: SirAndy Jan 8 2010, 06:59 PM
I guess I should stop making fun of Andy's picture taking huh ?
Posted by: scotty b Jan 26 2010, 05:42 PM
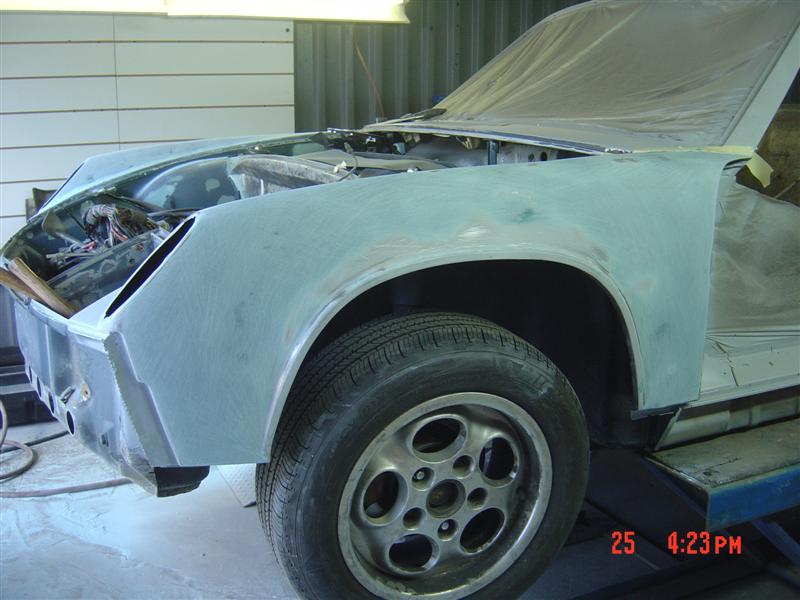
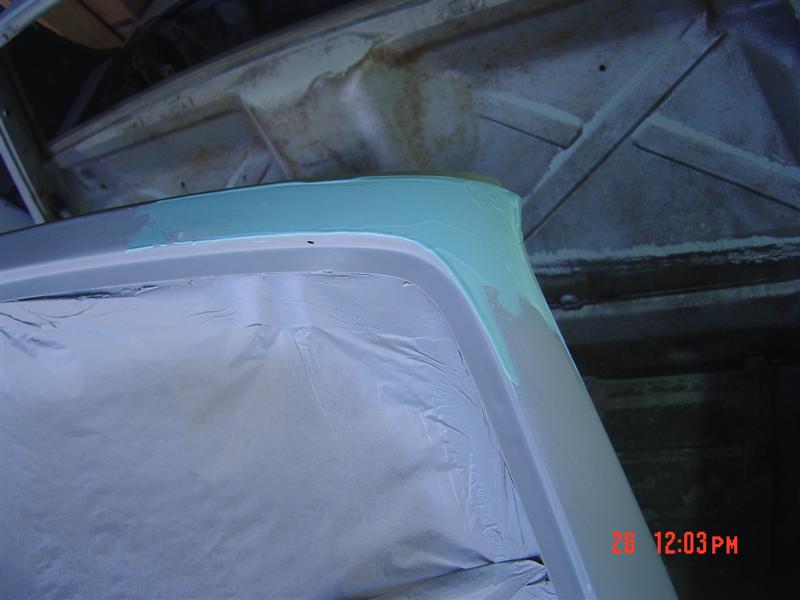
Front and roll bar be done. Next up is a couple coats of high build primer and tackle the fuel filler in the hood. The ALOT of blocking and priming
Attached image(s)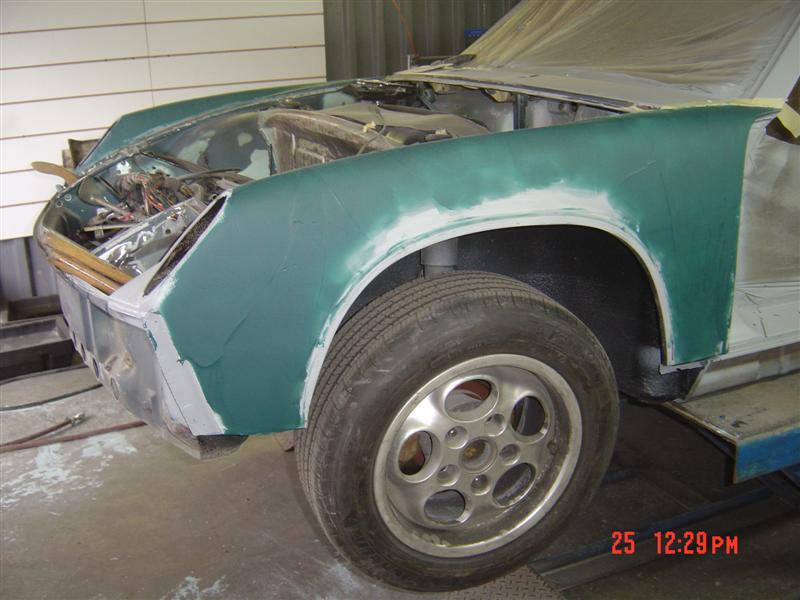
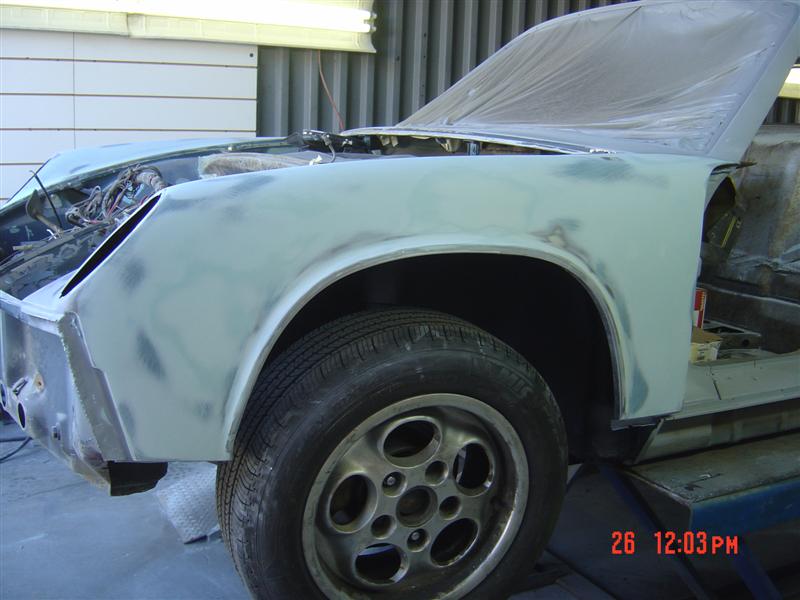
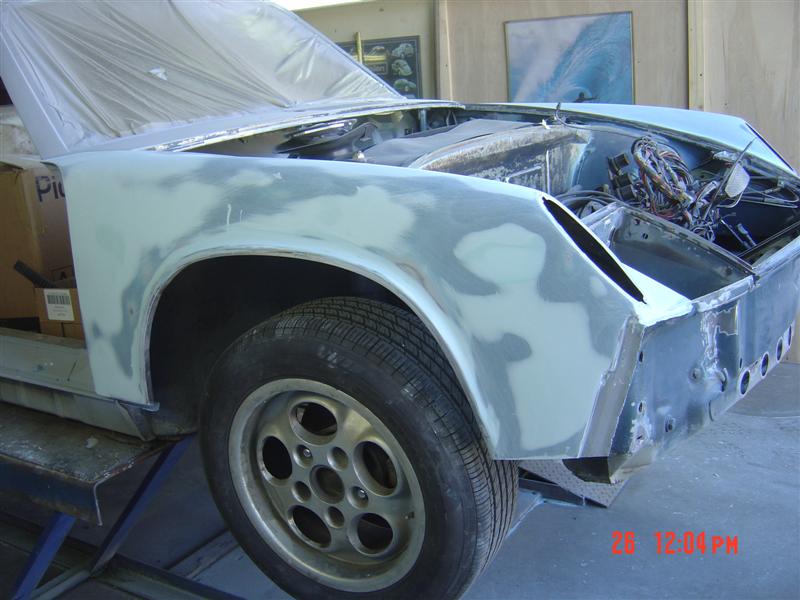
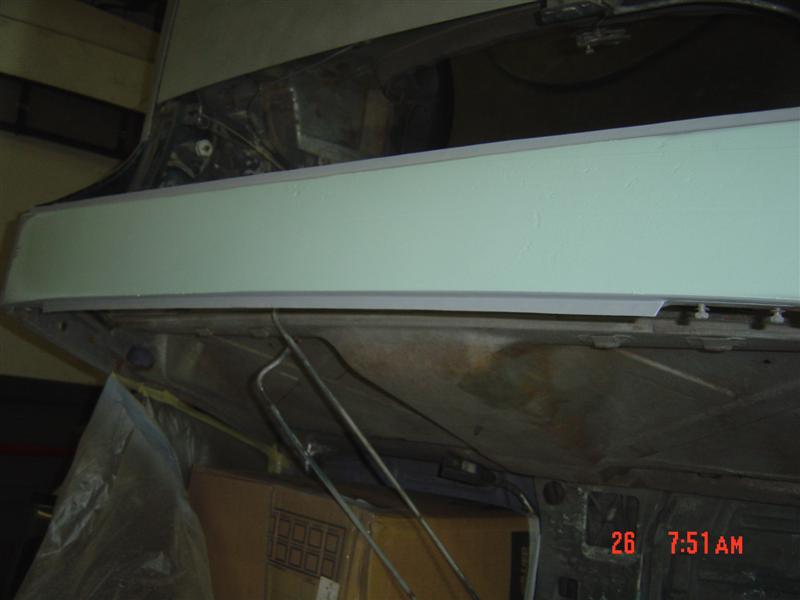
Posted by: scotty b Jan 26 2010, 05:43 PM
![]()
Attached image(s)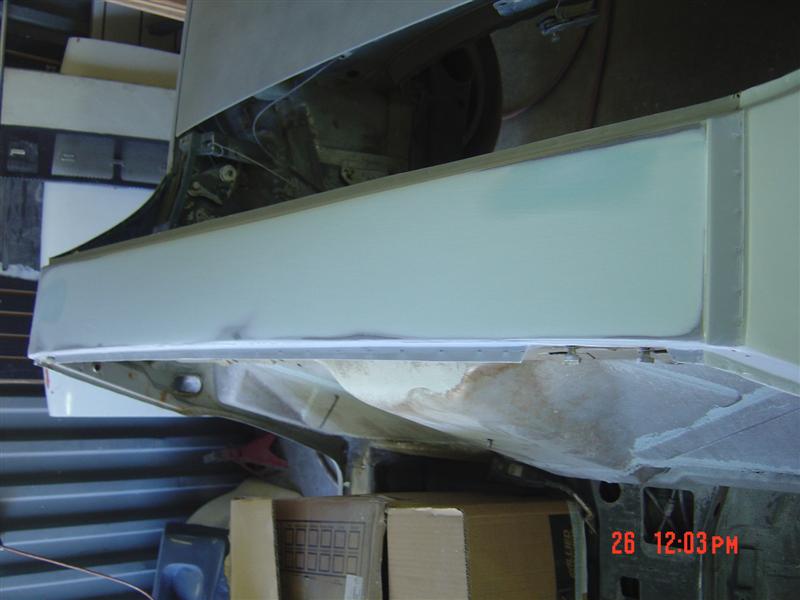
Posted by: Dr Evil Jan 26 2010, 05:55 PM
Ya, work it, work it, whore that bitch out! ![]()
Posted by: kwales Jan 26 2010, 06:30 PM
Evercoat.....
They are about three miles from me. Amazing how small they are.
Best stuff I've found, and some of it is actually waterproof.
Posted by: scotty b Jan 28 2010, 06:24 PM
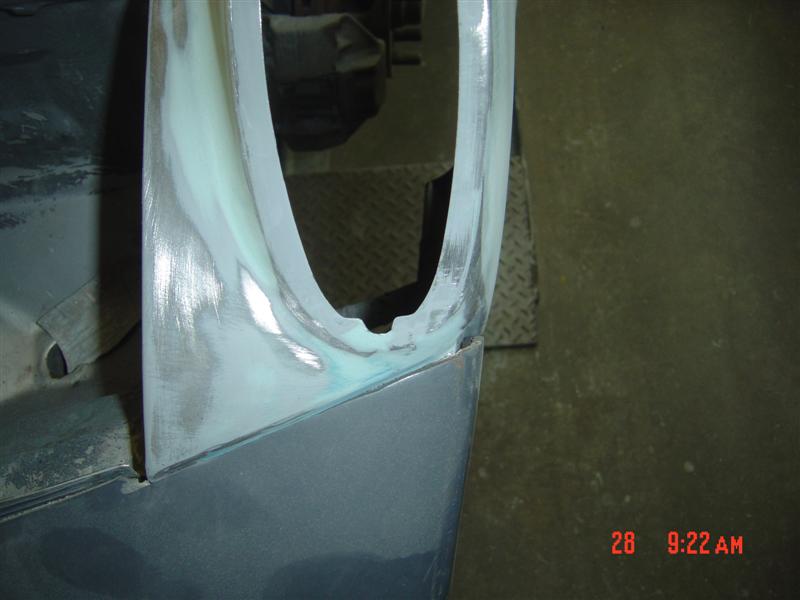
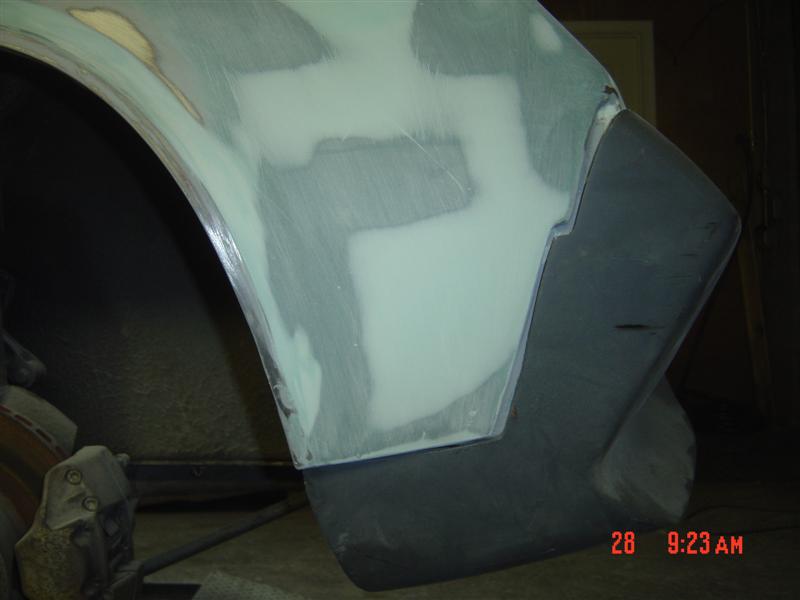
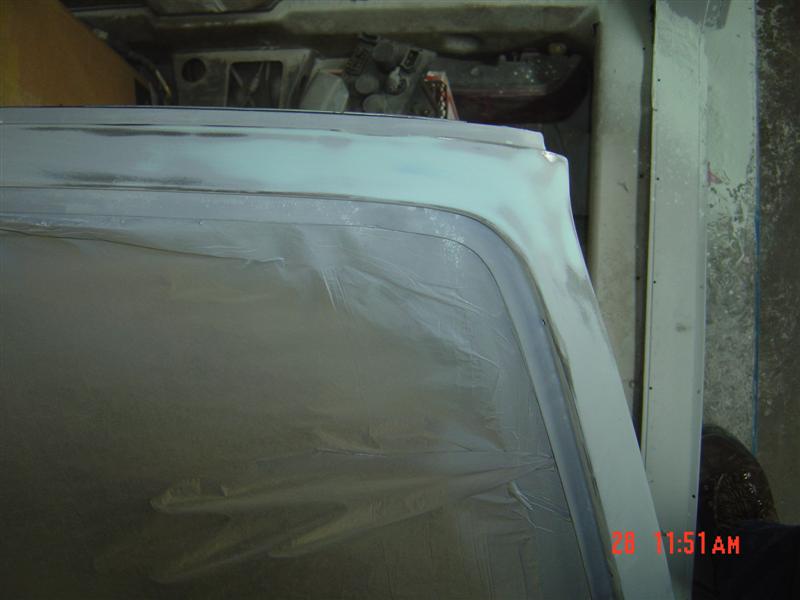
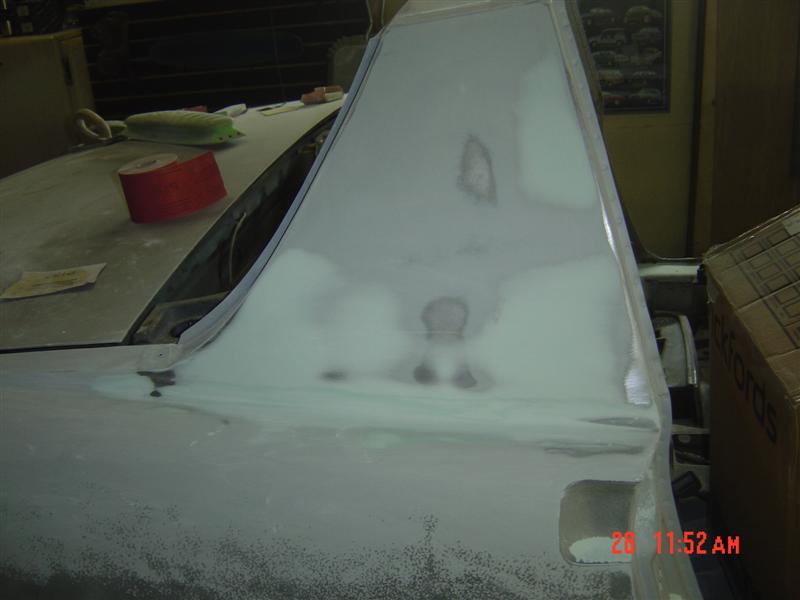
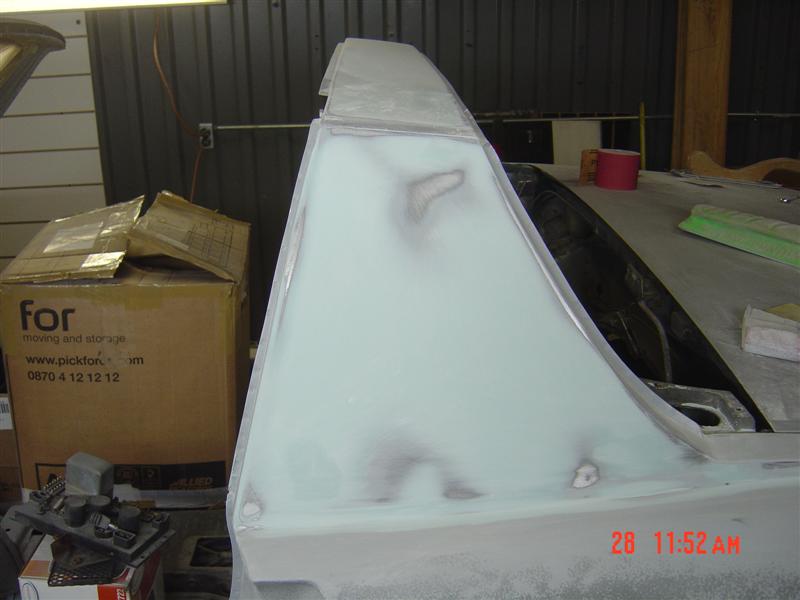
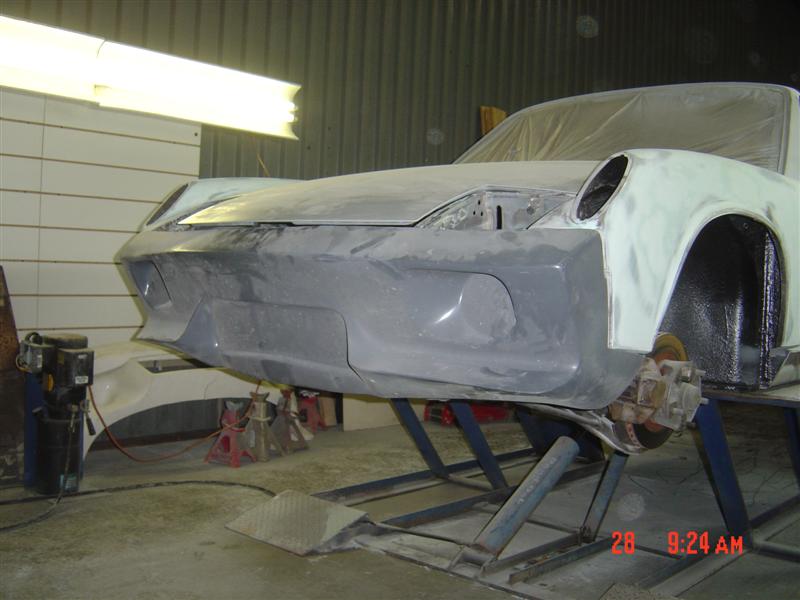
![]() Fuck those ill fitting P.O.S. bumpers
Fuck those ill fitting P.O.S. bumpers ![]()
Attached image(s)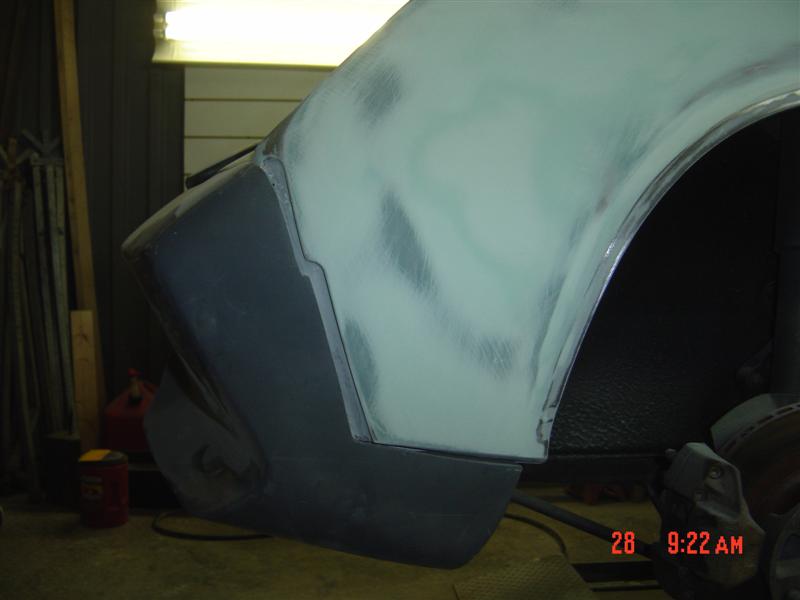
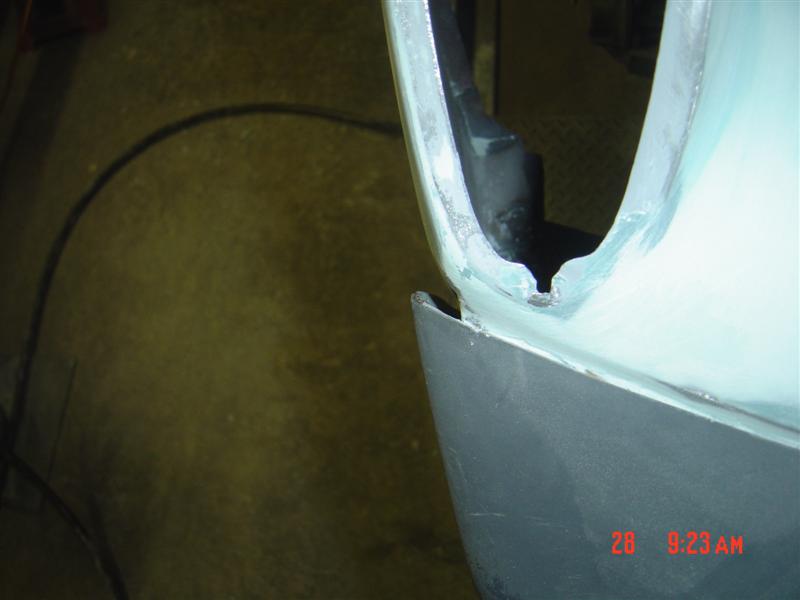
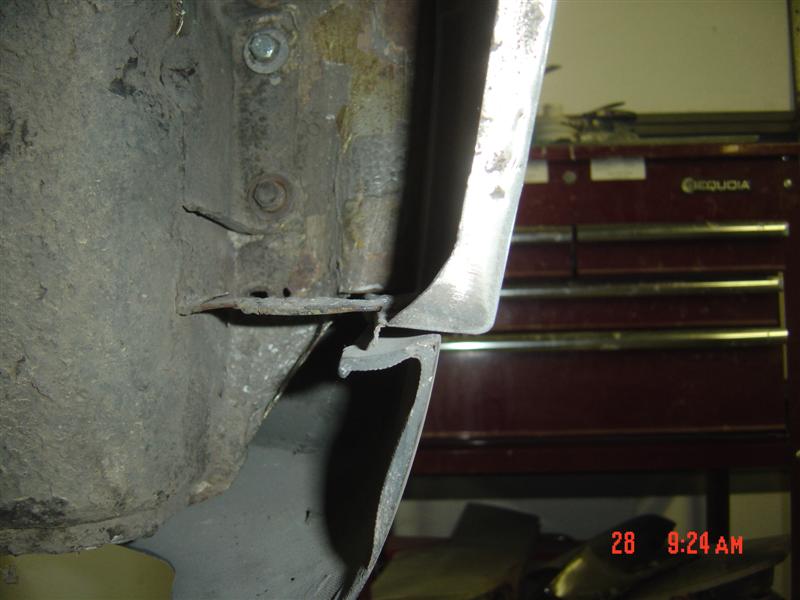
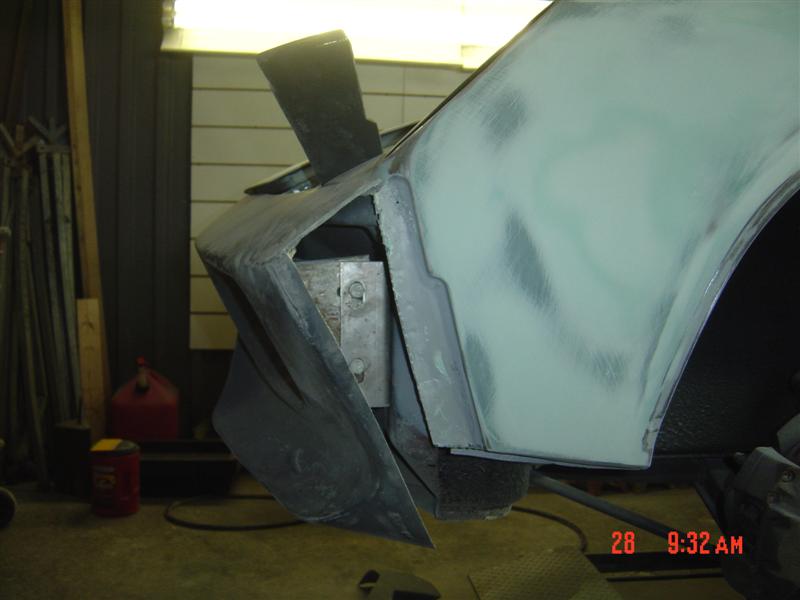
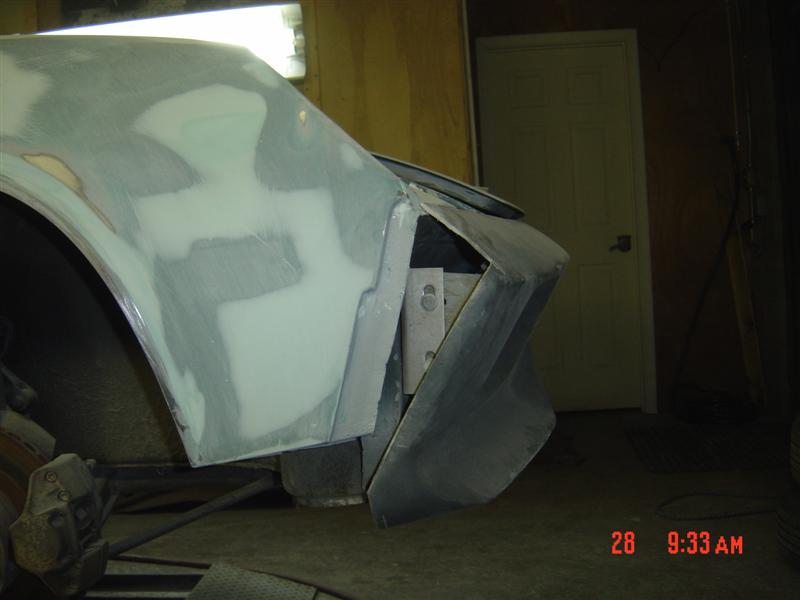
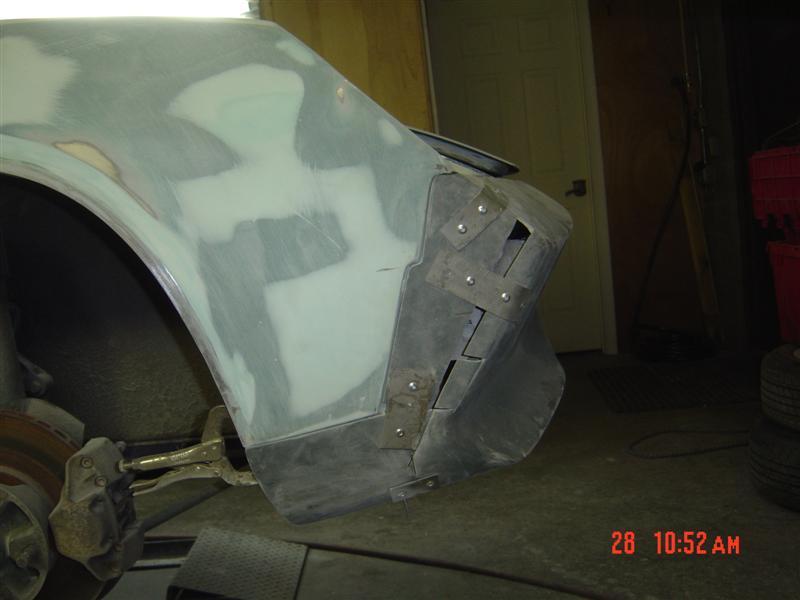
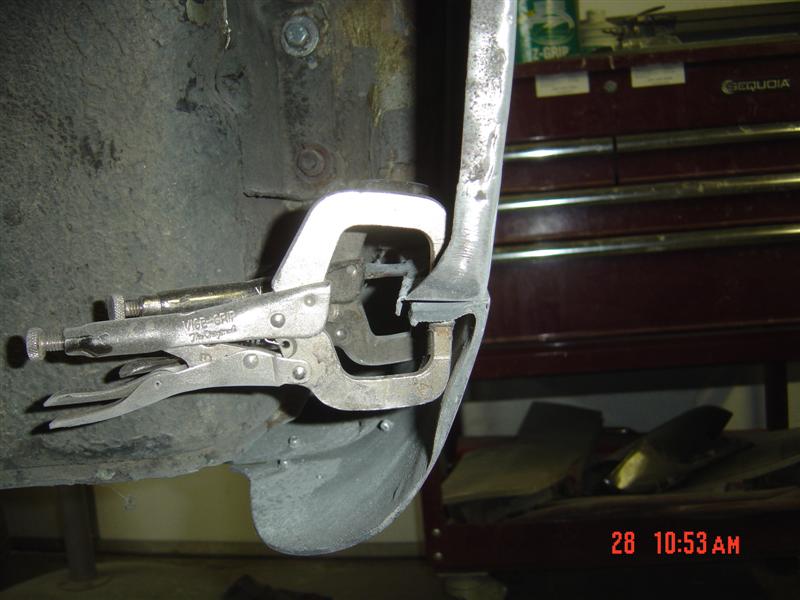
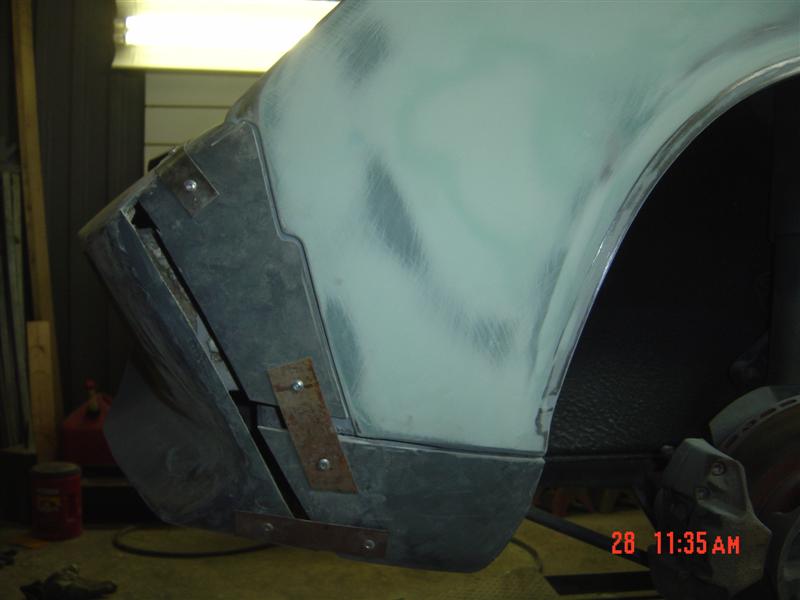
Posted by: scotty b Jan 28 2010, 06:26 PM
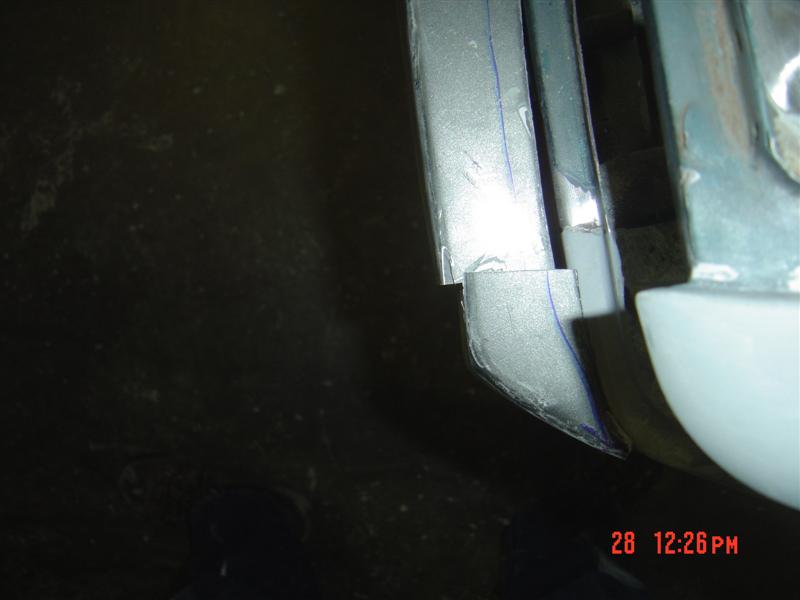
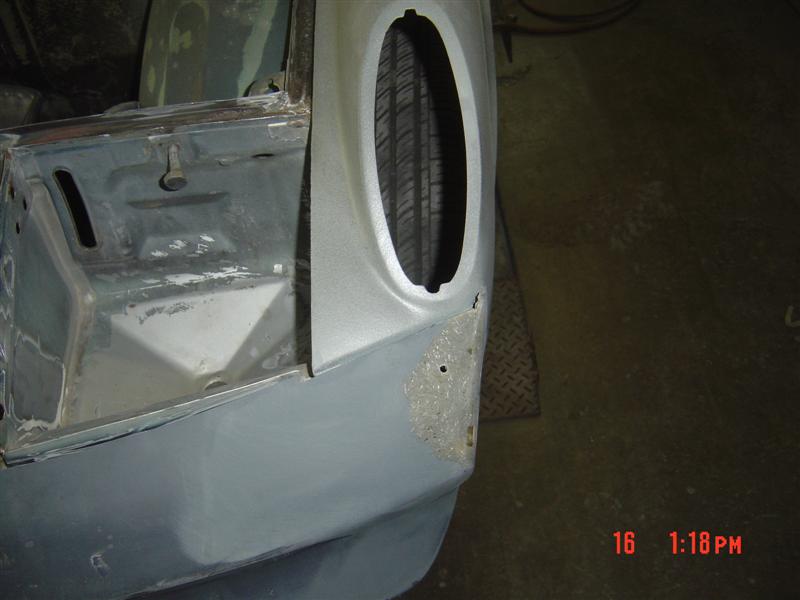
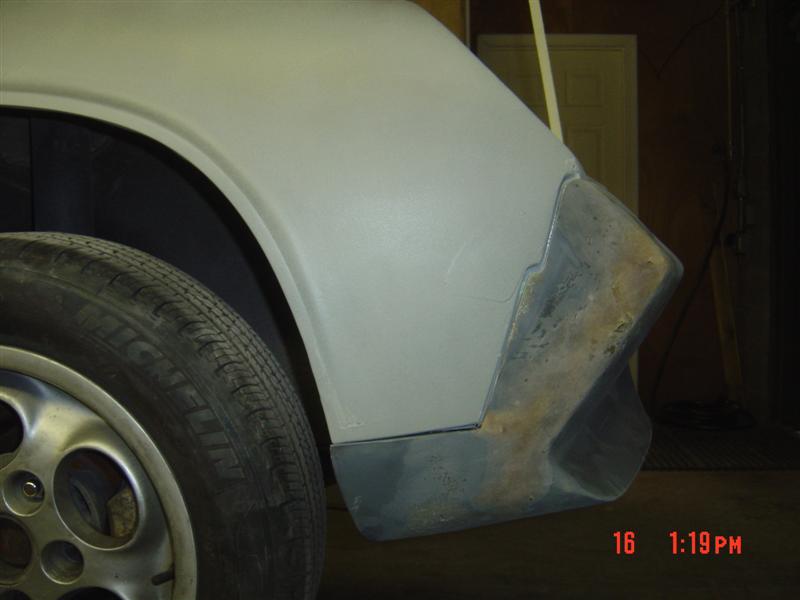
Cut the rear apart AGAIN, this time in a different spot. This is getting old.......
Attached image(s)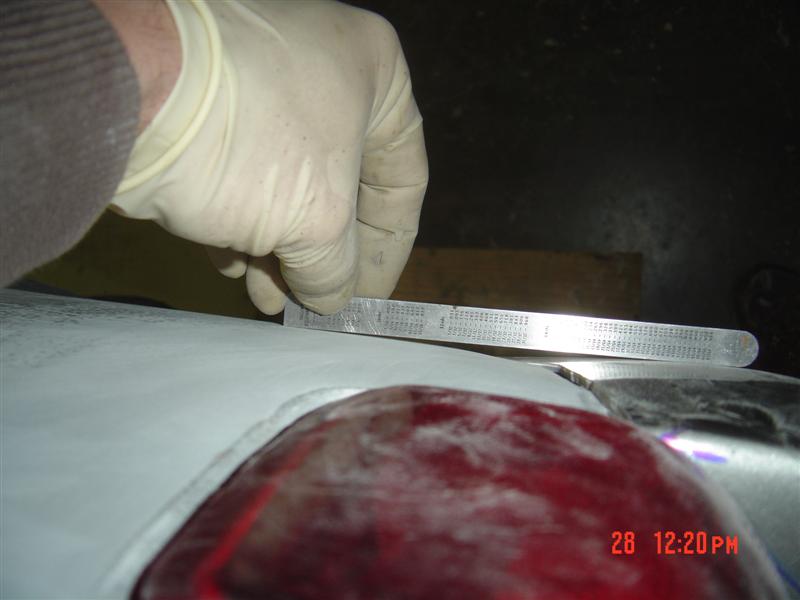
Posted by: Dr Evil Jan 28 2010, 07:41 PM
Aw man, Sorry that it is sucky ![]()
![]()
Posted by: SirAndy Jan 28 2010, 08:36 PM
That's the crappy 916 front bumper with the 'dimple' in the middle. I have the same one. ![]()
There's a repro out there that's much, much, much closer to the shape of a real 916 bumper. I have seen them a few times. I need one.
The 'dimple' is fugly ...
![]() Andy
Andy
Posted by: Dr Evil Jan 28 2010, 09:21 PM
What do you mean, "dimple"? Do you have a pic of the one that fits better?
Posted by: MDG Jan 29 2010, 11:55 AM
What do you mean, "dimple"? Do you have a pic of the one that fits better?
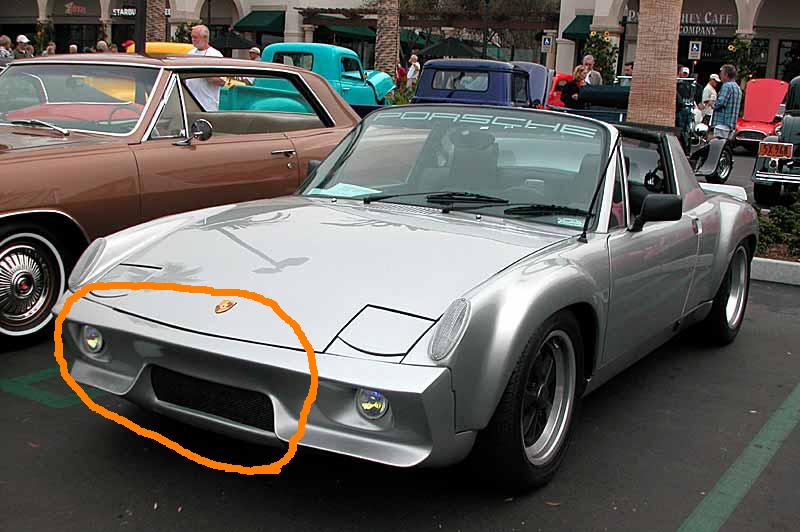
I believe what Andy is talking about are some of the crappy molds out there for these things. I've seen some so bad it looks like someone put a boot to it.
George's real 916 - note the crisp line that mimics the rubber bumper top and how proportioned the grill area is:
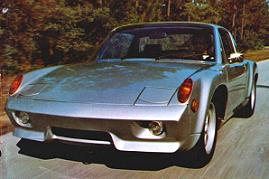
compared to this - and I've seen way worse than this: apologies if this is a member's car - not slamming it; just a reference
Posted by: Dr Evil Jan 29 2010, 12:03 PM
WOW! Ya, that is different. I dont believe I have one that bad.
Posted by: kwales Jan 29 2010, 10:12 PM
Yup,
I noticed that years ago. The other thing that is usually off is the two small spoilers should be the same curve as the front edge of the bumper so that when you stand in front and look down, they should all appear parallel.
Now if Scotty should ever get one right and make a mold..... ![]()
Posted by: RobW Jan 29 2010, 11:12 PM
Andy's right on... in person it looks a "little" different...
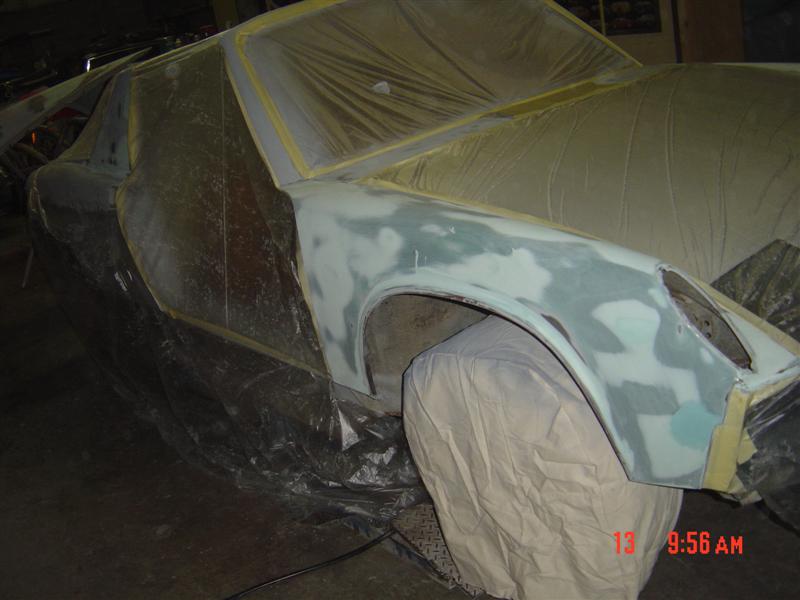
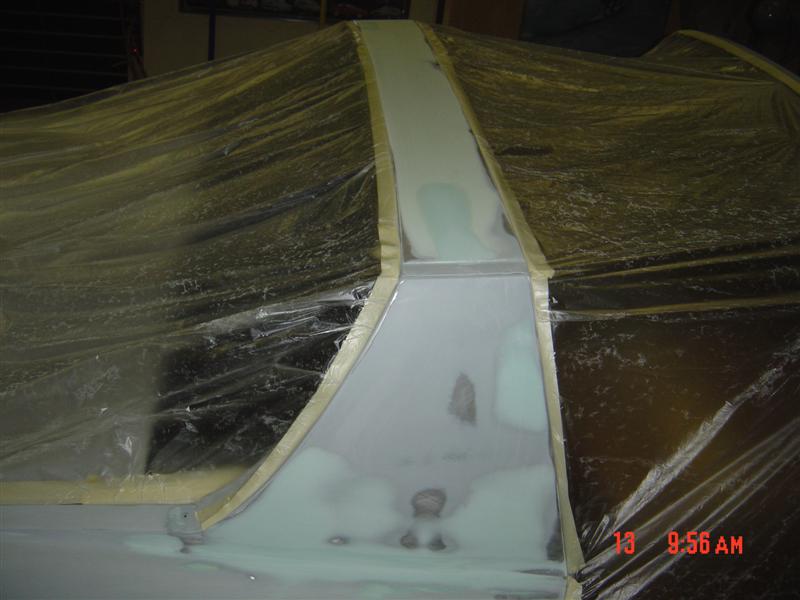
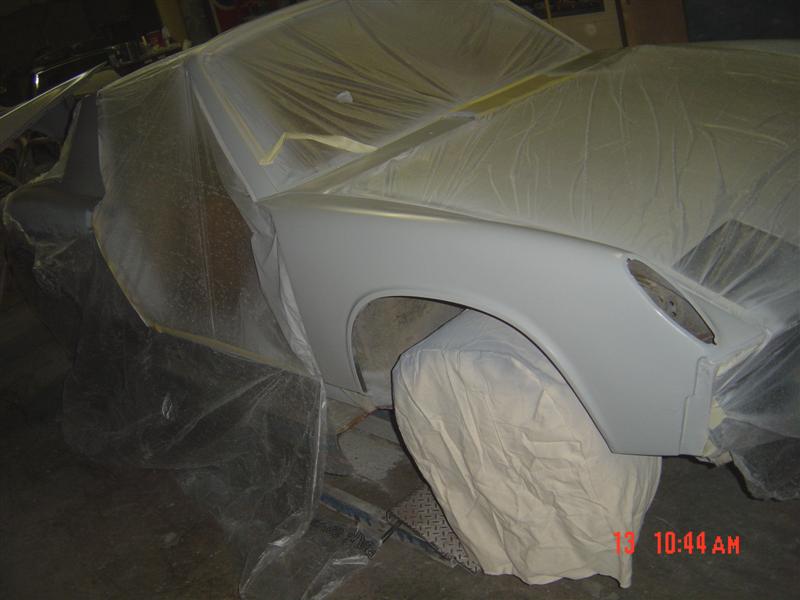
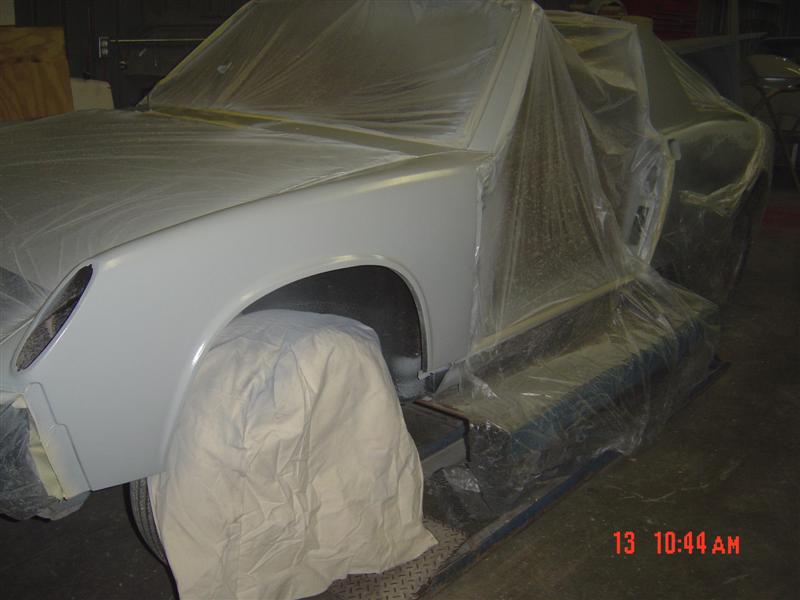
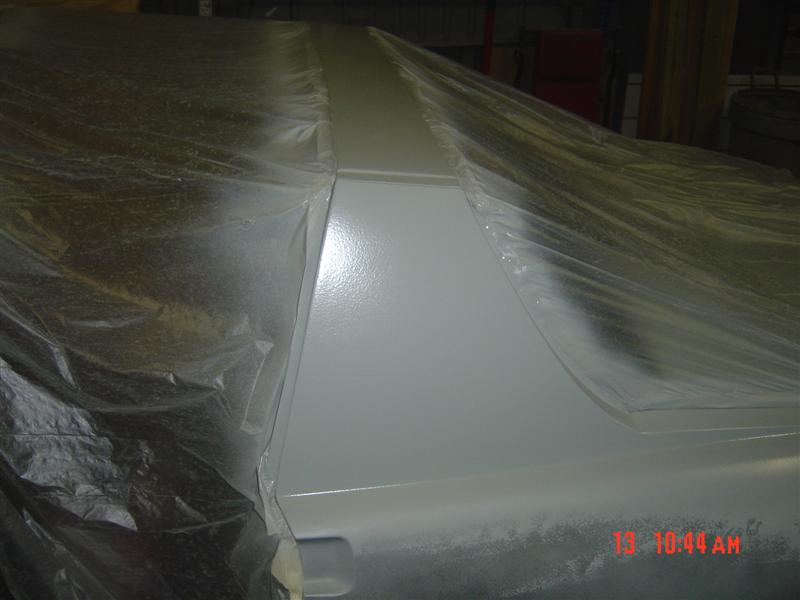
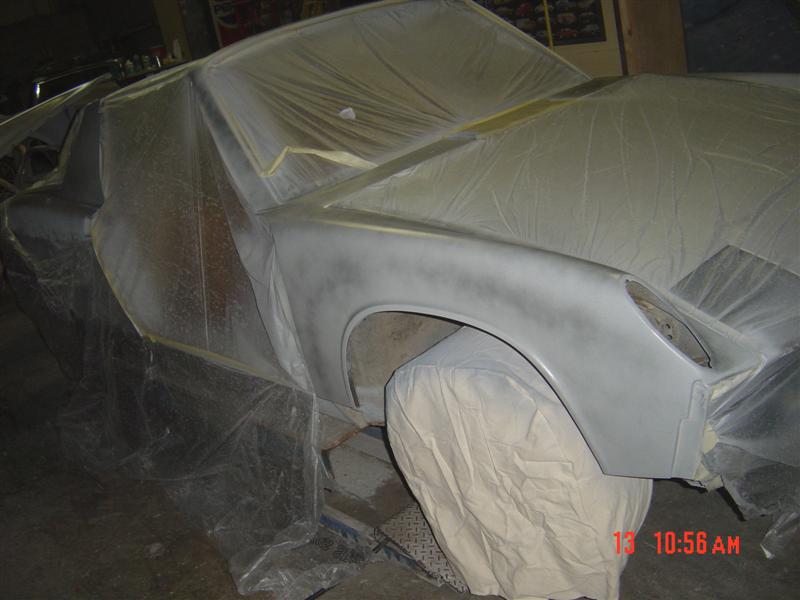
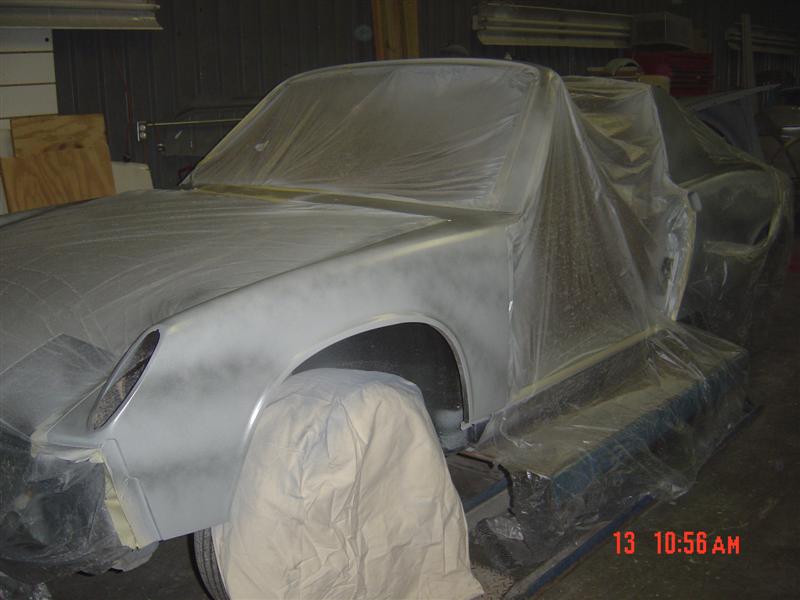
Posted by: scotty b Feb 13 2010, 04:34 PM
![]()
Attached image(s)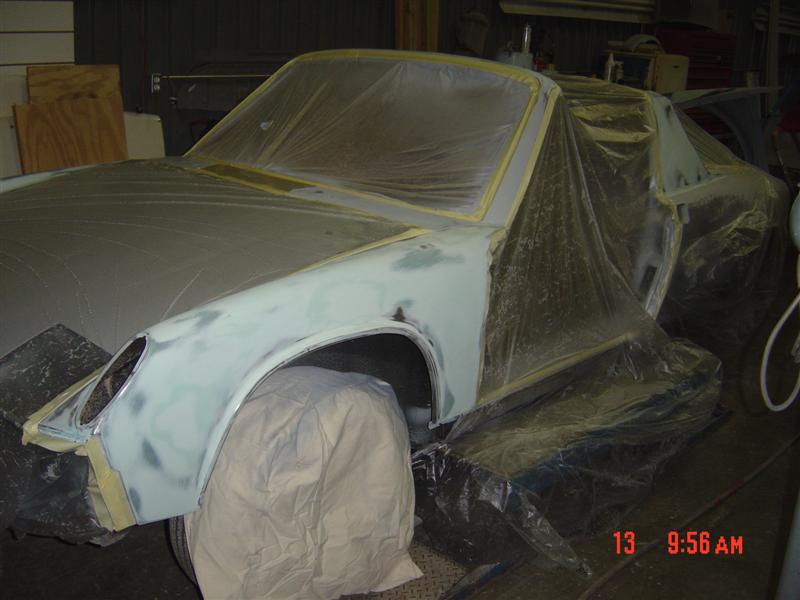
Posted by: MDG Feb 13 2010, 05:54 PM
Your work, as always, is superb. Kinda gets boring. F-up once in awhile please.
Posted by: scotty b Feb 13 2010, 08:44 PM
Your work, as always, is superb. Kinda gets boring. F-up once in awhile please.
Oh I do, I just don't show those pics
Posted by: scotty b Feb 16 2010, 06:52 PM
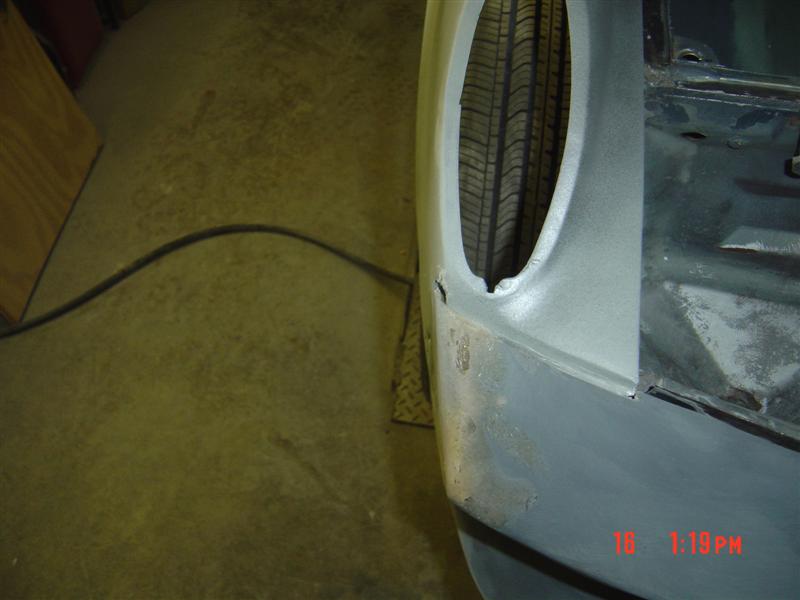
Still have some fine tuning to do but the major issue is done.
Attached image(s)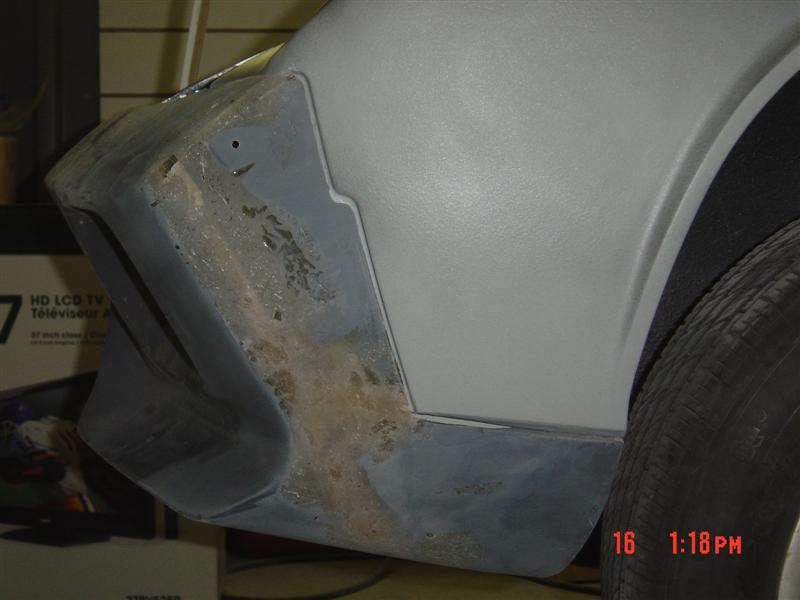
Posted by: Jon Fernandes Feb 16 2010, 07:18 PM
Wow Scotty, that looks great! Can't wait to see it in paint.
Posted by: Dr Evil Feb 16 2010, 10:17 PM
Dude, that is fantastic! Above and beyond. ![]()
Posted by: scotty b Feb 21 2010, 12:21 PM
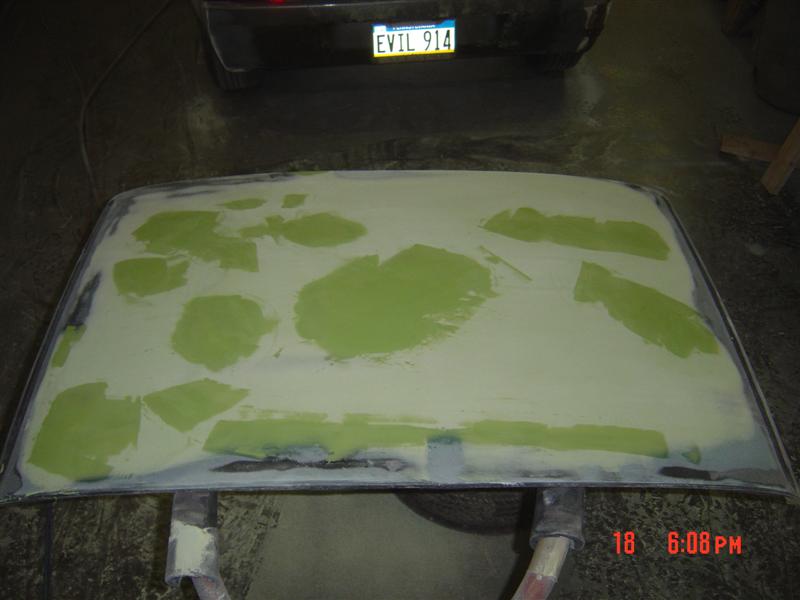
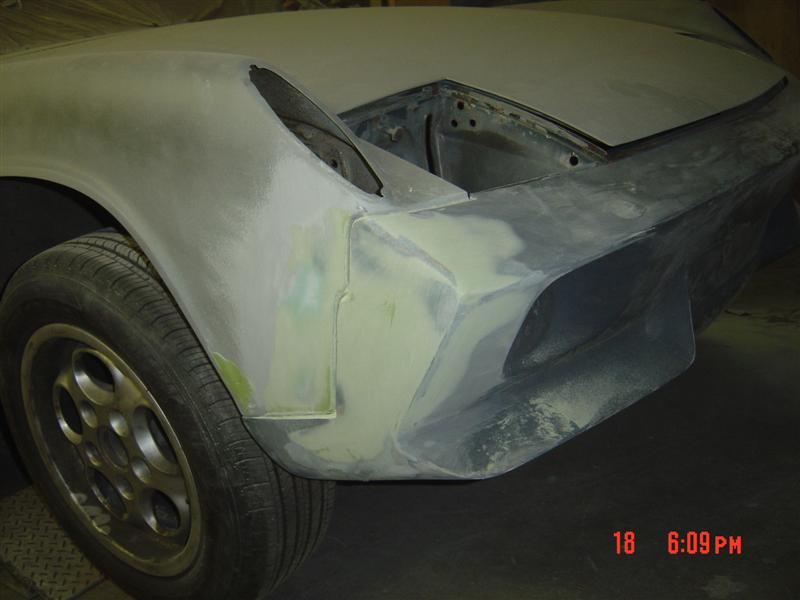
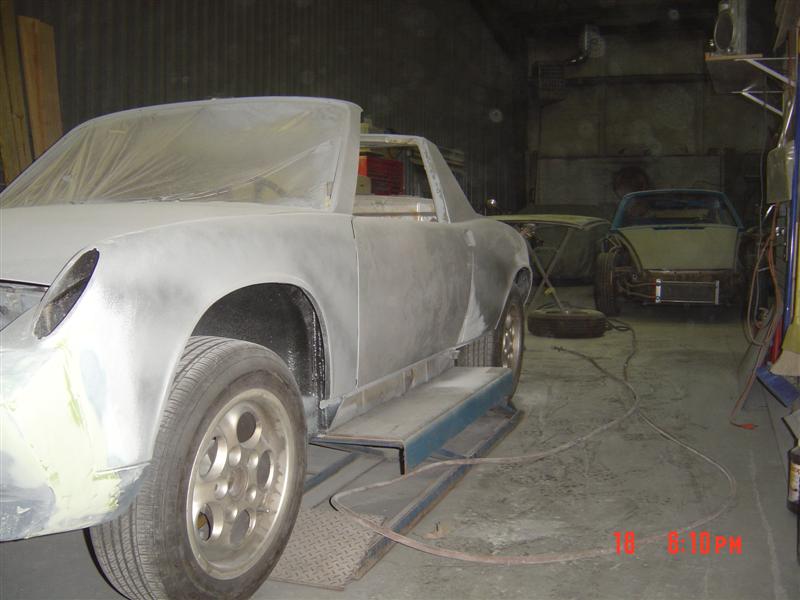
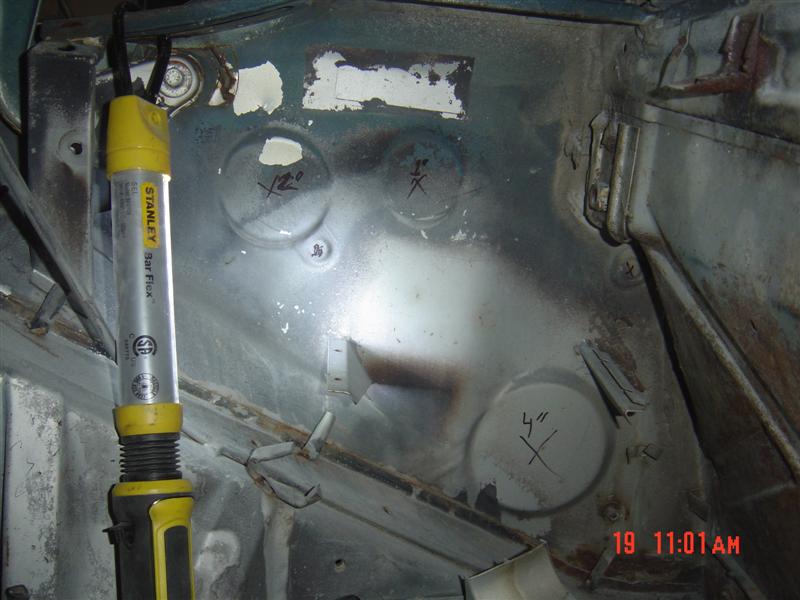
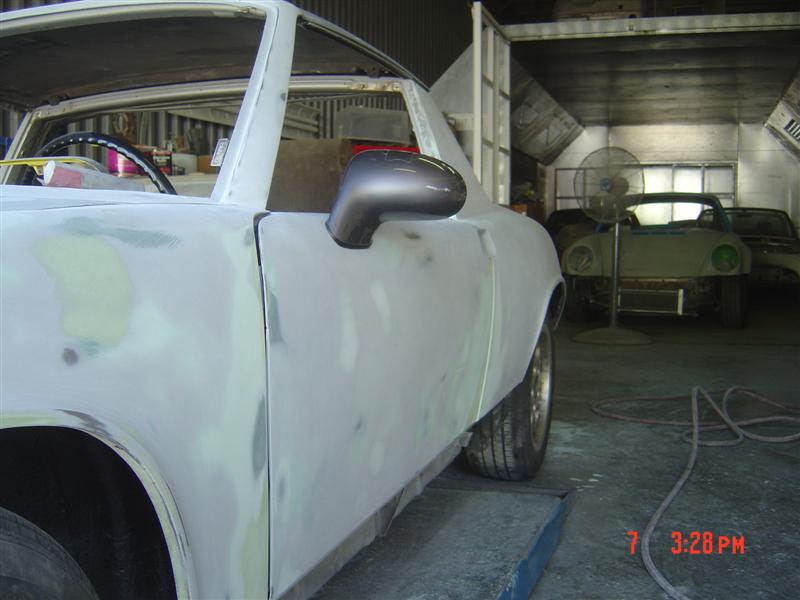
I got the rear trunk lid all blocked out and smooth as a babies bottom. All that is left on it is several primings and wet blockings. Got started on the roof panel. Before Pat has a heart attack, this top was one I had that a tree limb went through so it would have needed more work than was feasible for a stock car. Mike wanted it smoothed and painted body color so out came the sander. Also got the bumper to body matched up and since these pics that edge has a smooth transition and is ready to do final body work on. hung the doors and have a little massaging to do at the bottoms where they meet the body.![]() Also marked and started cutting the holes for the oil tank before I left on friday.
Also marked and started cutting the holes for the oil tank before I left on friday.
Attached image(s)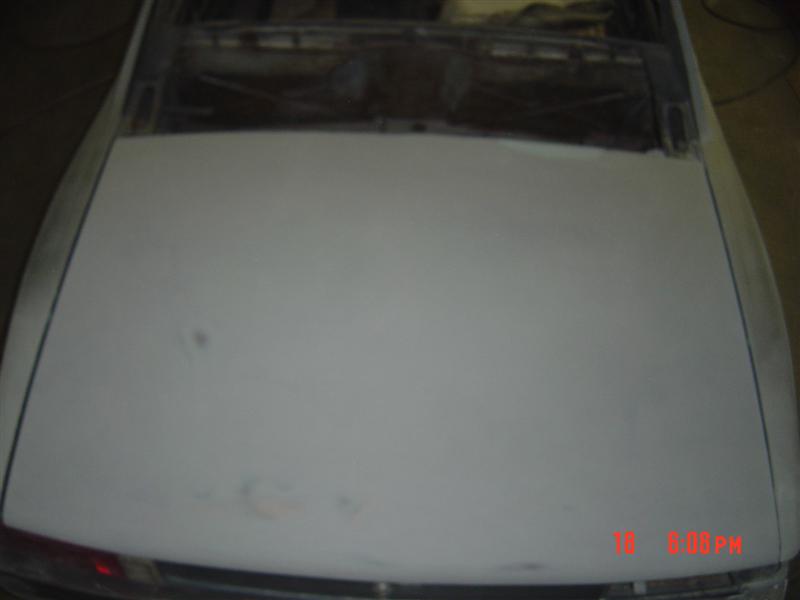
Posted by: RJMII Feb 21 2010, 01:55 PM
Is the targa going to be body color?
Posted by: Wilhelm Feb 28 2010, 02:35 AM
Evil, don't know if this woulb be of interest to you: http://cgi.ebay.com/ebaymotors/OFFENHAUSER-ENGINE- ADAPTOR_W0QQcmdZViewItemQQhashZitem20afa9b018QQitemZ140386086936QQptZMotorsQ5fCa
rQ5fTruckQ5fPartsQ5fAccessories#ht_500wt_1170
Posted by: Dr Evil Feb 28 2010, 02:37 AM
Evil, don't know if this woulb be of interest to you: http://cgi.ebay.com/ebaymotors/OFFENHAUSER-ENGINE- ADAPTOR_W0QQcmdZViewItemQQhashZitem20afa9b018QQitemZ140386086936QQptZMotorsQ5fCa
rQ5fTruckQ5fPartsQ5fAccessories#ht_500wt_1170
Nope. My 2.7L Porsche 6 is going into this car. The bus is using a chevy trans so no need there. Also, I already have one for later experiments
good looking out, though.
Posted by: Tom_T Mar 12 2010, 07:33 PM
Must be something about this color on a 914 that attracts stuff to hit them!? ![]()

.
Here's mine - same color - hit by a sorority ditz in a UCLA parking structure & pushed front into wall during my MBA days back in 5/85! ![]()
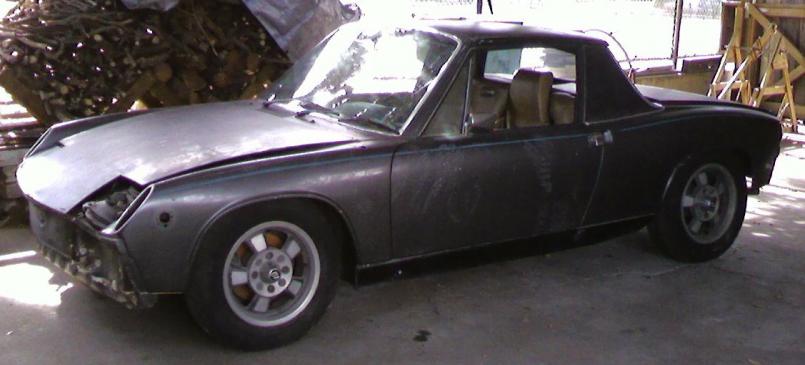
BTW - I painted it that color in 5/80 as "tarmac camouflage" when my point count reached 1 short of loss of license time - how about you Doc?? ![]()
I have no idea why this post suddenly jumped up on my forum subscription, but looking at the "new" shell/roller Scotty started with for the transplant - it's the PERFECT illustration of why one should know thy limits, when it comes to body work! If you want it done right the first time, and aren't a true expert in this stuff yourself, then you're far better off having someone like Scotty do it for you! ![]()
I've taken a fair bit of flak on here in my "how to approach my resto" type posts, from other so-called 914-xperts about why I'd send mine to a body shop - am I crazy, etc. - when I want it right & without the 500 lbs of extra bondo that I'm sure I'd end up with - along with crappy joints & welds etc. - if I were to attempt it myself. With 1/4" - 1/2" thick piles of crap filler that Scotty has scraped off this tub, it should be a lesson to all. Plus - if you're not cuttin' the checks, don't disparage the one who is! ![]()
Oh - Doc, Zach, RobW & several others have noted here about trying to do this 914 stuff while you're in med/grad school, raising families, etc. - S**T - I don't know how the hell you do it boyz!!?? ![]() My solution was simple - put it in the garage on blocks for 24+ years while I finished my MBA, ran my biz, got remarried & raised a family, then do it when I've got more time & bucks!
My solution was simple - put it in the garage on blocks for 24+ years while I finished my MBA, ran my biz, got remarried & raised a family, then do it when I've got more time & bucks! ![]()
AWSOME work Scotty!!!! ![]() .... wish you were here in SoCal!
.... wish you were here in SoCal!
Tom T
Orange CA
early-73 914-2.0 - the others are cool classics, but this is the one that counts! ![]()
![]()
///////
Posted by: Tom_T Mar 12 2010, 07:43 PM
PS - if it's not too late, do some Tangerine SS tunnel fuels lines, so you don't flame Scotty's hard work! I recall reading in an earlier post that the one's in your wreck broke & flamed when he was welding/cutting on it in his shop.
.... good lesson of why to change now IMHO! ![]()
Posted by: Dr Evil Mar 12 2010, 08:33 PM
Mine were/are SS. I make my own for about $30 ![]() The issue with the crash was that the fire folks could not find them.
The issue with the crash was that the fire folks could not find them.
Posted by: scotty b May 11 2010, 03:39 PM
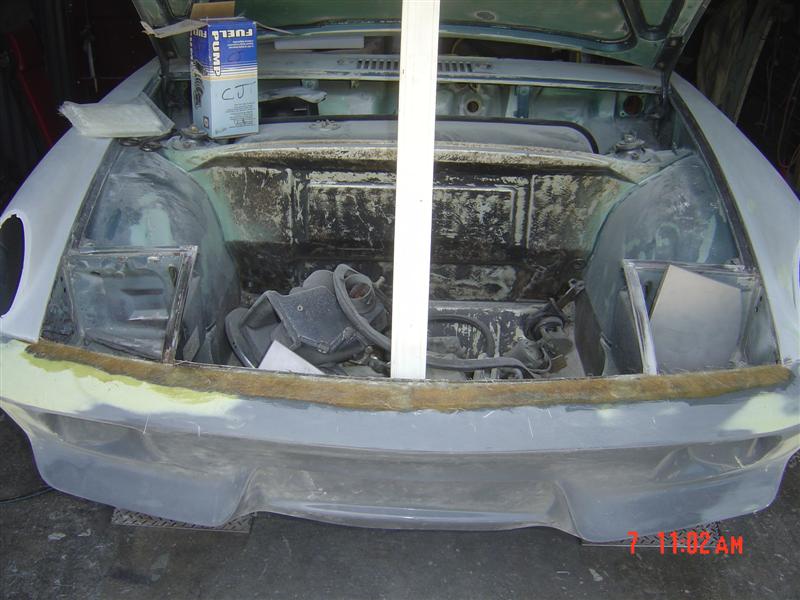
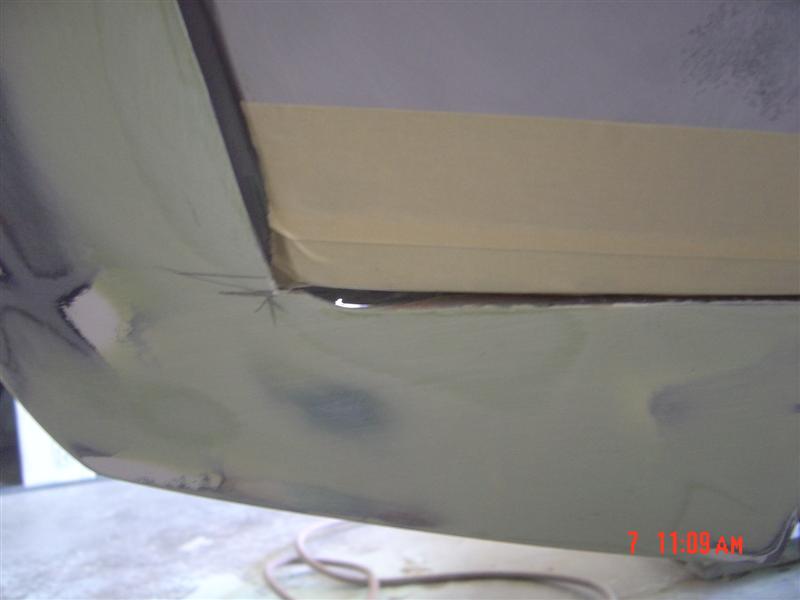
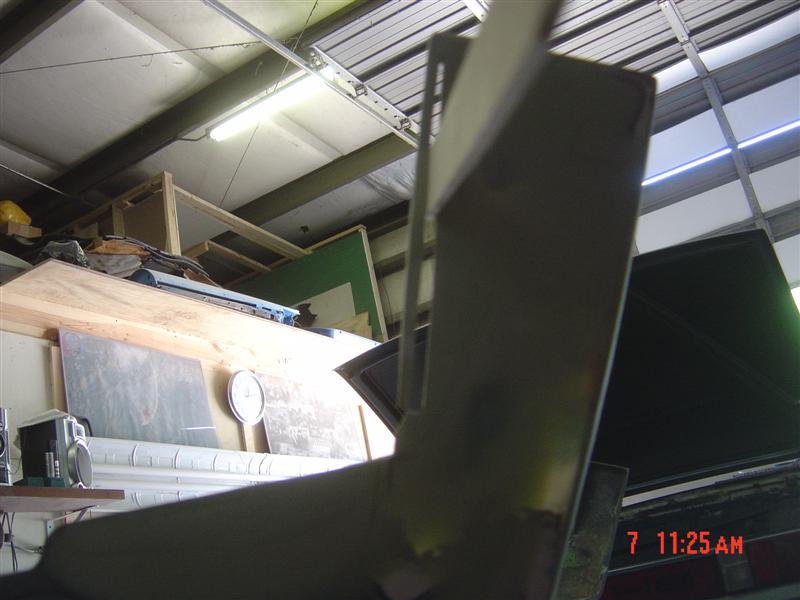
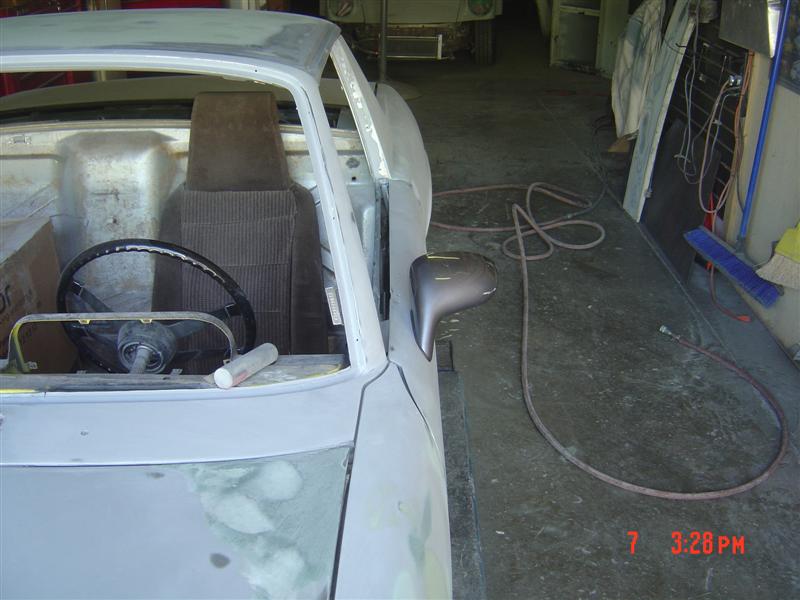
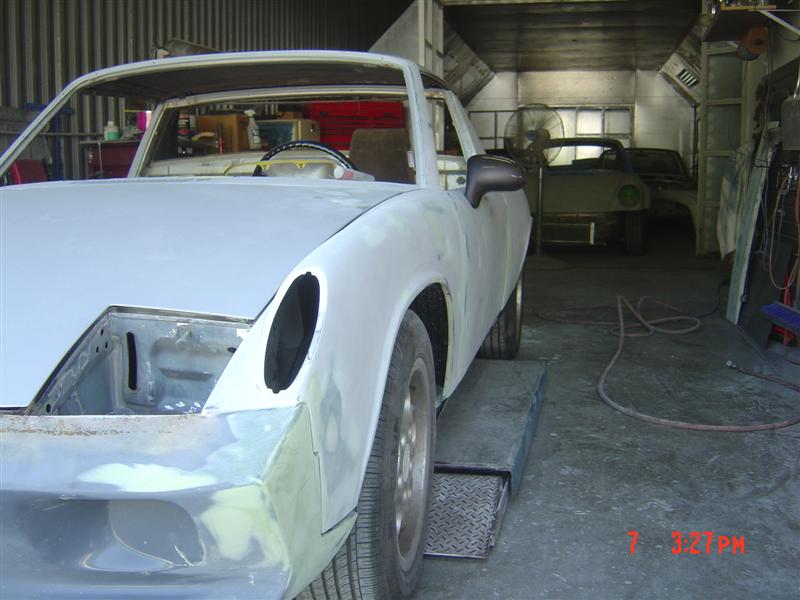
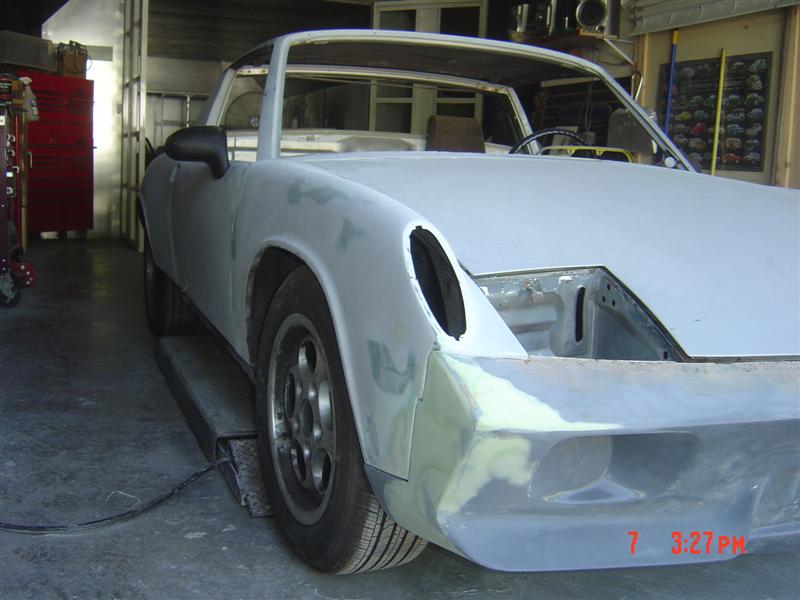
Got some time in last week. Not a whole lot worth taking pics of. Spent a lot of time going over the body cleaning up edges, wheel wells, and pinholes in the filler. still fucking with the bumpers, roof is flat and ready for primer, and got the mirrors and rear reflector mounted.
Mike please do everyone a favor and tell them who NOT to buy bumpers from ![]()
Attached image(s)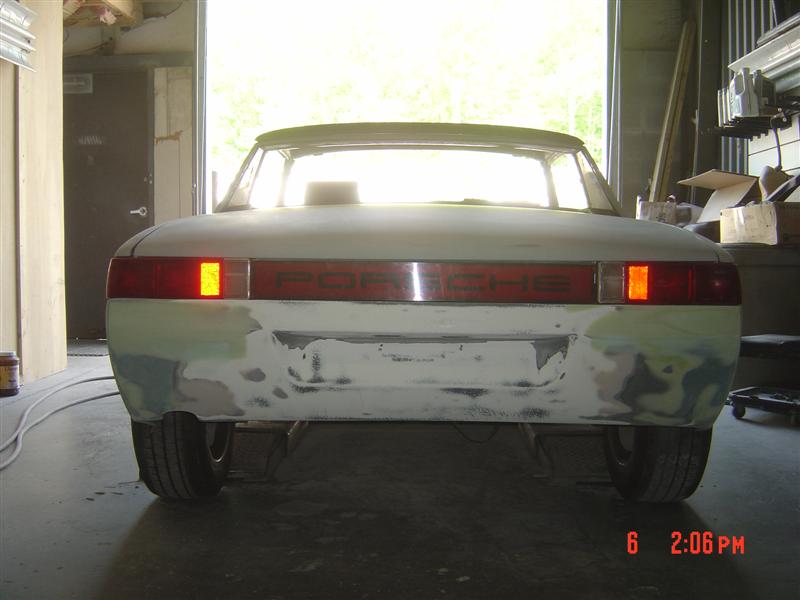
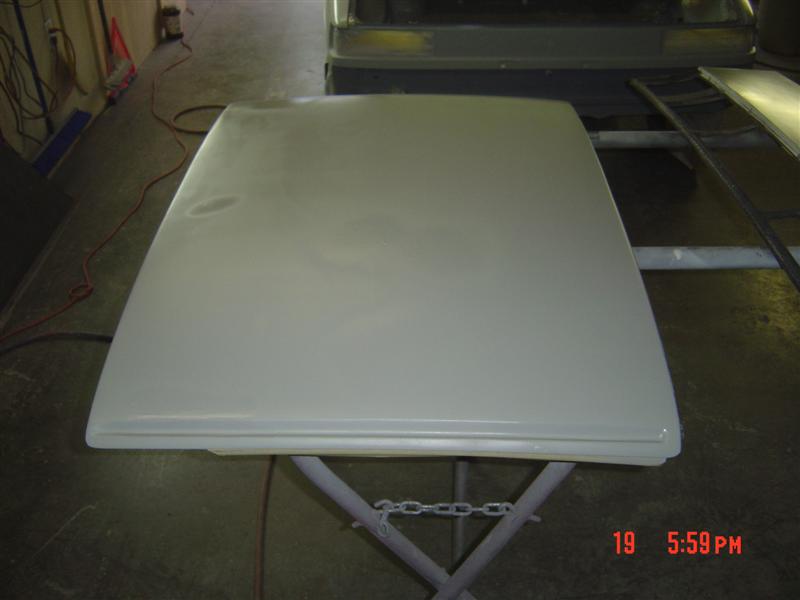
Posted by: scotty b May 20 2010, 07:42 PM
Threw some high build on Miguels top while I had it mixed up yesterday.
Attached image(s)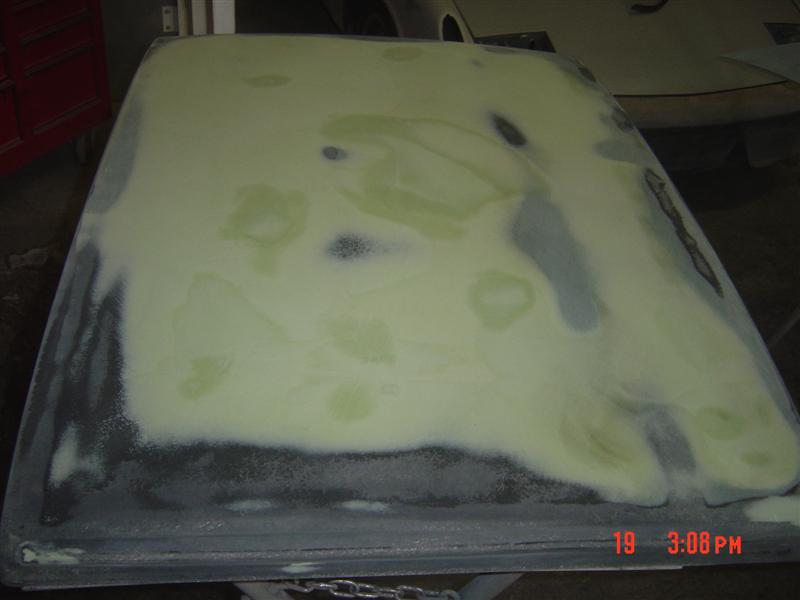
Posted by: hot_shoe914 May 20 2010, 10:01 PM
![]()
Posted by: arkitect May 21 2010, 12:31 AM
Dr. Evil,
what color is it going to be? Can't wait to see it finished.
Scotty,
good work, your a patient man.
Posted by: Dr Evil May 21 2010, 12:49 AM
We are still working on the color. I want a dark gray/gunmetal/with some black/and silver all mixed together. Easy, right?
Posted by: type11969 May 21 2010, 07:15 AM

Posted by: kenshapiro2002 May 21 2010, 08:23 AM
I know I'll get an ass whooping for this question, but I honestly gotta know...why spend the inordinate amount of time, and money to restore something this far gone, when there are many better examples out there that require far less in both time and money. I love 914s, more than almost any other car...certainly more than any car in it's value range, but I don't get it. Again...not being critical...just wondering the rationale. If it were a Bugatti Atlantic...
Posted by: hot_shoe914 May 21 2010, 08:44 AM
I know I'll get an ass whooping for this question, but I honestly gotta know...why spend the inordinate amount of time, and money to restore something this far gone, when there are many better examples out there that require far less in both time and money. I love 914s, more than almost any other car...certainly more than any car in it's value range, but I don't get it. Again...not being critical...just wondering the rationale. If it were a Bugatti Atlantic...
Posted by: Dr Evil May 21 2010, 08:46 AM
You live in MD and you think this car is too far gone to save? ![]() The body was far better than anything I found in months of searching in the East. After living here for a few years, it is still far better than most examples. It has not taken more work than it should, I am having lots of stuff done to it and Scotty is using it as a platform to demonstrate some of his skills (lucky me!).
The body was far better than anything I found in months of searching in the East. After living here for a few years, it is still far better than most examples. It has not taken more work than it should, I am having lots of stuff done to it and Scotty is using it as a platform to demonstrate some of his skills (lucky me!).
What exactly about this car makes you think that it was not worth using? It was free, pretty rust free, and would not have required much to bring to stock if that were the way we were going. I would rather modify a car that is not perfect than to find a better one that is stock and mess with it.
Posted by: Vacca Rabite May 21 2010, 08:57 AM
I think that Ken thinks that this is the car you nudged with a telephone pole.
It isn't. parts were taken from the horseshoe car and moved over to the body doner.
Zach
Posted by: ClayPerrine May 21 2010, 11:02 AM
I think that Ken thinks that this is the car you nudged with a telephone pole.
It isn't. parts were taken from the horseshoe car and moved over to the body doner.
Zach
I think the word "nudged" is a huge understatement... but I like the "horseshoe car" name.
Posted by: zymurgist May 21 2010, 11:45 AM
Damn pole jumped out in front of the car and nudged it.
Posted by: kenshapiro2002 May 21 2010, 12:43 PM
Makes sense to me ...just wondering.
You live in MD and you think this car is too far gone to save?
What exactly about this car makes you think that it was not worth using? It was free, pretty rust free, and would not have required much to bring to stock if that were the way we were going. I would rather modify a car that is not perfect than to find a better one that is stock and mess with it.
Posted by: ClayPerrine May 21 2010, 01:31 PM
Damn pole jumped out in front of the car and nudged it.
Sounds like a line from a Bill Cosby routine...
"The tree jumped out in the middle of the road and bit my car!!!"
Posted by: Dr Evil May 21 2010, 03:20 PM
It towed straight on a dolly all the way to Scotty (4 hours) ![]()
Posted by: hot_shoe914 May 22 2010, 01:25 AM
It towed straight on a dolly all the way to Scotty (4 hours)
Maybe it just "looked" like it was towing straight because you were still sucking on the tequila bottle!
Posted by: Jerry Aug 27 2010, 07:02 PM
whats the latest on the Doc's car ???
Posted by: RobW Aug 27 2010, 08:34 PM
whats the latest on the Doc's car ???
Posted by: Andyrew Aug 28 2010, 12:02 AM
Yes we need more! These are perfect Friday night drinking threads to scroll through!
Posted by: montoya 73 2.0 Aug 28 2010, 09:49 PM
I personally would like to see how you installed the fuel door in the hood? So far Scotty your doing a hell of a good job!
Posted by: scotty b Aug 29 2010, 07:55 AM
I've had about 3 months where everything that could go wrong has, and just haven't had anytime to spend on Mikes car or another customers 911. As soon as I have gotten caught up, and a little ahead there will be an update. I promise. The most recent " event " is the timing belt breaking on my moms car that I need to take care of. Interference motor ![]() Another week without pay
Another week without pay ![]()
Posted by: RobW Aug 29 2010, 07:58 AM
I've had about 3 months where everything that could go wrong has, and just haven't had anytime to spend on Mikes car or another customers 911. As soon as I have gotten caught up, and a little ahead there will be an update. I promise. The most recent " event " is the timing belt breaking on my moms car that I need to take care of. Interference motor
Hang in there buddy! Life can take you through the woods, but you're fine as long as you have another golf ball in your pocket...
Posted by: Dr Evil Jun 12 2011, 11:49 PM
![]()
Posted by: KELTY360 Jun 13 2011, 12:26 AM
![]()
Posted by: scotty b Jun 13 2011, 06:06 AM
![]()
![]()
![]()
![]()
Posted by: MDG Jun 13 2011, 06:53 AM
![]()
Scotty, isn't that the car with the trailer hitch we used as a parts hauler last week when Dave and I were down there?
Posted by: balljoint Jun 13 2011, 08:10 AM
I told you! ![]() You shouldn't have popped the clutch at 5,000 rpms. Nor should you have driven that far in reverse with the trailer that heavily loaded.
You shouldn't have popped the clutch at 5,000 rpms. Nor should you have driven that far in reverse with the trailer that heavily loaded.![]() MDG + Stop sign + chubby girl with cleavage on moped = Show off trouble!
MDG + Stop sign + chubby girl with cleavage on moped = Show off trouble! ![]()
Posted by: MDG Jun 13 2011, 08:46 AM
A Vespa is a scooter not a moped.
Posted by: KELTY360 Jun 13 2011, 10:00 AM
![]() I just knew this thread revival had entertainment possibilities. To say nothing of being a veritable post whore goldmine.
I just knew this thread revival had entertainment possibilities. To say nothing of being a veritable post whore goldmine. ![]() I'm driving towards 2000 drivel-filled posts and this is a great vehicle. Until we get more news on the actual build it's like Seinfeld...a thread about nothing.
I'm driving towards 2000 drivel-filled posts and this is a great vehicle. Until we get more news on the actual build it's like Seinfeld...a thread about nothing.
Mayo Rules!
![]()
Guess I'm not very good at this. I could have stretched this out for at least 4 more posts. ![]()
Posted by: balljoint Jun 13 2011, 10:13 AM
A Vespa is a scooter not a moped.
Semantics. And anyway, I thought that was her name the way you were yelling it out.
"VESPA!"
That said it does explain your high-school girlfriend "Suzuki".
Did you ever tell Scotty about the open can of tunafish in the front trunk?
Posted by: Root_Werks Jun 13 2011, 10:59 AM
So no progress? Nothing? ![]()
Posted by: MDG Jun 13 2011, 11:02 AM
Did you ever tell Scotty about the open can of tunafish in the front trunk?
Oh crap.
Did you?
Posted by: scotty b Jun 13 2011, 11:21 AM
Did you ever tell Scotty about the open can of tunafish in the front trunk?
Oh crap.
Did you?
Oh I ate that. Maybe I should have mentioned that to the docotor the other week. Might explain a few things
Posted by: MDG Jun 13 2011, 11:37 AM
I'm glad to hear there was actually tuna in there.
I thought it was just the girl from the Vespa. ![]()
Posted by: hot_shoe914 Mar 29 2014, 07:51 PM
![]()
![]()
![]()
![]()
![]()
![]()
![]()
![]()
Posted by: Jerry Apr 3 2014, 10:27 PM
bump !!!! updates?
Posted by: scotty b Apr 4 2014, 05:20 AM
Mike knows what is going on. His car is doing a fine job holding the floor down. Big shout out to Donald for attempting to stir shit up ![]()
Posted by: Dr Evil Apr 4 2014, 08:12 AM
![]() Irony.......so.......delicious!
Irony.......so.......delicious!
Powered by Invision Power Board (http://www.invisionboard.com)
© Invision Power Services (http://www.invisionpower.com)