Printable Version of Topic
Click here to view this topic in its original format
914World.com _ 914World Garage _ VOX Subaru Swap build
Posted by: VOX Feb 22 2009, 02:00 AM
Hey guys i'm new, name's James, i've been surfing the forum for the last few weeks. At first i was planning on building a sr20 datsun 240z, but through some convincing by dlo, i decided to go with a subaru swapped 914. i just picked up the 914 yesterday and started working on it today. I'll try to document what i do in this thread. anyways im new at this and i'm working on a limited budget, so anything you can contribute would be greatly appreciated. especially knowledge and parts on a subaru swap. i'm a full time student so its mostly a weekend project, i hope to get done by summer.
picked up the 914 from dale in lake elsinore. who still has a red roller for sale.
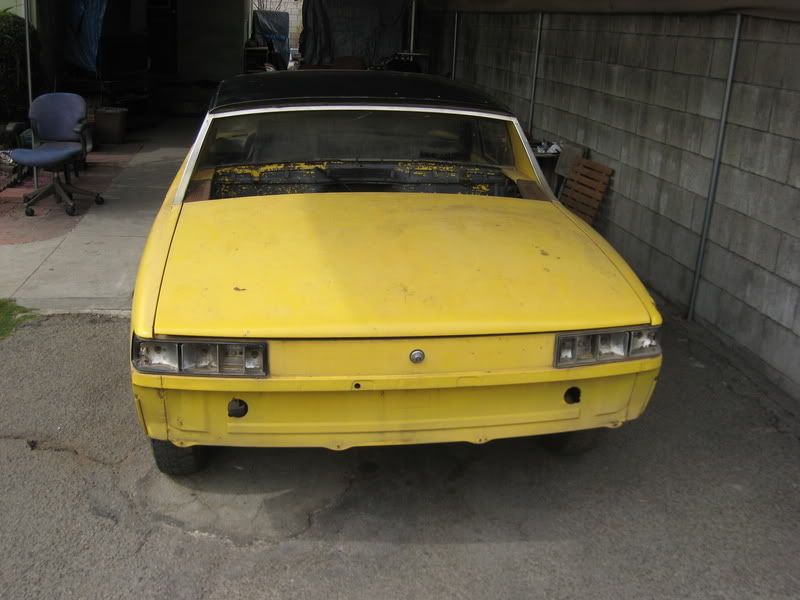
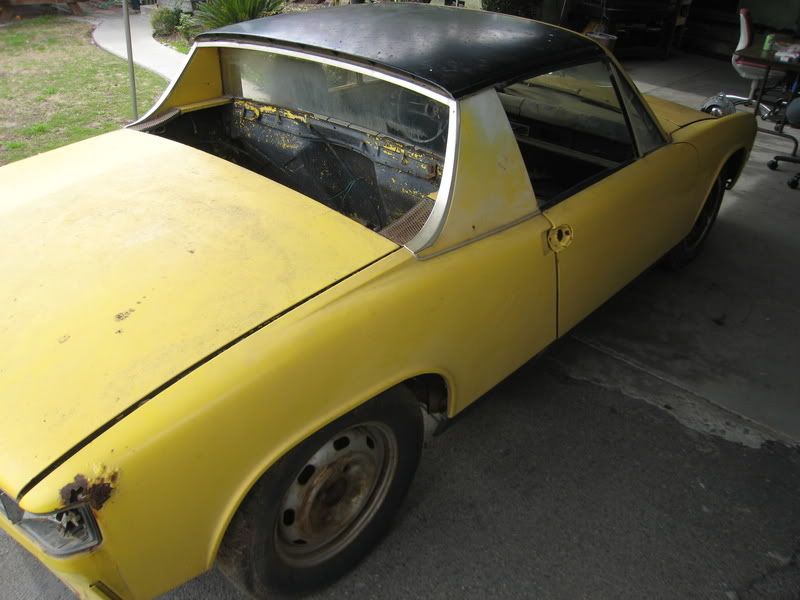
heres how it sat when i showed up. it was sitting at the top of a long uphill dirt road which my car could not make it up. dale drove me and dlo up the hill to check out the car. very nice guy.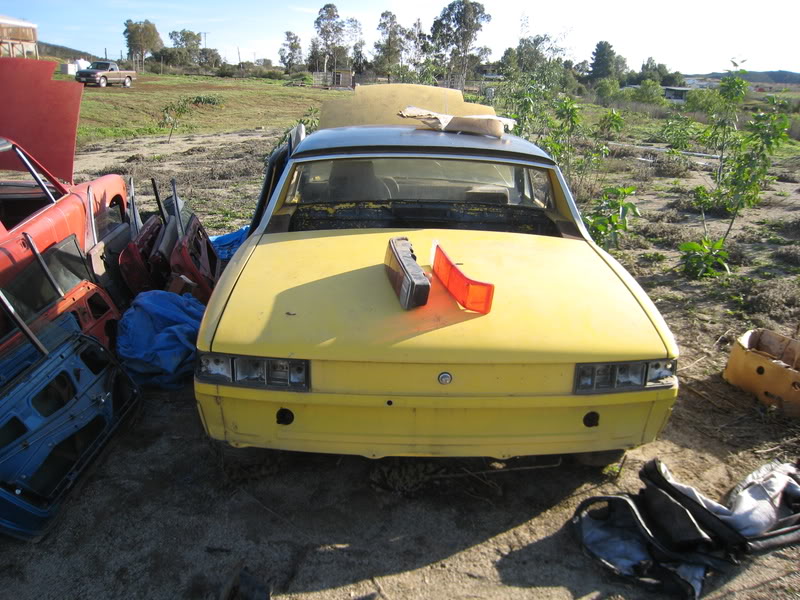
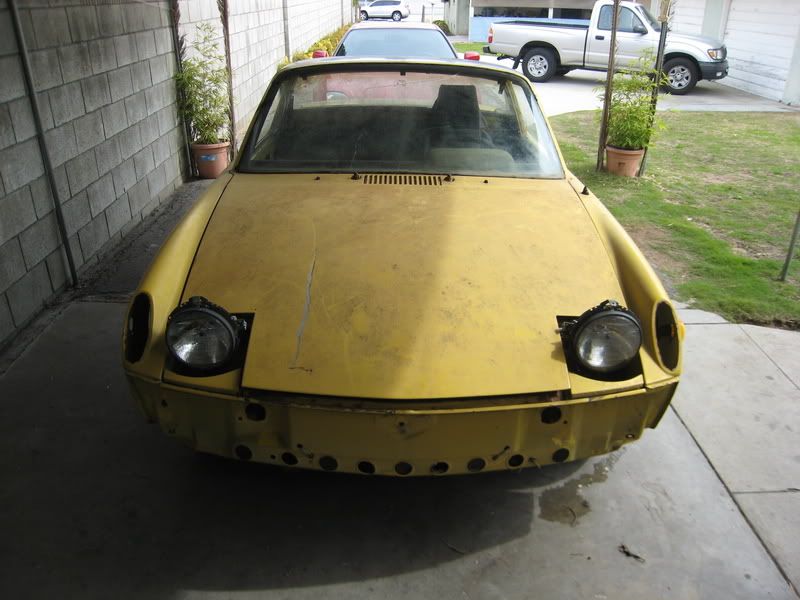
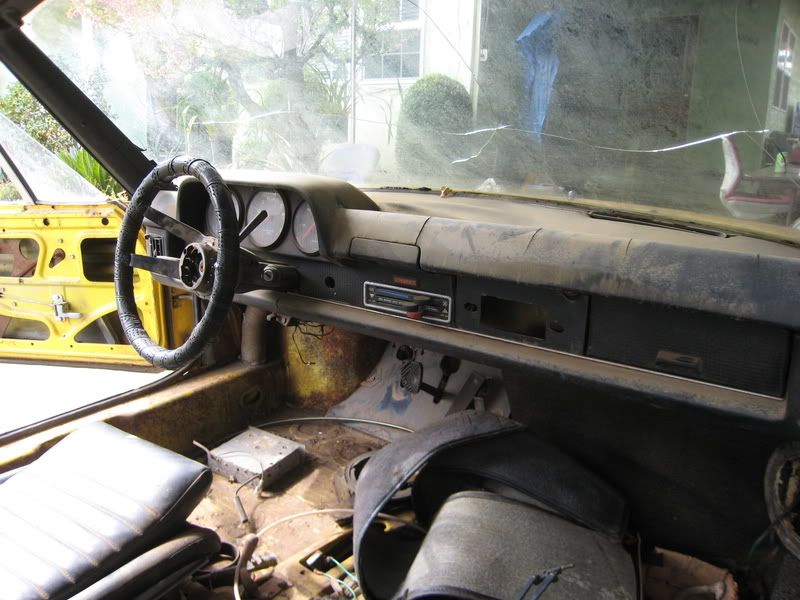
heres the front trunk and gas tank.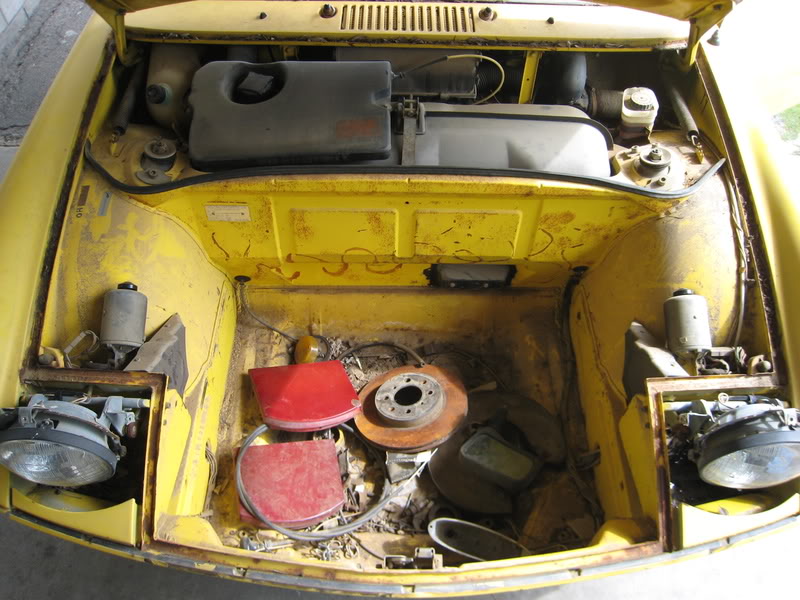
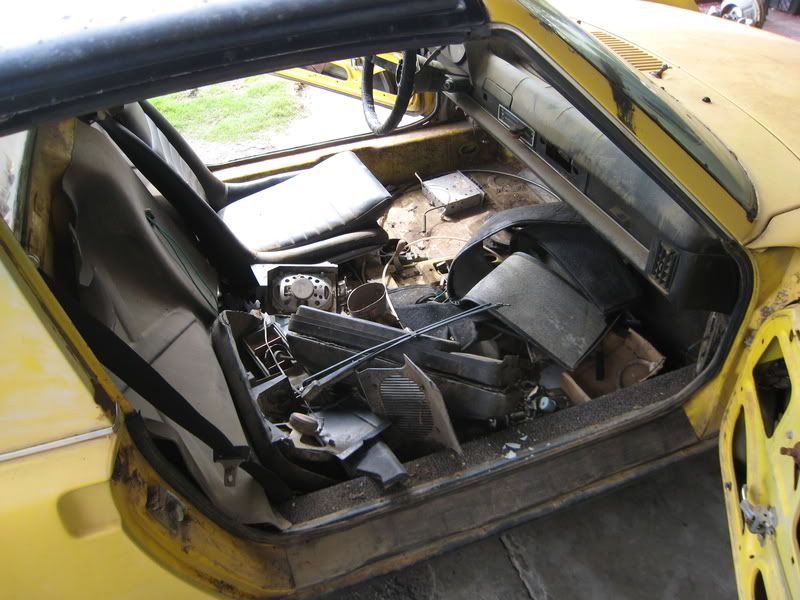
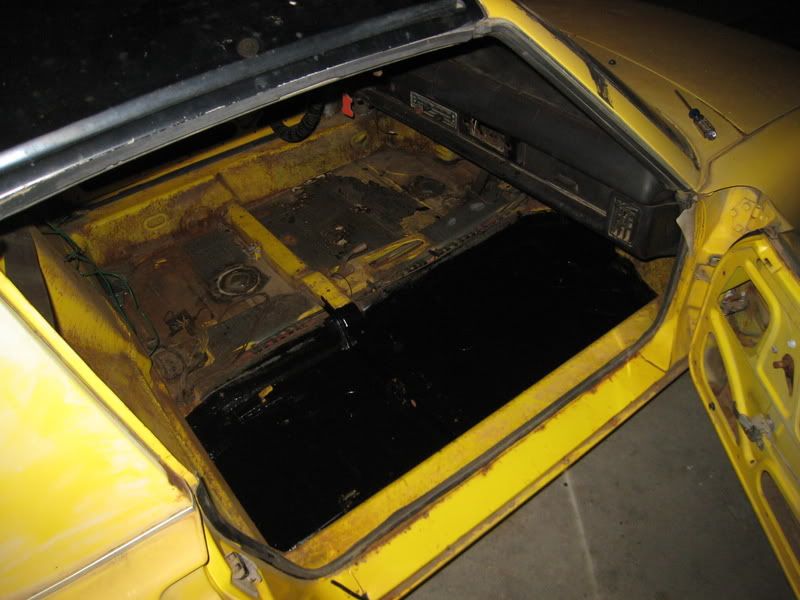
the rear trunk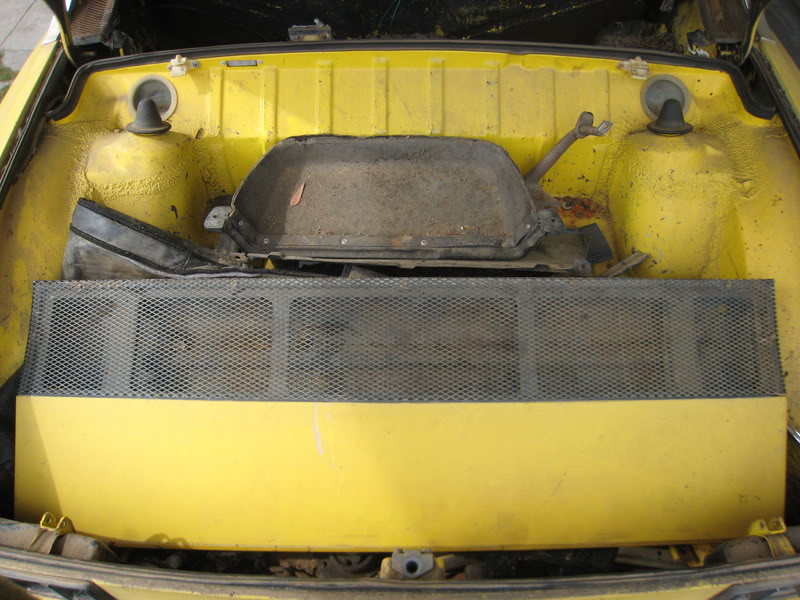
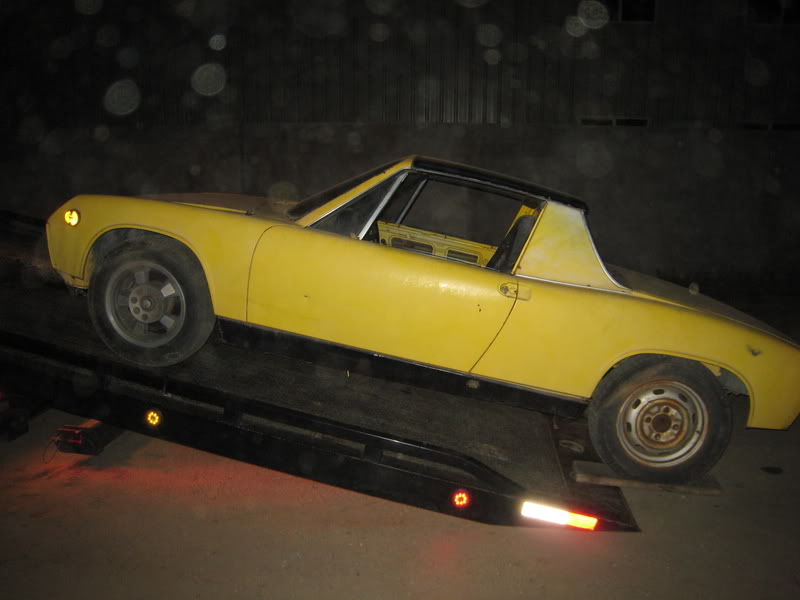
here we are towing the car down the dirt road with dlo in the cockpit.
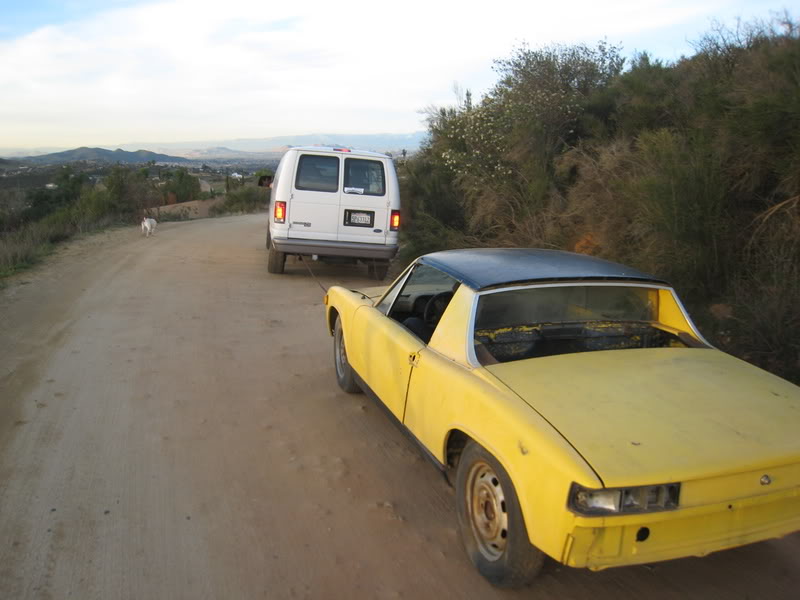
finally next to the street. along with my car and onto the tow truck!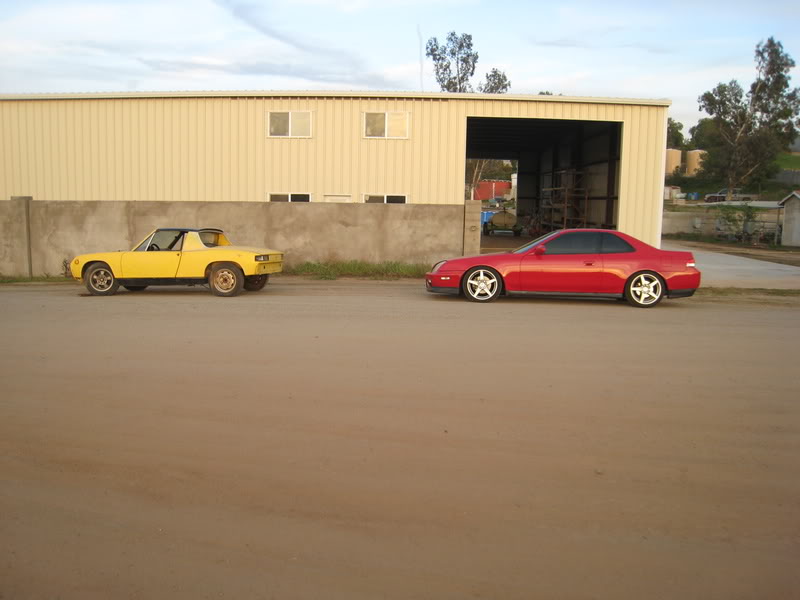
Posted by: VOX Feb 22 2009, 02:04 AM
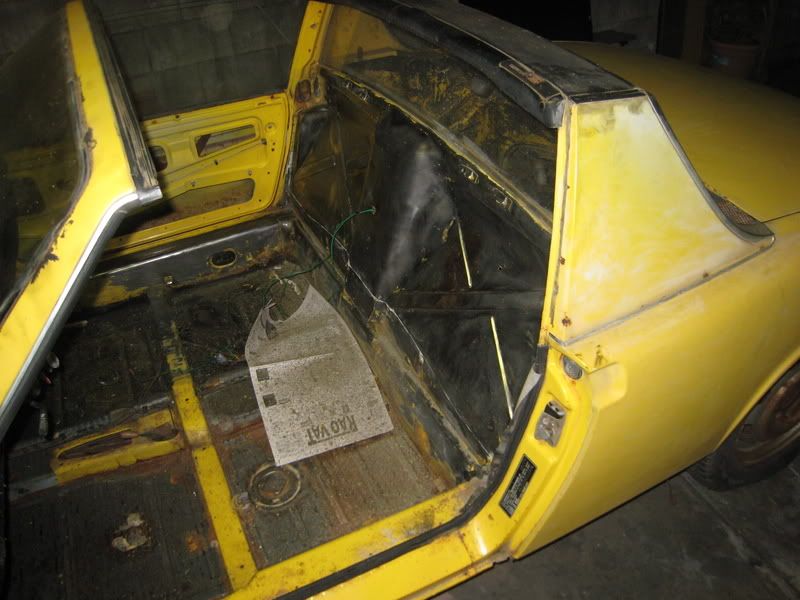
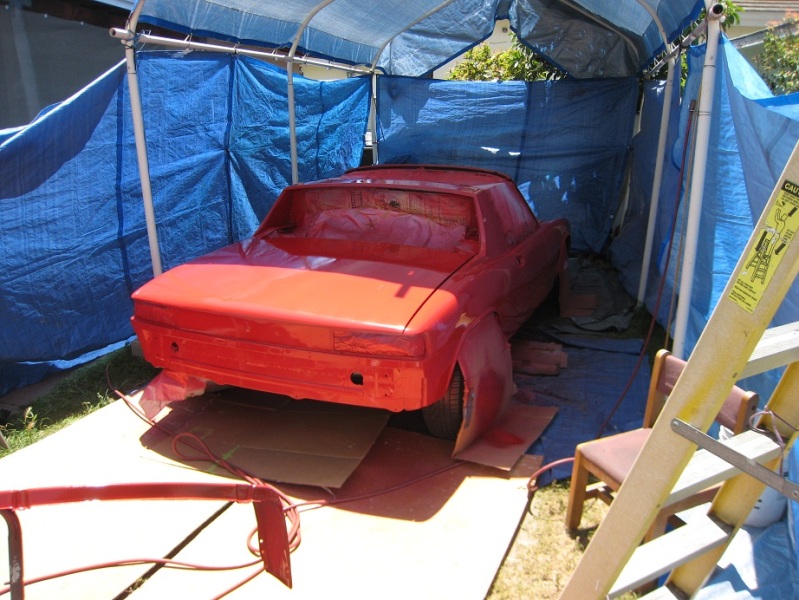
here it is sitting at my house.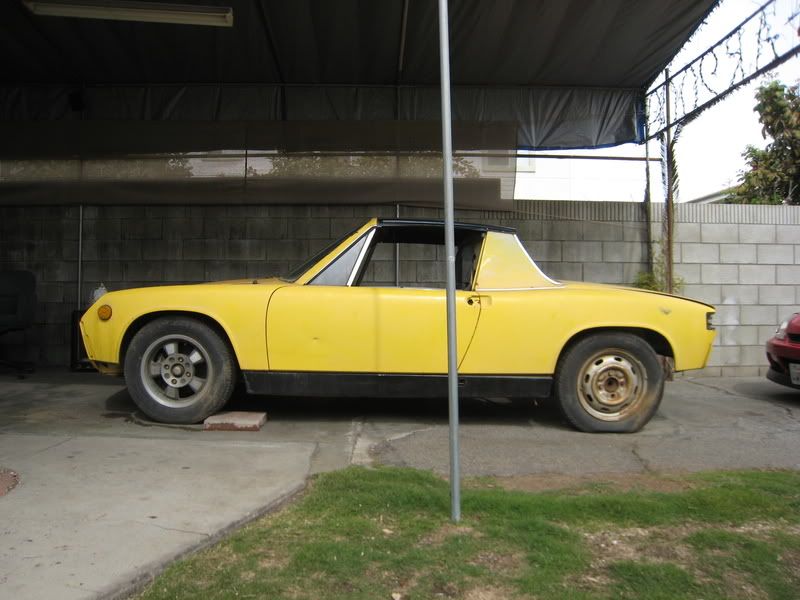
Posted by: dlo914 Feb 22 2009, 02:05 AM
Guy's this car was a bargain! It's a 74' with front and rear sway bars, minimal rust. Battery tray is toast, but underneath is solid, rust bubble at right rear next to taillight, longs are solid, surface rust in front and rear trunks, and get this all for just $300.
Posted by: dlo914 Feb 22 2009, 02:07 AM
Our next goal is to find a suby powerplant, sideshift tranny, OEM engine bar and KEP adapter plate. Then we can begin to mock up the engine and tranny to fab the engine mounts.
Posted by: VOX Feb 22 2009, 02:22 AM
heres a picture of the battery tray, we're probably going to relocate it to one of the trunks. 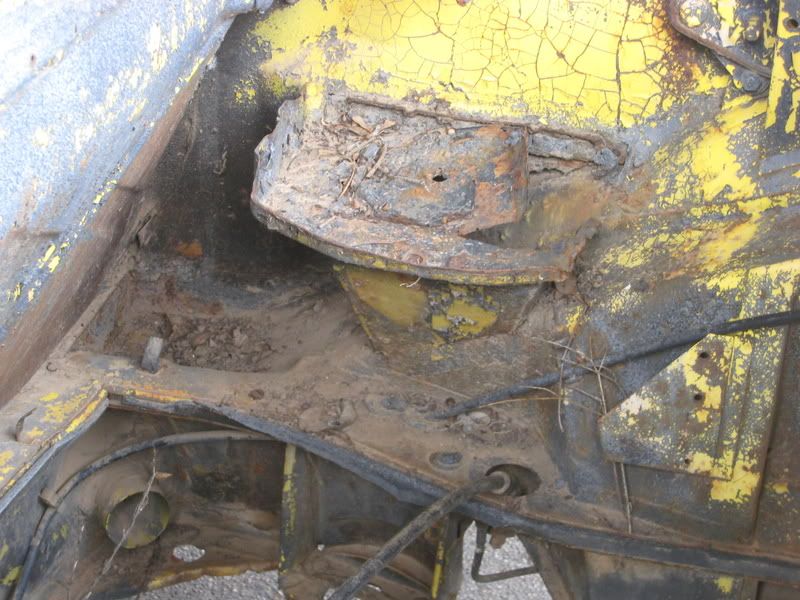
the other side 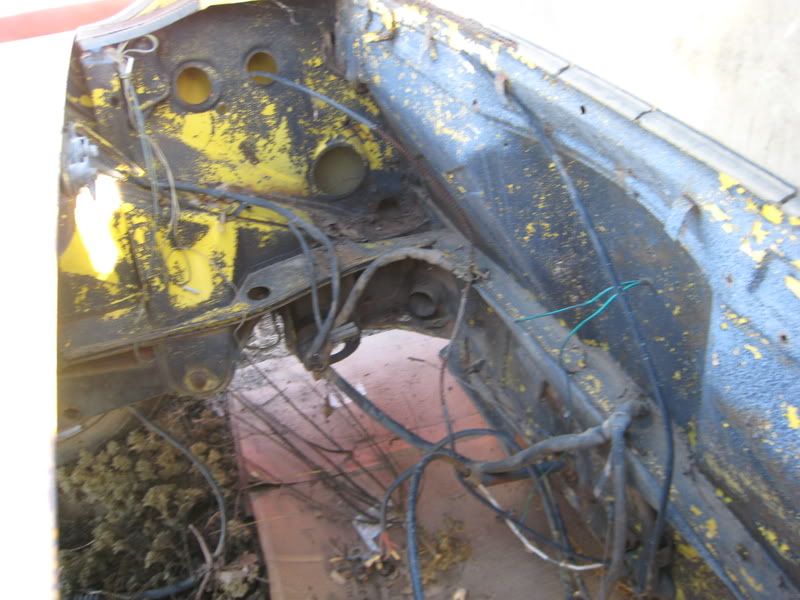
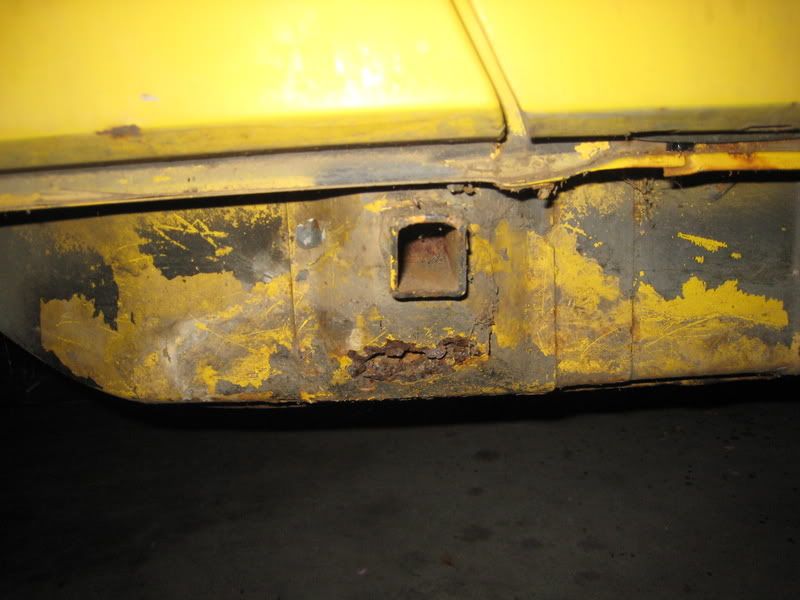
rust on passenger rear quarter panel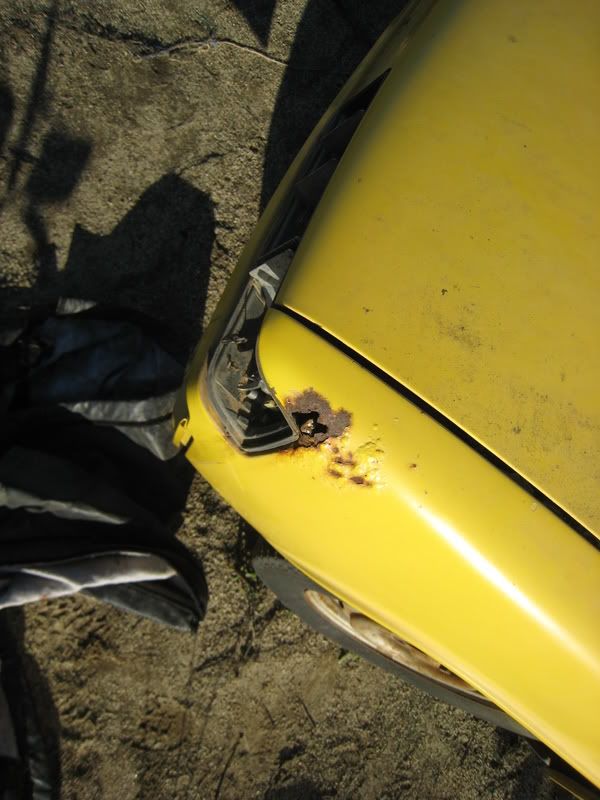
ps. can anyone find the face in the first picture from my first post!
and that dog in the picture with the van pulling the 914, it belonged to the neighbors, it followed us almost all the way down the dirt road, it belonged to the neighbors.
heres a story. after we got it down the dirt road waiting for the tow truck driver. that building behind the picture with the 914 and the prelude, belonged to a previous 914 owner. he came out and talked to me, told me if the tow truck didnt make it that night we could roll the car into his property and leave it there til morning if i wanted to. very nice guy, i believe his name was K.C. or Casey. he went back inside and grabbed some framed pictures and brought them out to show me. a 72 white with red accents with a 911 6 swap. he said he sold it once he moved out here to a kid who was an audiophile (maybe one of you?) anyways what an experience owning a porsche
Posted by: pktzygt Feb 22 2009, 06:06 AM

heres a picture of the battery tray, we're probably going to relocate it to one of the trunks.
the other side
rust on passenger rear quarter panel
ps. can anyone find the face in the first picture from my first post!
and that dog in the picture with the van pulling the 914, it belonged to the neighbors, it followed us almost all the way down the dirt road, it belonged to the neighbors.
heres a story. after we got it down the dirt road waiting for the tow truck driver. that building behind the picture with the 914 and the prelude, belonged to a previous 914 owner. he came out and talked to me, told me if the tow truck didnt make it that night we could roll the car into his property and leave it there til morning if i wanted to. very nice guy, i believe his name was K.C. or Casey. he went back inside and grabbed some framed pictures and brought them out to show me. a 72 white with red accents with a 911 6 swap. he said he sold it once he moved out here to a kid who was an audiophile (maybe one of you?) anyways what an experience owning a porsche
If you go with a turbo subaru swap and decide to use renegade's intercooler relocation or your own solution, you'll have to move the battery anyway. Even if you don't plan on turbo, you'll eventually want more power, I always plan for an upgrade. I like to keep my targa in the trunk, so a front location makes more sense to me. In the front, you'll be closer to the fan relays anyway.
Posted by: smokey Feb 22 2009, 06:53 AM
Your new car is a 1975 .
Can open , WERMS all over the place . GET ready for that experience Of your life .


Posted by: smokey Feb 22 2009, 07:16 AM
BUDGET and 914

Ledzepplin
Jumboe shrimp
Bigysmall

OK ?
ok ??
Posted by: jc914 Feb 22 2009, 07:24 AM
Posted by: toon1 Feb 22 2009, 10:18 AM
Cool! good luck with your project.
By the looks of all those doors he has had a few of them . might be a good parts source also.
There is alot of info on Subi swaps in here.
Posted by: dlo914 Feb 22 2009, 11:29 AM
really it's a 75? But the door jam says 74? 
Posted by: charliew Feb 22 2009, 02:07 PM
Your new 914 might make a good race car start but all the missing little stuff is going to kill a little budget unless you have lots of friends with 914 parts.
Also all that cracked paint above the battery tray is not original paint it has been painted over and there is probably some filler there. You might want to poke around quite a bit before you spend a lot of money on stuff to make sure it's THE ONE you want to start with. Also using a suby tranny is probably cheaper than the 914 tranny and it's repairs + the kennedy stuff.
Posted by: roadster fan Feb 22 2009, 03:19 PM
prolly manufactured in 74 but a 1975 model. Guages and bumper mounts are definitely 75-76 items.
The vin prolly starts 475.......right? Still looks like it might be a good start, but as the man said it is missing alot of parts that can eat the budget up fast. Oh, and it looks like it may have had a six at one time, since the drivers side inner fenderwell has the cutouts removed for the oil tank. Post the vin, someone may know this car.
Good luck with the project, the suby conversion has alot of support here.
Jim
Posted by: VOX Feb 22 2009, 10:39 PM
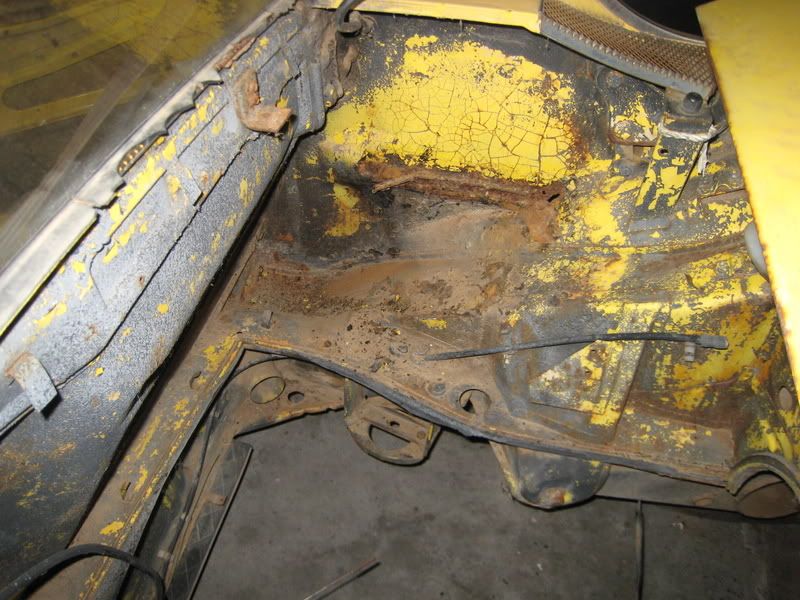
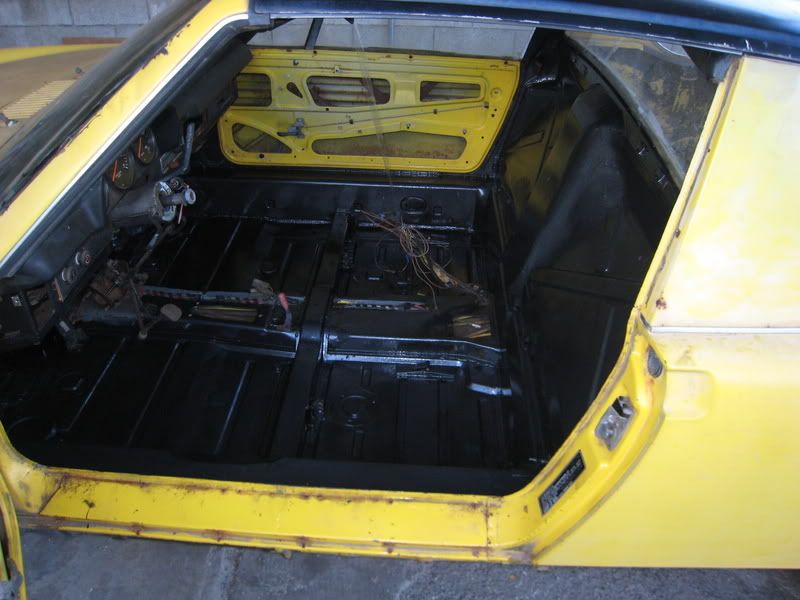
spent the weekend cleaning up and started on the rust. the black you see in the engine bay is actually a paint on top of the yellow, which wasnt done very well because the black is flaking off real fast but the yellow underneath is still there.
i believe u guys are right, the car is a 75 made in 74. and how would a subaru tranny be used? more info on that would be great.
the start of the day after cleaning out and vacuuming.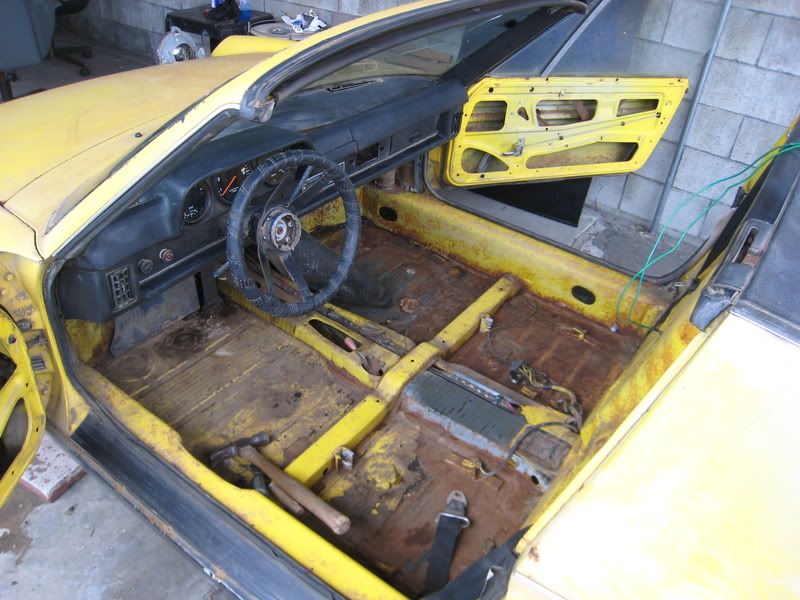
items removed from car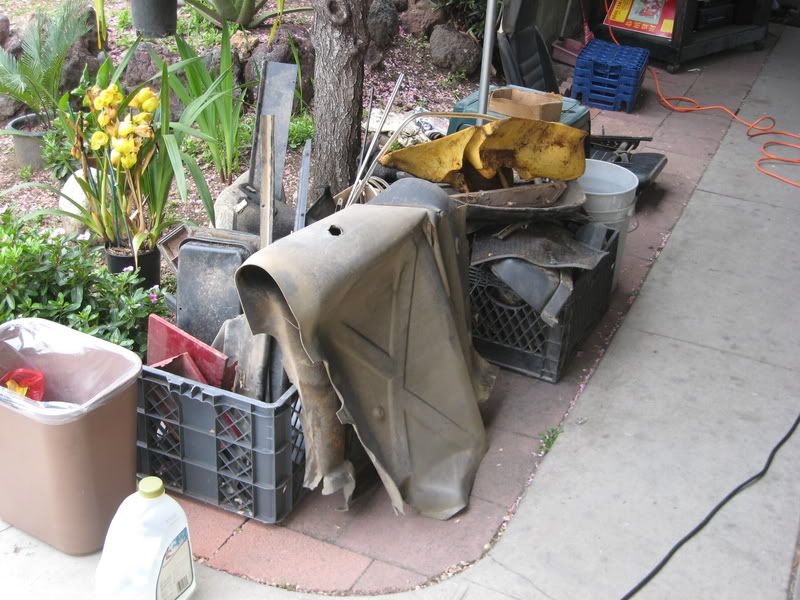
before during and after battery tray removal.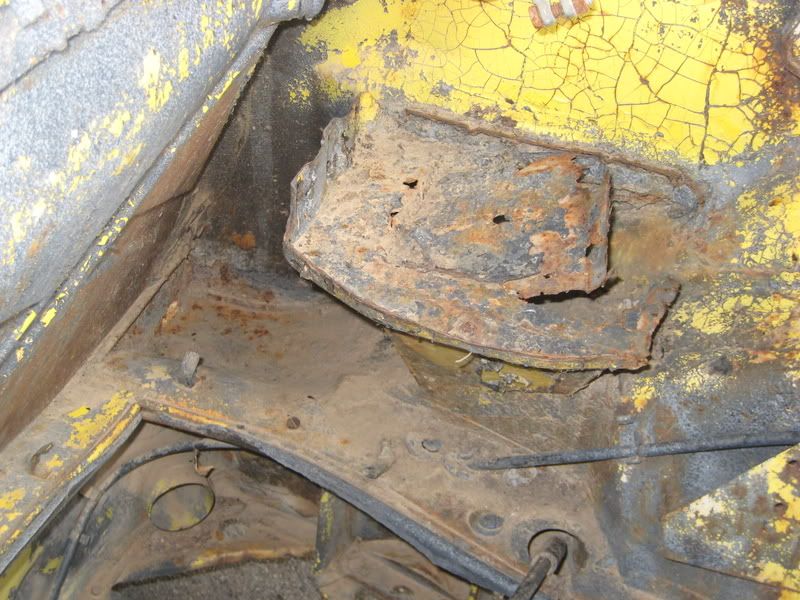
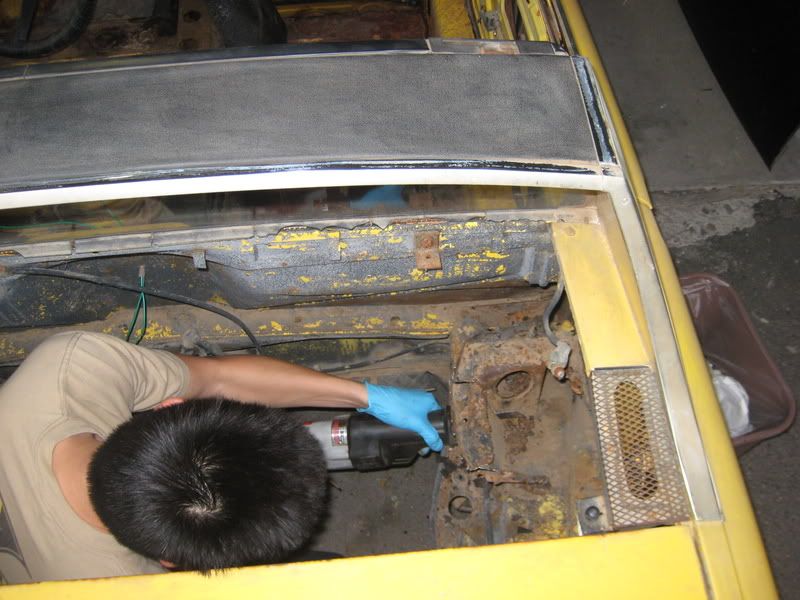
sound deadning removal and rust removal from floorpans.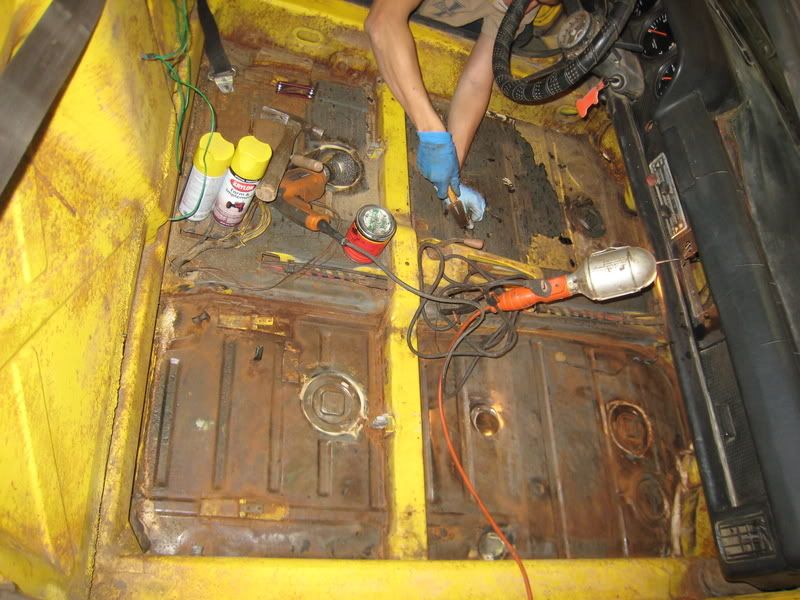
longs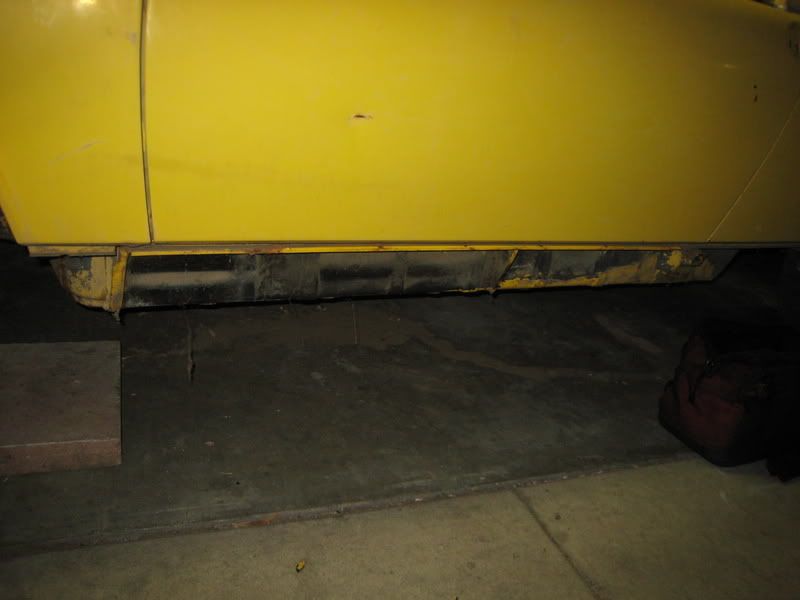

Posted by: dlo914 Feb 22 2009, 10:53 PM
Boy it's tiring chiseling away at the sound deadening material on the floor pans. We managed to Por-15 the passenger side. We hope to find what we're missing on the car at the G&R swap meet later in April. Next weekend we'll finish the driver side pan, then clean up the hell hole and por-15 and if time permits we'll sand down the rear trunk and por-15 that as well. Yeah the car was manufactured 10/74 and sold as a 75. Also discovered today that the passenger side jack slot has rust on the bottom shown above. We're gonna remove the jack slot and see if there's any extensive damage. As far as the driver side goes that long is actually rust free.
Posted by: VOX Feb 22 2009, 10:59 PM
Posted by: dlo914 Feb 23 2009, 12:36 PM
There's actually no layer of tar or deadening in the wheel wells, was that original? There's only a crispy layer of black paint that chips off and reveals the original yellow.
Also, as far as interior goes it's going to be very bare. One aftermarket bucket seat, one original seat for passenger, simple door pull panels covered in vinyl, dynamat of some sort entire floor pan, then some carpeting for entire rest of interior, tear out stock dash and create one out of sheet metal, delete the air controls and radio, and that's all i can think of at the moment. But all this will be done after we finish the the power/drive train setup.
Posted by: dlo914 Feb 23 2009, 08:54 PM
Might have found an powerplant. We've got a choice of an EJ20 (non turbo) or EJ22. Both are rated around 145-150hp. Any pointers as to how to tell what year car these engines came from?
Posted by: charliew Feb 23 2009, 09:28 PM
NASIOC is the place to get subaru driveline answers
Posted by: SirAndy Feb 23 2009, 09:44 PM
Did you guys prep the metal before you put the por15 down? Ospho? Metal Ready?
If not, you'll have surface rust bubble through in no time.
Anyways, glad to see another one saved!
 Andy
Andy
Posted by: dlo914 Feb 23 2009, 10:19 PM
Did you guys prep the metal before you put the por15 down? Ospho? Metal Ready?
If not, you'll have surface rust bubble through in no time.
Anyways, glad to see another one saved!
AndyI didnt know about that. What brand of Ospho or Metal Ready should we use? And that means we have to grind away the first layer of Por-15 and then apply the Ospho or metal ready, right? Thanks for the help...oh yeah lemme enter this VIN# into our database.
Posted by: SirAndy Feb 23 2009, 11:36 PM
Did you guys prep the metal before you put the por15 down? Ospho? Metal Ready?
If not, you'll have surface rust bubble through in no time.
Anyways, glad to see another one saved!
AndyI didnt know about that. What brand of Ospho or Metal Ready should we use? And that means we have to grind away the first layer of Por-15 and then apply the Ospho or metal ready, right? Thanks for the help...oh yeah lemme enter this VIN# into our database.
Por15 does not interact with the rust, it just seals it off. Unless the metal is spotless, the rust will eventually work it's way through the Por15 again. It just slows it down.
I prepped all my metal with Metal Ready, which chemically turns the rust. Others have used Ospho with good results.
Once that is dry (you should wipe off all excess), apply a layer or three of Por15.
Also, i would not use black Por15 again if i had to do it all over again. You can't see anything on black. Their silver would have been a much better choice in spotting cracks and such.
And lastly, Por15 is a bitch to prep for paint, so don't use it anywhere you might want to add real paint later.
 Andy
Andy
Posted by: dlo914 Feb 24 2009, 12:00 AM
Did you guys prep the metal before you put the por15 down? Ospho? Metal Ready?
If not, you'll have surface rust bubble through in no time.
Anyways, glad to see another one saved!
AndyI didnt know about that. What brand of Ospho or Metal Ready should we use? And that means we have to grind away the first layer of Por-15 and then apply the Ospho or metal ready, right? Thanks for the help...oh yeah lemme enter this VIN# into our database.
Por15 does not interact with the rust, it just seals it off. Unless the metal is spotless, the rust will eventually work it's way through the Por15 again. It just slows it down.
I prepped all my metal with Metal Ready, which chemically turns the rust. Others have used Ospho with good results.
Once that is dry (you should wipe off all excess), apply a layer or three of Por15.
Also, i would not use black Por15 again if i had to do it all over again. You can't see anything on black. Their silver would have been a much better choice in spotting cracks and such.
And lastly, Por15 is a bitch to prep for paint, so don't use it anywhere you might want to add real paint later.
AndyCool...we went with Por-15 black b/c i had a pint leftover from my previous 914. There's this other rust preventer that was mentioned on this site, but i dont remember what it is. I PM'd TonyAKAVW for the name since i recall him being the one who used it and said he prefers it over Por-15.
Thanks again Andy

Posted by: dlo914 Feb 24 2009, 09:08 PM
Will be picking up a powerplant tomorrow for a smoking deal, b/c the engine importer i normally go to is going out of business. Lets hope that engine is still there. :crosses fingers:
Posted by: VOX Feb 24 2009, 09:32 PM
so after we put everything away last weekend, i closed front hood, and now i cant seem to get it open. any ideas on how to get it open? the pull lever inside isn't working.
Posted by: flippa Feb 24 2009, 09:47 PM
There is a hole in the center of the front panel that is in front of the hood latch mechanism where the cable attaches. This is visable in one of your pics.
You can reach in the hole with a screwdriver & pop the lid open.
Posted by: flippa Feb 24 2009, 09:54 PM
WTF???!!!  I just re-read my own post & it doesn't make any sence.
Sorry for the lousy description: I could show you how to do it better than I can explain how to do it.
Look in the hole & you will see where the cable end attaches to the arm on the latch mechanism. Get the screwdriver on the passanger side of the arm & move it towards the drivers side of the car. This should release the hood & it will pop up.
Posted by: VOX Feb 24 2009, 10:36 PM
Thanks flippa!, i'll give it a try this weekend.
Posted by: dlo914 Feb 24 2009, 10:37 PM
Cool! We'll try that this weekend, when we resume rusteration.
Posted by: dlo914 Feb 26 2009, 02:25 AM
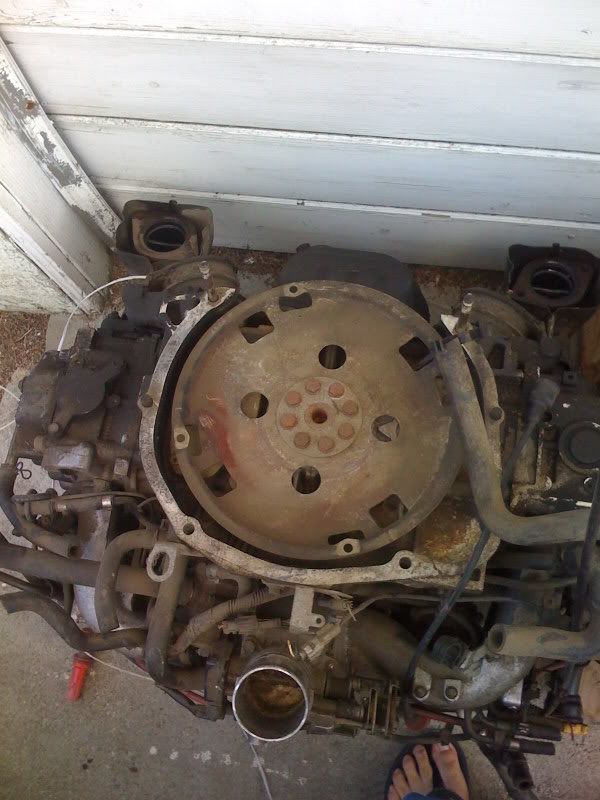
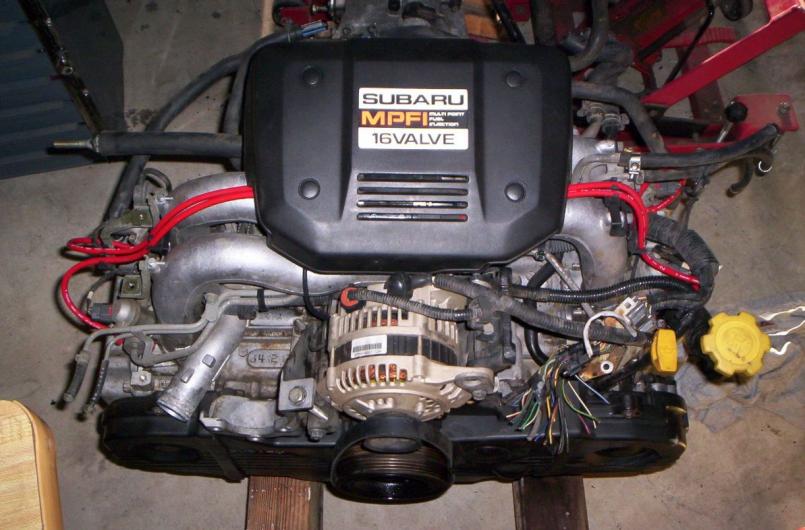
We have powerplant: EJ22 (pretty light engine)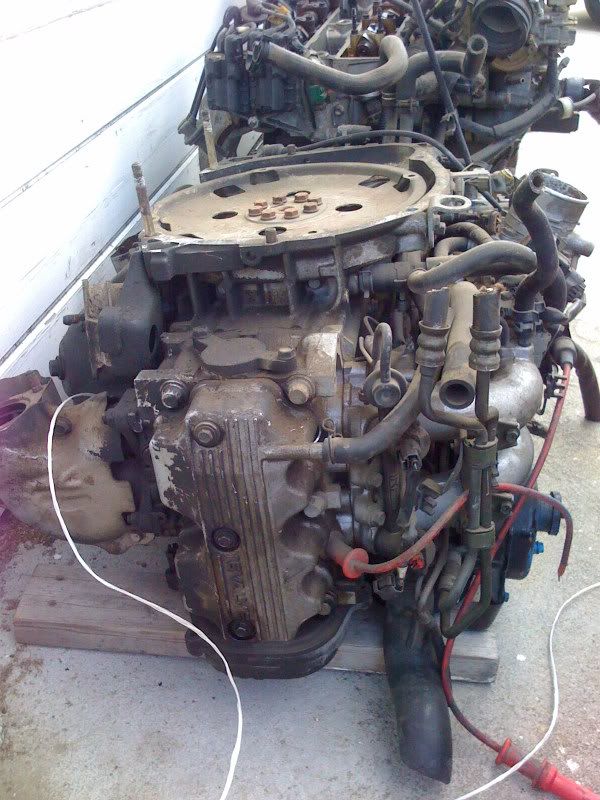
Posted by: dlo914 Feb 26 2009, 10:51 AM
Can't wait to resume rust-oration on the 914 this weekend. Also James and i have decided that we're gonna use the Small Peformance engine mount since it can be used for an assortment of Subaru engines, and we plan to upgrade the engine later on to a turbo'd EJ25T or EJ20T.
Posted by: toon1 Feb 26 2009, 11:13 AM
The more I see these subie swaps, the more I think I should have gone that route.
Posted by: dlo914 Feb 26 2009, 12:40 PM
The more I see these subie swaps, the more I think I should have gone that route.
This might veer you even more to the Suby route, a friend's engine importing shop is going out of business. And the EJ22 you see up above we picked it up for $250 out the door and he's got a few other EJ20 non-turbo and 1 other EJ22 non turbo.
Posted by: toon1 Feb 26 2009, 01:49 PM
The more I see these subie swaps, the more I think I should have gone that route.
This might veer you even more to the Suby route, a friend's engine importing shop is going out of business. And the EJ22 you see up above we picked it up for $250 out the door and he's got a few other EJ20 non-turbo and 1 other EJ22 non turbo.
If my t-4 engine was not so fresh, I'd go this route, $250 is a sweet deal. Maybe in the future.
Posted by: Zaney Feb 26 2009, 04:06 PM
Deals are out there!
I picked up a 2002 Suby 2.5L N/A motor, 5-speed Suby Trans, and complete wiring harness w/ECU $600!
But, that's the cheap part of the build 
Good luck!
Posted by: dlo914 Feb 26 2009, 11:20 PM
We've also thought about using the Subaru transmission, but not sure how to fab the shifting linkages that are required to adapt it to the the 914.
Posted by: VOX Feb 27 2009, 09:37 PM
so opening the front hood, screwdriver worked great. thanks.
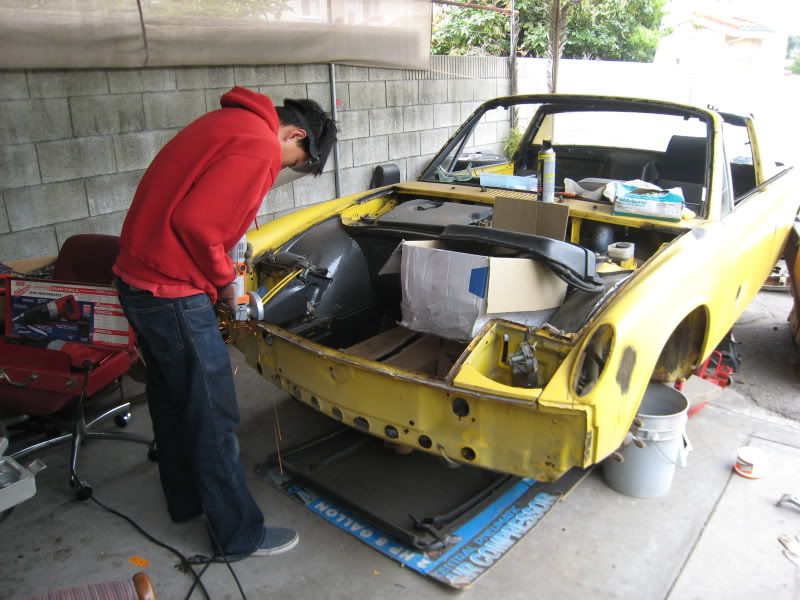
another question, whats the best way to remove the old paint? i hear the use of aircraft paint removal to be the best, but im worried it would leave residue and once i paint over it, it would ruin the finish. is there a different bit that would grind out the paint? we've been using the steel wheel but its not working as great as i had hoped.
Posted by: VOX Feb 28 2009, 08:34 PM
went out and got some Jasco paint remover from home depot and worked on the car for awhile today.
heres the before 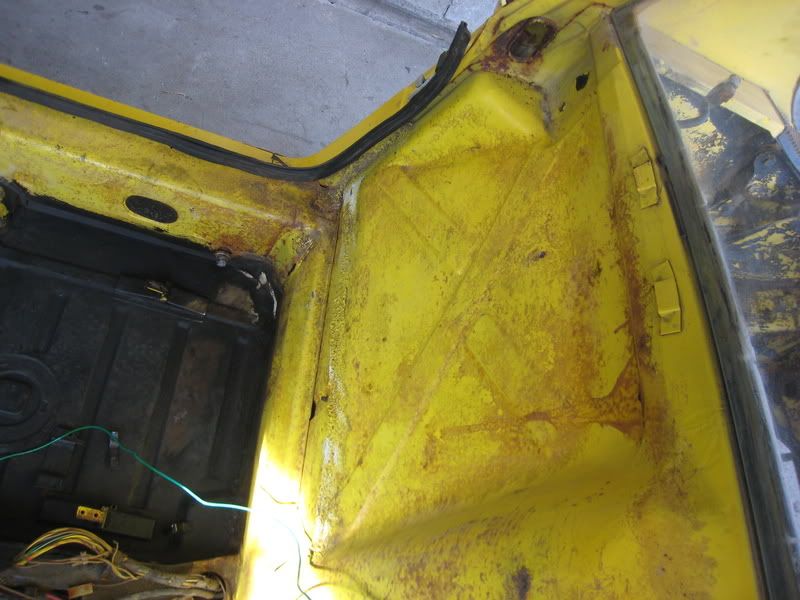
heres after about 3 mins of letting the stuff sit and then scraping at it for a minute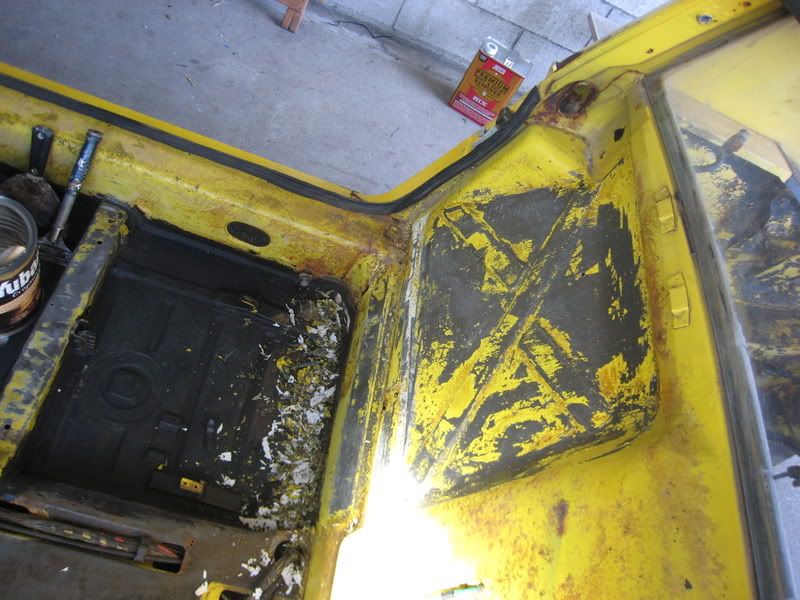
heres the stuff working, it starts bubbling up the paint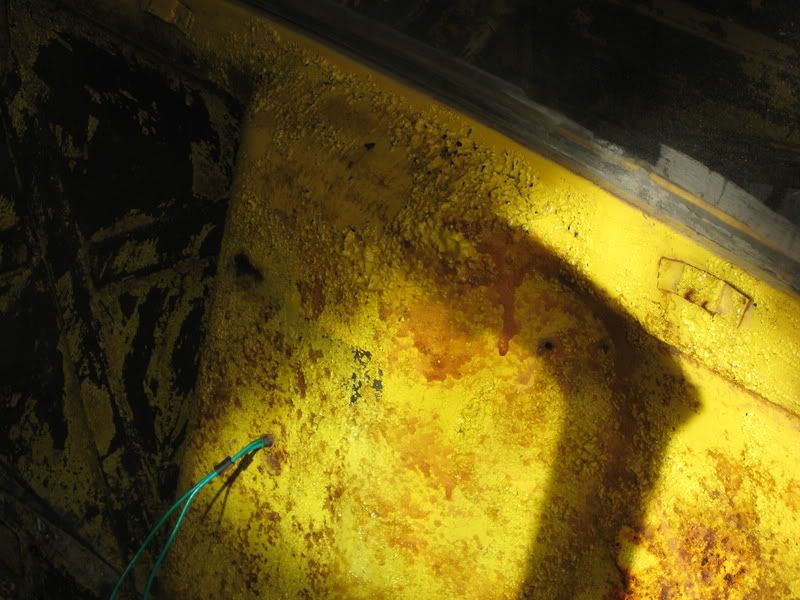
worked at it by hand like a dummy, an hour later i thought to myself, there had to be an ezier way of removing the paint, so i brought out the power drill with the steel wheel.
heres how it is now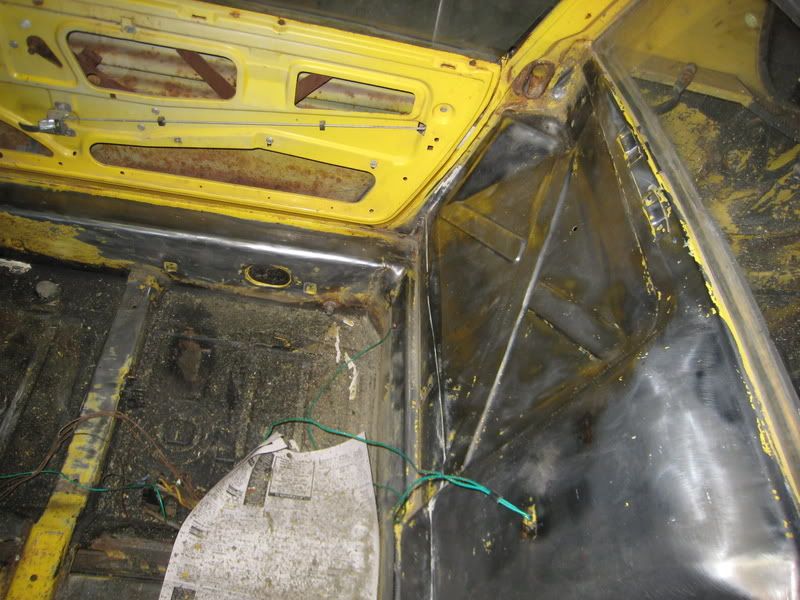
i hope to get the cabin stripped and cleaned by the the end of tomorrow with some help. so i can metal prep it then por-15 the whole cabin.
Posted by: charliew Feb 28 2009, 09:09 PM
Everywhere the stripper gets in seams it will screw up the new paint. You can try to wash the stripper out of the seams but usually it doesn't all come out.
Posted by: dlo914 Feb 28 2009, 09:24 PM
Everywhere the stripper gets in seams it will screw up the new paint. You can try to wash the stripper out of the seams but usually it doesn't all come out.
:doh: o wells we're not gonna paint it any fancy color, just Por-15, then some type of dynmat, and carpeting.
Posted by: Heeltoe914 Feb 28 2009, 09:35 PM
Looking good keep up the good work. Looking forward to the eng. swap part if I can come out and offer tips on fabing anything let me know.
Posted by: VOX Feb 28 2009, 10:16 PM
any help, or pointers would be greatly appreciated! i'll be sure to let you know when we begin mounting the engine and fabbing up the mounts.
Posted by: dlo914 Feb 28 2009, 11:26 PM
Looking good keep up the good work. Looking forward to the eng. swap part if I can come out and offer tips on fabing anything let me know.
Thanks Leamon

Also would you happen to have a spare side shift engine bar, shifter, shift linkages and bar, side shift transmission we could buy off of ya? Feel free to drop by, we're gonna be working on the car tomorrow.
Posted by: RJMII Mar 1 2009, 02:50 AM
nice work! keep it up. =o) It's good to see some progress being made.
Posted by: VOX Mar 2 2009, 01:32 AM
did some more work on the 914, cut out some left over bits of the battery tray, and cut out a chunk of the hell hole. jasco'ed grinded, then soap water, then dried, then used some rust converter on the entire cabin. probably come back next weekend and por15 everything.
my prelude can fly.
or not.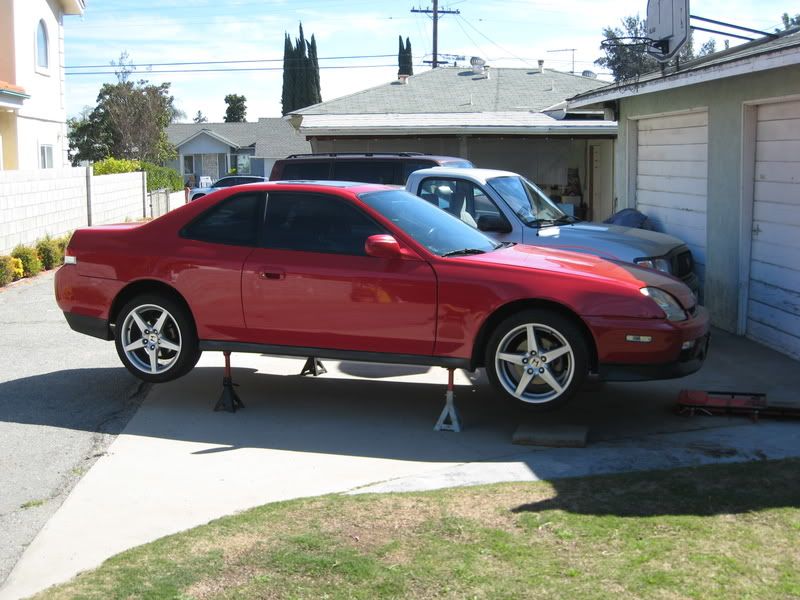
took off my fujitsubo exhaust and put the stock back on.
Posted by: TonyAKAVW Mar 2 2009, 06:27 PM
I can't see the pics yet (stupid work blocks some stuff) but I will cehck it out when I get home. Where are you guys working on this? I could come by and check it out, give you some pointers, some test rides in my suby conversion to get the motivation going a little more
-Tony
Posted by: dlo914 Mar 2 2009, 10:33 PM
We're working on the car at James' house in Rosemead, mainly we can only work on the weekends when he comes home from school @ UCR.
A ride in your suby conversion would be awesome! I'll PM you my cell.
Posted by: VOX Mar 6 2009, 11:25 PM
tonight me and my uncle welded up the hole in the cabin, first time using the welder, welds look pretty crappy, but it will do, theres no light leaking through to the other side. 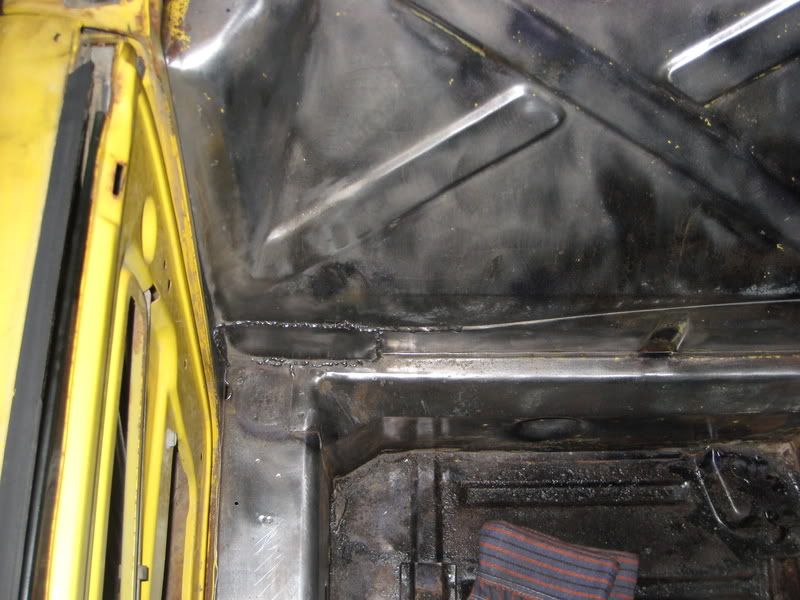
Posted by: VOX Mar 8 2009, 10:36 PM
Posted by: dlo914 Mar 10 2009, 03:24 AM
What James forgot to mention was that there was welding done in the following circled areas & then Por-15'd the entire floor pan and firewall (prep'd with Duplicolor rust fix):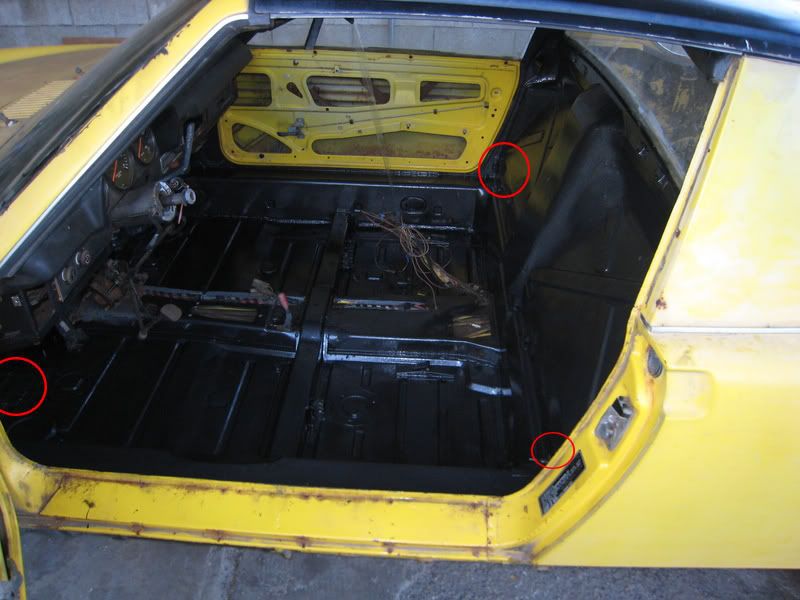
Next weekend, i plan to weld up the sidemarker holes, and patch up the spot where the battery tray use to be (deleted battery tray).
Posted by: dlo914 Mar 12 2009, 03:37 AM
Can't wait to work on the car this Friday. Might have a few extra helping hands
Posted by: RJMII Mar 12 2009, 04:31 AM
is VOX's name James? re: post #47
Posted by: dlo914 Mar 12 2009, 01:04 PM
is VOX's name James? re: post #47
Yeah, repost #47?
Posted by: dlo914 Mar 13 2009, 09:07 PM
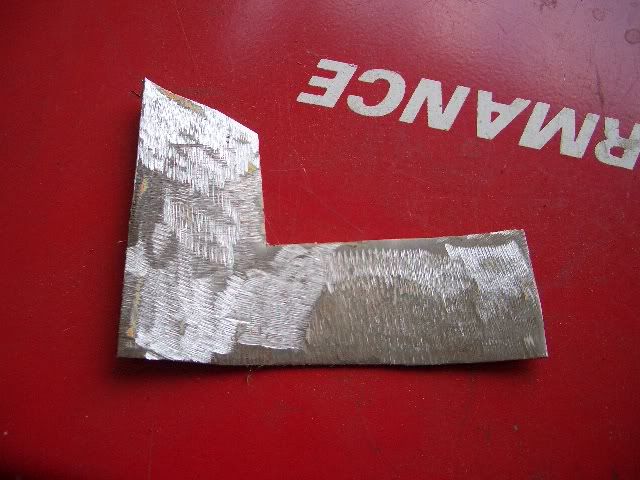
So today i got an early start on the car and proceeded to weld up the sidemarker holes and antenna hole. ***Note this is my first time welding*** Here's some pictures of my progress:
1. I jasco'd (paint remover) the surrounding area.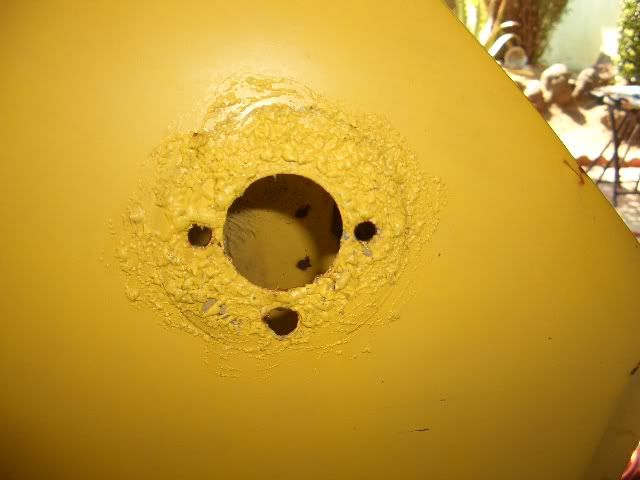
2. Then took a wire wheel and brushed off the paint down to bare metal.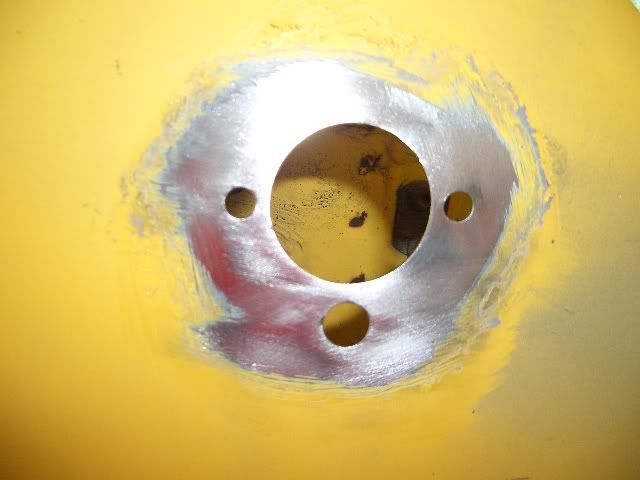
3. Cut out a circular piece of 22 gauge sheet metal.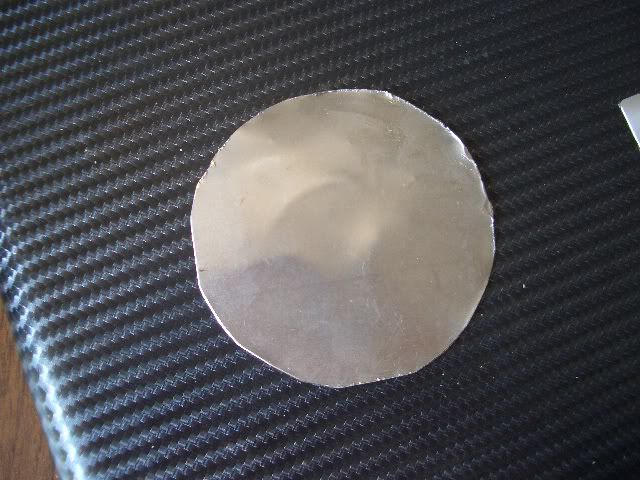
4. Used a C-clamp to hold the piece in place.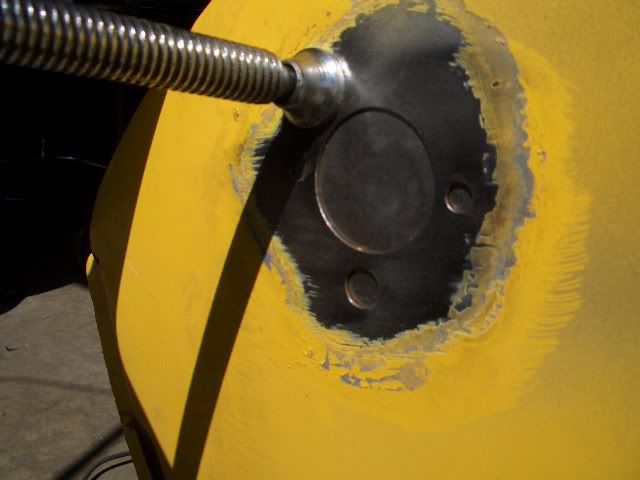
5. Tack welded, filled up the hole, and then took a grinder to clean up the welds.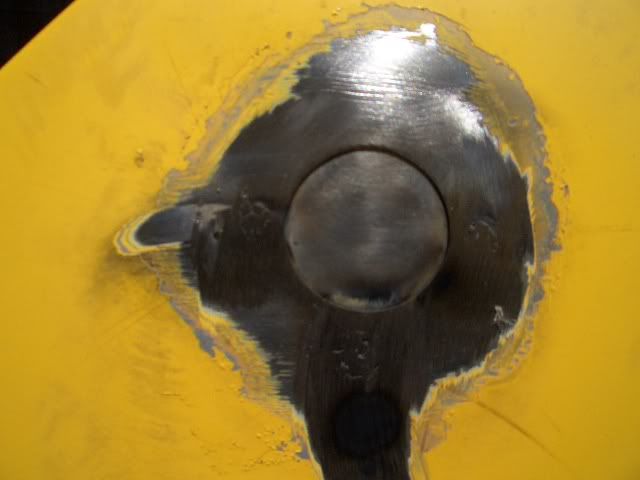
To finish up the patch we're gonna bondo the area and get it down as thin as possible for a smooth surface.
Here's pics of the other side and the antenna hole that was patched.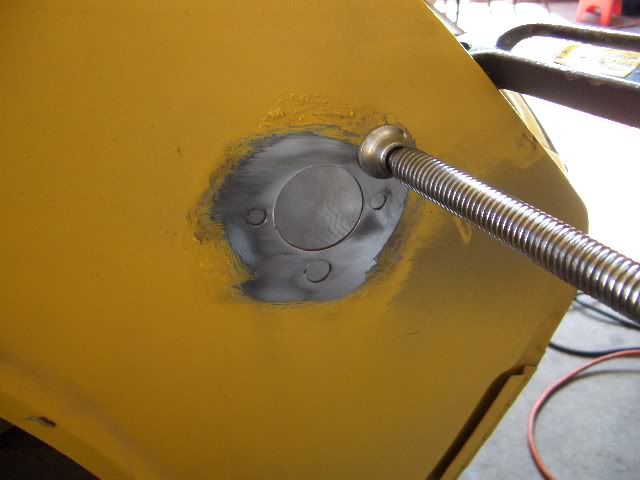
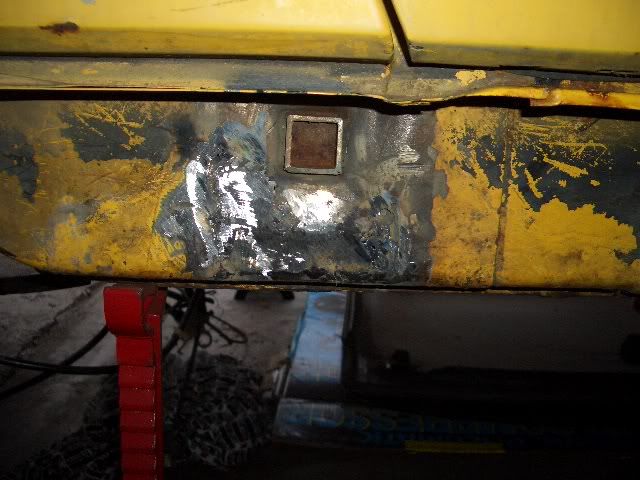
Lastly, we cut out the rusted area where the battery tray use to be. Then took some cardboard and cut out two pieces that fit the area cut out and then welded it in place. We weren't able to grind down the welds since our grinding disk was worn down.
Before:
After:
Posted by: sendjonathanmail Mar 13 2009, 09:27 PM
Flux-core welding? Nice work Dan
Posted by: dlo914 Mar 13 2009, 11:24 PM
Flux-core welding? Nice work Dan
Thanks! Yeah it's flux-core
 i wanna try gas n tig welding now
Posted by: VOX Mar 14 2009, 03:38 PM
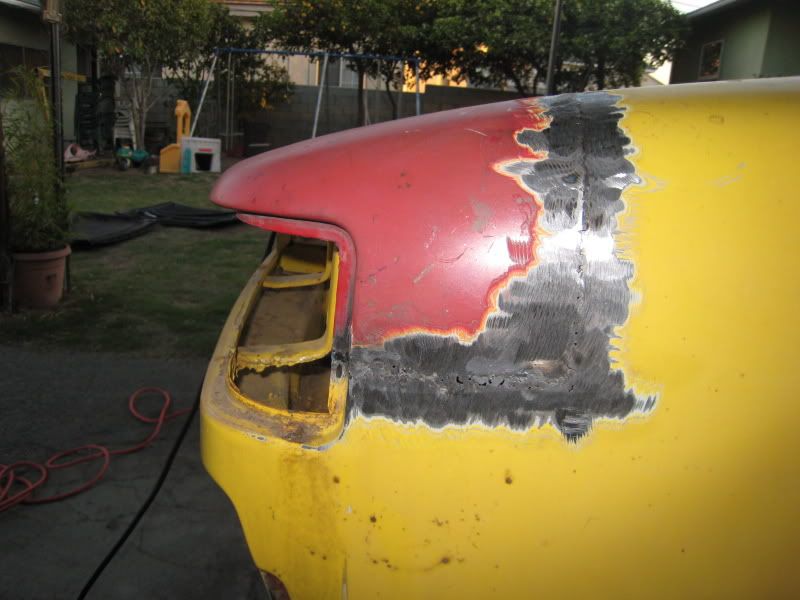
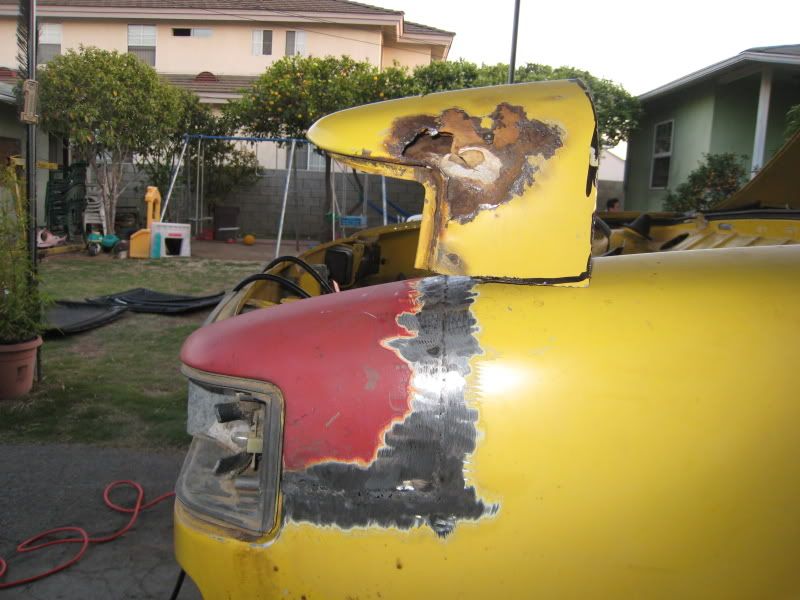
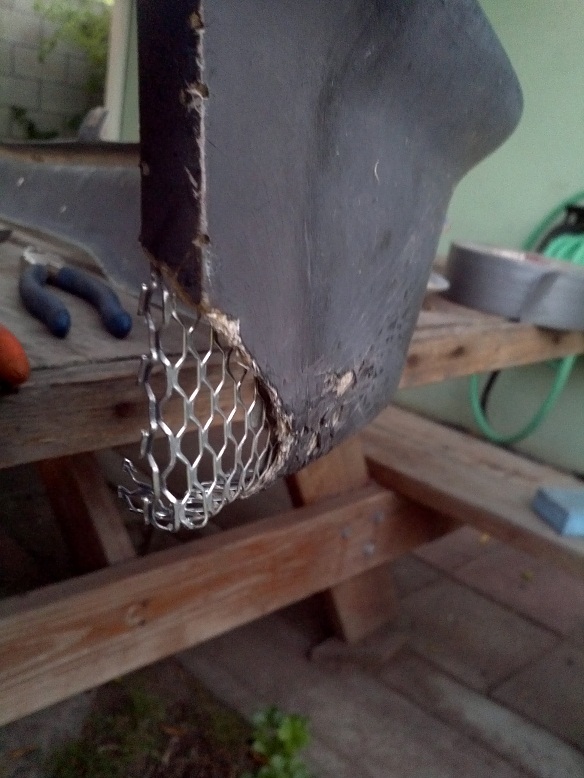
so im looking at the front trunk and the rain gutters along the edge of the hood is all rusted quite badly. how would you guys reccomend fixing this? should i cut out the gutters then weld in new bent pieces or should i treat the rust with a rust converter and then weld a new piece on top of it, to keep its shape. any ideas?
Posted by: FourBlades Mar 15 2009, 11:41 AM
I patched some of my rain gutters and they ended up looking pretty rough
because it is hard to grind them smooth enough to blend in.
I cut out some other sections and made new gutters and welded them on. Those
looked better. Try to keep the area you need to weld small and your repairs
will look better.
John
Posted by: dlo914 Mar 15 2009, 12:02 PM
I patched some of my rain gutters and they ended up looking pretty rough
because it is hard to grind them smooth enough to blend in.
I cut out some other sections and made new gutters and welded them on. Those
looked better. Try to keep the area you need to weld small and your repairs
will look better.
John
Very helpful advice. Yeah there's quite a few sections that have rust through and we'll use the cut out section and weld in new metal technique.
Posted by: VOX Mar 21 2009, 12:15 AM
and onto the jackstands we go.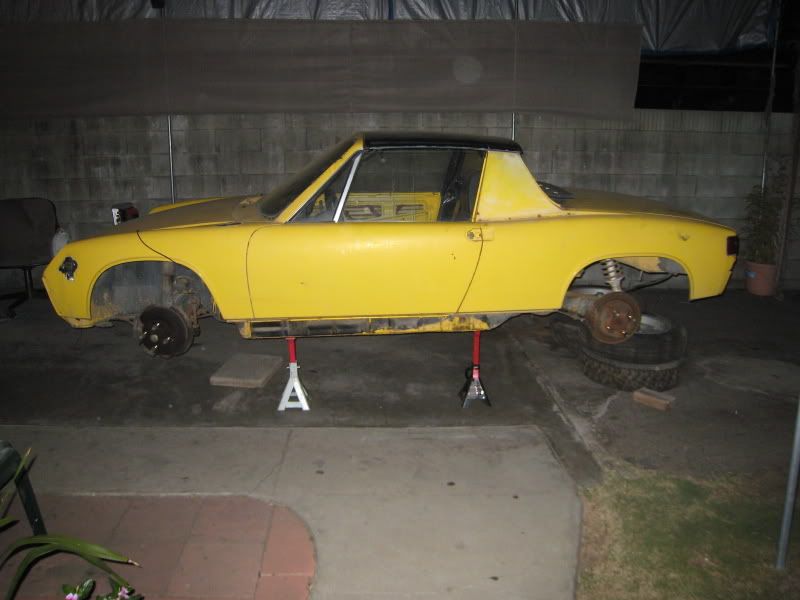
Posted by: smokey Mar 21 2009, 02:29 PM
and onto the jackstands we go.
![popcorn[1].gif](style_emoticons/default/popcorn[1].gif)

Posted by: RiqueMar Mar 21 2009, 02:53 PM
No! Now it wont be off for 3 years!
Edit: Hey VOX, are you guys hitting up WCC? Gotta represent the young teeners like you and me!
Posted by: VOX Mar 22 2009, 03:57 AM
we're really gonna try man, hope to see you there, but it depends how far we get by then. im going to try and get all the rust done and sand it down this week, then get paint on it before i go back to school. if you got some free time while the paint dries or something drop us a line and come check ours out.
Posted by: dlo914 Mar 22 2009, 11:23 AM
I see sunlight! Hopefully it stays that way so we can really work on the car all day tomorrow.
Posted by: VOX Mar 23 2009, 08:59 PM
more pictures yay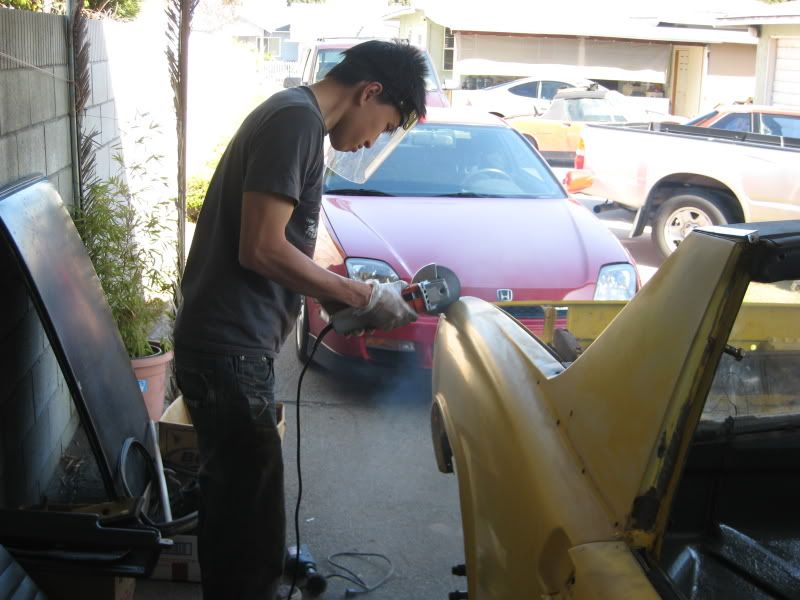

Posted by: dlo914 Mar 23 2009, 10:49 PM
And before pic of the rear quarter panel portion: 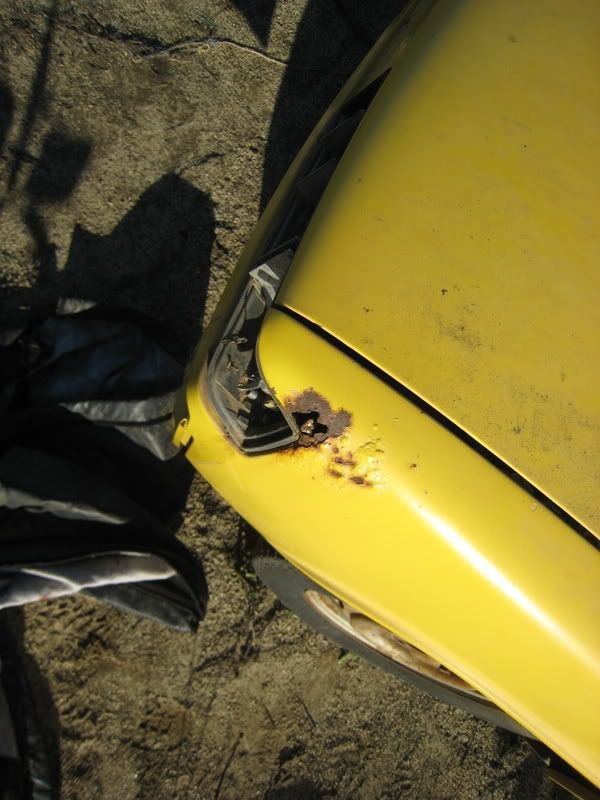
Posted by: VOX Mar 26 2009, 06:48 PM
killed 2 black widows i hope there arent anymore!
two 914 on jackstands
trunk painted not the greatest work but i hope to cover it with carpet.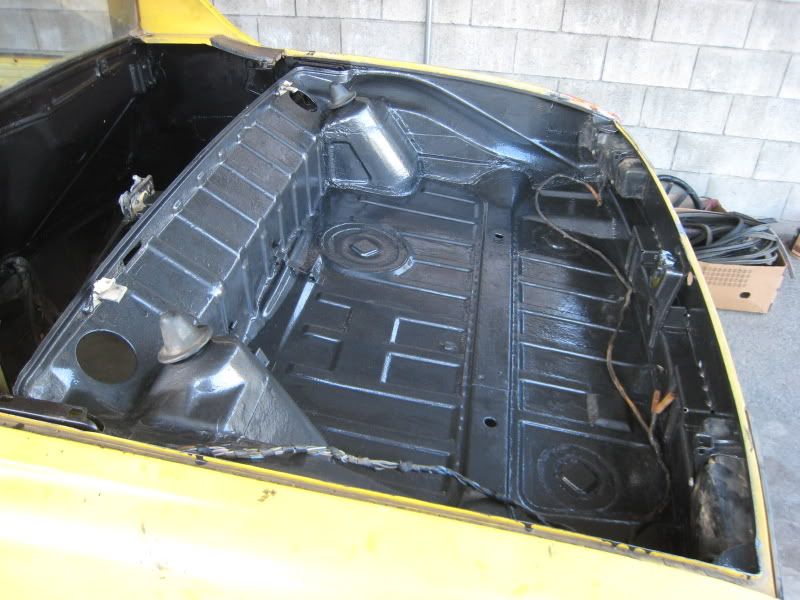
painted engine bay with bbq high temp paint.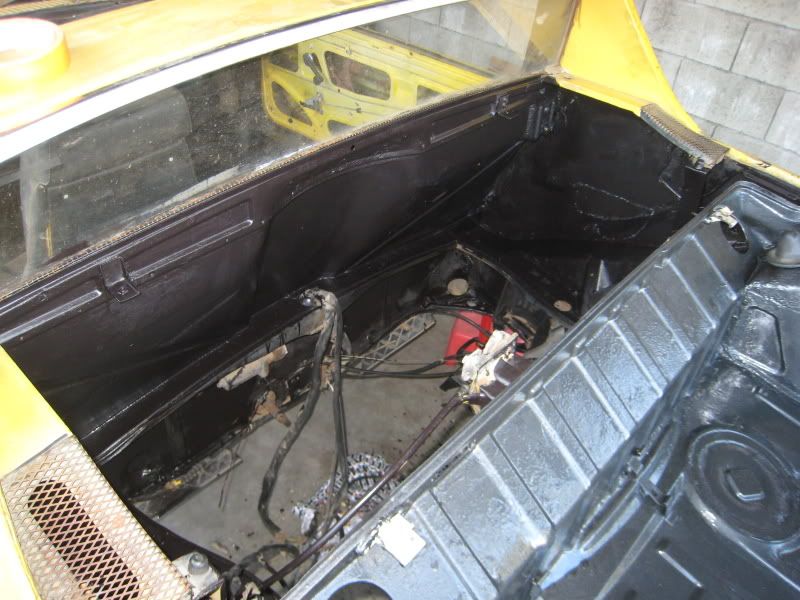
Posted by: sendjonathanmail Mar 29 2009, 07:55 PM
Nice job guys!
Posted by: wallys914 Mar 29 2009, 08:28 PM
Great Progress!
Posted by: VOX Mar 30 2009, 07:07 PM
thanks guys, we appreciate the comments.
sadly small car no longer sells just the side peices to the subaru to vanagon engine mount kit, looks like we'll have to buy the whole set =/
engine wiring harness is here, cant wait to tackle that =/
bored of body work so we'll start working on the engine this weekend, and hopefully get all of its maintence done.
Posted by: charliew Mar 31 2009, 12:04 AM
Have you seen Tony's engine mount? Check his thread out it's a pretty well done mount and you won't need small car parts to do it. He even has the dimensions for it.
Posted by: dlo914 Mar 31 2009, 12:18 AM
Have you seen Tony's engine mount? Check his thread out it's a pretty well done mount and you won't need small car parts to do it. He even has the dimensions for it.
Thing with Tony's engine mount is that you have to mount it to the inner sections of the engine bay. While we can just weld the Small Car engine mount onto the existing engine bar. I mean i would tack weld it onto the bar and then send it out to be structurally welded on by a professional.
Posted by: TonyAKAVW Mar 31 2009, 02:52 PM
I have no welding capability at home, I think I paid at most $75 to have all the welding done on my engine bar and its mounting in the engine bay. I paid maybe $20 for materials. It hold the engine in the right spot. I'm not sure how the Small Car mount works, but using the stock mounting points is tricky because they are so far forward of the engine mounts on an EJ motor. My best estimate is that it is between 14 and 18 inches away. Thats an awefully big torque arm.
-Tony
Posted by: dlo914 Mar 31 2009, 08:36 PM
Here's what Amenson (Scott) did with the Small Car mount:

the progress thread: http://www.914world.com/bbs2/index.php?showtopic=58431&st=0
Posted by: dlo914 Apr 1 2009, 09:54 PM
Hands are aching to work on the 914 after a first week back in school fulltime. Probably, will be done with welding and can start on refreshing the EJ22 powerplant.
Posted by: pankopp Apr 3 2009, 12:48 PM
You should like the EJ22, thats what I have in my car. Hopfully you got one of the 90-93 Legacy ej22, they are dual port exhaust and have a ton more aftermarket surport than the later 90's single port heads.
The only dislike i have about the ej22 is the low 5500 rpm redline. but the lowend grunt of the motor is a very nice improvement over my original stock 1.7 liter. But only about a year with the ej22, i got the itch for more power and built a turbo kit from the old stock parts off my WRX and threw it all on the ej22. Simply said, its much more fun and quicker now. All on only 5 psi.
Keep up the progress! Let me know if you have any questions on the wiring haness or anything else about the motor...
Posted by: VOX Apr 4 2009, 08:54 PM
we do have an early ej22, we're just about to start working on the engine/wiring harness so any help you can provide would be greatly appreciated.
Posted by: dlo914 Apr 5 2009, 01:22 PM
You should like the EJ22, thats what I have in my car. Hopfully you got one of the 90-93 Legacy ej22, they are dual port exhaust and have a ton more aftermarket surport than the later 90's single port heads.
The only dislike i have about the ej22 is the low 5500 rpm redline. but the lowend grunt of the motor is a very nice improvement over my original stock 1.7 liter. But only about a year with the ej22, i got the itch for more power and built a turbo kit from the old stock parts off my WRX and threw it all on the ej22. Simply said, its much more fun and quicker now. All on only 5 psi.
Keep up the progress! Let me know if you have any questions on the wiring haness or anything else about the motor...
The 5500 rpm redline doesn't sound correct. I read on www.thesamba.com that if you're using the wrong Vehicle Speed Sensor (VSS) you'll get an incorrect reading on the tach. I just searched on eBay for the 91' Subaru Legacy gauge cluster and came up with this ebay ad: http://cgi.ebay.com/ebaymotors/SPEEDOMETER-CLUSTER-SUBARU-LEGACY-1991- 1992_W0QQcmdZViewItemQQ_trkparmsZ72Q3a1205Q7c66Q3a2Q7c65Q3a12Q7c39Q3a1Q7c240Q3a1
318Q7c301Q3a0Q7c293Q3a1Q7c294Q3a50QQ_trksidZp3286Q2ec0Q2em14QQhashZitem400037228
637QQitemZ400037228637QQptZMotorsQ5fCarQ5fTruckQ5fPartsQ5fAccessories#ht_3513wt_
1217

The correct redline should be 6.5k. As it reads on this tachometer.
Posted by: pankopp Apr 5 2009, 07:24 PM
Actually i guess your right. I have the stock cluster in my garage and its the same as the one pictured... I built my own vss out of a magnetic pole switches and some magnets, but it souldnt affect my autometer tach, you do however have to use the autometer tach adapter box to read correctly with any Subaru engine. either way, it feels low. Or maybe it just get there too quick. 
Posted by: Vacca Rabite Apr 5 2009, 08:28 PM
Vox, progress looks good.
A suggestion, to take or leave. Paint the engine bay a light color. It is dark and cramped working in there. Anything that reflects a little more light is going to be very helpful down the line.
Zach
Posted by: dlo914 Apr 5 2009, 08:35 PM
Vox, progress looks good.
A suggestion, to take or leave. Paint the engine bay a light color. It is dark and cramped working in there. Anything that reflects a little more light is going to be very helpful down the line.
Zach
Thanks for the suggestion Zach.
Posted by: dlo914 Apr 6 2009, 12:51 AM
Actually i guess your right. I have the stock cluster in my garage and its the same as the one pictured... I built my own vss out of a magnetic pole switches and some magnets, but it souldnt affect my autometer tach, you do however have to use the autometer tach adapter box to read correctly with any Subaru engine. either way, it feels low. Or maybe it just get there too quick.
I'm not sure if this is the low RPM culprit: The stock 901 transmission
http://www.914world.com/specs/regearing_901.php
Posted by: dlo914 Apr 7 2009, 11:01 PM
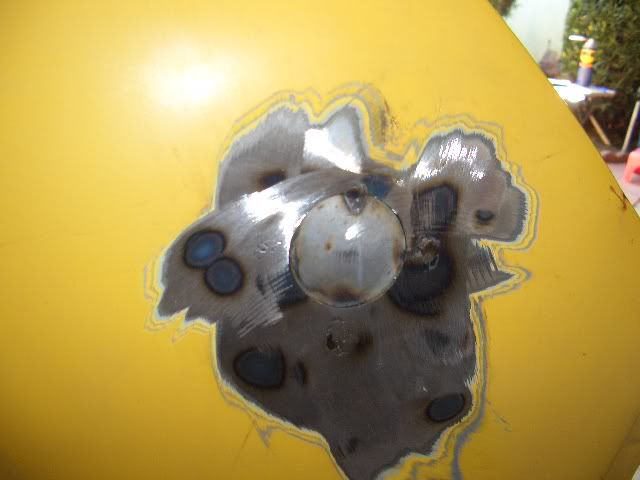
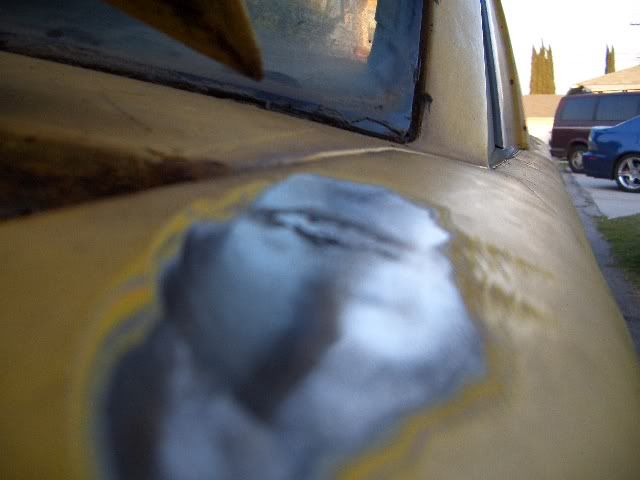
So after class/work today i had some daylight to spare and decided to finish up the welding from last Friday:
Last Friday i tackled the passenger side headlight rain gutter, the passenger and driver side top rain gutter. And today i tackled the passenger side jack point location. Here are the pics: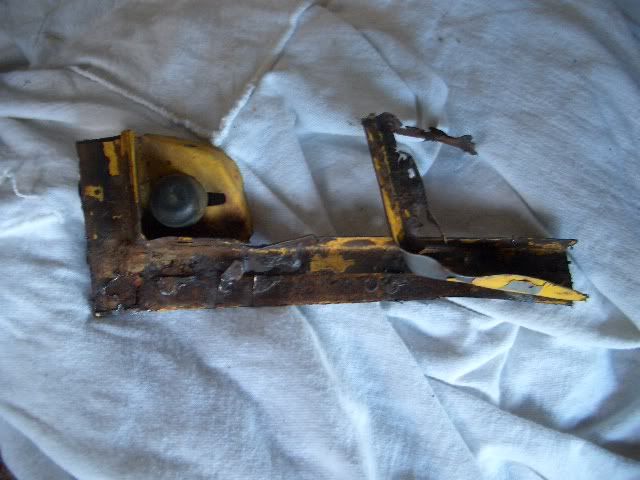
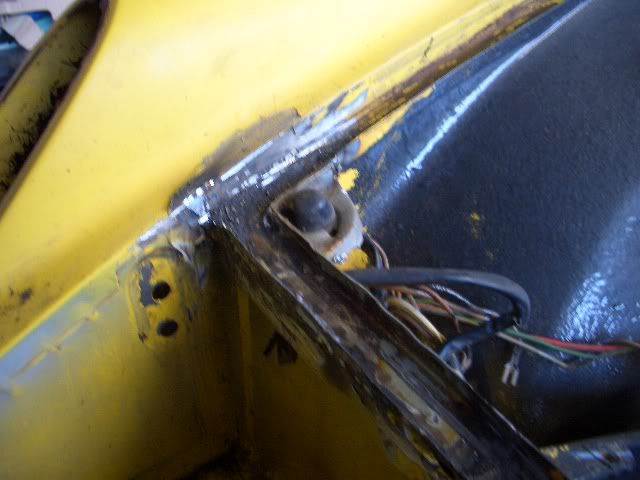
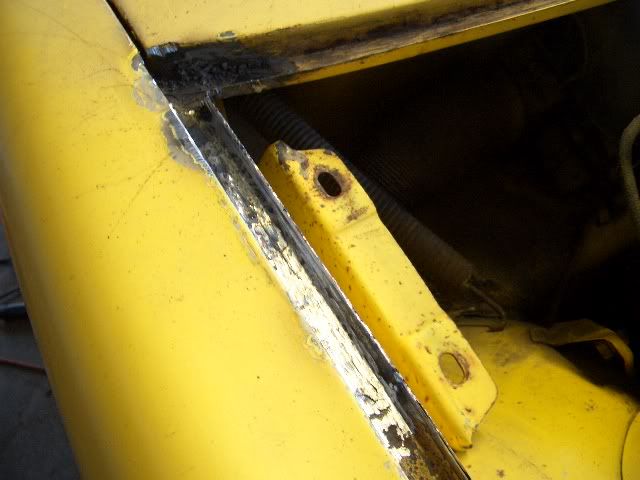
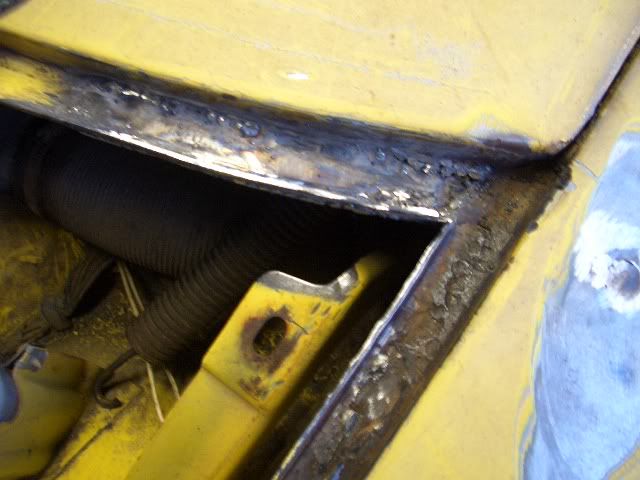
BTW...how would one go about grinding down the welds in the corner? Dremel?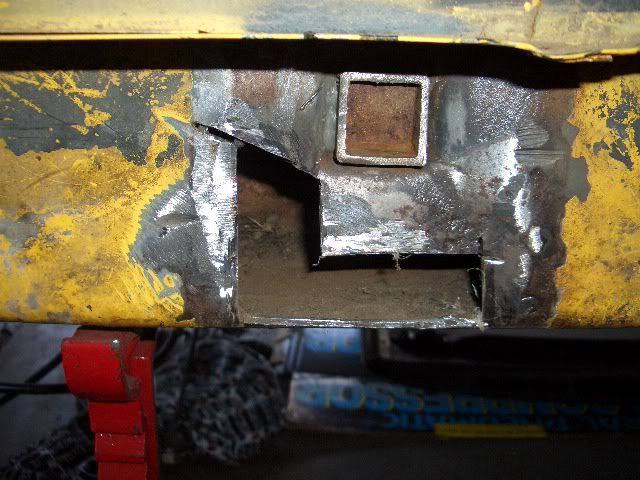
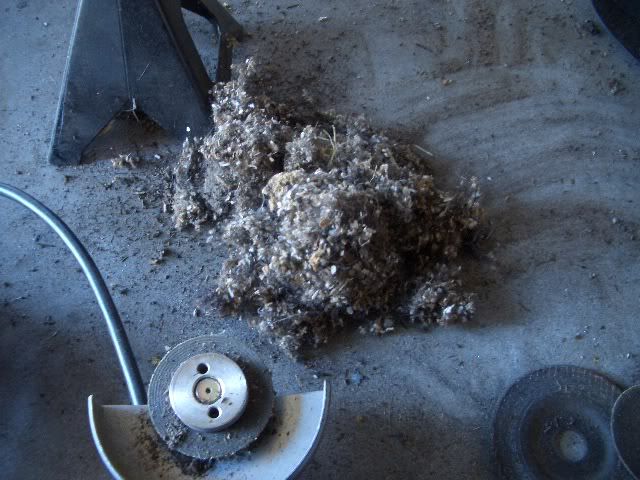
Huge rats nest, surprised i didn't find a rat in there as well! 
Posted by: charliew Apr 7 2009, 11:37 PM
You can get carbide burrs in lots of different shapes. One shaped like a spear point would get in the corner easily in a air tool. Be sure and wear safety glasses cause it will really make sharp cuttings and they go everywhere. You do pretty quick work but you are also leaving some small holes in your welds. Go back and weld over the holes and it will last a lot longer.
Posted by: dlo914 Apr 7 2009, 11:46 PM
You can get carbide burrs in lots of different shapes. One shaped like a spear point would get in the corner easily in a air tool. Be sure and wear safety glasses cause it will really make sharp cuttings and they go everywhere. You do pretty quick work but you are also leaving some small holes in your welds. Go back and weld over the holes and it will last a lot longer.
My concentration was running low after 6 hours of work today. I'll go over them on Friday. Is there any way to get a good bead down with Flux Core? I've only been able to tack weld the piece in and then connecting the tack welds little by little. I'll check harbor freight on friday for the carbide burrs. Thanks
Posted by: charliew Apr 8 2009, 12:19 PM
I buy lots of stuff at hf but I can't say that they will have a good carbide burr. I get mine from a industrial supply. You can try a hf burr and if it goes bad you can probably get one at a sears store tool dept. A good one that will last a long time will not be cheap. If you let it bounce or chatter it will break teeth off when cutting steel. It takes a little practice learning to control it. It's like the limp wrist syndrome with a semi auto pistol I guess. It sometimes takes two hands to control it especially in a small hole, it will try to run around the inside.
Posted by: dlo914 Apr 9 2009, 02:22 AM
Just had James (VOX) put in an order for the engine maintenance items, the following were ordered from www.partsgeek.com: 1 bando timing belt, 2 koyo timing belt idler, 1 nsk tensioner roller, 1 timing belt idler cogged(nsk) 2 camshaft seal(nok) 1 valve cover gasket set (ishino) and 1 Nippon oil filter. Total came out to $240.10 including shipping.
Posted by: charliew Apr 9 2009, 08:08 AM
Are you removing the cam pulleys to do the cam seals? Hope you've done this before. You might want a new waterpump and thermostat with gasket and front and rear main seal while you are at it.
Posted by: dlo914 Apr 9 2009, 10:30 AM
Are you removing the cam pulleys to do the cam seals? Hope you've done this before. You might want a new waterpump and thermostat with gasket and front and rear main seal while you are at it.
Yeah, we're gonna get the water pump from Autozone since they offer one with a lifetime warranty. As for the thermostat, partsgeek didn't have the correct one so i'll probably have to look around for the correct one. And i'll check on the front and rear main seal before i go about purchasing. Oh and the accessory belts, since we're not gonna be running powersteering i wanna see if i can remove the powersteering pump and run a shorter belt or maybe just fill up the unit and recirculate.
In the past i've done a refreshing on a 93' Camry V6 3VZFE, i did the timing belt, water pump, thermostat, timing belt tensioner, idler pulley, front main seal, spark plugs, valve cover gasket kit, and accessory belts.
Posted by: pankopp Apr 9 2009, 11:04 AM
get rid of power steering... You can find shorter belts easily. Also for the water pump, you may want to look into geting the turbo water pump. the water pumps off of the early turbo legacy's and wrx's have a different angled outlet and thermostat housing. With this pump you can use the wrx exhaust manifolds to have a much simpler exhuast design, or to add a turbo later down the road. The still bolt to the block the exact same, just different outlet.
Posted by: dlo914 Apr 9 2009, 10:18 PM
get rid of power steering... You can find shorter belts easily. Also for the water pump, you may want to look into geting the turbo water pump. the water pumps off of the early turbo legacy's and wrx's have a different angled outlet and thermostat housing. With this pump you can use the wrx exhaust manifolds to have a much simpler exhuast design, or to add a turbo later down the road. The still bolt to the block the exact same, just different outlet.
 Hmmm...
That would save us the hassle if we do decide to go the turbo route way down the line. What year turbo legacy and wrx is this water pump off? 91?
Posted by: dlo914 Apr 13 2009, 01:26 AM
Picked up tires for our project. Found a set of four 205/50/15 Falken Azenis RT-615 for $200 off of Craigslist and i offered $180.
Posted by: pankopp Apr 14 2009, 09:58 PM
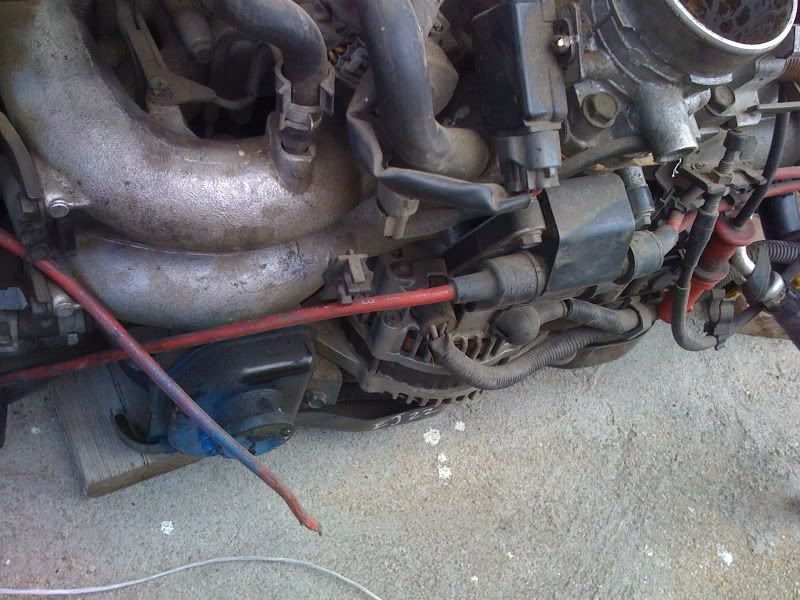
The pump I used is the water pump from an 02 WRX, bought from ebay. I am not positive but i think all turbo water pumps are the same. They have a revised angled outlet and two outlets on the side of the pump instead of the N/a pump's one outlet for the heater core line. I just plugged the extra outlet.
Posted by: dlo914 Apr 14 2009, 10:19 PM
The same water pump shown in this picture?
Posted by: charliew Apr 15 2009, 08:27 AM
You will need the extra outlet to cool the turbo.
Posted by: dlo914 Apr 15 2009, 09:32 AM
Pankopp, how did you plug the extra outlet? Since we're not gonna be running a turbo anytime soon we'll need the extra outlet plugged.
Posted by: charliew Apr 15 2009, 09:39 AM
If it will ever be in a cold climate you can use the extra also for the throttlebody heat.
Posted by: pankopp Apr 15 2009, 10:04 PM
Pankopp, how did you plug the extra outlet? Since we're not gonna be running a turbo anytime soon we'll need the extra outlet plugged.
Edit: Actually now that i look at it, i think the picture shown is the same as the one i used. It has three outlets instead of just two. I used one outlet to feed the heater core hardlines and just ran a line between the two other outlets to circulate the flow. it has worked fine for a little over a year of use. I will craw under the car tomorrow and check, maybe take a quick pic for you.
Yes the extra outlet could be used to cool the turbo, if/when you add one. but i ended up just T'ing into the heater core lines. I didnt really want three feet of water line going up and around all the exhuast components... also, the throtle body water line already is sourced from the main engine coolant manifold on the top of the motor, under the intake manifold.
good luck!
Posted by: pankopp Apr 16 2009, 09:25 PM
just checked my pump and it only has two outlets like i originally thought... two on the right side looking at the front of the motor. sorry for the confusion.
Posted by: VOX Apr 20 2009, 07:26 PM
Thanks, we'll have to check that out.
we just picked up a transmission along with the engine bar, and shifter linkage. supposedly this transmission is from a shop (which moved to Alabama or Arkansas or something, but had someone working under them who had worked for nasa.) long story. anyways supposedly this transmission might have been rebuilt but im not sure. anyone know a shop like that? i want to find out if it really has been rebuilt or not. the tranny is wrapped with cellophane wrap looks like it has been shipped before (but the guy bought it along with a 914 in person)
also would anyone know if a 72 shifter will work for the 75 SS tranny linkage?
Posted by: VOX Jun 12 2009, 08:38 PM
yay summer, finally getting back to the car.
first off lookie what i found huge black window, both the male and female.
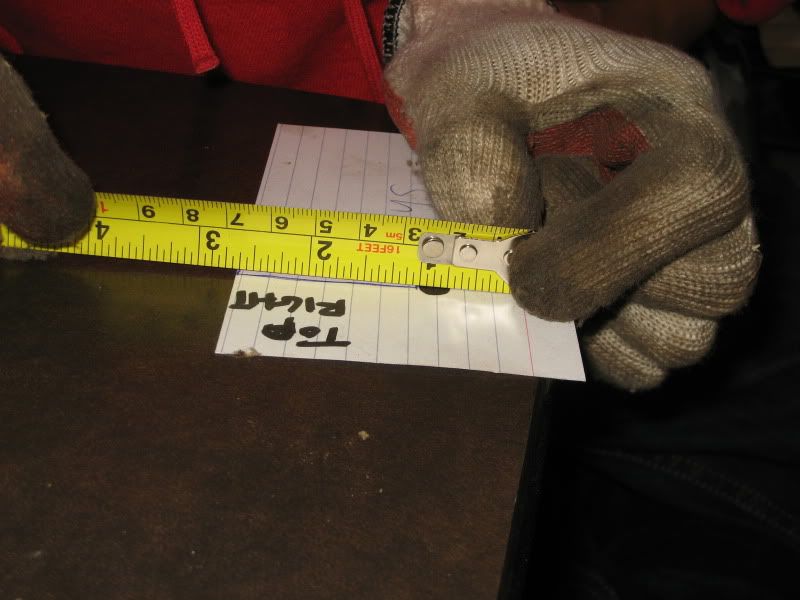
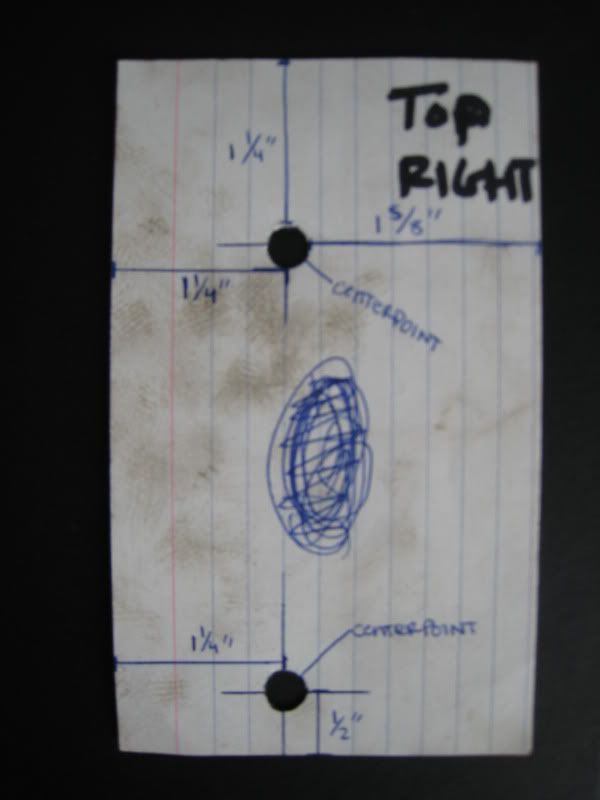
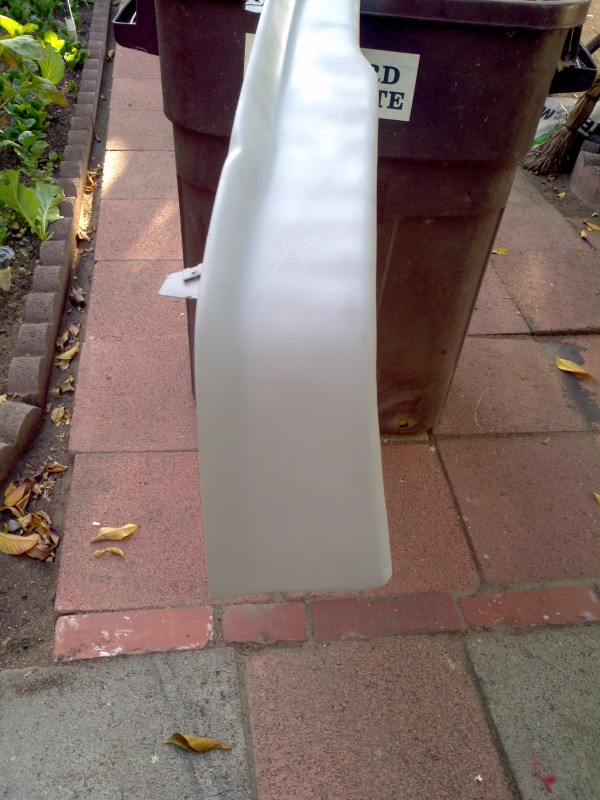
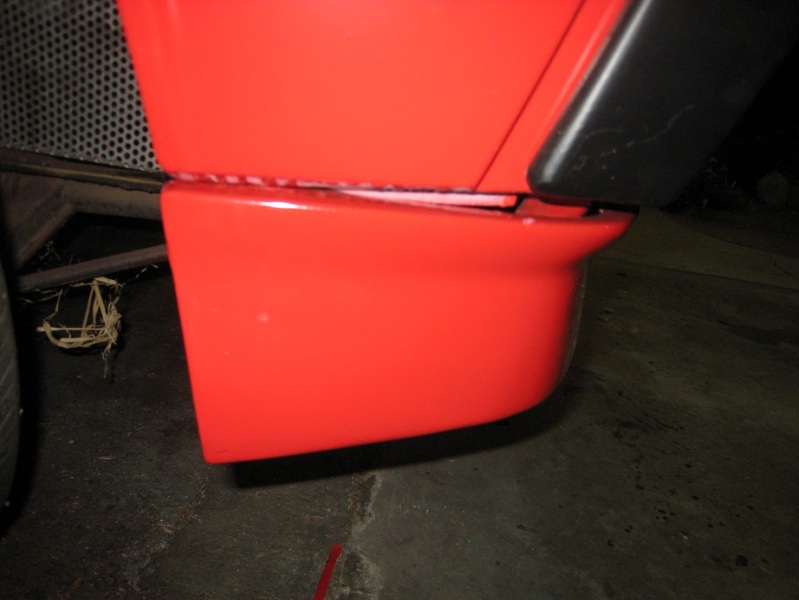
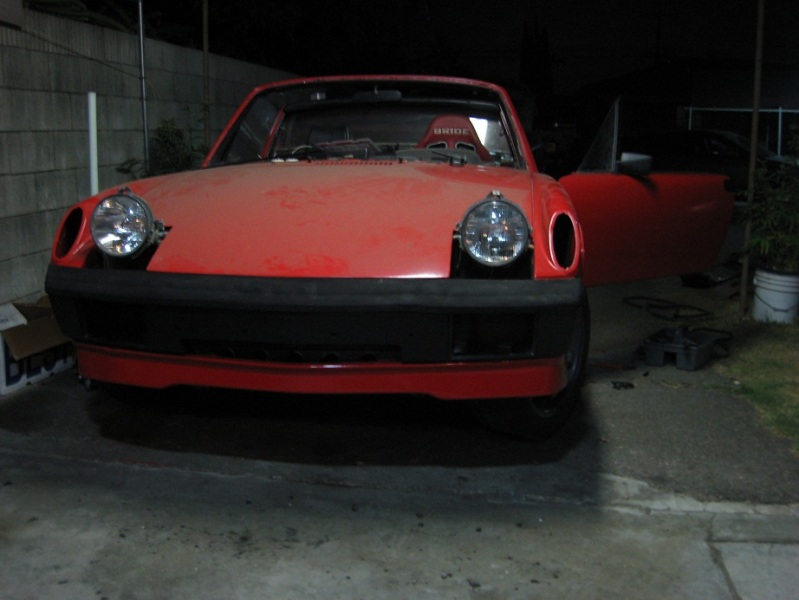
retrofiting bumpers! pretty easy took a note card to the 72 parts car lined it up with the edges and marked it accordingly, then brought it over and drilled it out with a 21/62 drill bit. just a little bit bigger then the bolt. worked great for the rear, fronts needed some adjusting.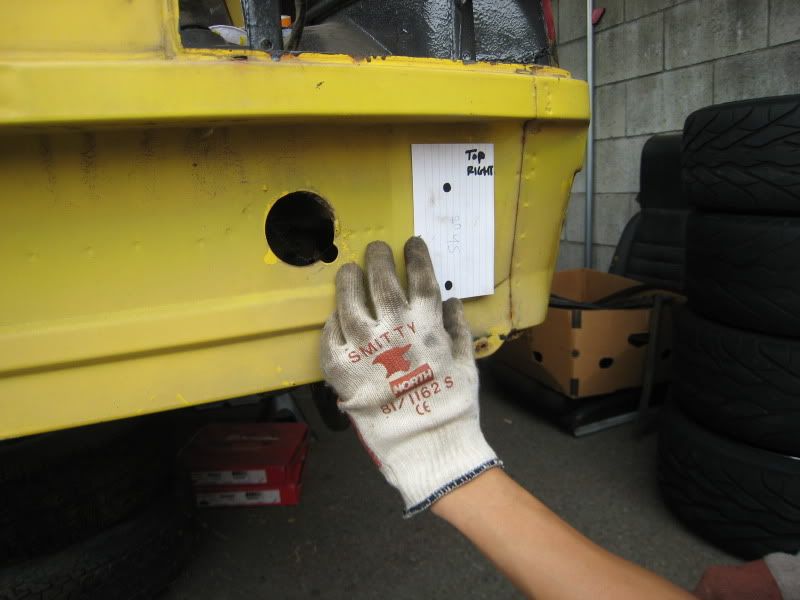
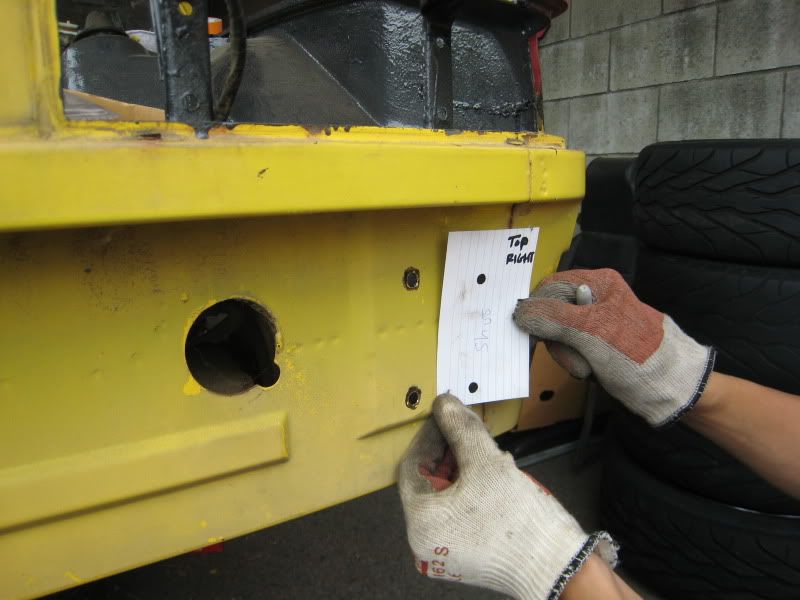
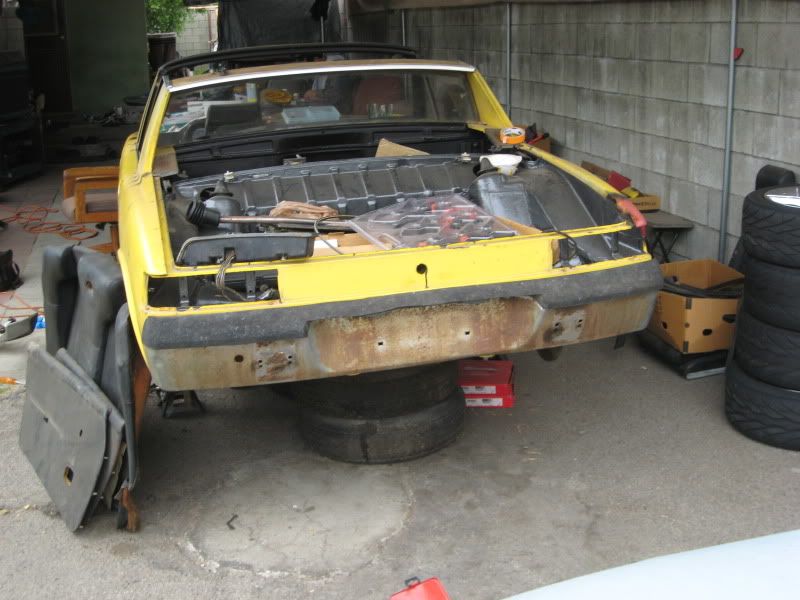
front retrofitting.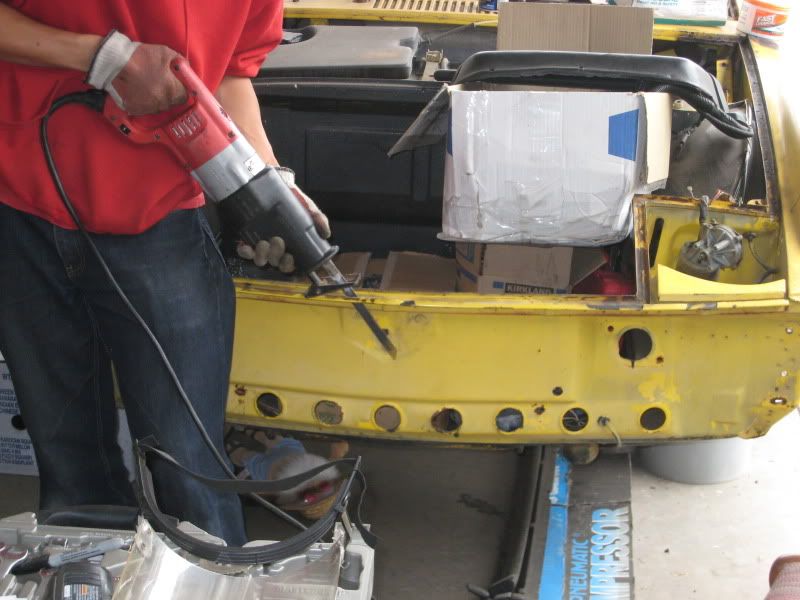
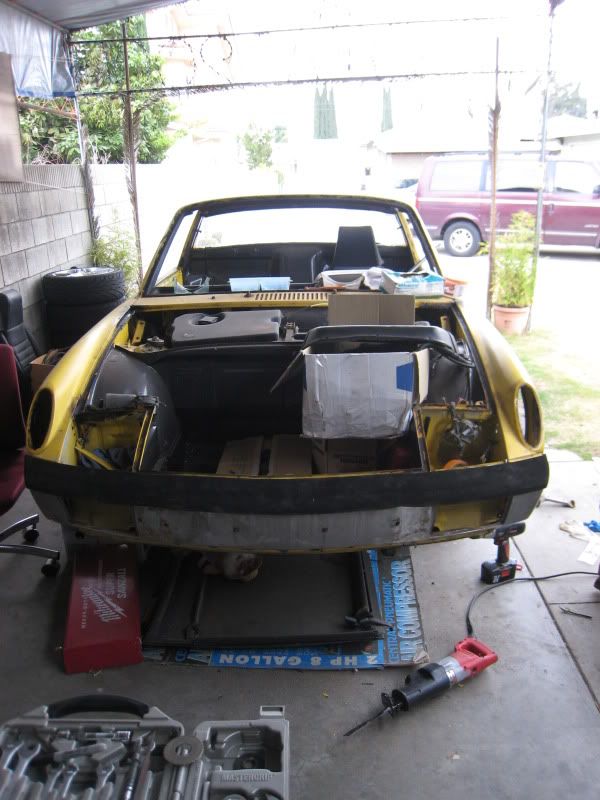
and here we got bored.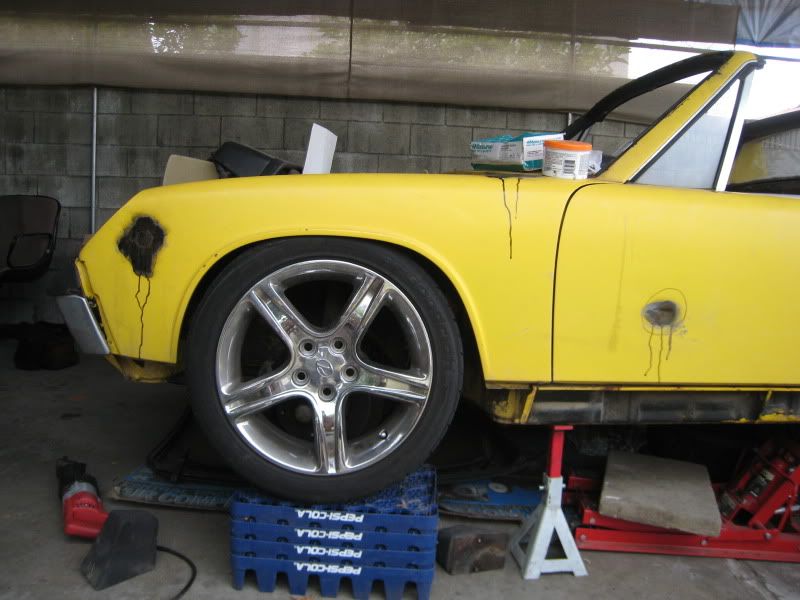
Posted by: RiqueMar Jun 12 2009, 09:10 PM
Hell yeah man, it's all about the old bumpers, and I know you're gonna go blacked out, right?
Awesome, I know how you feel living only a few miles away when you say, "Yay summer" we really have it lucky with this California weather and being able to work outside till like...... 8:30
Posted by: VOX Jun 12 2009, 09:20 PM
yea gonna paint the bumpers black, hahaha were definitely spoiled here in ca with nice weather, its actually pretty weird that its so cloudy this week. as for that drive we can go up and down the coast once were both done. maybe hit up a canyon or something.
we cut out the front trunk for the radiator. thinking of cutting out the circles underneath as well.
Posted by: VOX Jun 14 2009, 06:27 PM
so i was removing the gas tank and there are 3 wires connected to it, seems like its for the fuel level sender. anyways is there a way to unplug it? i dont want to go snipping the wires if i dont have to.
Posted by: 914forme Jun 18 2009, 06:34 PM
They pull straight up, you can pry them up gently if they are corroded.
Posted by: VOX Jul 28 2009, 10:30 PM
had to removed the expansion pack before removing the plug.
been slacking off but finally put in my order for the KEP adapter plate. trying to decide how i want to cut the inner fender for the radiator exhaust. either cut up the red sections and drilling holes in the center section looks like that part is reinforced. or just cut up the entire section in green like what i see most people do.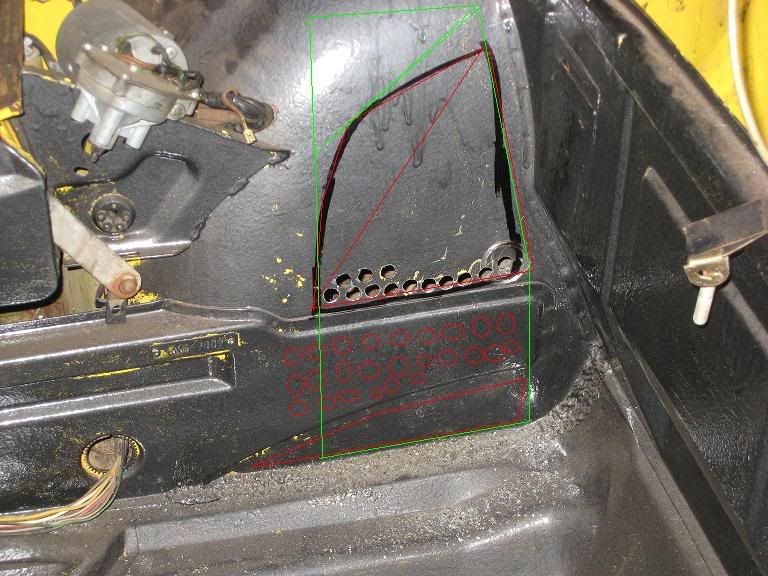
Posted by: McMark Jul 28 2009, 11:15 PM
The large reinforcements are for the 75/76 impact bumpers. You've backdated, so they're just dead weight now. Drill/cut right through them.
Posted by: VOX Sep 1 2009, 11:16 PM
just picked up the adapter plate, timing belt water pump seals are done. i need to modify the hard fuel lines but not quite sure how yet.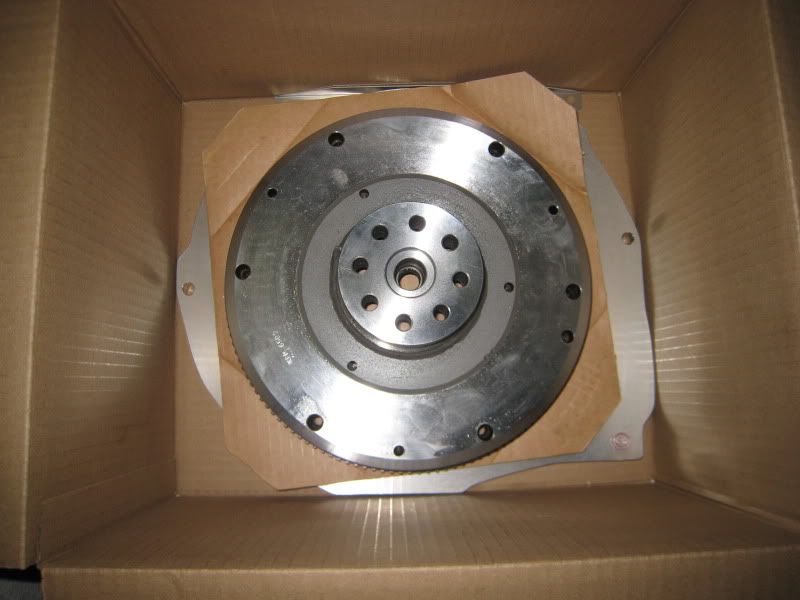
Posted by: VOX Oct 5 2009, 12:45 AM
damn aint that the truth
adpater plate on with flywheel oh yea and story, got the seals from dr. evil THANKS DR EVIL. put in the seals then the stub axles the engines all done timeing belt replaced rollers and bearings and seals as well as sparkplugs just need to pick up the spark plug wires and put everything back together and figure out how to run the fuel and coolant. started to install the adapter plate however we didnt have the clutch alignment tool looks like we'll have to finish it up next weekend. 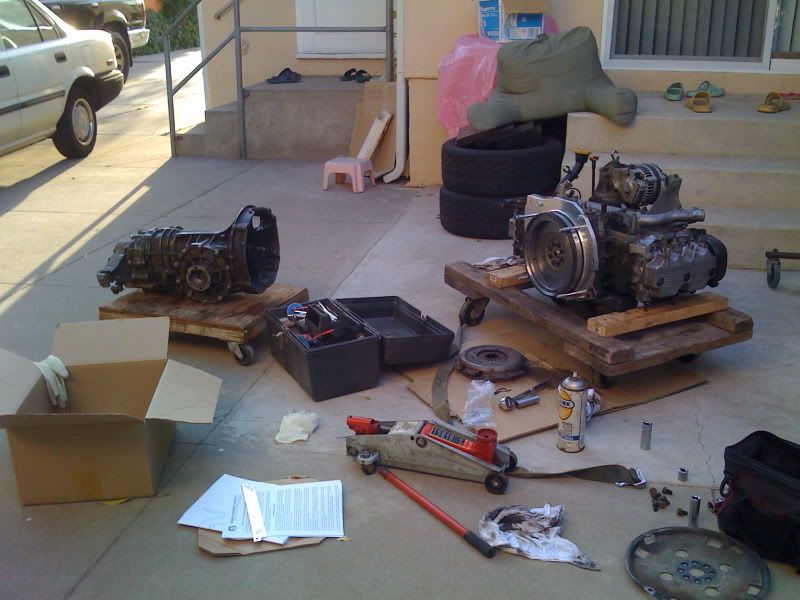

shrinkwrap?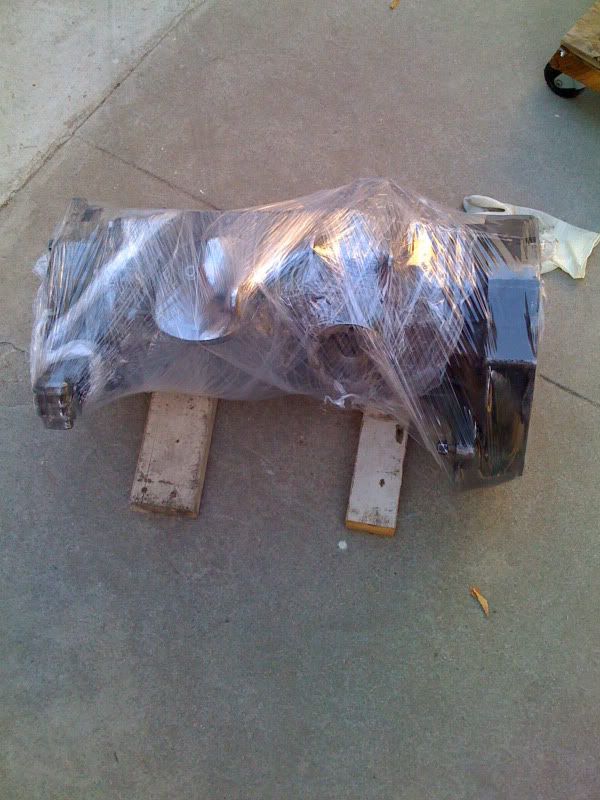
transmission was dirty so we took it to a self car wash to use their engine degreser however this particular place didnt have it so we went ahead and sprayed it down with the pressurized soap. 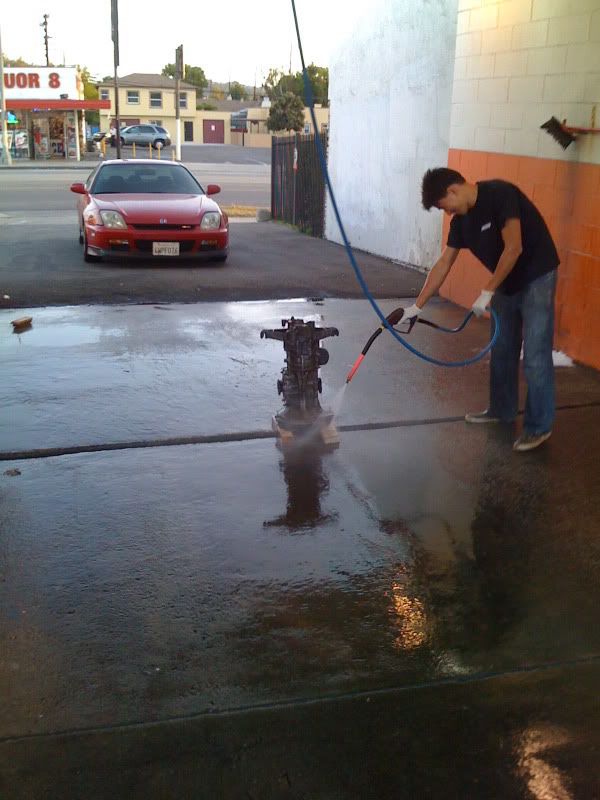
Posted by: dlo914 Oct 5 2009, 01:16 AM
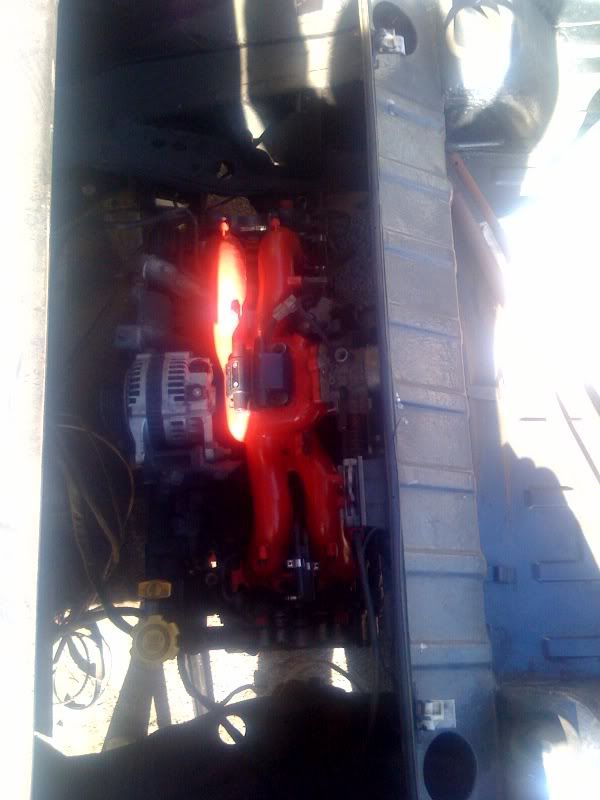
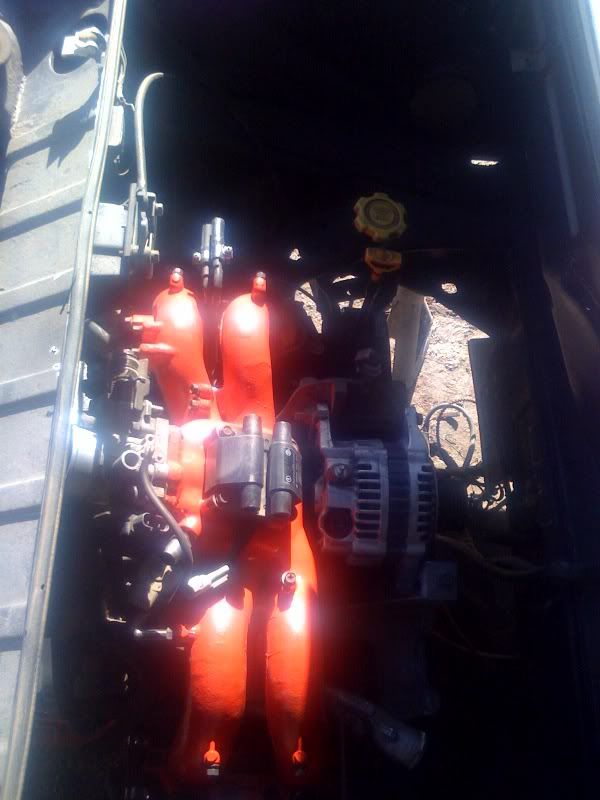
We also stripped down the intake manifold, cleaned it, and then painted it w/ some high temp red paint. I'll take a pic of it tomorrow or sometime this week.
Posted by: oldschool Oct 20 2009, 01:23 AM
We also stripped down the intake manifold, cleaned it, and then painted it w/ some high temp red paint. I'll take a pic of it tomorrow or sometime this week.
dude you guy's are cooking man
 ....so I think I want the red car to be a subi pusher. let me know when I can stop by and get a close up view
 Posted by: dlo914 Dec 20 2009, 04:49 AM
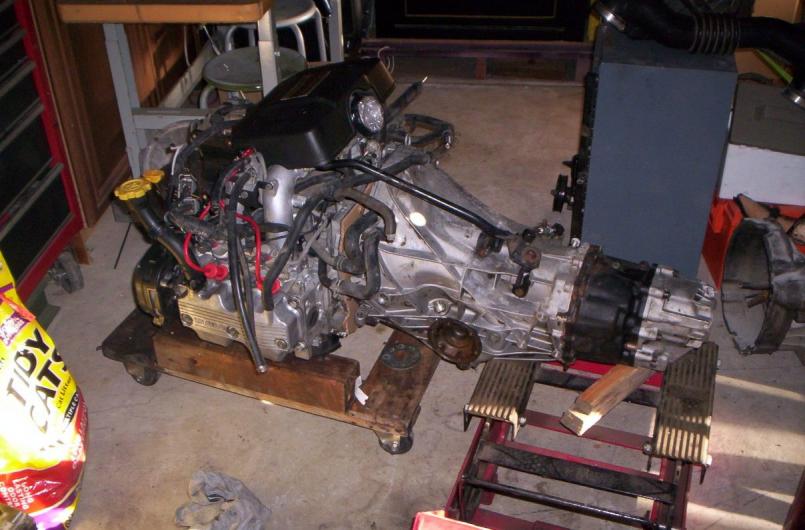
Progress 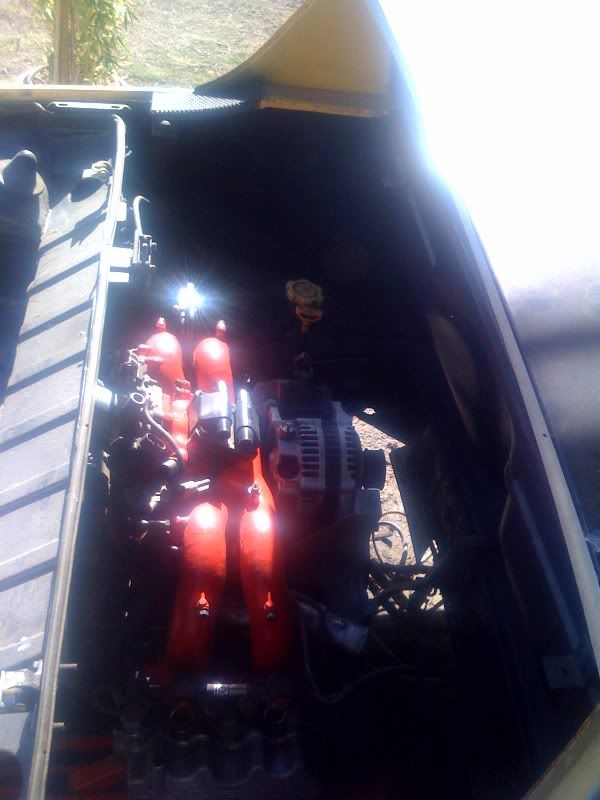
This will be the exact position our engine is gonna sit in the engine bay. At the moment only the tranny is attached to the body. We're gonna work on modding the small car engine mounts. We tried to mock up the engine bar w/ the mounts but the small car mounts overlapped by a guesstimate of 1/2-1". So we're gonna use 5/16 thick angle stock and create some sort of mount to adapt the small car mounts to the stock engine bar.
Posted by: dlo914 Dec 21 2009, 12:00 PM
I got bored and rendered a image of what our project will look like when we're finished:
Attached image(s)
Posted by: dlo914 Dec 23 2009, 10:45 PM
Engine+Tranny have been united w/ the body.
Posted by: SECHSER Dec 24 2009, 12:29 AM
sAweet! i've heard you guys talking about this project, and this is the first time i've every seen this thread. looks like some great progress man.. !
Posted by: dlo914 Dec 24 2009, 02:40 PM
sAweet! i've heard you guys talking about this project, and this is the first time i've every seen this thread. looks like some great progress man.. !
SOT...are you selling your panel bus? I thought i saw an ad on craigslist of one same year, color, and condition like yours.
Posted by: dlo914 Dec 24 2009, 02:43 PM
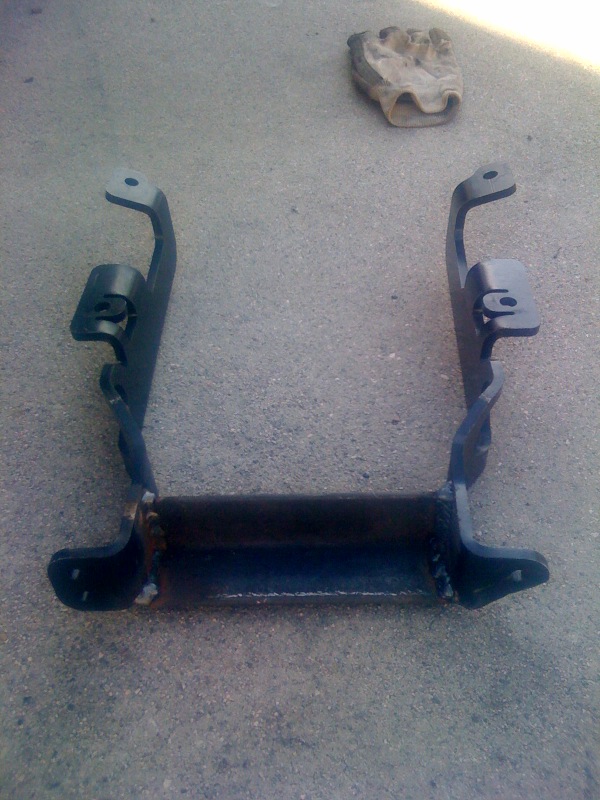
We got the motor mount mocked n tacked and then we took it to the local muffler shop and they professionally welded it for $25.
Attached image(s)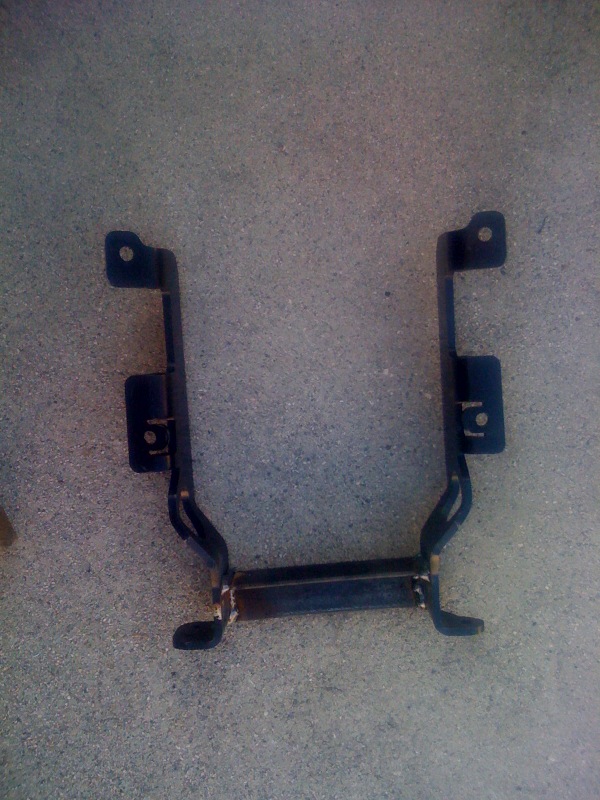
Posted by: dlo914 Dec 30 2009, 12:34 AM
Bump...
Posted by: Travis Neff Dec 30 2009, 09:22 AM
Is that the mount from smallcar?
Posted by: DBCooper Dec 30 2009, 10:53 AM
Is that the mount from smallcar?
The two side pieces are. I intended to use it as well, but then chose to keep the exhaust crossing in the front for the turbo plumbing, so needed to use a different mount.
Posted by: budman5201 Dec 30 2009, 08:34 PM
Looks just like my small car mounts that i used in my N/A conversion.
Posted by: dlo914 Dec 30 2009, 09:08 PM
Looks just like my small car mounts that i used in my N/A conversion.
Yup! We got the idea from Amenson's project thread. The only thing we did different was just notch the driver side arm for the shift rod hole in the engine bar. Amenson notched both arms providing the intake manifold clearance. But to our discovery if we did that the water pump outlet neck would not clear the engine bar. I'll take more pictures later on.
Posted by: 72914GOLD Jan 10 2010, 08:28 PM
 Hey looks good man, it's a lot of work isnt it? I'm starting a similar build right now, I picked up a N/A 2.2 for $150 and I am mounting it to a Audi 5000 transaxle which is suppose to handle up to 450-500 HP, which is perfect for when I can afford a STI engine. Keep up the good work.
Posted by: dlo914 Jan 11 2010, 08:21 PM
Thanks! Good luck on yours as well! You should setup a project thread so we could compare notes n such.
Posted by: VOX Jan 11 2011, 11:02 PM
its been awhile! graduated and started working full time. so far i've thrown down a first coat of paint, needs another 3 or so. spark plugs, new wires, alt belt are in, looking to pick up megasquirt to run the engine. just picked up a radiator today.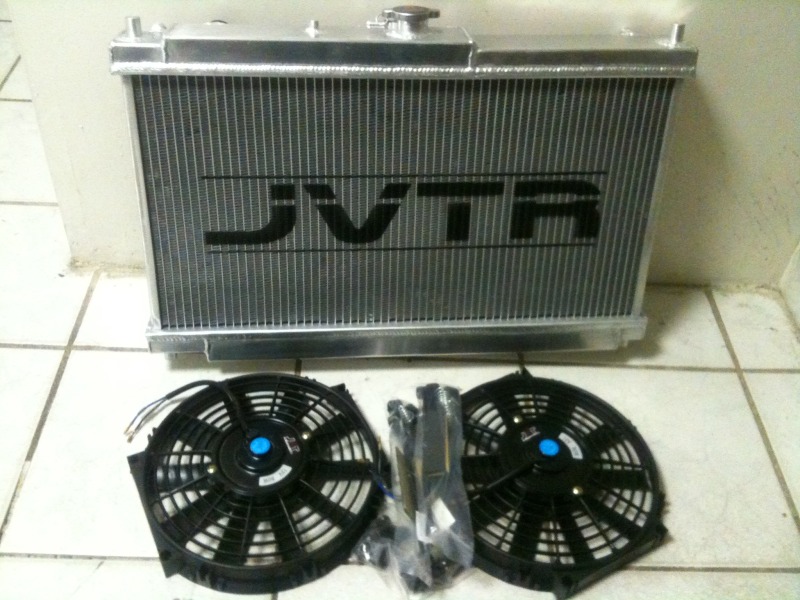
Posted by: oldschool Jan 12 2011, 12:16 AM
its been awhile! graduated and started working full time. so far i've thrown down a first coat of paint, needs another 3 or so. spark plugs, new wires, alt belt are in, looking to pick up megasquirt to run the engine. just picked up a radiator today.
glad your bad to work(on the 914) I was getting worried
..now get your boy D down there and help you out 
Posted by: dlo914 Jan 14 2011, 02:59 PM
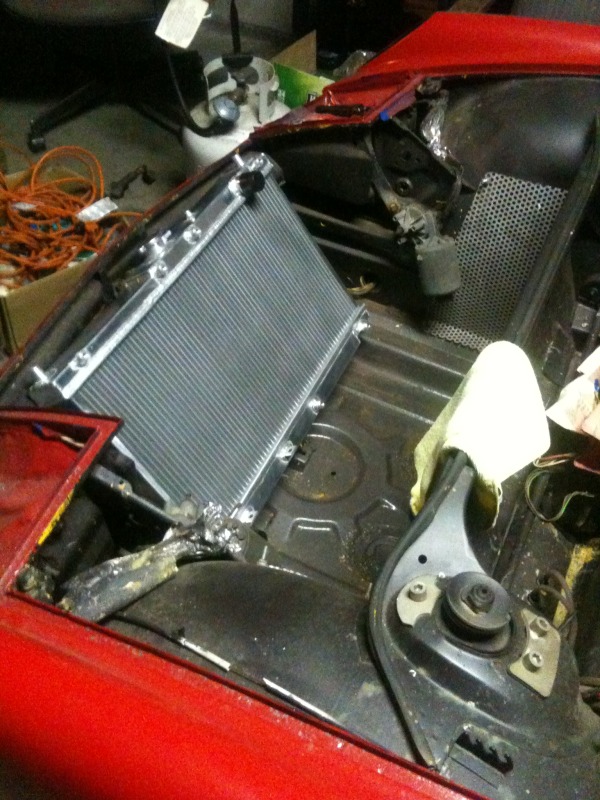
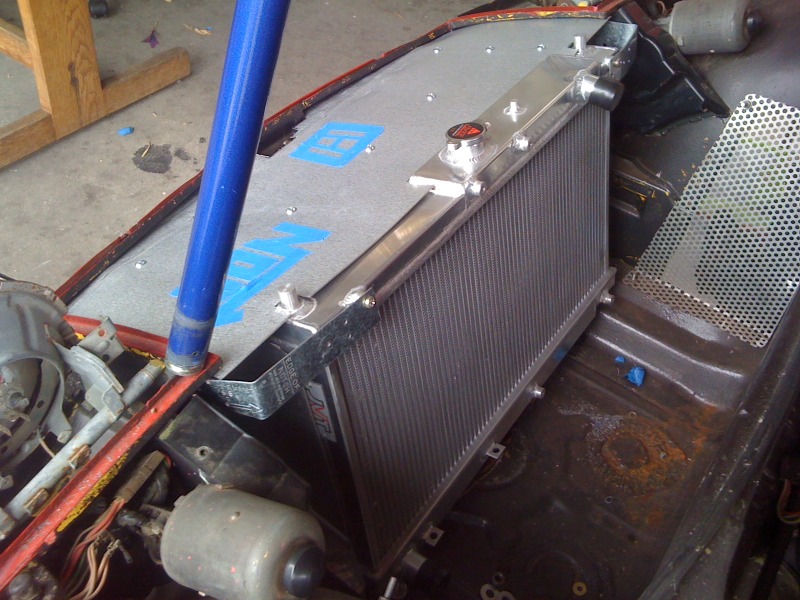
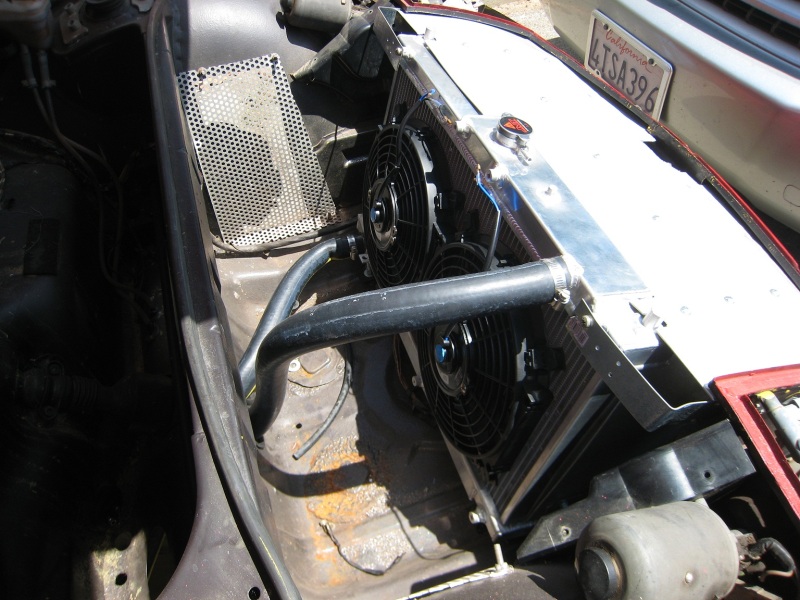
Found some time yesterday after class to mock up and mount the radiator:
mocked-up: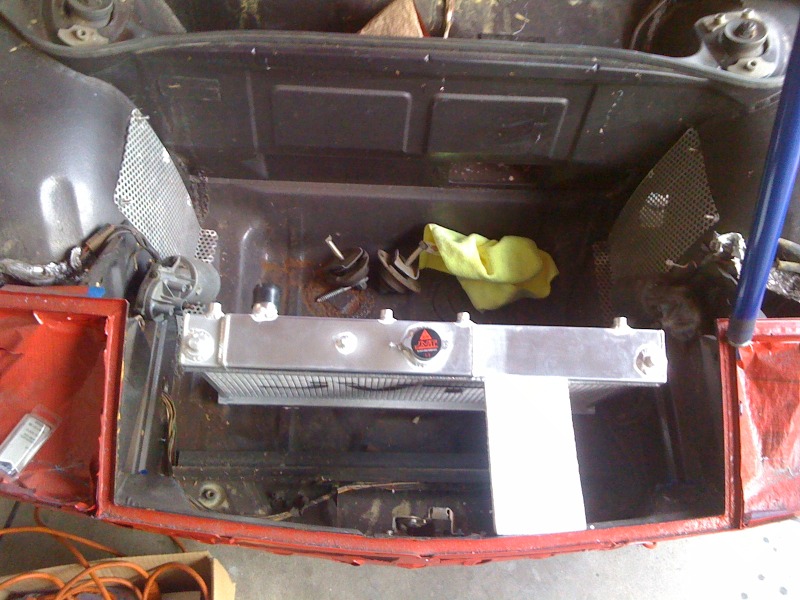
Top View: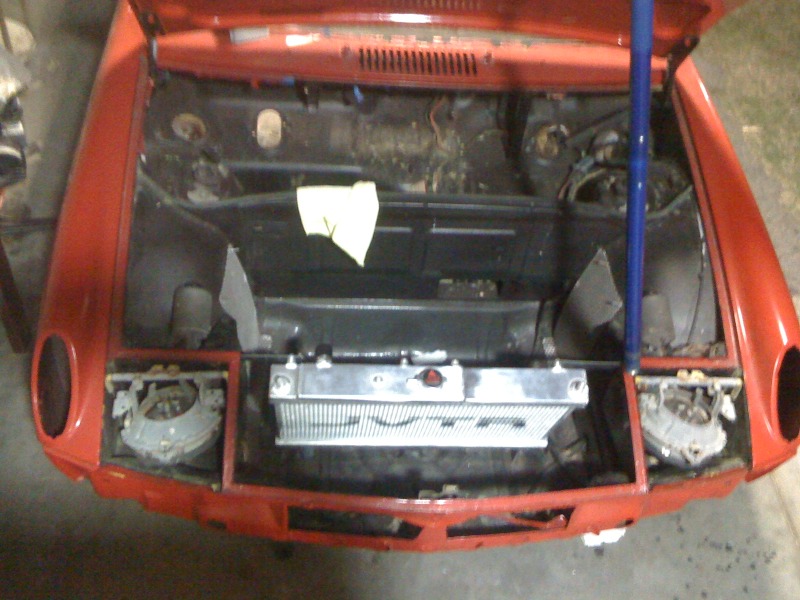
Front View: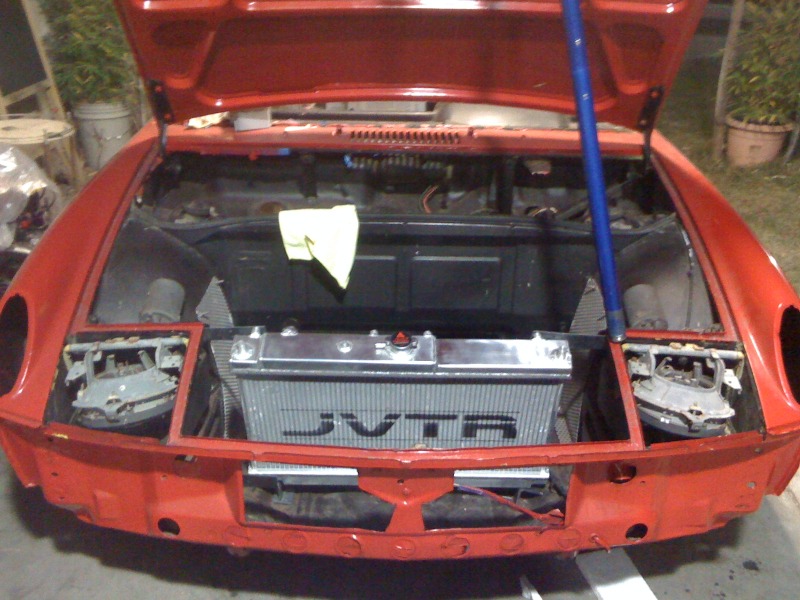
Posted by: dlo914 Jan 14 2011, 02:59 PM
Next thing on the list is some shrouding made out of sheet metal.
Posted by: Andyrew Jan 14 2011, 03:39 PM
Thats a nice sized radiator! What is it out of?
PS Rubber isolators for the radiator are your friend. The radiator should not be touching metal.
Posted by: dlo914 Jan 14 2011, 07:46 PM
Thats a nice sized radiator! What is it out of?
PS Rubber isolators for the radiator are your friend. The radiator should not be touching metal.
It's a dual core aluminum radiator for a Miata. I need to hit up Home Depot for some rubber bushings at the moment i'm only using rubber washers.
Posted by: VOX Jan 17 2011, 03:05 AM
Posted by: dlo914 Apr 15 2011, 11:22 AM
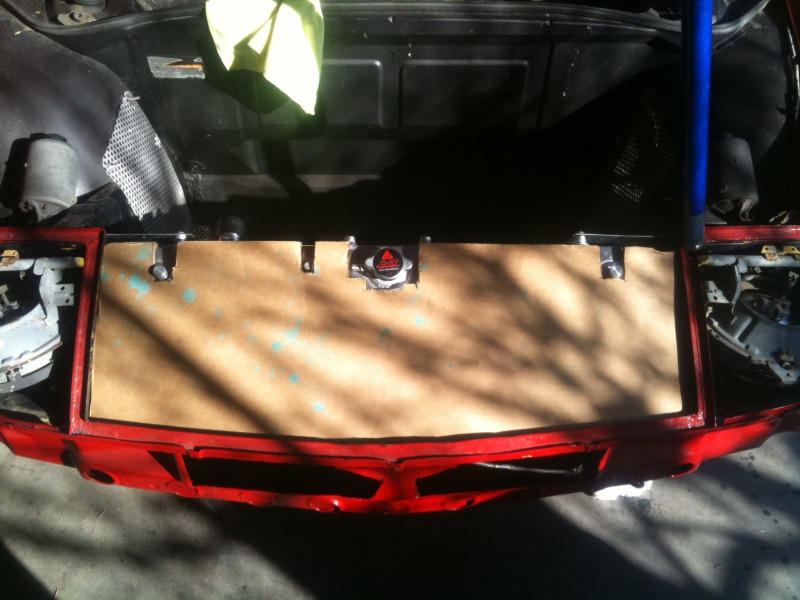
Managed to fabricate the radiator shroud a few weeks back: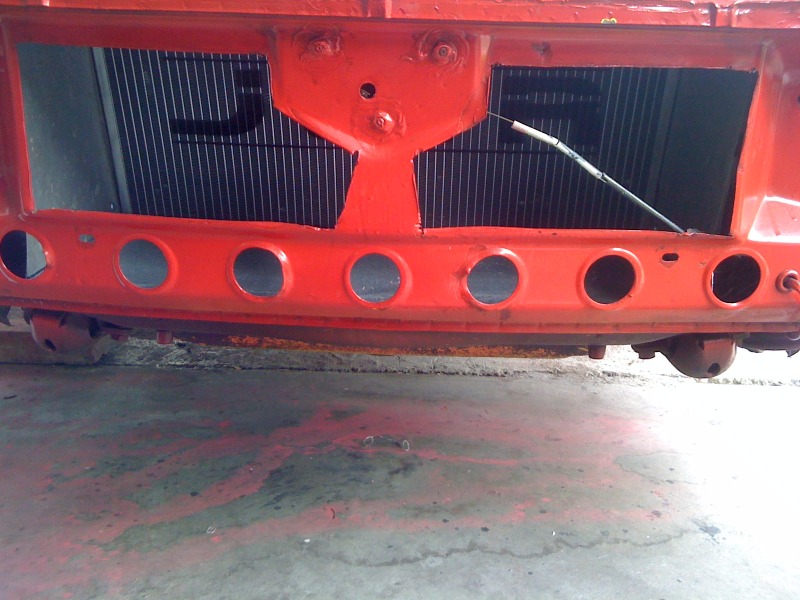

then we got bored and started blue taping 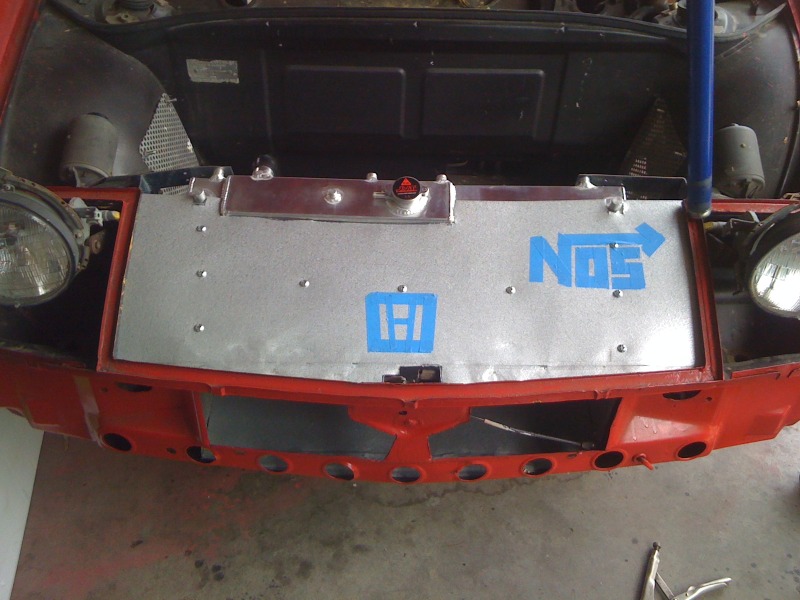
Posted by: dlo914 Apr 15 2011, 11:22 AM
double posted...oops.
Posted by: Andyrew Apr 15 2011, 09:05 PM
Looks great!!
Posted by: dlo914 Apr 16 2011, 12:59 PM
Looks great!!
Thanks! Same with yours! Next we've gotta route the coolant hoses.
Posted by: VOX May 15 2011, 02:27 PM
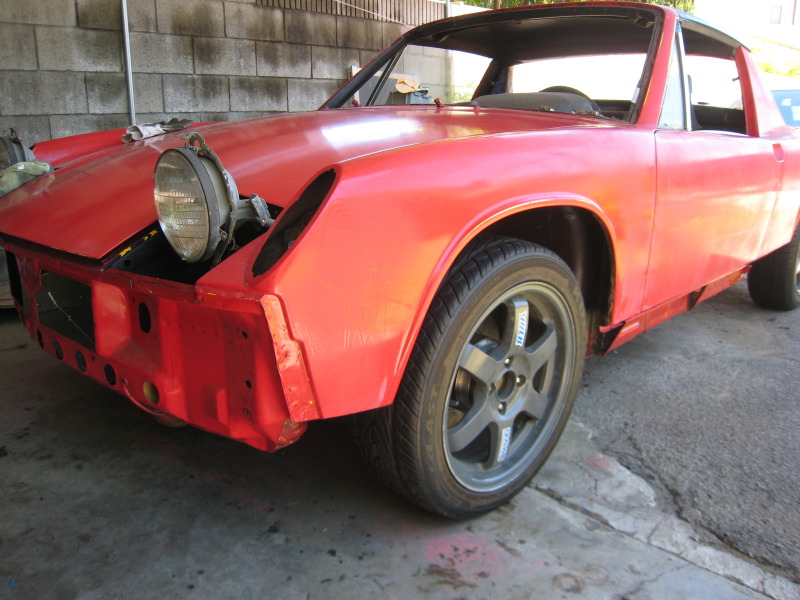

Posted by: dlo914 May 15 2011, 02:43 PM
16x7 +40 offset 4x100 bolt pattern Volk TE37 in gun metal gray, i think we're gonna go w/ 225/50/16 sized tires. These were installed with 4x130 to 4x100 bolt pattern adapters.
Posted by: fasthonda May 15 2011, 03:35 PM
16x7 +40 offset 4x100 bolt pattern Volk TE37 in gun metal gray, i think we're gonna go w/ 225/50/16 sized tires. These were installed with 4x130 to 4x100 bolt pattern adapters.
Volks on a 914. Pretty cool.
BTW I bought the red car from Dale show in your first post.
Regards,
Michael
Posted by: VOX May 15 2011, 04:38 PM
holy cow, you shipped it out to SC? wouldnt dale be surprised to find both his 914's are japanese powered lol. cant wait to see yours running! f20c in a 914 incredible. hopefully i'll get mines running soon as well.
Posted by: DrifterJay May 22 2011, 12:06 AM
Cool project guys, where did you source your wheel adapters from? Any concerns or issues with them?
Posted by: dlo914 May 22 2011, 02:59 AM
Cool project guys, where did you source your wheel adapters from? Any concerns or issues with them?
We found the guy on eBay, and it just so happens the guy was local. So we were able to go in person to give him the dimensions and paid cash. We got'em off this guy: http://cgi.ebay.com/ebaymotors/Wheel-Adapter-4x130-4x100-Spacers-1-Made-USA- _W0QQcmdZViewItemQQhashZitem53e75d2949QQitemZ360363927881QQptZMotorsQ5fCarQ5fTru
ckQ5fPartsQ5fAccessories So far we have no issues, but we've only had the car stationary. So we'll see if they will affect our alignment later on.
Posted by: VOX Jun 6 2011, 11:00 PM
lowered the front end. super low, got the arm to be parallel.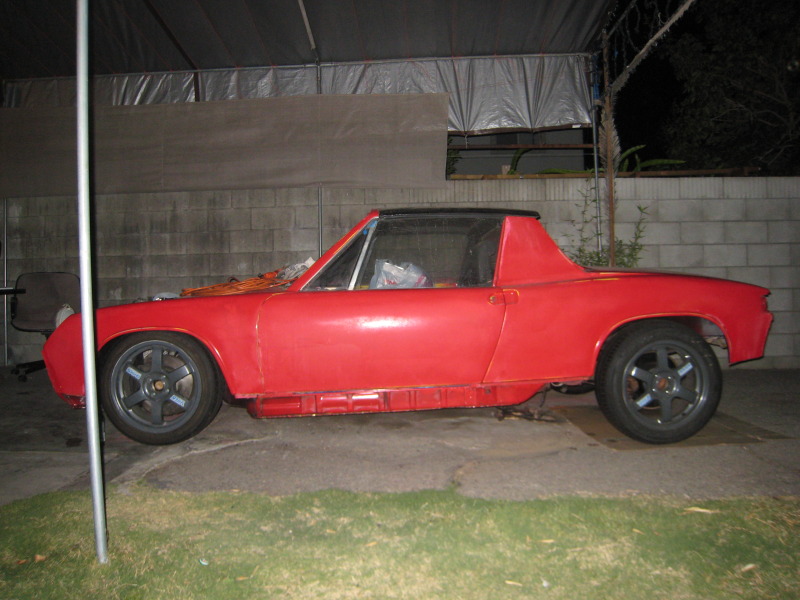
built a gt lid, took about a coupleof hours not too bad, except for the center part, the 2nd grill pops up, so i took a few nuts and screws to fasten it down looks pretty good to me.
Posted by: dlo914 Jul 25 2011, 02:06 AM
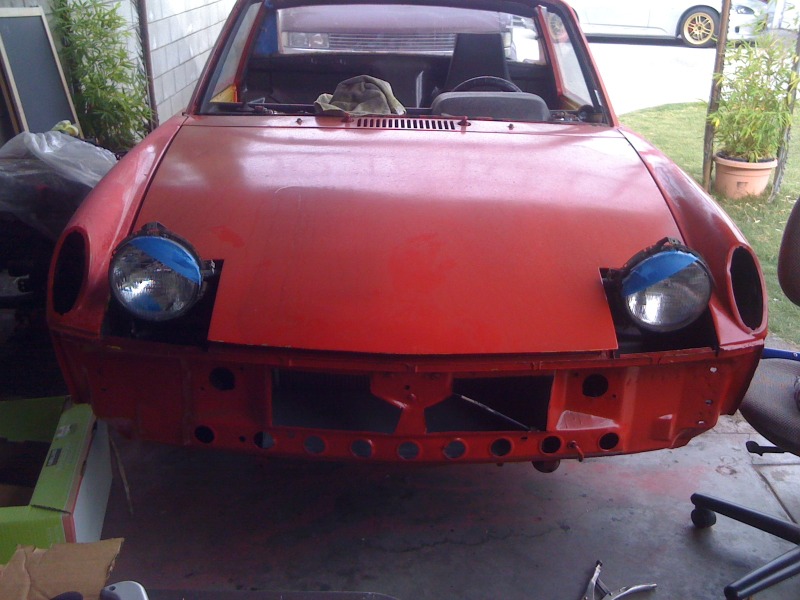
Cut the opening in the bumper and valance for the radiator: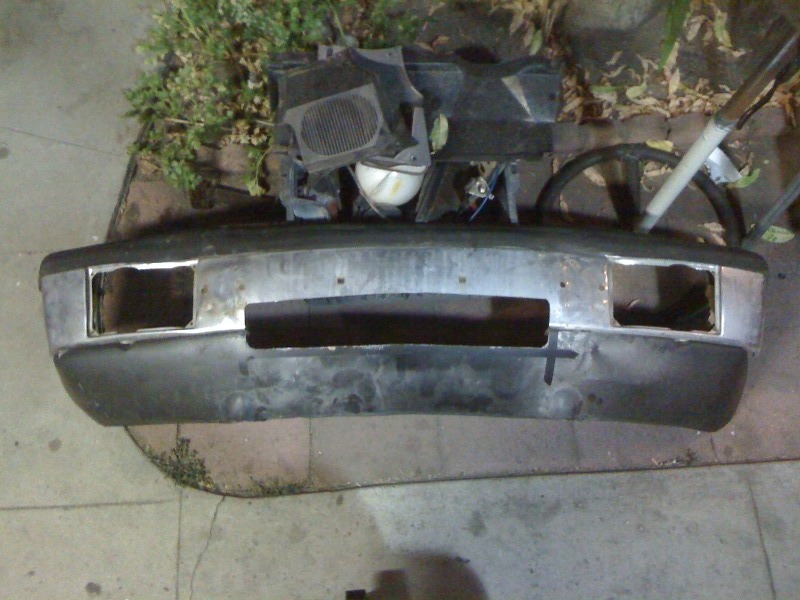
Posted by: VOX Jul 25 2011, 02:29 PM
80's ford f150 fuel pump.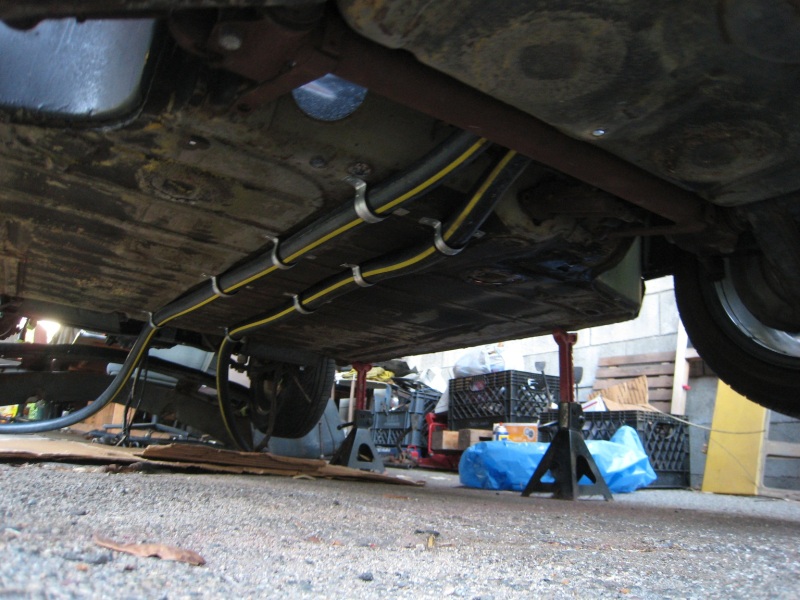
Posted by: hsus2k Aug 10 2011, 05:56 AM
Volks does sell 5X130 pattern TE37 18" wheels weighs about 18# each, but the offset are for 90 or newer cars. some thing like 50-60mm offset; they are 8.5" wide or 9"wides.
I don't like to use spacer or adaptors, especially for a track car.
Wish they had 16" with the ocrrect offset for 5X130 pattern.
My 16" SRS wheels for my VW are only 12.5# each.
Porsche OEM wheels are so heavy!
Posted by: JRust Aug 10 2011, 02:11 PM
I'm hoping you are running some rubber on the mounts for the radiator. It should have rubber on all points connecting to the car. If not the flex will kill your radiator sooner rather than later  .
.
Great progress overall! Keep it up 
Posted by: VOX Aug 10 2011, 08:01 PM
5x130 is the 911 bolt pattern, not willing to shell out the money for that conversion just yet, also 18" is quite big for the 914.
Yes i would not run spacers on a track or any race car, but this isnt one.
my volks are 16x7 and they weigh 12 lbs each.
yes we'll be adding rubber to the mounting points, when we find suitable rubber pieces but that isnt a priority right now, i really just want to get it running.
thanks for the comments guys.
currently i have the megasquirt 3 made, waiting to be installed, just scared of doing the wiring really, so its holding me back, also im trying to finish up other parts of the car. thinking of hosting a bbq so i could get some help reinstalling the shifter, throttle cable, clutch cable, and restoring the brakes, not sure if people in the area would be interested, but i'll make a separate thread on that when i have the parts for it.
Posted by: Prospectfarms Aug 13 2011, 04:55 AM
I just finished reading your thread (to date) and it was fascinating. Reminded me somewhat of Rique's but your project seems a little more "accessible" in terms of budget and choices. Thanks for posting it.
There must be something in the water in Southern California that produces braniac kids. It is also very generous of you (and all [most] of the posters of build threads) to entertain us with a slideshow of your work. Articulate and energetic young people like you inspire and amaze.
Posted by: oldschool Aug 13 2011, 10:08 AM
5x130 is the 911 bolt pattern, not willing to shell out the money for that conversion just yet, also 18" is quite big for the 914.
Yes i would not run spacers on a track or any race car, but this isnt one.
my volks are 16x7 and they weigh 12 lbs each.
yes we'll be adding rubber to the mounting points, when we find suitable rubber pieces but that isnt a priority right now, i really just want to get it running.
thanks for the comments guys.
currently i have the megasquirt 3 made, waiting to be installed, just scared of doing the wiring really, so its holding me back, also im trying to finish up other parts of the car. thinking of hosting a bbq so i could get some help reinstalling the shifter, throttle cable, clutch cable, and restoring the brakes, not sure if people in the area would be interested, but i'll make a separate thread on that when i have the parts for it.
What kind of bbq

Posted by: 76-914 Aug 13 2011, 01:41 PM
16x7 +40 offset 4x100 bolt pattern Volk TE37 in gun metal gray, i think we're gonna go w/ 225/50/16 sized tires. These were installed with 4x130 to 4x100 bolt pattern adapters.
Volks on a 914. Pretty cool.
BTW I bought the red car from Dale show in your first post.
Regards,
Michael
And I pulled the tranny out of your red car before you bought it! Odometer showed something like 43K IIRC. It was a solid bodied 914.
Posted by: VOX Aug 14 2011, 05:06 PM
thanks stuart, i appreciate the kind words.
as for the bbq, I'm thinking burgers, hot dogs, chicken, and ribs. depending on how many people are gonna show. hopefully a few experienced people will show and make things easier as far as the car goes.
Posted by: rohar Aug 14 2011, 05:37 PM
5x130 is the 911 bolt pattern, not willing to shell out the money for that conversion just yet, also 18" is quite big for the 914.
Yes i would not run spacers on a track or any race car, but this isnt one.
my volks are 16x7 and they weigh 12 lbs each.
yes we'll be adding rubber to the mounting points, when we find suitable rubber pieces but that isnt a priority right now, i really just want to get it running.
thanks for the comments guys.
currently i have the megasquirt 3 made, waiting to be installed, just scared of doing the wiring really, so its holding me back, also im trying to finish up other parts of the car. thinking of hosting a bbq so i could get some help reinstalling the shifter, throttle cable, clutch cable, and restoring the brakes, not sure if people in the area would be interested, but i'll make a separate thread on that when i have the parts for it.
We're facing similar challenges with terribly different engines. I'm at 4x114.3 for the rims and staring at my MS3 trying to get the confidence to wire it up. Good luck to you, from my recent experience, you may need it

Posted by: bfrymire Aug 14 2011, 08:24 PM
thanks stuart, i appreciate the kind words.
as for the bbq, I'm thinking burgers, hot dogs, chicken, and ribs. depending on how many people are gonna show. hopefully a few experienced people will show and make things easier as far as the car goes.
Too bad I am not closer.. I just did a MS install on a CIS 2.7l. The Subaru is different, but, not that much different. wiring is the easy part of the install.
I need to post some new pictures of my install. But, you just have to follow the wiring diagram, and match the wires.
Oh, and my install is a "from scratch" wiring harness. I just tap into the existing harness at one point, keyed power.
-- brett
Posted by: VOX Sep 18 2011, 05:09 PM
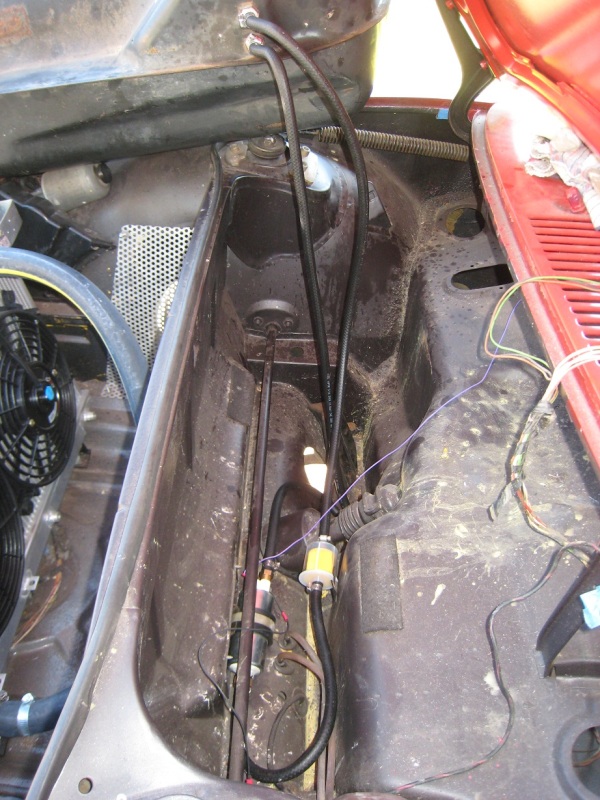
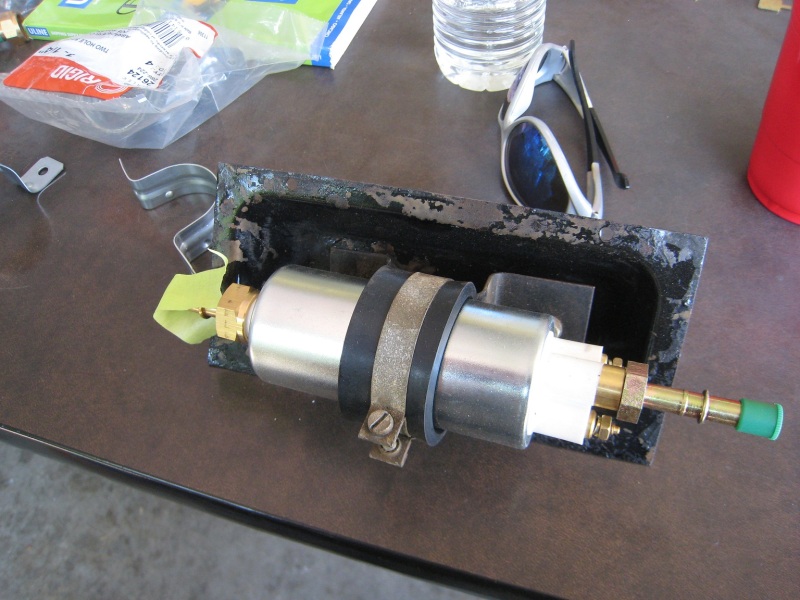
finished up the fuel related parts, i have an E2000 model fuel pump (electric inline) its rated at 70-90 psi. the filter is just a cheap one i plan to swap out after a few hundred miles on it.
the tank had some rust so i first threw a chain in there and shook it around. then i poured in about a gallon of vinegar and swished it around, left it over night, washed that out with water and baking soda a few times, then sprayed in wd40 to get more of the moisture out, then washed it out again with gasoline. seems to do something, since i found pieces of rust coming out with the first couple of washes. and from a visual inspection it was much better.
the hose im using is actually carburetor hose, SAE 30R7, it states not for fuel injection, however after some research i decided to go with it. the fuel injected hose costs about 7 dollars per foot. where as this stuff was $1.30
the FI stuff is rated at 100psi operating, and 900 burst. whereas the carb hose is rated at 50psi operating and 250 burst. purchase from Kragen aka O'reily, i got the stuff made by gates, so i find a little more comfort in that. gates saftey stripe II. i ended up using 20 ft of hose.
Posted by: bdstone914 Sep 18 2011, 05:39 PM
You are going to need to shorten those fuel lines coming off the tank. Anything more then about 5+ extra inches and the hose will become kink almost every time you set the fuel tank in. Ask me how I know 
Posted by: kg6dxn Sep 18 2011, 07:06 PM
If you are running EFI, please use the correct hose. I hade the low pressure hose blow on my EFI conversion. Dumped 1/4 tank on the freeway before I clamped it off.
Posted by: Prospectfarms Sep 18 2011, 10:05 PM
the hose im using is actually carburetor hose, SAE 30R7, it states not for fuel injection, however after some research i decided to go with it. the fuel injected hose costs about 7 dollars per foot. where as this stuff was $1.30
the FI stuff is rated at 100psi operating, and 900 burst. whereas the carb hose is rated at 50psi operating and 250 burst. purchase from Kragen aka O'reily, i got the stuff made by gates, so i find a little more comfort in that. gates saftey stripe II. i ended up using 20 ft of hose.
Here's a link to a Gate's "tech tips" on fuel hose
http://www.gates.com/oreilly/tech_tips/PermeationResistantFuelLineHose.pdf
It indicates that 7mm SAE 30R7 hose has a working pressure rating of 50psi and 3/8" has a working pressure rating of 35psi. It also warns that 30R7 line is not suitable for any fuel injected system because of high pressure and the possibility of "sour gas" in the fuel return line. The Gates company asserts that only SAE 30R9 hose should be attached to any fuel injection system.
Fuel hose with a SAE rating of 30R9 is five time more expensive than 30R7 and it's in Gates interest to sell more of the 30R9 -- I presume.
What is sour gas? Is it the same as what is referred to as oxidized gas? When a manufacturer describes a technical condition with a loaded phrase, e.g., "sour gas,". it means they are selling something. That's not to say they are using bad faith -- there is no question that 30R9 is much more durable than R7
The Bosch pressure regulator appears to be a spring loaded adjustable check valve. Could it produce a pressure surge that is much greater than its adjusted setting? For instance, when you are running WOT and then completely let off the throttle. An engineer could figure that out pretty easily. I cannot.
What was the quality of the OEM hose in the mid 1970's? Did a lot of 914's blow fuel lines then? We all know VW's burned all the time still do today, but that problem is not related to fuel pressure as their cam-actuated mechanical pumps only produce around 5-8 psi.
Different rubber degrades differently from a given heat, which I think is an equally important consideration in an air-cooled application-- although I've yet to see any rubber hose that could handle contact with a cylinder head. 30R7 is rated to 257F./ 125C. while R9 goes to 270F./135C. The 13 degree difference doesn't sound significant but I don't know what a normal engine bay temperature is. If it's between 258F. and 270F. then R9 would be much better than R7. Otherwise it might not make a difference.
Posted by: VOX Sep 19 2011, 12:08 AM
I'll check on the lines bruce, i dont think they were kinking but i'll try to get a flashlight underthere and take a look. i wanted to leave enough line for me to pull the tank and inspect or do maintanence.
what kind of pump were you using mike? was it a high pressure walbro or maybe better? having the hose blow off is a major concern of mines, did your hose burst? or did it blow at a connection?
with my applications and from my research i've read about the 30r7 vs 30r9 and chose to go with the 30r7, if i run across problems later on i'll switch to 30r9. there are some VW guys who are switching to the E2000 fuel pump and running the 30r7, they've run their test on the hose as well, with burst pressures of over 250. not sure if my fuel pump and pressure regulator will cause pressure to exceed or even get close to that.
if i was more wealthy i would definately go with the fuel injection hose, but for now i'll work with what i've got.
thanks stuart, i've gone thru alot of the info, i'm sure the fuel injection stuff is more profitable, also the FI stuff creates less pollution. i'm not too concerned with the temperature, i believe it is located in cool locations. i'll be keeping a close eye on the fuel line.
Posted by: Prospectfarms Sep 19 2011, 12:42 AM
"If i was more wealthy i would definately go with the fuel injection hose, but for now i'll work with what i've got."

I'd spent $100 on FI hose then messed up one of the legs of the fuel lines. When I ran out of R9 I used R7. I don't think it will fail for a while anyway. I'm more concerned with the connections and routing everything out of harms way. We'll see.
Posted by: dlo914 Jan 10 2012, 12:43 AM
The motor has been hooked up with MegaSquirt 2. Purchased a new size 58-RDL battery from Autozone, bought some angle stock to make the battery tray and then bolted it down into the top right corner of the trunk. And then i retrofitted trunk shocks off a Lexus ES250 to the 914's trunk. Here's a pick of the rear trunk now: 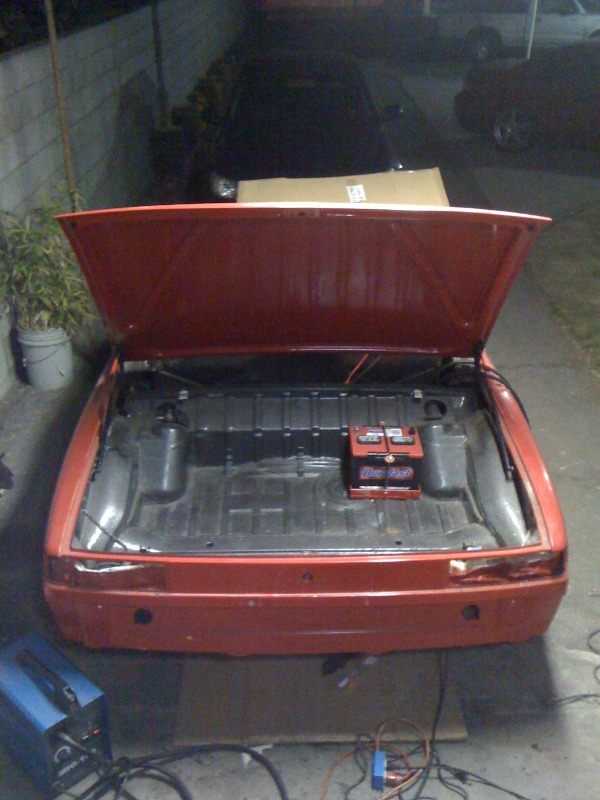
Posted by: dlo914 Jan 10 2012, 04:42 PM
Had a machinist machine down our crank pulley to accept a trigger wheel: 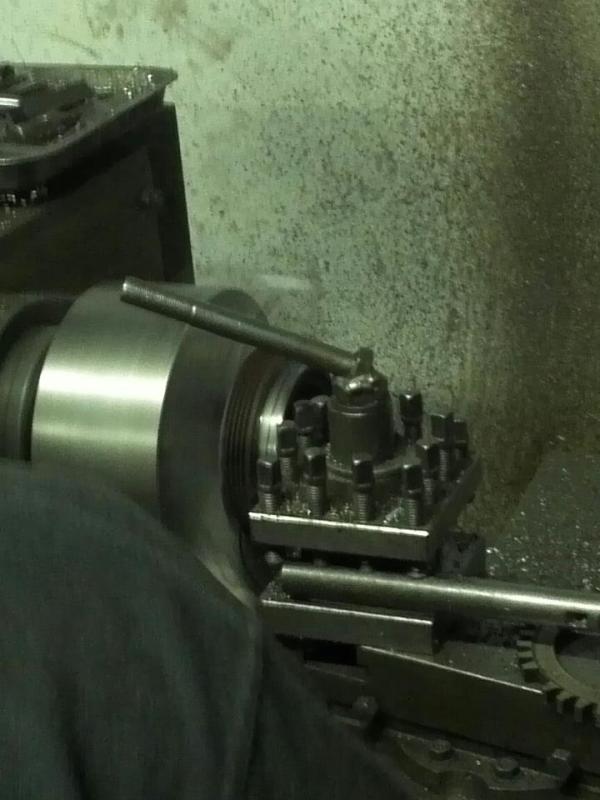
Finished by pressing on the trigger wheel: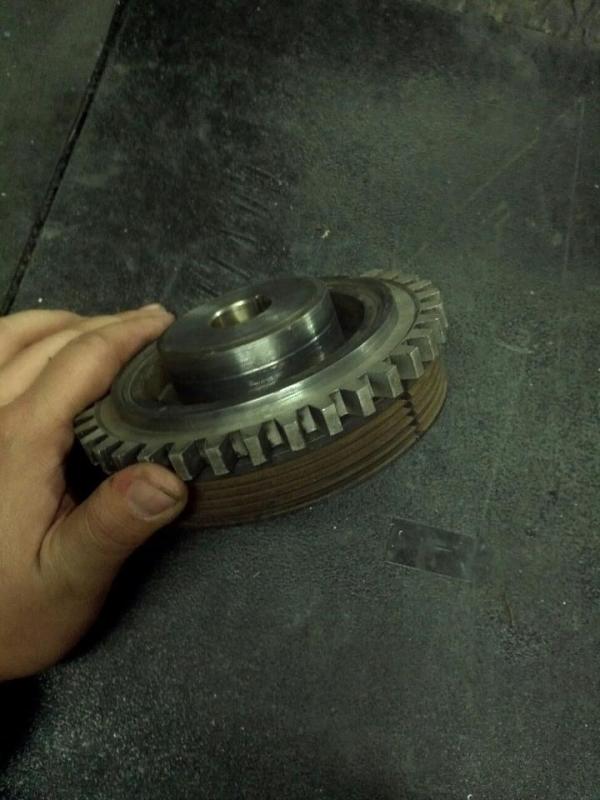
Posted by: Meoshe Jan 20 2012, 10:36 PM
Nice work, can't wait to see this thing run. Keep up the updates.
Posted by: Hammy Jan 21 2012, 01:54 AM
This is a great looking project, glad you guys are keeping along with it. I'd like to do a suby some day.
Posted by: ClayPerrine Jan 21 2012, 08:57 AM
I am going to throw in my warning.
GET THE CORRECT EFI FUEL HOSE!!!
Gasoline is nothing to screw around with.
I have watched my wife's 914 burn on the side of the road. It was like watching a family member die. It almost cost me my marriage. It took 6 years to get the car fixed and back on the road.
Please don't risk all your hard work and money on a few bucks worth of fuel hose.
finished up the fuel related parts, i have an E2000 model fuel pump (electric inline) its rated at 70-90 psi. the filter is just a cheap one i plan to swap out after a few hundred miles on it.
the tank had some rust so i first threw a chain in there and shook it around. then i poured in about a gallon of vinegar and swished it around, left it over night, washed that out with water and baking soda a few times, then sprayed in wd40 to get more of the moisture out, then washed it out again with gasoline. seems to do something, since i found pieces of rust coming out with the first couple of washes. and from a visual inspection it was much better.
the hose im using is actually carburetor hose, SAE 30R7, it states not for fuel injection, however after some research i decided to go with it. the fuel injected hose costs about 7 dollars per foot. where as this stuff was $1.30
the FI stuff is rated at 100psi operating, and 900 burst. whereas the carb hose is rated at 50psi operating and 250 burst. purchase from Kragen aka O'reily, i got the stuff made by gates, so i find a little more comfort in that. gates saftey stripe II. i ended up using 20 ft of hose.
[/size][/size]
Posted by: dlo914 Jan 22 2012, 01:20 AM
Also rebuilt the pedal cluster w/ bronze bushings: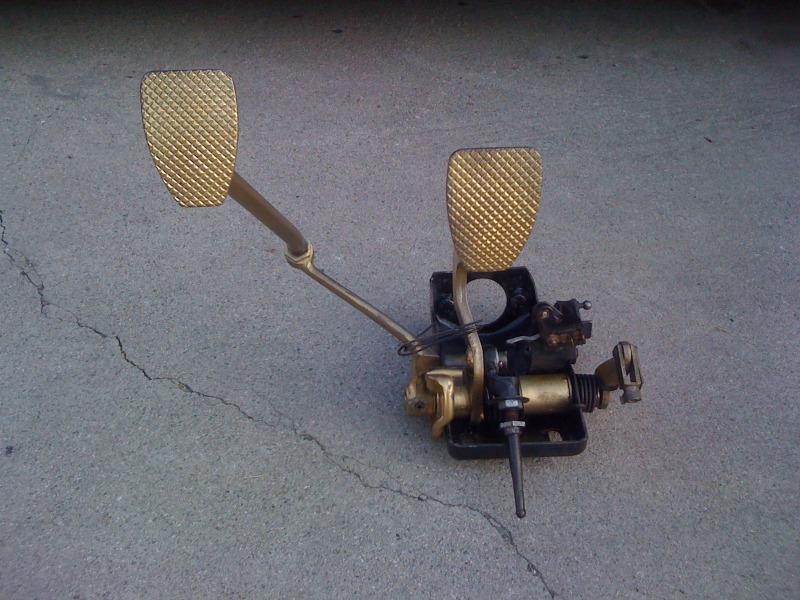
and rebuilt all four of the calipers, painted them goldish/bronze and installed them: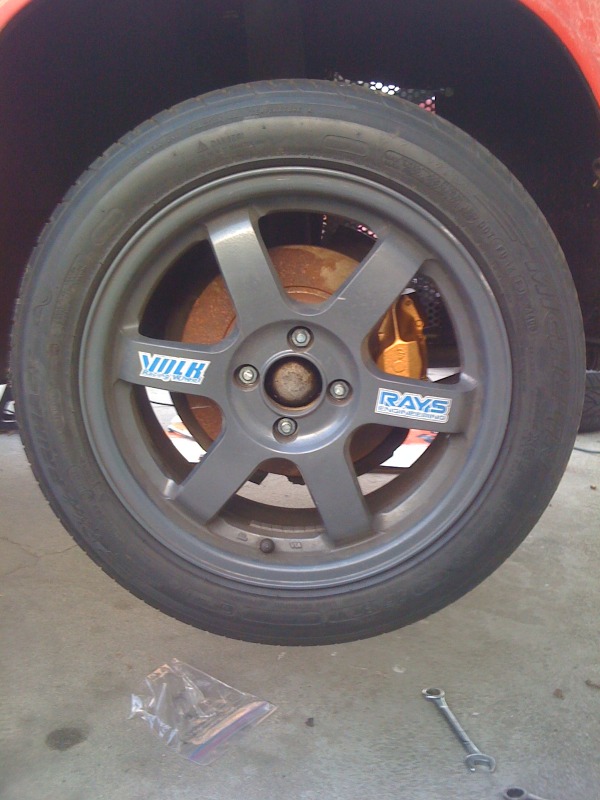
Posted by: 396 Jan 22 2012, 06:54 AM
I am going to throw in my warning.
GET THE CORRECT EFI FUEL HOSE!!!
Gasoline is nothing to screw around with.
I have watched my wife's 914 burn on the side of the road. It was like watching a family member die. It almost cost me my marriage. It took 6 years to get the car fixed and back on the road.
Please don't risk all your hard work and money on a few bucks worth of fuel hose.
finished up the fuel related parts, i have an E2000 model fuel pump (electric inline) its rated at 70-90 psi. the filter is just a cheap one i plan to swap out after a few hundred miles on it.
the tank had some rust so i first threw a chain in there and shook it around. then i poured in about a gallon of vinegar and swished it around, left it over night, washed that out with water and baking soda a few times, then sprayed in wd40 to get more of the moisture out, then washed it out again with gasoline. seems to do something, since i found pieces of rust coming out with the first couple of washes. and from a visual inspection it was much better.
the hose im using is actually carburetor hose, SAE 30R7, it states not for fuel injection, however after some research i decided to go with it. the fuel injected hose costs about 7 dollars per foot. where as this stuff was $1.30
the FI stuff is rated at 100psi operating, and 900 burst. whereas the carb hose is rated at 50psi operating and 250 burst. purchase from Kragen aka O'reily, i got the stuff made by gates, so i find a little more comfort in that. gates saftey stripe II. i ended up using 20 ft of hose.
[/size][/size]
Excellent advice!
Posted by: BIGKAT_83 Jan 22 2012, 07:48 AM
I am going to throw in my warning.
GET THE CORRECT EFI FUEL HOSE!!!
Gasoline is nothing to screw around with.
I have watched my wife's 914 burn on the side of the road. It was like watching a family member die. It almost cost me my marriage. It took 6 years to get the car fixed and back on the road.
Please don't risk all your hard work and money on a few bucks worth of fuel hose.
finished up the fuel related parts, i have an E2000 model fuel pump (electric inline) its rated at 70-90 psi. the filter is just a cheap one i plan to swap out after a few hundred miles on it.
the tank had some rust so i first threw a chain in there and shook it around. then i poured in about a gallon of vinegar and swished it around, left it over night, washed that out with water and baking soda a few times, then sprayed in wd40 to get more of the moisture out, then washed it out again with gasoline. seems to do something, since i found pieces of rust coming out with the first couple of washes. and from a visual inspection it was much better.
the hose im using is actually carburetor hose, SAE 30R7, it states not for fuel injection, however after some research i decided to go with it. the fuel injected hose costs about 7 dollars per foot. where as this stuff was $1.30
the FI stuff is rated at 100psi operating, and 900 burst. whereas the carb hose is rated at 50psi operating and 250 burst. purchase from Kragen aka O'reily, i got the stuff made by gates, so i find a little more comfort in that. gates saftey stripe II. i ended up using 20 ft of hose.
[/size][/size]
I don't want to beat on you too much,but you do need to redo that fuel system. The hose clamps look to be the unshielded worm type. These will loosen and are not to be used on high pressure fuel systems. I don't think that plastic fuel filter will hold anything like 70psi.
Whats up with the trigger wheel? You didn't want to use the stock subaru stuff.
Bob
Posted by: VOX Jan 22 2012, 01:33 PM
i understand the need to replace the fuel hose, and i have intentions on replacing them with the correct hose, when i have the necessary funds. as for the fuel filter, that was only meant as a temporary filter to catch all the left over junk from the fuel tank, i plan to replace that after i run a tank of fuel through the system. and the hose clamps, i've already started to pick up the correct fuel hose clamps at the pick-a-part.
the location where i got the engine from did not include the stock wiring harness and ecu. after looking at the prices from the dismantlers (yes i know a ripoff from them.) i decided it was simplier and more cost effective to go with an aftermarket engine management system. especially if i ever intend on using forced induction later down the line, or if this motor went out on me, to switch to an ej25 or ej22t or ej20t
Posted by: VOX Jan 29 2012, 01:33 AM
intake is in. replaced all the fuel lines with r9, found dayco 5/16" on amazon for 90$ 25 foot roll. for all those looking for it. switched all the clamps to FI clamps. dlo has a the pictures he'll probably post soon.
Posted by: dlo914 Jan 29 2012, 07:47 PM
Made a hole with a 3.5" hole saw and then straightened out the bottom to create a U shaped hole and lined it with some rubber hosing. 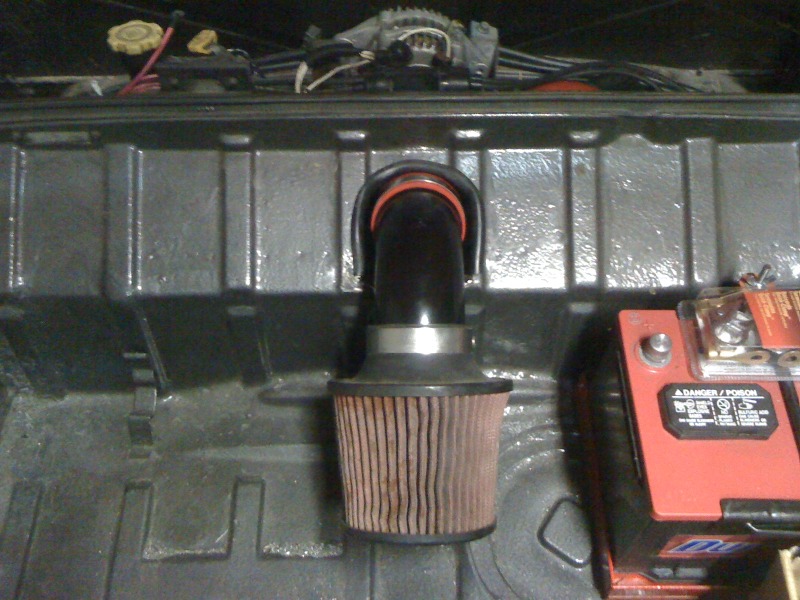
Posted by: dlo914 Feb 5 2012, 04:12 AM
Continuing with the rear trunk:
Mounted the Megasquirt ECU: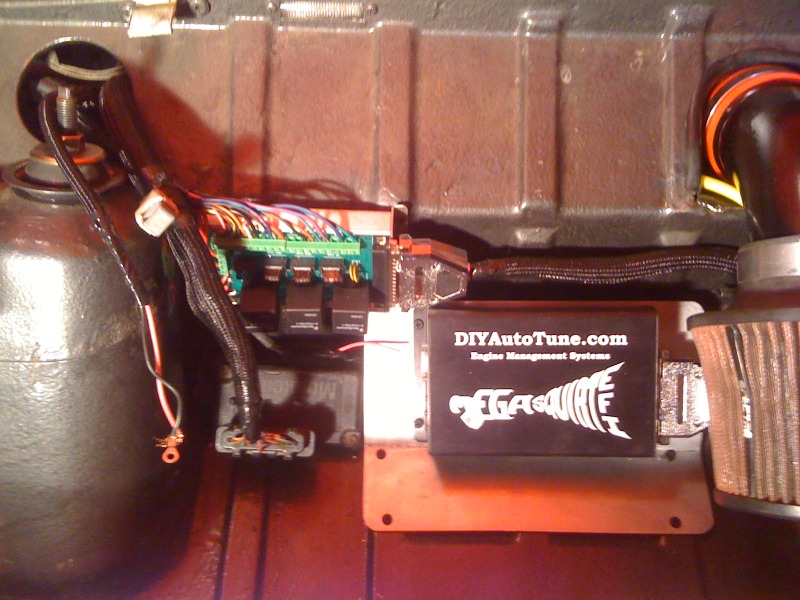
Our steering wheel setup with an NRG quick release hub and 30mm spacer. (got the sparco for $30 off a friend)
And our driver seat setup: replica fixed Bride seat mounted on the stock seat rail (donated for free from James' uncle)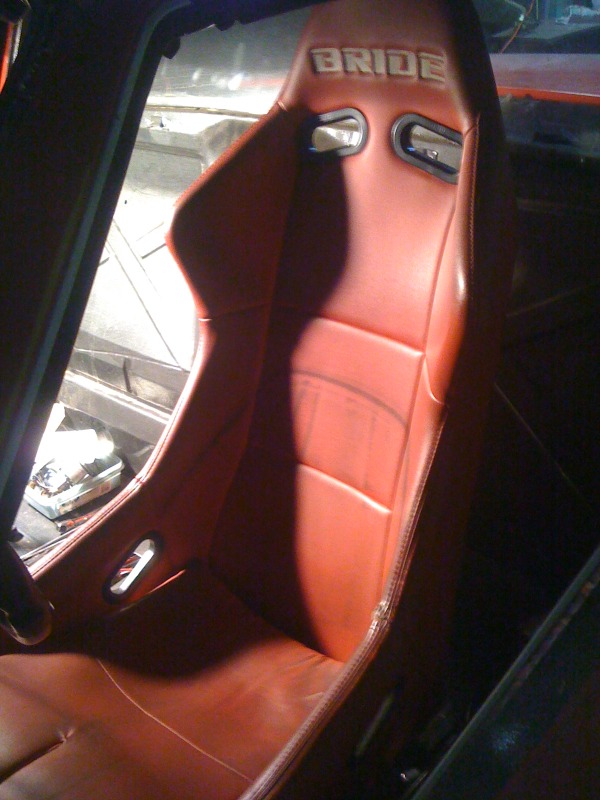
Posted by: VOX Feb 10 2012, 04:07 AM
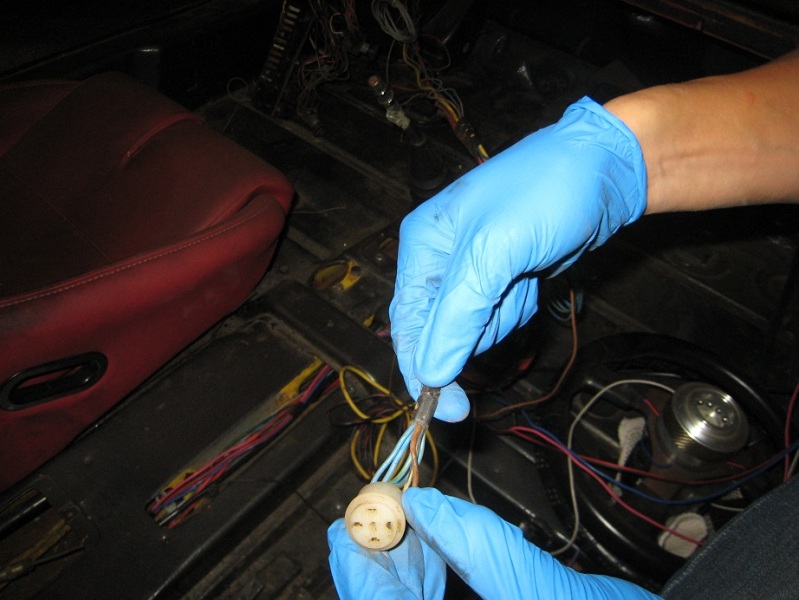
whats this plug connect to? i've been working on wiring, trying to pull all the wires that arent being used. any useful diagrams would be appreciated. its located in the cabin by the passenger foot well.
Posted by: ClayPerrine Feb 10 2012, 09:55 AM
whats this plug connect to? i've been working on wiring, trying to pull all the wires that arent being used. any useful diagrams would be appreciated. its located in the cabin by the passenger foot well.
Wiring for emissions equipment, not used anywhere but the Peoples Republic of California.
I would suspect your car is a 75/76, or has a 75/76 wiring harness.
Posted by: VOX Feb 10 2012, 02:22 PM
thank you good sir! yes it is a 75.
Posted by: dlo914 Feb 19 2012, 09:49 PM
For those looking for new rear sway bar bushings, we found a new set of polyurethane bushings @ Autozone for $17.99+tax. They come with new brackets, washers, and grease. They come in either black or red. They're only available online here http://www.autozone.com/autozone/accessories/Energy-Suspension-17-mm-bar-dia-red-non-greaseable-sway-bar-bushing-set/_/N-25ssZ1z141hj?itemIdentifier=355863_0_0_
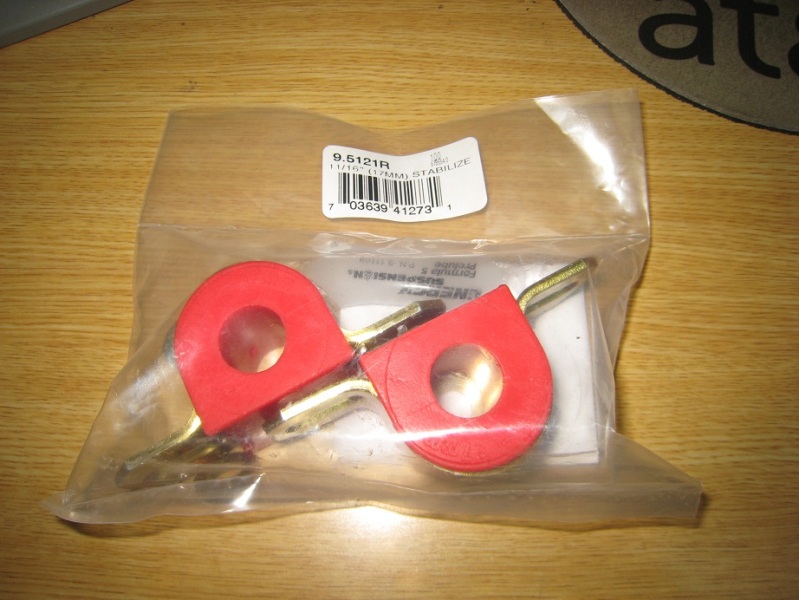
this accepts a 17mm sway bar.
Posted by: VOX Feb 25 2012, 07:37 PM
picked up a hi-torque starter from imi and a 19mm brake master cylinder, question about the hi-torque starter, are there only two wires going to it? the main + from the battery, and a + from the ignition?
and installed the e-brake but unsure if this is the correct orientation, if someone could confirm or correct us on that, here's a picture.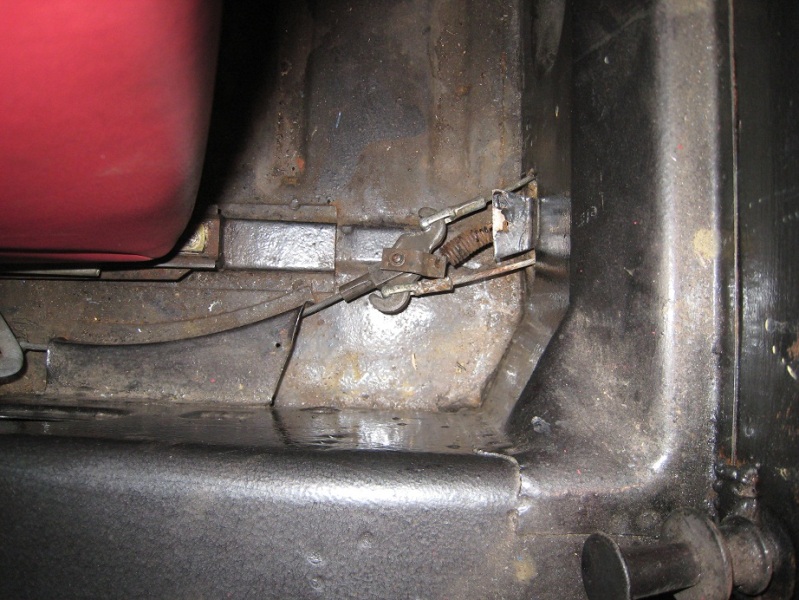
Posted by: dlo914 Feb 27 2012, 05:37 AM
![]()
Posted by: dlo914 Mar 25 2012, 06:59 PM
Won a set of Euro Tail Lights! WOOHOO! $89 shipped to my door step!!!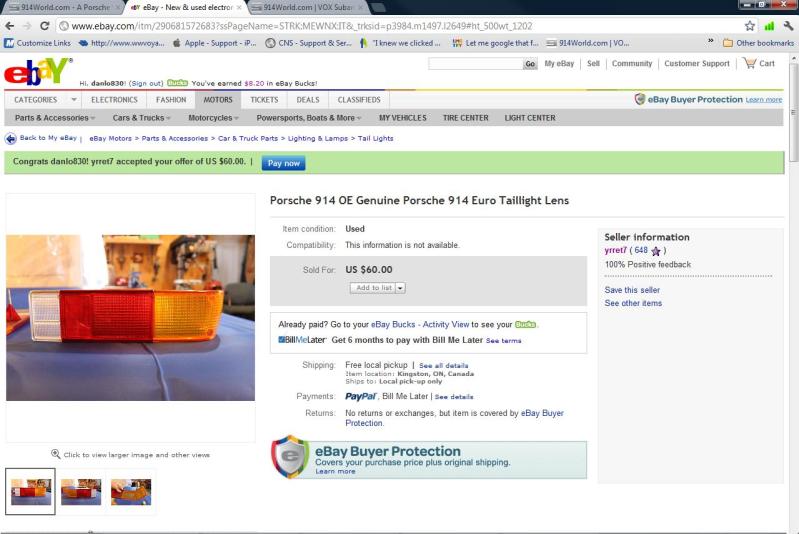
Posted by: VOX Apr 13 2012, 01:48 AM
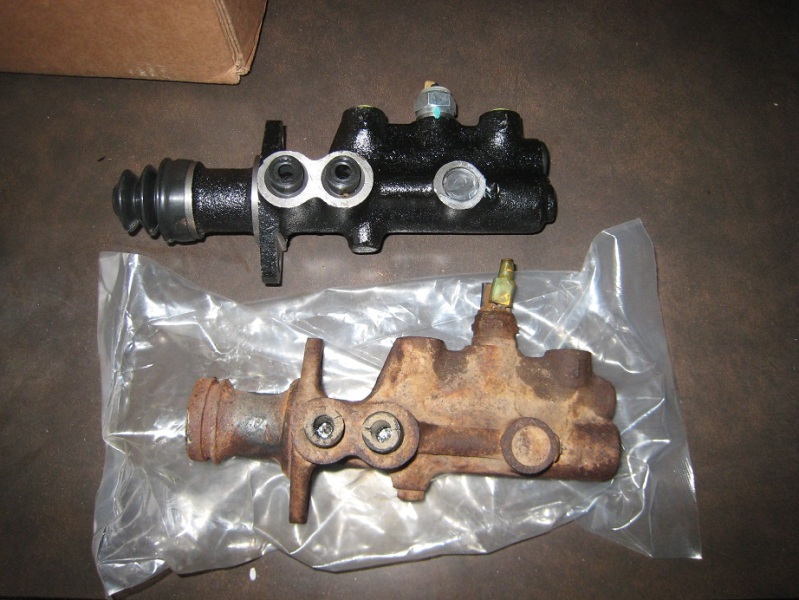
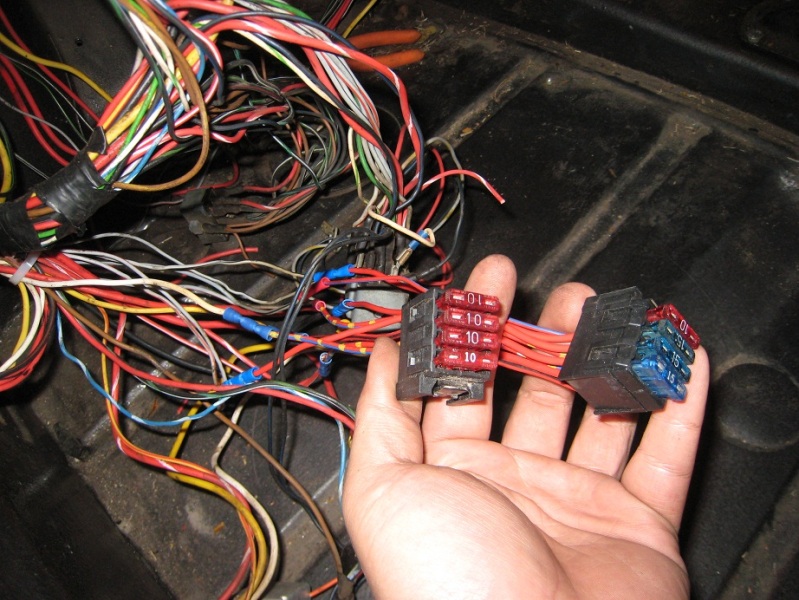
got the hi-torque starter in, got the axles in, also switched to a 19mm master cylinder still need to bleed it tho. and picked up a few fuse holders at the pick a part and swapped the fuse panel to new fuses. for the 8 amp fuses, i used 10 amp, and the 16 used 15, are there any problems with this?. plans are to custom wire an hid headlight kit, as well as a foglight kit. and after we bleed the brakes, off to the muffler shop.
Posted by: Rotary'14 Apr 13 2012, 06:17 PM
Wow that will be running soon,, congrats to you guys!!
I can't wait to see it run.
-Robert
Posted by: VOX Apr 16 2012, 11:15 PM
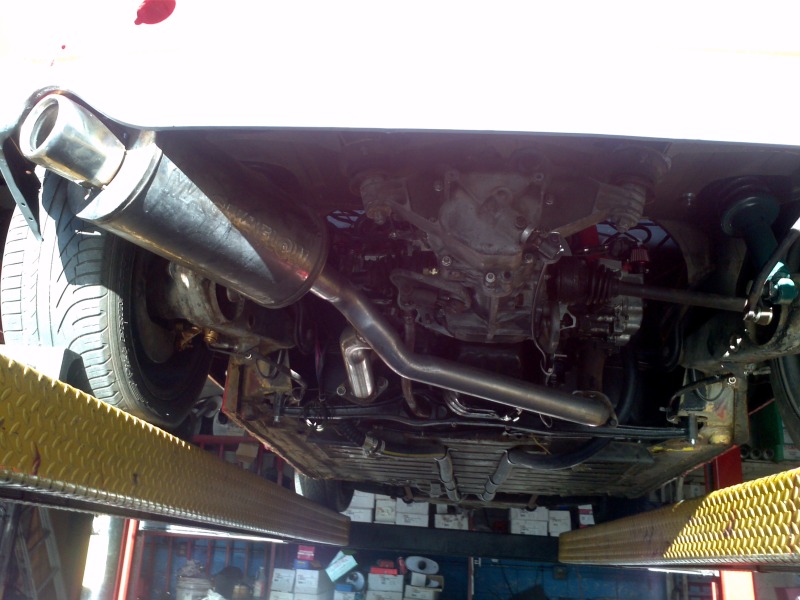

pushed the 914 to the muffler shop this morning. 2 1/4 inch piping.
Posted by: dlo914 Apr 16 2012, 11:18 PM
our baby can finally roar with new piping 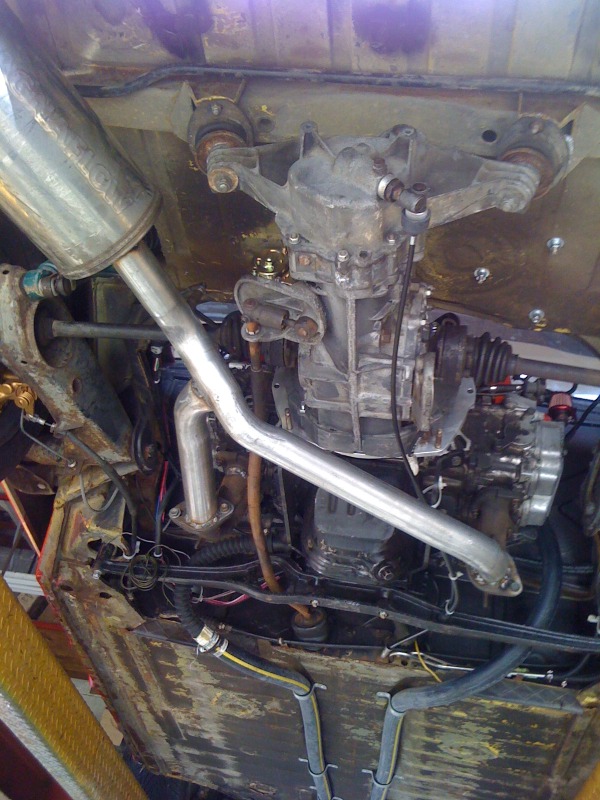
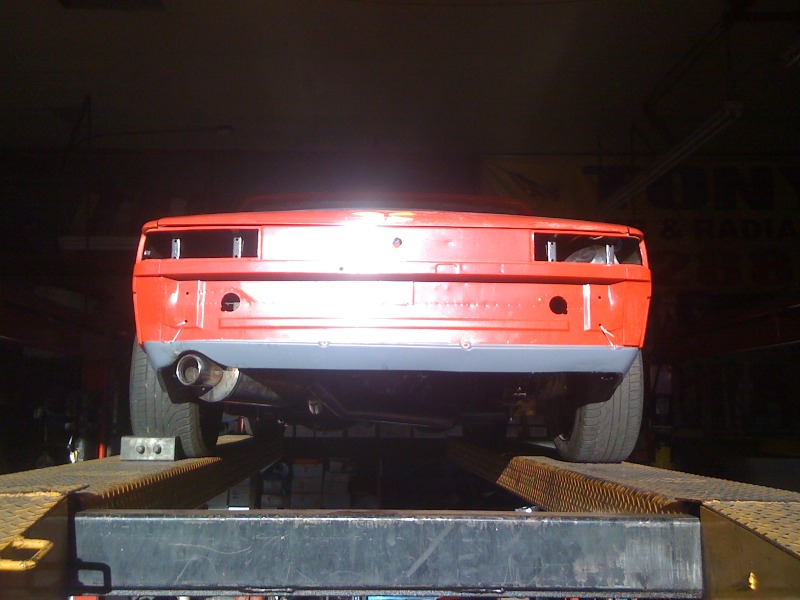
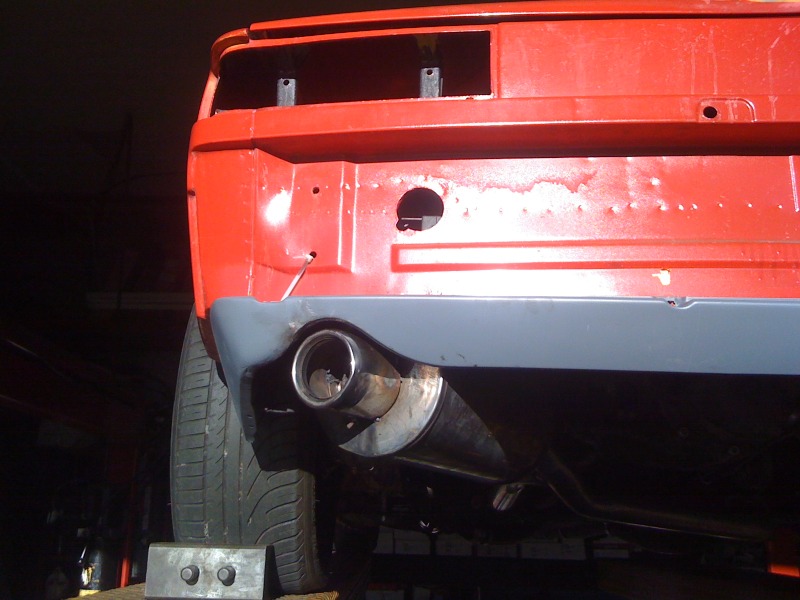
not bad for $125 out the door, they reused the stock exhaust manifold stubs. modified the driver side stub to clear the shift rod and then used 2.25" piping, with uneven running lengths that join into the magnaflow canister tipped off with a shortened S2000 AP1 muffler tip.
Posted by: dlo914 Apr 17 2012, 12:19 AM
It's not the best quality of work on that header, but it's functional and fits the mood of the project, which was to keep it affordable with a small budget.
Posted by: IM101 Apr 17 2012, 01:29 PM
Wow you guys are getting so close, makes me pretty jelous, i havent even started mine... keep it up!
-Ian M.
Posted by: dlo914 Apr 19 2012, 03:36 AM
Wow you guys are getting so close, makes me pretty jelous, i havent even started mine... keep it up!
-Ian M.
You've got a sweet chassis to start with mMm aubergine and flares

Posted by: fasthonda Apr 19 2012, 04:47 AM
It's not the best quality of work on that header, but it's functional and fits the mood of the project, which was to keep it affordable with a small budget.
Exhaust looks great from the rear. I like the placement of the muffler. Only thing I would change would be to use a collector instead of just a 90 degree 'T' where the 2 sides merge for better flow.
Posted by: VOX Apr 19 2012, 01:57 PM
yea thats what i thought they were gonna do. should have been more like a Y then a T. the driver side should have been bent the other direction towards the muffler. but it was alot cheaper then the other quotes i had gotten. possibly in the future i'll get the collector redone. once the cars up and running.
any videos of your car yet michael?
Posted by: oldschool Apr 19 2012, 02:11 PM
yea thats what i thought they were gonna do. should have been more like a Y then a T. the driver side should have been bent the other direction towards the muffler. but it was alot cheaper then the other quotes i had gotten. possibly in the future i'll get the collector redone. once the cars up and running.
any videos of your car yet michael?
Dude love to come by and check it out ...let me know when your around.
Posted by: VOX Apr 19 2012, 08:10 PM
sure, i'll let you know when its running tho. should be soon, i hope.
Posted by: fasthonda Apr 20 2012, 08:11 PM
yea thats what i thought they were gonna do. should have been more like a Y then a T. the driver side should have been bent the other direction towards the muffler. but it was alot cheaper then the other quotes i had gotten. possibly in the future i'll get the collector redone. once the cars up and running.
any videos of your car yet michael?
Not yet. Just added a 5 point harness and I'm in the process of reinstalling the transmission with shortened gear ratios. Wil start making test drives again once the tranny is back in. Got my front GT valance mounted also. Been very busy with family and work so my progess has really slowed.
With my set up I'm able to replace the transmission without removing the exhaust or lifting the car. Nice track feature!
Posted by: VOX May 22 2012, 11:26 PM
figure i'd update on what i've been up to.
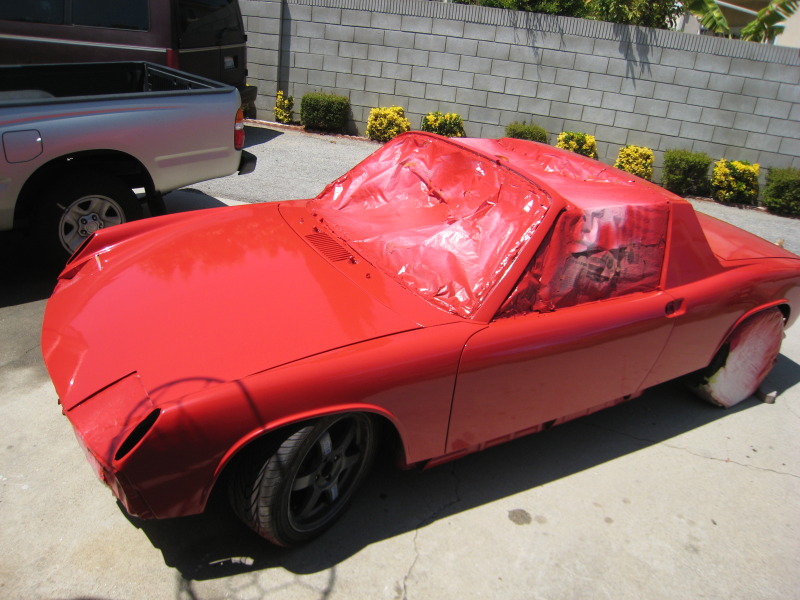
heres my CSOB paint job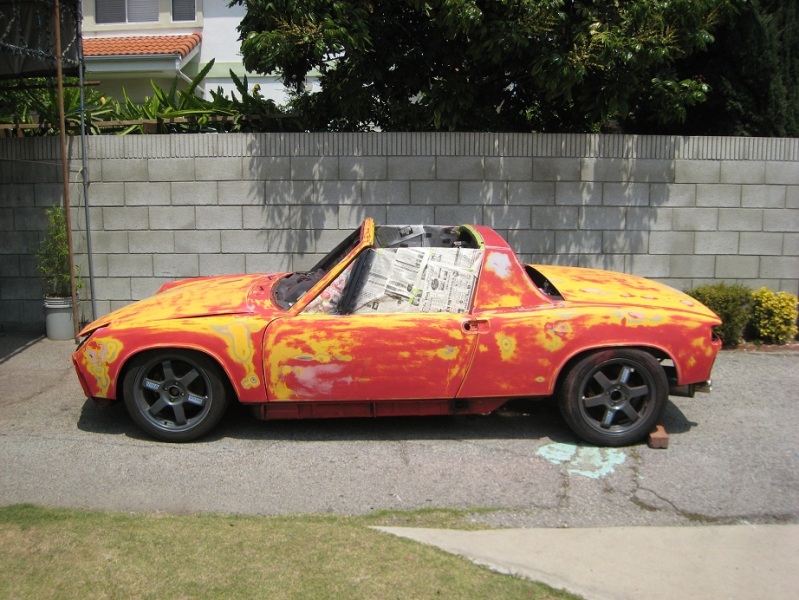
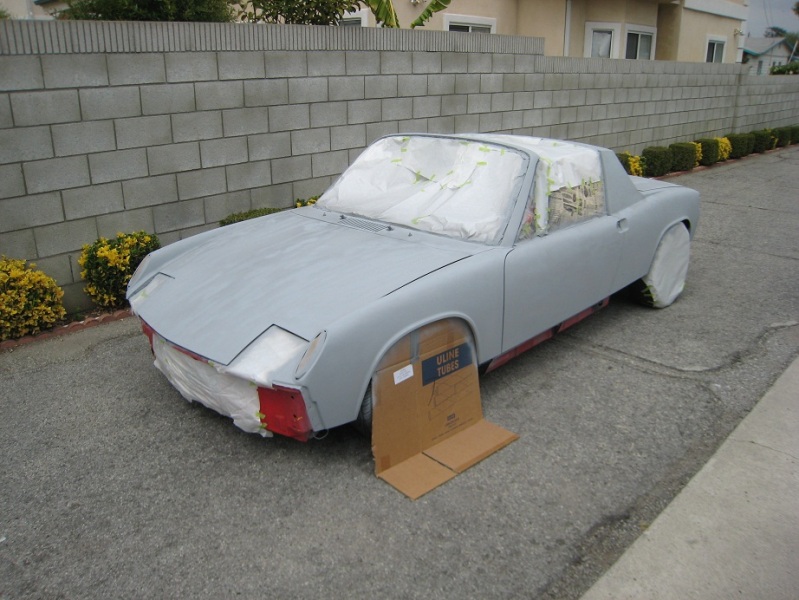
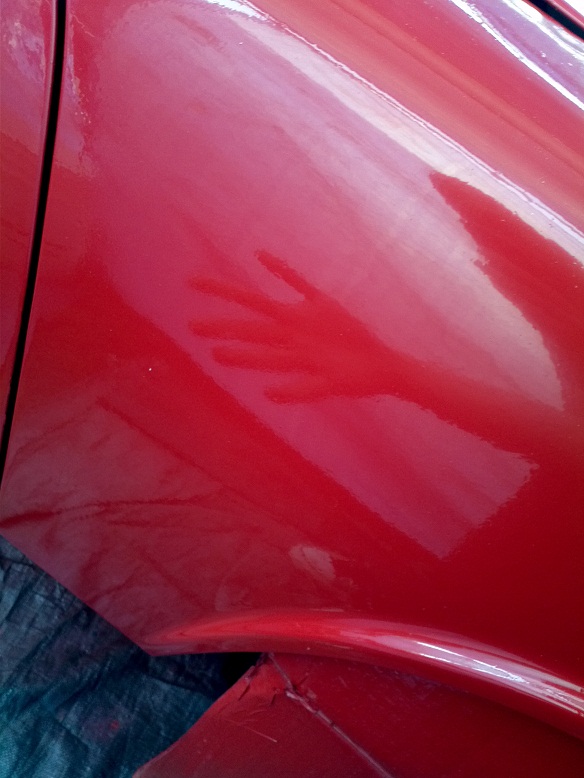
paints uncut, needs to be wetsanded and buffed out.
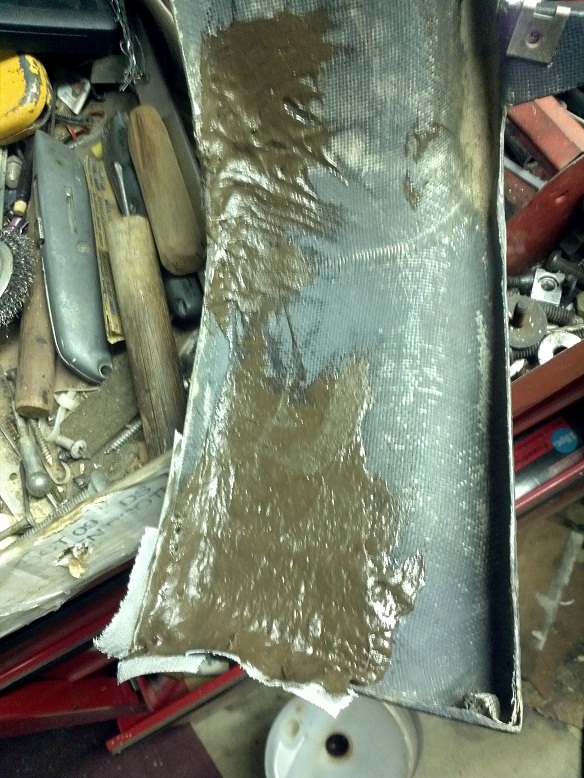
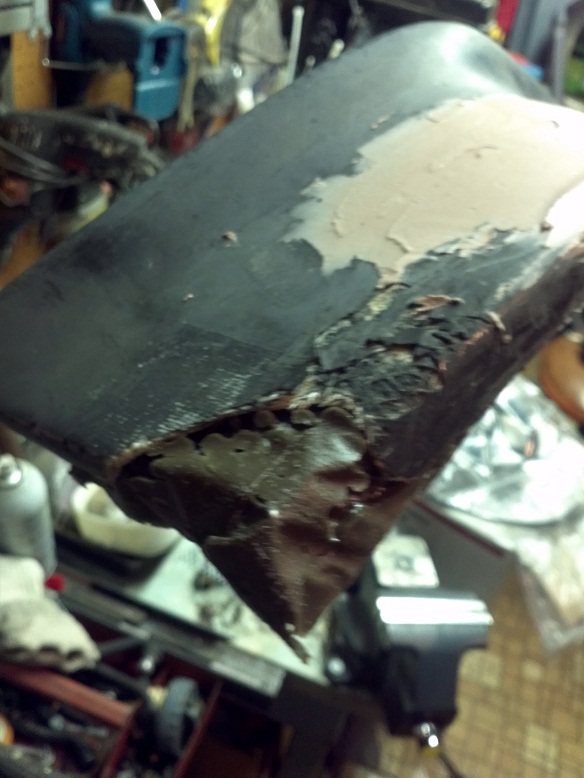
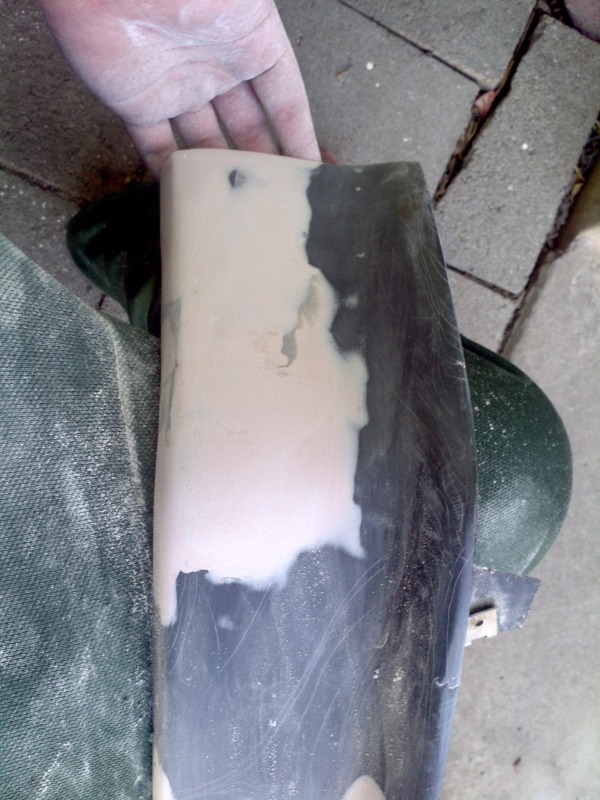
then picked up a LE fiberglass lip with a chunk missing, so did a repair with short strand fiberglass. i added a layer of fiberglass to the front, but dont have a picture of the finished product yet. im still sanding it.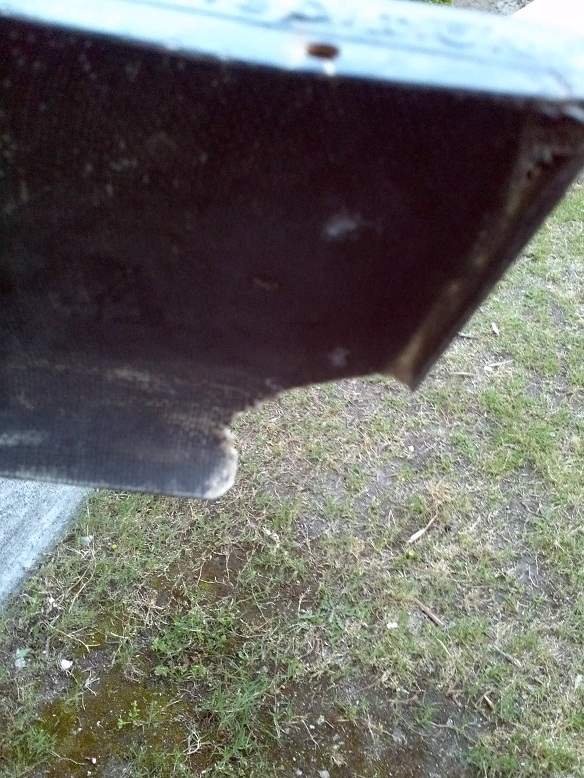
Posted by: VOX May 23 2012, 03:20 PM

Posted by: dlo914 May 31 2012, 01:48 PM
Picked up that fiberglass LE lip from the GnR swapmeet of Leamon (heeltoe914) for a smoking price, but it required a little repair. We're in the home stretch. Now i just gotta get my lazy ass up and diagnose the brake issues
Posted by: dlo914 Jul 22 2012, 05:51 AM
Took apart the rear right caliper to find one of the new rubber seals shredded, in the process of contacting Eric Shea for a replacement. Other than repaired a nut on the rear bumper by drilling out the seized nut and welding in the correct bolt into the drilled out hole. It was an easier solution than to weld in another nut of same size and risk distorting the threads from the weld. We have a stick welder so it was easier going with the bolt solution.
Posted by: VOX Aug 29 2012, 01:37 PM
Posted by: dlo914 Aug 12 2019, 11:40 PM
Update:
Moving the car to my place Wednesday night. James is selling me the car, and i will finish up the swap and get it running
Powered by Invision Power Board (http://www.invisionboard.com)
© Invision Power Services (http://www.invisionpower.com)