Printable Version of Topic
Click here to view this topic in its original format
914World.com _ 914World Garage _ Explore inside a MPS
Posted by: Bleyseng Feb 24 2004, 11:47 PM
Here is a MPS that doesn't hold a vacuum. Looks like a rebuilt unit too.
Attached image(s)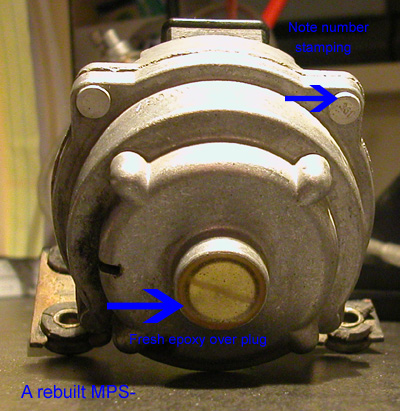
Posted by: Bleyseng Feb 24 2004, 11:49 PM
After drilling out the rivets, the MPS comes apart
Attached image(s)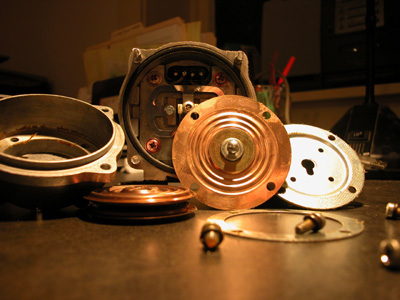
Posted by: Bleyseng Feb 24 2004, 11:50 PM
covers with and without the epoxy
Attached image(s)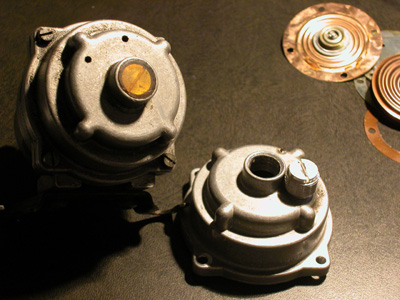
Posted by: Bleyseng Feb 24 2004, 11:52 PM
After heating the epoxy with a heat gun, it is scraped off and the plug is screwed into the cover. The threads are carefully cleaned so the plug screws back in.
Attached image(s)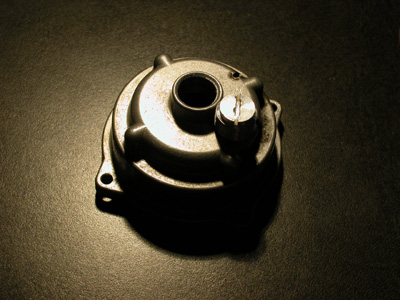
Posted by: Bleyseng Feb 24 2004, 11:53 PM
A good diaphram without any cracks.
Attached image(s)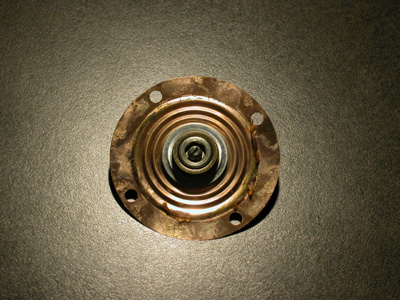
Posted by: Bleyseng Feb 24 2004, 11:54 PM
The diaphram is installed with a light coating of sealant
Attached image(s)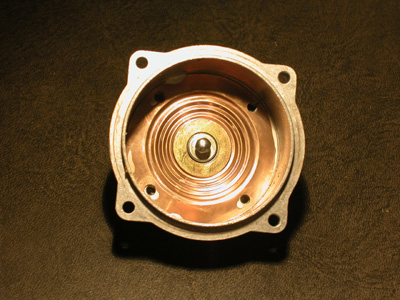
Posted by: Bleyseng Feb 24 2004, 11:54 PM
The spacer installed
Attached image(s)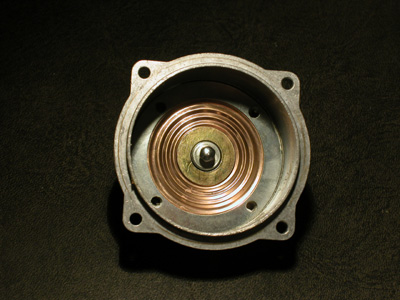
Posted by: nebreitling Feb 25 2004, 02:13 PM
nice shots, thanks. can we put this in classics?
Posted by: davep Feb 25 2004, 02:17 PM
I need a couple of "not-yet visible cracks" diaphragms.
DaveP
Posted by: reverie Feb 25 2004, 08:01 PM
Excellent photos. 
What kind of digital camera are you using?
Posted by: anthony Feb 25 2004, 11:27 PM
So why wasn't that MPS holding a vacuum? Are you putting back the same diaphram?
Posted by: Bleyseng Feb 25 2004, 11:42 PM
Looks like the paper gasket and the big o ring weren't sealing. Trying to finish that MPS tonight as I read all the funny posts.
Geoff
Oh, the shots were taken with a Nikon 5000 without a flash. DaveP, I wish I had a stash of good diaphram!!! I have two or three left.
Posted by: ChrisReale Feb 25 2004, 11:44 PM
Read this funny man: Where is the MPS you still owe me? 
If all goes well with my Kit Carlson, you guys can take yer MPS's and...... 
Posted by: Bleyseng Feb 25 2004, 11:49 PM
What MPS?
Geoff
(good thing you live so far away) :finger2:
Powered by Invision Power Board (http://www.invisionboard.com)
© Invision Power Services (http://www.invisionpower.com)