Printable Version of Topic
Click here to view this topic in its original format
914World.com _ 914World Garage _ Zaney's Suby Rustoration Adventure
Posted by: Zaney Apr 23 2009, 11:06 PM
Well, I finally have found the time to put down some of the ideas and pictures that have been going on for about a year now.
It all started last April when I found out that hitting the curb in a round-about is not the best thing for your suspension. Needless to say that it definitely put my '74 out of service. The passenger A-Arm broke, bent the tie rod, ruined the ball joint, bottomed out the shock, and blew a tire. The only thing that I damaged was my pride. 
So, thanks to my Dad's AAA the teener was towed 3 blocks back to his house and waited to be brought back to Redmond from Tacoma (40 miles or so). I took it home and put it on jack stands to check out the damage.
I decided that this is as good a time as any to upgrade and refurbish my front end. However, like any project that begins around here it usually ends up in a major rustoration. Let me list out the plans for the teener:
Engine: 2002 Subaru 2.5 N/A using stock ECU and stock trimmed harness
Transmission: 2002 Subaru 5-Speed with DIY style Bremar conversion to 2wd
Intake: Aftermarket Ricer 3"
Exhaust: Stock trimmed WRX header to a Dynomax SS Ultraflo muffler
Suspension: Tarret sway bar on Engman mounts
Koni Yellow adjustable shocks with rear Ground Control adjustable perches and springs
Elephant racing monoballs, low friction control arm mounts, polybronze control arm bearings, polybronze trailing arm bearings
Turbo tie rods w/ bump steering spacer
New ball joints
Five-lug conversion with new bearings, 911 front M calipers on vented rotors, 914 rear calipers on 914-6 rotors with Porterfield Pads
19mm New master cylinder & new hard lines
911 16 x 7 inch Fuchs on Falken 205/50/ZR16
Body Mods: Engman stiffening kit
Stock seats (for now)
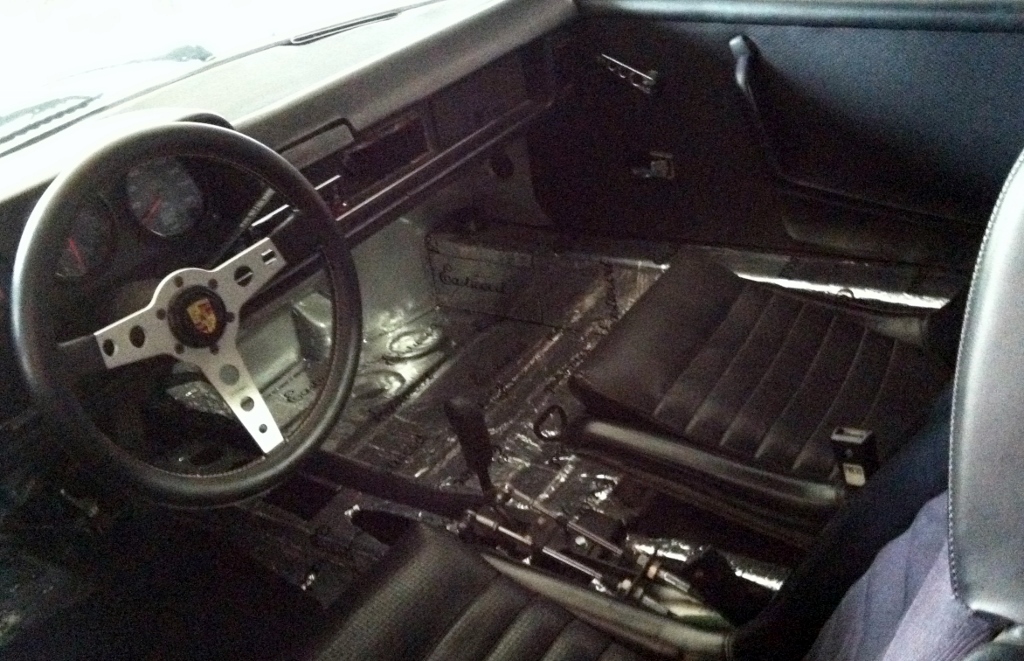
Momo Prototipo steering wheel
Rennline Perforated REV 2 Adjustable Aluminum Pedal Set (someday)
Racing "minimal" look for interior
Stereo TBD or omit
John Kelly styled rear fenders (hand hammered)
Paint scheme: Silversickle Body all silver with Phoenix Red wheels, bumpers, and rockers
Ambitious but, not out of reach!
Now for some pics...
Pictures when I bought it as a roller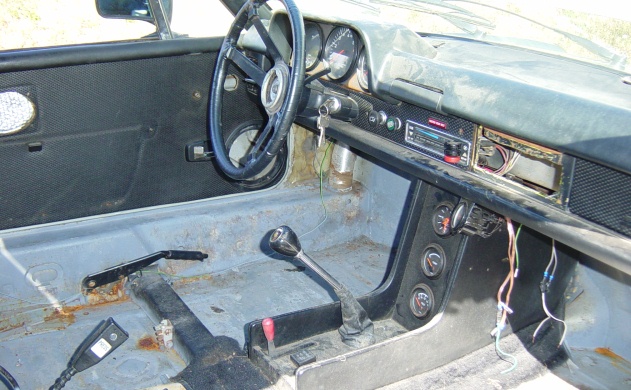
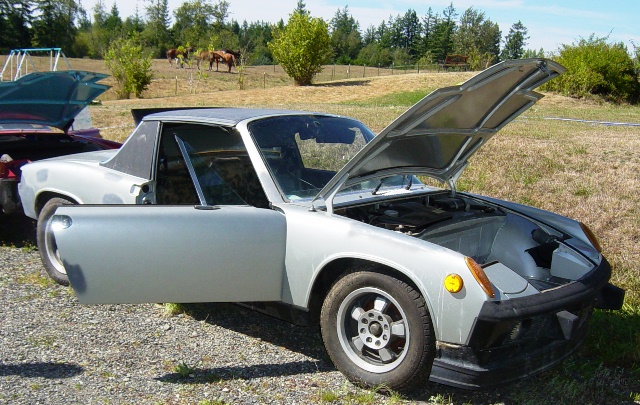
My Dusty '74
A bit crowded
Posted by: Zaney Apr 23 2009, 11:11 PM
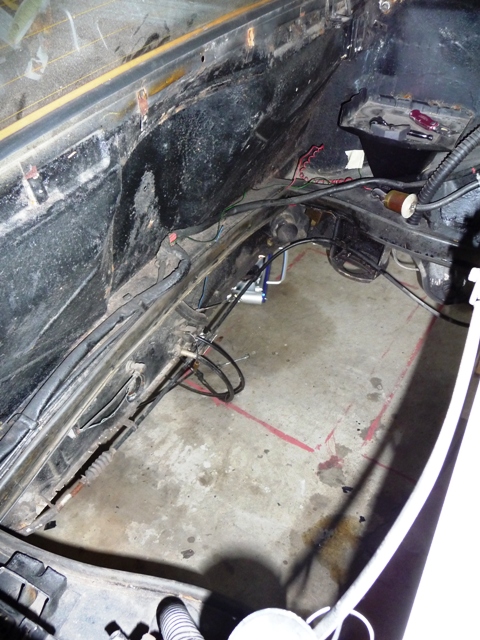
Kind of grimy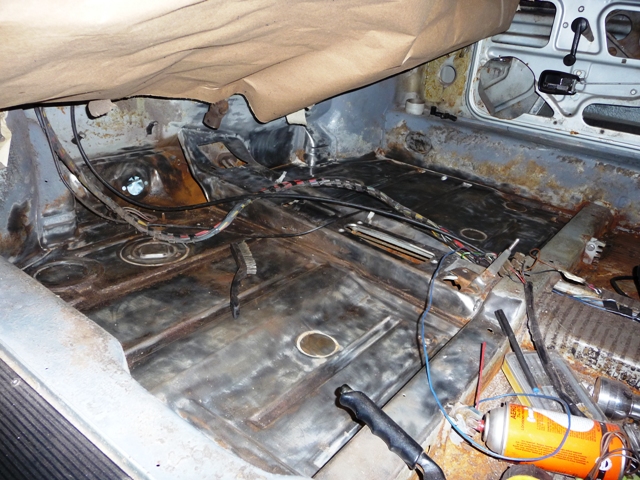
really grimy
Posted by: Zaney Apr 23 2009, 11:15 PM
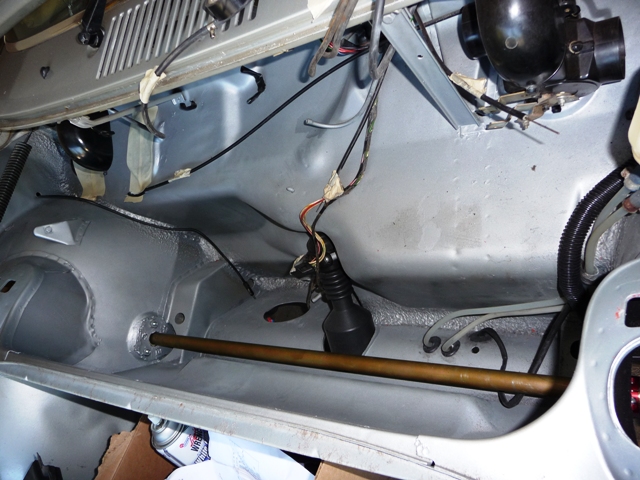
Cleaned up the steering rack area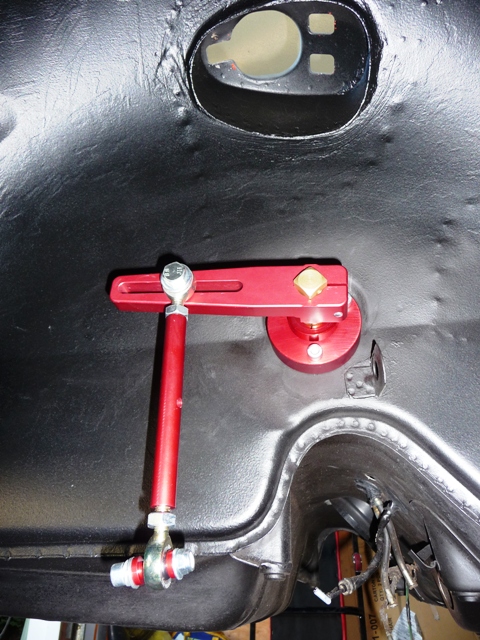
Cleaned up the wheelwells and installed the Tarett bar!
Posted by: Zaney Apr 23 2009, 11:20 PM
Cleaned up under the fuel tank
Sent the tank to be boiled out and sealed up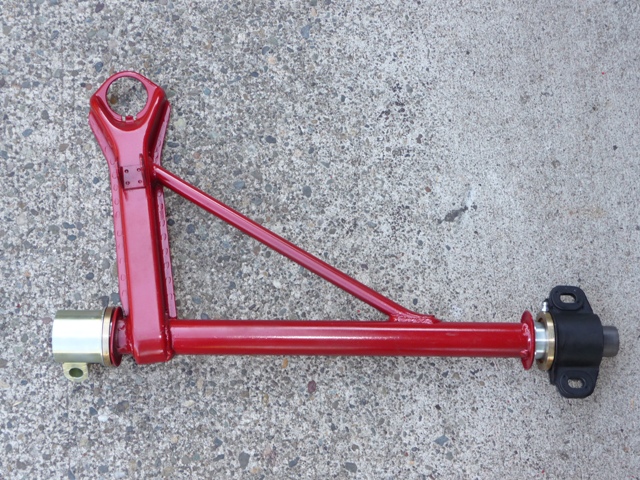
Cleaned up a pair of A-arms I bought from Rhodyguy (Kevin) and installed the Elephant hardware
Posted by: Zaney Apr 23 2009, 11:22 PM
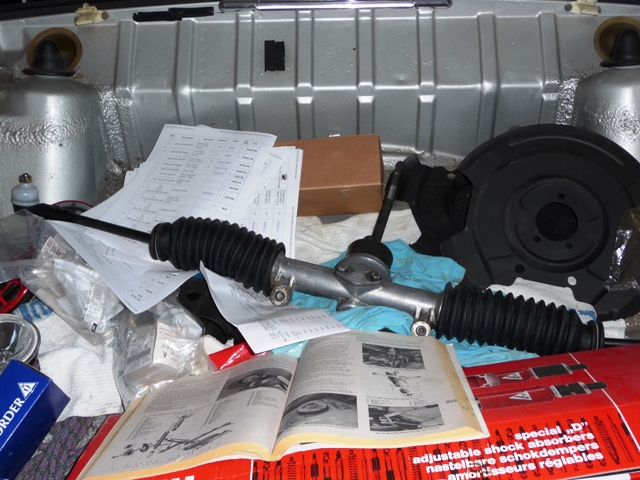
Cleaned up the steering rack and attatched the turbo tie rods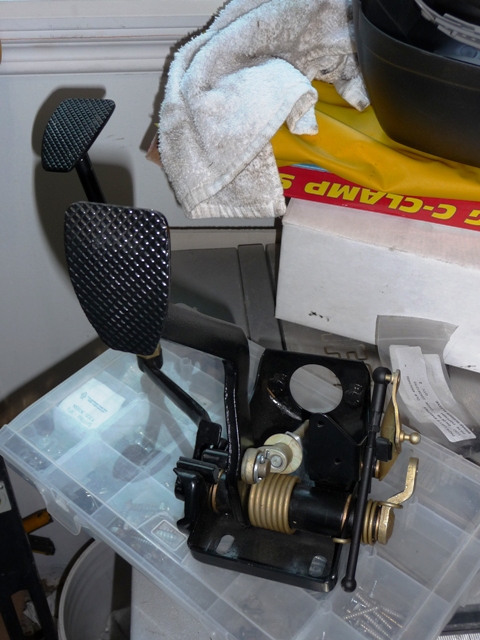
Bdstone refurbished pedal cluster... Tasty! 
Posted by: Zaney Apr 23 2009, 11:26 PM
Good enough to lick!
Almost ready for the tank
Posted by: Zaney Apr 23 2009, 11:29 PM
Back from the radiator shop and awaiting install...
More to come...
It is getting late

Posted by: dlo914 Apr 24 2009, 12:36 AM
Have you thought up how to run the cable lines for the cable shifter to the suby tranny? Good luck on your upgrade and it's nice to see another suby swap being done.
Posted by: TonyAKAVW Apr 24 2009, 02:20 AM
Wow, talk about a nice car to start with! That thing is pristine! Speaking from experience, the EJ25 is a great motor for a 914. I'm definitely jealous of all that suspension work!!
Good luck with the conversino can't wait to watch!
-Tony
Posted by: charliew Apr 24 2009, 08:58 AM
Is the cover on the torsion bar to prevent it from rubbing on the tank?
Have you considered running the cooling lines down the bottom of the centertunnel? Now is a good time to figgure the lines out.
Posted by: dlo914 Apr 24 2009, 09:30 AM

Is the cover on the
Posted by: Zaney Apr 24 2009, 09:38 AM
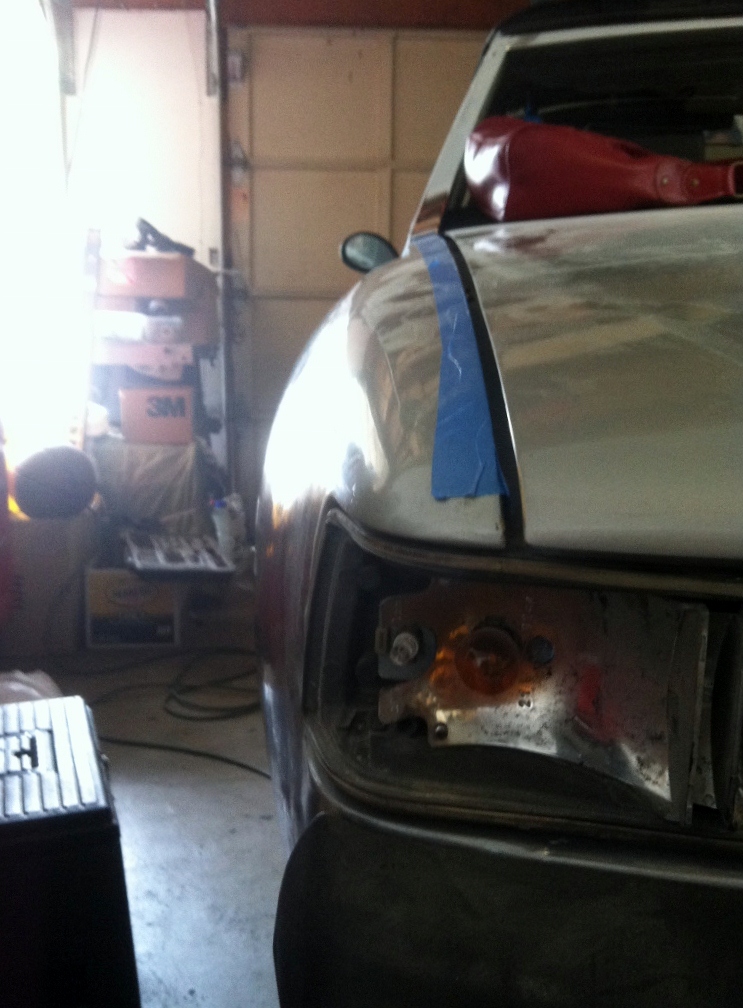
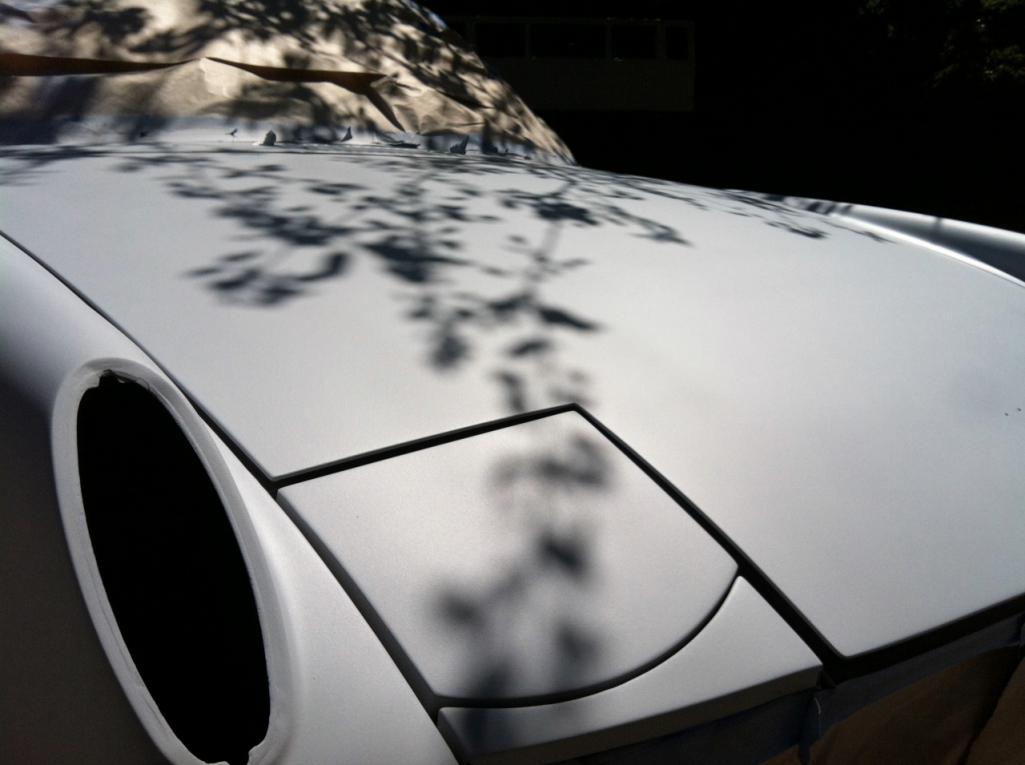
I should clarify the condition of the car at the time of the some of the 'cleaned up' pictures of the front end. I spent many hours on my back with a grinder/wire wheel taking the pan and wheel wells down to bare metal. Then, prepped the surface with Marine Clean and Metal Ready. Instead of POR-15 on the exterior surfaces I used Zero Rust sold in rattle cans (2 coats) and, finally in the wheel wells I sprayed an even layer of undercoat. So, this kind of scrutiny is being used on the rest of the car (minor OCD/ perfectionist tendencies). However, by doing so I unearthed what everyone finds in a 914; RUST! Some of the pictures to follow will show the extent of the cancer and rebuilding.
Dlo - I am going down the path blazed by Porscharu (Steve) since my mechanical skills are still in the novice range. I think I will be using this http://www.cableshift.com/Subaru/subaru%20page.html after Steve tweeks with it.
Tony - I have read about your journey into Suby Land in your thread about 3x to glean as much info as possible. You, Fiid, Steve Thatcher, and others have inspired me to do this conversion! Thanks for the kind words!
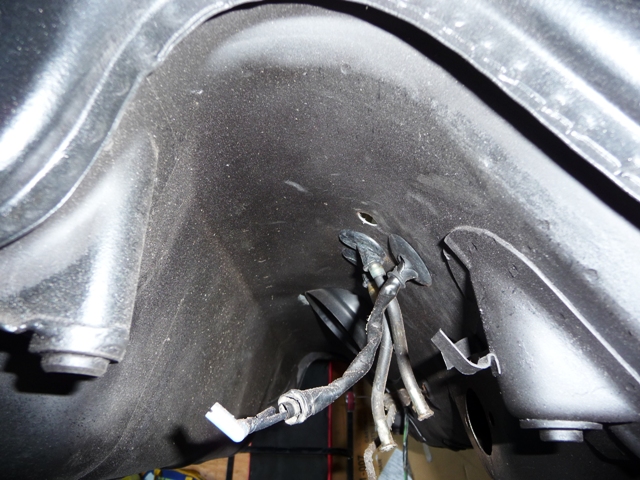
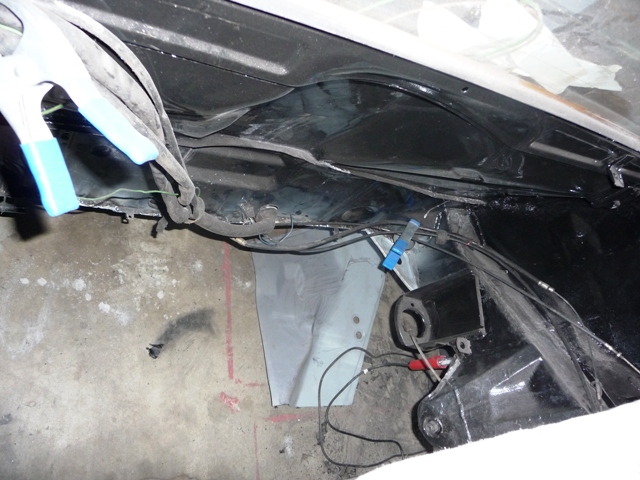
Charlie - I used a thin piece of pipe foam insulation to cover the swaybar to keep it from banging on the bottom of the gas tank. rTowle (Rich) has posted using a piece of garden hose but, I am going to try this and see how it goes. As for running the coolant lines, I am debating making a semi-removable http://www.914world.com/bbs2/index.php?automodule=blog&req=attach&id=9779 for the center tunnel like Carreraguy had made for his Suby conversion. I probably would cut out the heater cable tubes and eventually make an access panel in the engine bay like Amenson did: 
More pics to come...
Posted by: Zaney Apr 24 2009, 09:55 AM
I made a door brace for the passenger side after Strawman's (Geoff) example. Using a turnbuckle cut in two and welded onto a piece of 1 inch schedule 40 pipe. Then, connected to the upper seat buckle mount and welded to a plate in the foot well.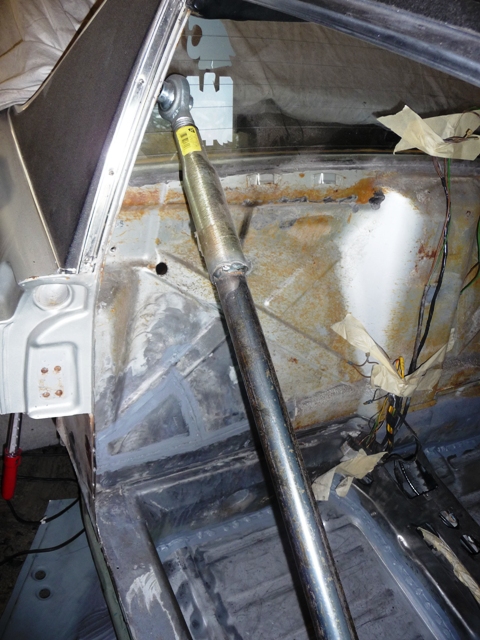
Upper attachment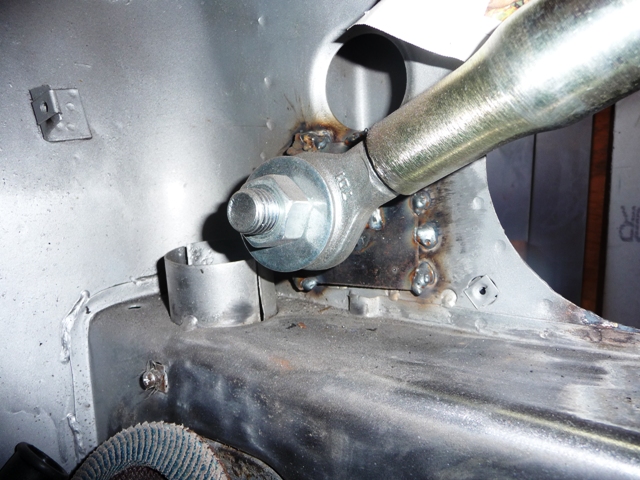
Lower attachment
Posted by: Zaney Apr 24 2009, 10:09 AM
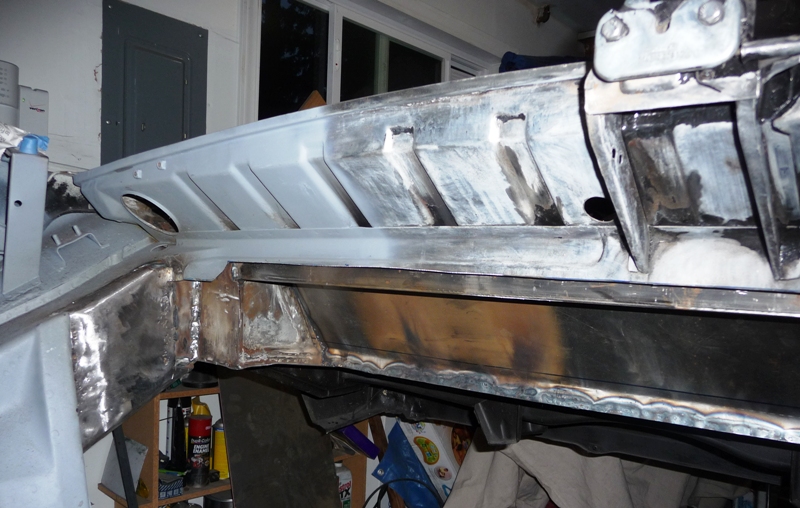
Then came the moment of truth and I broke out the heavy artillery. Many spot welds were drilled out and the pneumatic saws were humming to cut out the rotten areas: rear floor pan, right inner long, jack points, passenger sill, right lower wheel house, and the hell hole. 
I researched the "Digging into Hell" thread and others to make sure that I did not open up too much at one time. Especially, since I am not using a rotisserie. (wish I was)
Here are some pics: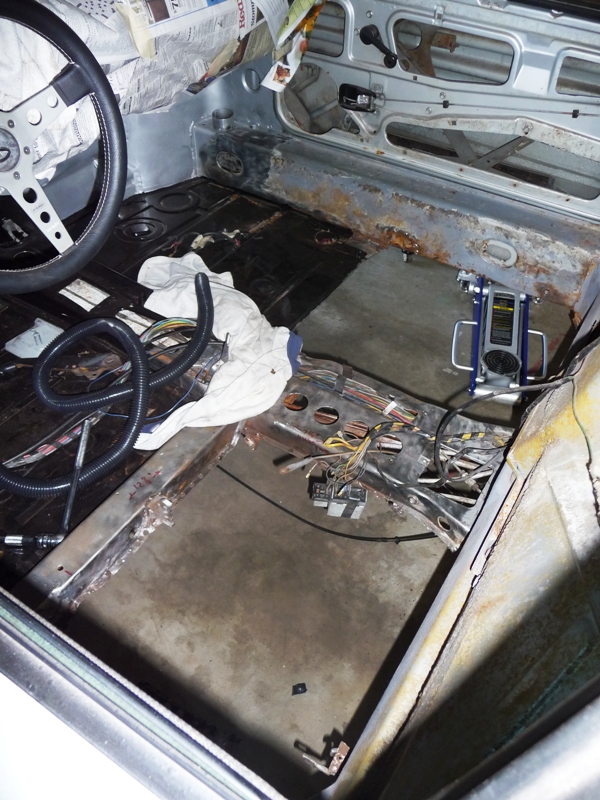
Cut out rear floor pan
Posted by: Zaney Apr 24 2009, 10:13 AM
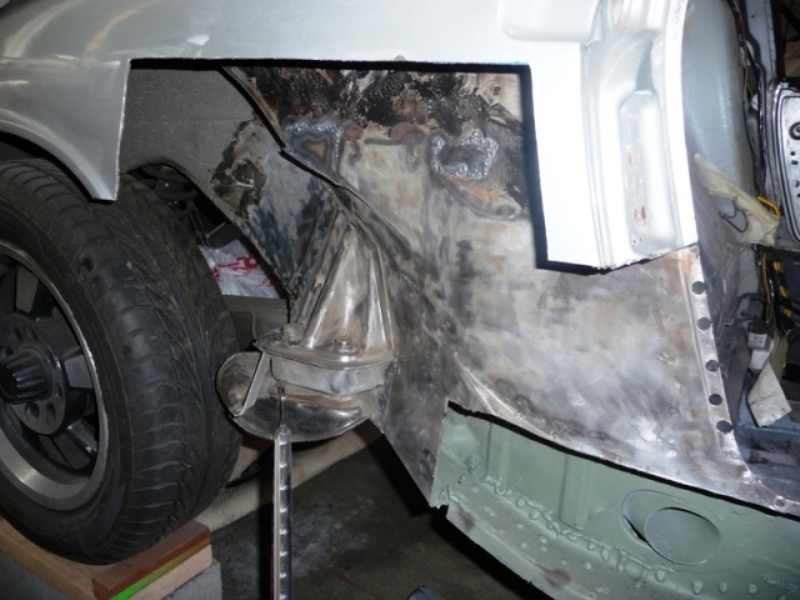
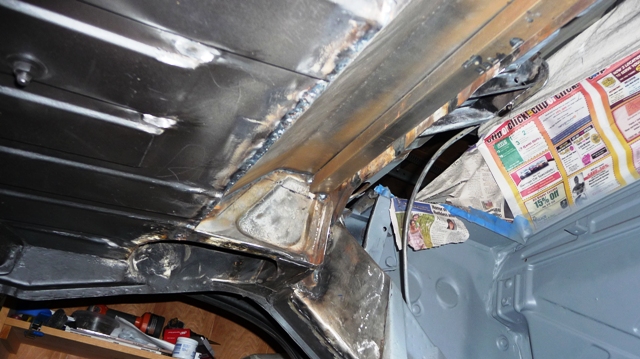
Cut the fender to get at the wheel house and took off the sill and inner rocker.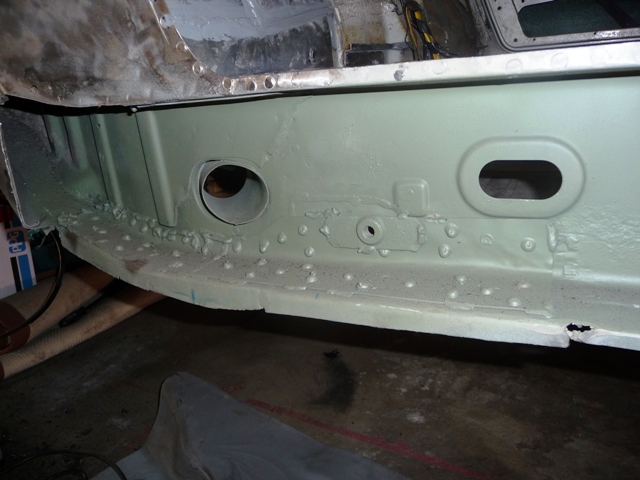
Had to repair part of the interior long, repaired then double wall reinforcement, cut out the heater tubes & supports.
Wire wheeled it out, prepped and painted.
Posted by: Zaney Apr 24 2009, 10:17 AM
In the engine bay I cut out all of the aircooled tin and extra metal. Wire wheeled it down, cleaned and prepped for POR-15. I have to re-open the hell hole repair I did awhile ago but, it will be a lot cleaner with new metal!! 
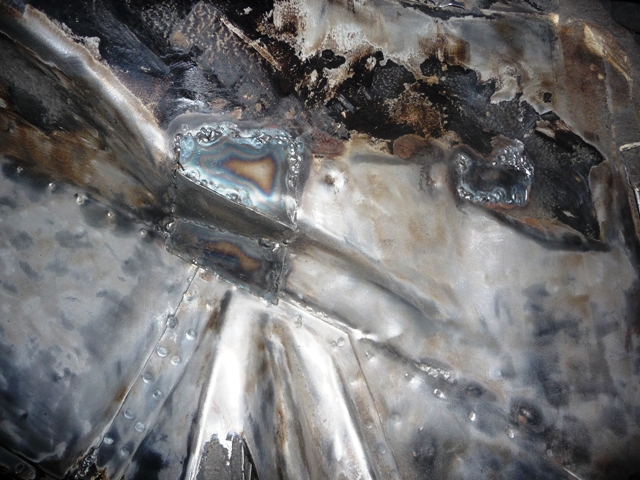
Cut out my slop!
Posted by: Zaney Apr 24 2009, 10:23 AM
After the passenger long was repaired on the interior side I got the rear floor pan ready. I used Jeff Hail's sketch about over lapping the front and the rear pieces so the rear is on top of the front section. Rosette welded on top and seam welded under neath. I also replaced the passenger side cross member support since it was rotted out too. I ground down the welds enough but not all the way (yet), prepped them and applied seam seal on them for now.
I will get more particular when I install the Engman interior stiffening kit later.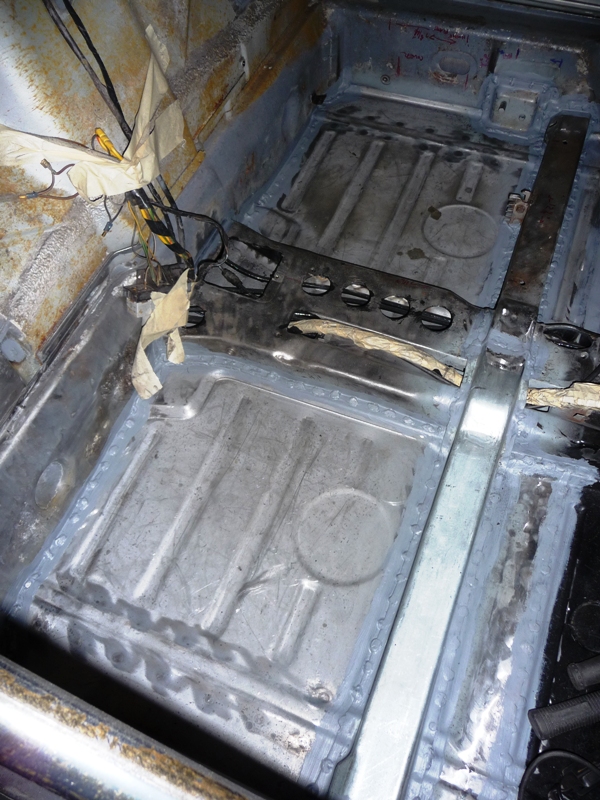
Posted by: Zaney Apr 24 2009, 10:29 AM
Underneath, the seat rail reinforcements were replaced as well as new Restoration Design rear jack points.
Again, the welds were not ground down all the way yet and seam sealed for now.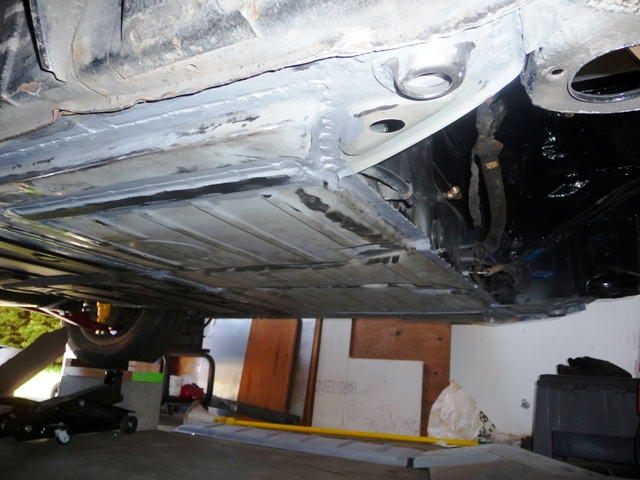
Hard to get into all the tight spots to grind everything. Maybe I will use a die grinder with stones.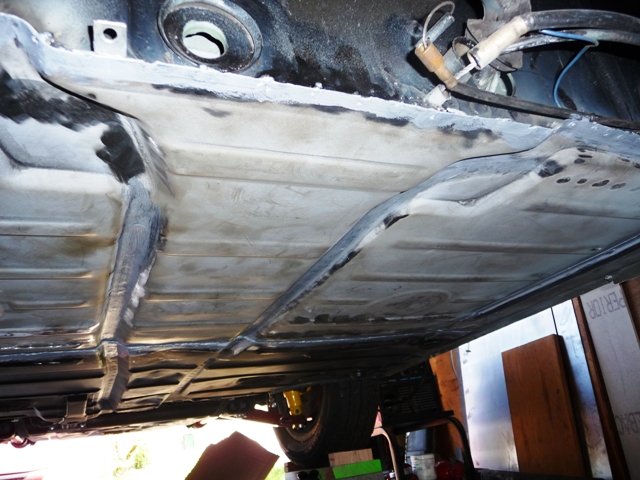
Fine details will happen after all the repair welding is completed.
Posted by: Zaney Apr 24 2009, 10:35 AM
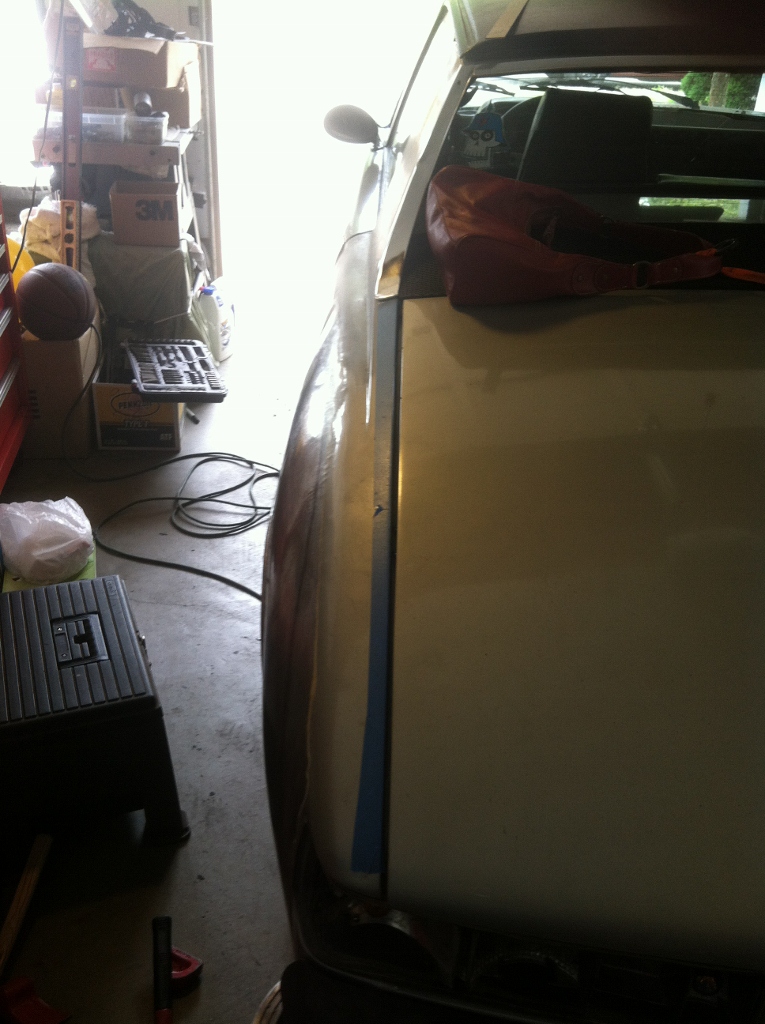
Earlier, I jumped the gun a bit with the interior paint and POR-15 on the front floor pan. But WOW! I like the color contrast!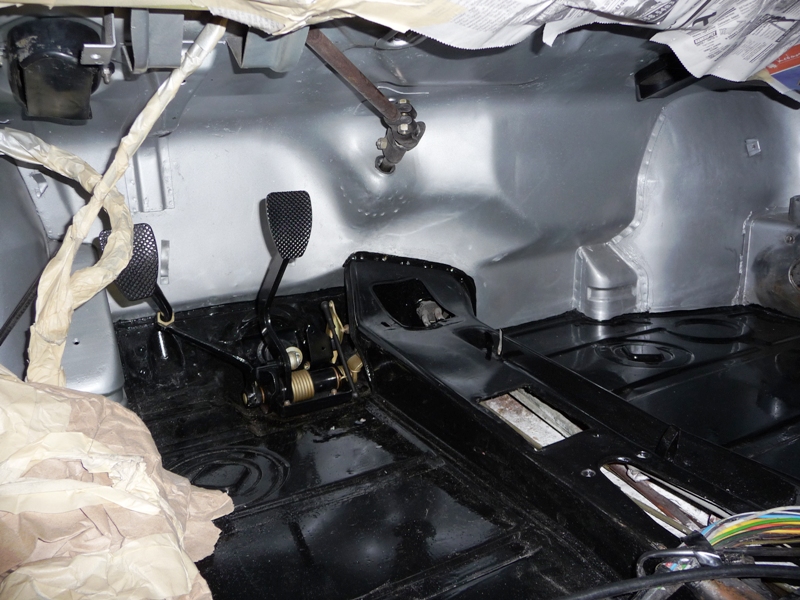
Touch ups after I am done...
My neighbor said, "Take it over and use it! It is only sitting around over here."
Thanks Tony!
Posted by: Zaney Apr 24 2009, 10:37 AM
Here is my new engine sitting patiently. 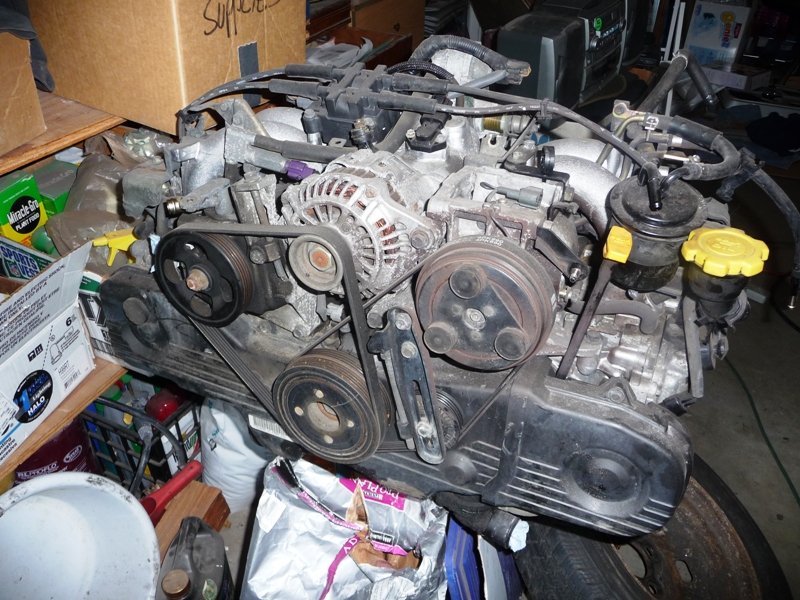
Posted by: Zaney Apr 24 2009, 10:40 AM
Suby 5 speed waiting for the Bremar conversion parts.
(Have to work some overtime soon...)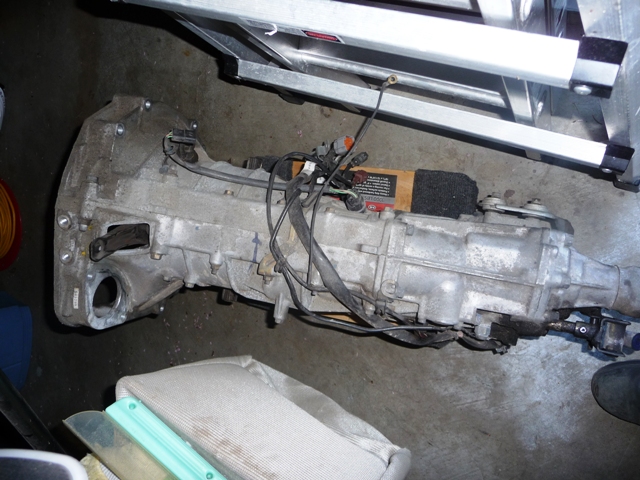
Other Koni shocks and Ground Control Goodies waiting for their turn to play!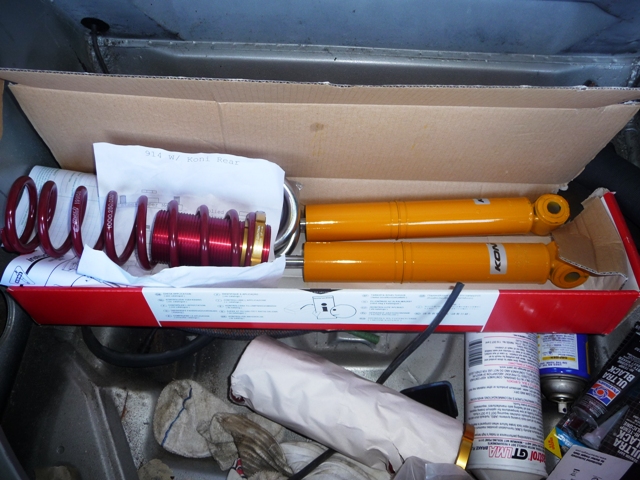
Posted by: charliew Apr 24 2009, 10:43 AM
I guess the tarret is that much bigger than the stock bar.
With that much off the passenger side do you think the tub will twist? Do you still have the top on? You might want to diagonal brace the door gaps, across from side to side, to try to keep them square. My 75 is really sound and if I jack up the pass side on the front donut the door moves out .400 at the top by the handle. It doesn't move more than .080 using the rear donut. These cars will twist real easy, thats why the front fender has the rubber in the gap at the cowl.
You might want a obx lsd for the tranny while your there. These little cars really need lsd with hp and skinny tires.
Posted by: Zaney Apr 24 2009, 10:45 AM
Last two pics for now...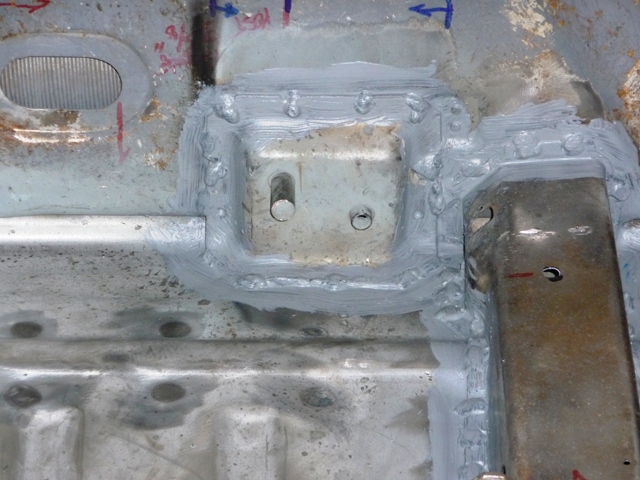
New brake pivot plate from AA in place waiting for the Engman kit for grinding.
Today, I am going to weld up the passenger long and then get ready for the wheelhouse. I wanted to have as little as possible open and unsupported as possible. So, the welder will be sizzling today!
Stay tuned for more...
-Z
Posted by: Zaney Apr 24 2009, 10:56 AM
I guess the tarret is that much bigger than the stock bar.
With that much off the passenger side do you think the tub will twist? Do you still have the top on? You might want to diagonal brace the door gaps to try to keep them square. My 75 is really sound and if I jack up the pass side on the front donut the door moves out .400 at the top by the handle. It doesn't move more than .080 using the rear donut. These cars will twist real easy, thats why the front fender has the rubber in the gap at the cowl.
You might want a obx lsd for the tranny while your there. These little cars really need lsd with hp and skinny tires.
Charlie,
I still have the top on and put a smidgen of flex in the door brace to counter any shrinkage. I am following the path that many members have traveled before and have not had any trouble with their door gaps. So, cross your fingers!
That is why I wanted to button up the floor pan and passenger long before I cut open the rear wheelhouse/ hell hole area.
As for an LSD, that will come with an upgrade to a WRX or Sti engine. Unless, I find a good deal out there earlier. Plus, I plan on running on 16x7 inch tires all the way around. Maybe 9's in the rear if I can find someone to stretch my rear fenders.
Thanks for the heads up!

Nate
Posted by: Phoenix 914-6GT Apr 24 2009, 12:07 PM
That's looking great Nate.
Posted by: Zaney Apr 24 2009, 09:38 PM
Thanks Jon! 
Welded up the passenger long today but, my wife has the camera so no pics yet.
Took my time to make sure every rosette had enough time to cool before I zapped another in that area.
My neighbor who let me borrow the Mig said he would give me a good deal on it. He said, he wants to buy a TIG setup. I think I will save some cash and buy it! (My baby shower gift!)
Oh ya, T-minus 4 weeks and counting til my little girl shows up. That is why the rustoration has kicked it up a notch! 
Now it is time to wrap it up with the right wheel house...
Have a great weekend!
Nate
Posted by: rickthejetman May 9 2009, 10:22 PM
hi there new to the 914 world and im contemplating the subby swap as my 73 914 has no engine anyway. i was wondering what you do for axles when you use the subby 5 speed?
Posted by: Zaney May 9 2009, 11:52 PM
Hey Rick!
Two options for ya! Search for Porcharu and his Subaru transmission tread for the output flanges. (that is what I am using) Or, custom axles made to order for around $500 + or -
Good luck and 
Posted by: Zaney May 10 2009, 12:03 AM
BTW, got the camera and the passenger long repair pics!
Posted by: Zaney May 10 2009, 12:05 AM
Time to finish up a quick house project then, back to the passenger wheelhouse replacement!
Wish me luck!!!
Posted by: Zaney Aug 8 2009, 01:50 AM
Well, a lot has happened in the past 12 weeks... Only a little progress on the car but some BIG Life changes! 
My wife decided she wanted to cut open the wall in out kitchen to make it more open (when she was 39 weeks pregnant!) So, nothing like a deadline to get a project done!
We went from this
To this in two weeks!
Oh ya, Little Miss Sydney was born twelve weeks ago right in the middle of the house project!!! 
Luckily, my mother-in-law stayed with us for 10 days in order for me to wrap up the messy project!
Posted by: Zaney Aug 8 2009, 01:57 AM
I was able to take six weeks off of work in order to help my wife recover from the C-section and, sneaked in some time on the Teener when I could too!
I cut out the rotten portion of the right side wheel house and replaced it with new metal! It was tricky to match the pieces but, I used a template to get it as close as possible! I also added two pieces of 16 gauge steel to help support the patched areas. Not sure if was needed but now I know it is double walled in those areas!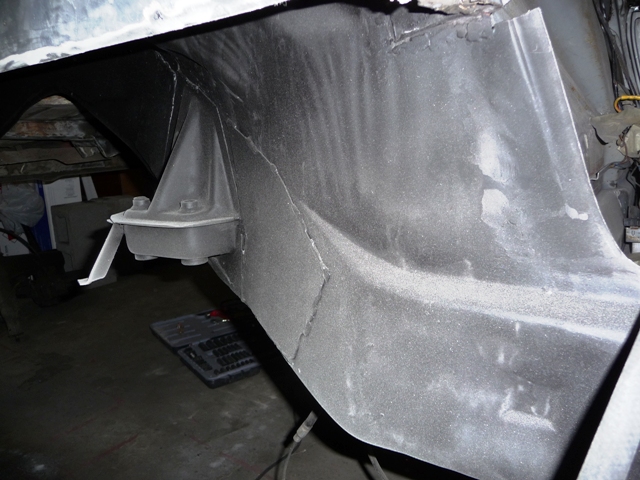
Found a wonder tool in order to help remove the old undercoating of the bottom of the chassis. 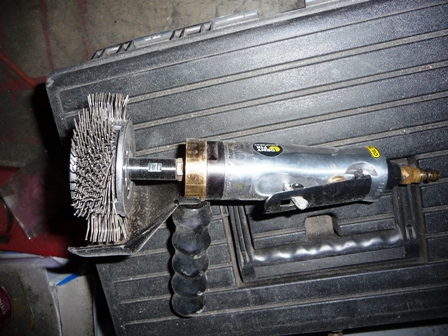
It RAWKS! 
Posted by: Zaney Aug 8 2009, 02:01 AM
I am in the process of cleaning up the wheel wells and the bottom of the trunk area with the Flail tool. I think I am going to cut out the muffler shield in the end...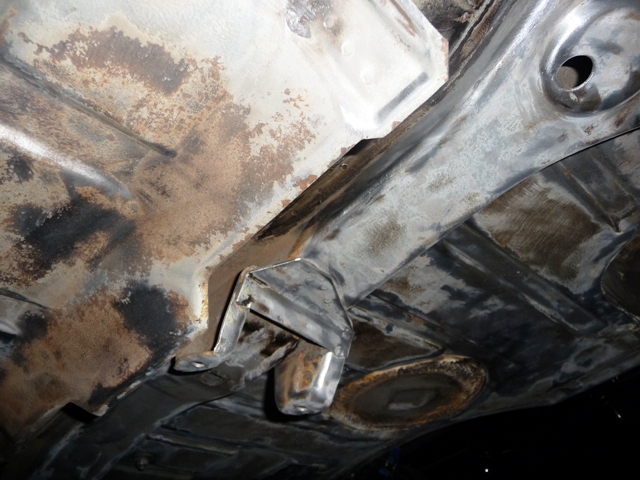
And also giving the hard to reach places the Marine clean, Metal ready and Zero Rust treatment before I weld the cut away fender panels back into place.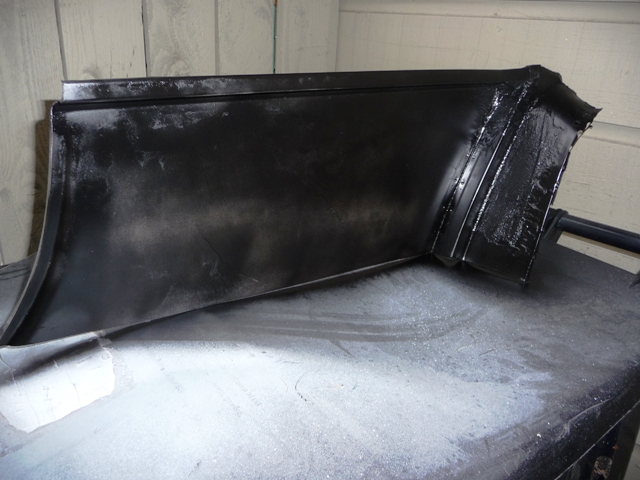
Posted by: Zaney Aug 8 2009, 02:08 AM
First good result in welding thinner sheet metal panels without blowing holes in it!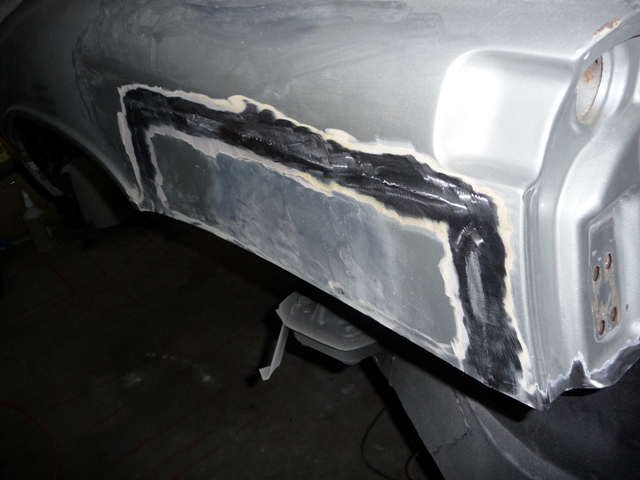
Next:
Fabricate or reuse the triangles for the sill
Weld in the sill and triangles
Weld the lower fender panel back in places
Fill in the turn signal markers
Repair the PO attempts with Bondo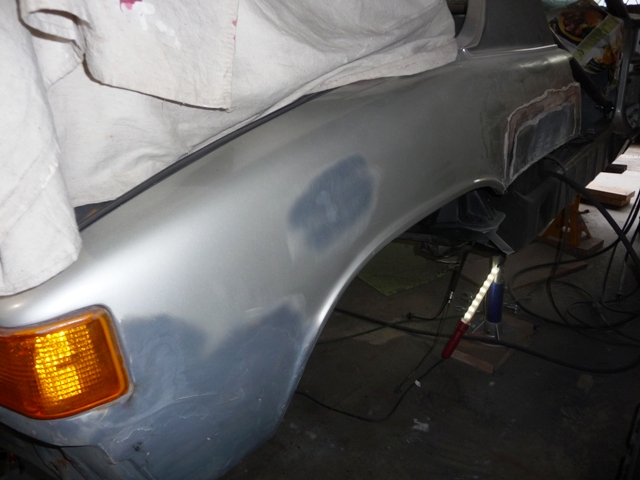
Then, fill in the holes in rear trunk area for a previous PORSCHE reflector!
More to come!!!
Nate
Posted by: nsr-jamie Aug 8 2009, 04:14 AM
I love these kind of posts, keep up the good work and please post more pics when you get it done and congrats on the new baby, also nice work on that kitchen!! Cheers!!
Posted by: strawman Aug 10 2009, 01:06 AM
Great to see another Suby conversionite (is that a word?) making progress! I finished up my engine mount system today and am now working on the Suby trans mount. It was HOT today; think I lost about 5 pounds in sweat! I'll post some pictures in the coming days. Keep up the good work...
Posted by: Zaney Nov 18 2009, 10:12 PM
Finally some time to UPDATE!
Welded up the door jam and the rocker sill & triangles.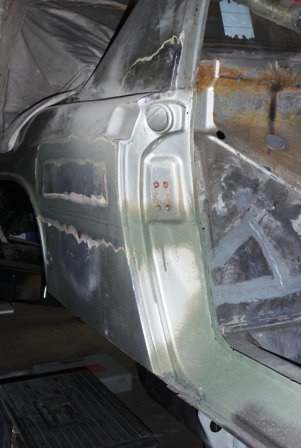
Lower piece of fender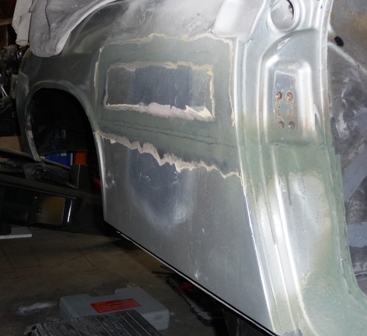
Filled in the PORSCHE reflector holes in the rear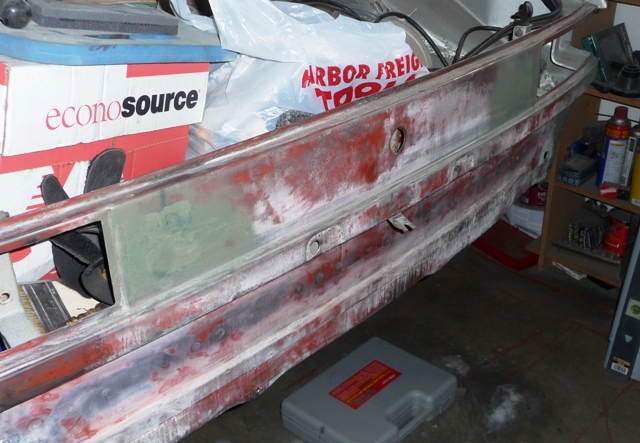
Posted by: Zaney Nov 18 2009, 10:15 PM
Cleaned the underbelly where the Trans and Muffler will go.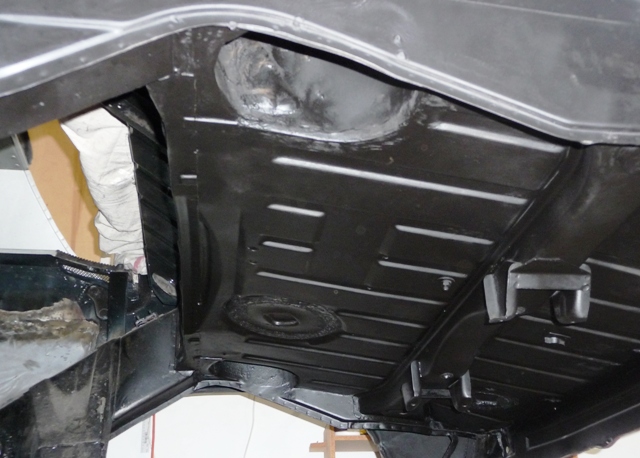
Driver's rear wheel well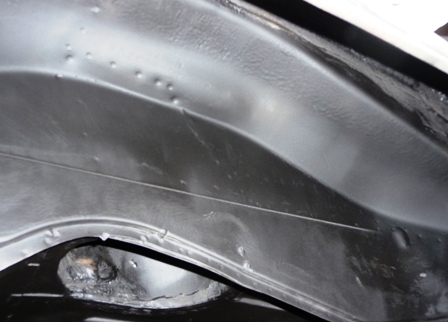
Muffler shield removed and area treated for Rust! 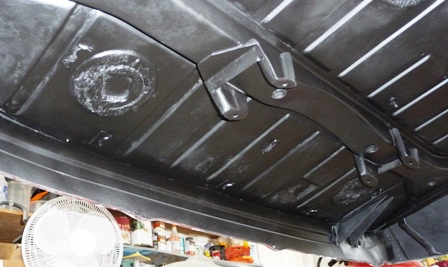
Posted by: Zaney Nov 18 2009, 10:22 PM
Filled in the side markers and Sold them to Fourblades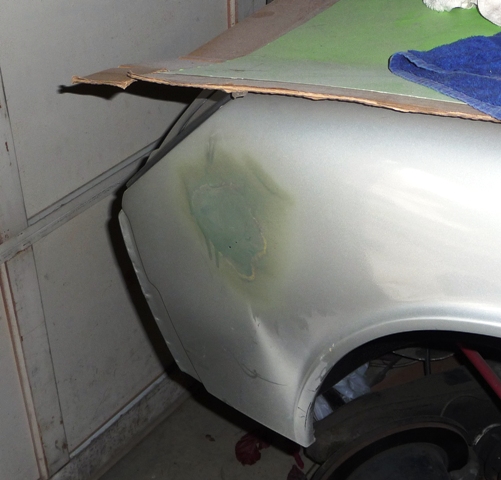
Planned on removing the Sail Vinyl but, took care of Mucho rust too! 
More on passenger side and smoothed out too! 
Posted by: Zaney Nov 18 2009, 10:25 PM
Hopefully, I will get a few hours to install my Engman stiffening kit that I was fortunate to acquire during the most recent group buy!
Then, my Suby build will really get down to brass tacks!
Nate
Posted by: strawman Nov 20 2009, 10:34 AM
Good job Nate, keep up the great work!
Posted by: plymouth37 Nov 20 2009, 11:31 AM
Nice work, you are going to end up with a really great little car when you finish this one!
Posted by: Zaney Nov 20 2009, 11:49 AM
Dana and Geoff,
Thanks for the words of encouragement! My welding and fabrication skills pale in comparison to your practiced art but, I am learning! 
Geoff, thanks for the pics of your project. I am counting on some holiday time to work on the car then!
Hopefully, I can prep the car for the Engman kit tonight!
Nate
Posted by: Zaney Mar 7 2010, 12:46 AM
It has been a while since an update but, progress is happening slowly. ![yellowsleep[1].gif](style_emoticons/default/yellowsleep[1].gif)
My 9 month old daughter has been the focus of my non-working hours at the Firehouse but, I have been able to sneak into the garage once and a while
I installed the Engman Stiffening kit.
(Now for the OCD part) I stripped out all of the Por-15 in the passenger compartment and engine bay and prepped it again for Acid Etching Primer.
Passenger interior firewall is a mix of two different colors (leftovers of the same brand) Then, a round of seam sealer.
The engine bay will receive the same treatment after all the welding is completed.
2K Primer will be the next layer before paint.
I went against Por-15 because of many mixed results and the better application of the primers.
Posted by: Zaney Mar 7 2010, 12:48 AM
Pic of interior firewall
Engine bay firewall
Posted by: Zaney Mar 7 2010, 12:50 AM
Hell hole ready for seam sealer and 2K Primer.
16 gauge gusset plate welded into place ready for the Suby motor mount bar placement. 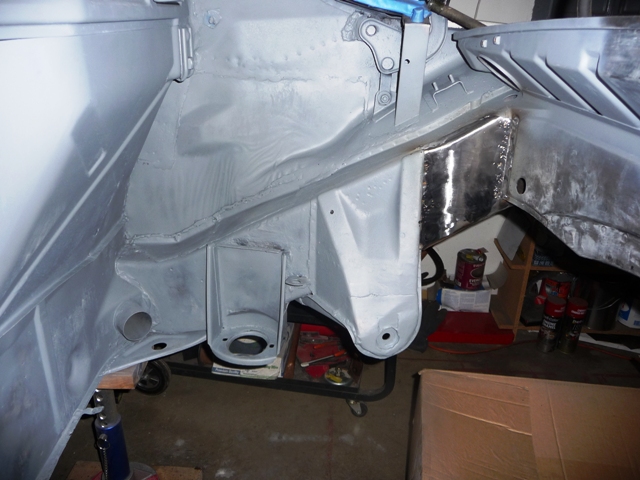
Lower shot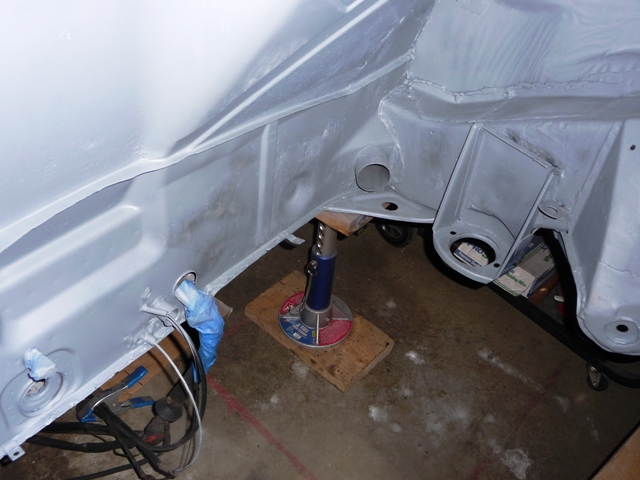
Posted by: Zaney Mar 7 2010, 12:58 AM
And the trunk firewall before being boxed out for the future turbo. Still need room for the starter and clutch slave cylinder though.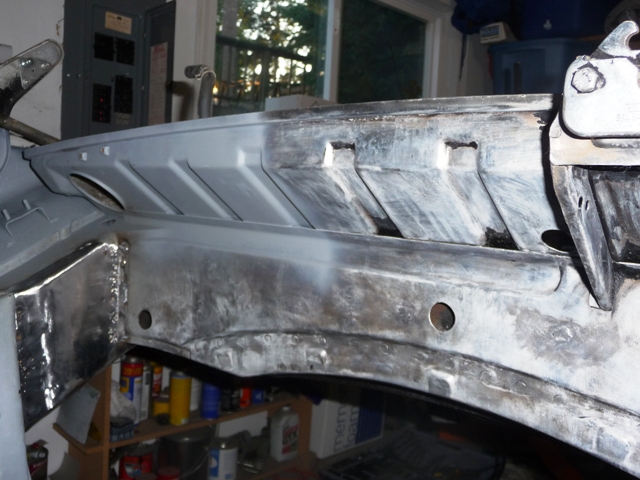
Now, I am researching the various engine maintenance procedures for the Suby in order to get it ready to mock up the placement.
Still need to order the Bremar transmission components and get the tranny ready for mock up too.
A lot to do still but I am trying to keep each milestone small and not think about too much. (Easy said than done )
Cheers,
Nate
Posted by: FourBlades Mar 7 2010, 06:49 AM
Nate,
You are really kicking ass now! 
I am amazed you get so much done with a new baby in the house.
The areas you have prepped look like brand new metal.
Your turn signals look great on my car with clear lenses.
John
Posted by: rebelmdot Mar 7 2010, 07:21 AM
Great work! A guy is supposed to pick up my 911SC today sometime and then I will have a little extra $$ to begin a resto of my own. I currently have 3 and I am planning to do a Suby conversion to one of them. I think that it will be the 2nd one I do, so I will have some time for you to finish . I will use your post for ideas and encouragement. I can't wait to see what you do next.
Posted by: Zaney Mar 7 2010, 09:38 PM
Thanks for the words of encouragement!
John, your car is awesome! I think the clear markers against the deep blue turned out to be a great idea!
Christian, I am only following the lead of many people way more talented than myself.
Search - TonyAKAVW, Strawman, Fiid, Amenson, and Carreaguy for their builds!
Good luck with your Build!
This is what I am battling right now.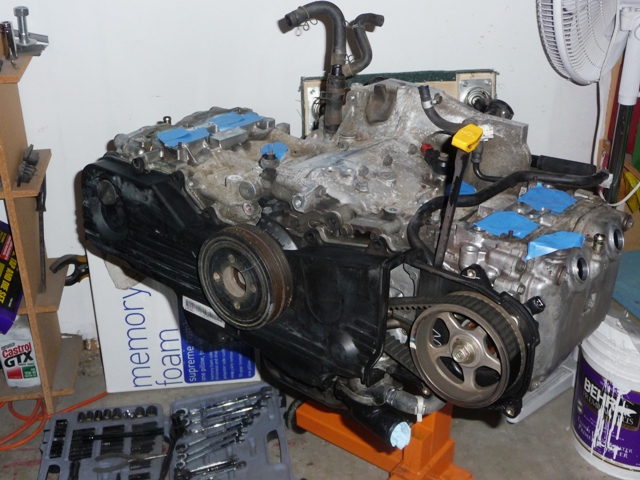
I can't seem to remove the stubborn crankshaft pulley 22mm bolt. A little overnight Aerocoil and maybe an impact wrench will get it off. I plan on replacing the stock pulley with a lightened one.
Any other suggestions are more than welcome to remove the frozen bolt.! 
Cheers!
Nate
Posted by: strawman Mar 8 2010, 10:17 AM
I can't seem to remove the stubborn crankshaft pulley 22mm bolt. A little overnight Aerocoil and maybe an impact wrench will get it off. I plan on replacing the stock pulley with a lightened one.
Any other suggestions are more than welcome to remove the frozen bolt.!
Cheers!
Nate
Hi Nate --
An impact gun has always worked for me on all of my Suby engines. It is torqued to only something like 76 ft/lbs (don't have my manual in front of me), so I'm surprised you're having trouble with it. Maybe your impact gun isn't strong enough? The crap one that came with my old Craftsman air compressor was useless; I bought an Ingersoll Rand that is lighter and much burlier.
Good luck, and keep up the great work!
Geoff
Posted by: Zaney Mar 8 2010, 07:19 PM
Geoff,
I believe that you are correct! "You get what you pay for," is exactly what the $19.99 Impact gun from Harbor Freight is about. I think I can borrow one in the short term that has a little more zip!
I am going to strip it down to a shortblock and take the cams down to Tacoma and have Delta Cams put their street grind on them for about $150 or so.
Wish me luck!
Posted by: Zaney May 24 2010, 11:33 PM
So after celebrating my daughter's 1st Birthday  Sydney, I thought I would give an UPDATE
I stripped the Suby down to a short block and gave it the once over!
- New gaskets, new water pump, new time belt and pulleys, new Delta Cams (1000 grind), valves reseated and rockers gapped, and the cylinder heads were cleaned up, gasket matched, and polished up!
- The intake and TB were cleaned up and polished a bit too. I will eventually paint the intake either STi red or Chevy red-orange 
- The rear trunk/firewall area is stripped, cleaned, Metal-Readied, and awaiting Fabrication! I am trying to find access to a bead roller to attempt the stock 'buttresses' in the new panel. I am also following Steve's (Porschru) lead on the bracing in that area with 1 inch square tubing.
- I copied the engine bar design from Geoff (Strawman).
- Finally, I picked up an early MR2 shifter for a great deal on evilbay!
On to the Pics!!!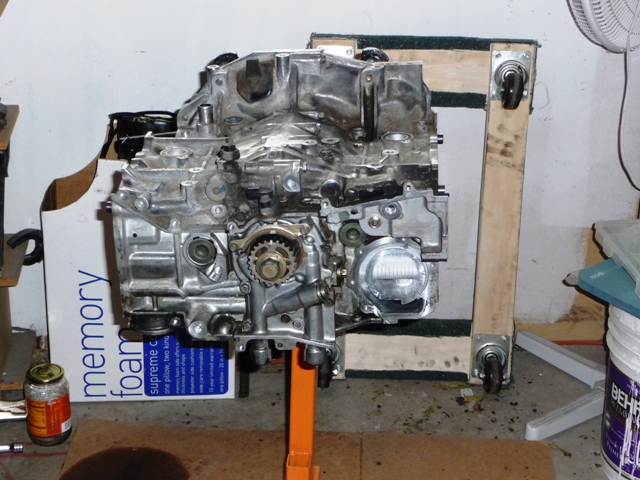
Short block cleaned up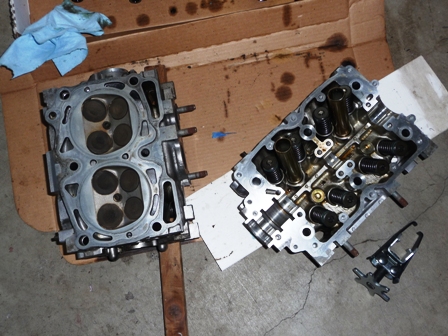
Cylinder heads awaiting tear down.
Posted by: Zaney May 24 2010, 11:37 PM
Drove down to Tacoma where I stopped by Delta Cams and picked up some 1000 grinds after giving them my cores.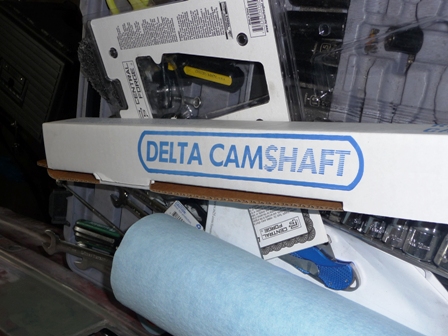
Spent many hours staying up reading DIY threads about port matching and gasket matching cylinder heads. So, I thought what the hell 
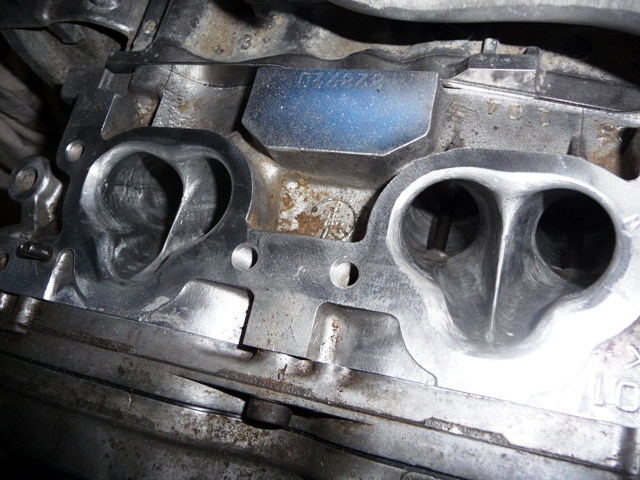
Intake side
Posted by: Zaney May 24 2010, 11:40 PM
Exhaust side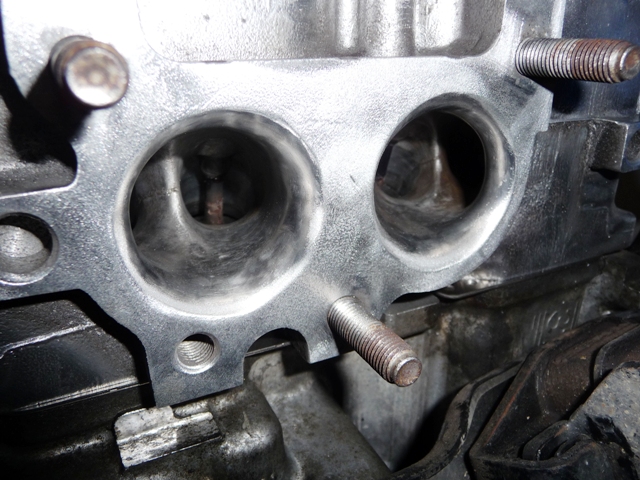
Longblock assembled after reading over the Suby Tech Manual for awhile...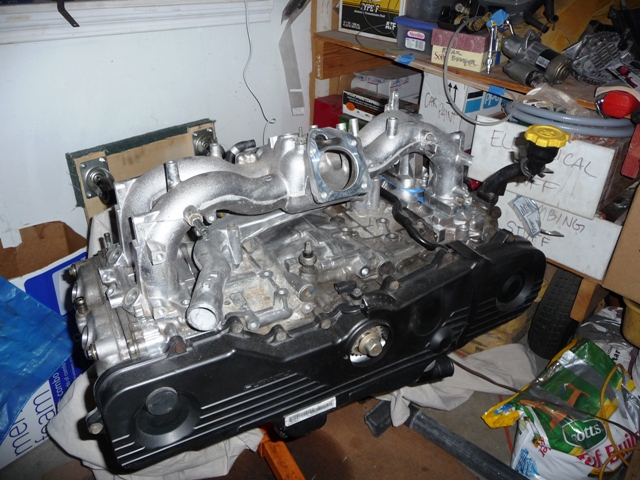
Posted by: Zaney May 24 2010, 11:42 PM
Throttle body cleaned up using a homemade soda-blaster siphon gun!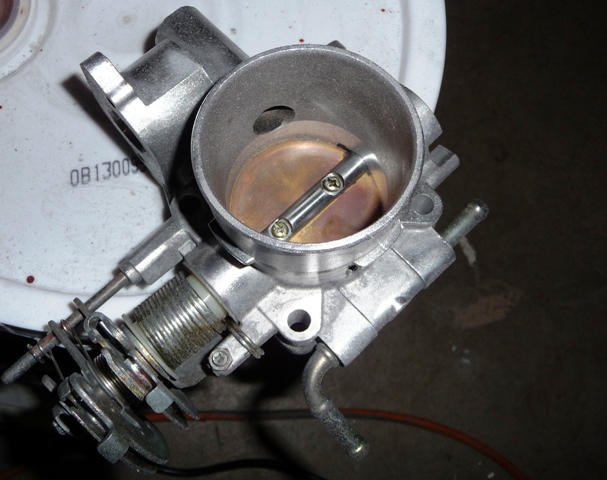

Posted by: Zaney May 24 2010, 11:45 PM
Strawman version of the Suby engine mount bar. Inspired from S. Thatcher and Tony!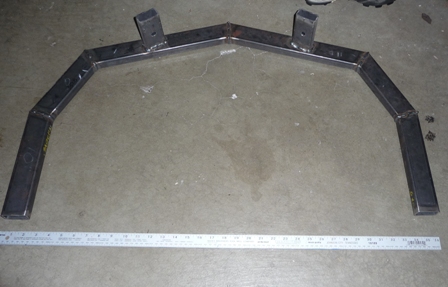
MR2 Shifter ready to be cleaned up and mocked up!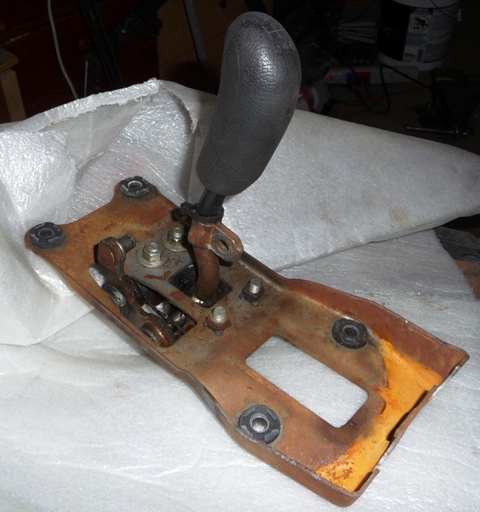
Posted by: Zaney May 24 2010, 11:47 PM
Rear firewall trunk area cleaned up and ready to be and !!!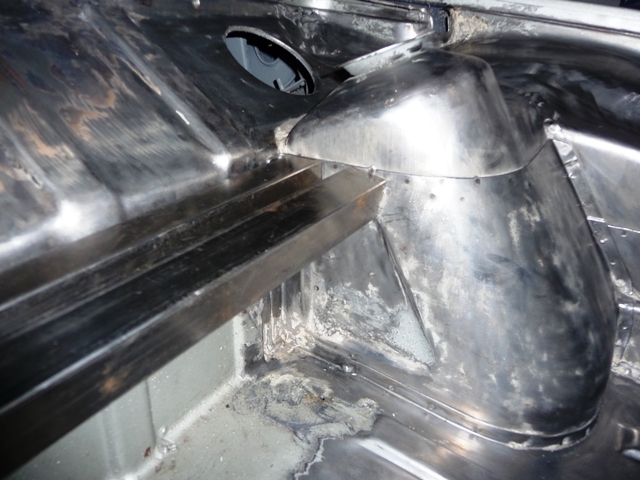
Posted by: Zaney May 24 2010, 11:51 PM
Next step after the firewall is fabbed up is to locate the final resting position for the powerplant and make the tranny mount.
Also, sort out the FI mess 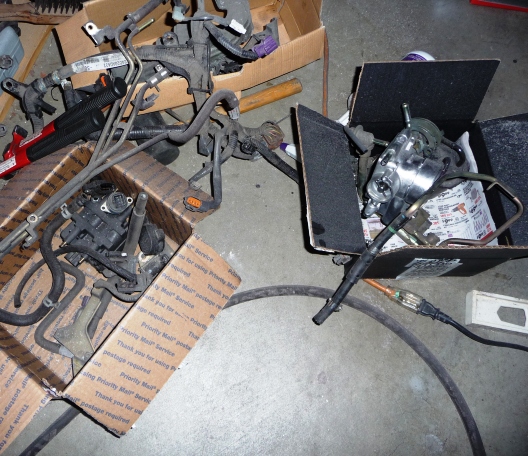
Chime in if you see me missing a step or forgetting something! Thanks in advance!!
Nate
Posted by: strawman May 25 2010, 06:20 PM
Lookin' good! 
You might want to seam weld the shock towers "while you're in there" -- prior to cutting/welding up the "turbo/starter/clutch release arm" box in the rear trunk. From everything I've read here, using significantly higher-rate-than-stock rear springs could tear the towers loose. If you're using the same U-bar mounting system on the upper longs that I did, you might also wanna tie-in the upper longs to the shock towers on the engine bay side of things while welding in those mounts.
Your progress is shaming me into providing an update on my project... keep up the great work!!!
Posted by: Zaney May 31 2010, 12:25 AM
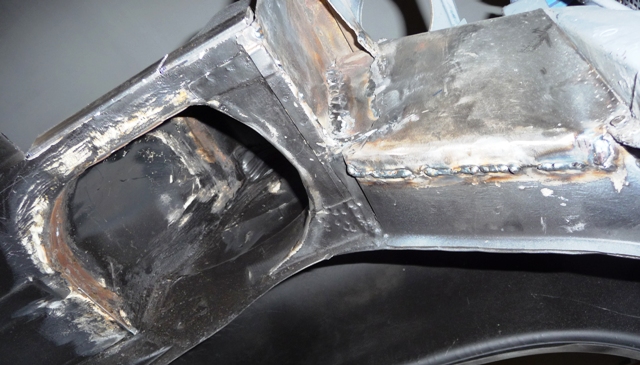
Thought I would listen to Geoff's advice and tighten up the welds in the trunk and the rear firewall before I cut into it.
Took about 3 hours of patiently seam welding and air quenching but it turned out alright. I ground off some of the high spots and the area between the strut towers for the new 'boxed out' firewall.
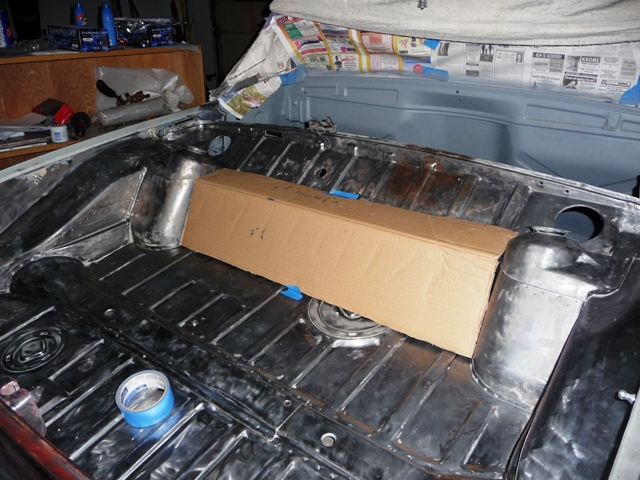
Then, measured and remeasured the trunk and...
Here are some pics to survey the surgery 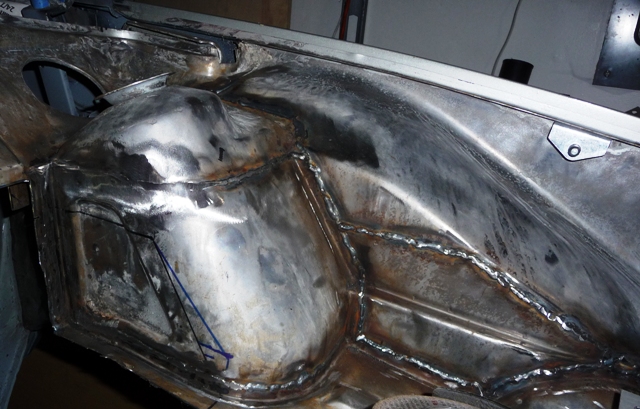
Seam welded trunk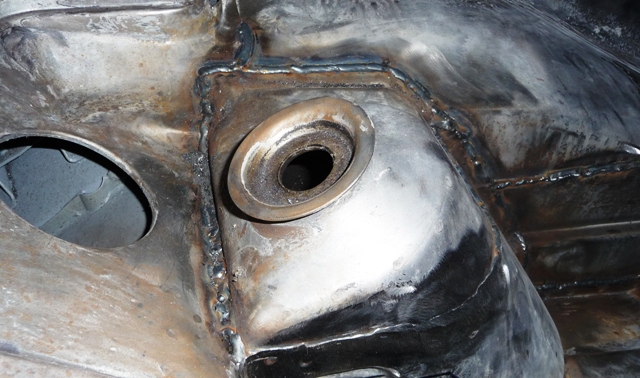
Got the firewall strut tower joint welded up
Posted by: Zaney May 31 2010, 12:29 AM
tied all the gusset plates together into the 'long'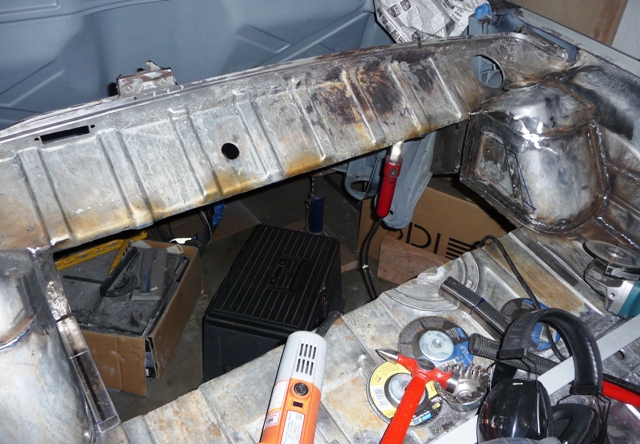
Cut out the 'Big Hole' No turning back now.... Do you think an Eaton M90 and piping will fit in there? (End of dream sequence  )
)
Posted by: Zaney May 31 2010, 12:33 AM
Followed the advice of many who have come before me and got to the inner seam weld between the firewall portions,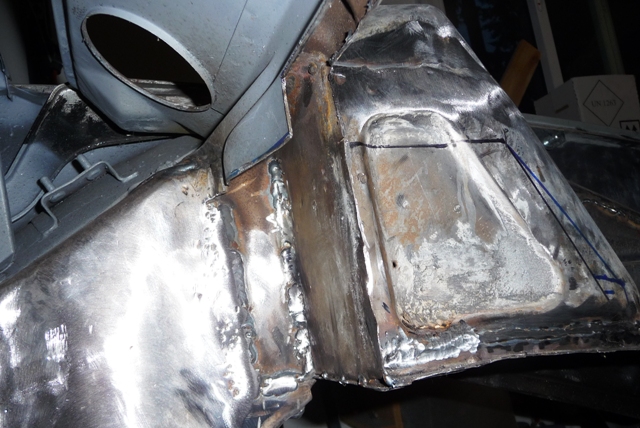
Now it is time to Fab up the 'box' and make it fit nicely in the Big Hole.

Time to
Cheers
Nate
Posted by: charliew Jun 5 2010, 10:51 PM
Don't slow down now. Try to get someone to cut up a donor for the pieces you need, that way the rib pattern will line up. You actually may have cut a little too far back to use the donor parts though.
Posted by: Zaney Jun 5 2010, 10:57 PM
Got a bit of time thanks to Grandma visiting and watching Sydney for the day! Thank you Sue!!!
So, measured some 18 gauge sheet metal and buzzed it down to size! Took a spare 2'x4' and the table saw to rip out my form to bend the metal on. Then, found my cinder blocks and made my own DIY sheet metal brake. It got me close enough without a real one. 
Followed Steve's (Porscharu) lead and braced the strut towers with a piece of 1 inch steel tubing.
Then, used the bench grinder to make the final tweeks on the firewall cover.
Here are some pics: 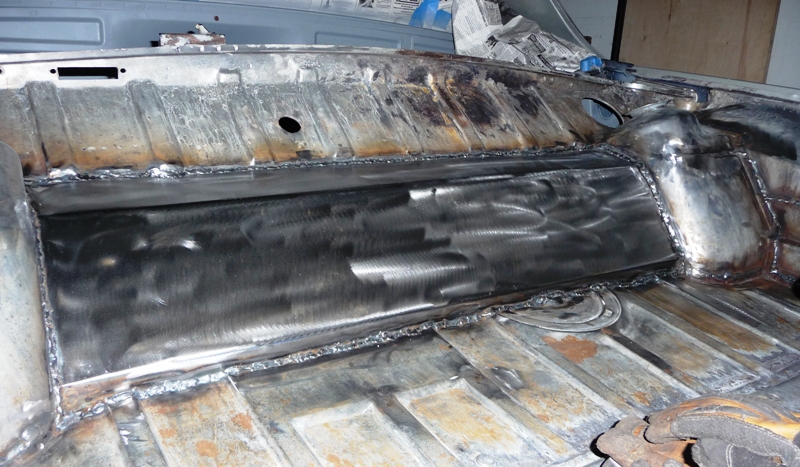
Posted by: Zaney Jun 5 2010, 10:59 PM
Looking up from the engine bay "new expansion"! 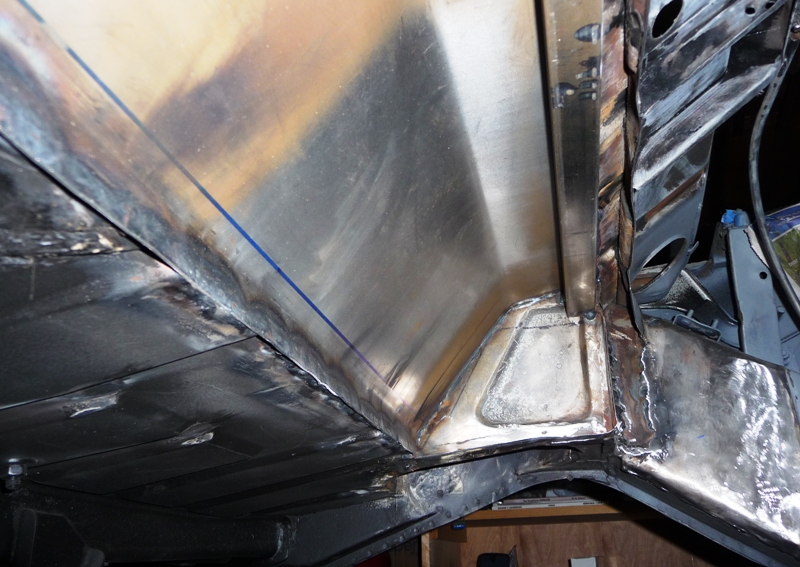
Posted by: Zaney Jun 5 2010, 11:01 PM
Posted by: Zaney Jun 5 2010, 11:06 PM
Next, I am going to take apart the tranny and attempt to do the DIY coupling magic and save $350. Need to find out the thickness of the block off plate then, go buy a piece of aluminum to make one.
After the trans is ready then mate the power plant together and fit it for final placement in the engine bay!
The momentum is building! I will probably hold off on the 5-lug conversion due to funds. Instead, get this baby on the road!!!
Tada!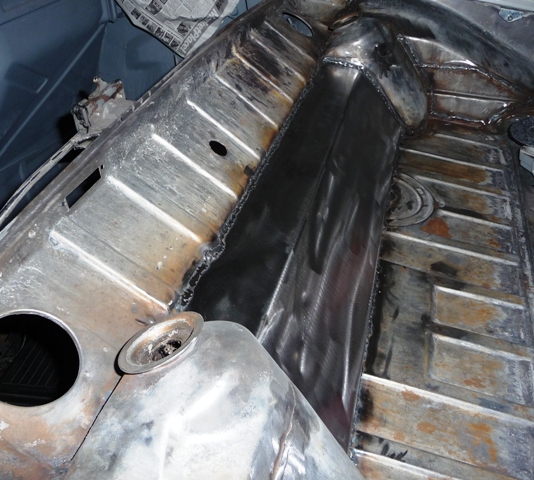
Posted by: Zaney Jun 13 2010, 02:34 PM
Keep the momentum going...
Painted the rear trunk and seam sealed the welds.
Painted the intake manifold with 500 degree chevy red-orange paint.
Used the http://www.914world.com/bbs2/index.php?showtopic=104513 and http://www.914world.com/bbs2/index.php?showtopic=108064 to save myself $350.
Here are the pics 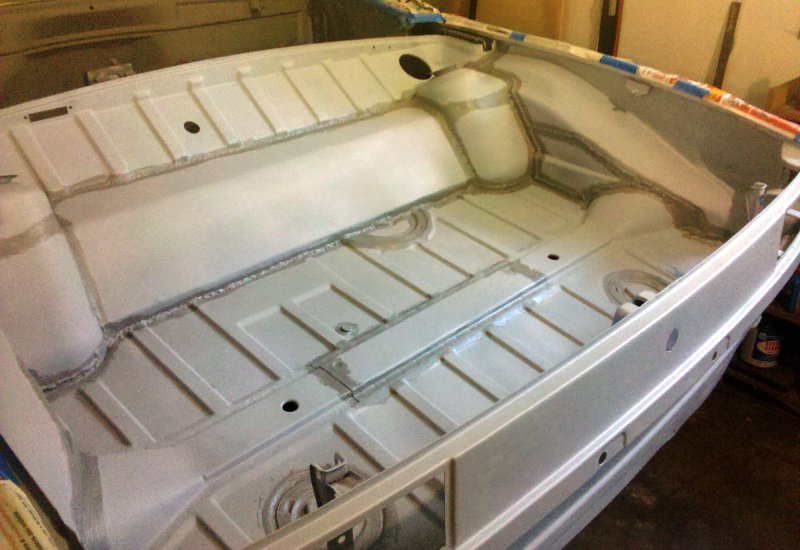


Posted by: nsr-jamie Jul 4 2010, 05:53 AM
I love this thread! Keep up the excellent work!
Posted by: Zaney Jul 20 2010, 01:57 PM
Alrighty then!
More progress on the Suby Transmission mount and the final placement of the mounting tabs for the engine cradle.
I copied the engine cradle/yoke design from Geoff (Strawman)
Another pic with the trans mount
The little notch is my mismeasurement of the cylinder clearance on that side. Should not hurt the stabilty of the cradle.
Posted by: Zaney Jul 20 2010, 02:04 PM
Here is my attempt at the Suby Transmission mount in the 914.
I utilized the stock subaru transmission mount and made a simple plate-based mount to hang from the 914 stock trans mount position.
I will use better fasteners for the final installation. 
Here is the clearance under the rear trunk. Since this picture was taken I ground down the old muffler hanger tabs. So, there is about 1/2 to 3/4 inch clearance.
Posted by: Zaney Jul 20 2010, 02:09 PM
Here is the alignment of the axle for the Suby Trans and the teener trailing arm.
Here is the room from the trunk clearance modification for the starter and the slave clutch cylinder. 
Posted by: Zaney Jul 20 2010, 02:13 PM
There is plenty of room in the engine bay with this current setup.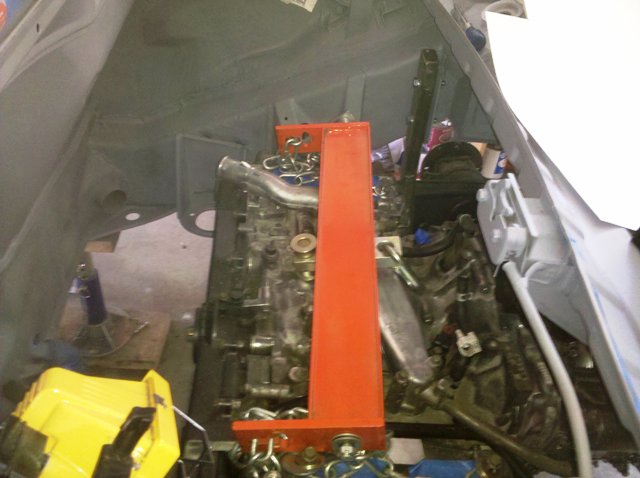
Now, it is time to measure the placement for the front radiator system and hopefully utilize a heater core from the water heater piping from the Suby engine.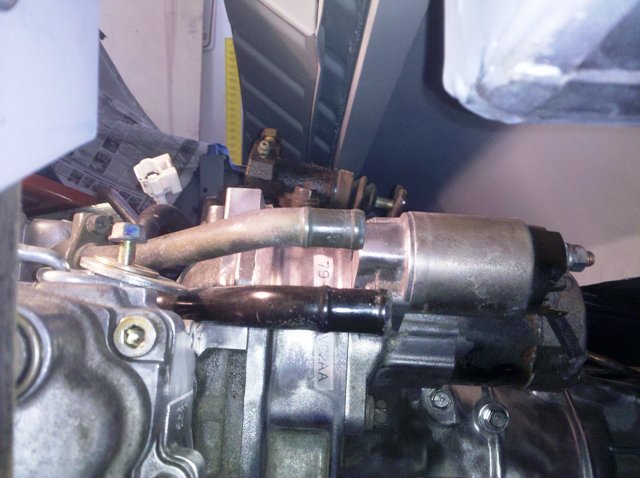
Keep it movin'!
Posted by: KELTY360 Jul 20 2010, 02:54 PM
Nice looking work. I like the way you took a little space from the rear trunk but retained it's utility. When you say 'front radiator system', does that mean front of the engine bay or front of the car? Sorry if I missed that detail in your build thread.
Posted by: KELTY360 Jul 20 2010, 02:58 PM
Nice looking work. I like the way you took a little space from the rear trunk but retained it's utility. When you say 'front radiator system', does that mean front of the engine bay or front of the car? Sorry if I missed that detail in your build thread.
Posted by: Zaney Jul 20 2010, 04:40 PM
Nice looking work. I like the way you took a little space from the rear trunk but retained it's utility. When you say 'front radiator system', does that mean front of the engine bay or front of the car? Sorry if I missed that detail in your build thread.
I am going for the "front of the car" radiator system. I picked up a new 90's VW Golf radiator at the Cascade Kombis Car Show/Swap Meet along with some decent used Bay Window Bus axles/CVs.
So, next is to build a radiator mount and shroud. Buy some gates radiator hose and pipe it into the engine bay.
Clean up the Bus axles, bus CV's, 914 CV's and then find a Suby radiator reservior at a pick n pull.
Fun stuff!
Posted by: charliew Jul 20 2010, 11:18 PM
Why not just take off from the front radiator to make the heater connections? That will be much cleaner than running the hoses from the suby lines that are facing rearward behind the motor unless you are going to put the heater core in the enginebay.
Posted by: Porcharu Aug 25 2010, 10:59 PM
Good to see MY idea for the trunk is working out well for the Subi Swappers (it's actually Ricks ie Aliens idea.) At this rate I might be the last person to have a running all Suby 914. It will happen - I just don't know when. The joys of a new house and son
Steve
Posted by: Zaney Aug 26 2010, 12:02 AM
I am actually in the redesigning phase of my transmission mount. I received some sage advice from some members about my first version of the trans mount being the lowest point of the car. Thus, being the first thing to get ripped off in the unfortunate event (ie. bad speedbump.)
So, I am going to go with a hard mount point to the trans case and use the stock 914 tranny mounting points with 911 sport mounts.
I am also collecting the necessary hardware to do the rear 5-lug swap with 944CVs, in SirAndy's classic thread.
Pics to come...
Nate
Posted by: charliew Aug 26 2010, 02:16 PM
I think you will find that unless you brace the motor or tranny front to rear they will swing forward and rearward under power. the only thing preventing it is the strength of the tubing crossection at the vertical part of the motor mount. Thats probably why Dana built the cradle type mount he made for rh. You maybe could build a mount from the top of the bellhousing to the tubing you put between the towers like the subys (pitch link) use to stop it.
Posted by: Zaney Sep 10 2010, 01:29 PM
After studying some online pics of some Suby trans mounts, I gave it another try.
I followed the advise of other Conversionites and used 911 sports mounts to attach the Suby trans to after fixing it with hard mounts.
The pics will say it better... Sorry for the blurriness, camera phone pics.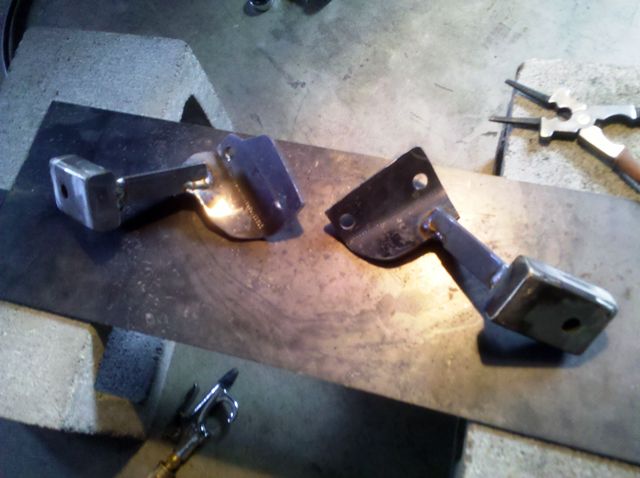
1 inch tubing that is boxed and sleeved for the bolt (prevent crushing)
attatched with 1"x1"x.25" angle steel to a .25" plate cut to fit the Suby case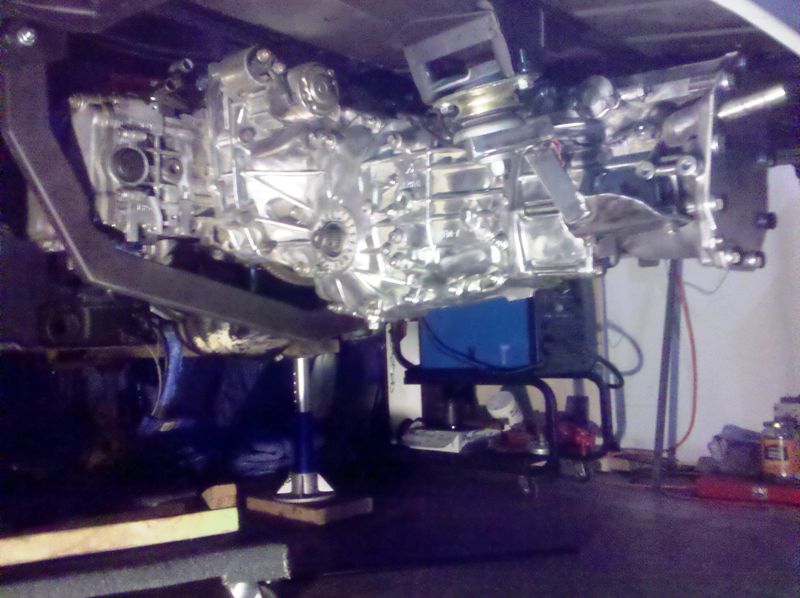
Suby mounts version 2.0
Posted by: Zaney Sep 10 2010, 01:36 PM
The main reason for the new mounts was to provide clearance for any obstacles that the rear of the car might encounter (ie. speedbumps)
I will see how the forward and rear sway of this system is effected by the acceleration and braking of the car. It was suggested to join the engine and trans mounts to provide more stability. I will watch this when I get it on the road and go from there.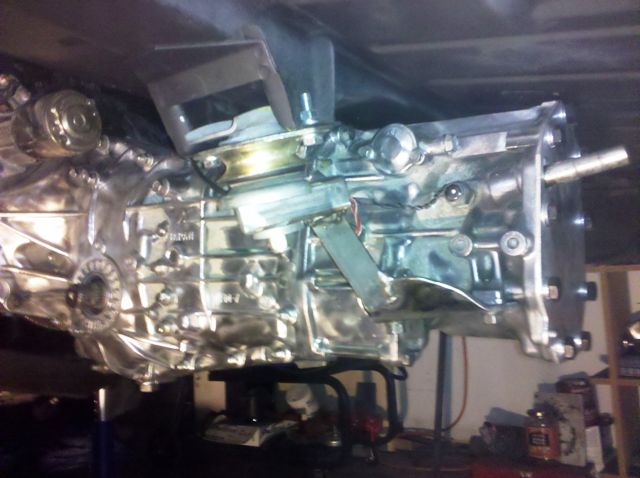
Another pic in car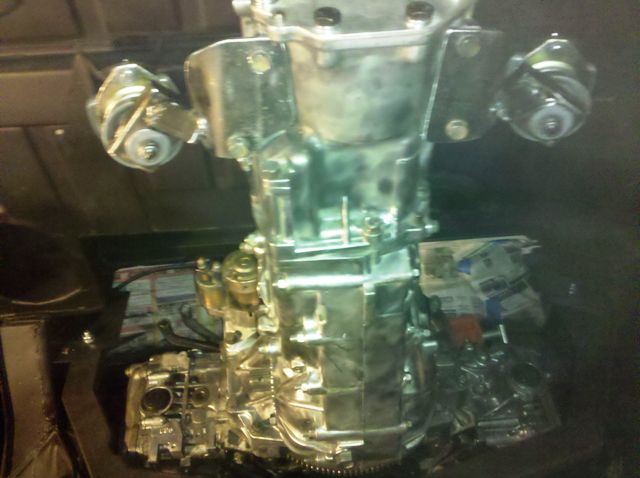
From below
More to come!
Cooling system and cable shifting system are next!
Nate
Posted by: strawman Sep 10 2010, 02:19 PM
Looks great Nate! Keep the updates coming.
Signed,
A Guy Who Has Been Too Lazy to Update My Build
Posted by: Zaney Nov 13 2010, 07:26 PM
Well, it has been a while but finally some progress!
I have been studying the pics of DBCooper's (Paul) awesome build and tried to copy his version of the cable shifter. I had some cables made from a company in the http://www.midwestcontrol.com/ and used some scrap metal from an old Seagrave fire engine for the shifter linkage!
So, here is the fruit of my MAN SKILLZ! (novice that they may be  )
)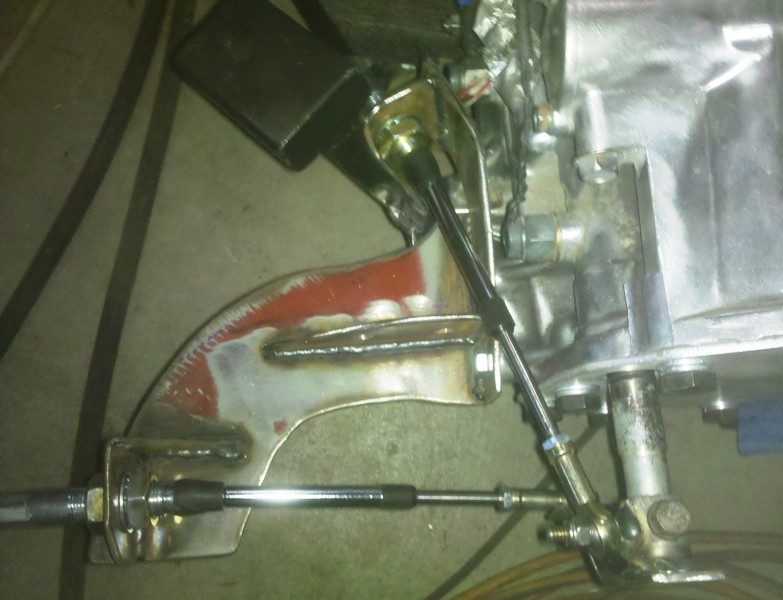
Top down view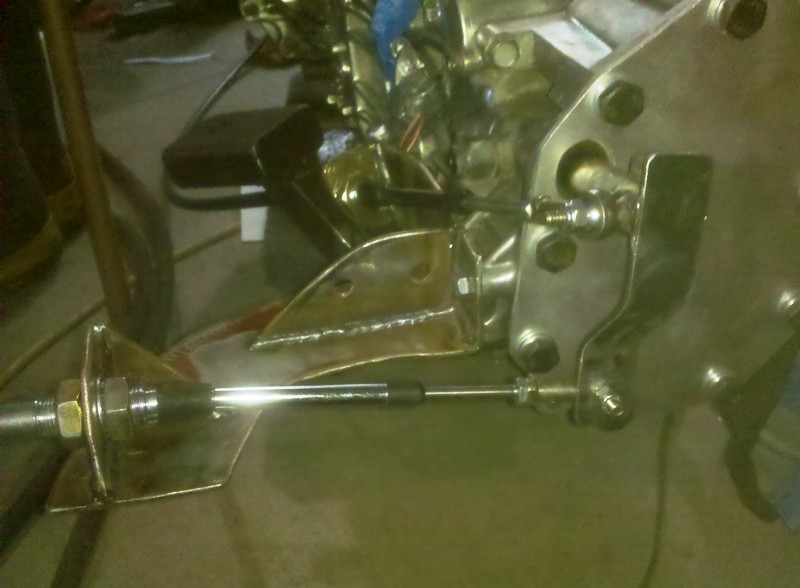
Looks kinda familiar 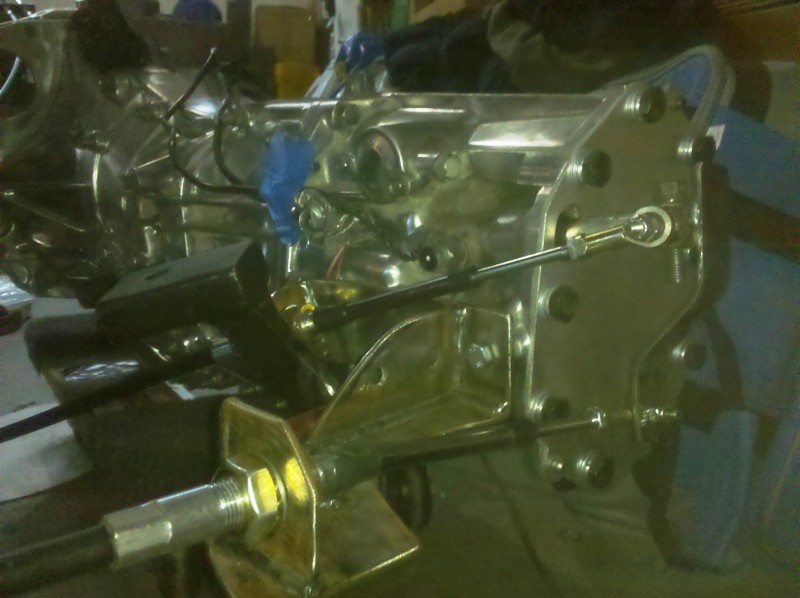
Still need to paint it up
I was able to play with a plasma cutter at the fire mechanic shop for the first time and boy that thing is awesome! 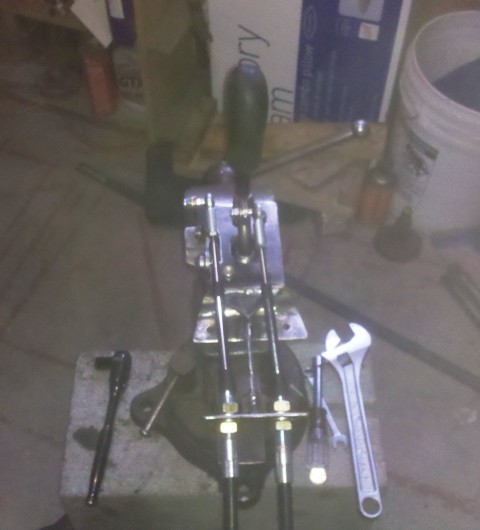
Cable shifter using an MR2 linkage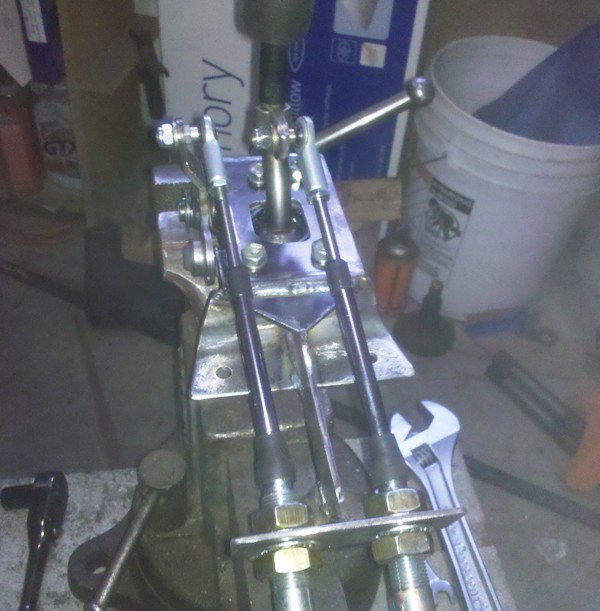
another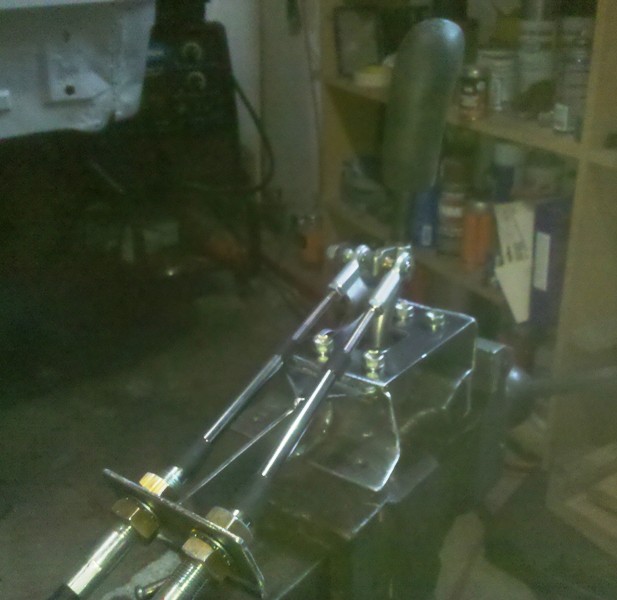
I still need to mount it in the car and make it pretty but, I am very proud of myself considering I have never done this before!
Now it is time to go out in the garage and pretend I am driving it
Cheers,
Nate
Posted by: sawtooth Nov 13 2010, 08:09 PM
Very nice. I'll be doing the same very soon. Keep up the great work!
Posted by: strawman Nov 14 2010, 01:48 AM
Great job Nate. I'm finally in the "pre-assembly" stage with my Suby-teener, so it is great to see your progress to inspire me. Keep up the good work!
Posted by: Zaney Nov 14 2010, 10:54 AM
Thanks Geoff!
Next step is copying your hydraulic clutch solution and getting the car one step closer!
Posted by: Zaney May 3 2011, 02:19 PM
Been too long since I have posted any progress on the Suby project but, there has been a bit of movement! 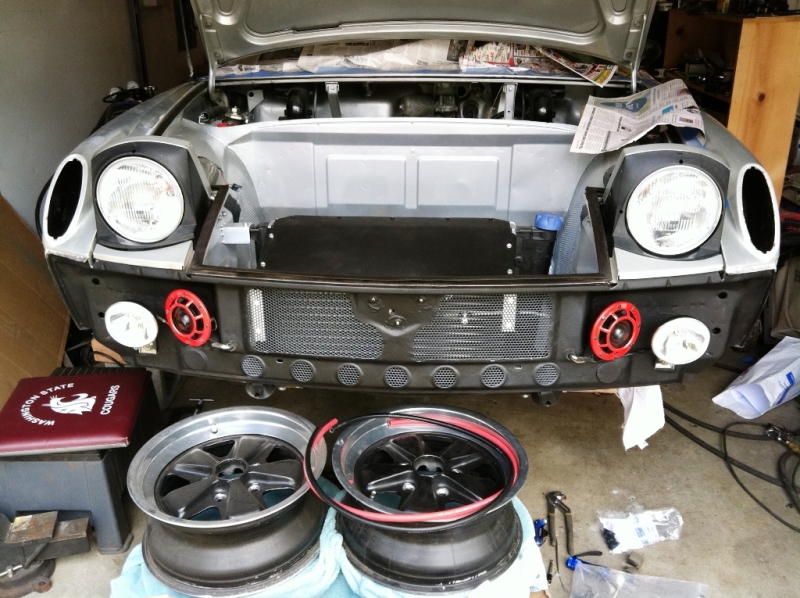
-Installed the hydrallic clutch master cylinder and ran the hard line to the back. Followed Strawman's idea about using it with the stock pedal cluster.
-Gathered all the necessary pieces for the five lug swap. I did the front strut option and followed Sir Andy's thread for the rears.
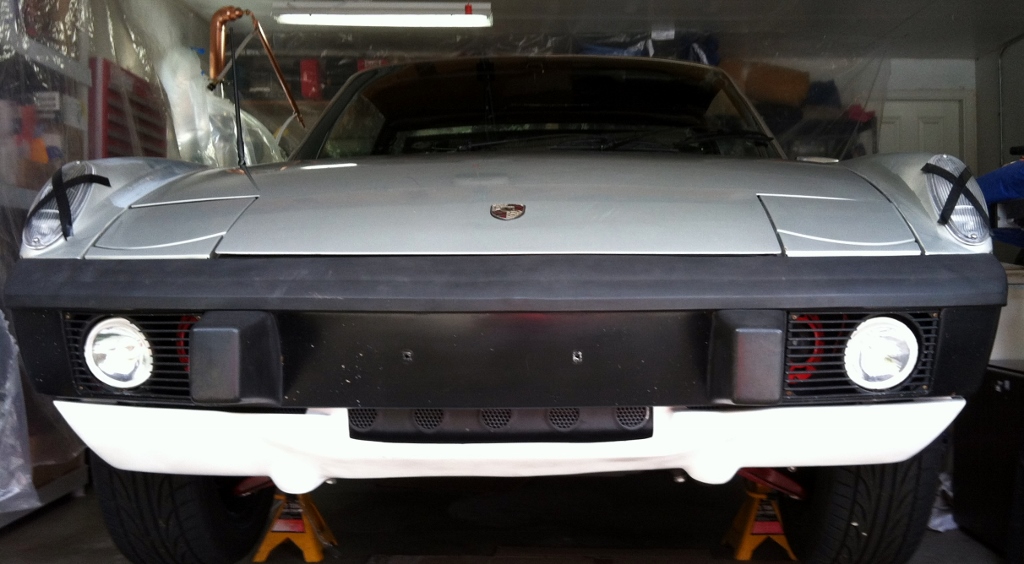
-Cleaned up the front trunk and prepped it for the radiator. Cut the exhaust holes and welded in the all of the openings.
-Painted the Fuchs and I am picking up some tires this week!
-Got the Suby manifold flipped over, moved the alternator, and rewired the engine harness to fit.
-Trimmed out all off the unnecessary wires out of the stock Suby harness using Small Car Performance info and made a harness to mate with the Teener.
Posted by: Zaney May 3 2011, 02:23 PM
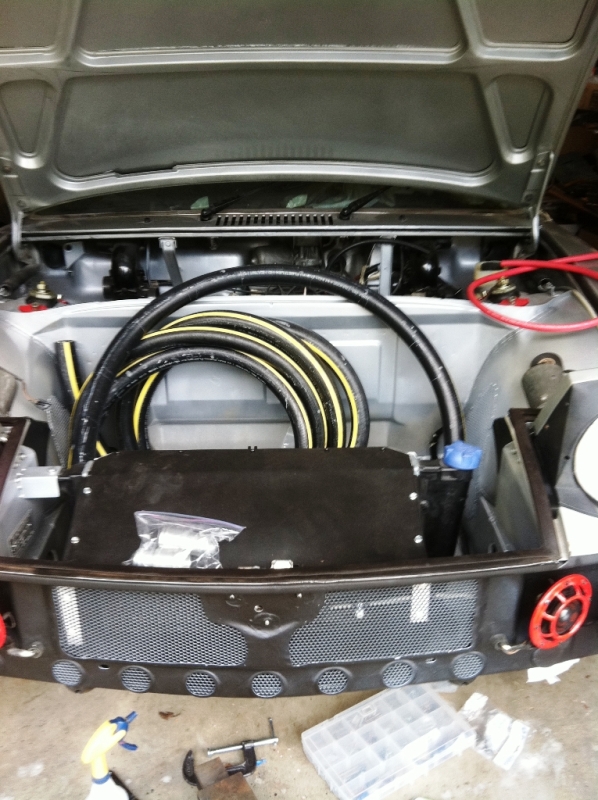
Ordered the Gates radiator hose from Renegade Hybrids and reinstalled the front wiring harness.
Still need to install the hose.
Posted by: sawtooth May 3 2011, 02:24 PM
Looking great Nate, keep it up! You'll have that suby running in no time.
Posted by: Zaney May 3 2011, 02:25 PM
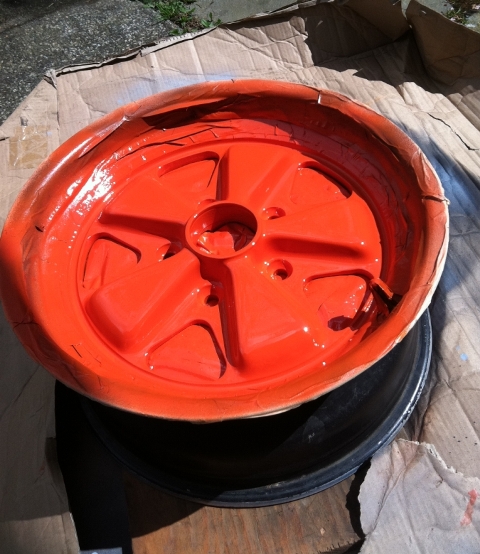
Phoenix Red!!!
16x7's! Tires to be picked up this week.
Posted by: Zaney May 3 2011, 02:28 PM
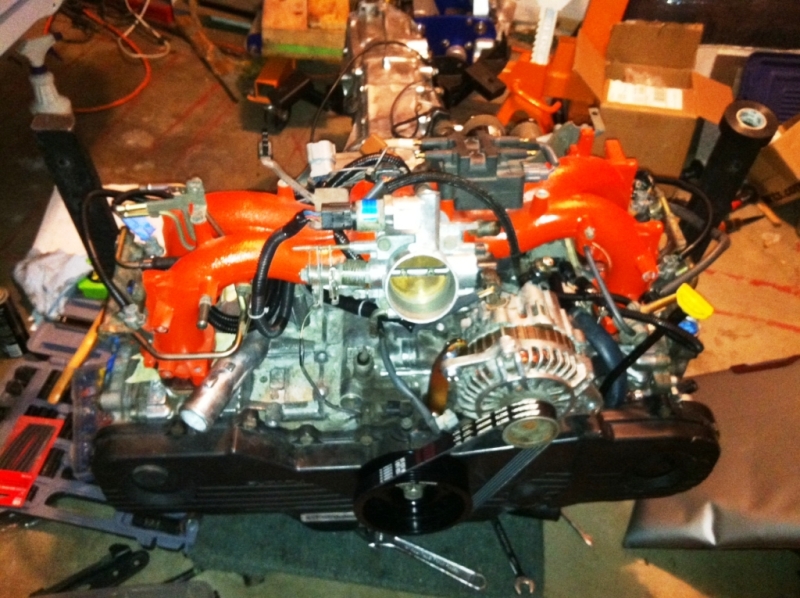
Suby engine!! Ready to be installed! Minus some tubing...
-Still need to route the engine fuel lines with the Walbro fuel pump. Already put in Racer Chris' SS lines.
-Need to order small bits for the front fuel system before putting everthing back.
Posted by: ruby914 May 10 2011, 09:09 AM
Looking good. Nice work Nate.
What profile tires will you use?
Posted by: Zaney May 10 2011, 10:49 AM
I picked up a set of Falken 205/50/ZR16 tires!!
Still waiting for set of lug nuts from Rennline in the mail. Then, I will see if I need to stretch the rear wheel wells.
Posted by: JRust May 10 2011, 01:18 PM
Hey Nate is that Outfronts alternator relocation bracket? If so how did you get it to fit & the alternator not hit the AIR ports? I had to stick ny alternator further up & right
Posted by: Zaney May 15 2011, 08:17 PM
Hey Nate is that Outfronts alternator relocation bracket? If so how did you get it to fit & the alternator not hit the AIR ports? I had to stick ny alternator further up & right
I have a 2002 2.5 NA engine and flipping the manifold 180 was not just a plug and play. I had to trim back the heater hardpipe leading down to the water pump and use a rubber hose to connect it. Also, I had to take apart the engine stock harness and splice in a few extra inches to make everything reach. I am using the stock ECU and harness that I trimmed down using Small Cars' print out for a 2002.
I am also using a phenolic spacer for the intake manifold which also gave me a bit of clearance room for everything to fit.
I will post some pic of everything in place once I am done with all the wiring.
Cheers,
Nate
Posted by: Zaney May 27 2011, 09:52 PM
Here are some pics of some more progress: 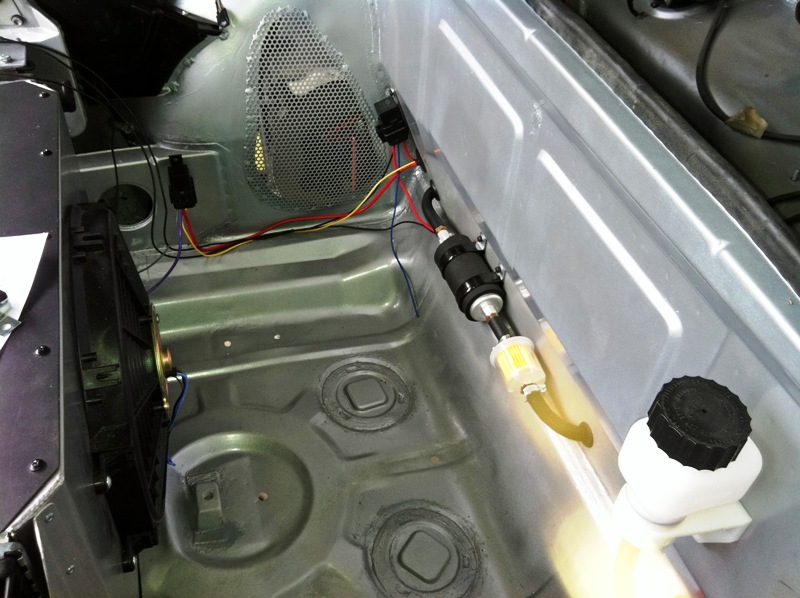
Front trunk with Walbro fuel pump installed & remote reservoir for hydraulic clutch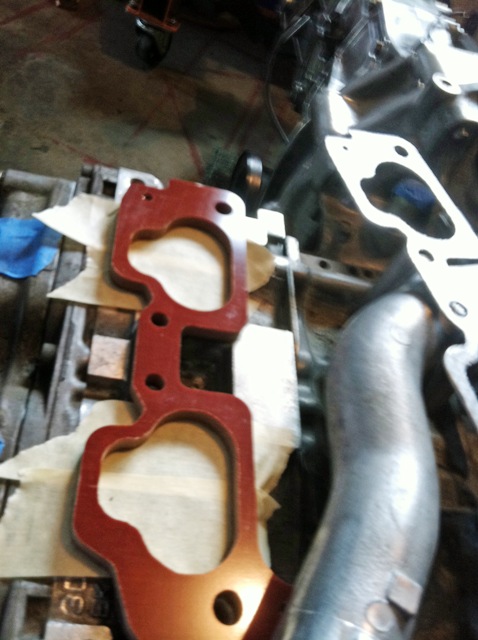
Phenolic spacer ordered from Grimmspeed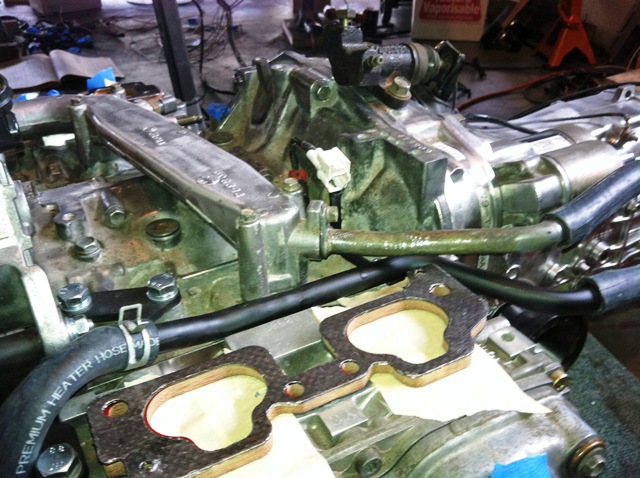
Modified heater downpipe to the water pump
Posted by: Zaney May 27 2011, 09:53 PM
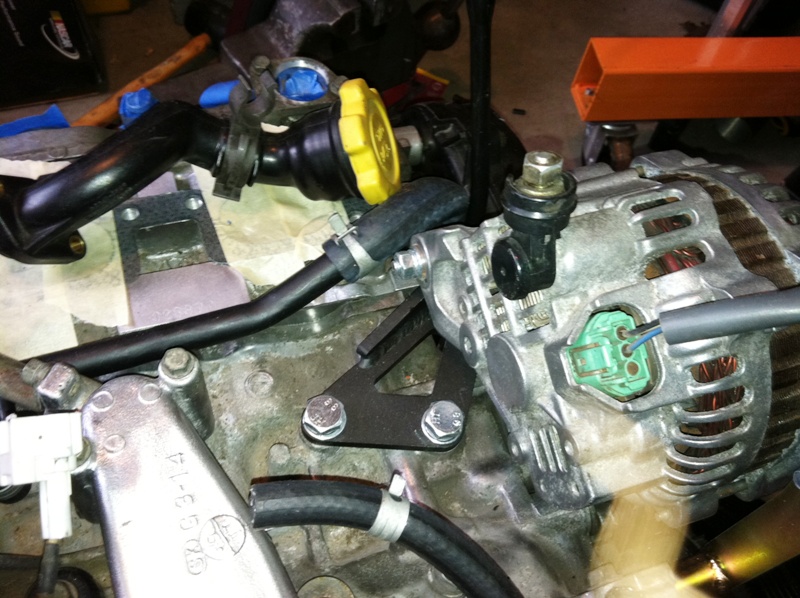
Side view of Outfront unmodified Alternator bracket
more pics to come next week ![popcorn[1].gif](style_emoticons/default/popcorn[1].gif)
Posted by: sawtooth Jun 14 2011, 04:24 PM
Hey Nate, what's the status. You must be getting close. Going to make it to WCR?
Posted by: Zaney Jun 15 2011, 02:23 PM
Thanks for checking in on me Dean
However, the car will not be ready by WWC '11, even if I would be in town. I will be in Maui, for my sister-in-laws' wedding.
Quick question to Suby converts. Does the later stock Tach from the 914 work with the signal sent from the Suby ECU?
I found this quote the the Classics engine conversions thread:
Tachometer- Early (silver button) 914 tachometers will not register the stock Subaru ecu tach output signal. They can be modified to work with the addition of one resistor (search the forum). Later 914 tachometers should work fine. The basic 5" Autometer tach(~$100) will fit in place of the original tach and register correctly.
Can anyone confirm this? It would save me a bit of money right now until I can afford a new gauge makeover. I need to use the Tach in order to break in my Delta Cams.
Thanks!
Nate
Posted by: sawtooth Jun 15 2011, 02:34 PM
Thanks for checking in on me Dean
However, the car will not be ready by WWC '11, even if I would be in town. I will be in Maui, for my sister-in-laws' wedding.
Quick question to Suby converts. Does the later stock Tach from the 914 work with the signal sent from the Suby ECU?
I found this quote the the Classics engine conversions thread:
Tachometer- Early (silver button) 914 tachometers will not register the stock Subaru ecu tach output signal. They can be modified to work with the addition of one resistor (search the forum). Later 914 tachometers should work fine. The basic 5" Autometer tach(~$100) will fit in place of the original tach and register correctly.
Can anyone confirm this? It would save me a bit of money right now until I can afford a new gauge makeover. I need to use the Tach in order to break in my Delta Cams.
Thanks!
Nate
Bummer, I was hoping see your car and have 3 suby trans conversions there. Next year then. Maui will be an ok alternative to WCR I suppose, have a great trip!
Posted by: Zaney Aug 26 2011, 11:15 PM
Been awhile since I last posted and saw a bit of progress but, not enough to get me on the road in time for the Edmonds Teener Picnic. Next year for sure! 
Got the engine mechanical and electrical gremlins resolved:
-Time belts are a pain in the butt!
-Grounds are really important, especially the trans to the body!@
-Wrapped and unwrapped the harness about 3 times...
-Still need to get a cleaner adaptor between 914 and Suby accellerator cables
-Initially bought the wrong length Bus axles (too long) realized they were from a Vanagon and not a Baywindow bus. Traded for the correct length! Fits like a glove with the Porscharu adapters!
-Now I need to get the front alignment close enough to drive it to the shop.
And now for the pics!
Engine and modified stock engine harness with new Odyessy Battery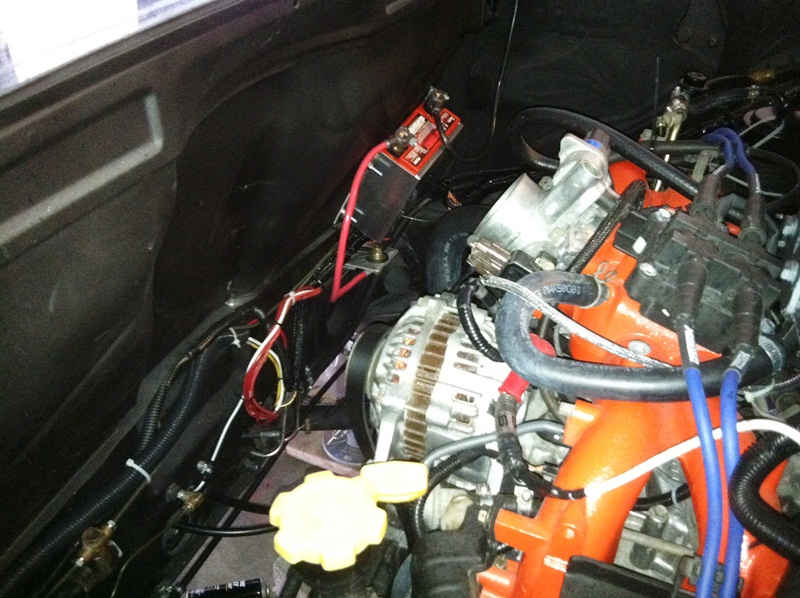
Correct length VW Bus axles between Magic Flanges and 944CV's with the cable shifter installed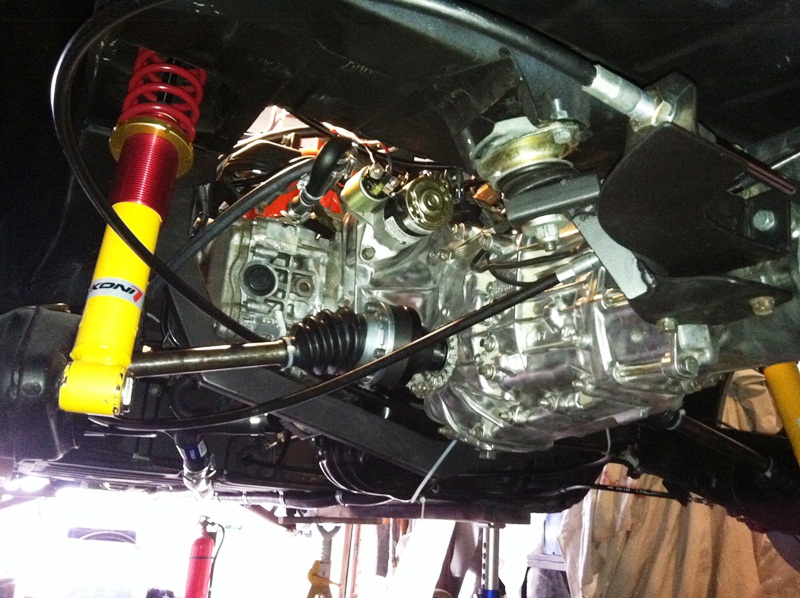
Attached image(s)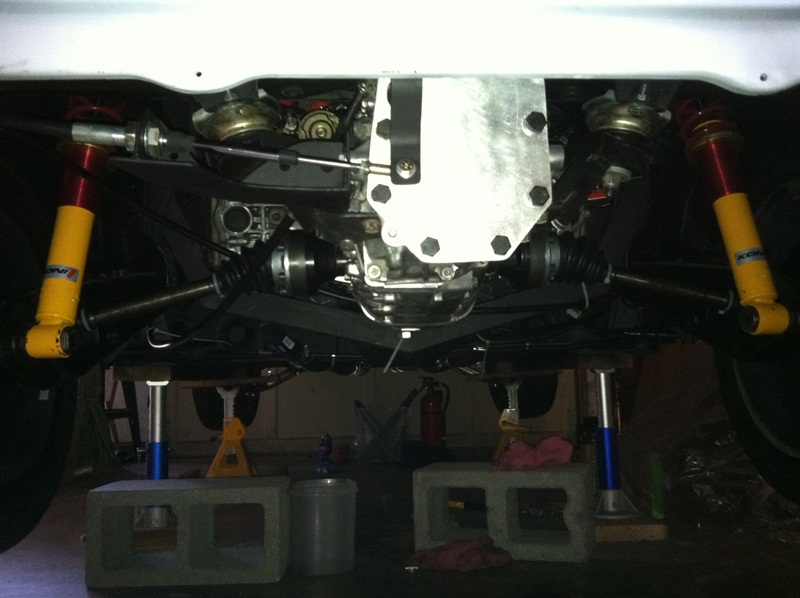
Posted by: Zaney Aug 26 2011, 11:24 PM
Getting ready to mount the harness for each of the seats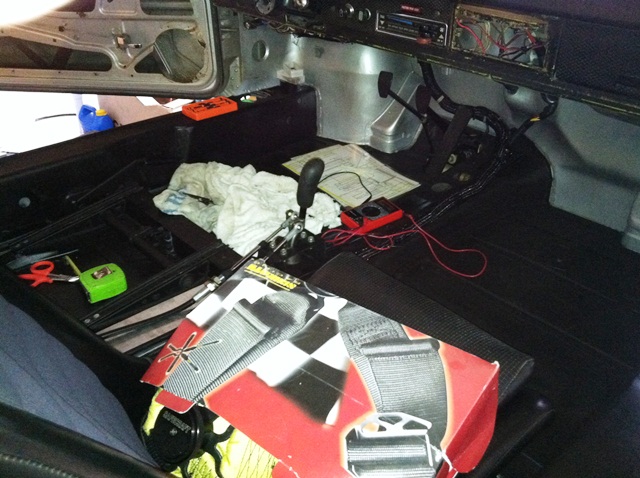
Shifter mounted in the cockpit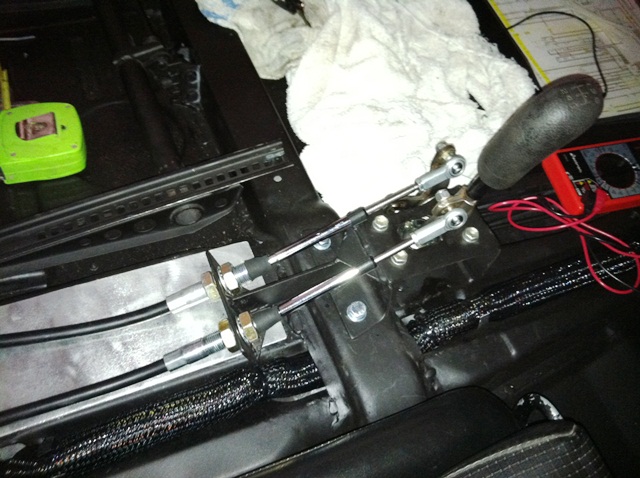
Stock ECU and wiring harness ready to be secured in the trunk
Still need to polish the chrome but the red brakes with the Phoenix Wheels look good! 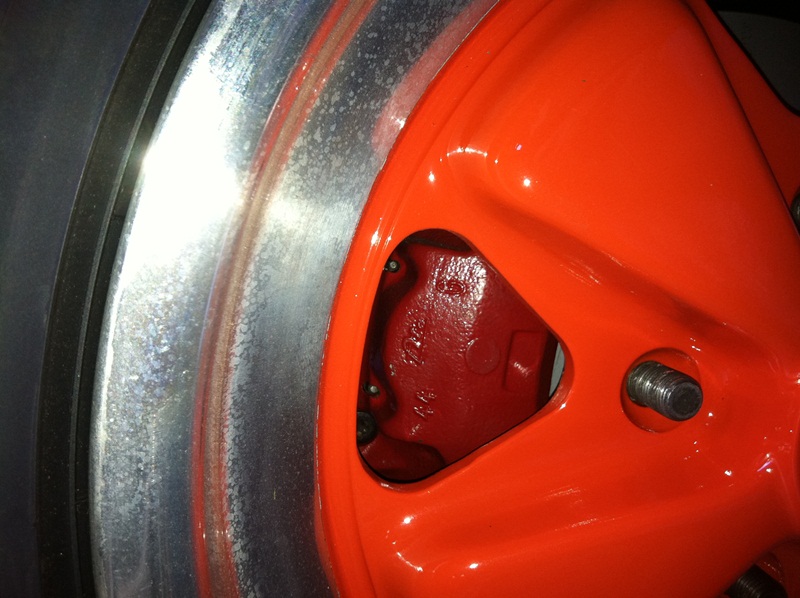
Radiator hoses secured and mounted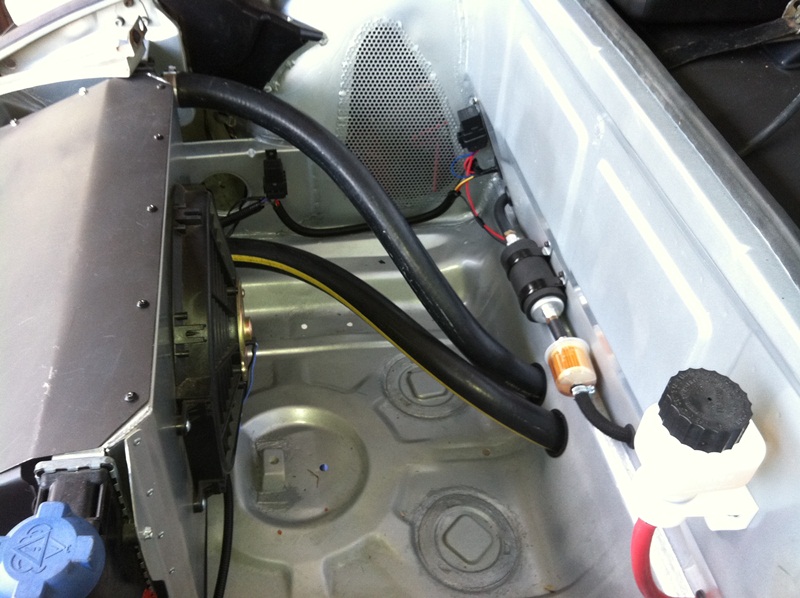
Posted by: messix Aug 26 2011, 11:35 PM
nice work
Posted by: Zaney Aug 26 2011, 11:58 PM
Here is the moment of truth!
https://www.youtube.com/watch?v=rfR0rISZyPU
Posted by: Mr.242 Aug 27 2011, 01:25 AM
Nice....too bad it wasn't at the BBQ. You the man!
Posted by: strawman Aug 27 2011, 03:13 PM
Attaboy Nate! I'm getting closer to starting my Suby conversion; seeing yours run will give me some needed inspiration!
Posted by: JRust Aug 27 2011, 03:19 PM
Nice! Love seeing the first start! Way to go man but get some headers on that bad boy
Posted by: BIGKAT_83 Aug 27 2011, 04:00 PM
Looks really nice. You have done alot of work with everything not just the conversion, The cover in the trunk came out great.
Bob
Posted by: Zaney Aug 27 2011, 11:04 PM
Thanks for all the kind words!
I am hoping to wrap up some of the loose ends and get this thing on the road before too long! That's it for now, going to the San Juan Islands for a quick getaway!
Cheers!
Nate
Posted by: Porcharu Sep 1 2011, 01:22 AM
Thanks for all the kind words!
I am hoping to wrap up some of the loose ends and get this thing on the road before too long! That's it for now, going to the San Juan Islands for a quick getaway!
Cheers!
Nate
Great work Nate. You are doing just fine on the fab stuff - don't sell your self short!!!! Can't wait to so the finished project.
Steve
Posted by: RobW Sep 1 2011, 06:43 AM
Nice work!
Posted by: sawtooth Sep 1 2011, 08:41 AM
Wow Nate, nice to hear that suby fire up. Building your own modified stock harness is no small task. Great work! You will love the way that motor/trans combo makes a 914 feel.
Posted by: jpnovak Sep 1 2011, 08:56 AM
Nice work. I started mine a few weeks ago as well.
How have you connected the hydraulic clutch on the Suby transmission?
Posted by: Zaney May 31 2012, 07:05 PM
Time to do some updating...
So, this past Fall I was on the path of getting this Teener on the road but...
After a few test drives around the block I pulled into the driveway and noticed a trail of oil following me to a pool forming under my car. I wanted to push the POS out into the street and light it on fire
Instead, I turned it around and backed it into the garage and prepped the car for engine removal.
I tore it down to the rear main seal behind the flywheel and found that I had installed the prior incorrectly. So, I went to the dealer and got a new one and researched how to install it properly. Got it done in a long day and put it back in the car.
Then, throughout the following months I went through the 914 wiring and tried to weed out any bugs. I have everything ironed out except, that I can not have my headlights on and have the turn signals flash.
Now, I borrowed the HOT wire engine bay fuse panel idea and replaced my future car fire with a safe boat water resistant fuse box.
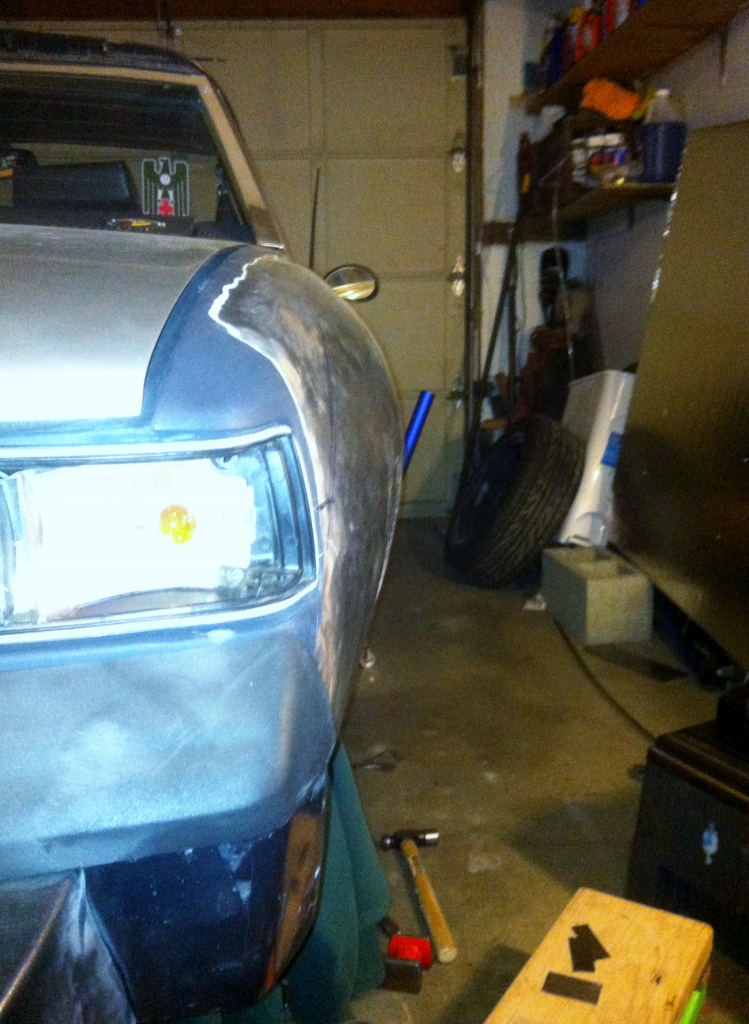
I have to expand my rear wheel wells by about 1/2 inch or so in order to make the 16x7 inch tires fit. My question is should I hammer and dolly the fenders or roll them with the "baseball bat" technique? I am pre-paint so that is not an issue to me right now.
Then, I am off to the alignment shop to dial in the suspension!
Here are the pics!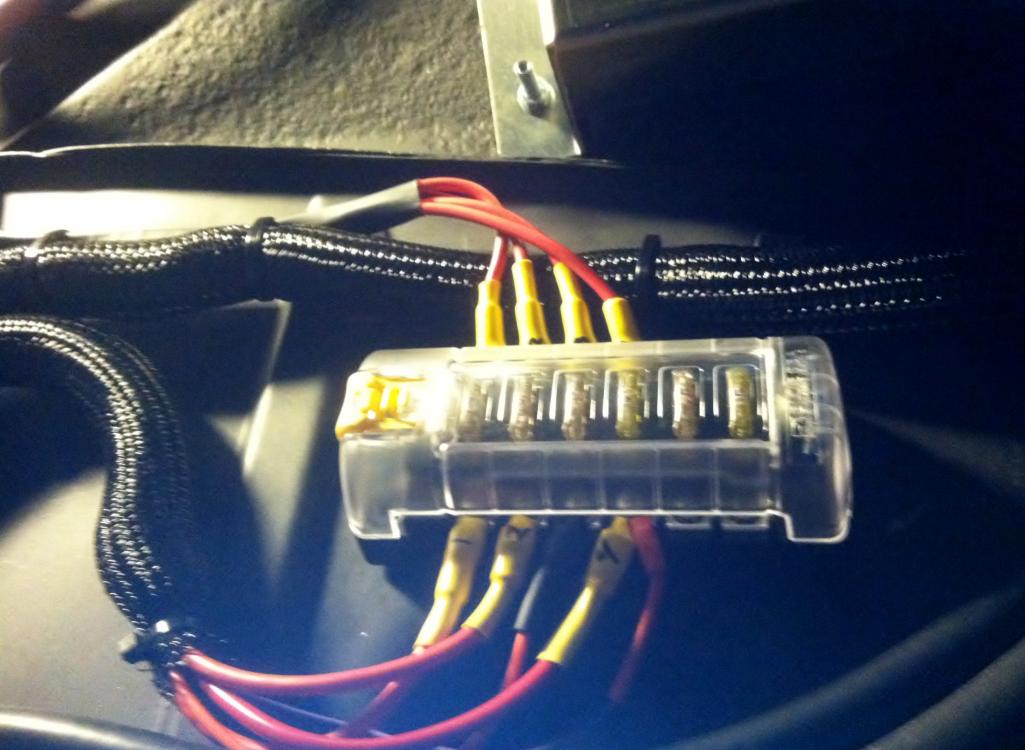
Blue Sea fuse panel
Cleaned up
Posted by: Zaney May 31 2012, 07:08 PM
My novice body work on the passenger fender.
Posted by: Zaney May 31 2012, 07:11 PM
I am going to use these Audi markers behind the front fender well to help prevent me from getting T-Boned.
Posted by: Zaney May 31 2012, 07:13 PM

Here is where I am with the rear fenders before the stretch!
Input is welcomed
Posted by: a914622 May 31 2012, 08:48 PM
bat roll it! My 16x7 fit under the rear. I do plan on lifting about a 1/2-1 inch. I like the not slamed look.
Nice work. If you are looking for a header Call or stop by Stan's header down in Auburn. He is making vanagon/2.5 headers. It could be run on the 914s
jcl
Posted by: Zaney Jun 26 2012, 01:59 PM
So, I decided to go the CSOB route with the stretching of the rear fenders. Since the weather here in the PNW is still rainy and crappy  I am using the John Kelly method of flaring my rear fenders.
I contacted John Kelly about his DVD and info about his planishing hammer. It turns out that his hammer was for sale! So, I picked up the DVD and a planishing hammer!!
I am trying to contact Zach, the owner of the 914 in the video, to get some better photos of the rear flares in order to get a good idea of what I am doing.
Here are some pics of the experiment!
Stripped the paint and traced out some fluid lines in order to make a good looking flare!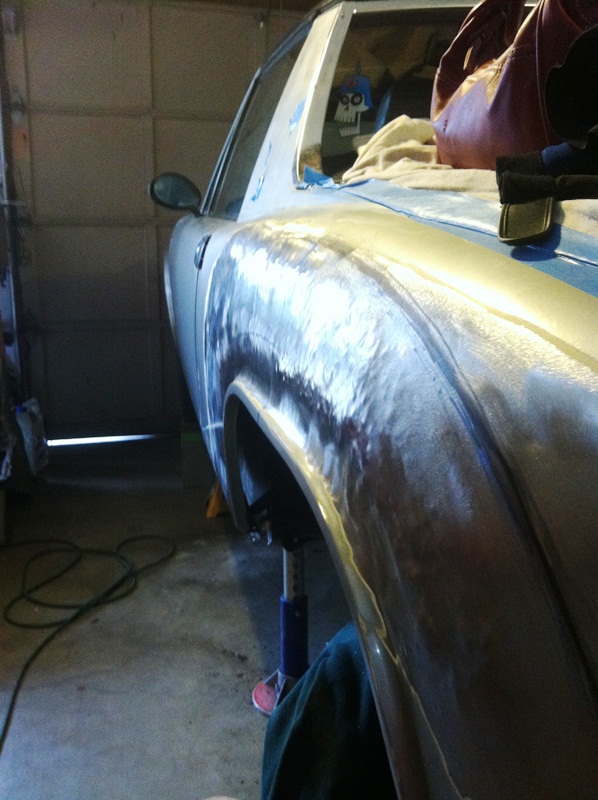
Stretching and smoothing! Slowly!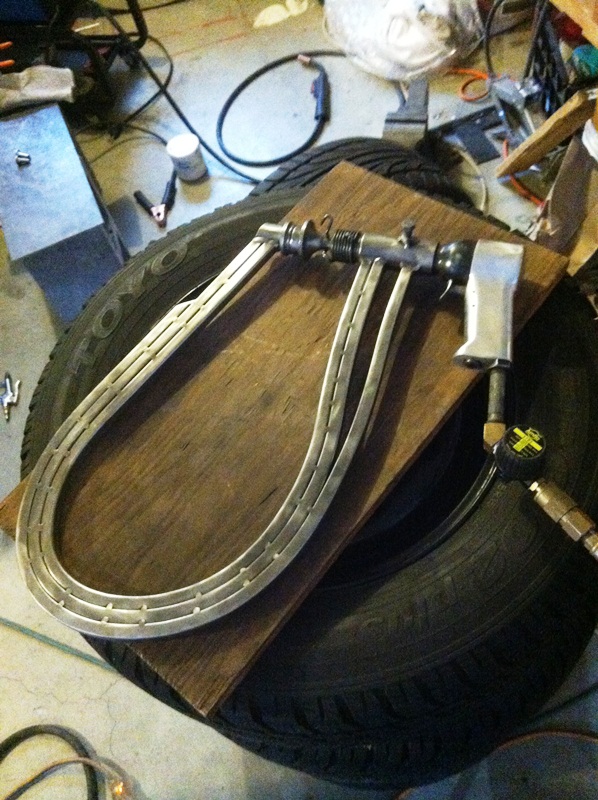
Made by the man himself, John Kelly!
Now in the hands of a novice
To be continued...
Posted by: jmmotorsports Jun 26 2012, 03:39 PM
If you want to sell the planishing hammer when you are finished with it, I am interested.
Jerry
Posted by: rdauenhauer Jun 26 2012, 05:46 PM
Very Cool Nate LMK if you touch base w/Zach, I've often wondered what happened to that car. The flares on his car are the BOMB!
I still have the set of flares that John created "in" that video, hanging on my wall.
Posted by: Mr.242 Jun 26 2012, 08:39 PM
HURRY...July 5th we start our summer weather. need to have that car out and running around!
Posted by: 76-914 Jun 26 2012, 09:49 PM
Is John Kelly the guy that did that amazing Gull Wing Karmann Ghia? Another metal wizard in your state is Kent White. I love watching these guys create. Your planishing hammer is cool. Is that a Chicago 4x Rivet gun? That head looks like a counter sunk rivet set, too. Looks like genius to me.
Posted by: Zaney Jun 26 2012, 11:26 PM
Is John Kelly the guy that did that amazing Gull Wing Karmann Ghia? Another metal wizard in your state is Kent White. I love watching these guys create. Your planishing hammer is cool. Is that a Chicago 4x Rivet gun? That head looks like a counter sunk rivet set, too. Looks like genius to me.
Yes, it is the same metal craftsman from http://ghiaspecialties.com/ I believe he made the hammer frame and used a rivet gun body. The dies for the inside are homemade as well, I believe. Either way, I am now a metal shaping fan! I want to get more equipment in the future (ie. english wheel and dies) It is fun and gives me that Kustom Hot Rod flavor to instill on my Teener, definately similar to a 356 Outlaw! Or at least after a few pints!
Rich - I will share the pics of Zach's car in the thread if I can. I believe he still has it. I work with his brother-in-law at the Fire dept. and he gave me Zach's e-mail.
PS> here is a pic from the GS website
Wish me luck on finishing the drivers fender in the next few days!
Cheers!
Nate
Posted by: rhodyguy Jun 27 2012, 07:36 AM
you've developed some mad skills nate. a far cry from the beginning picking up a used trans at emerald downs.
k
Posted by: Zaney Jun 27 2012, 01:09 PM
you've developed some mad skills nate. a far cry from the beginning picking up a used trans at emerald downs.
k
Thanks Kevin!
I figured that this Teener is a great way to develop some Man Skillz! I wasn't as interested in all the Tinkering that my Grandfather did when I was younger but, now that he is gone I want to continue the tradition. Of course, it helped that he was a machinist. I am now developing an affinity for Hand-made art and cars!
More for me in the future!
Nate
Posted by: Zaney Jun 28 2012, 04:10 PM
Started on the fender today and made some good progress
Now I am waiting on the shrinking disc and slapping spoon to come in the mail.
Here are some pics: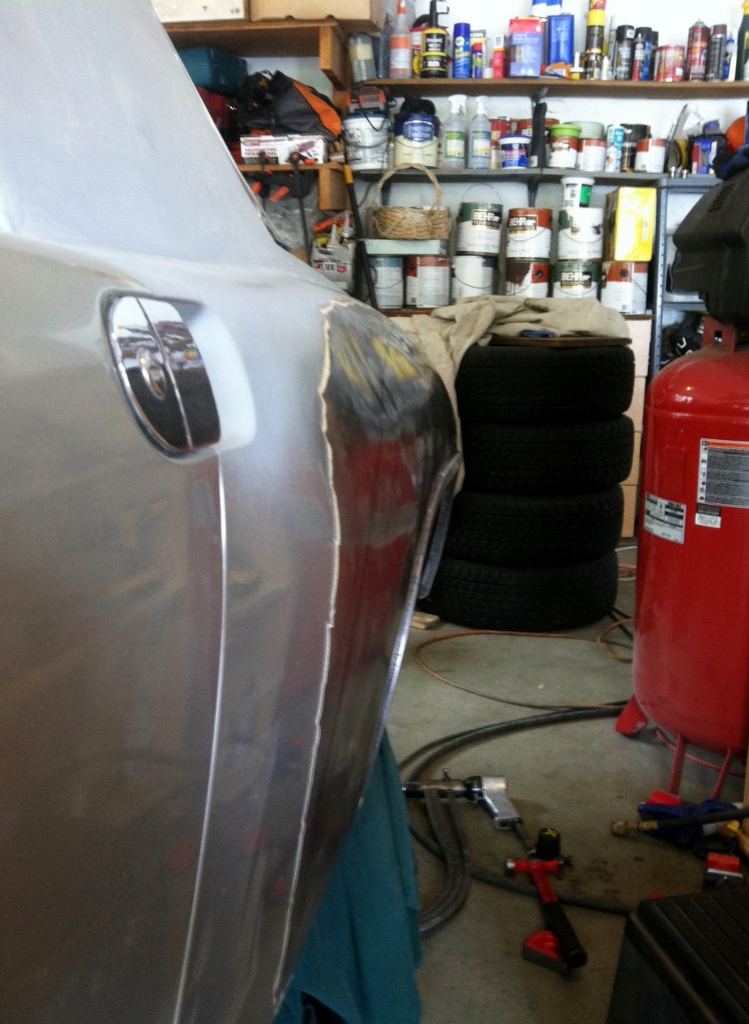
More to come!
Cheers,
Nate
Posted by: rdauenhauer Jun 28 2012, 05:36 PM
invest in ear plugs!
Posted by: boogie_man Jun 28 2012, 05:40 PM
Wow !!! that's some great workmanship right there. Keep those pix coming please......
Posted by: rhodyguy Jun 29 2012, 08:42 AM
john's flairs are so subtle. you going to shoot the car yourself?
k
Posted by: Zaney Jun 29 2012, 09:50 AM
I might have an opportunity to purchase a good spray gun with with my father-in-law and in doing so, have access to knowledge about paint. He has friends that own a auto paint store in Longview, WA.
If I can smooth out all the panels in bare metal form I even thought about polishing them up and just clear coating them  Kind of like the Anklebiter. Then, leaving the hoods and roof in paint. (or maybe Carbon Fiber in the Future???)
If not, then all stock Metallic Silver with Phoenix Red wheels and rockers & valences.
A Silversickle!
A guy has to dream 
Cheers,
Nate
Posted by: BIGKAT_83 Jun 29 2012, 10:17 AM
Very impressed, 
You have any idea how long it took to get this far? You must be working on them 24hrs a day,
Bob
Posted by: Zaney Jun 29 2012, 10:30 AM
Very impressed,
You have any idea how long it took to get this far? You must be working on them 24hrs a day,
Bob
I have only worked on the driver's rear fender and have about 4 hours into it including sanding it down to metal. I started to use a palm nailer and sand-filled purse but I found a ball peen hammer gives me more control. Then, followed up with the planishing hammer and hand dollys. All wearing good hearing protection for sure!
I am waiting for a shrinking disc and body slapping spoon to come in the mail. These will help do the fine tweeking and finish work. Then, I will sand off all the filler on the passenger rear fender and start pounding away!
I am still undecided about the front. My wheels fit but I love the look and it gives room for wider 8" tires in the future.
Eirther way, it is fun work!
You see instant results! Just don't try and skip steps.Nate
Posted by: ruby914 Jun 29 2012, 10:58 AM
Nice work Zaney,
I always think of my WRX car as a never ending school project. Looks like you are taking the body work class now.
After I put the flares on my car I spent sooooo much time taping and shrinking. After seeing others "no filler work", I thought, I would never be happy with my work.
Your work looks great. Your next challenge will be getting the passenger side and the drivers side the same. You may need to make some templates.
Posted by: 3d914 Jun 29 2012, 05:59 PM
Started on the fender today and made some good progress
Now I am waiting on the shrinking disc and slapping spoon to come in the mail.
Here are some pics:
Nice work. I like round rears - especially on the 914.
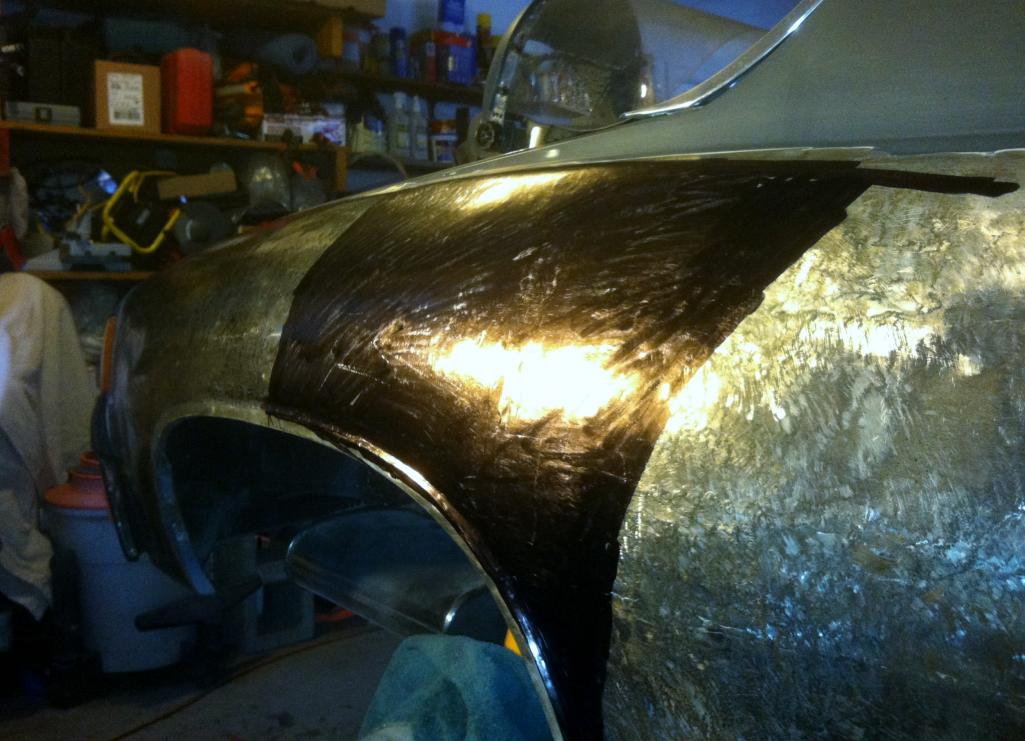
Posted by: Zaney Jul 15 2012, 10:11 PM
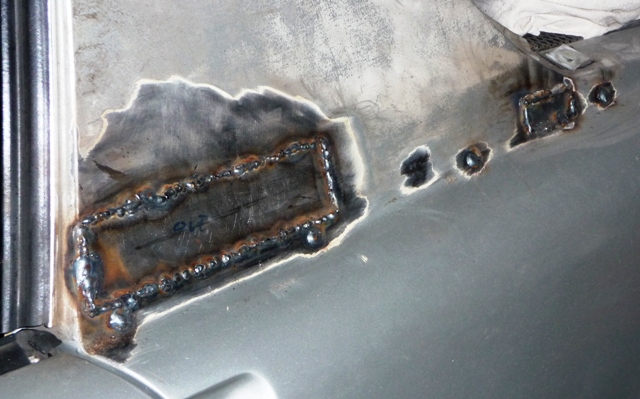
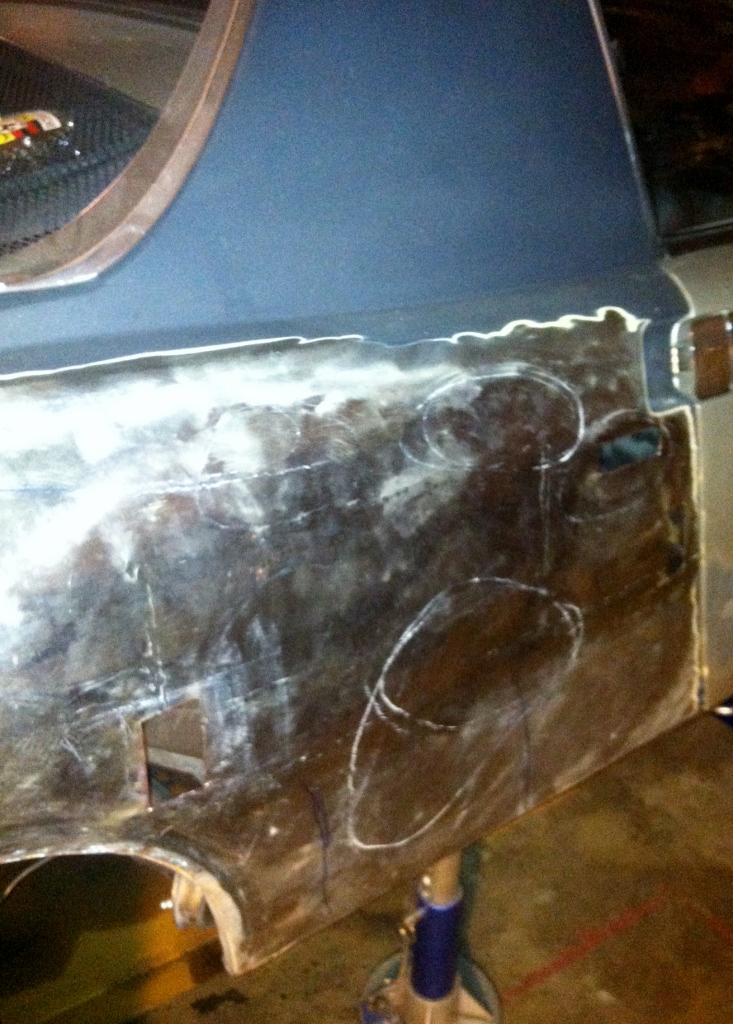
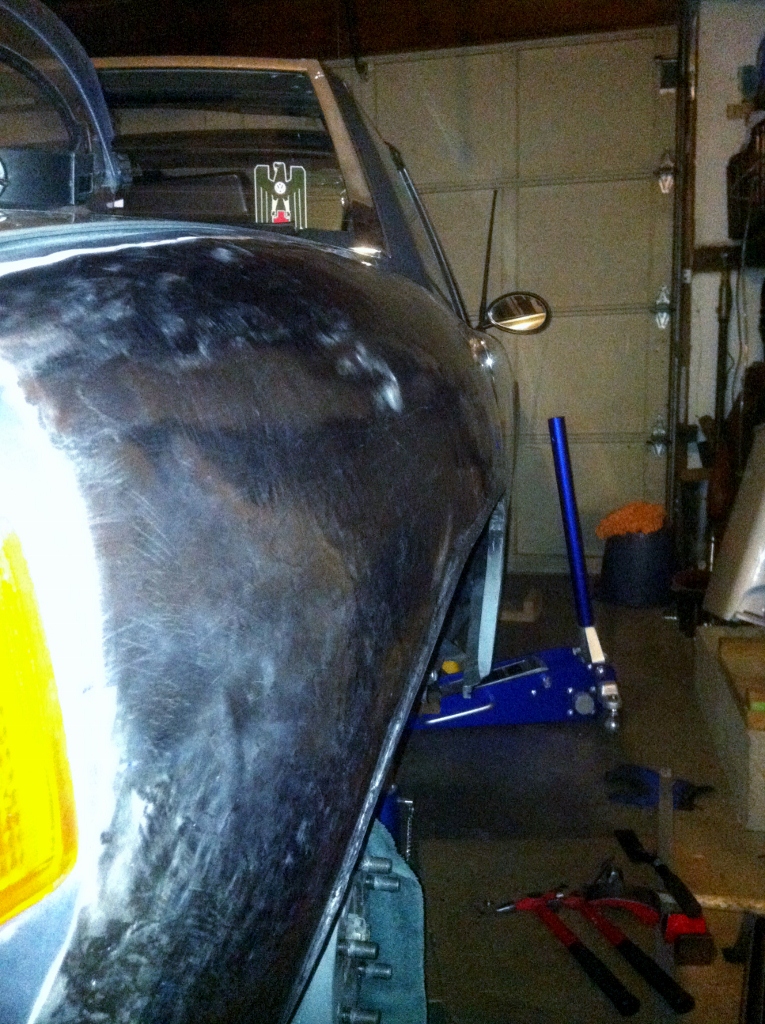
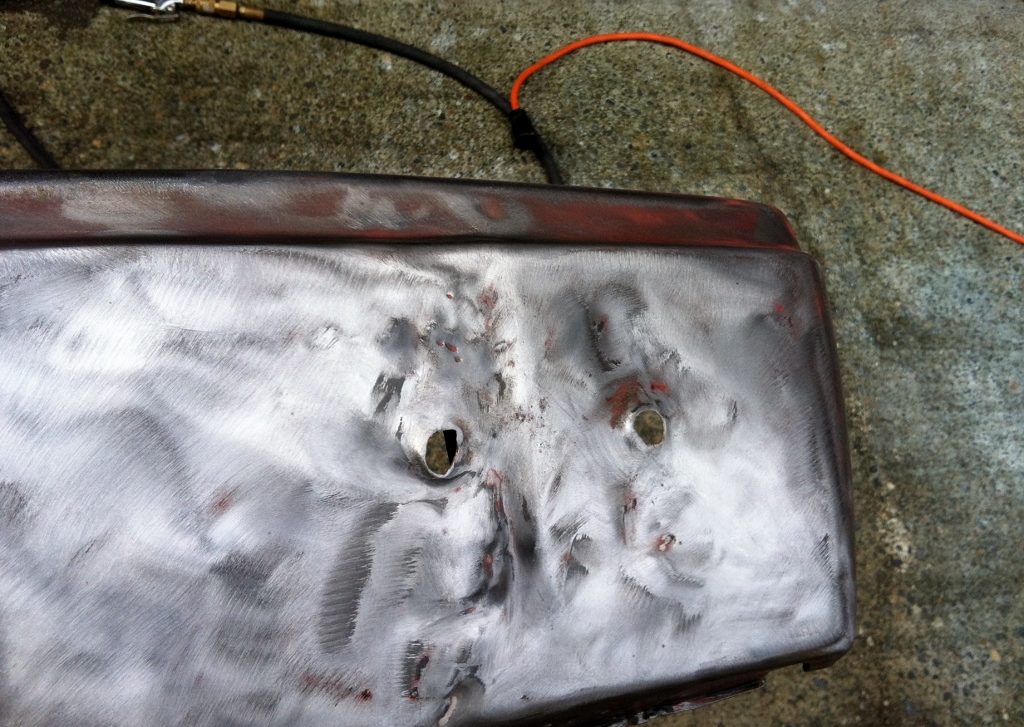
Ok, had a bit of time these past SUNNY days to work on the passenger side rear. Boy, what a mess!  Up to 1/2 inch of filler applied to an oil can dent (by me ) was ground out. Got the entire side exposed in bare metal and traced my template and made some landmarks.
Sorry no pics of the mud but trust me, it would not let a magnet stick
My biggest problem is working around the welded seams of my panel repair to the inner long. I eventually had to cut out some thin spots and I am waiting for another free day to tidy it up. However, I did make some good headway on the flare itself! I just need to mirror them better when I get the slapping spoon and shrinking disc this week!
So, here are the pics!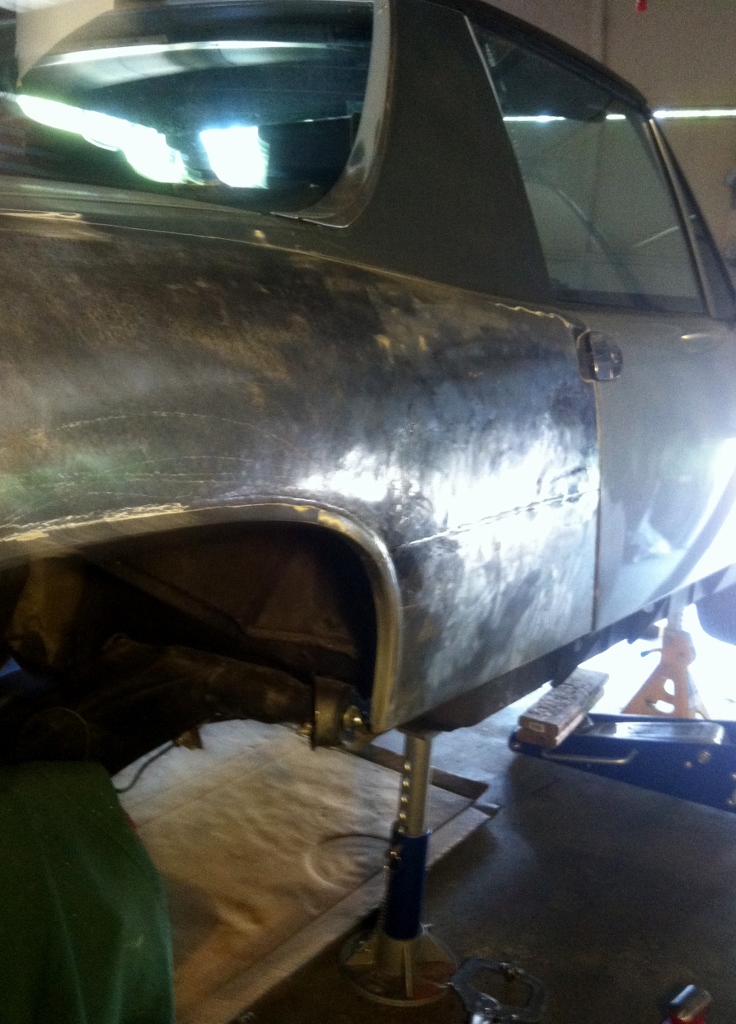

Using a aluminum angle piece for the mold of the flare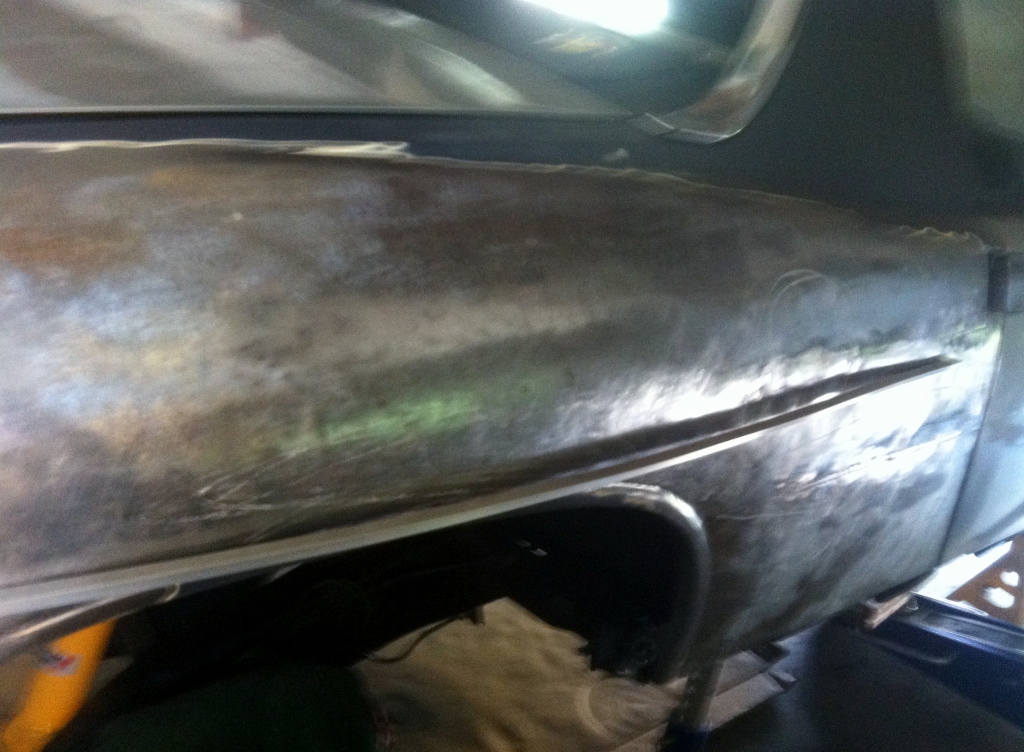
Hard to match the profile but close!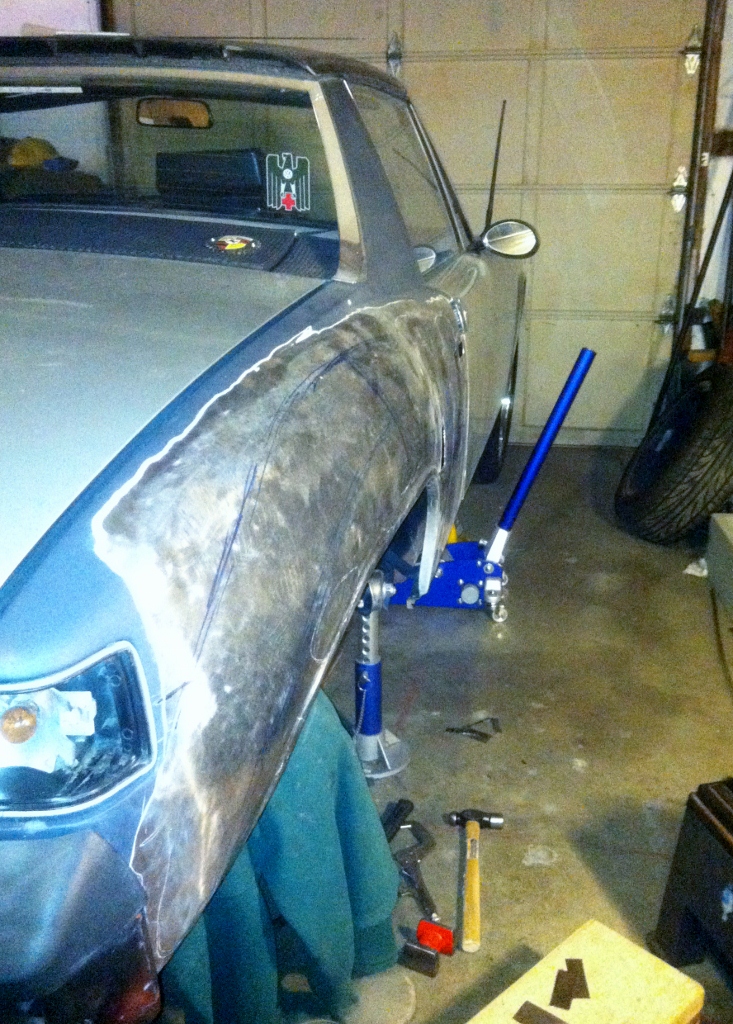
Damaged panel mapped out for repair!
Little patches to blend in~!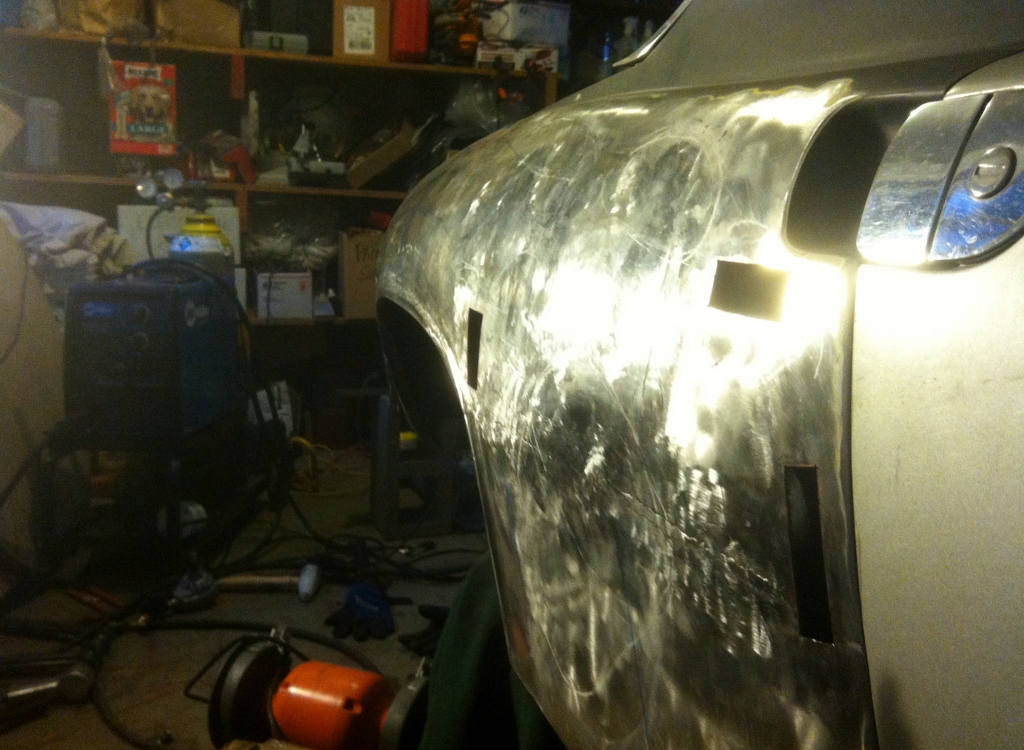
That is it for now!
Cheers!
Nate
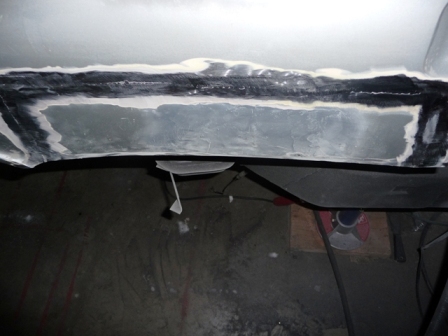
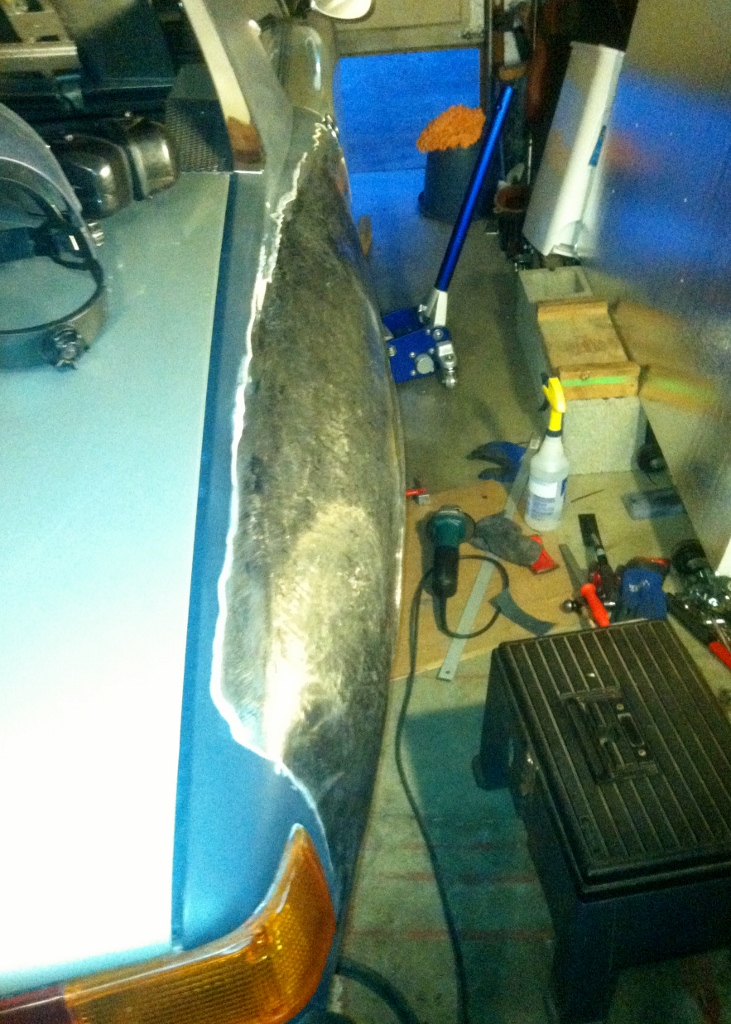
Posted by: Zaney Jul 17 2012, 03:04 PM
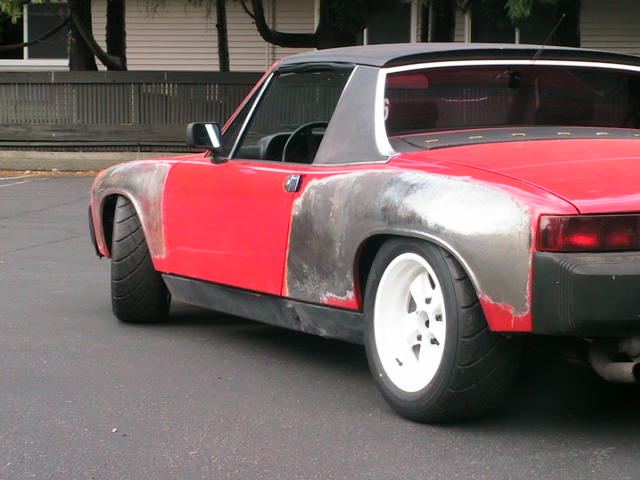
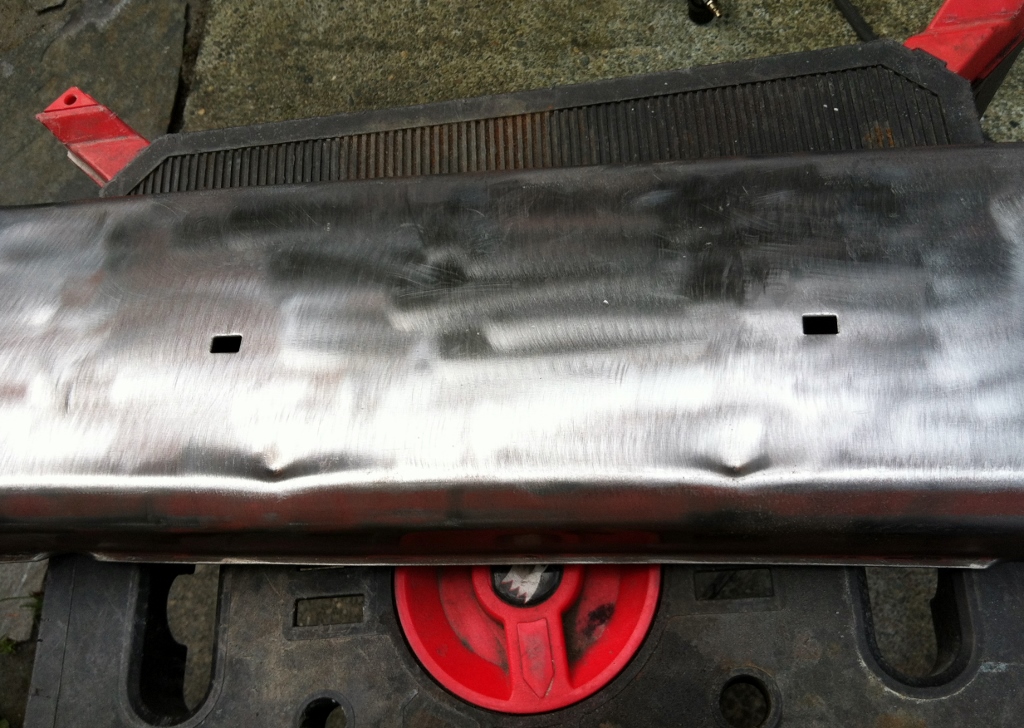
Got some things done today. Welded in the small patches, carefully!
And put the car on the ground to compare the flares. I will probably stretch the drivers side a bit more to match the passenger side. I really like the more aggressive flare than the more subtle one. I probably made them big enough for 8 inch tires but, that works for me too!
Just waiting for the finishing tools to arrive sat my door so I can smooth out the lumps and small oil cans.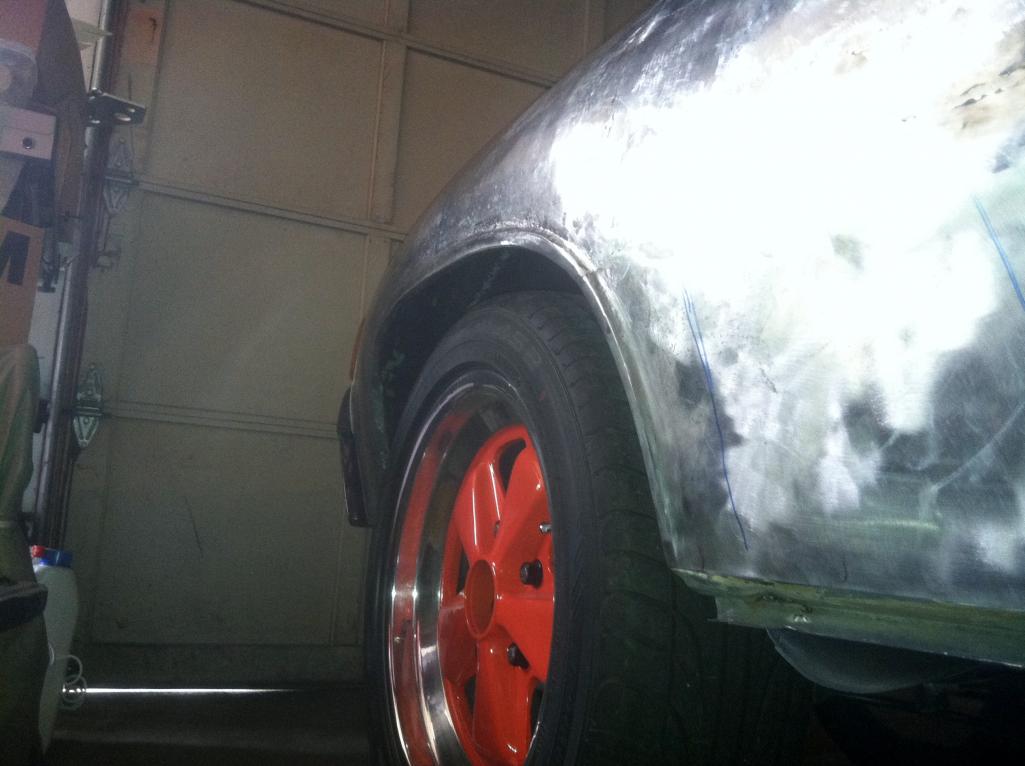
Repairs made but still lumpy for now.
Posted by: Zaney Jul 17 2012, 03:06 PM
Drivers side (still needs some stretching)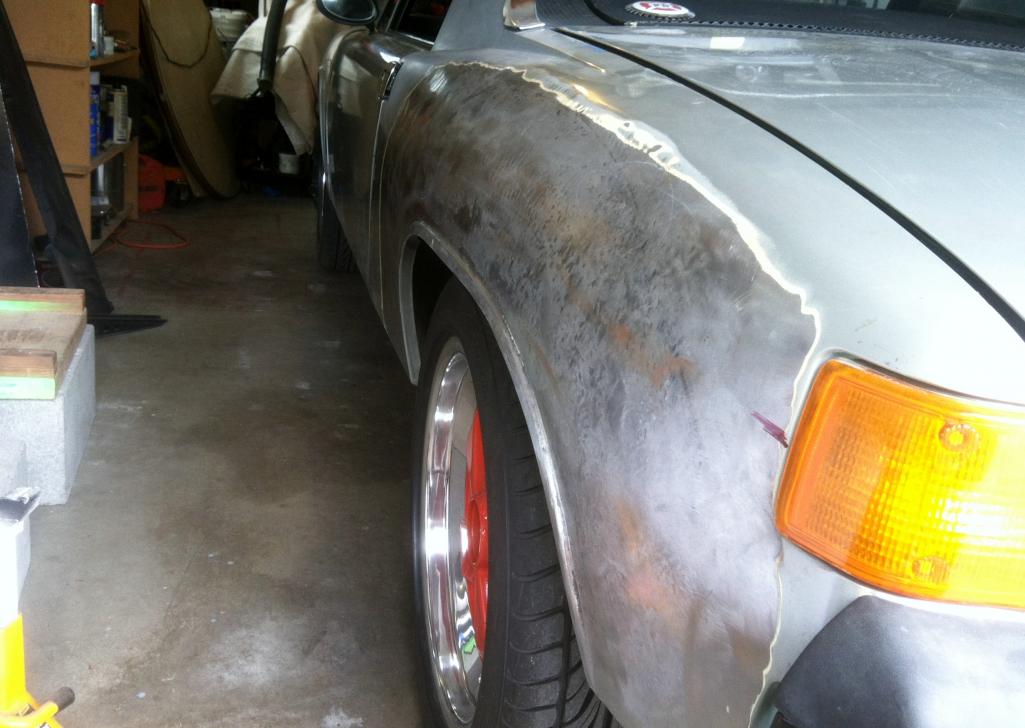
Passenger side (still needs a bit more massaging)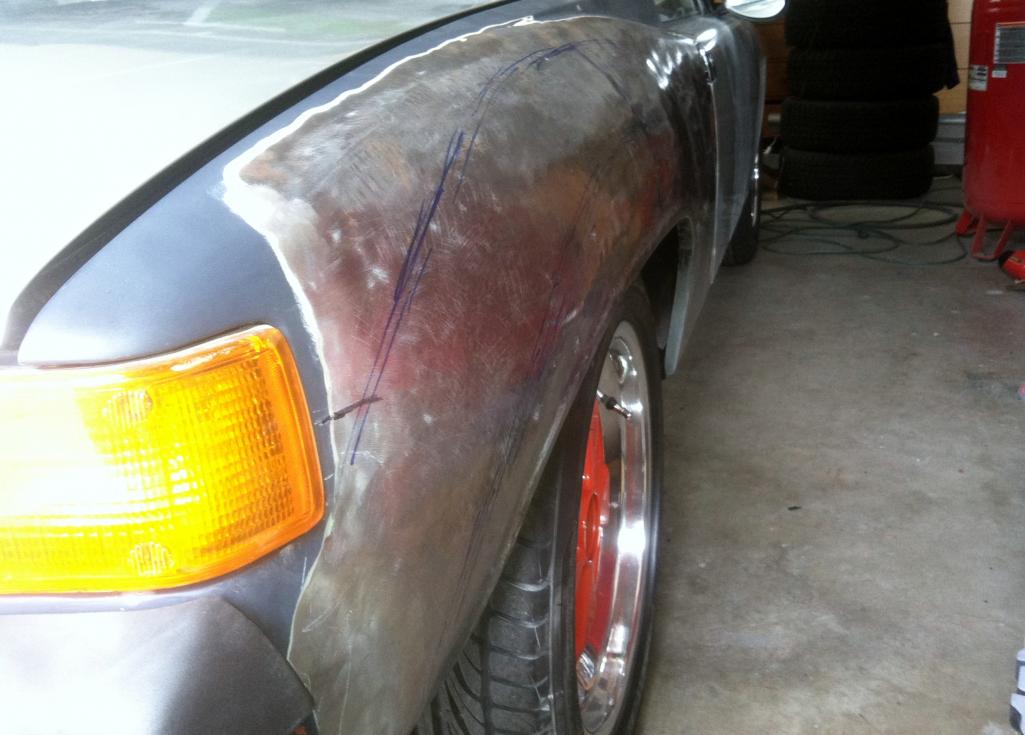
More later!
Nate
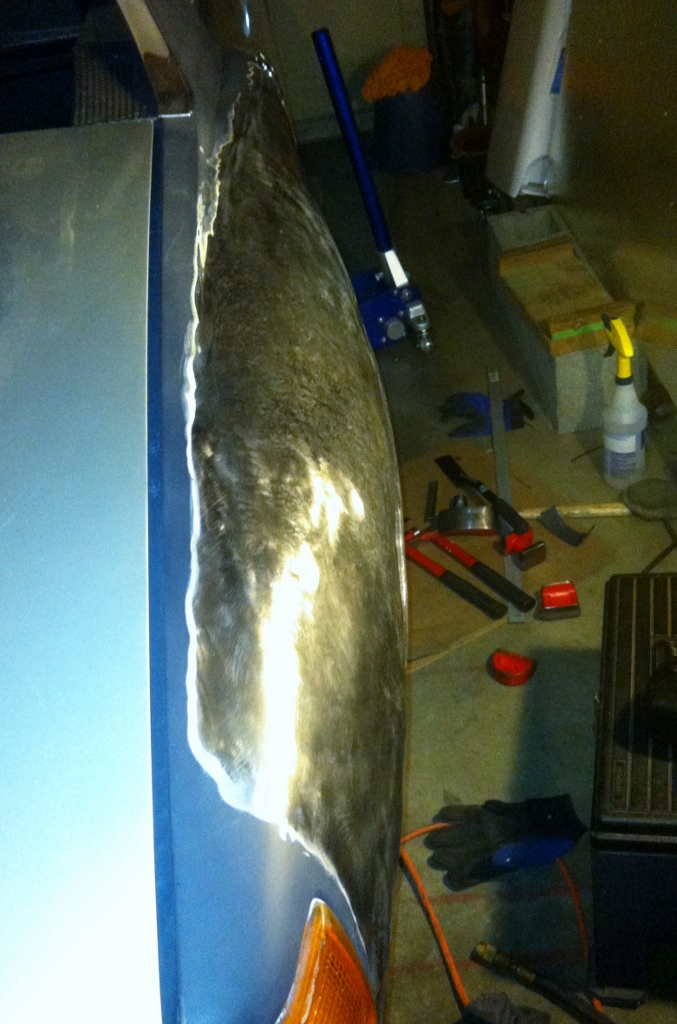
Posted by: Zaney Jul 29 2012, 01:20 PM
Been trying to work on the fenders with the slapping spoon and the 4 inch SS shrinking disc that I bought from http://www.daggertools.com/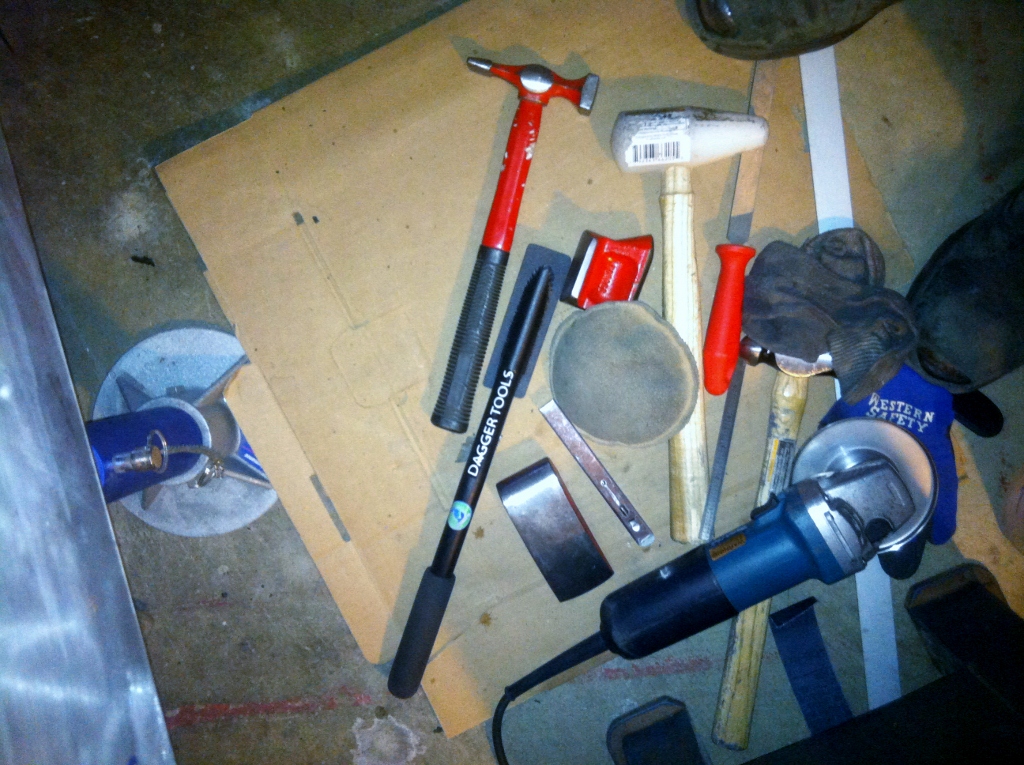
I am working on a section at a time by shading the fender with a Magnum 44 marker and then block sanding off the ink, just like you do for paint prep.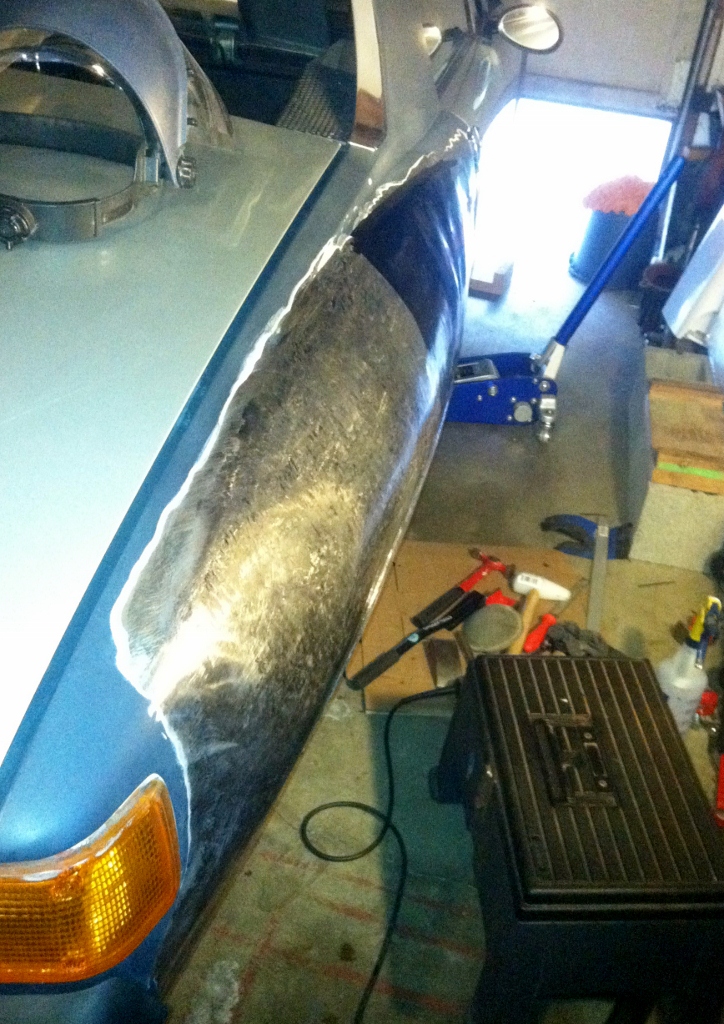
Then, all the low spots will be left to bump up and then, slapped down flat.
Posted by: Zaney Jul 29 2012, 01:24 PM
Sorry for the I phone pics but you can get an idea. Better final pics when I am closer to being done.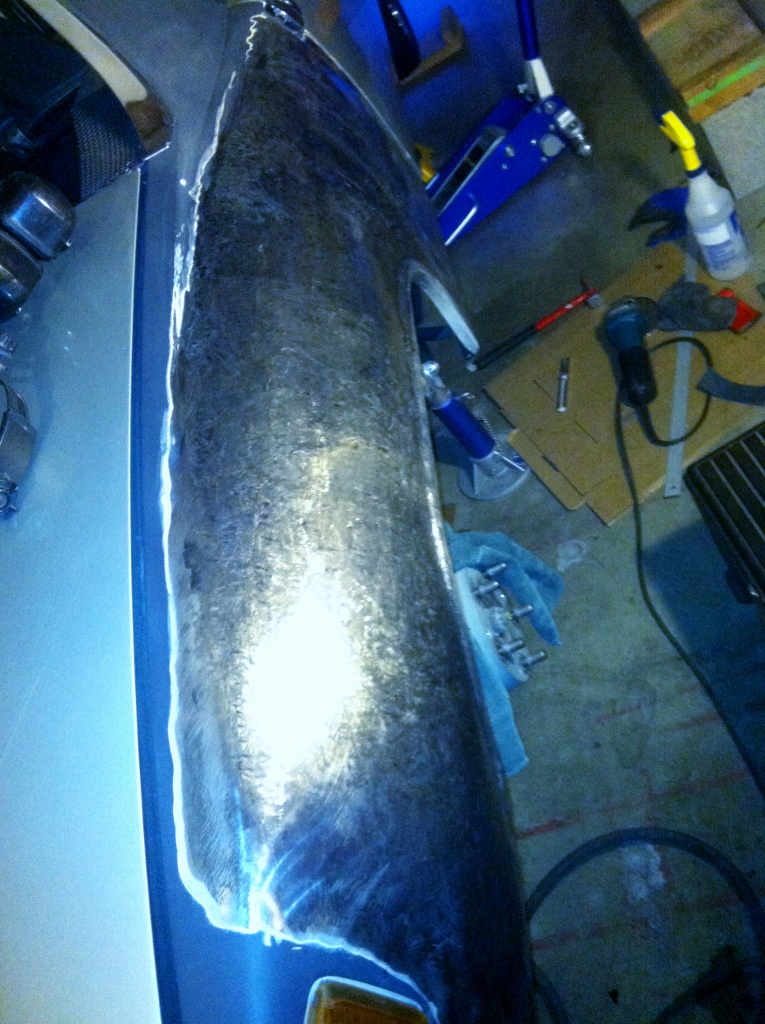
Posted by: Zaney Jul 29 2012, 01:26 PM
Plus, I am trying to resolve an alternator charging issue and exhaust leak in order to have the car driving smoothly and reliably.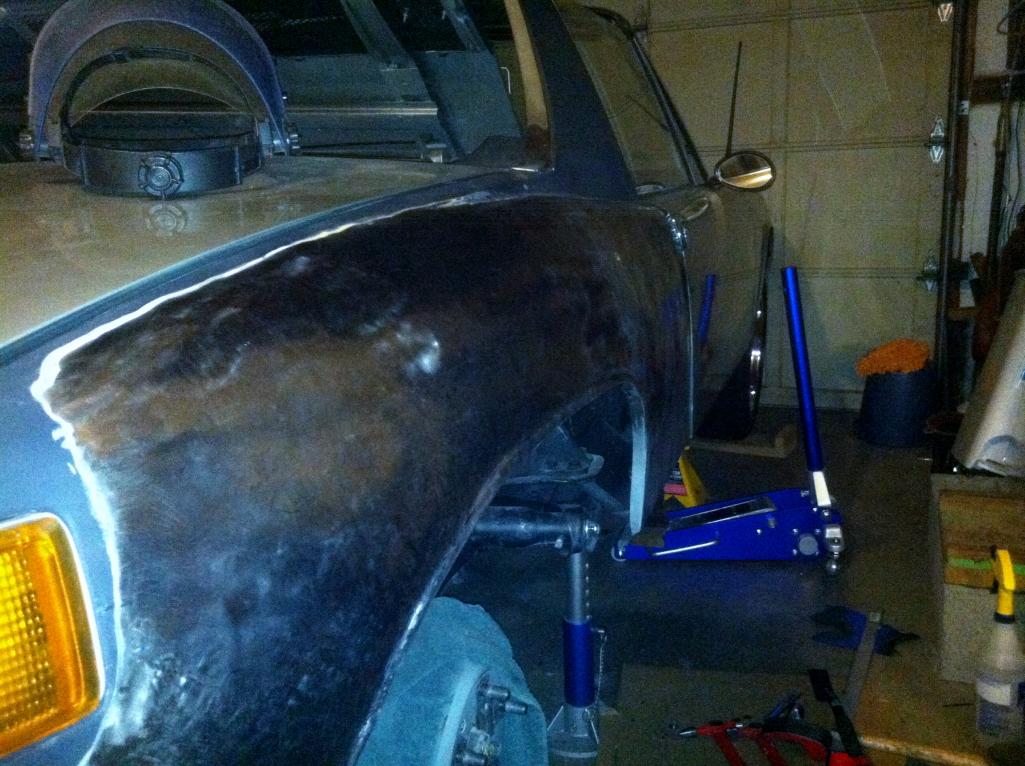
Last pics for now.
Cheers,
Nate
Posted by: Zaney Nov 15 2012, 08:54 PM
Ok, it is running!!!!
I finally got the Suby OBDII codes sorted out and drove the teener over to Redmond European to get the fuel system safety checked, corner balanced, and the suspension set up!
Now, all that is left is: finish the interior, french in the Passat marker lights, finish blending the flares, and prep for paint!
It was sunny and dry today so I took it for a spin!! Man, does this Teener RAWK!! Second and third gear really pull!!! On ramps are now my guilty pleasure! 
Oh ya!
Posted by: Zaney Nov 15 2012, 09:16 PM
http://youtu.be/2j32P-5BJpI
Cheers!!!
Posted by: strawman Nov 15 2012, 10:36 PM
YES!!! I've been following your conversion, which has provided me with some needed inspiration for my Suby teener. Keep up the great work!
Geoff
Posted by: DBCooper Nov 15 2012, 10:38 PM
It was sunny and dry today so I took it for a spin!! Man, does this Teener RAWK!! Second and third gear really pull!!! On ramps are now my guilty pleasure!
"RAWK"? I'm assuming that's good? So how does it shift? That transformed my car, though I'll sure never turn down more horsepower.
Posted by: rdauenhauer Nov 15 2012, 11:52 PM
Nice Nate you went to town on the R. qtrs.!!
How much did Johns planishing hammer help?
Posted by: ruby914 Nov 16 2012, 02:56 AM
Zaney,
Your body work looks great!
That's a lot of work. How's your neck?
Just the little clean-up work that I did on my car gave me a pain in the neck.
Congratulations for your first drive, I know that feels good.
Mike.
Posted by: Zaney Nov 16 2012, 10:17 AM
"RAWK"? I'm assuming that's good? So how does it shift? That transformed my car, though I'll sure never turn down more horsepower.
I guess my youthful excitement and years of playing guitar came out! Yes, it shifts better than the 901 but I might look into Ian's (IM101) Suby shifting mechanism when he completes it. Or I might just need to drive it more?
Nice Nate you went to town on the R. qtrs.!!
How much did Johns planishing hammer help?
Thanks Rich! John's planishing hammer was the KEY to having the fenders turn out this well! Without it, I would still be hammering away! Also, having a shrinking disc made the fine tuning a lot easier.
Since then, I have discovered the world of metal working and https://www.tinmantech.com/html/hand_tools.php
Zaney,
Your body work looks great!
That's a lot of work. How's your neck?
Just the little clean-up work that I did on my car gave me a pain in the neck.
Congratulations for your first drive, I know that feels good.
Mike.
My neck wasn't the problem it was my wrists! After I found a comfortable working position, everything became a lot easier. I think once I was comfortable 'hitting blind' I could control the amount of "stretch" with the palm nailer/carriage bolt http://www.youtube.com/watch?v=Uyv_Ep-miw4&list=UUxZGXhHSB4mHmBLRfvAIzUQ&index=10&feature=plcp
Now the PNW weather has almost confined this 'sunny day car' to my garage but that allows me to finish the cosmetics and get it ready for paint in the Spring. And, hopefully drive it down to WCC '13!!!
Hopefully be one of many Suby Teeners to debut Cheers,
Nate
Posted by: 76-914 Nov 16 2012, 02:54 PM
Kent White is a metal wizard, huh? I watched him do his metal magic 18 yr's ago and I'm sure he has only gotten better. Check out some of his A/C fairings with the raised teardrops.
Posted by: Mr.242 Nov 16 2012, 05:19 PM
Nice work! I can't wait to see it this spring with new paint. WAHOO!
Posted by: Zaney Oct 8 2014, 02:59 PM
Time for a little housekeeping for this thread!
Life has definitely slowed the process of getting this Teener done! There was only two of us when I began this thread and know there are FOUR of us!
A fourteen month old and a kindergartener make life interesting, I am now outnumbered 3 to 1!
I have been driving the Teener on sunny days only in order to keep it out of the rain. Hopefully, not promote anymore rust until I could take it apart to get it ready for paint.
Had some loose ends to take care of: Fill in the passenger mirror holes
Started to smooth out the hand-shaped flares!
Finally got the SpeedHut Gauges installed!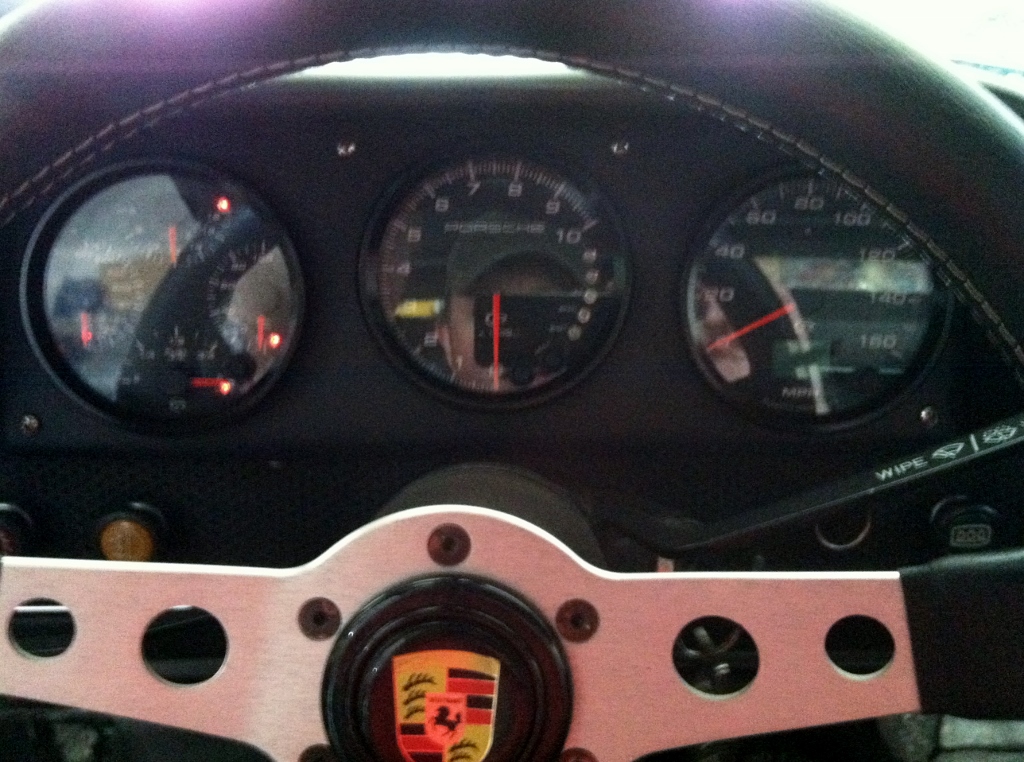

Got the door panels figured out 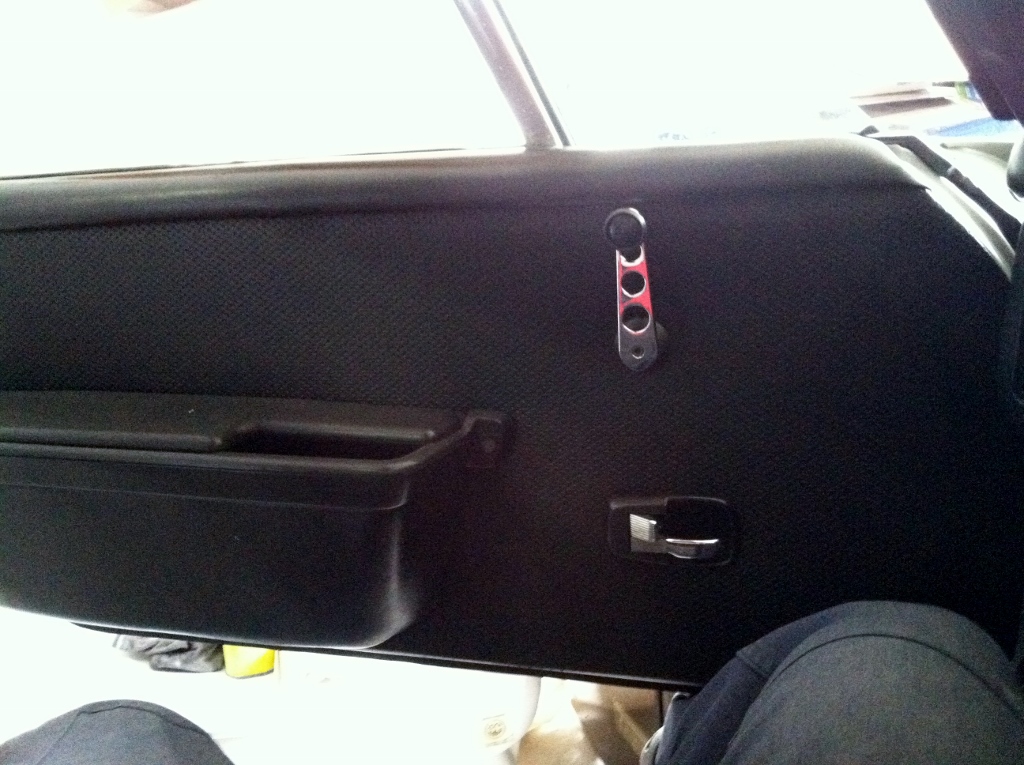
Posted by: Zaney Oct 8 2014, 03:22 PM
Started collecting body pieces and interior components:
front GT Valence
rear zero cutout valence to be fitted for Suby exhaust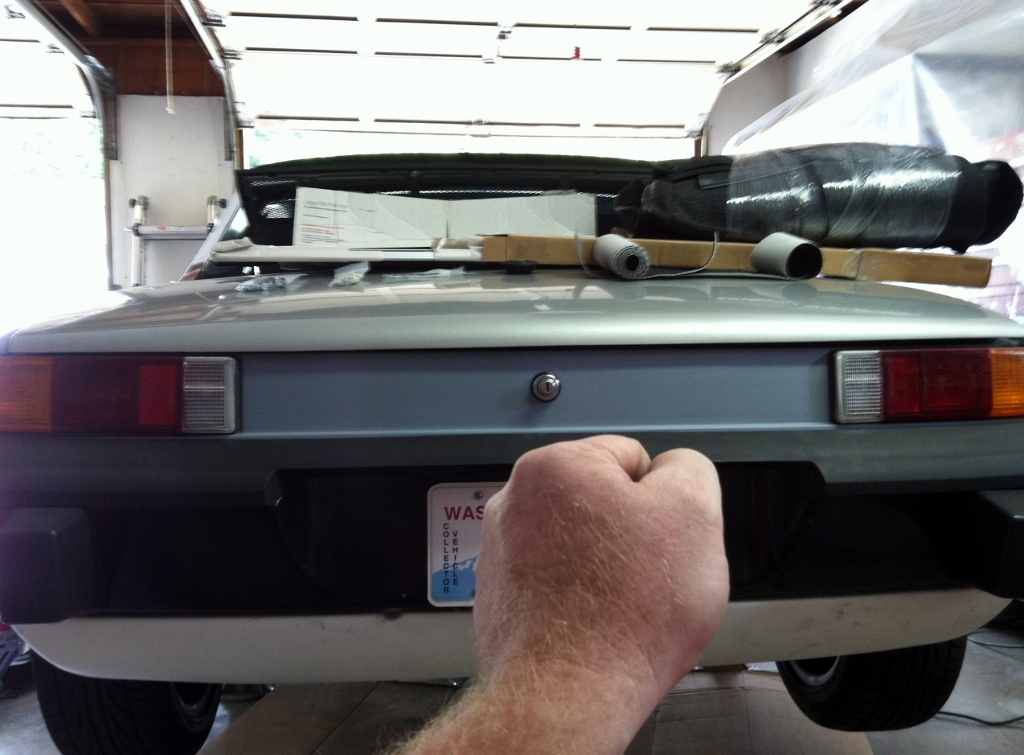
Fiberglass rockers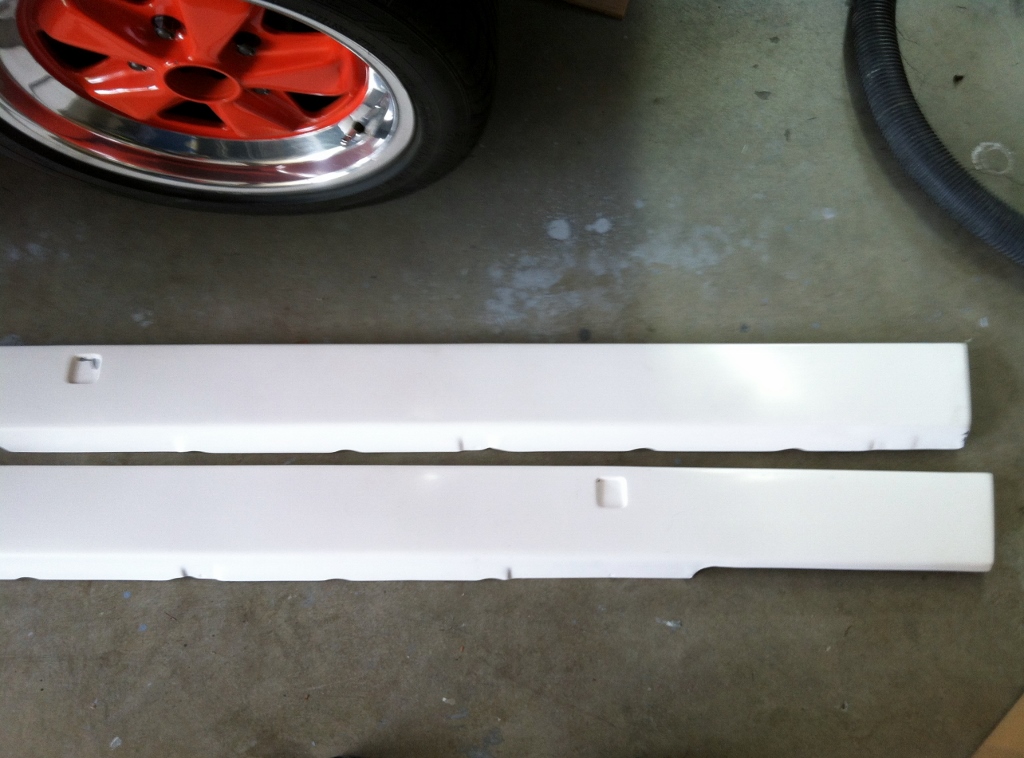
Suby 2.5L all tuned up and rocking!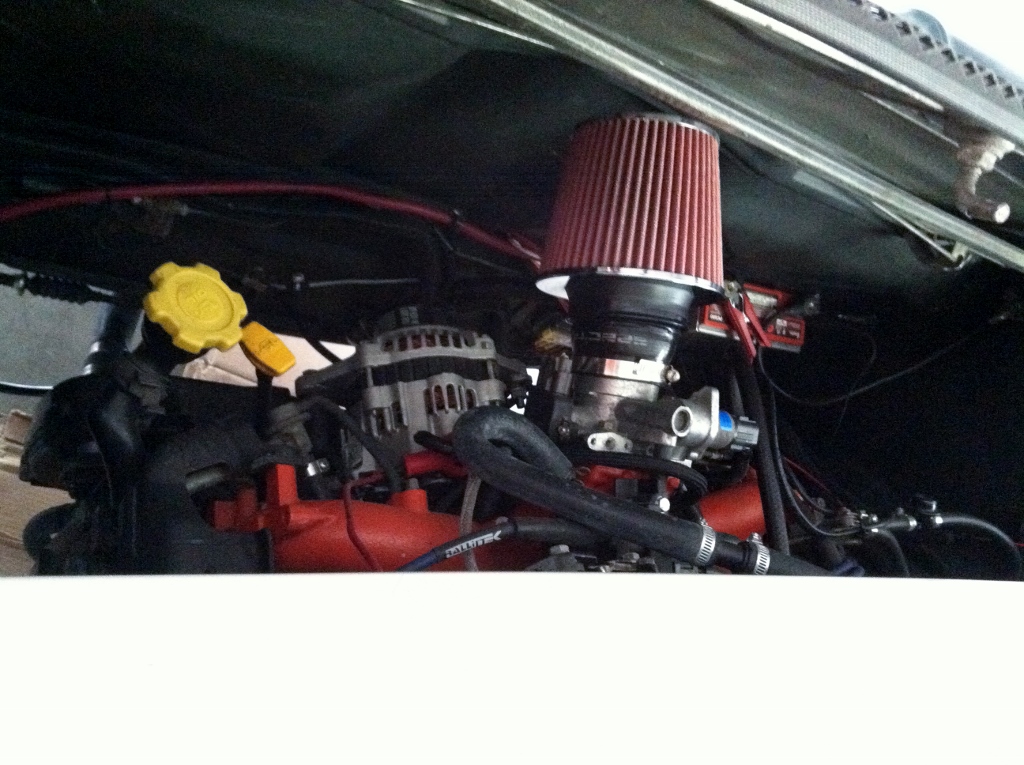
Aluminum Floorboard and pieces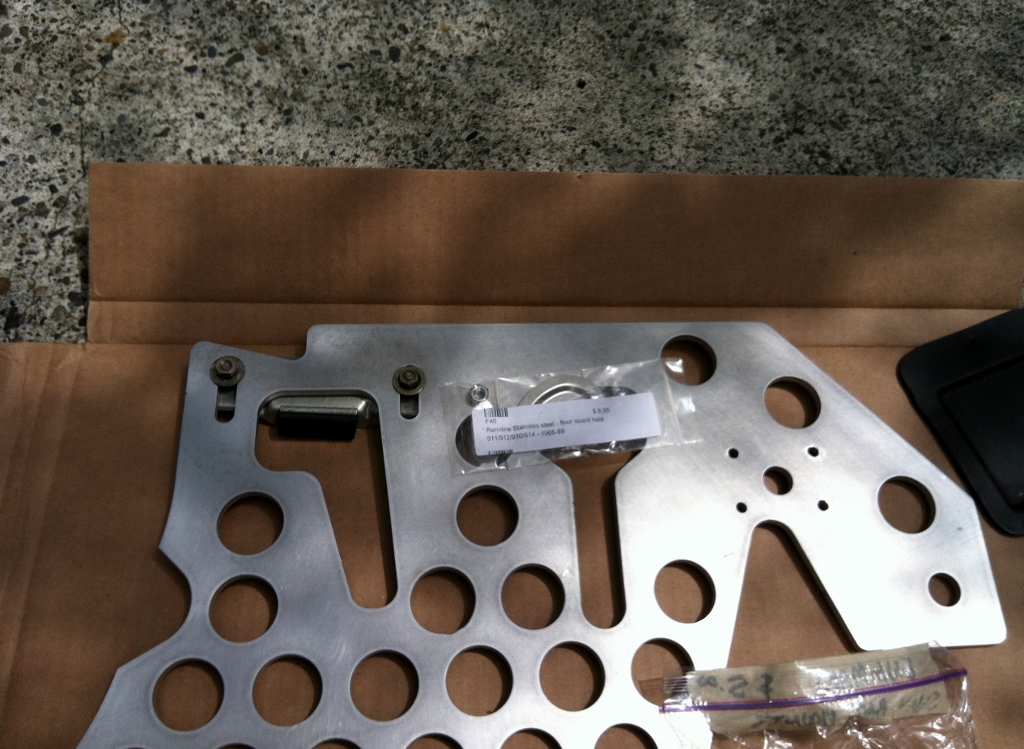
Rubber 914 pieces and A&P carpet kit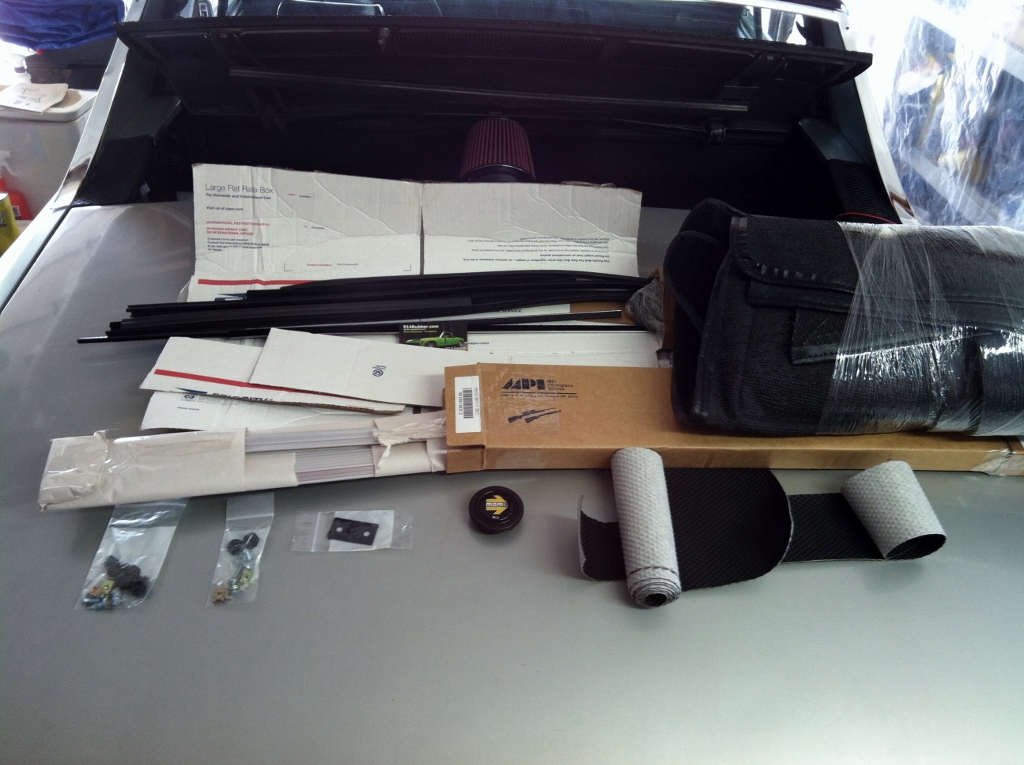
Decided against grafting in the VW Passat side markers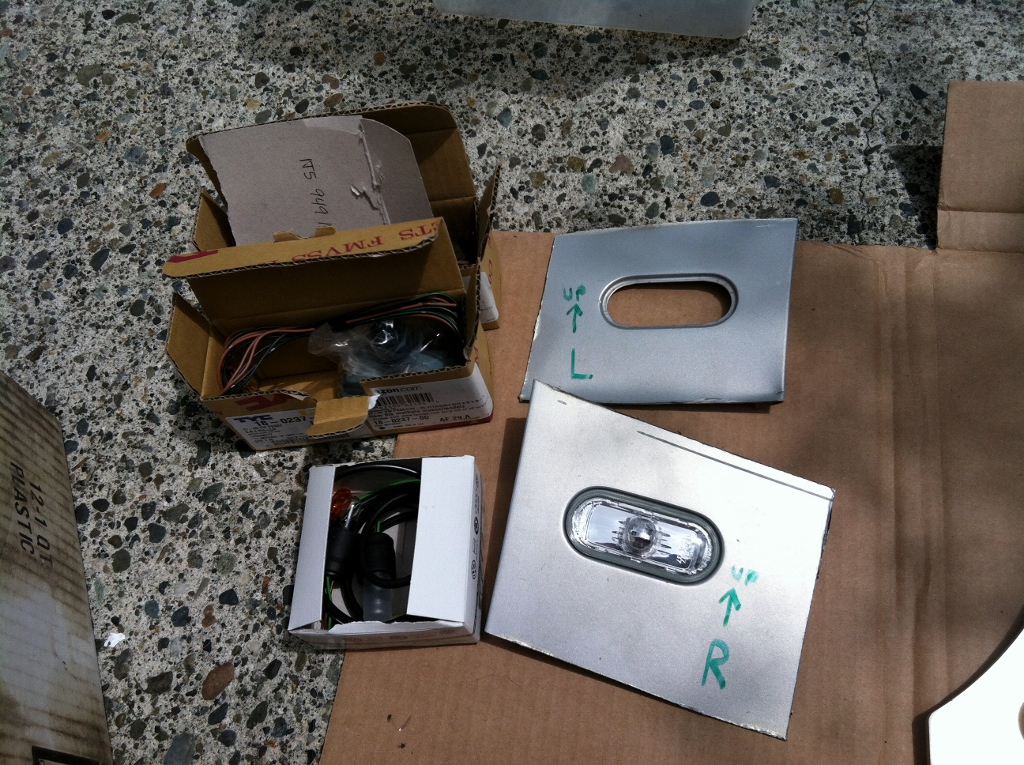
Everything compiled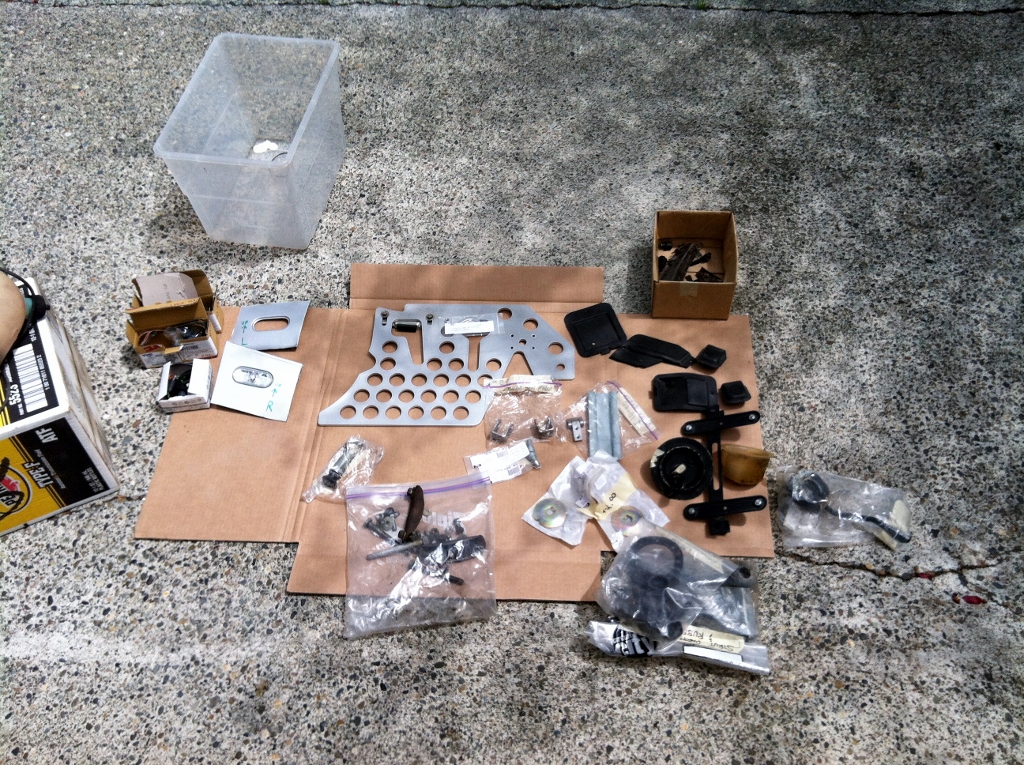
Ready to disassemble everything!
Posted by: Zaney Oct 8 2014, 03:36 PM
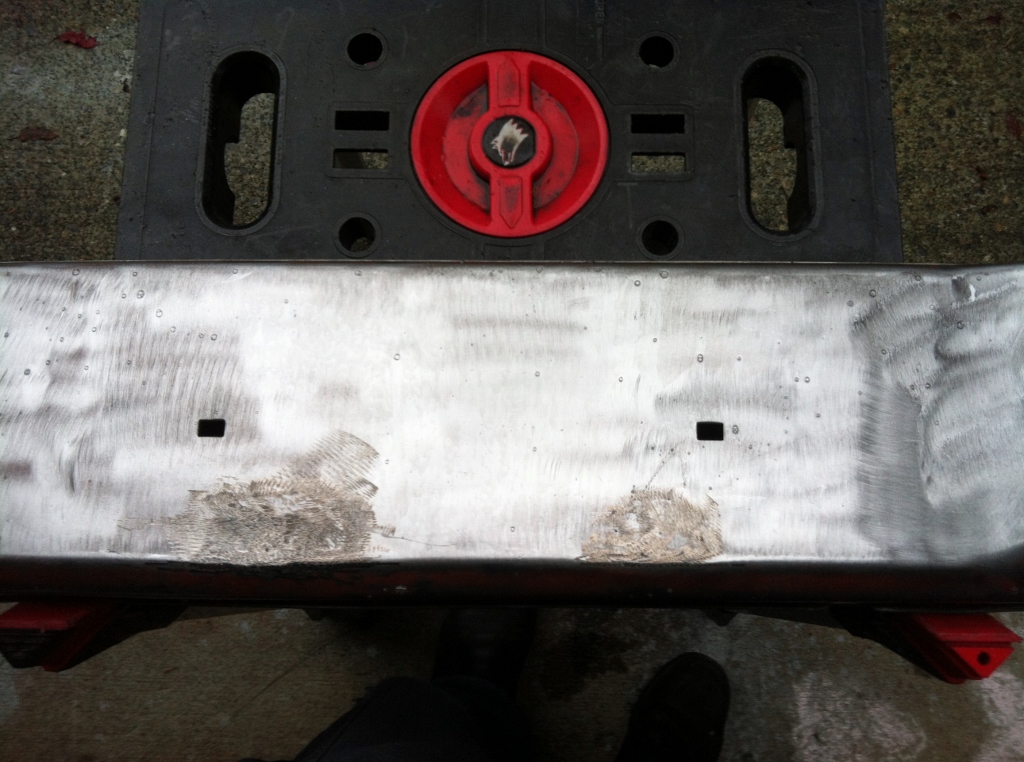
Took the doors apart, interior, and the trim.
Prepped the car to 400 grit and mask it off for high build primer.
Then, tagged it up for a contrasting guide coat and blocked it down to wet sanded 600 grit! Holy crap that took forever!
Not pictured, but I am smoothing out the bumpers with a hammer & dolly & planishing disc!
More to come!!
Posted by: Zaney Nov 2 2014, 10:47 PM
I have been trying to exercise my growing metalworking skills
Took the rear bumpers down to bare metal and discovered that it had been bumped into in the past and repaired with .5" of mud
So, I used my hammer & dollys with the planishing hammer. Then, tried to smooth it out with the shrinking disc! Pretty good success for the areas I could work on not interfered with by the bumper brackets. Those areas will be finished off with a skim coat of glaze and concealed by the rear bumper tits.
So, put on the ear muffs and start massaging the metal slowly!
Posted by: Zaney Nov 2 2014, 10:51 PM
Then, got it pretty close for an apprentice! 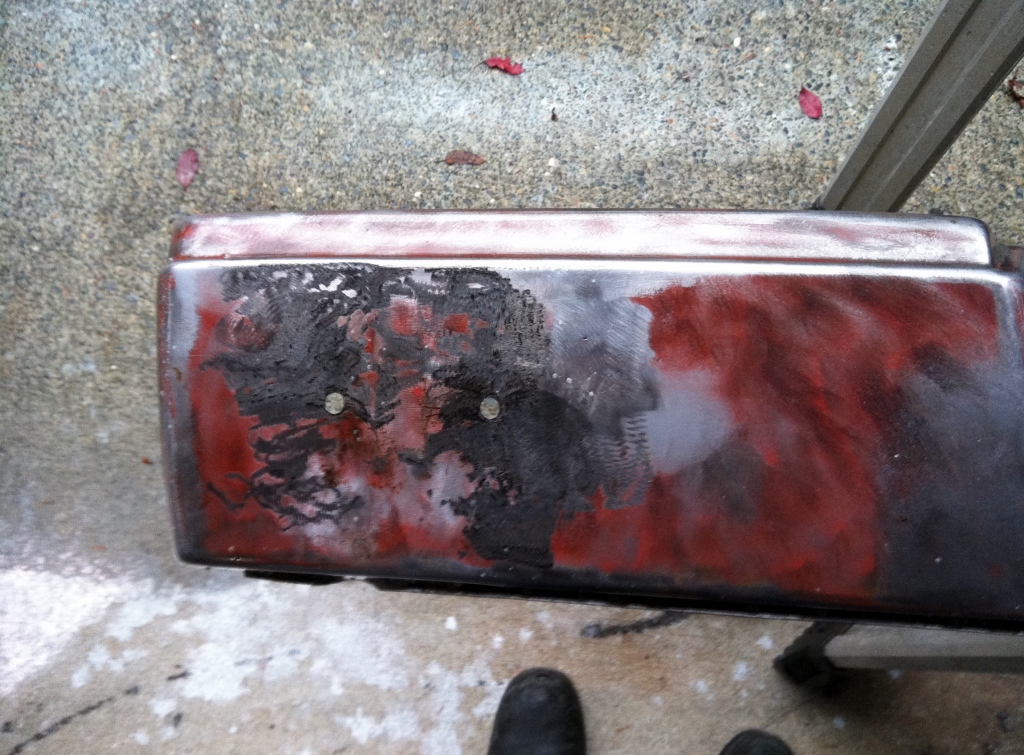
The front bumper was good structurally but I wanted to get it ready for paint. Both bumpers will be smoothed down to 600 grit when I'm done
Posted by: Zaney Nov 2 2014, 11:02 PM
Ok, here is the question of the night...
What is more appealing for this car, painted Metallic silver with Phoenix Red valences or, just leaving it primed and ready for the next owner to paint a color of their choice?
Yes, this car will be For Sale soon 
I went to to DirtFish Rally School this past spring and got hooked!
So, I want to build a RallyCross / Rally car! Looking into building a pre-66 VW Class 11 style vintage Rally car!
So, if anyone has a proposition for a good trade for a 1965 or earlier VW Beetle in decent shape maybe we can work something out.
Otherwise, I am just about done with this awesome Suby Teener and prepping it for its new adventure!
An ad will be put in the for sale section when it is ready, soon. If someone wants it as is, PM your thoughts.
Cheers!
Nate
Posted by: mgp4591 Nov 3 2014, 12:34 PM
Congratulations on the new adventure- rally is a real kick in the pants! I'd leave your project in primer for the new owner... less money for you and they pick the colors they want. Great build so far! Any idea what you'd need with price for it as it sits?
Posted by: effutuo101 Nov 3 2014, 05:45 PM
Looking great! Nice job.
Posted by: messix Nov 3 2014, 07:37 PM
don't sell it....
you'll only kick your self in the ass later
Posted by: matthepcat Nov 7 2014, 11:39 AM
PM sent
Posted by: Zaney Nov 7 2014, 02:40 PM
PM sent
Howdy. Check messages
Posted by: Zaney Dec 4 2014, 01:55 PM
Ok, here we go!
The Suby Teener is officially http://www.914world.com/bbs2/index.php?act=ST&f=20&t=246329&st=0#entry2118176
Thank you to all the members who have offered their advice and expertise along my fun, zany adventure with this wonderful car! Especially, Geoff, Dean and my Northwest friends!
This isn't goodbye but more like cya round!
Cheers!
Nate
Posted by: OddRobsGarage Dec 18 2014, 04:11 PM
At its new home in Arizona!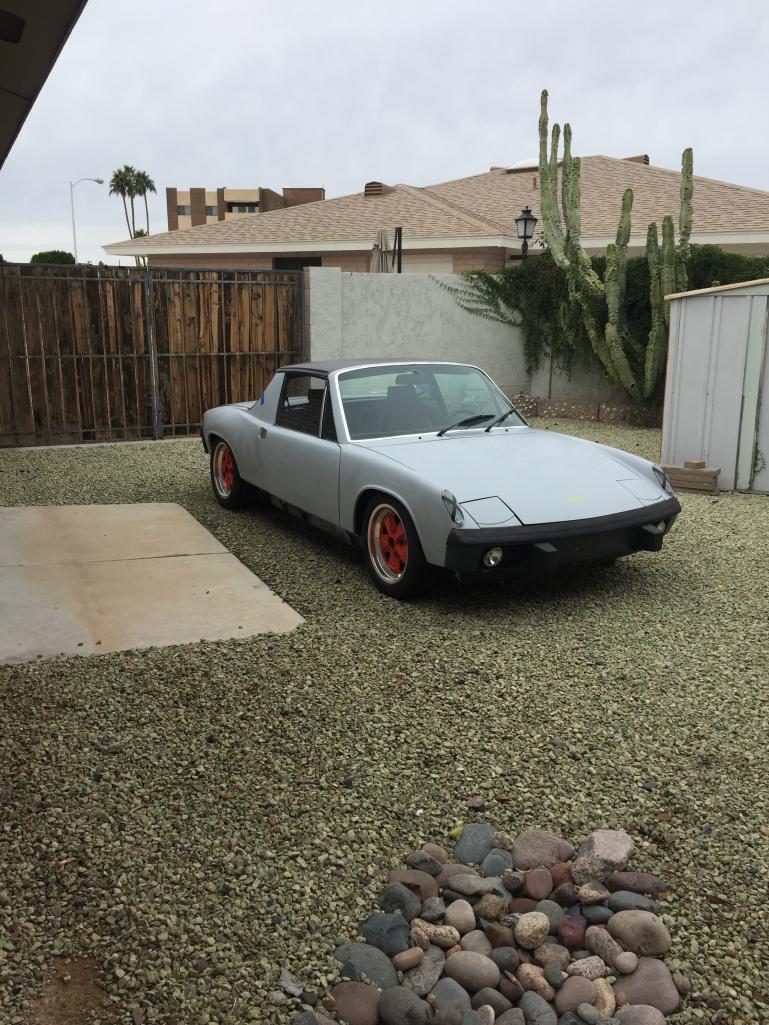
Posted by: OddRobsGarage Dec 18 2014, 04:19 PM
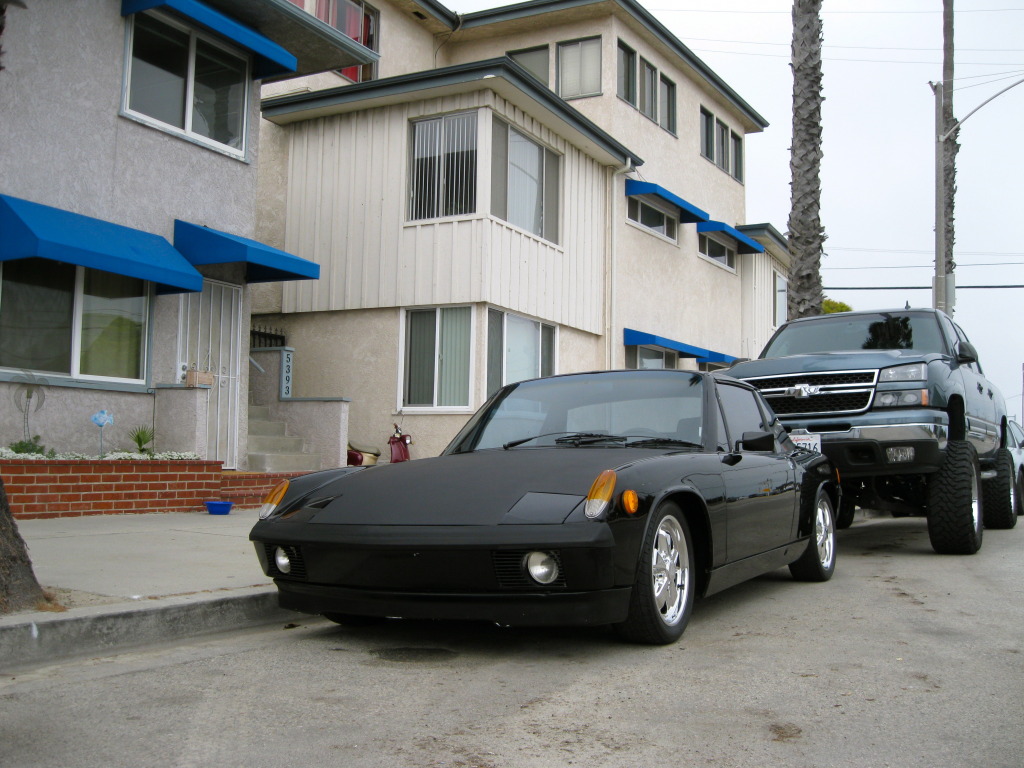 This is my other car, also a 74
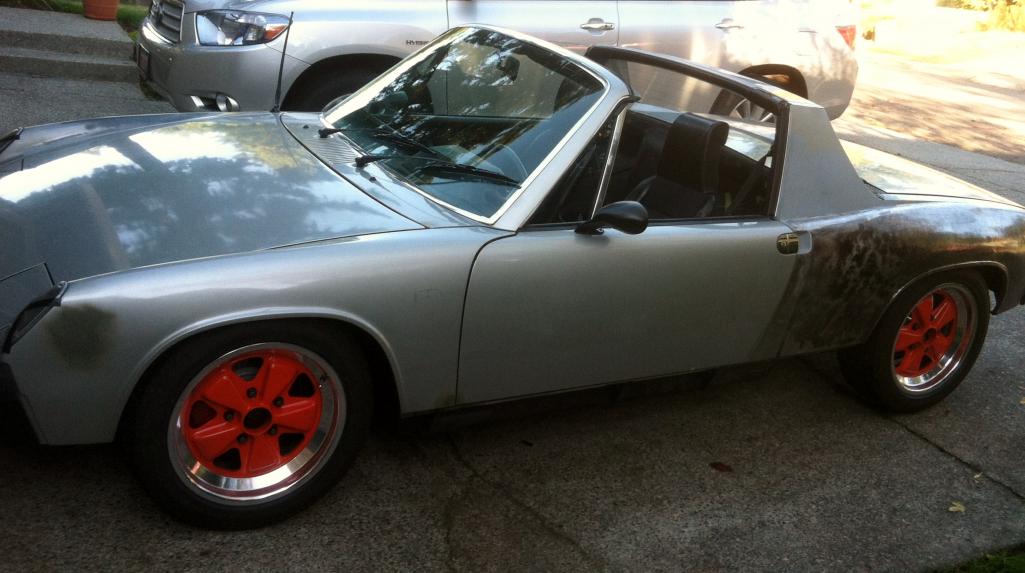
Posted by: OddRobsGarage Aug 27 2015, 01:46 AM
Body work almost done, had to put it on a rack to correct the door gap but it came out wonderful. paint to come very soon!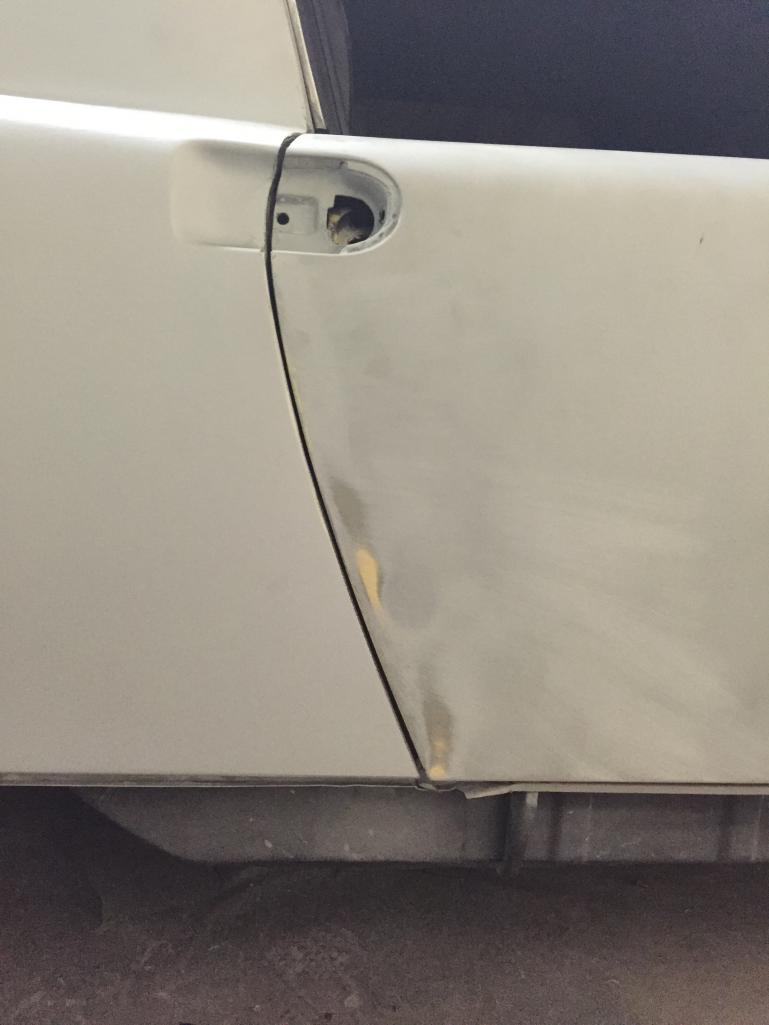
Posted by: 76-914 Aug 27 2015, 09:56 AM
Posted by: OddRobsGarage Oct 24 2015, 03:48 AM
Body prepped and jammed, tons of hours in bodywork and additional body mods (steel moulded rockers, filled fresh air vent and removed trim and filled around back window, reworked flares, notched front bumper for airflow. Painting on Saturday
Attached thumbnail(s)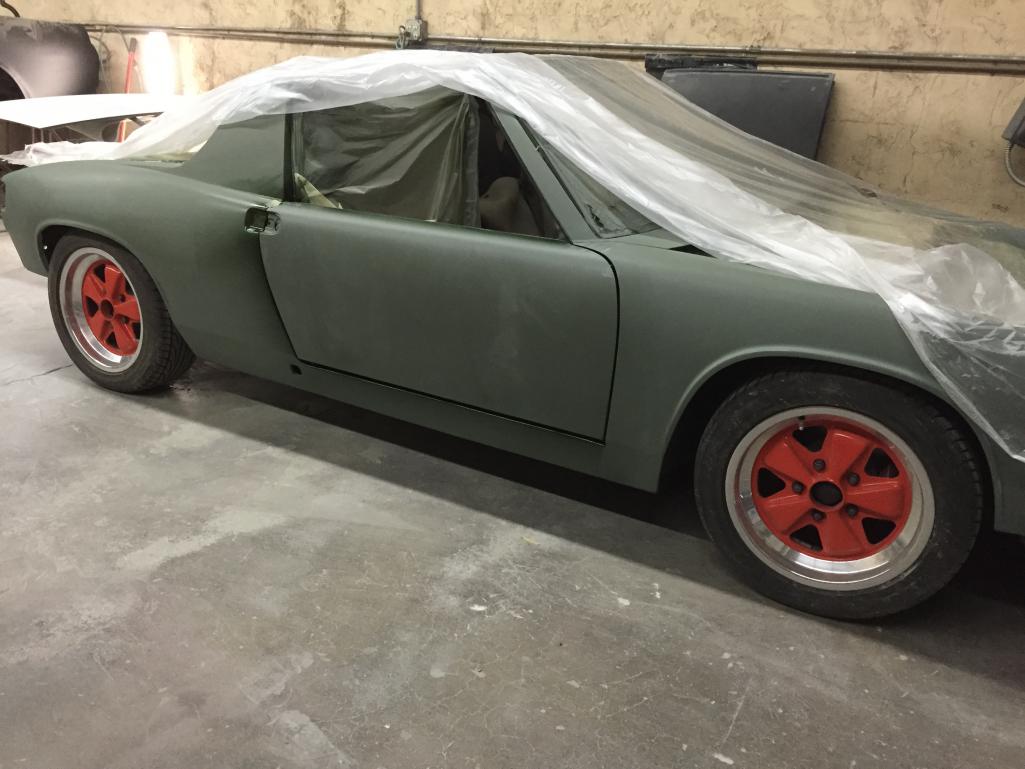
Posted by: Cairo94507 Oct 24 2015, 06:22 AM
Terrific progress and work.
Posted by: OddRobsGarage Oct 27 2015, 12:48 AM
Bam!!!! Outa the ballpark! Smooth as glass.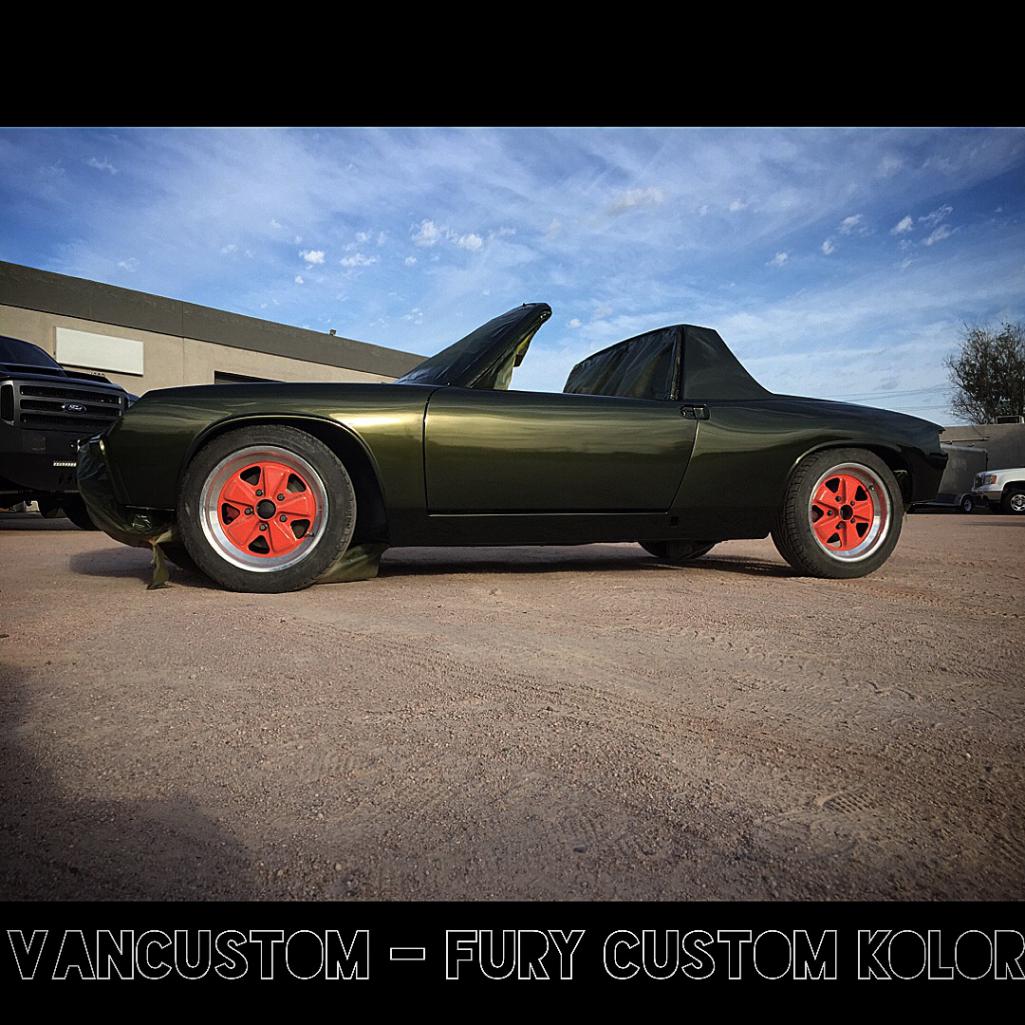
Posted by: OddRobsGarage Oct 27 2015, 12:51 AM
Camera 2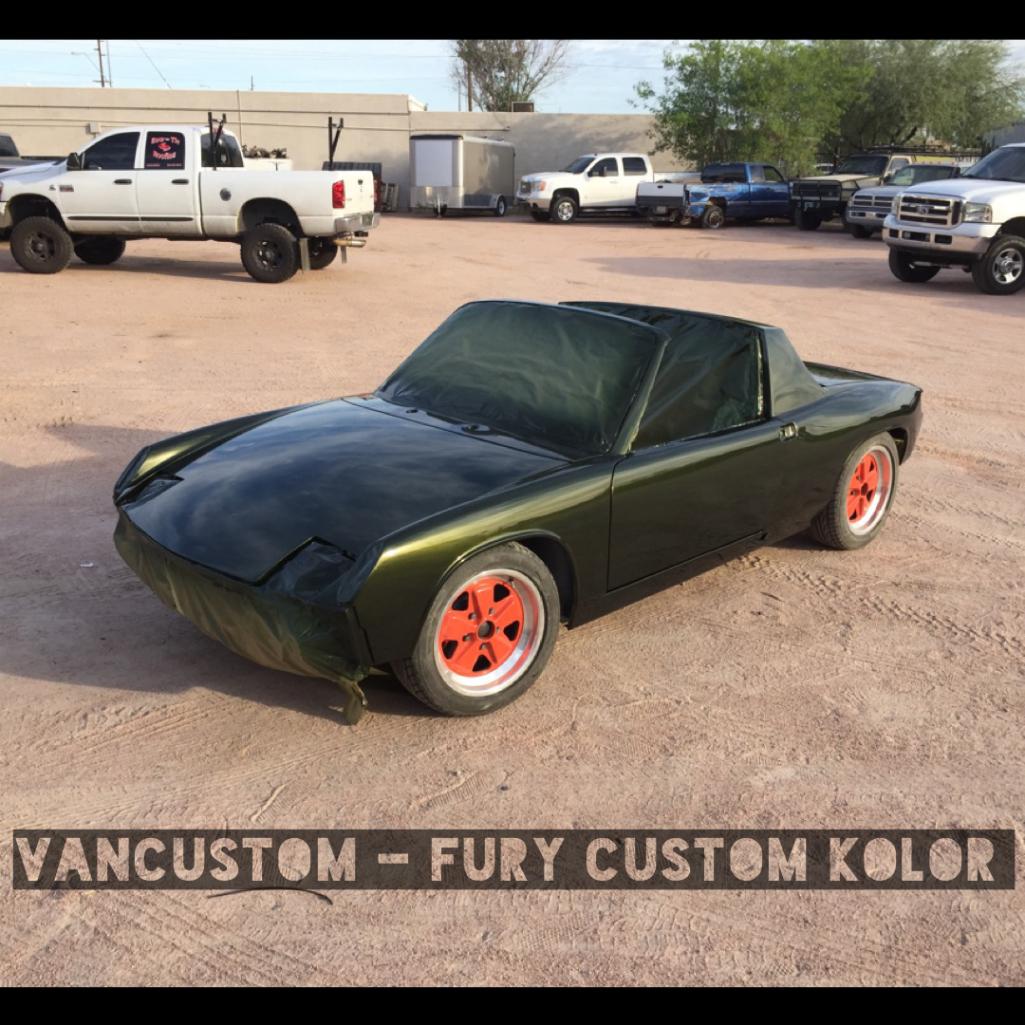
Posted by: mgp4591 Oct 27 2015, 01:18 AM
Nice work and paint! It looks like it may have a bit of green in it or is it just the lighting? And did you do your own rockers or pick them up as well as the rear flares? With all the work you've done, you could have made them yourself- they look great!
Posted by: OddRobsGarage Oct 27 2015, 03:36 AM
I bought this car as an unfinished project from "Zaney" this is his thread. He widened the fenders and my buddy spent 8 weeks straightening the car and the gaps. It is a custom blend Green with a touch of gold pearl. I'm calling it "Fury Green" after my painter.
It is incredibly straight.
I bought new metal rockers and moulded them in , shaved the fresh air vent and the trim around the back window. it makes the car look very sleek.
Next plan is to take some altitude out of the suspension, full stainless dual exhaust and wheels/tires.
Posted by: mgp4591 Oct 27 2015, 04:14 AM
I bought this car as an unfinished project from "Zaney" this is his thread. He widened the fenders and my buddy spent 8 weeks straightening the car and the gaps. It is a custom blend Green with a touch of gold pearl. I'm calling it "Fury Green" after my painter.
It is incredibly straight.
I bought new metal rockers and moulded them in , shaved the fresh air vent and the trim around the back window. it makes the car look very sleek.
Next plan is to take some altitude out of the suspension, full stainless dual exhaust and wheels/tires.
Great work, really pops with that color too! Maybe more detail pics on those custom touches?!

Posted by: Zaney Oct 27 2015, 08:39 PM
Awesome work!
Love all the Hot Rod touches! 
Powered by Invision Power Board (http://www.invisionboard.com)
© Invision Power Services (http://www.invisionpower.com)