Printable Version of Topic
Click here to view this topic in its original format
914World.com _ 914World Garage _ 73 2.0L Progress Thread
Posted by: dlee6204 Apr 30 2009, 05:52 PM
Its that time of year again so I'd thought I'd start a progress thread to help keep me motivated. I bought this car last summer as a nicer project car for me to work on and eventually be able to drive. My goal for this summer is to repair all the rust on the car and to get it running. I'll end up painting it down the road either the original Marathon Blue Metallic or Ravenna Green. I've been collecting parts all winter so hopefully I should be good to go. I've done a little work on it already but I'll bring everyone up to date. Feel free to comment, ask questions, make suggestions, tell me what I'm doing wrong or anything else for that matter. Enjoy!
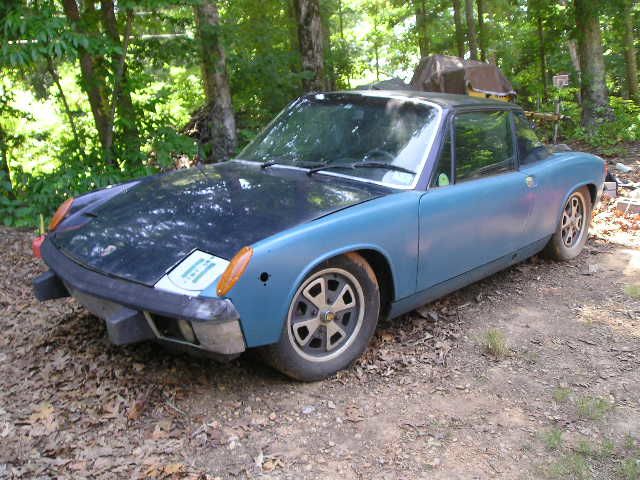
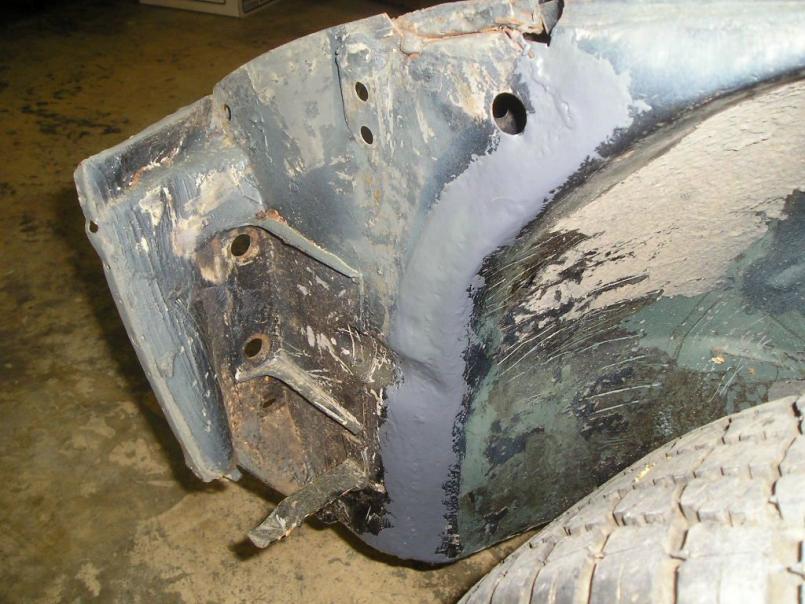
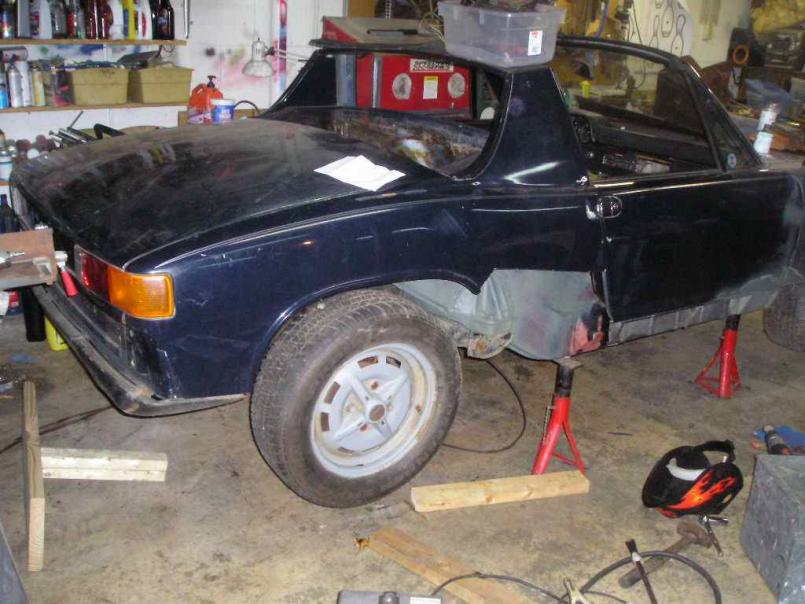
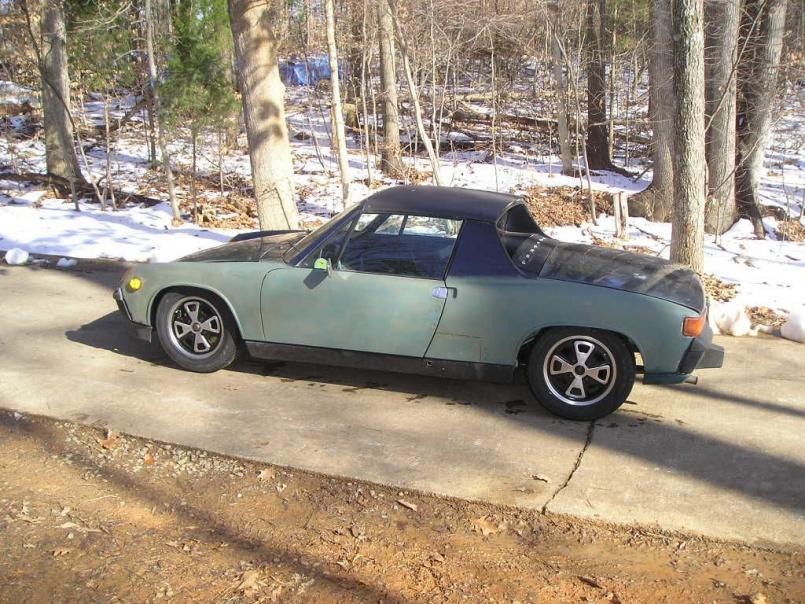
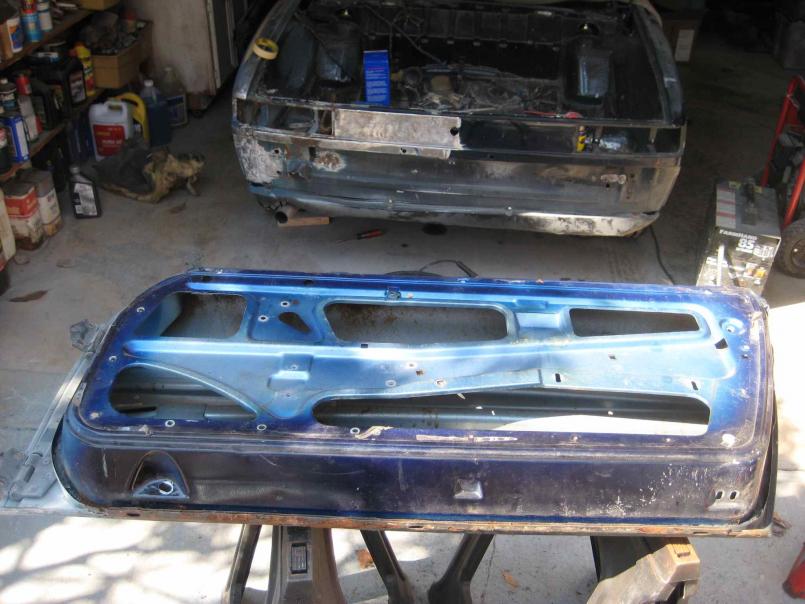
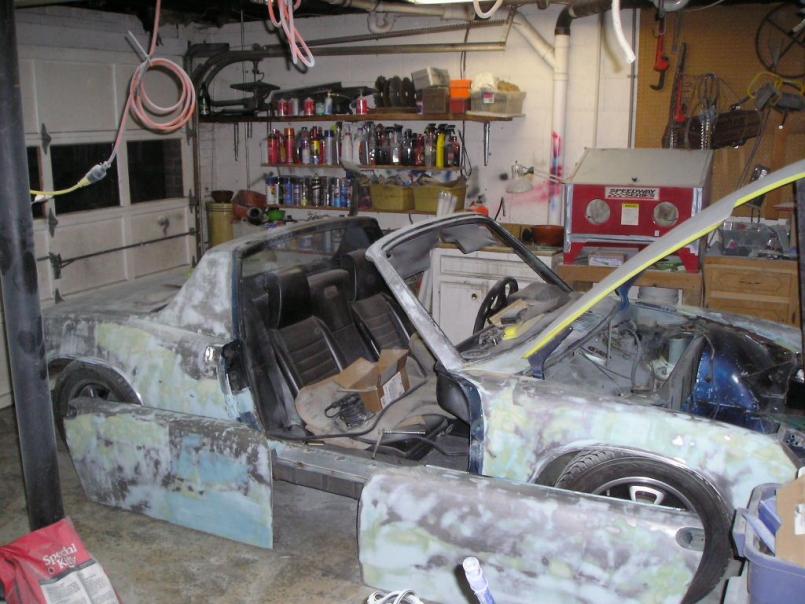
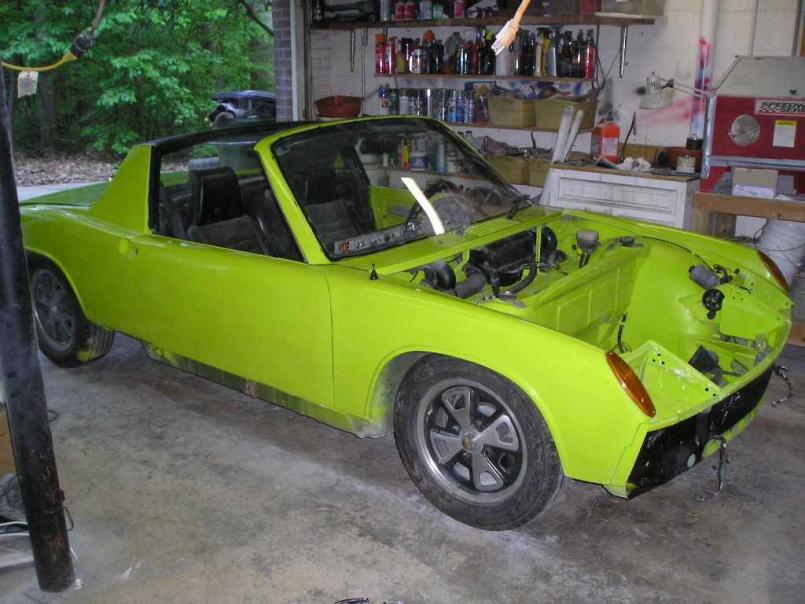
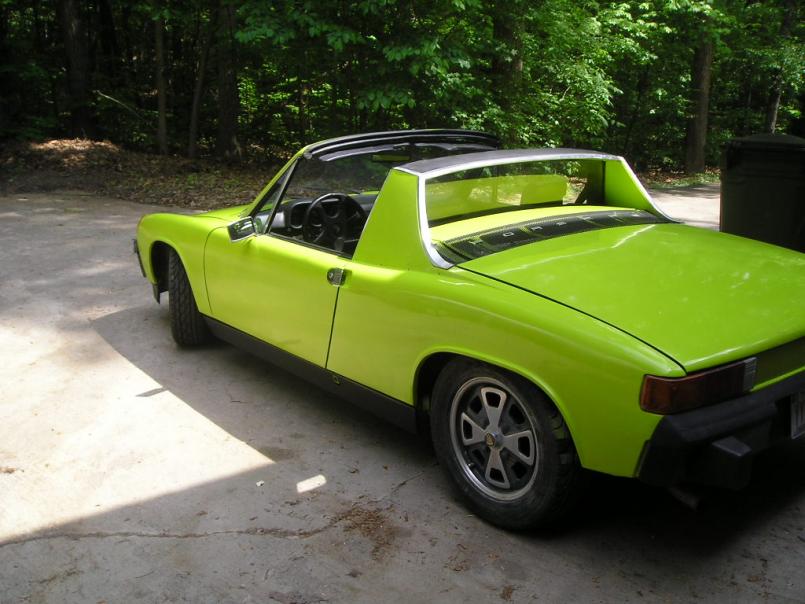
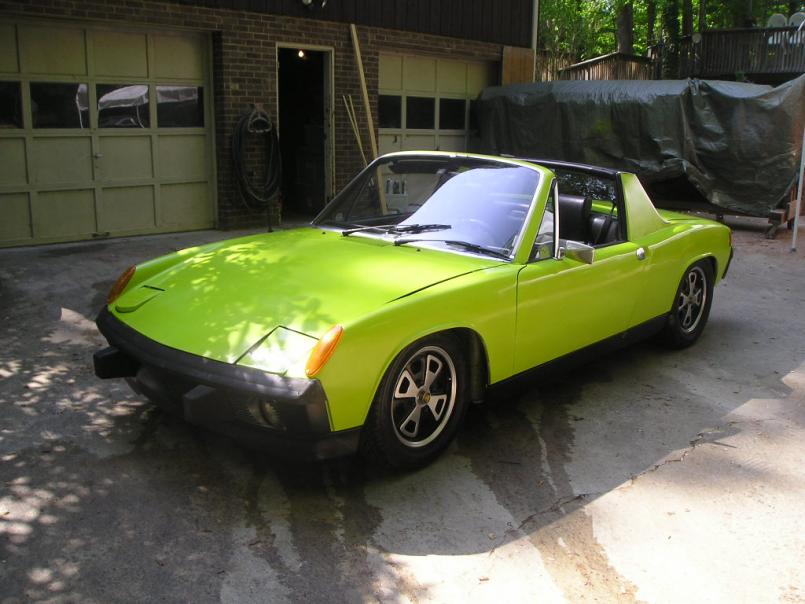
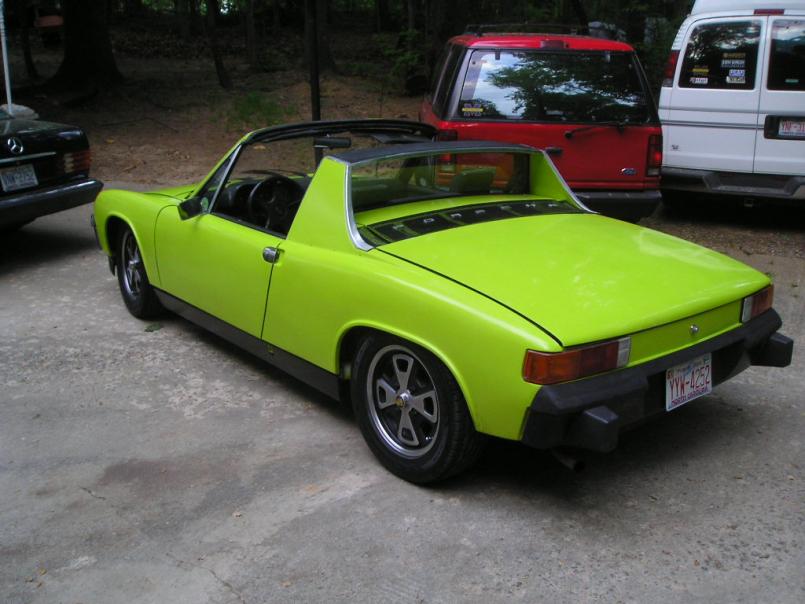
Here is the car when I first picked it up. The car came fully optioned and even came with SS heat exchangers and a running two liter engine. The car was wrecked at some point and had a crappy repair done to it but I am still trying to figure out what happened. Both the driver's front corner and the driver's rear corner had damage but the door and rear quarter seem fine. I will find out more once I start stripping some paint and bondo. 
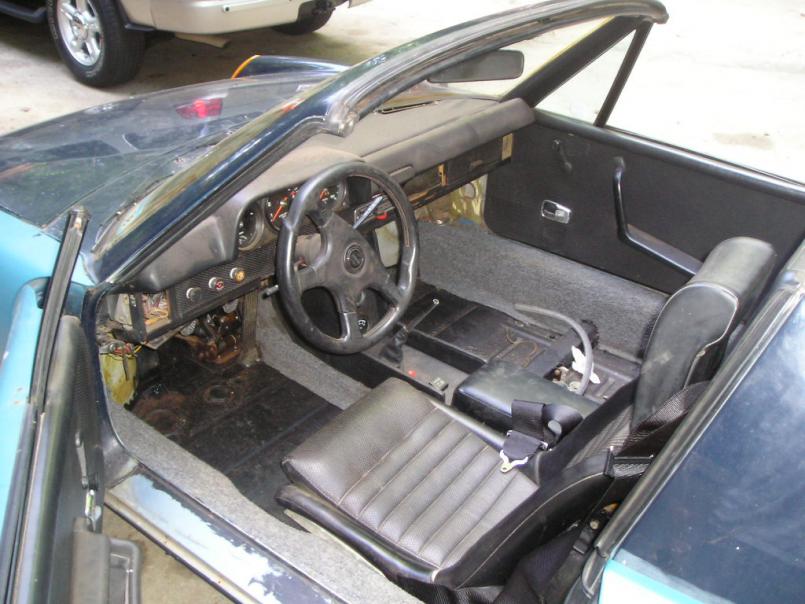
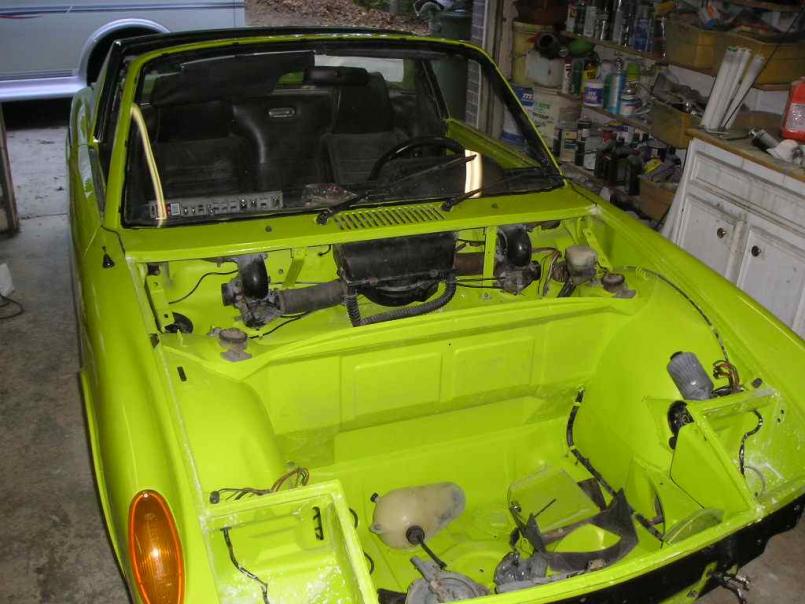
The interior was about a 4 on a 10 scale however the dash is crack free! 
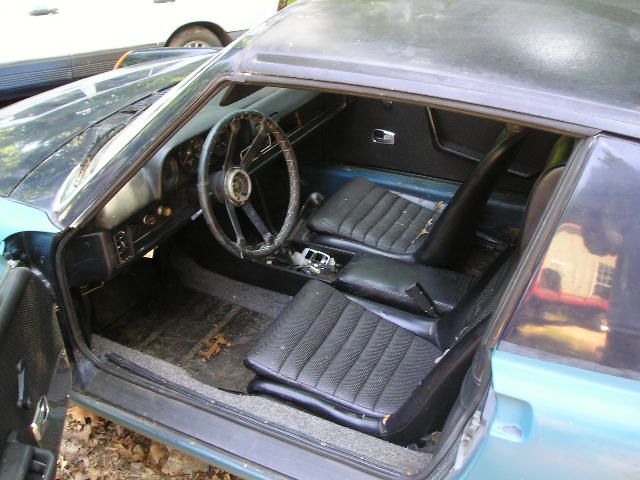
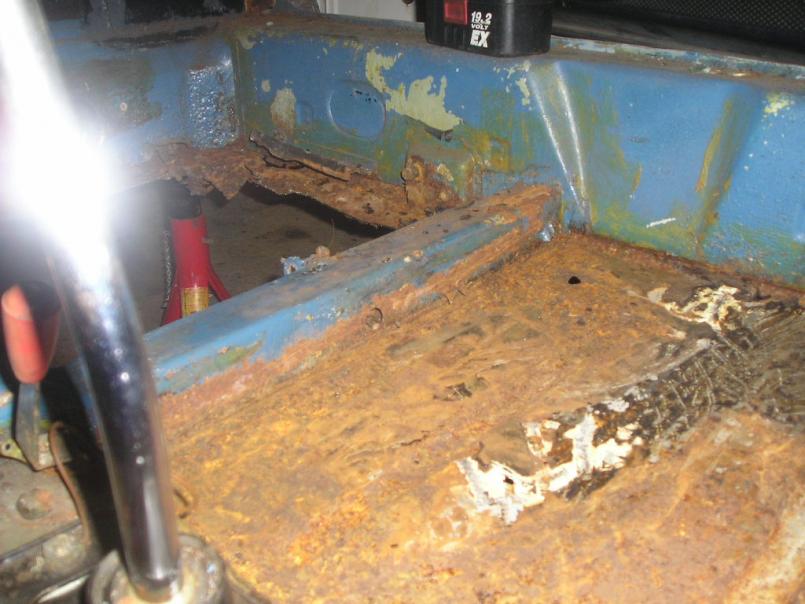
The rear floor pan is shot and I knew that before I bought the car. The previous owner patched the floor at some point and installed three new seat brackets over the bad metal. I ordered a new floor pan and a fourth seat bracket from AA today. 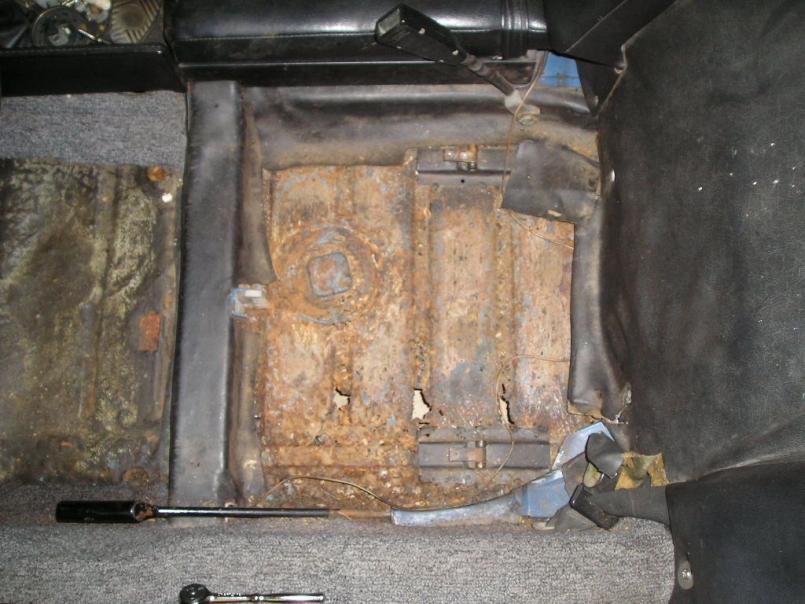
Posted by: dlee6204 Apr 30 2009, 05:57 PM
I couldn't help myself but see what it would look like with a nicer interior 
Posted by: dlee6204 Apr 30 2009, 06:08 PM
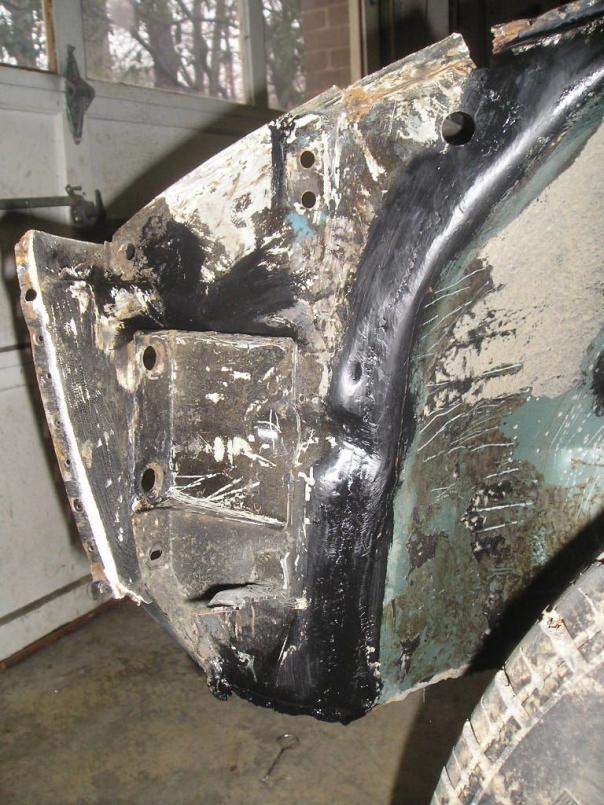
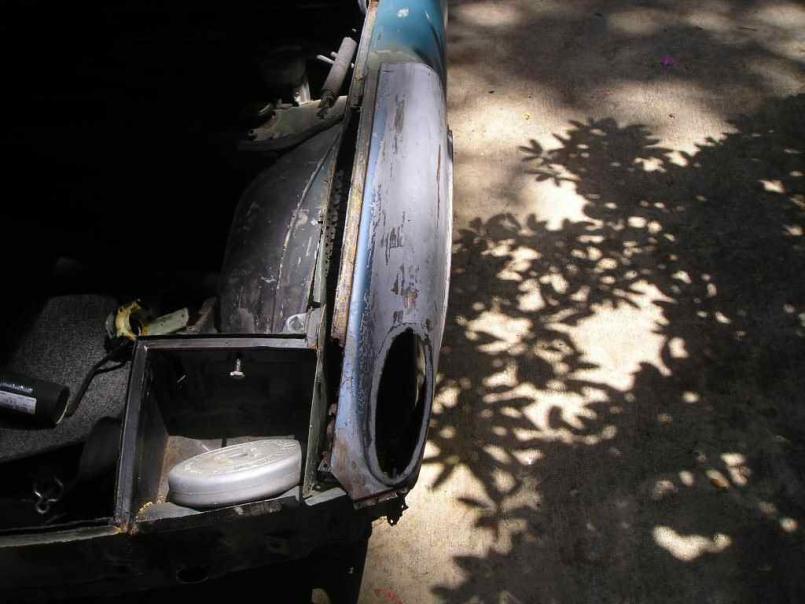
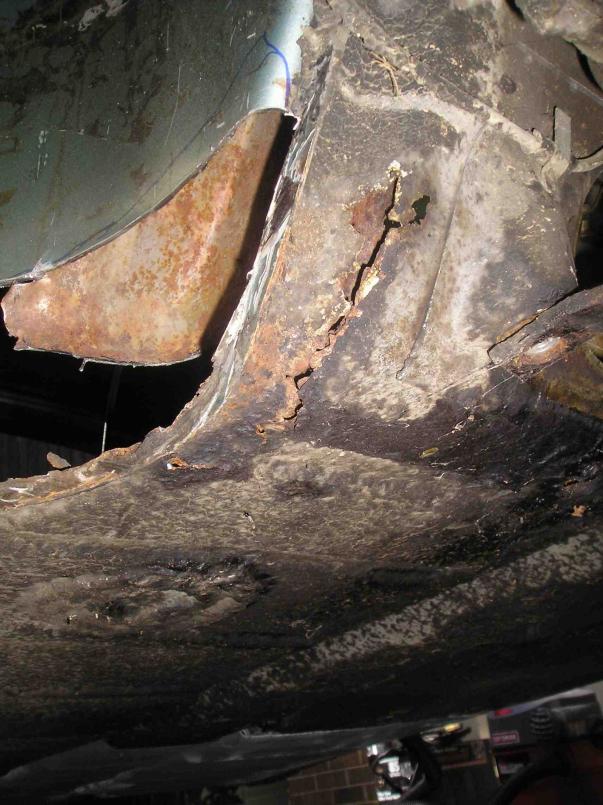
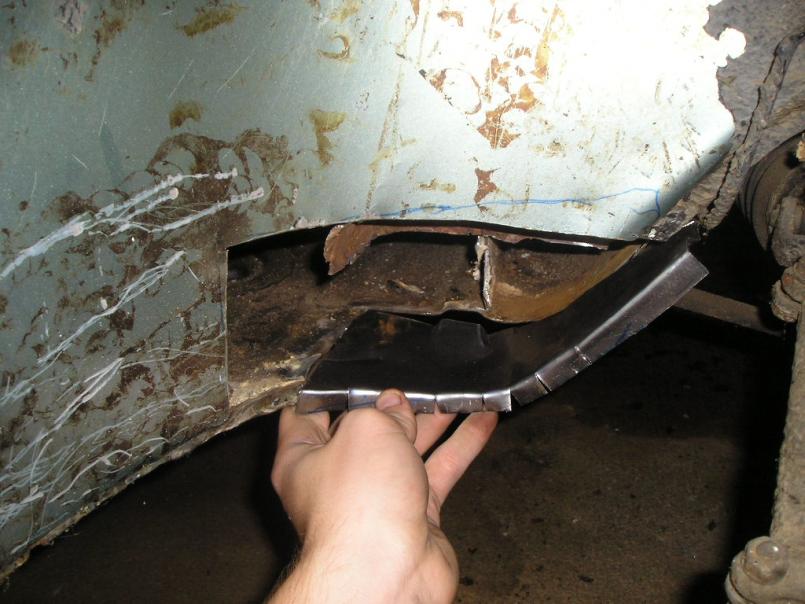
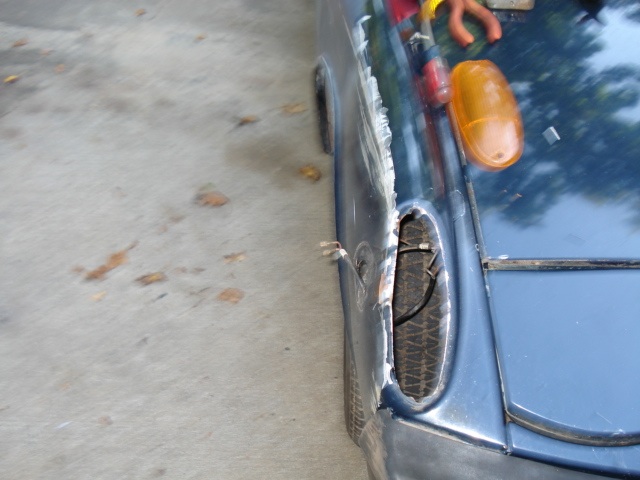
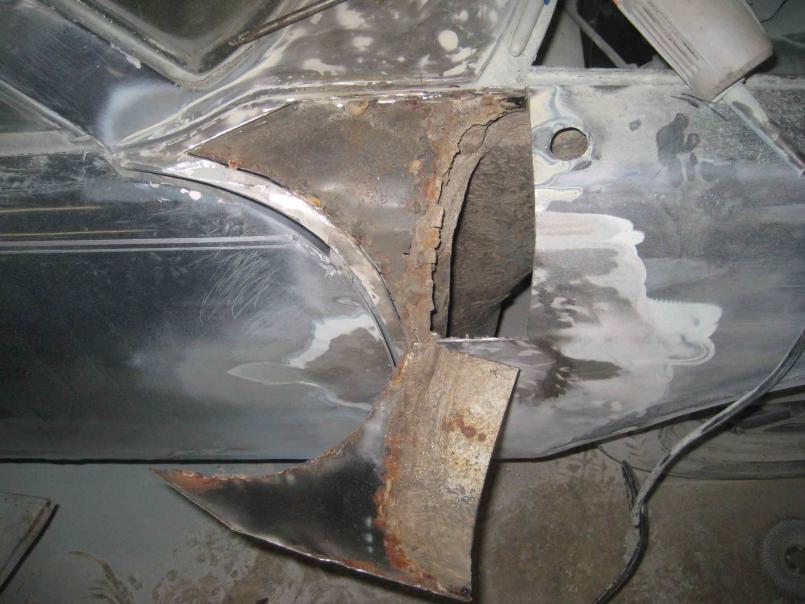
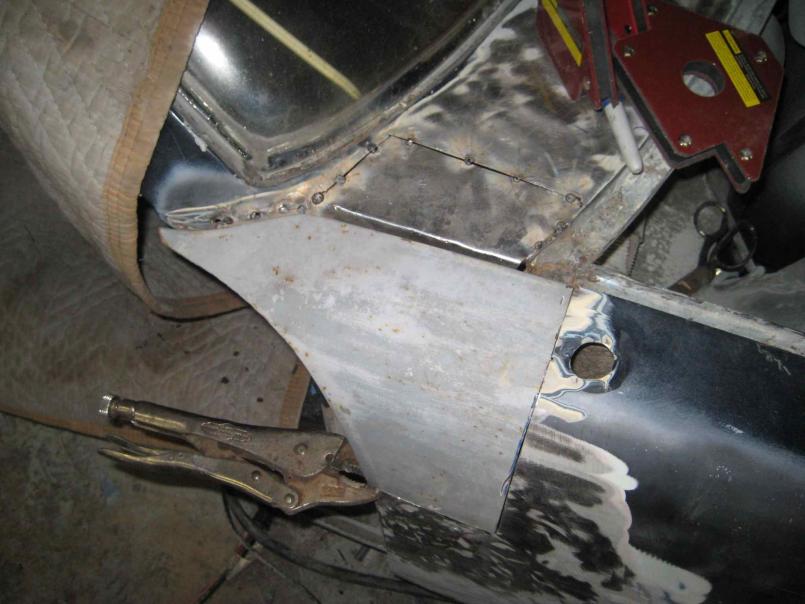
The first thing I started working on was the horrible repair on the driver's front corner. As you can see in the pictures, the corner was merely held on by a few pop rivets and a small bead of weld in the front. It took all off 10 minutes to remove.
Here is one of the nice joints 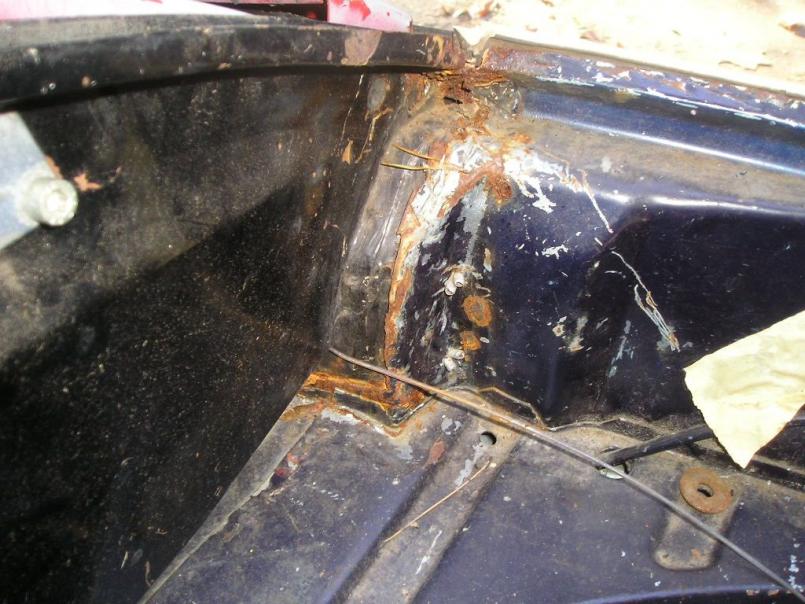
This is the inner fender-well where the replacement panel overlaps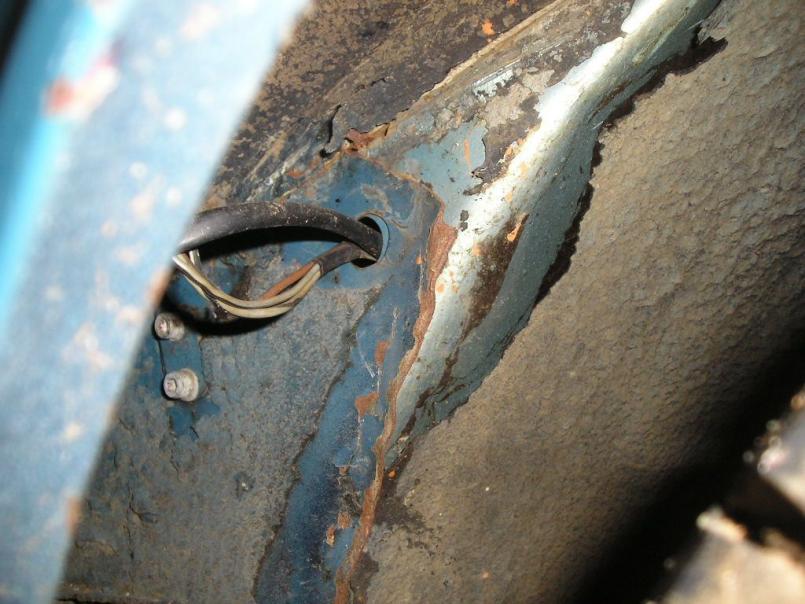
And the water-tight seal at the bottom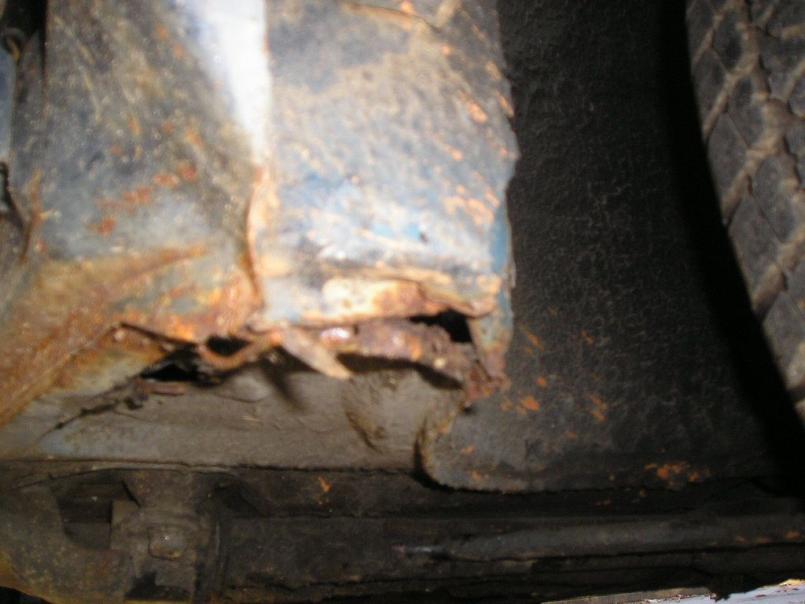
Posted by: dlee6204 Apr 30 2009, 06:16 PM
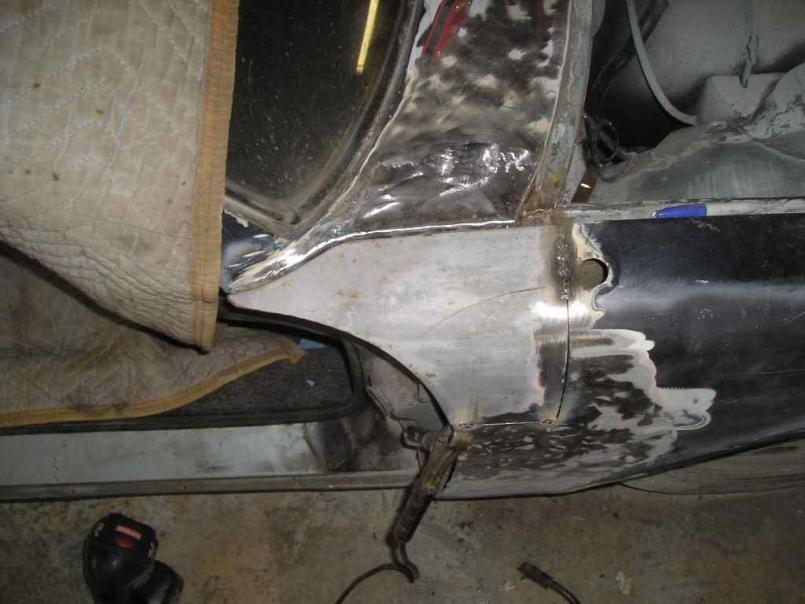
Here is a picture from the front
A little bit of this and a little bit of that and it was out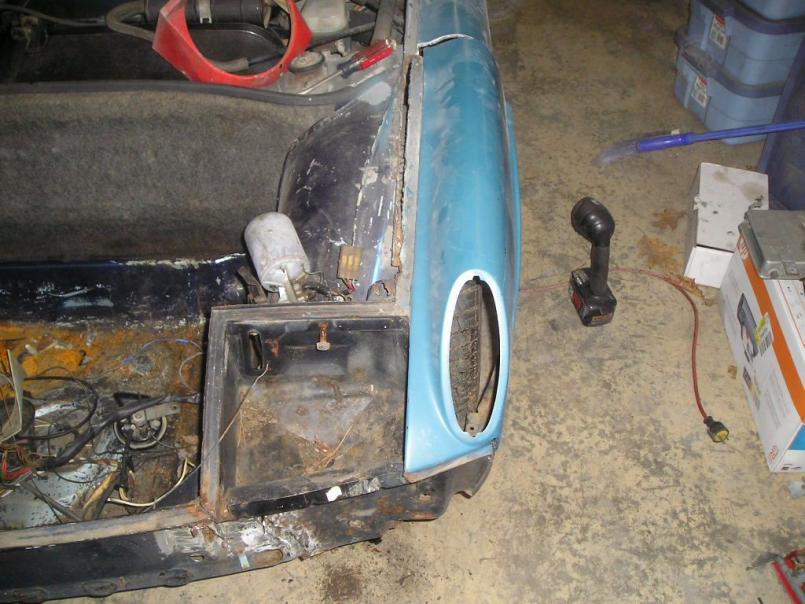

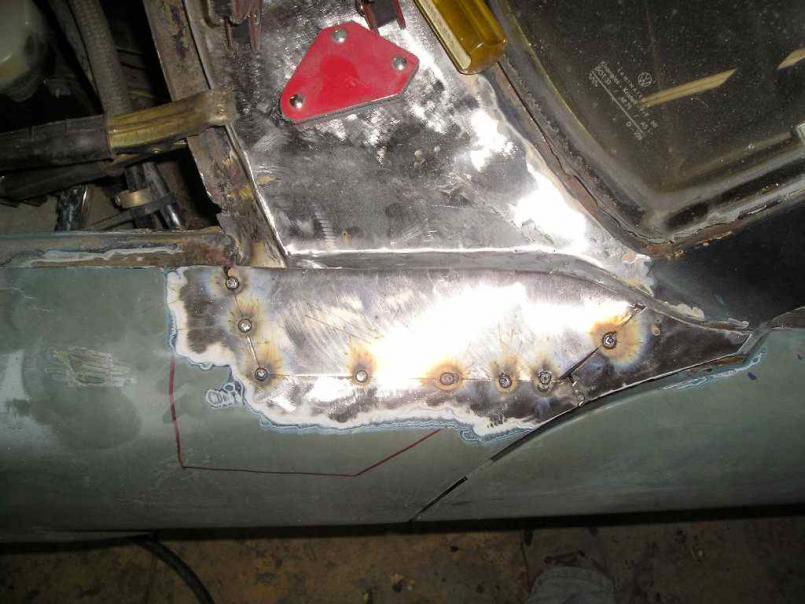
Posted by: dlee6204 Apr 30 2009, 06:25 PM
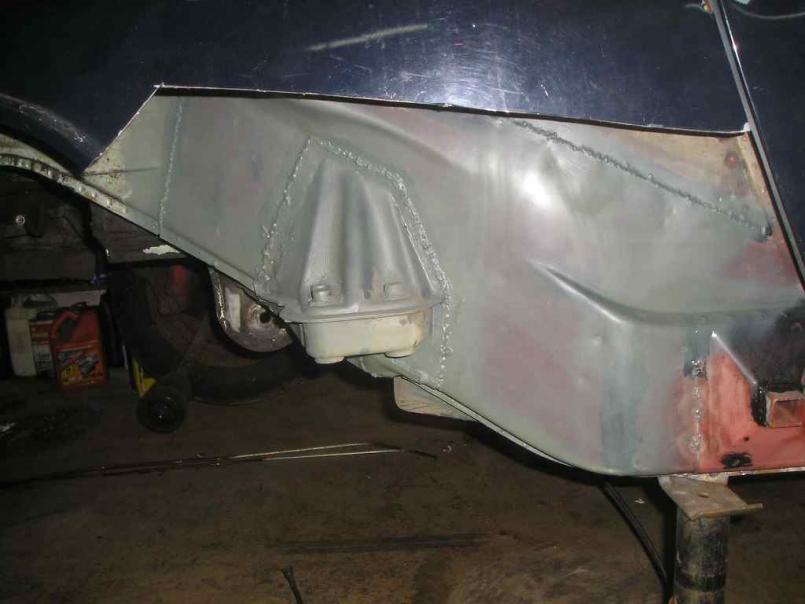
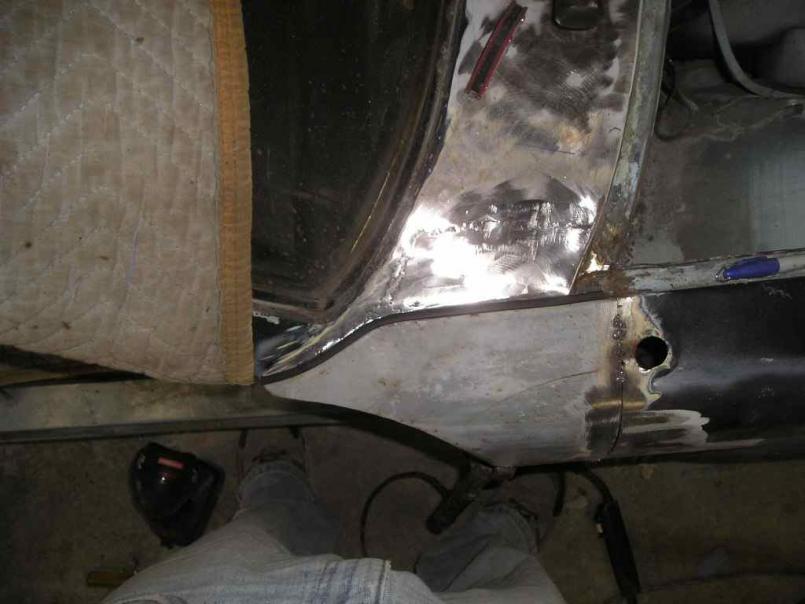
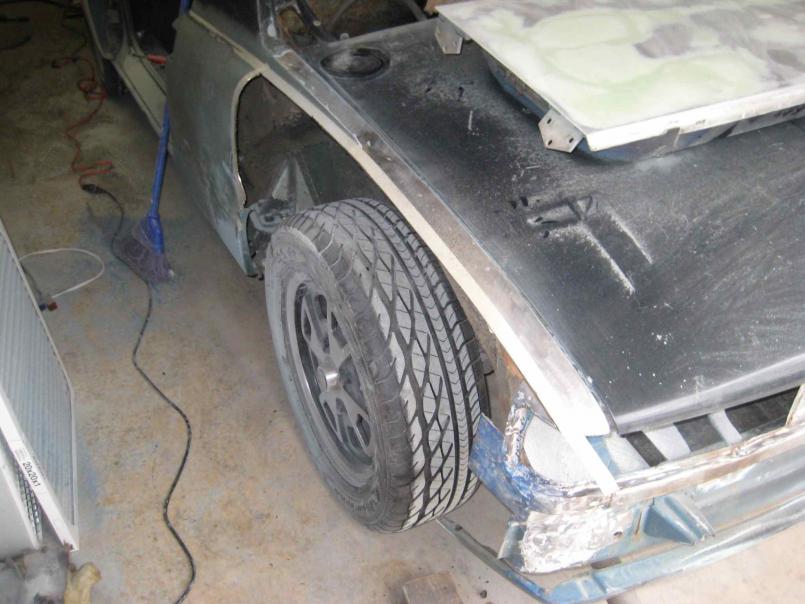
I did some trimming and here is the replacement piece in mock-up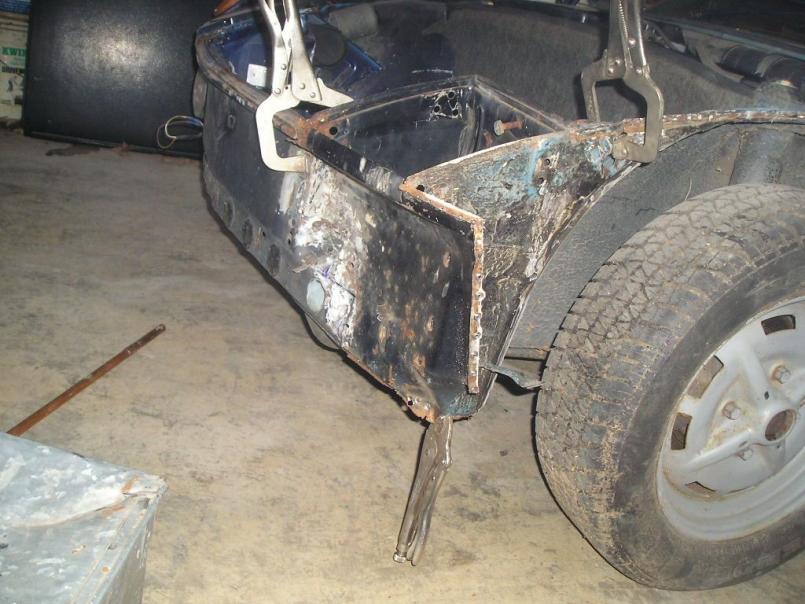
I then welded up all the seams and covered it with rust encapsulator and then some seam sealer. 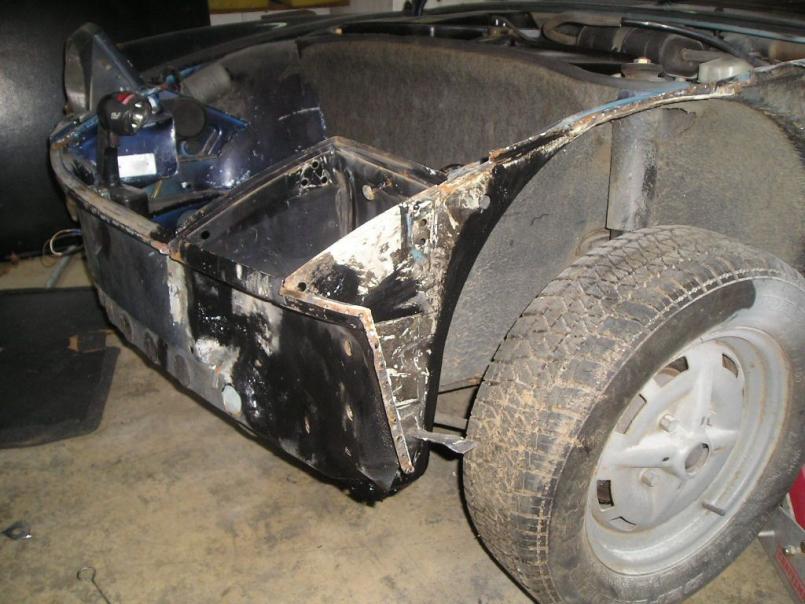
Posted by: dlee6204 Apr 30 2009, 06:35 PM
Now I just need to get a replacement fender from someone who is cutting up a car and that repair can be checked off the list! 
Posted by: dlee6204 Apr 30 2009, 07:04 PM
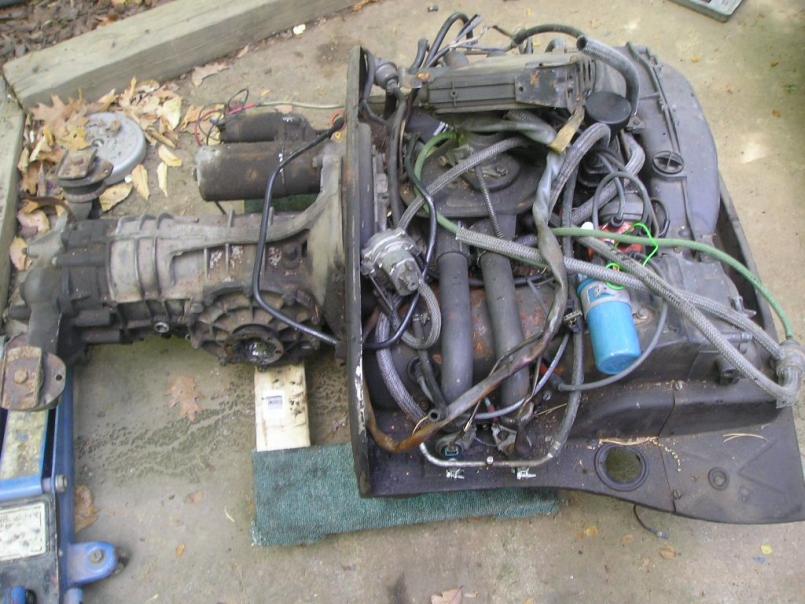
So on Monday I drove back from college in Michigan and early Tuesday morning I was taking the engine out. 
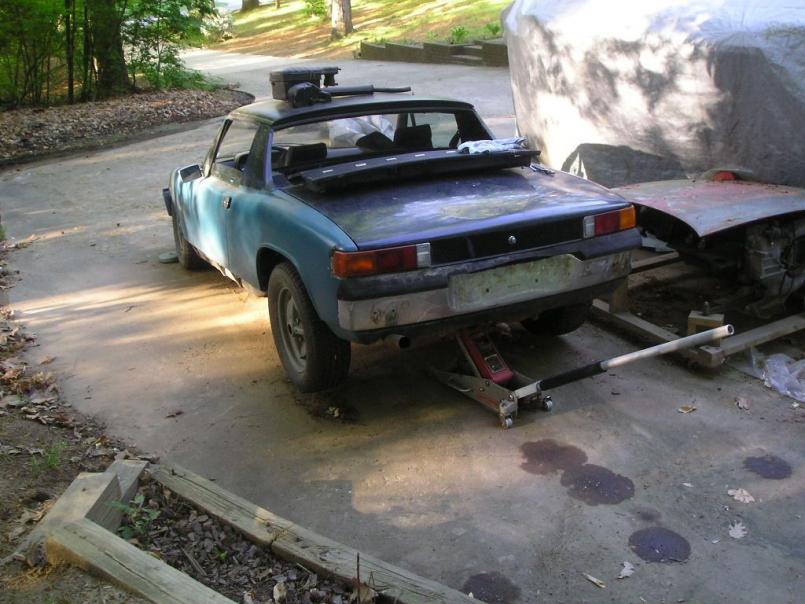
There is another 914 on a rotisserie hiding under the gray tarp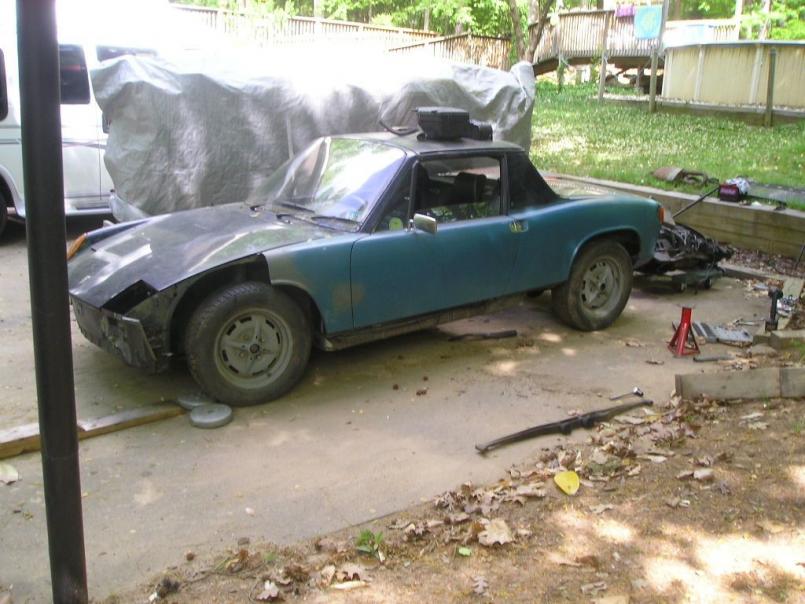
Posted by: dlee6204 Apr 30 2009, 07:13 PM
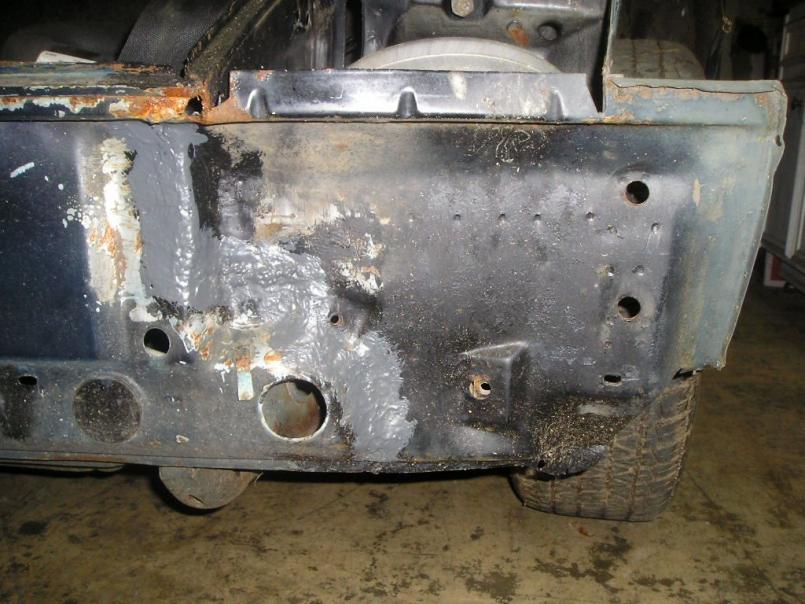
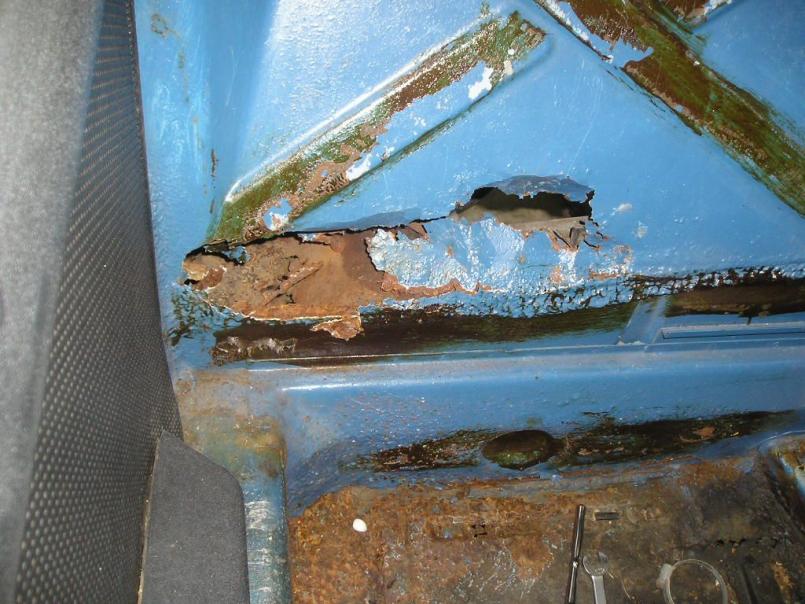
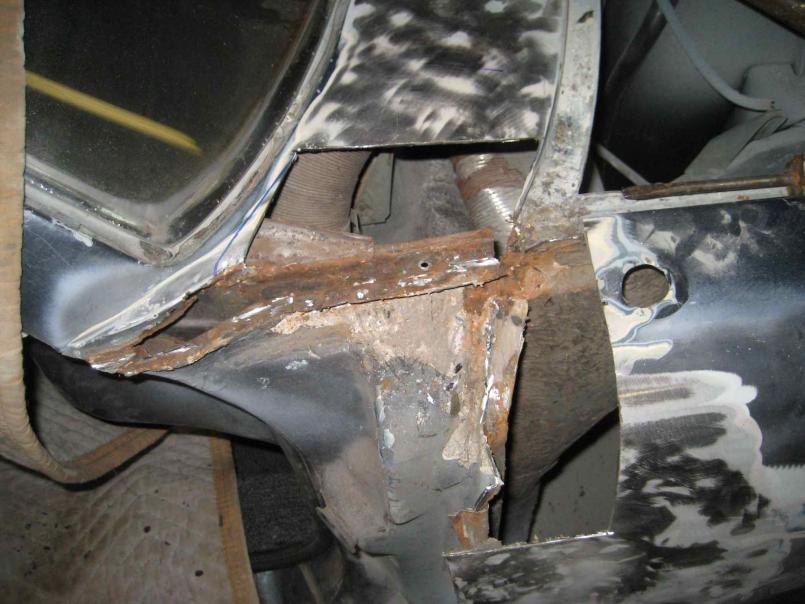
My next step was to strip the interior and work on rust in the firewall. I went ahead and punched out all the paper thin metal. It left me with some pretty big holes but nothing a metalworking cant fix. 


Posted by: dlee6204 Apr 30 2009, 07:21 PM
Tonight I went ahead and started trimming some before making a panel to replace it.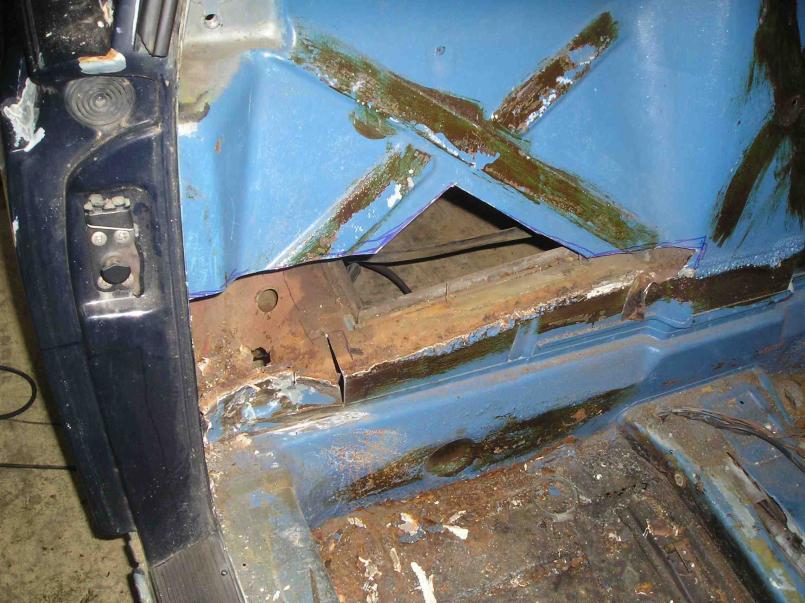
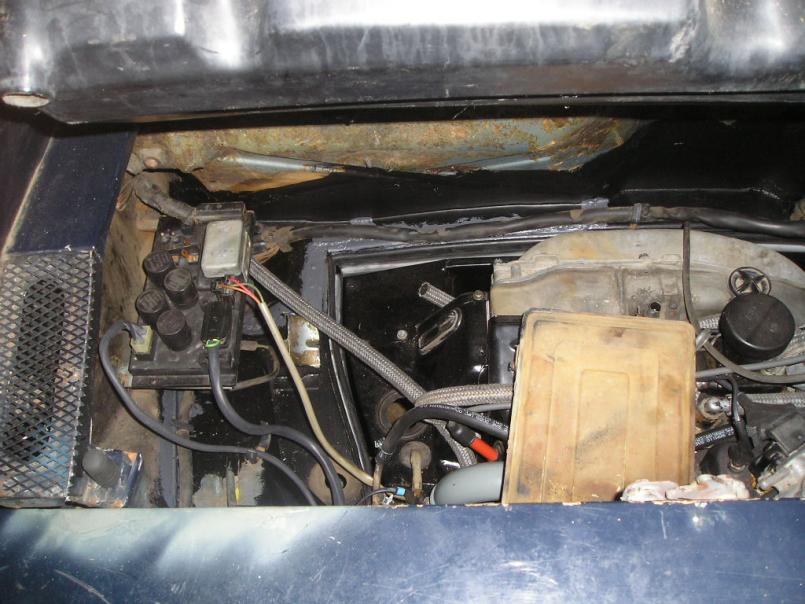
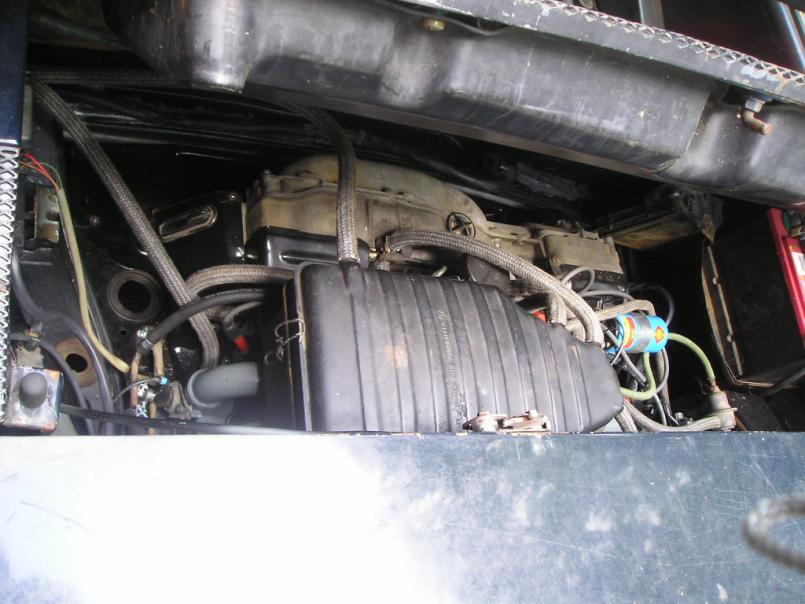
I also took the valve covers off the engine to find a really clean head  . I'm kind of anxious to see what the insides of the motor look like.
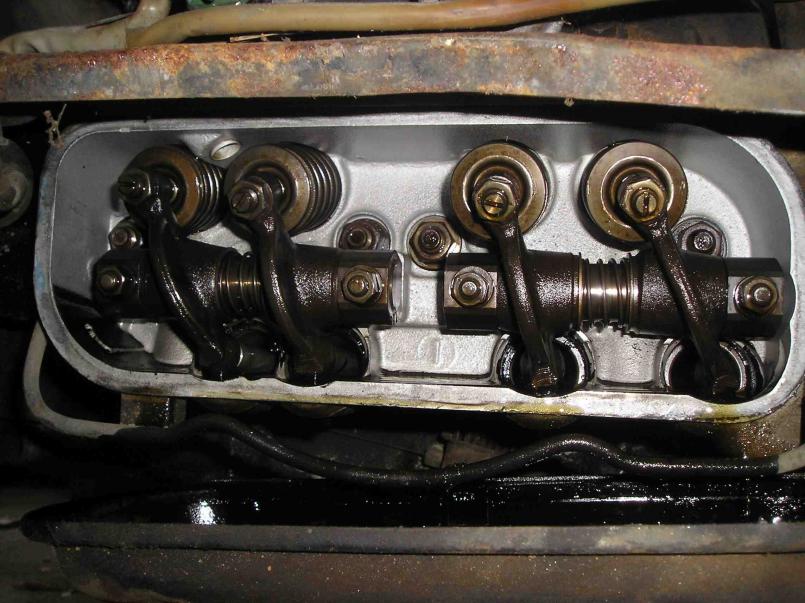
Posted by: dlee6204 Apr 30 2009, 07:25 PM
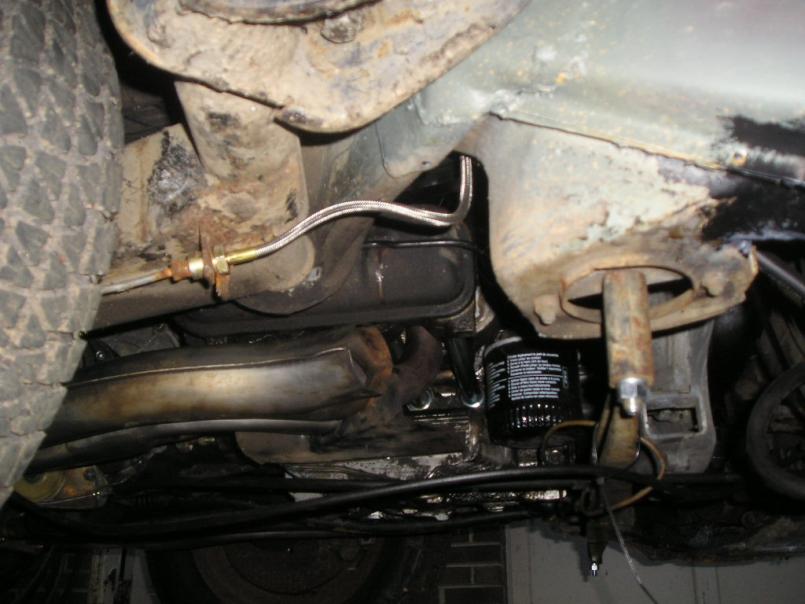
And the last one for the night. I took the heat exchangers off the motor before dropping it and it turns out they there isn't even so much a scratch on them and are practically brand new.  There is still a little bit of dirt/greese caked on them in the picture. More progress to come tomorrow!
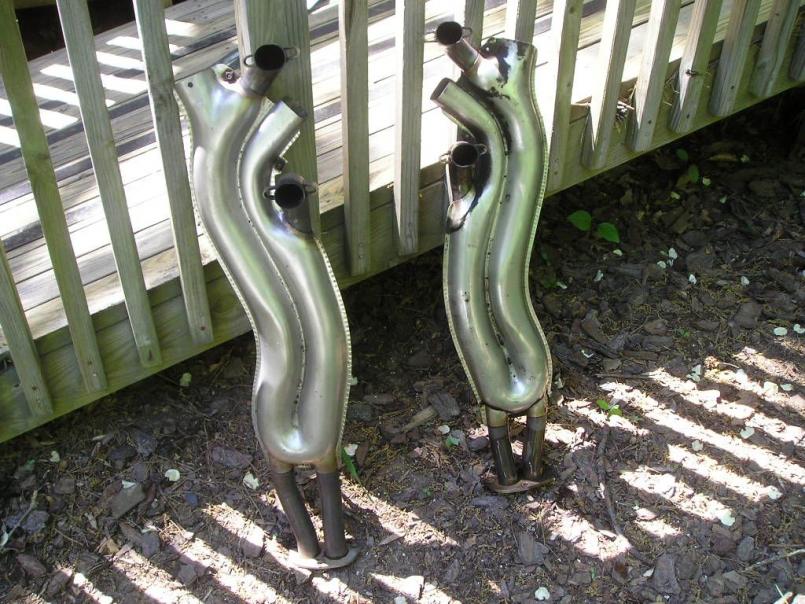
Posted by: my928s4 Apr 30 2009, 08:14 PM
You got your work cut out there! Looking good though, keep up the good work !
Posted by: dlee6204 May 12 2009, 09:58 PM
I was able to get some more work done. This last week has been extremely busy so I have just been trying to work on it when I can.
I cut out all the bad stuff and then I welded in the first piece. 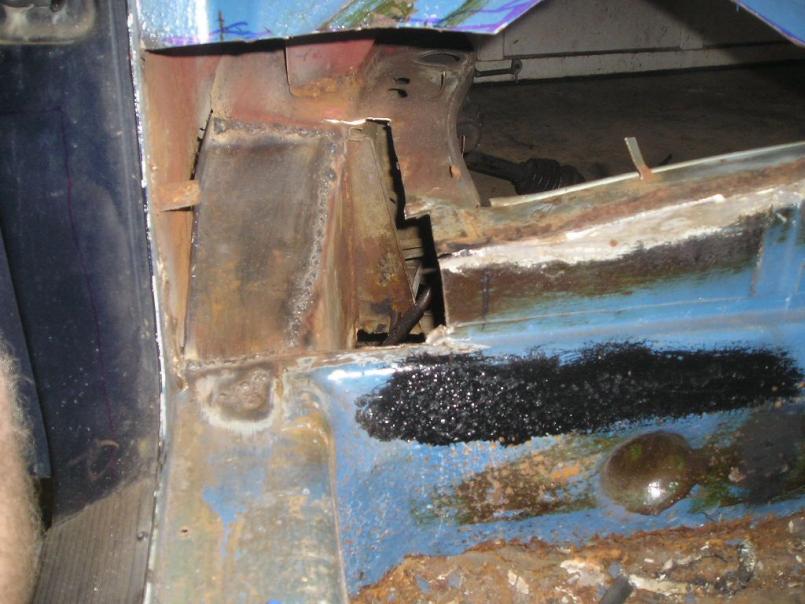
Here is the piece I made to cover up the engine shelf. It came out better than expected.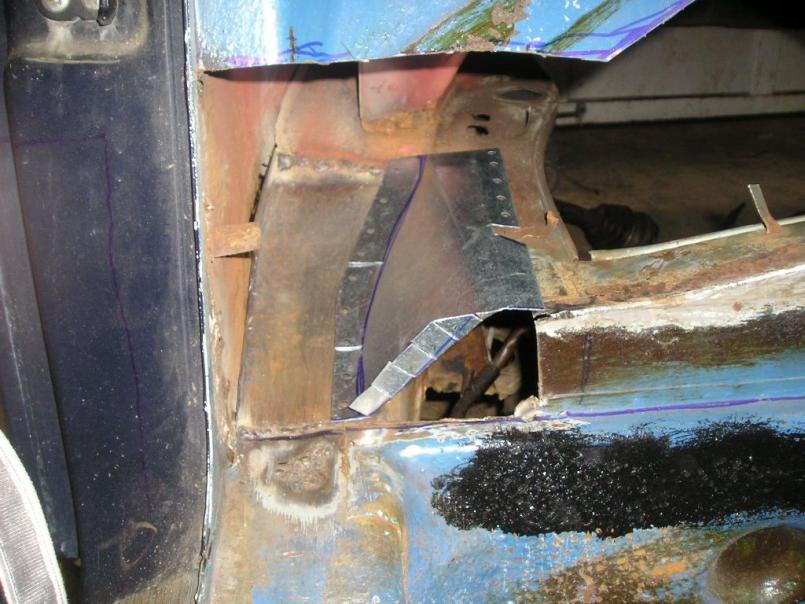
And the third piece went in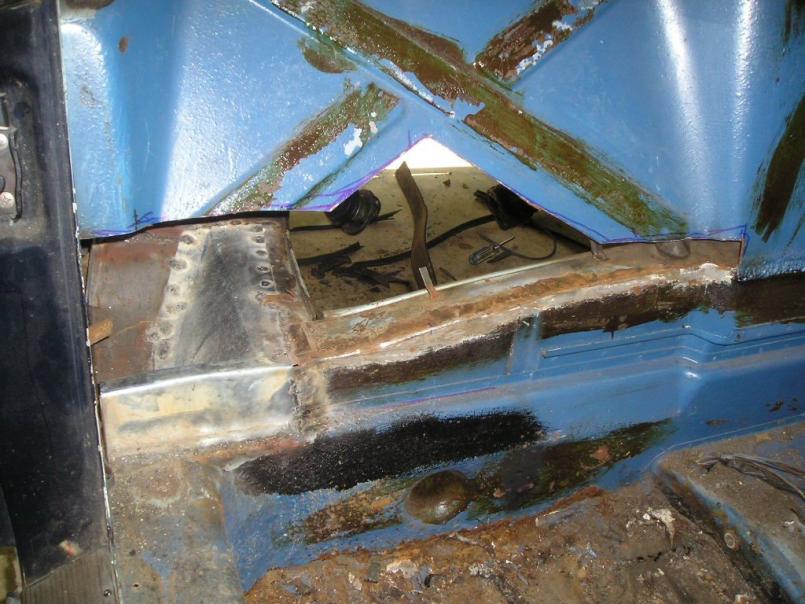
Posted by: dlee6204 May 12 2009, 10:06 PM
And finally the big piece was tacked in today. It took quite a bit more time making this piece but I think it came out fairly nice. 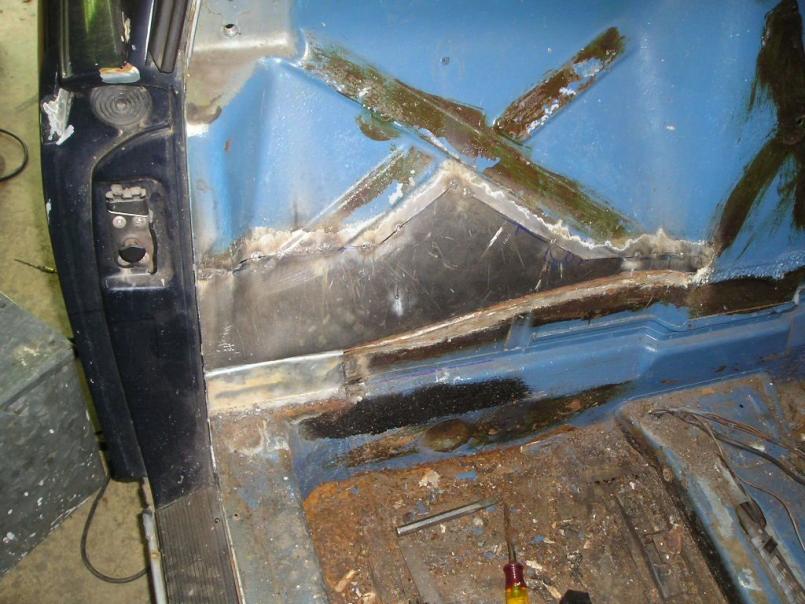
Back side...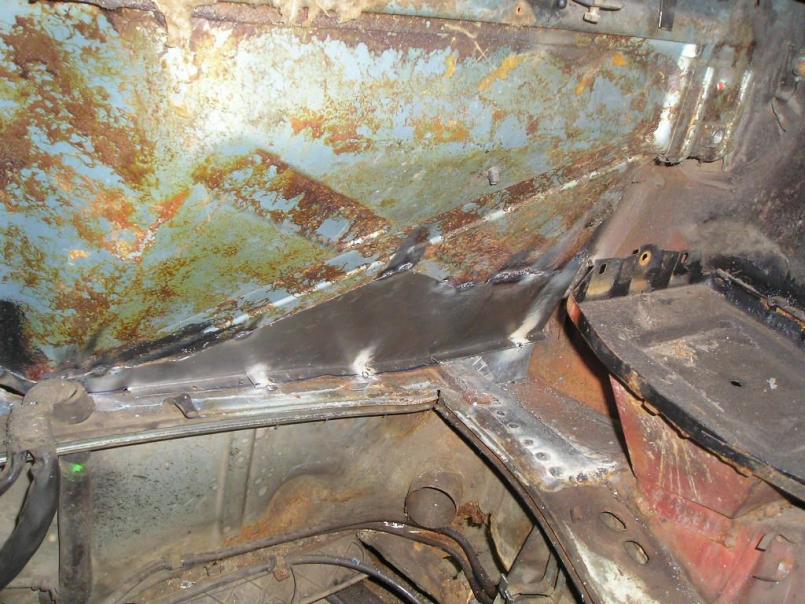
Oh and I also received my replacement floorpan and seat mount from AA last week so I can't wait for that to go in. I also bought a driver's side fender which should be coming in the mail within the next week. Once I receive that, I will put it on the car.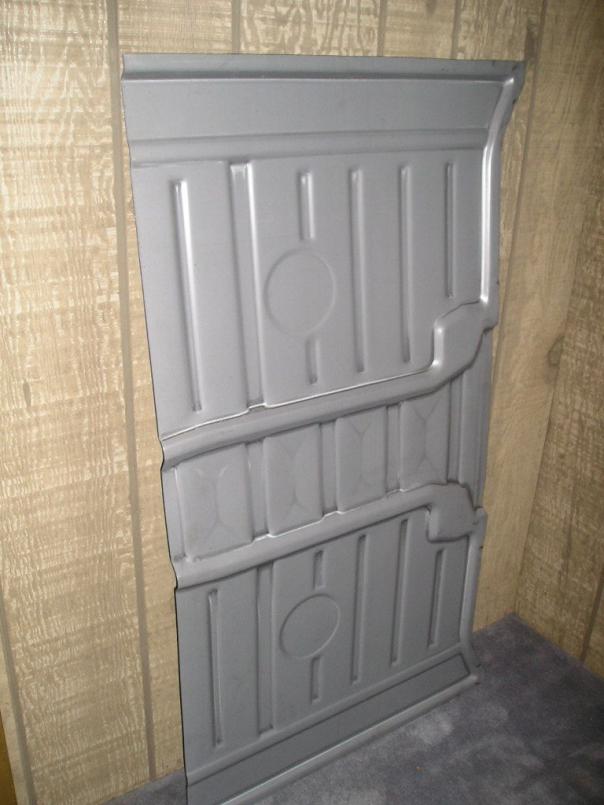
Posted by: dlee6204 May 12 2009, 10:13 PM
Oh and I also worked on our 62 Bug. I had to replace a broken exhaust stud. Talk about a pain. I finished putting her back together this morning and now she runs like a top. 
That's all the 914 progress for now. I'll be traveling the next week so hopefully after that I will have plenty of time to work on the car again.
Posted by: jcambo7 May 13 2009, 10:39 AM
Looking great... ![popcorn[1].gif](style_emoticons/default/popcorn[1].gif)
Posted by: dlee6204 May 27 2009, 04:27 PM
I got some more work done this past week. I am done with traveling for a while so I will have more time to work on the car. I started repairing the driver's side fire wall. It pretty much had the same rust as on the passenger side so the repair was the same.
This is what I had to work with after all the bad stuff was cut out. 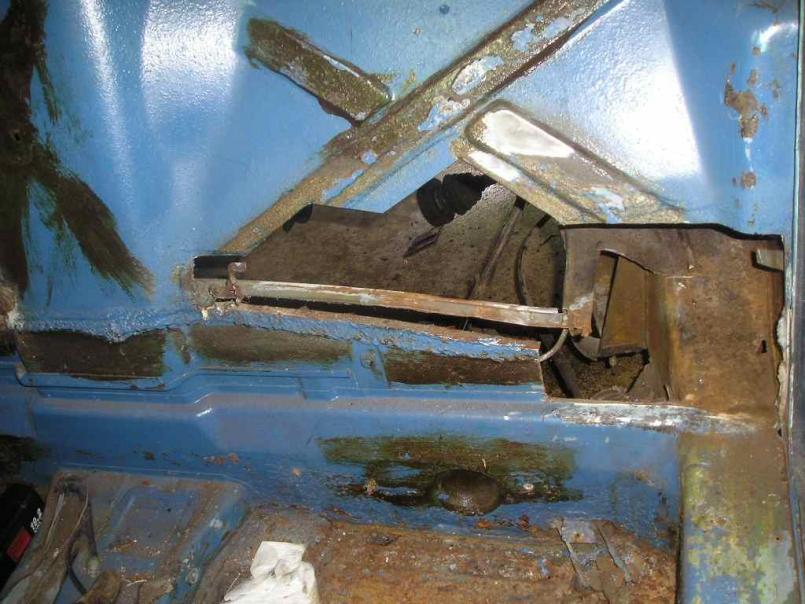
Here are the first two pieces welded in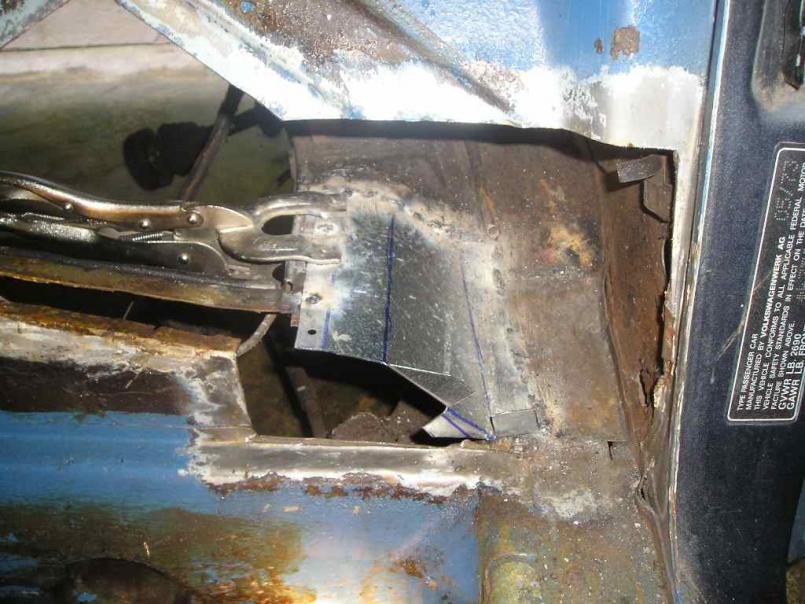
and the third piece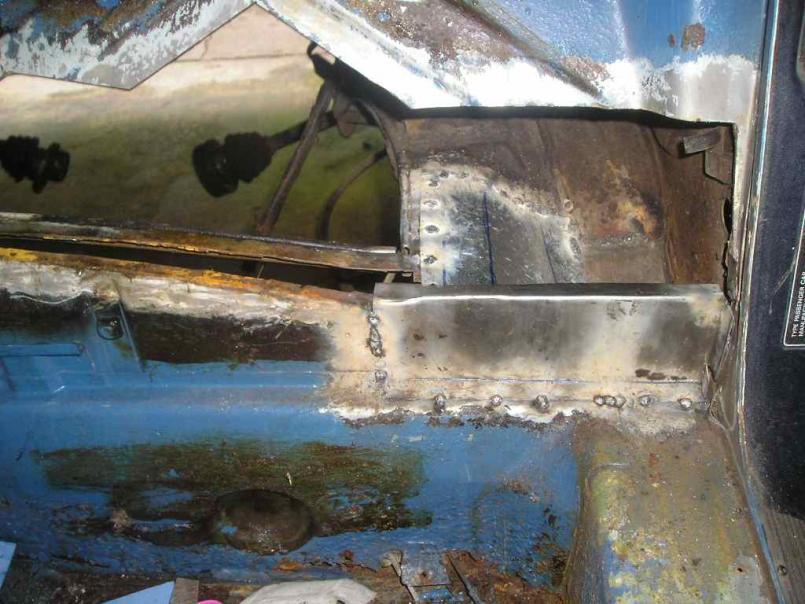
Shot from the back
Hopefully I will get the big piece in tomorrow. In the last picture you can see some rust in the side wall and I will take care of that when I cut off a portion of the rear fender. I need to do this anyway to access some rust in the long.
Posted by: dlee6204 May 27 2009, 04:36 PM
I also bought a portion of the front fender from a member on here and so I tacked it on.
Before trimming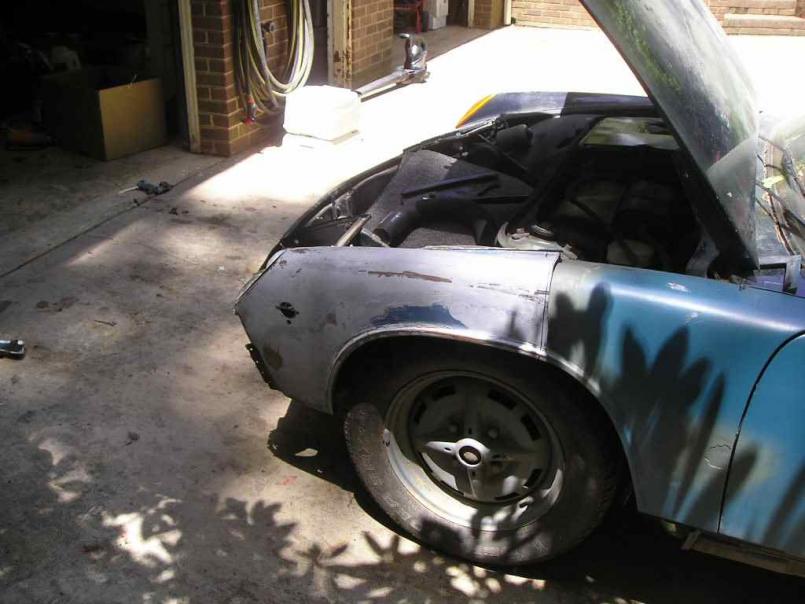
After trimming and tacked on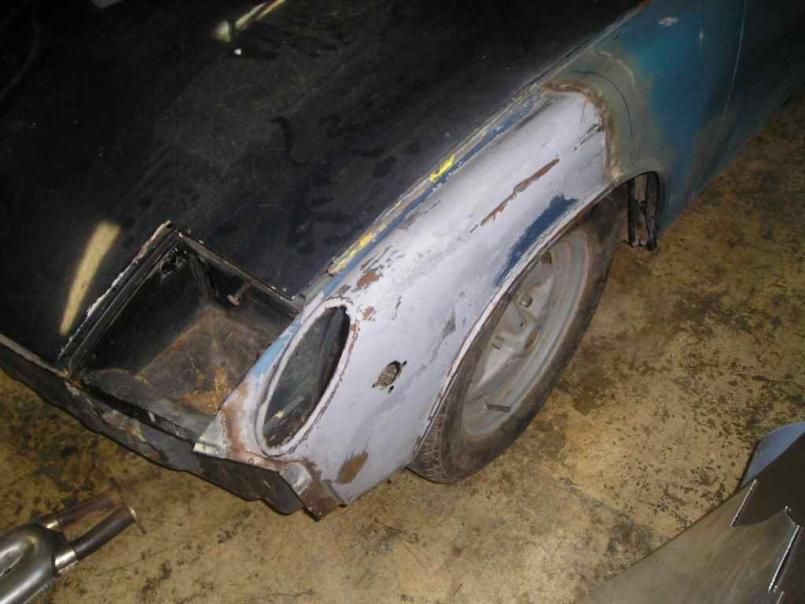
Posted by: dlee6204 Jun 1 2009, 08:36 PM
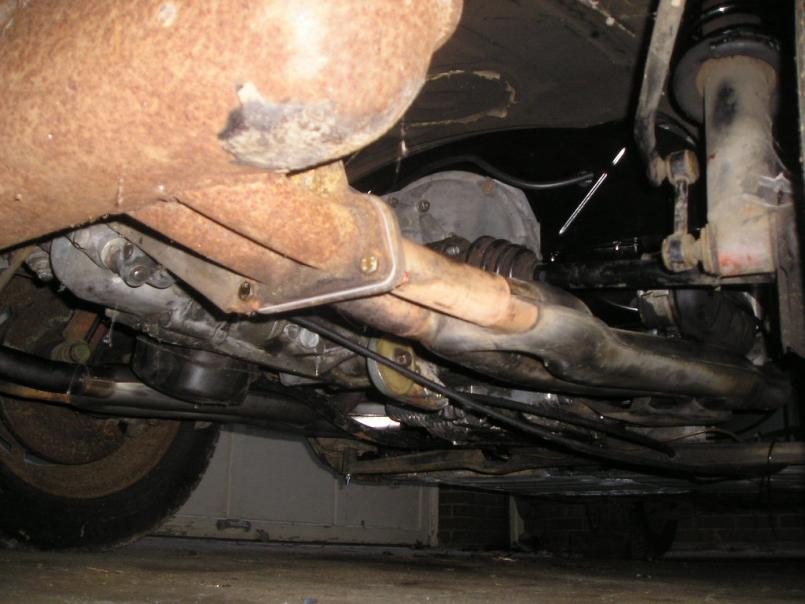
Well I got a lot done today. I had a friend come over and help me so we did a lot. I got the driver's side repair piece in and I finished up welding in both sides. I started to tear into the driver's side long and jackpoint. I also started to tear down the engine and clean it.
Here is the piece after a first few welds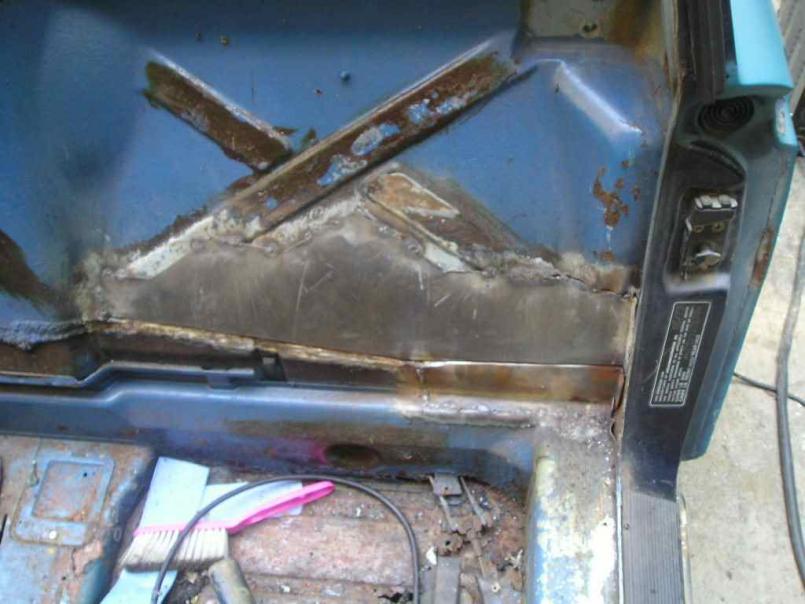
After I finished up both sides and coated them
The engine in pieces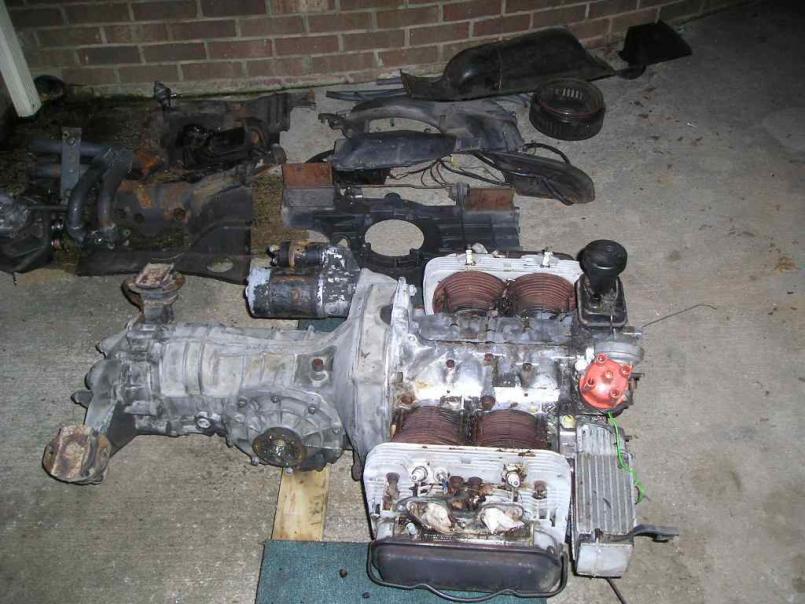
More fun
Posted by: dlee6204 Jun 8 2009, 11:01 AM
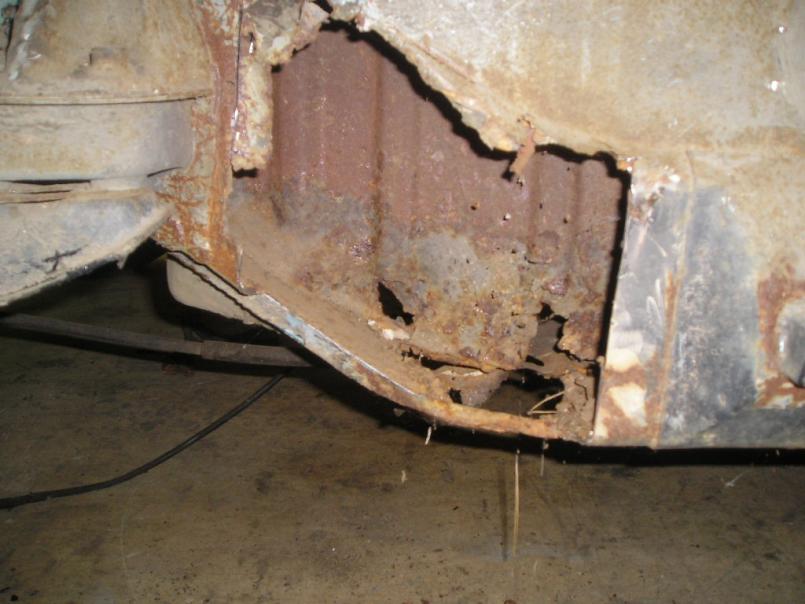
So here is what the driver's side jackpoint looked like before. Doesn't seem that bad right?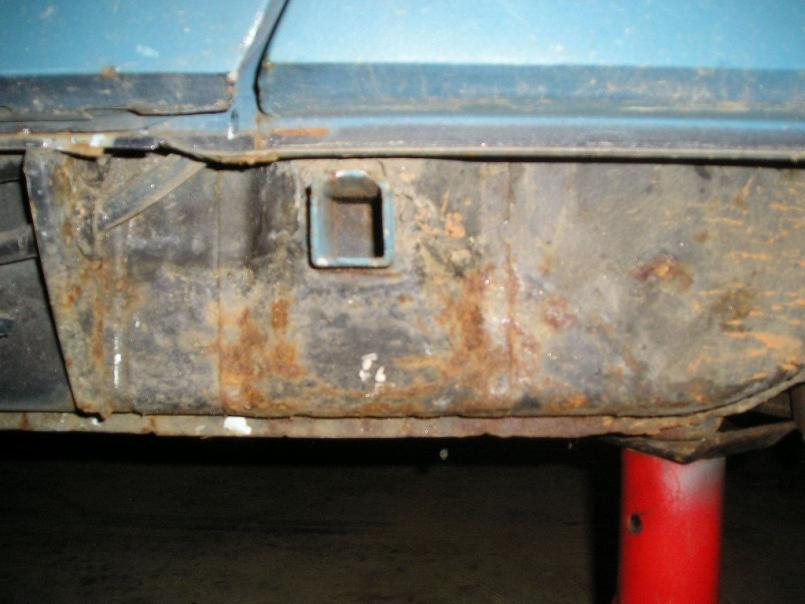
Here is all the rust exposed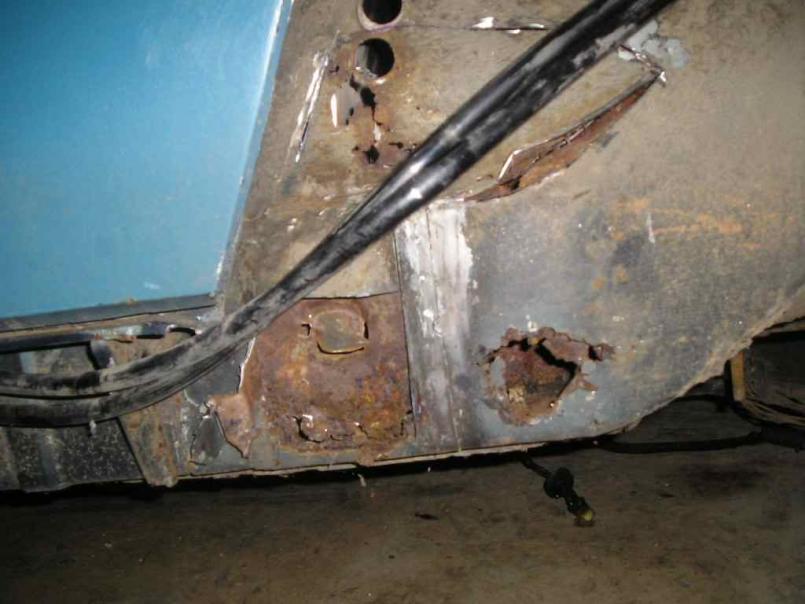
And then after a little handy work
And finally with the fender tacked in place.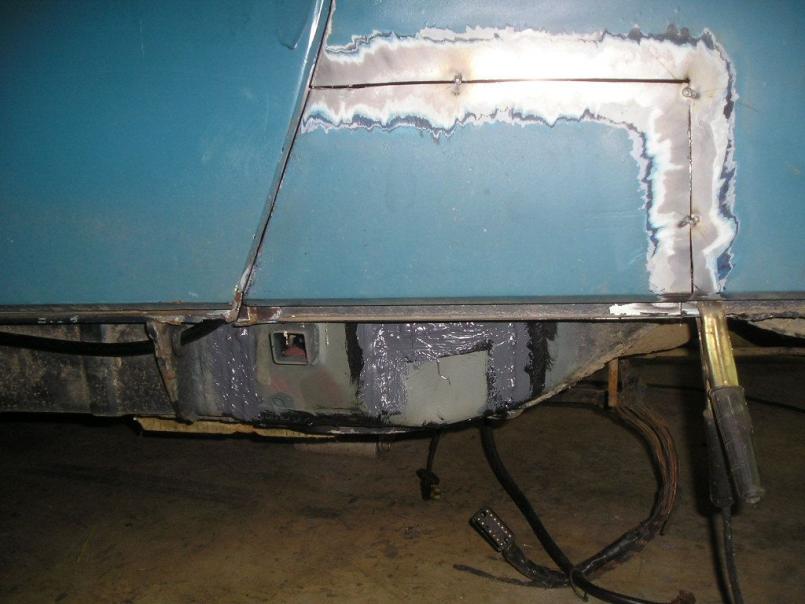
And one more for the road
Posted by: dlee6204 Jun 8 2009, 11:18 PM
And now on to the other side. I bought a lower wheelhouse replacement piece that will go in. I will end up having to remove the outer suspension mount which shouldn't be a problem. It will just mean more work to do. Here is what I have to work with. At some point, one of the previous owners tacked a patch panel over the area and then covered it in bondo. So much good that did. 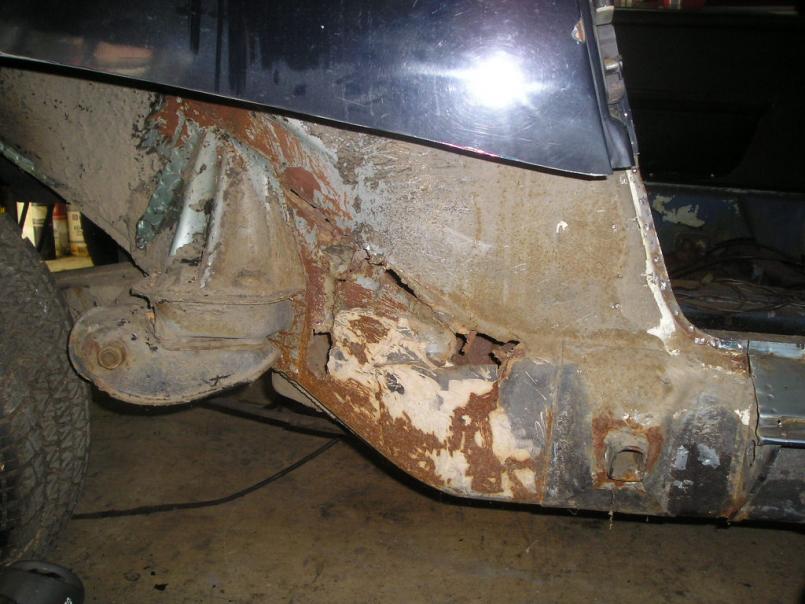
Posted by: dlee6204 Jun 11 2009, 08:28 PM
Here are a few pictures of some of the work I got done today.
I started by cutting out some more of the bad stuff.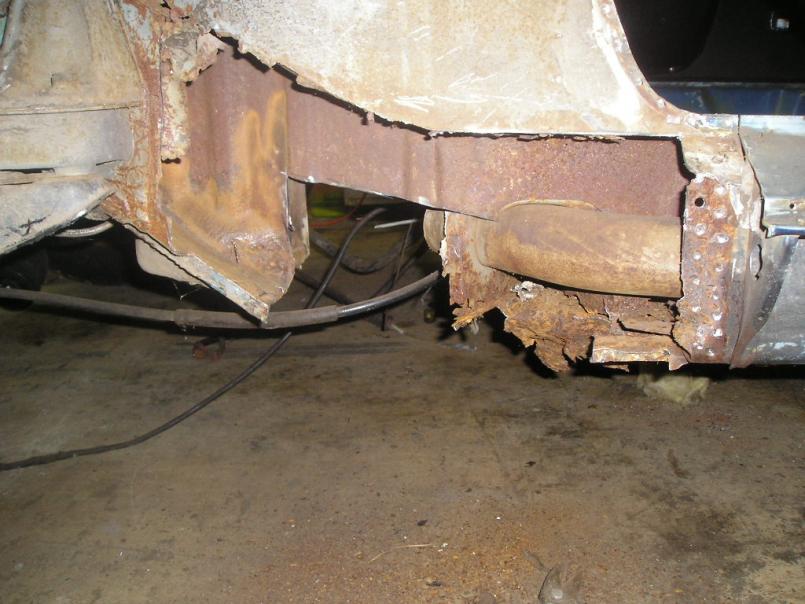
And then I made and tacked in one of the
two pieces that will repair the "inner" longitudinal. 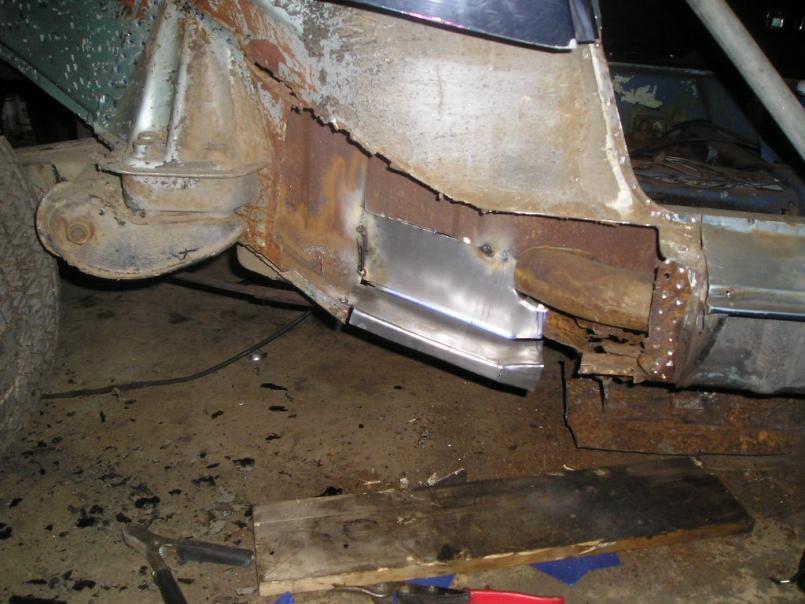
After I get done fixing the inner portion of the longitudinal I will weld in the lower wheelhouse panel and then the jackpoint and finish with the fender. After I get that side completely done, I will have to focus on replacing the floorpan and on the lower edge of the firewall where it meets the floor. So much work and so little time.
Posted by: dlee6204 Jun 13 2009, 05:52 PM
So today I got a lot done. I started off wanting to get most of the long done.
Rust=Bad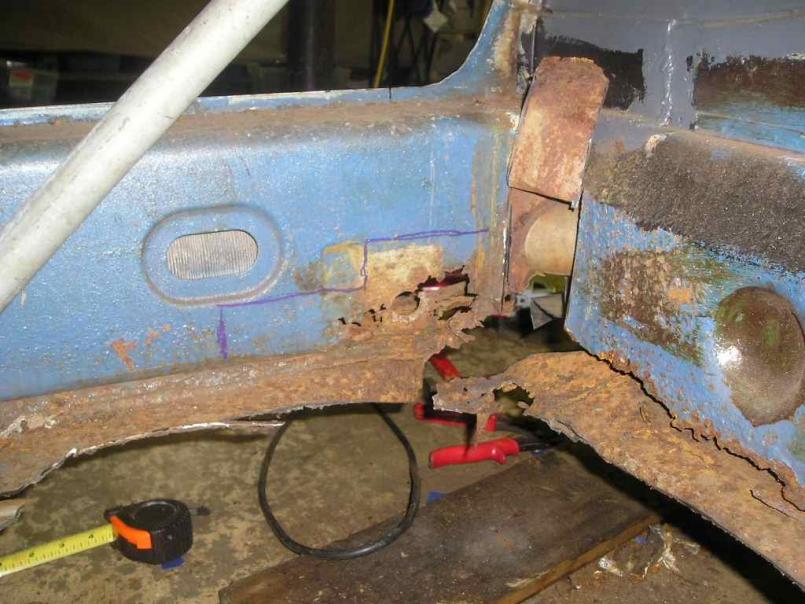
The piece I made to go in after I cut all the bad stuff out.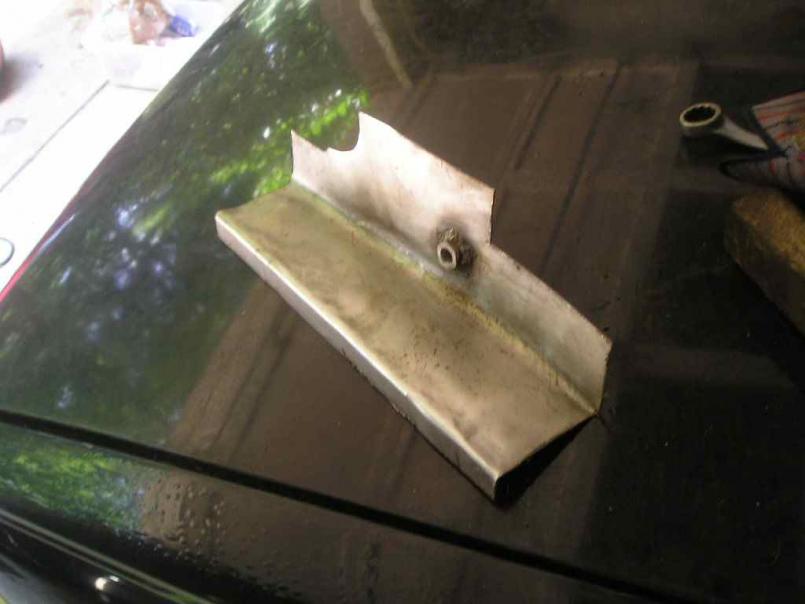
And then the piece welded in. 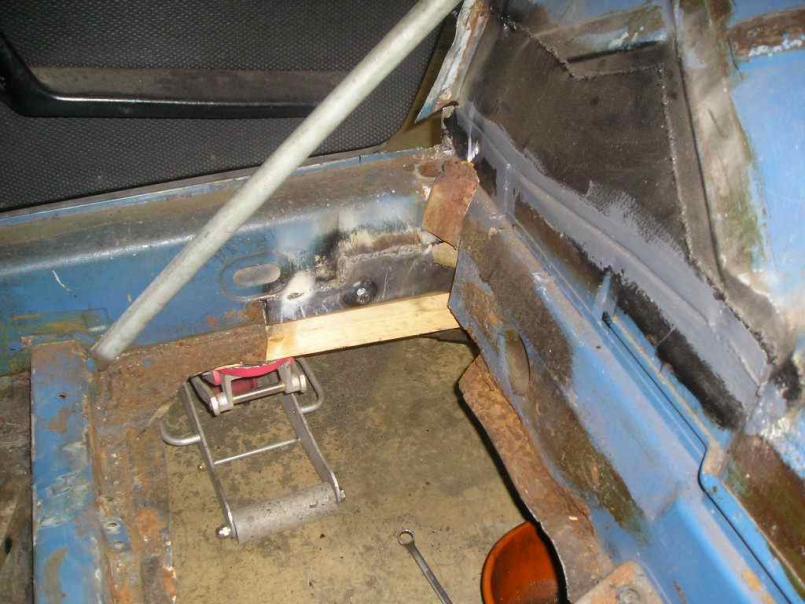
Posted by: dlee6204 Jun 13 2009, 06:01 PM
My next job was to work on installing the wheelhouse piece.
Here is after I cut out the suspension mount.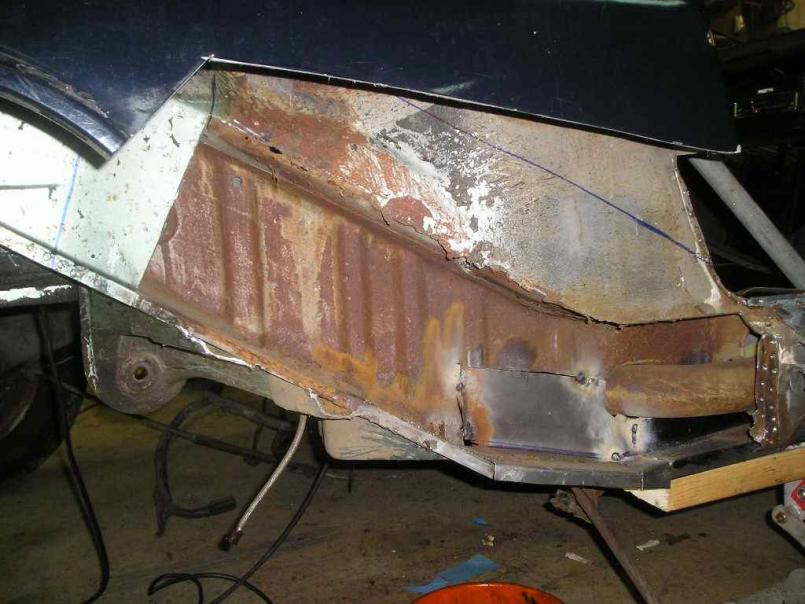
More
Different angle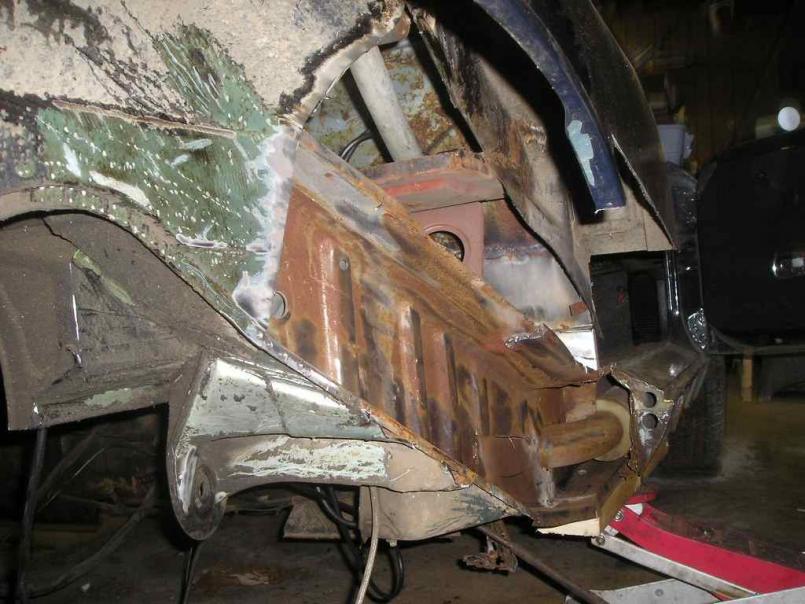
And then after I got as much of the surface rust off with the wire wheel, I coated everything with rust encapsulator. 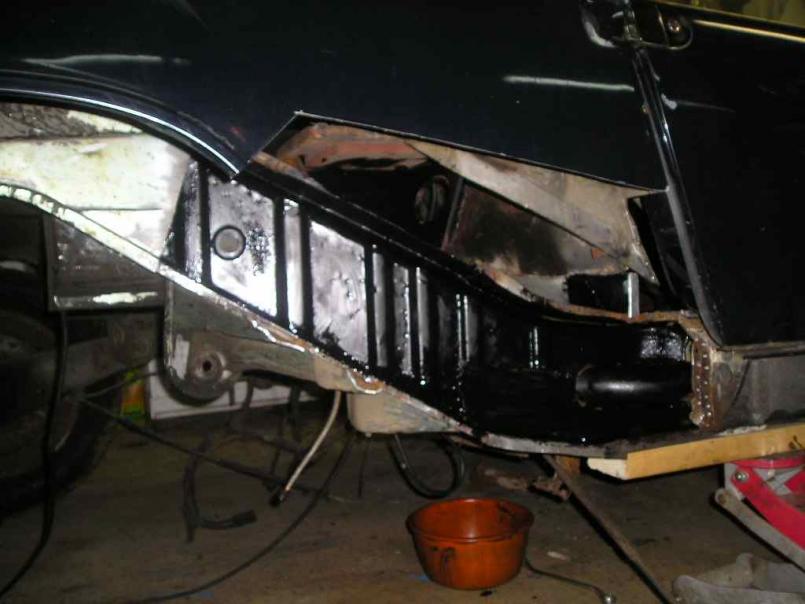
Here is everything just begging to be welded in.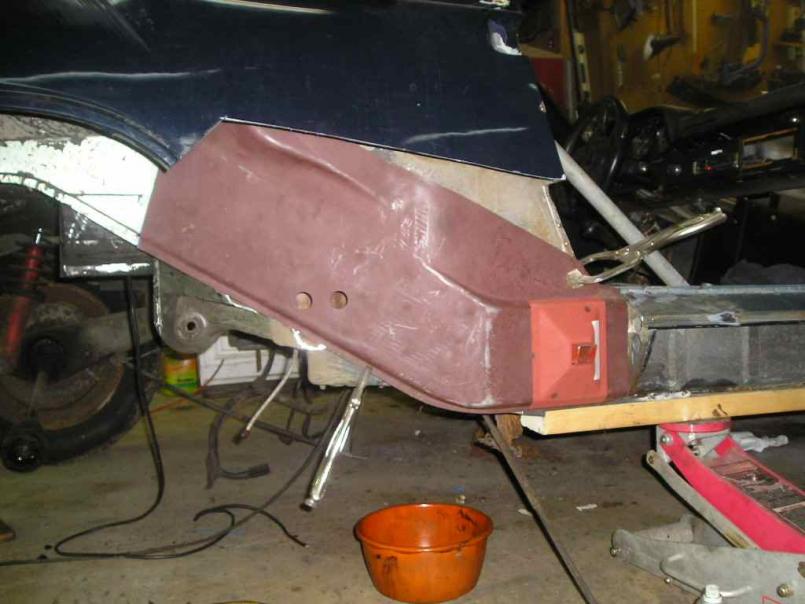
And this is all I got done today. Tomorrow my goal is to finish the wheelhouse and jackpoint pieces.
Posted by: dlee6204 Jun 14 2009, 09:54 PM
Well I got it welded in. The car no longer sags! All the door gaps and measurements are what they should be!  I still need to clean up the old suspension mount and then install it but at least progress is being made!
I start a new job this week so progress will slow a bit but I will still keep at it! Here is a list of stuff that still needs to be fixed: Suspension mount, Rear firewall "lip", floor pan, clutch tube, and then a little rust near the front suspension mount. I will probably end up installing an Engman stiffening kit later this summer but right now that is not priority. 
Posted by: type11969 Jun 14 2009, 10:04 PM
Doug-
Your updates are an inspiration for me to get working on my teener again. Nice work!
-Chris
Posted by: jc914 Jun 16 2009, 07:37 PM
NICE JOB keep us posted 
Posted by: dlee6204 Jun 28 2009, 05:29 PM
Well I have been pretty busy the past week or two so only a little progress has been made. The suspension mount I had was beyond worth repairing so I am waiting for that part to arrive. Meanwhile I started working on the floor area.
I cut most of the old floor out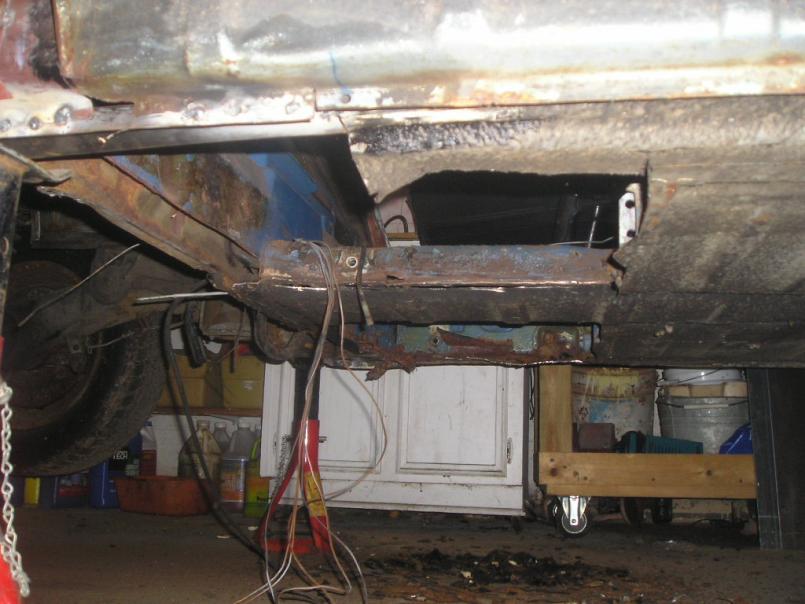
I also removed all the floor tar and found some more areas of rust. 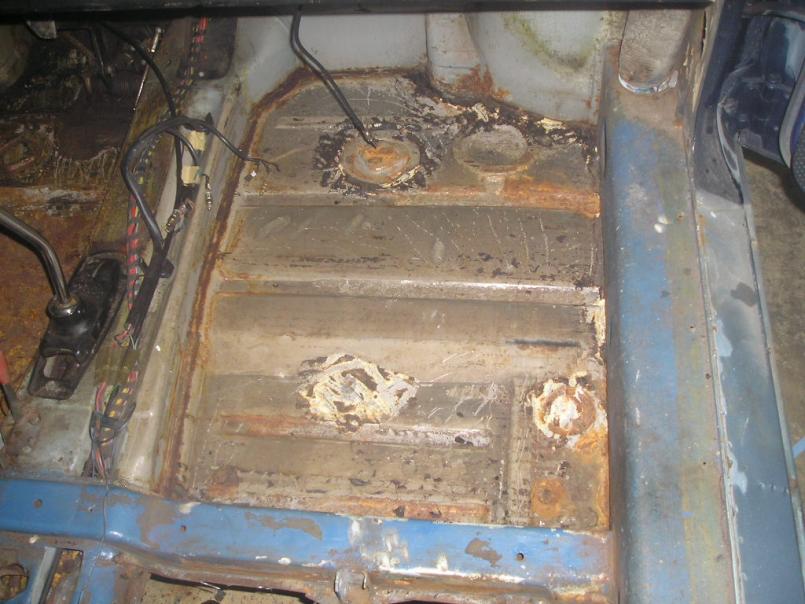
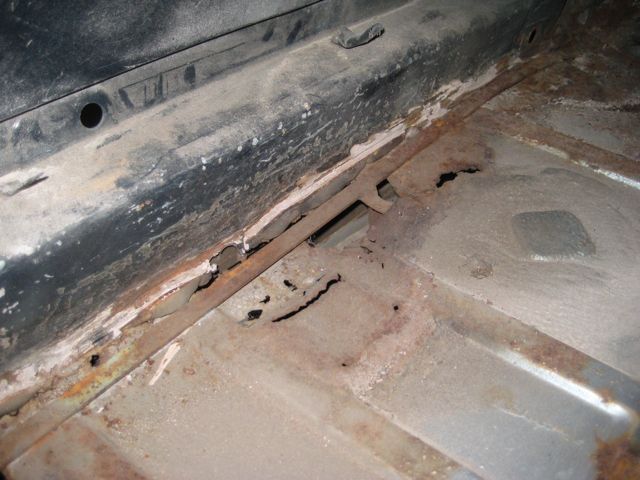
Here is a spot I will need to repair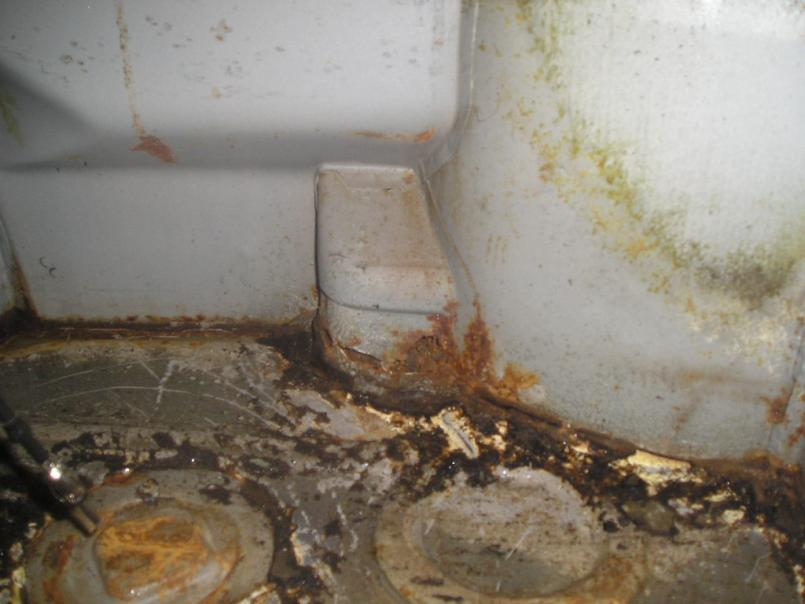
Posted by: dlee6204 Jun 28 2009, 05:34 PM
And then the driver's side had some rust but luckily the replacement floor panel will take care of most of this. The crossmember will need some work however. 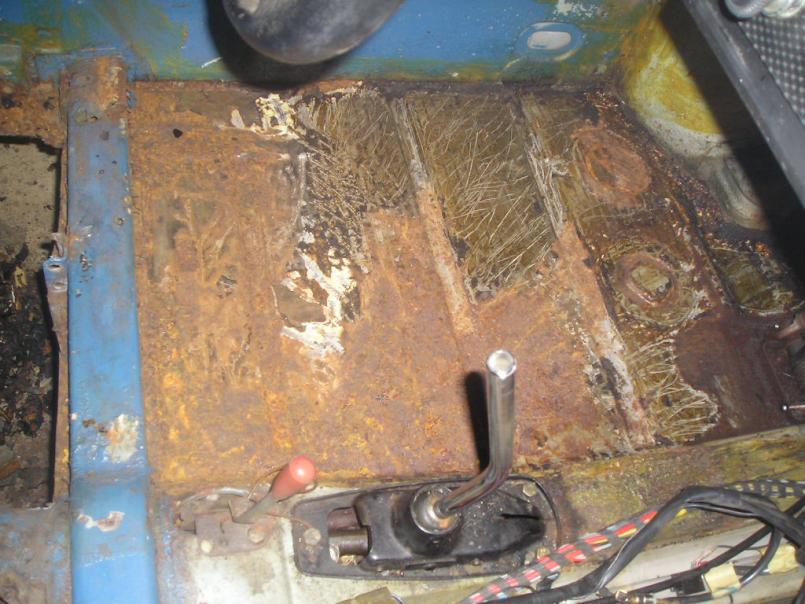
And then of course the infamous pile on the floor. 
Posted by: dlee6204 Jun 30 2009, 09:15 PM
Well I was trimming for the floor and I found some more rust in the driver's side long. I wasn't sure how bad the rust was and now I know. I will have to replace this area as well before the floor goes in. Luckily I have a four day weekend coming up so I will have plenty of time to work on the car!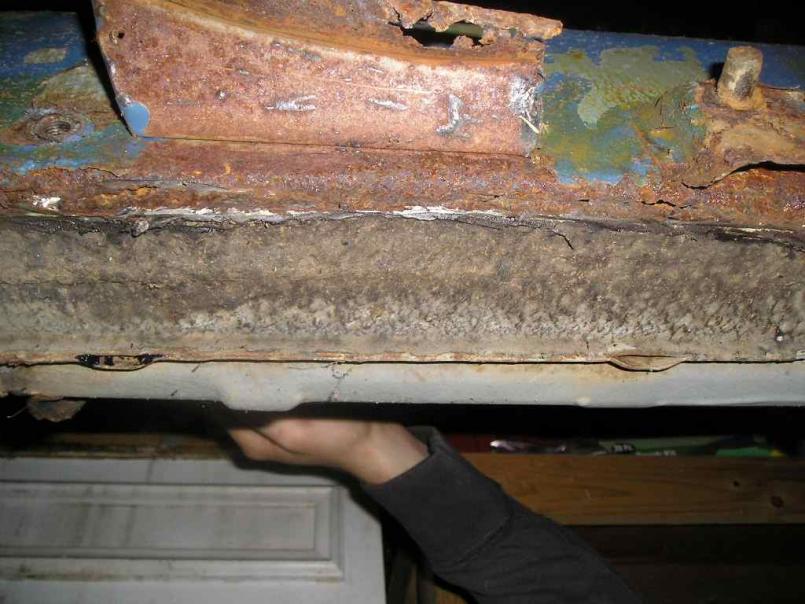
Here is the new floor held up in place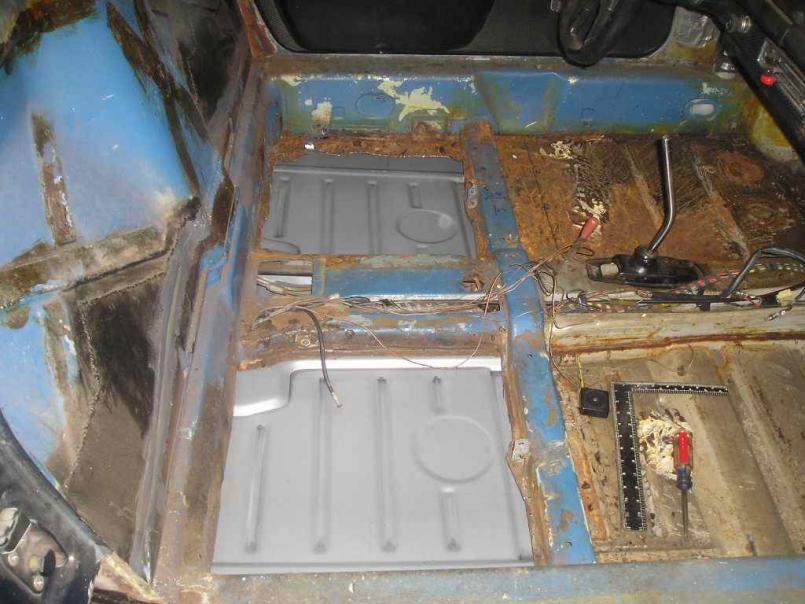
The center tunnel lines are luckily all solid. The clutch tube broke at some point and the PO did some handy work which I will correct before the new floor goes in. 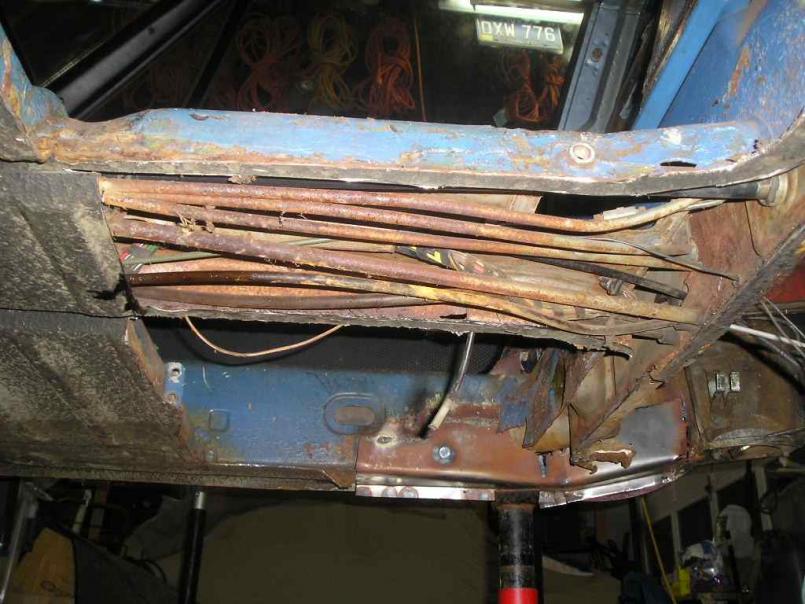
Posted by: Cupomeat Jun 30 2009, 10:36 PM
Wow, great job, and you handle all this with such little drama!
Great work, thanks and you are inspiring me to finally get a welder of my own and work up to a project like this.
Posted by: dlee6204 Jul 1 2009, 09:46 PM
Thanks for commenting! It keeps me motivated!
I took the gas tank out tonight. The rust that was in the passenger foot area extends under the gas tank and into the front wheel-well. The gas tank was also repaired on the bottom at some point and you can hear some rust rattling on the inside. I will most likely just replace it with another tank I have lying around.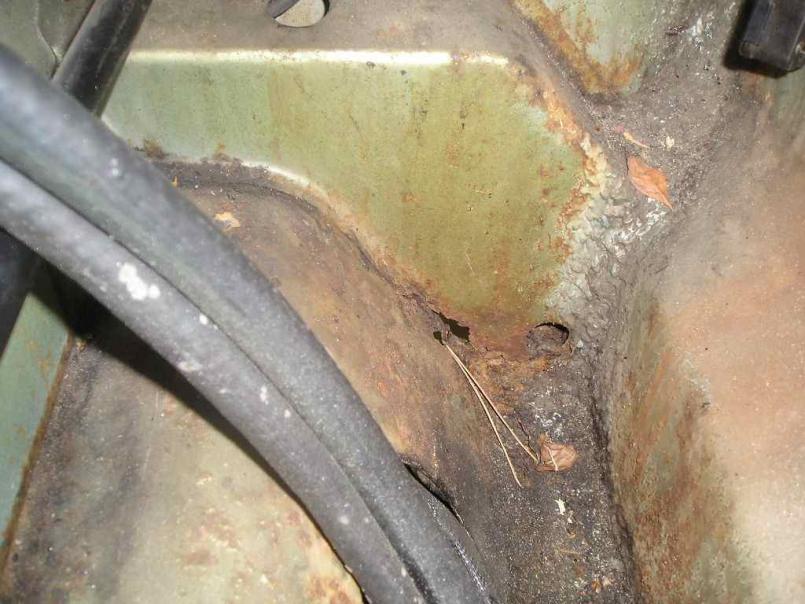

Posted by: FourBlades Jul 2 2009, 07:33 PM
Doug,
You are moving along really well, fast work.
It is really satisfying when you weld in your new floor.
Keep up the pictures.
John
Posted by: dlee6204 Jul 2 2009, 09:44 PM
Thanks John! 
I did a little more tonight. I got tired of cutting more and more out of the car so I repaired a piece on the tunnel. 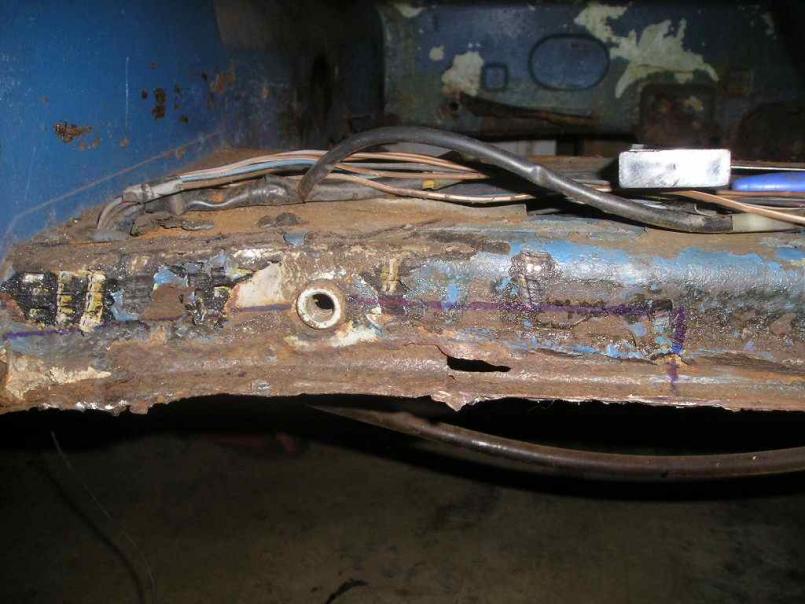

I also cut some more rust out in the passenger corner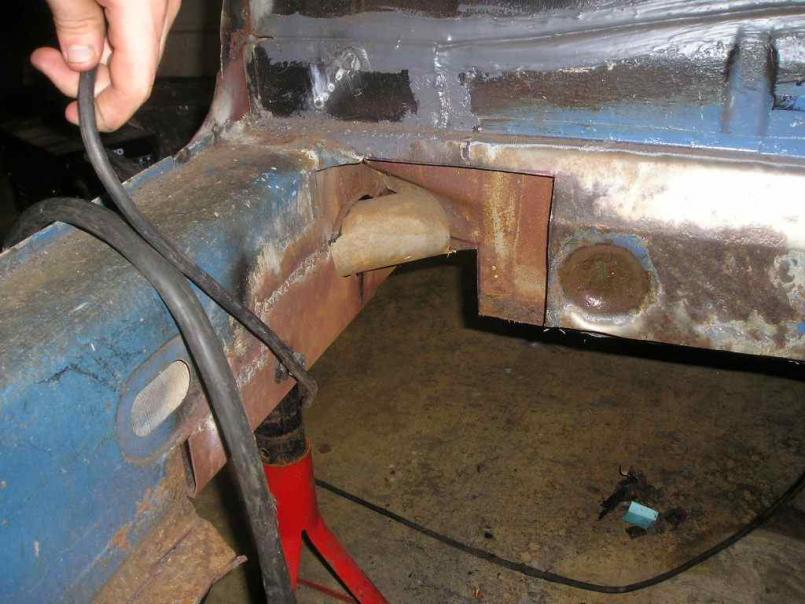
And I also cut the seat mounts from the old floor pan and got them ready to use.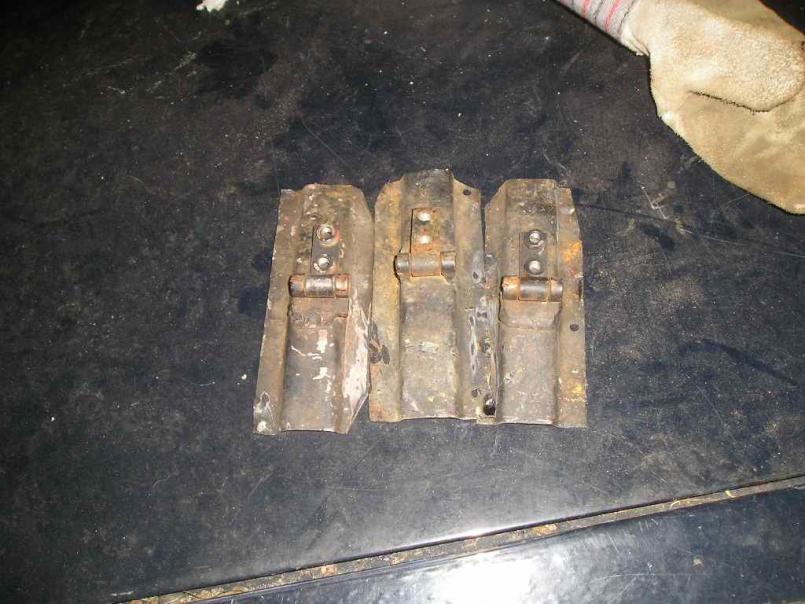
Posted by: dlee6204 Jul 6 2009, 09:39 PM
Well I made some big progress this weekend. I first repaired the driver's side long 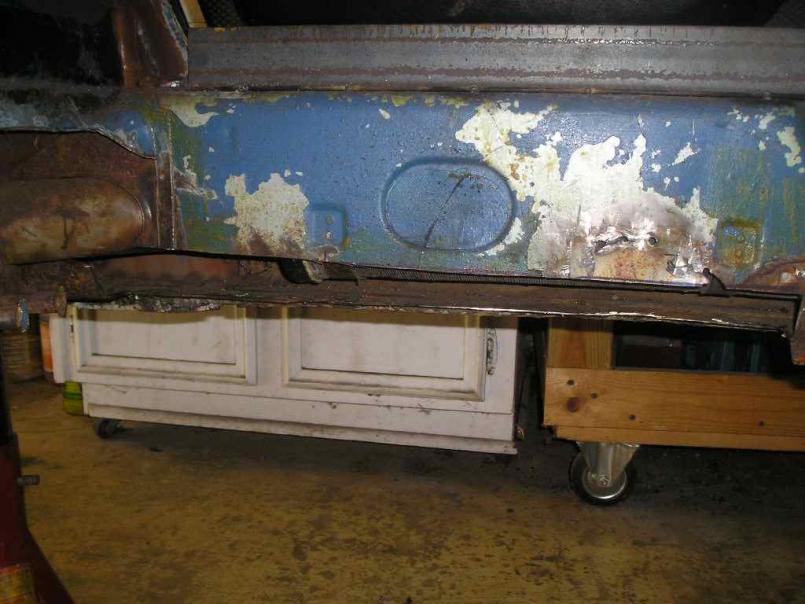
I then fabricated a crossmember for the driver's side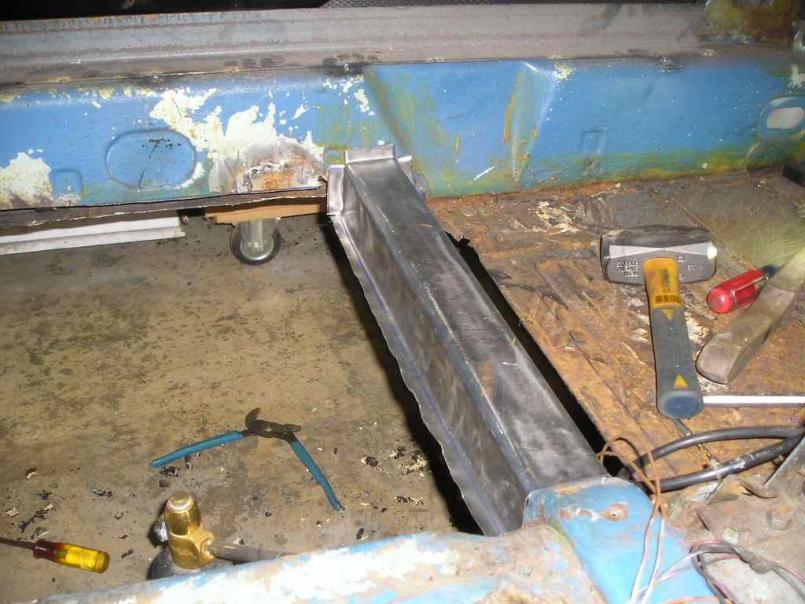
And I added a piece for the e-brake switch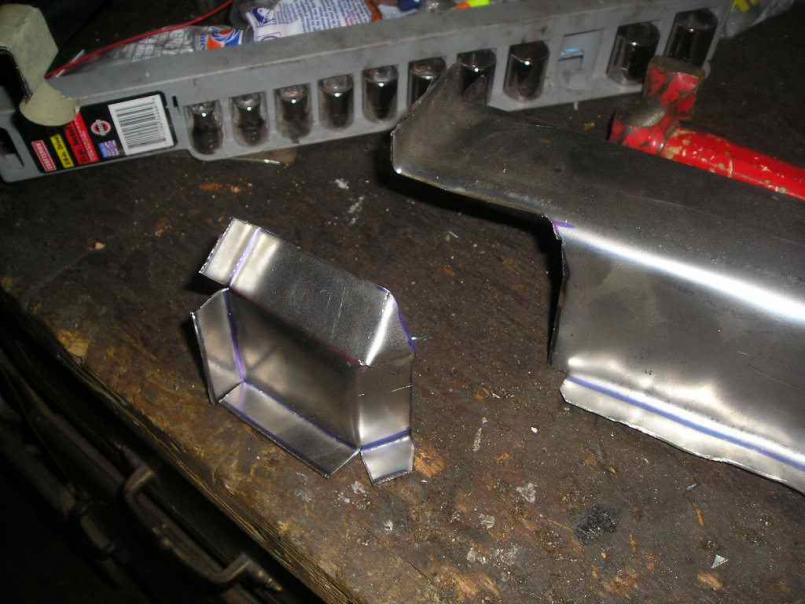
sitting in place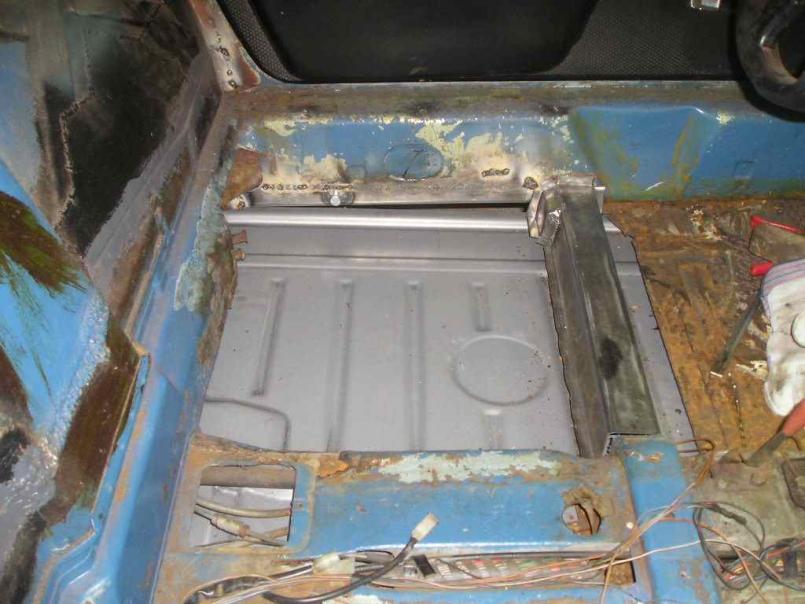
And last but not least... I got the floor put in! It is just tacked in place but I have to say I was pleased at how nicely it went in and how everything lined up. I had to do a lot of little things before putting it in like cleaning all the mating surfaces and fixing the clutch tube so that took some time. 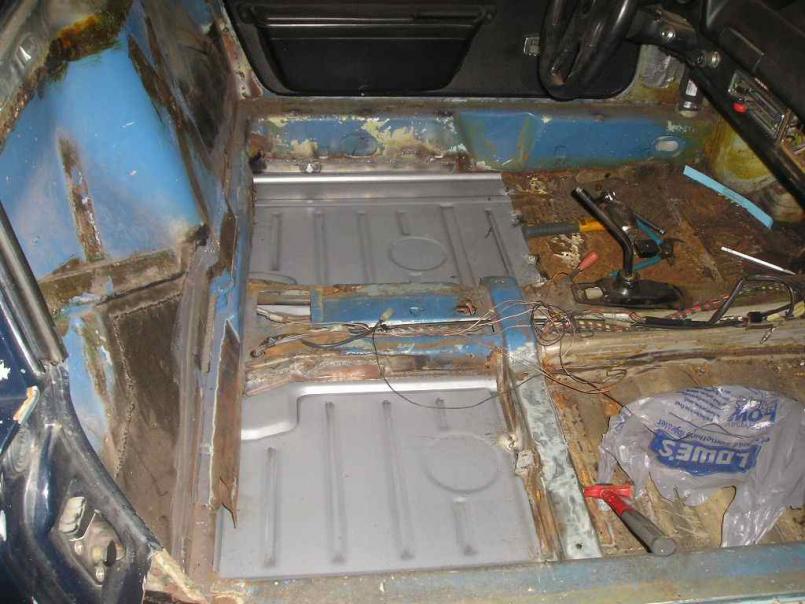
This week I will work on finishing the firewall, rust spots around the center tunnel, adding the crossmember and the seat hinges. I am also waiting on some parts to get here so more progress to come. Enjoy!
Posted by: saigon71 Jul 7 2009, 06:28 AM

Well I made some big progress this weekend. I first repaired the driver's side long
I then fabricated a crossmember for the driver's side
And I added a piece for the e-brake switch
sitting in place
And last but not least... I got the floor put in!
It is just tacked in place but I have to say I was pleased at how nicely it went in and how everything lined up. I had to do a lot of little things before putting it in like cleaning all the mating surfaces and fixing the clutch tube so that took some time. This week I will work on finishing the firewall, rust spots around the center tunnel, adding the crossmember and the seat hinges. I am also waiting on some parts to get here so more progress to come. Enjoy!
Posted by: saigon71 Jul 7 2009, 06:30 AM
Looks good Doug - great work! I will be tearing into mine in a few weeks. Question, is rust encapsulator the same as POR-15? I am trying to figure out the best stuff to paint with after welding in new panels.
Posted by: dlee6204 Jul 14 2009, 09:30 PM
I got some more work done. I received a box today with the suspension console, e-brake mount and cover in it. I went ahead and cleaned up the suspension mount and welded that on. Finally my car is able to roll again! 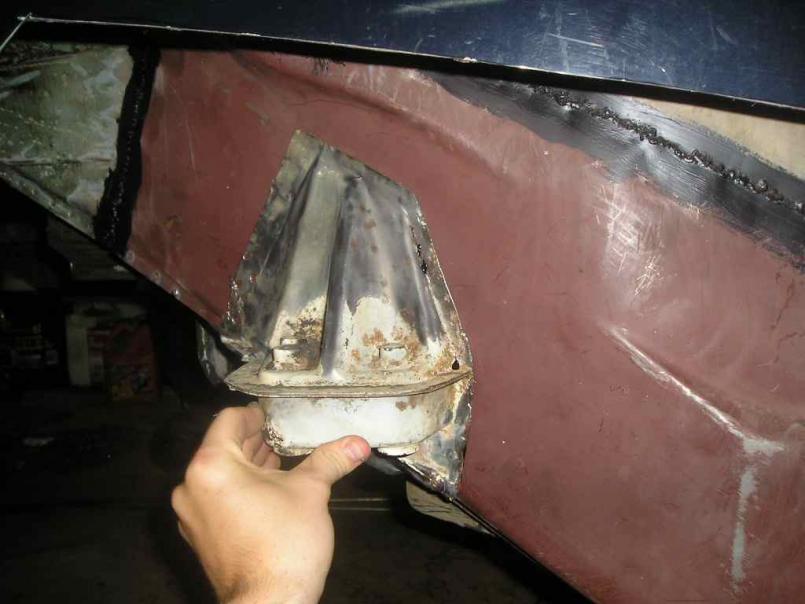
A lot of stuff on the to-do list is just welding and cleanup. I have to finish welding in the floor, crossmember, firewall, e-brake stuff, and both rear fenders not to mention the small rust in the passenger footwell and the front weather strip channel that needs to be repaired. I have also been trying to find a local powder coating place for all the engine tins so hopefully I will have something lined up within the next week. So much to do and so little time.
Posted by: dlee6204 Aug 10 2009, 09:38 PM
Wow so its been a while since I have last updated this. I have been extremely busy so I haven't made too much progress on the car. I did tack the seat mounts in place and clean up the ebrake cover and mount so those are ready to be welded in. I also have been making some more progress on the engine. I stripped down the engine and replaced the pushrod tubes and seals and have painted the tin instead of getting them powder coated. I of course adjusted the valves and all that good stuff and now I am just working on reassembling everything! I also forked out the cash to get a new engine harness from Jeff Bowlsby so hopefully I will have a nice looking and running engine after all is done.
To boost your memory, here is a picture of the engine the day I removed it. 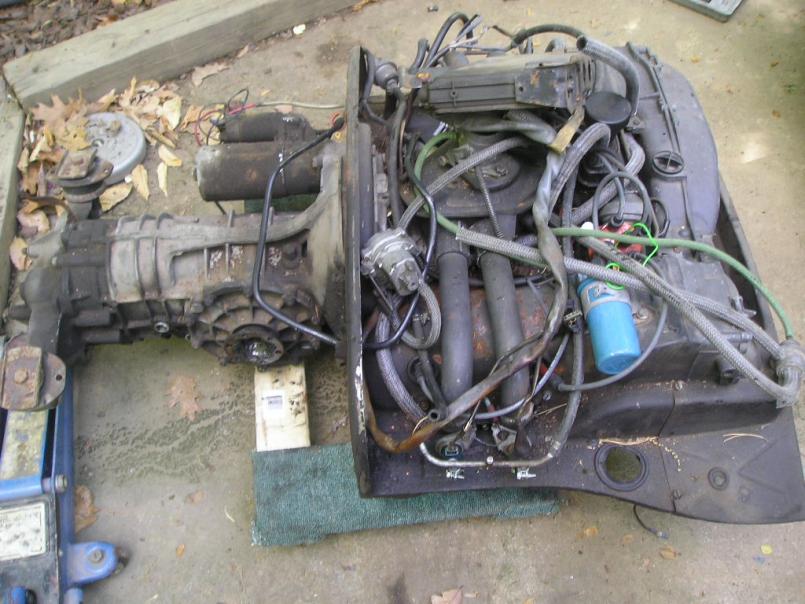
Here are some of the tin after they were painted. 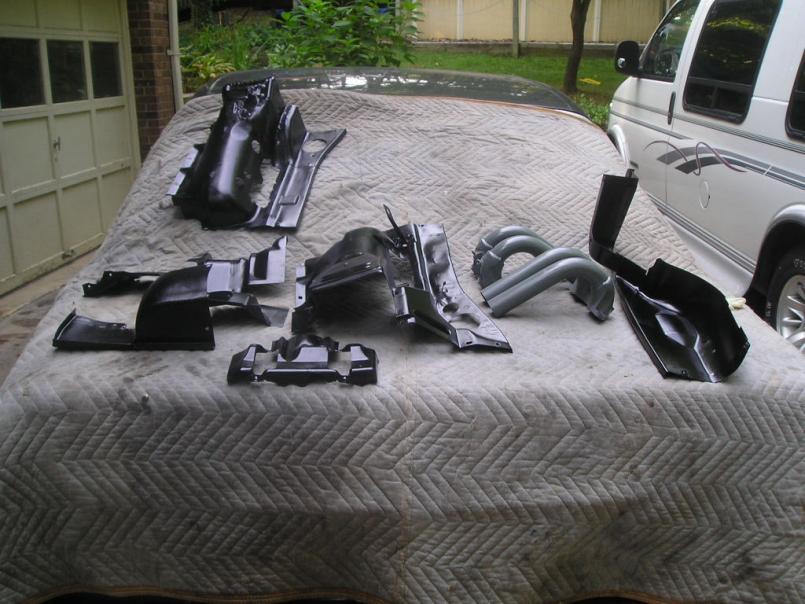
Posted by: dlee6204 Aug 10 2009, 09:45 PM
And here is what the engine looks like now. As you can see I still have some work to do. 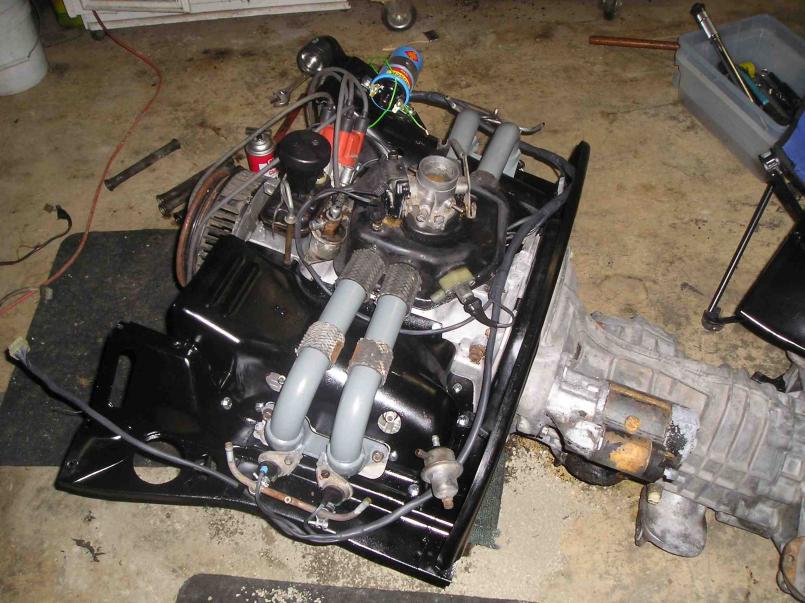
I also got new "PRESS" stickers for the seatbelts.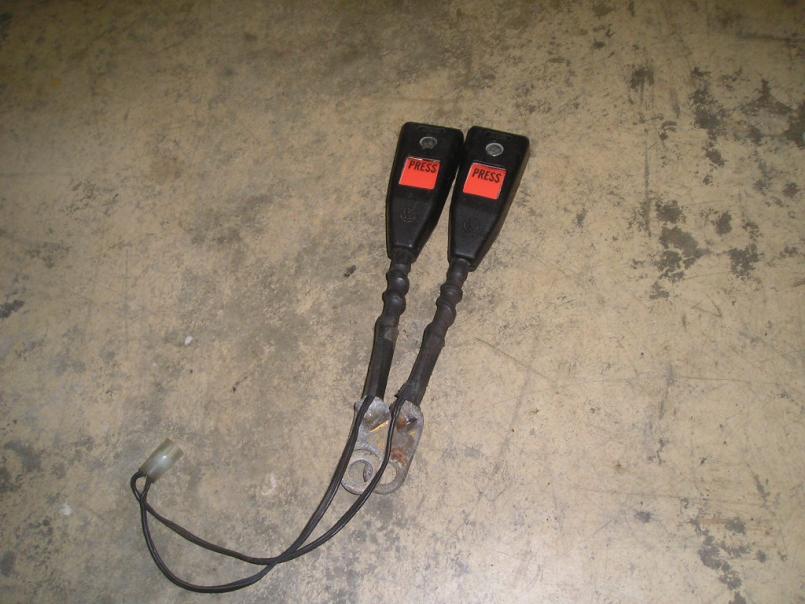
I have a friend coming over tomorrow to help me out on some more of this stuff so more pics will be on the way!
Posted by: dlee6204 Aug 10 2009, 09:47 PM
One more of the engine. 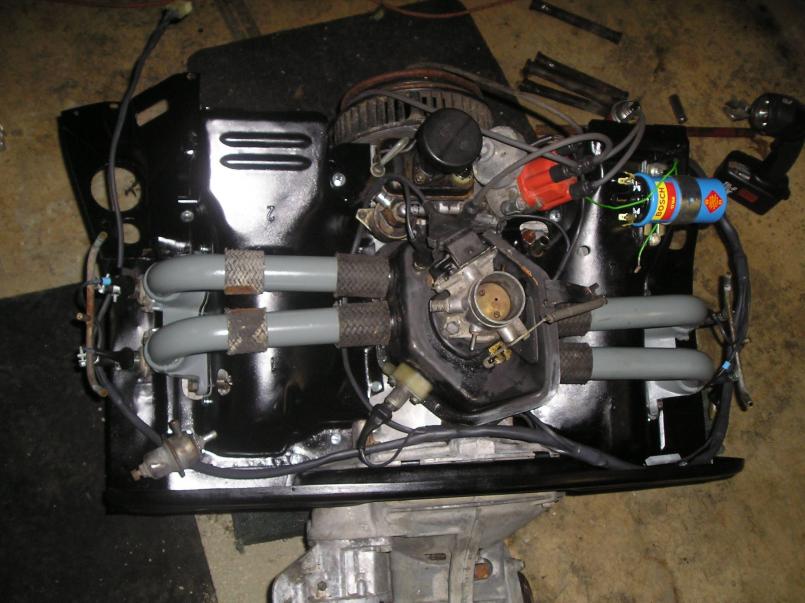
Posted by: RoadGlue Aug 11 2009, 10:09 AM
Your progress thread makes my progress thread look totally pathetic in comparison. I demand you stop immediately!
Nice work. It's really motivating to see enthusiastic people like yourself tackle such large projects. Really does make the work I need to do seem rather trivial.
Keep it up!
Posted by: dlee6204 Aug 18 2009, 01:14 PM
I finally got the motor all done. I ended up buying an ignition harness and oil temp wire from Jeff Bowlby as well. I just couldn't bring myself to putting the old ignition harness on along with the new engine harness. I also replaced all the fuel and vacuum lines as well as many other little things. Hopefully when I get the engine in, I won't have too many troubles and if I do, they will be easy to track down. Here is a picture of the engine... 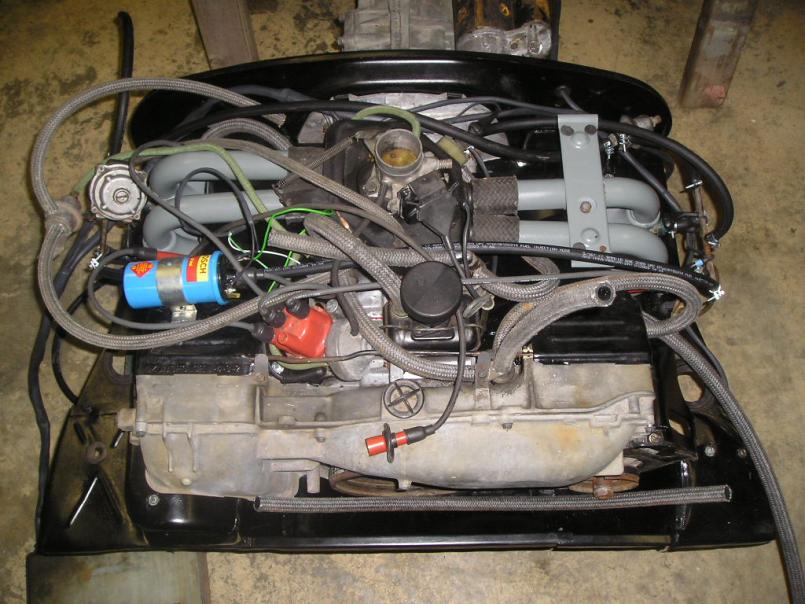
Now I just have to force myself to get working on the actual car again...
Posted by: trojanhorsepower Aug 18 2009, 05:47 PM
Hi Doug,
Great to hear of another Teener in NC!
Looks like you are doing a great job.
I have lots of family in Winston, I would love to see how you fabricated the parts you used. What gauge metal did you use. What is the name of the rust encapsulater that you used? My car needs much of the same stuff you used and I have been struggling to fabricate even relatively simple parts.
Thanks
-Peter
Posted by: dlee6204 Sep 4 2009, 10:50 PM
Wow. I am pretty bad at updating this. I've made some progress over the past few weeks. School started again so I have only been able to work on the car on the weekends.
For those who are interested, I used 18 gauge sheet metal for most of the structural areas such as the longs. I used 19 gauge for other areas such as the firewall and center tunnel. Finally I think I used 20 gauge for the engine shelves. I was able to get most of my metal from a local guy that I found on TheSamba. The rust encapsulator that I use is Eastwood's product. I just make sure to clean the metal real well before applying and it has held up pretty well for me in the past. I also use Eastwood's seam sealer as well.
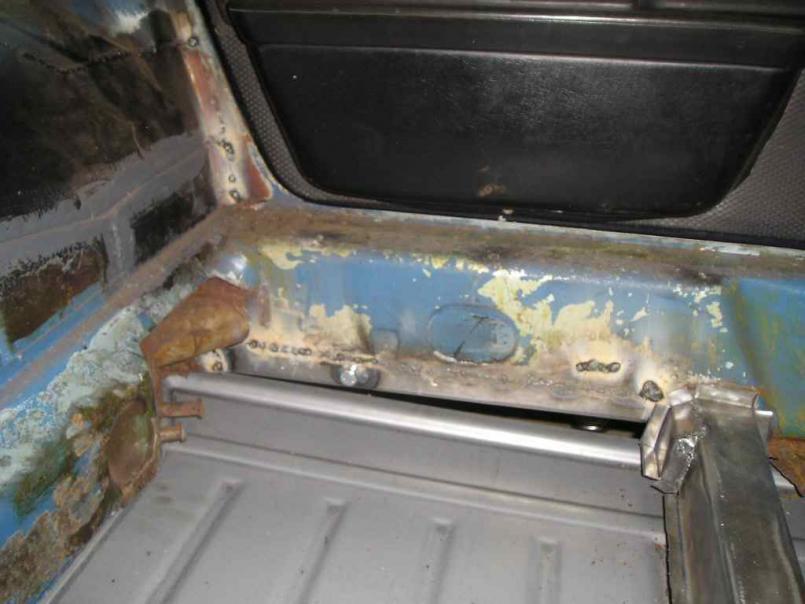
As far as the car goes, I finished welding in the passenger side firewall piece and seat mounts. Today I welded in the driver's side firewall, the seat mounts, and the e-brake mount and cover. I wrote out a list of everything else that I need to do to the car so I will just work my way through the list over this holiday weekend. Next up on the list is to fix the rust under the gas tank/wheel-well/front passenger floorpan.
Driver's side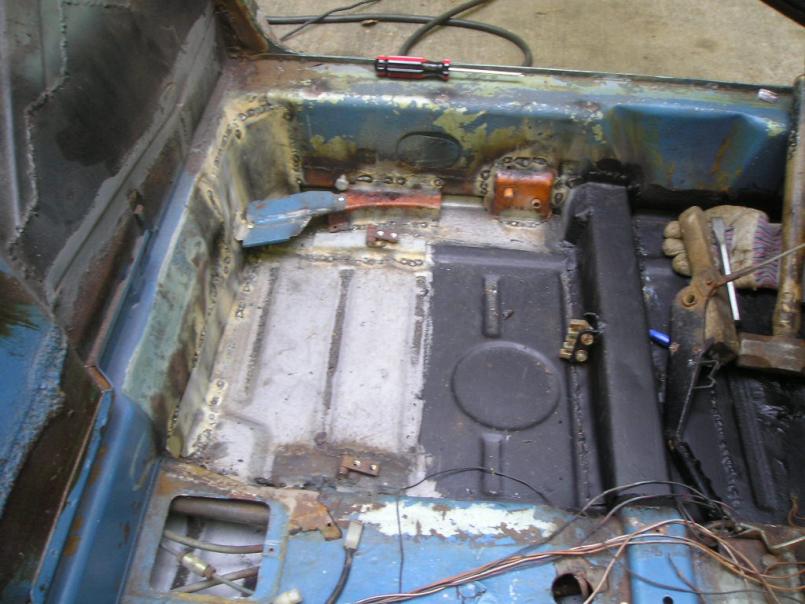
Passenger side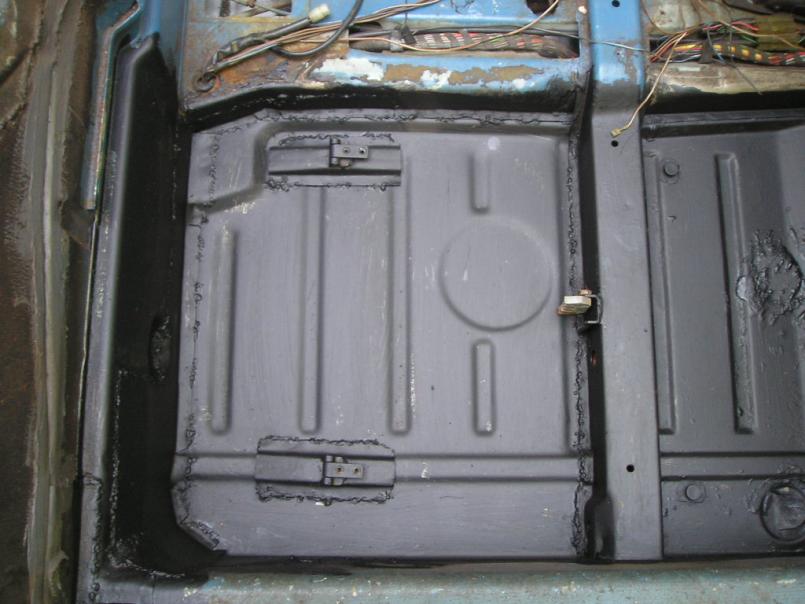
Rust in the wheel well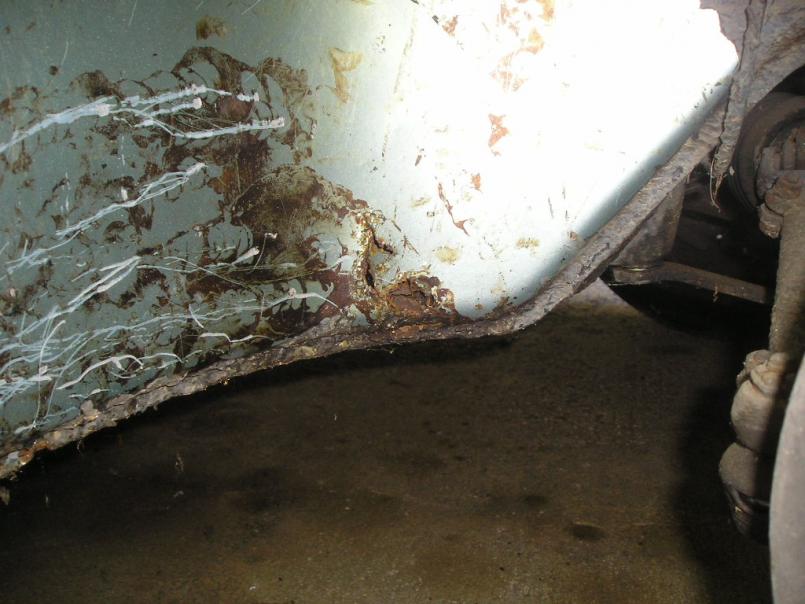
Posted by: dlee6204 Sep 5 2009, 11:59 AM
Here are some more pictures of the rust in the wheel well area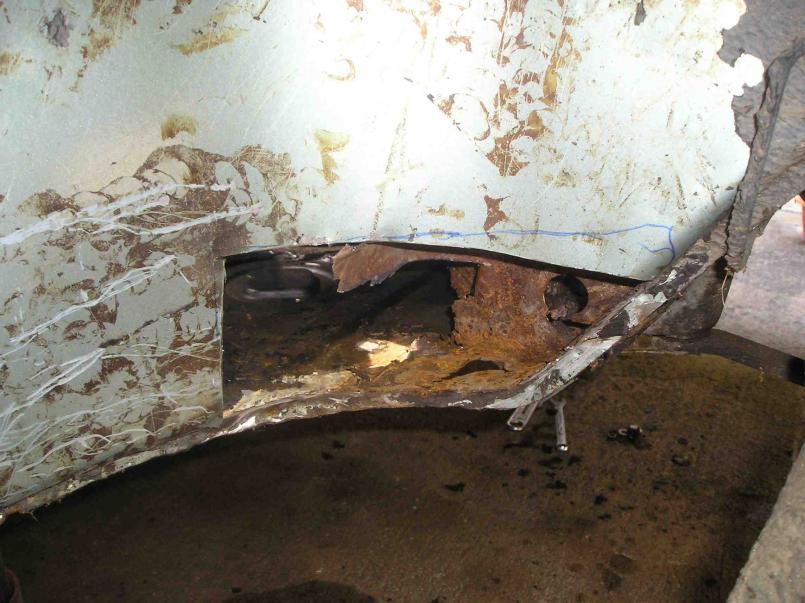
Posted by: dlee6204 Sep 5 2009, 12:05 PM
From the inside...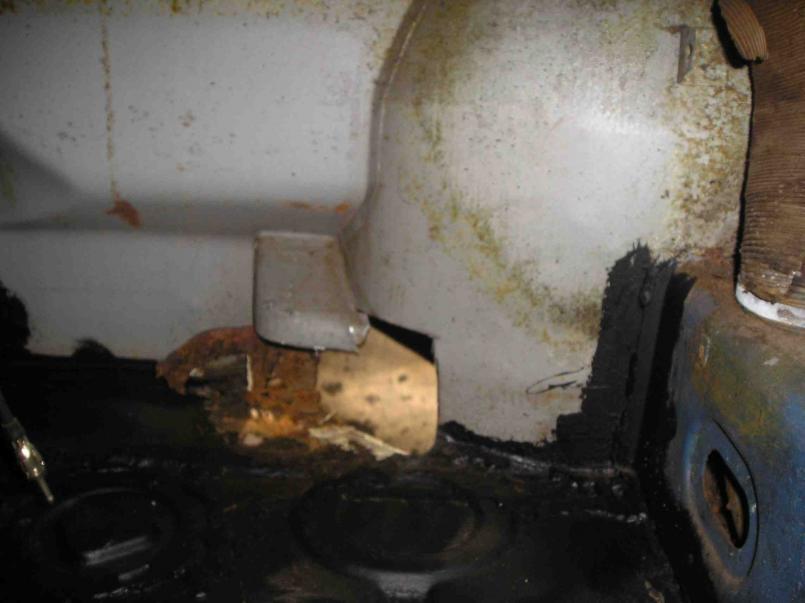
I also welded a new hinge for the engine bay lid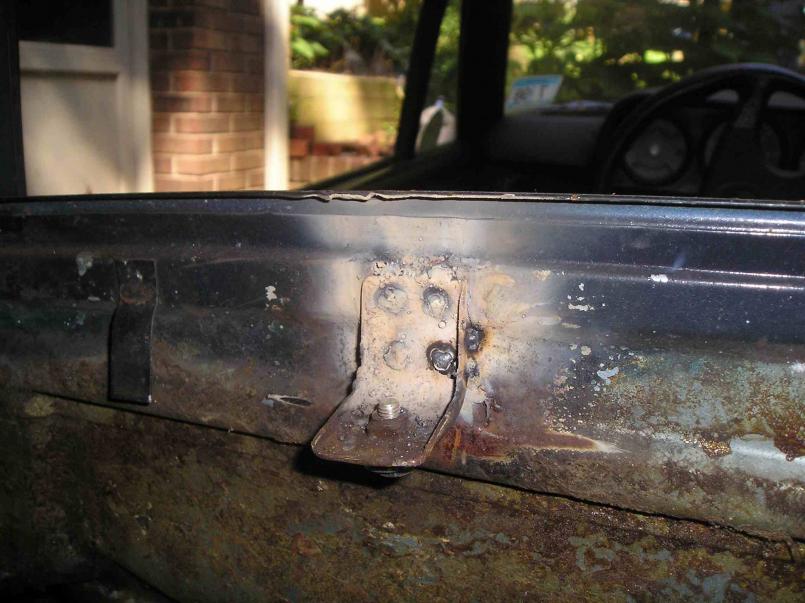
Posted by: dlee6204 Sep 6 2009, 12:22 AM
This afternoon I cleaned up and installed the rear glass. 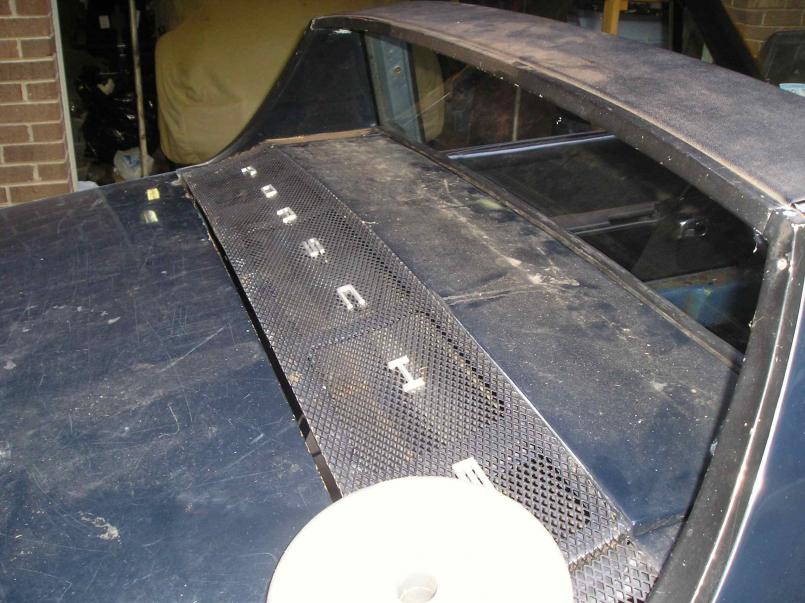
Posted by: dlee6204 Sep 6 2009, 12:23 AM
I also coated the pedal area and the rest of the floor.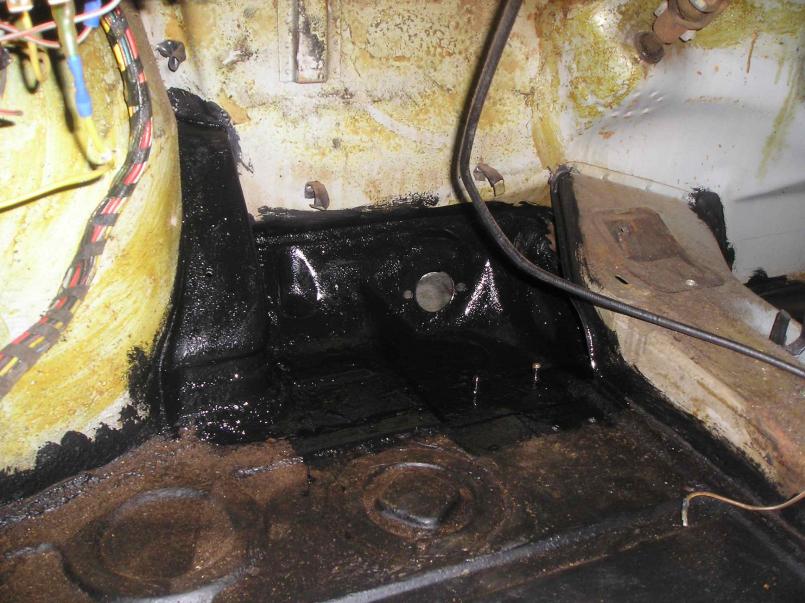
Posted by: dlee6204 Sep 8 2009, 03:53 PM
Well I got a lot of work done over the long weekend. I installed the pedal cluster and installed new accelerator, clutch, and speedometer cables, a 19mm master cylinder, SS brake lines, and new Weltmeister springs in the rear. 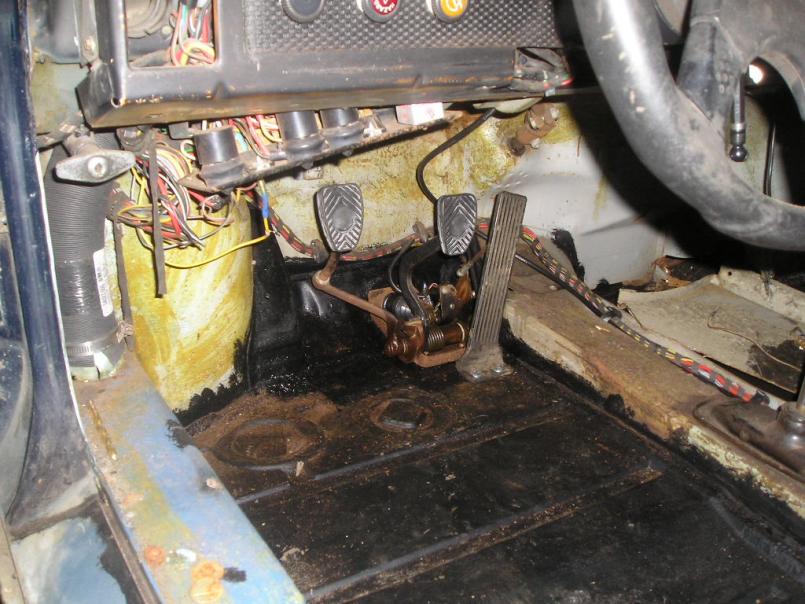
I also coated the driver's side floor pan.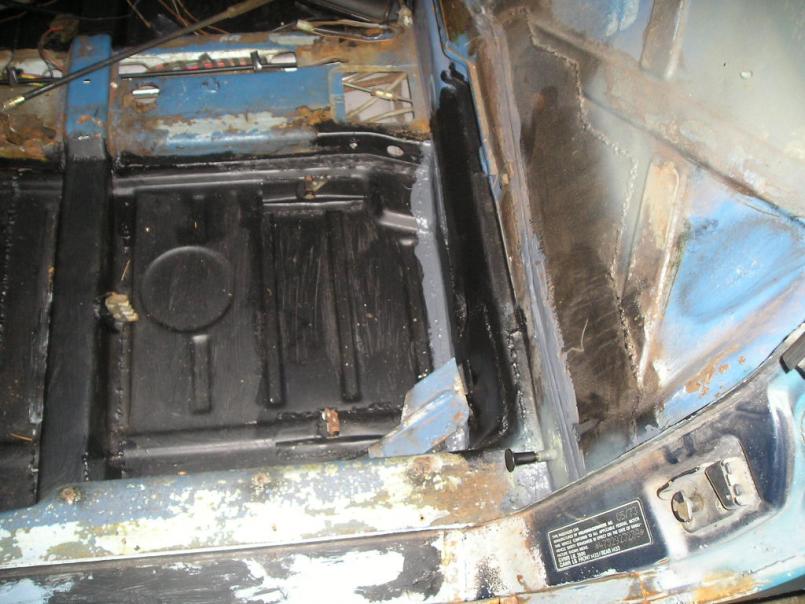
Posted by: dlee6204 Sep 8 2009, 04:02 PM
I also welded in a new engine lid pull tube from a spare car. It's hard to see in the picture but I purposely cut it about two inches short and attached the two ends together with a rubber piece of hose. In case dirt or anything gets down in that corner, I can remove the lower portion of the steel tubing and clean everything out. I already routed the cable and hooked it to the latch and it works perfectly. 
Posted by: dlee6204 Sep 8 2009, 04:07 PM
I just found a picture that I took of the old brake lines that were on the car and the new ones I installed. I am assuming the old ones were for a 911 because both ends of the lines were narrow so the stock clips wouldn't work. 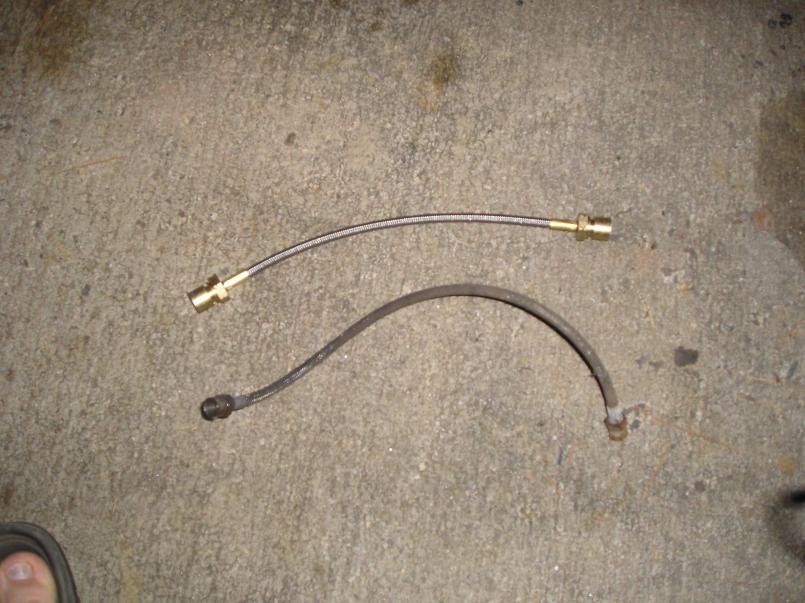
Posted by: dlee6204 Sep 8 2009, 04:32 PM
Oh and the fun doesn't stop there! I went ahead and finished any welding or repairs needed in the engine compartment, coated it, and sealed all the seams up. I then installed steel gas lines through the center tunnel, the fuel pump, and any gas lines underneath. I installed new engine bay seals, relay board and routed the wiring harness in order to get ready for engine installation...
Oh and by the way, I got the engine in too! The engine was ready to go so I just went ahead and did it. I actually got more done than I expected. I was able to bolt the engine in place, install the exhaust system, bolt up the cv joints, connect the clutch, accelerator, and speedo cables and connect the engine harness up. I think I
finished connecting things up from underneath so now I just have to bolt the computer up and make a few more connections up top before she will be ready to go. 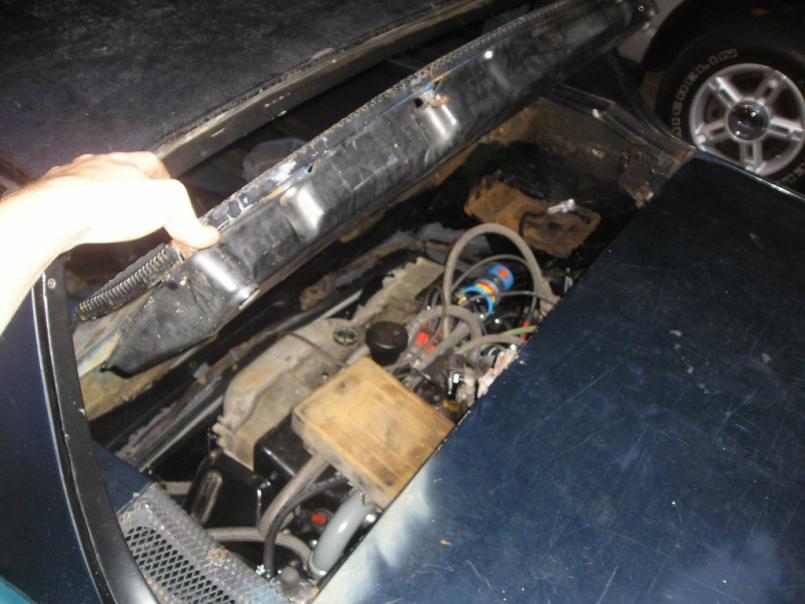
Posted by: dlee6204 Sep 8 2009, 04:40 PM
Here are a few more shots of the engine. You can see my SS heat exchangers that I had for the car. The car came to me with an old rusty bursch muffler so I replaced that with an original old rusty 2.0L muffler (which will get painted sometime). I also used an exhaust hardware kit that I got from AA to install everything. And before installing the engine I regreased the CV joints.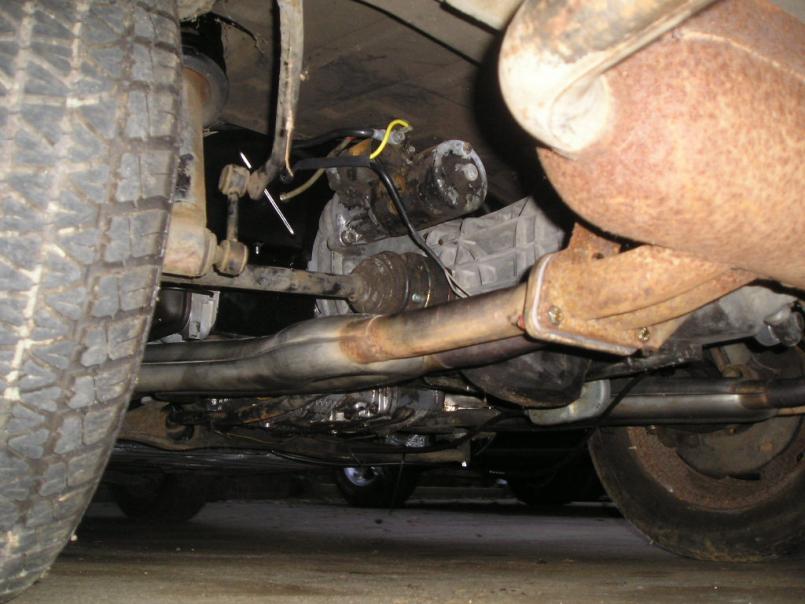
Posted by: dlee6204 Sep 8 2009, 04:52 PM
Here is a shot of the car on the ground again!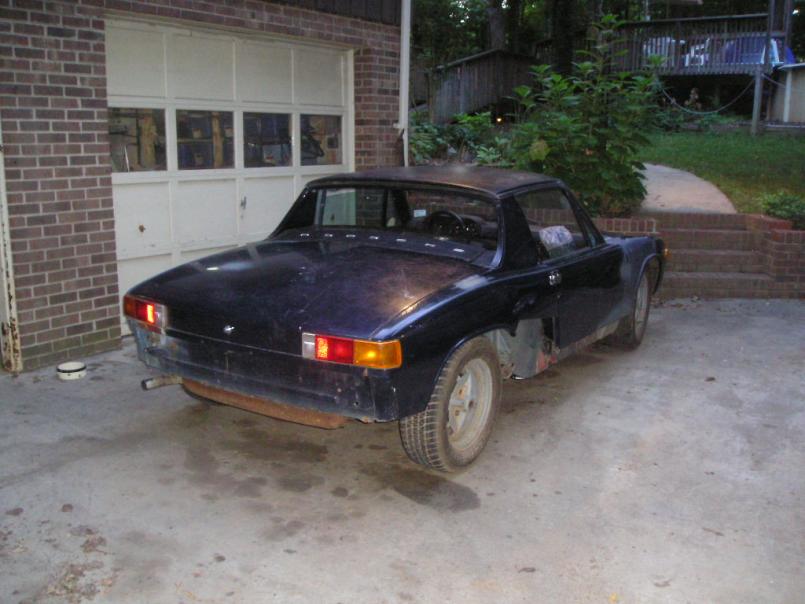
Posted by: dlee6204 Sep 8 2009, 05:14 PM
That's all for now. The things left on my to-do list are...
-Finish connecting up the engine
-Repair the rust in the front floorpan on the passenger side
-Install the fuel tank
-Install the emergency brake cables
-Install the interior
-Bleed the brakes
-Finish up the driver's side front fender
-Install the headlight
-Paint and assemble the bumpers
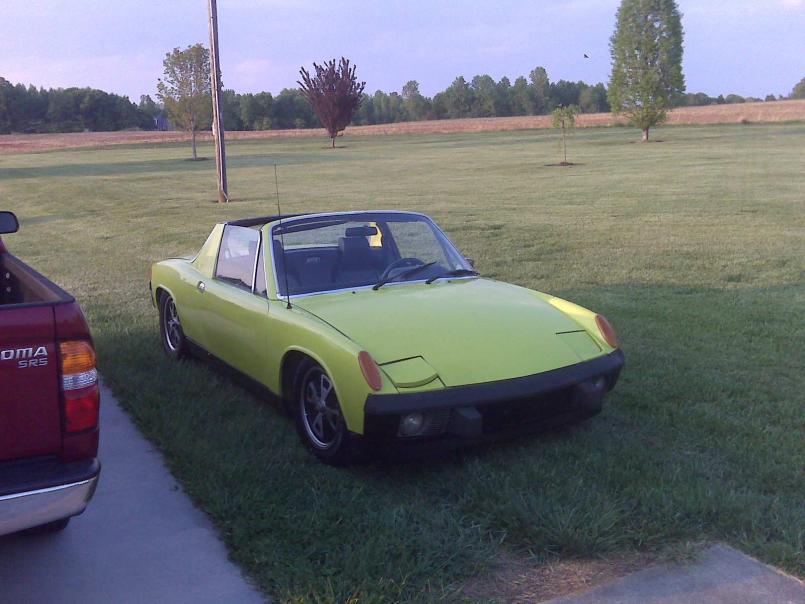
Hopefully most of these things will get done next weekend and I can work on getting the tags and insurance for it. It might not be pretty right now but it is a good feeling knowing the car will be drivable soon (fingers crossed). Here is a picture from the day I brought it home. 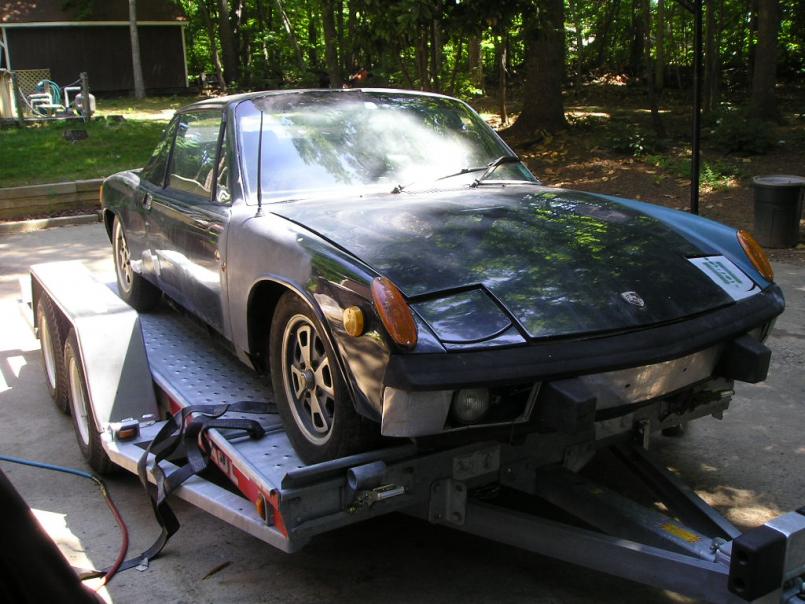
Posted by: trojanhorsepower Sep 9 2009, 12:17 PM
Man, your smoke'n.
That all looks great. I think part of my trouble was I have been using 16 gauge for the longs and it has been hard to work with. You have inspired me to try again!
-Peter
Posted by: bigkensteele Sep 9 2009, 10:46 PM
Doug, I am trying to figure out if you don't sleep or have no significant others in your life or both. I am amazed at what you acomplish in such short periods of time. With 2 kids and a wife, I am lucky to sandblast two wheels over a long weekend.
Great work! You keep a lot of people motivated.
Ken
Posted by: dlee6204 Sep 13 2009, 07:51 PM
Doug, I am trying to figure out if you don't sleep or have no significant others in your life or both. I am amazed at what you acomplish in such short periods of time. With 2 kids and a wife, I am lucky to sandblast two wheels over a long weekend.
Great work! You keep a lot of people motivated.
Ken
Thanks Ken. I just try to stay focused as much as possible since time available working on the car is limited. I have also found that making lists really helps.
Posted by: dlee6204 Sep 13 2009, 07:58 PM
So it was another productive weekend. I started off with repairing the rust under the fuel tank. Overall there were three replacement pieces that I had to make and weld into place. Unfortunately, I haven't taken pictures of the final product yet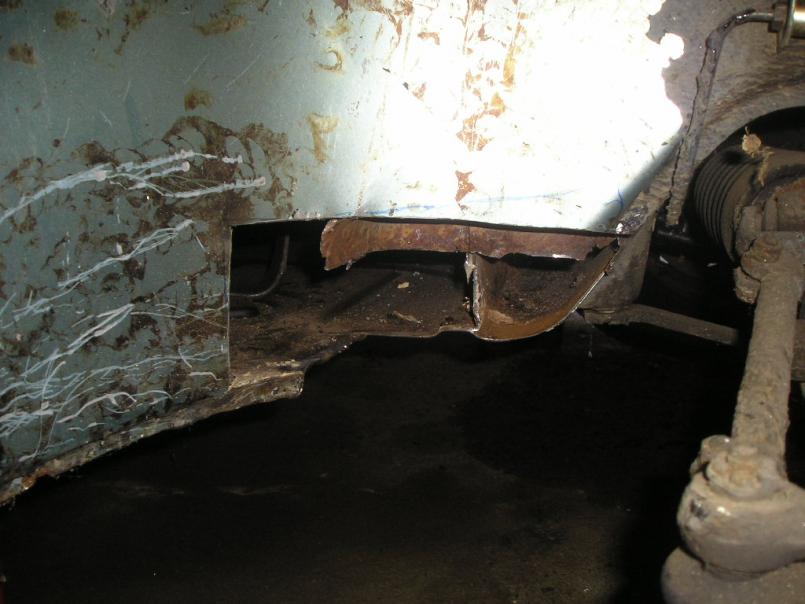
Posted by: dlee6204 Sep 13 2009, 08:03 PM
After I finished with the rust, I worked on the gas tank. The one that was in the car was pretty rusty on the inside and at one point it had even been repaired. I decided to switch it out with another one I had in storage. I painted the tanked and I also cleaned the sender unit before installing it. 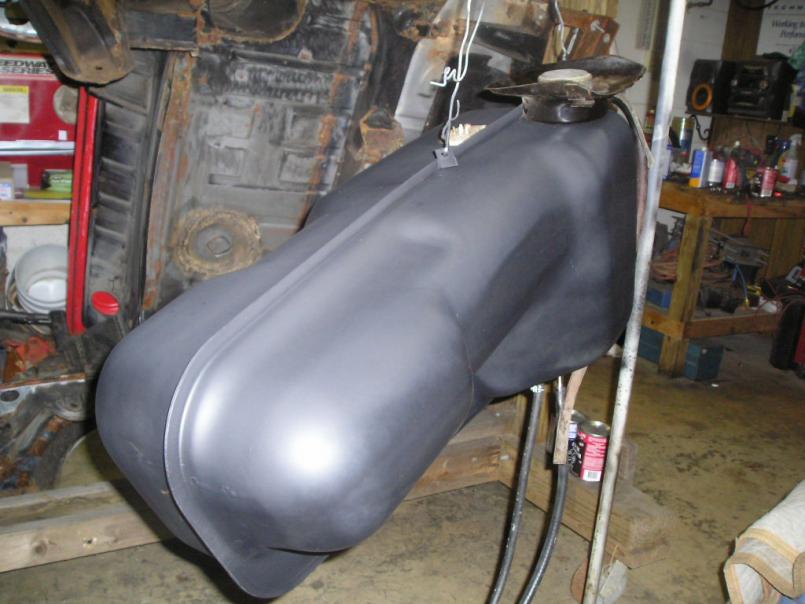
Here it is installed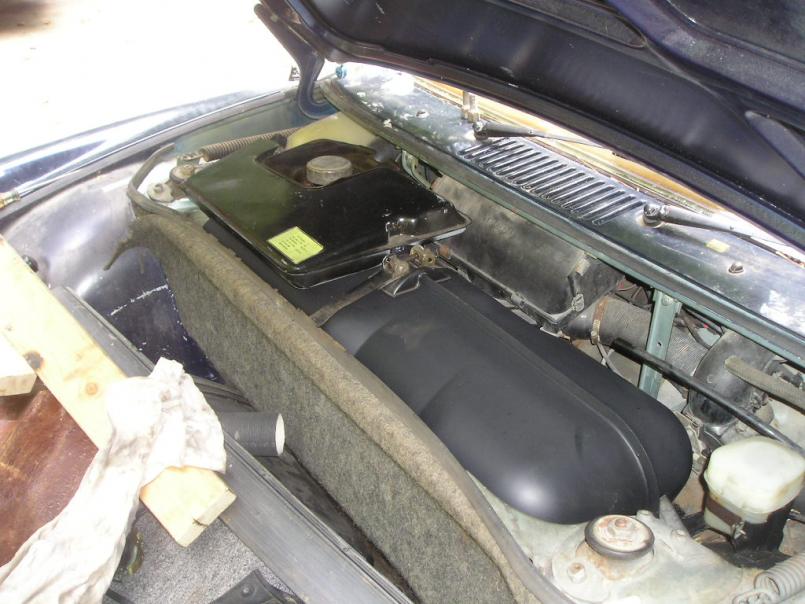
Posted by: dlee6204 Sep 13 2009, 08:17 PM
I finished up the engine and with the gas tank installed, it meant time for a test run. It started on the first crank however it ran like crap. It revved way up and it wouldn't hold idle. There must have also been a mouse colony in the muffler at some point because when I first started it up, all sorts of crap was shooting out that back. After fiddling with the motor a bit more, I learned that it helps to connect the Cylinder head temperature sensor beforehand  After it was connected, the car ran very well. The only problem I noticed was that the passenger side valve cover was leaking oil. I replaced the gasket and all is well now. I will try to get a video of it running sometime.
Here are a few shots of the engine. 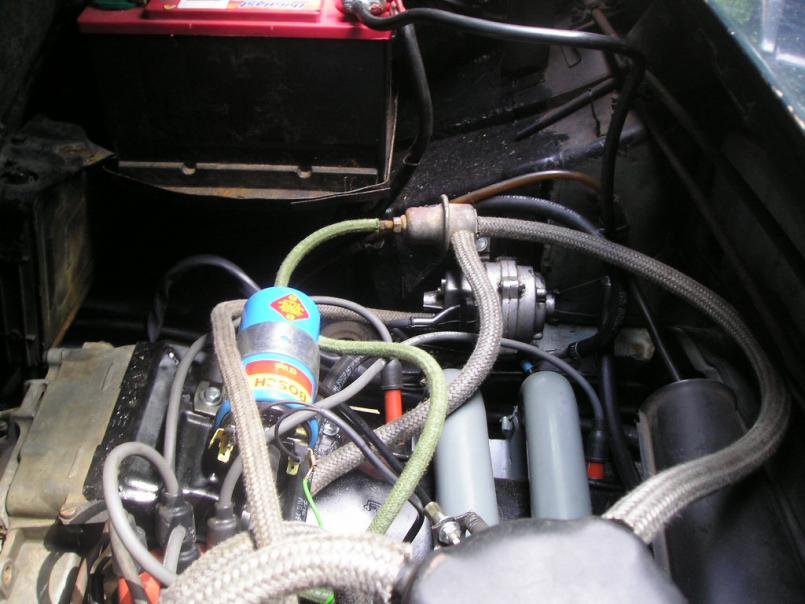
Posted by: dlee6204 Sep 13 2009, 08:22 PM
This weekend I also bled the brakes, installed the emergency brake cables, installed the rear bumper and started installing the interior. 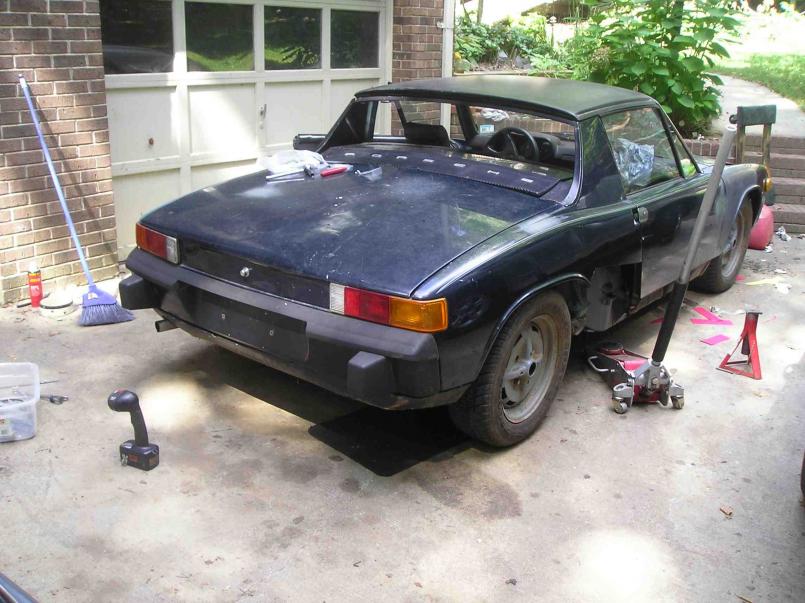
Posted by: dlee6204 Sep 13 2009, 08:31 PM
Here is another shot of the interior.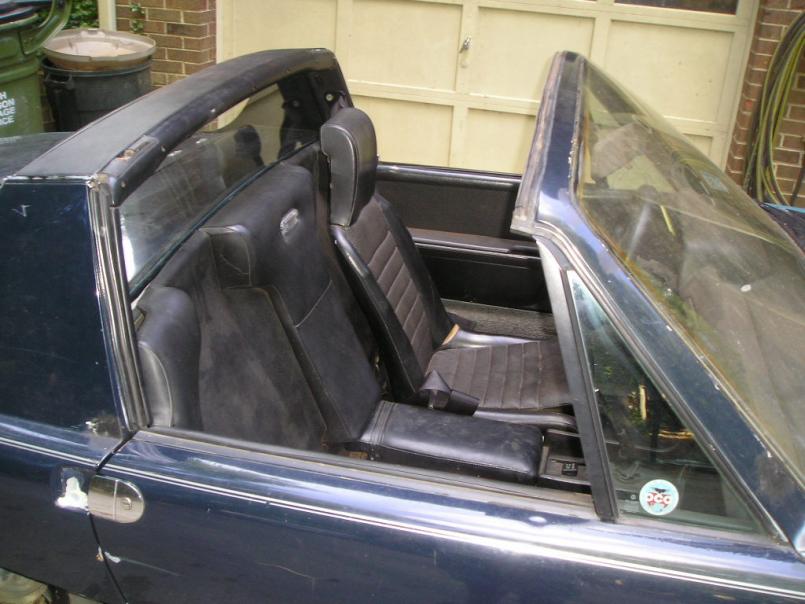
This evening I decided that it was time for a test drive down the driveway. Well that test drive turned out to be a test drive down the road.  It was only a block or two before I turned around but it sure was fun. The car ran very well, accelerated nicely, and shifted smoothly. As of right now there doesn't seem to be anything with the drivetrain that needs attention.(knock on wood) The rest of the car on the other hand... needs some lovin'. That's all for now. More to come next weekend.
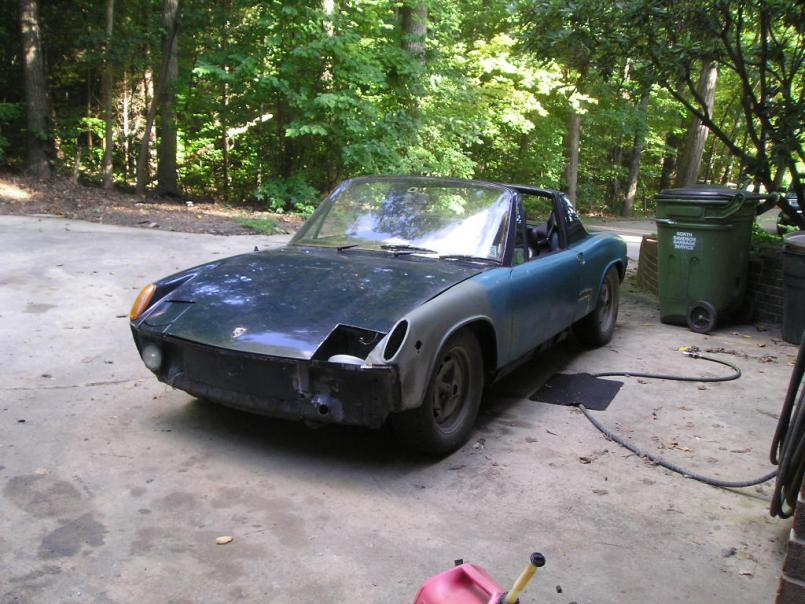
Posted by: dlee6204 Sep 23 2009, 07:40 PM
So this past weekend I slacked off but I still got some things done. I finished welding up the driver's side front fender and then installed the lights. I also painted the front bumper and installed it. 

Posted by: dlee6204 Sep 23 2009, 07:51 PM
I also installed the door mirror and the under-dash pad. Here is a picture with the lights on. 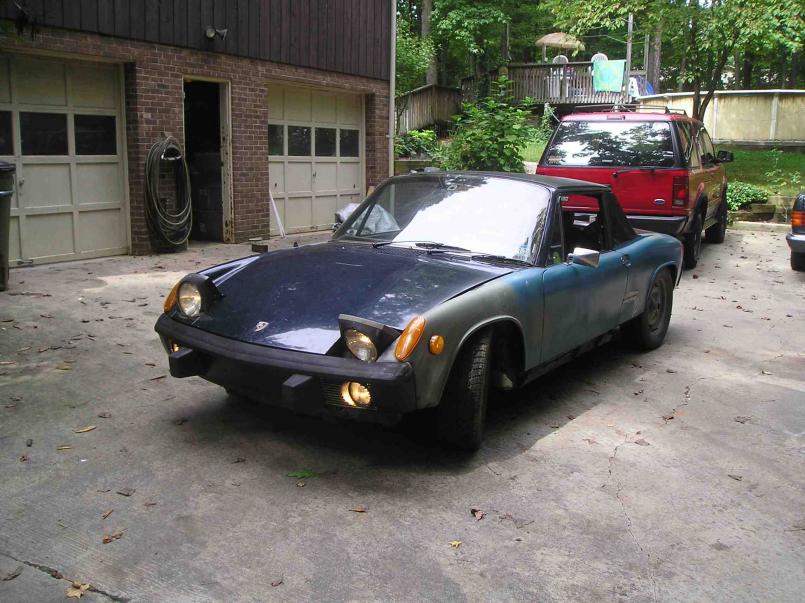
Some problems I noticed:
I noticed that the tachometer doesn't work. I traced the problem to a faulty black/purple wire that runs from the back of the gauge to the coil. The wire is cut somewhere between the engine relay board and the gauge.
Whenever I hit the brakes, the reverse lights come on. I am assuming that the wires are hooked up wrong somewhere.
The Driver's side headlight doesn't pop up and retract correctly. I'll have to try adjusting it again.
Posted by: dlee6204 Oct 5 2009, 03:39 PM
Well this past weekend was a complete whirlwind. On Friday afternoon, I called and finally got insurance for the car. I then got my registration and plates from the DMV which meant my car was finally street legal.
Before I could drive it, I had to do a few things. I fixed the brake and reverse lights. I also installed the seat belts and passenger seat and buttoned up a few other things. Finally the car was ready for a test drive! I took a few shorts drives, stopping to make sure nothing was on fire or anything and I gradually worked my way to longer and longer drives. Needless to say I put over 100 miles on it over 1.5 days without going more like 10 miles from my house. I even managed to take the girlfriend for a nighttime drive.
After hearing how the 914 is underpowered for all these years, I was actually surprised at how much power it DID have. The car accelerated beautifully and handled great. I don't know why no one told me how much fun these cars are! I became addicted to 914s when I was 13 and for the past 7 years i had yet to drive one of them until this past weekend. I had a blast driving all the back roads and I am just glad that now I finally have a car to drive. It might not be a looker but it sure is fun!
Two things that I noticed need work is the driver's side rear wheel bearing and the shift linkage needs minor adjustment. The wheel bearing was actually pretty bad so I didn't go above 60 when driving the car. The car is parked this week until I can replace the bearing this weekend. I will also replace the front wheel bearings and seals too. There is still a countless number of things left to do on the car but as least now I can enjoy it some!
The only pictures I took are of the interior after I got almost everything in. Speaker panels and sill pieces still need to be installed.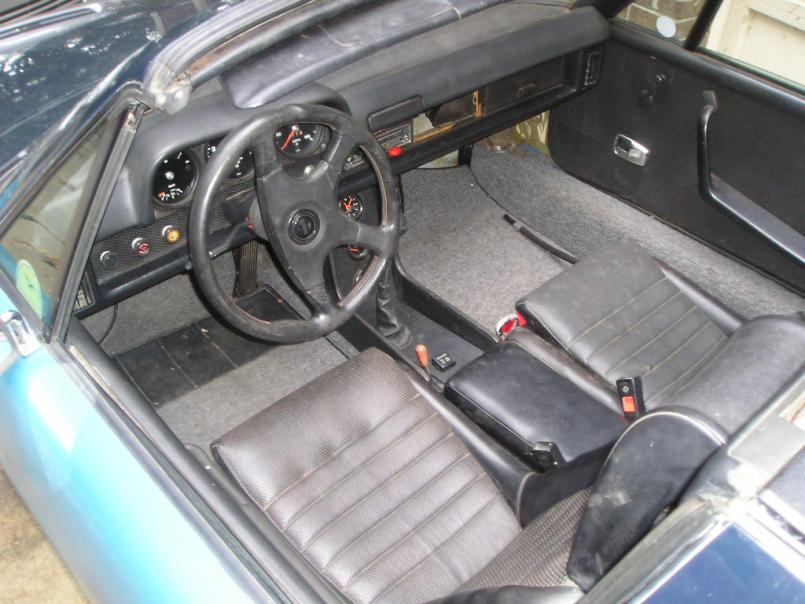
-Notice the big fire extinguisher 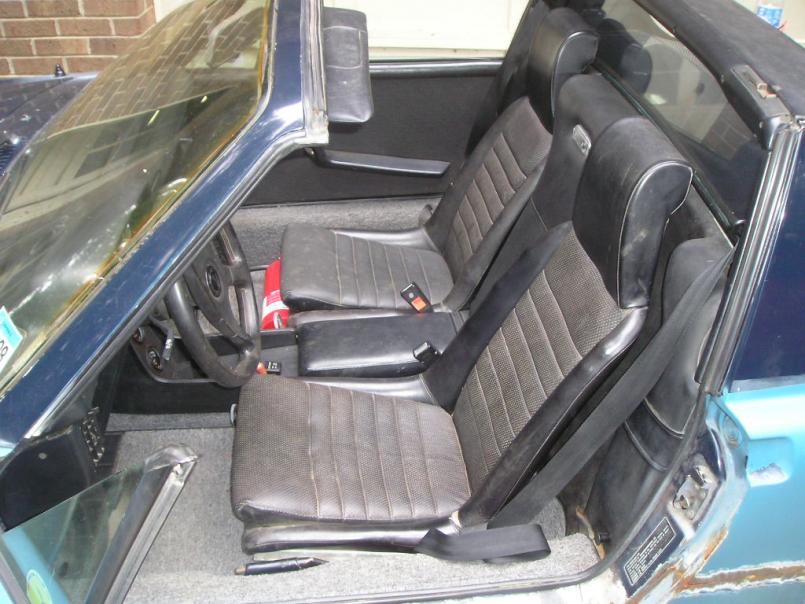
Posted by: Gint Oct 6 2009, 07:57 AM
Grats!
There is an alternative solution that may or may not suit your plan for the car either immediate or long term. You can get the car up and running more quickly by swapping in a spare control arm if you have one handy. It's faster and easier than replacing a wheel bearing. That would get you back to faster!
Posted by: dlee6204 Oct 6 2009, 08:42 AM
I thought about that but all the spares I have are either covered in rust or still on other cars. I'll just replace it so I know that I am riding on good bearings.
Posted by: FourBlades Oct 6 2009, 11:25 AM
Great work getting your car on the road!!!
I got so tired of waiting to get my blue car working I bought the red car just to
have a runner. I agree they drive great even with the 1.7 engine.
Your car is looking solid. Now you can just tinker when you feel like it.
John
Posted by: dlee6204 Oct 6 2009, 08:22 PM
Thank John. That's my thinking exactly. I'm trying to fight the inevitable. I'm trying to eliminate the jack-stand syndrome of the 914. I will gradually fix more and more on it while I enjoy it. When something breaks or goes wrong, I can fix it in a weekend without worrying about ruining the paint or anything. Once I get around to painting it, I will hopefully have worked through and restored all the systems on the car.
Posted by: dlee6204 Oct 6 2009, 08:33 PM
Speaking of not ruining the paint, I forgot to mention how there was a little "accident" over the weekend. After one of my drives, the car was idling a little high. I put the emergency brake on, and ran the car while I adjusted the idle. Once I shut off the car I went into the house. Ten minutes later I came back outside and found that the car had rolled down the driveway and wedged up against a tree. The passenger front fender got pushed in and both lights broke. I forgot to put the car in gear once I shut the car off and the emergency brake wasn't reliable enough. Here are some pictures of the carnage. 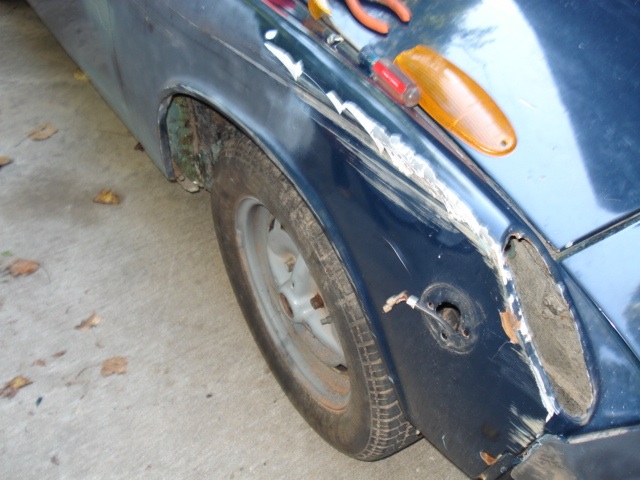
I beat it out as much as I could and I replaced the lights so all is good now. I will worry about the finishing touches when I go to do bodywork on the car.
Posted by: dlee6204 Oct 15 2009, 08:48 AM
Here are some picture from when I replaced the wheel bearing this past weekend.
The control arm after it is removed.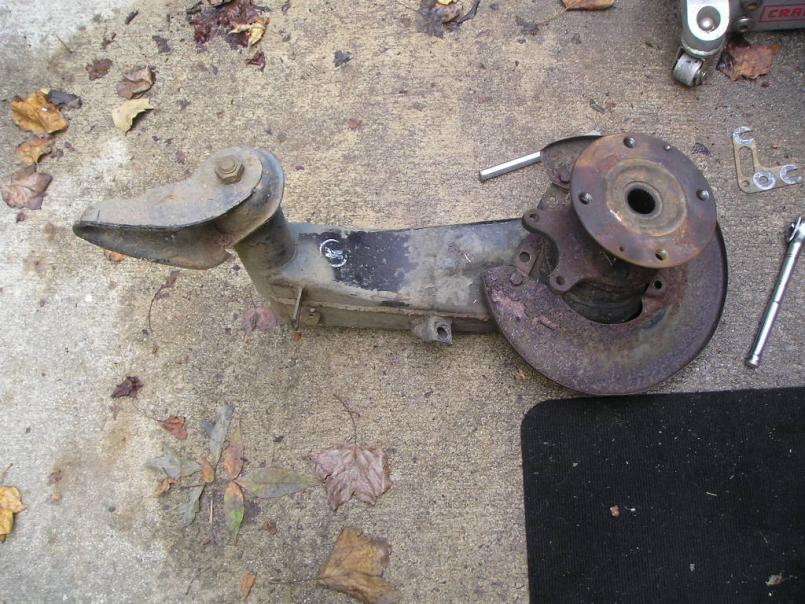
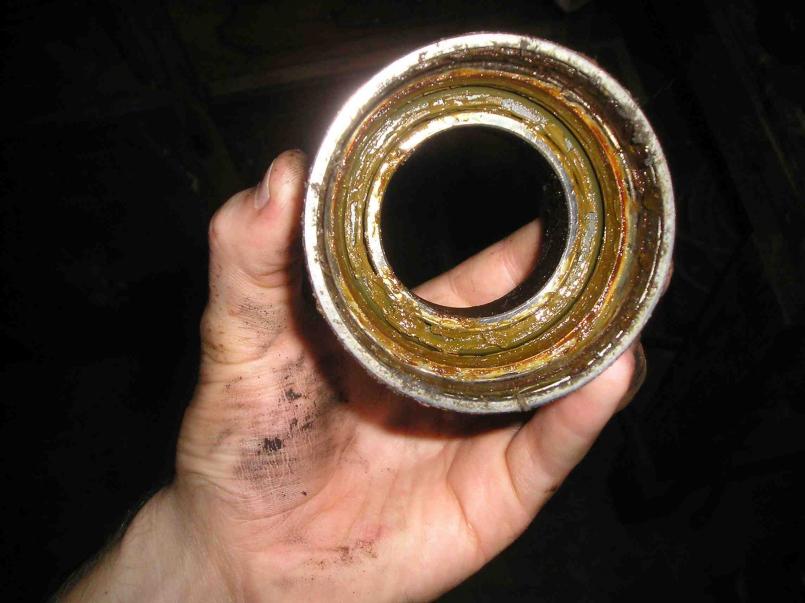
Posted by: dlee6204 Oct 15 2009, 08:54 AM
When I removed the hub from the bearing, the inner race came with it. You can see how nasty the inside of that bearing looks. I took a spare hub that I had and put it in the freezer to make installation easier.
After I pulled the old one out, I cleaned the housing and installed the new frozen bearing. It slide right into place!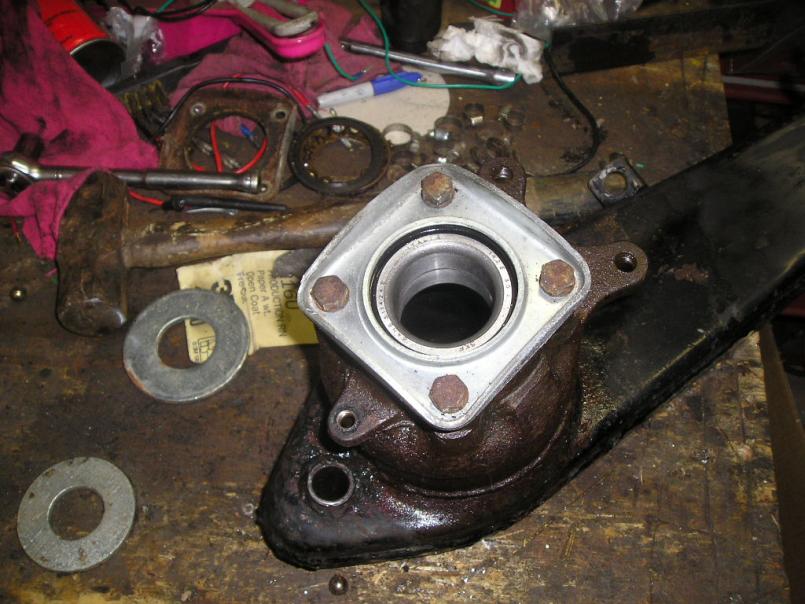
Posted by: dlee6204 Oct 15 2009, 09:01 AM
And finally, I installed the hub using some threaded rod, big washers, and nuts. 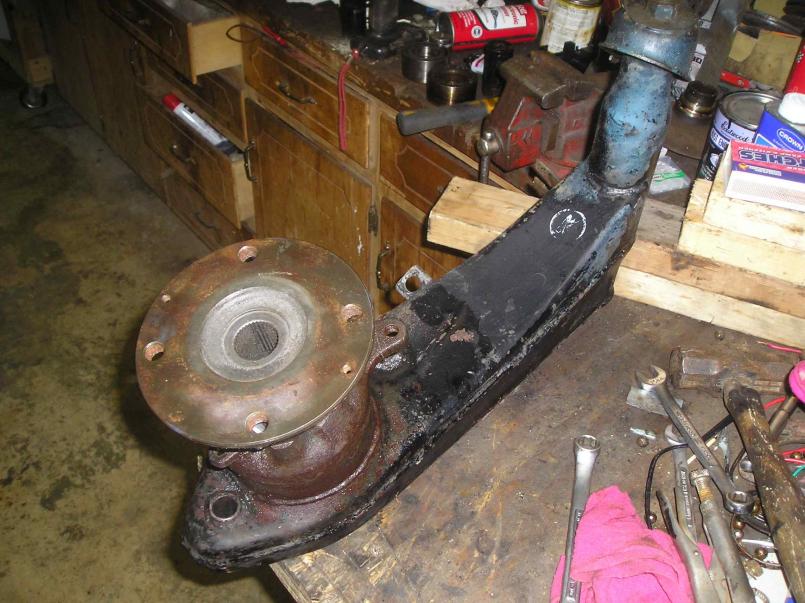
I also replaced the front wheel bearing and seals for good measure. I took it for a test drive and the noise was gone! I then proceeded to drive the car the entire weekend putting another 100-200 miles on it.
A new problem that came up was the infamous no-start problem. Some of the time the starter would work, some of the time it wouldn't. I replaced the starter with a known good one and it still would only crank some of the time so I believe the problem to be in the ignition switch. I'll replace it and go from there!
Posted by: kconway Oct 15 2009, 09:08 AM
Make sure you ground strap from the tranny to chassis is in tact and the connection points are clean as well.
Posted by: dlee6204 Nov 30 2009, 11:32 PM
UPDATE: I've driven the car over 1400 miles so far without any major issues. I've taken the car on several longer trips approx. 100 miles and it ran beautifully on all of them. I'm finding that I'm putting more miles on this car than my daily driver I have several projects going on right now with it so I will try to update the best I can.
First off I got some new tires for it. The only problem is that my Fuch wheels aren't ready to have the tires mounted. I have been working on cleaning them up and painting them. So far I have two of the wheels almost ready for a clear coat.
I don't have a before picture but here is a picture after I cleaned the wheels up and masked them for paint. 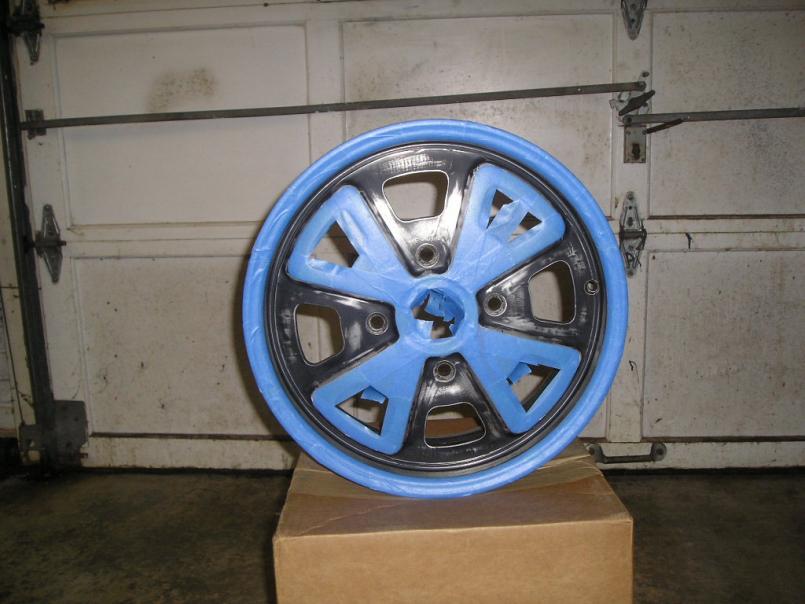
Primer
And some black...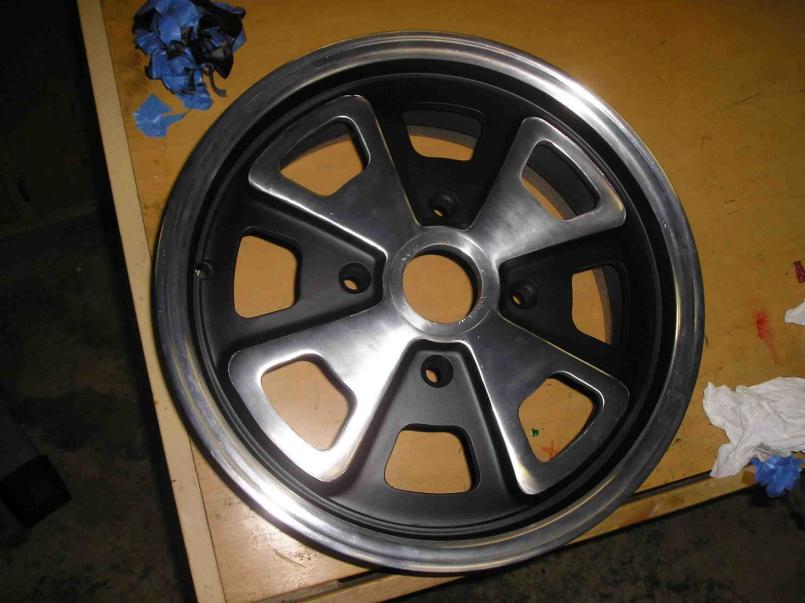
Posted by: dlee6204 Nov 30 2009, 11:37 PM
Another shot. The metal finish areas are a bit dirty in the pictures. It will look better after I get clear on them.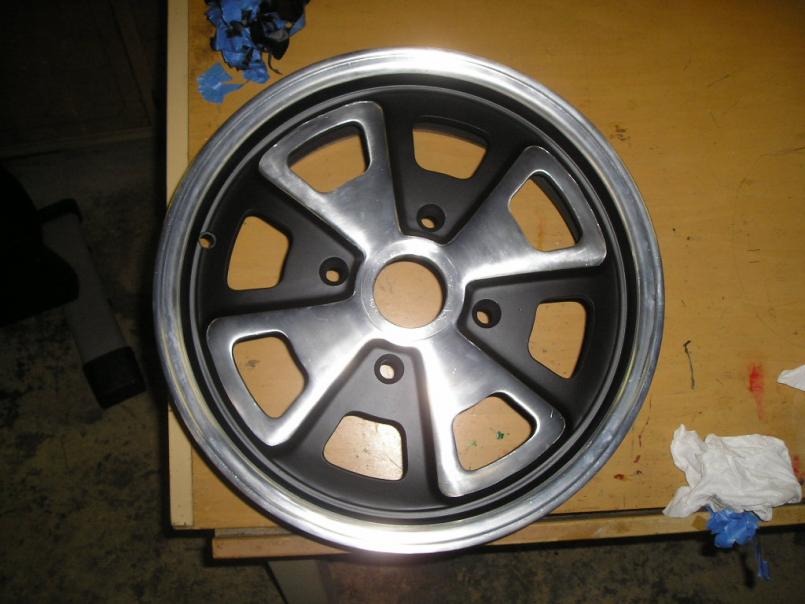
And the new rubber waiting for me in the driveway. 205/60/15's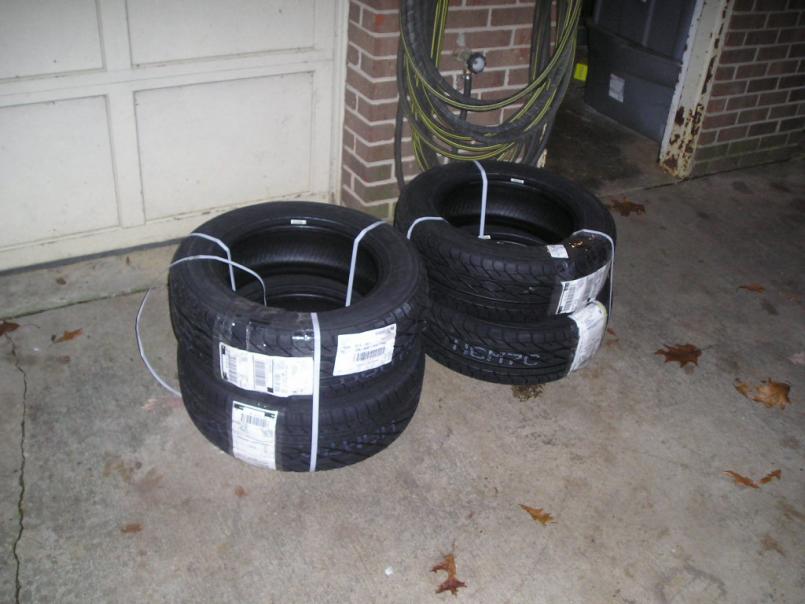
Posted by: dlee6204 Nov 30 2009, 11:41 PM
I also started rebuilding a set of axles that I had lying around. I finished one and the other will get done shortly. 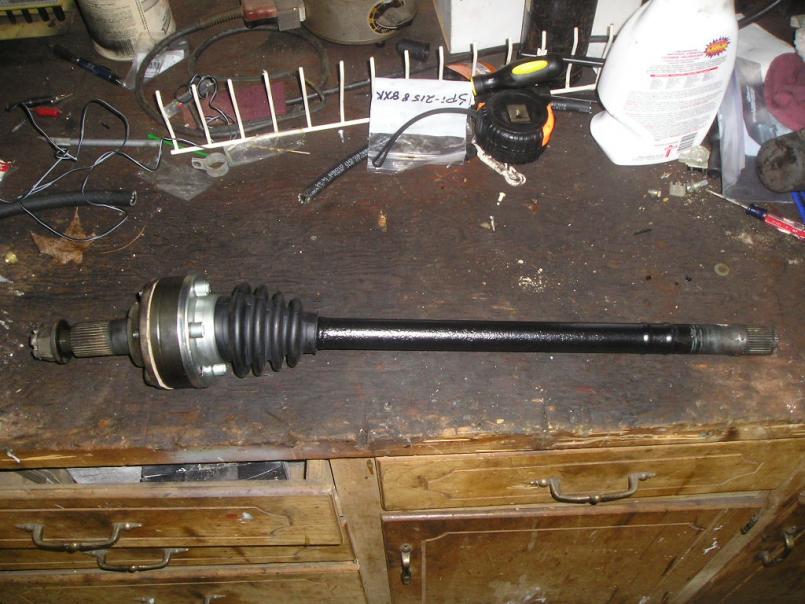
Posted by: dlee6204 Dec 1 2009, 12:12 AM
It started to get chilly here at night so I added heat to the driver's side of the car. The passenger side will get done eventually. I also added a front valence, rocker panels, a stereo system, replaced the ignition switch, wiper stalk and many other small things.
And now some of the things that need work:
- The transmission is hard to shift and grinds when going into some of the gears. I have tried to adjust the linkage and and clutch will no real success. I am leaning towards the transmission itself so that might get replaced sometime in the near future.
- The driver's side rear has a camber issue. I'm going to swap out the trailing arm with a spare to insure it is not bent. 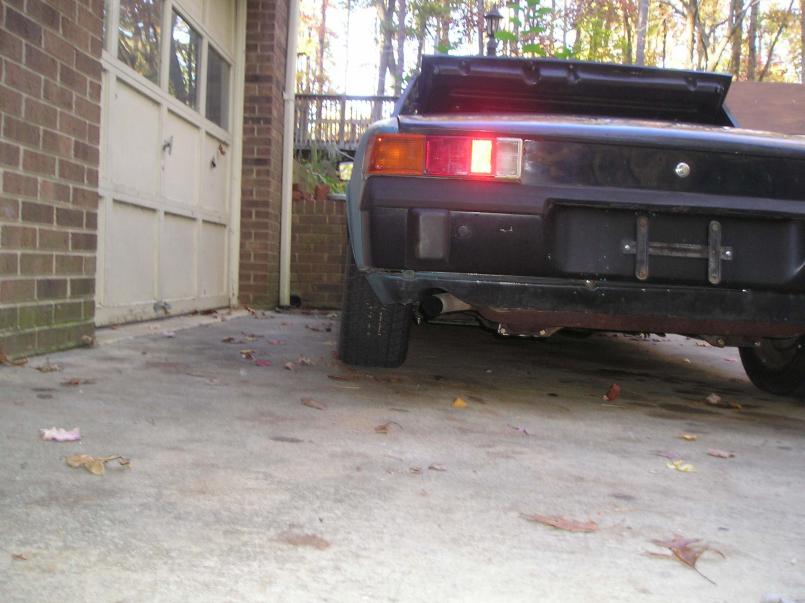
-Emergency brakes/ rear calipers need adjustment.
-Fresh air fan does not work. I cleaned the contacts but that didn't work. I will get around to replacing the fan.
-Passenger side needs heat ducting
-Wheels & tires need to be finished
-New axles need to be installed.
-Front steering pan needs to be painted and installed.
-Driver's door doesn't want to close some of the time.
-Interior light doesn't come on when door is open. The door switch is suspected.
-License Plate Lights need to be installed.
-Defrost illumination light doesn't work
-Clock doesn't work
To be continued...
Posted by: Phoenix914 Dec 3 2009, 12:14 PM
I have really enjoyed reading this thread. You make everything look easy! I have the exact same car, color included. Mine has been repainted the original Marathon Blue. My rear wheel bearings also need to be replaced, but I have been putting it off until I remove the engine for rebuilding.
What kind of radio did you install. Is it one that fits the dash without mods?
Posted by: dlee6204 Dec 3 2009, 05:00 PM
What kind of radio did you install. Is it one that fits the dash without mods?
Thanks Bryan! The radio I used was just a spare Kenwood CD headunit that I had lying around. Once the stock radio faceplate is removed, there is a standard size hole in the dash that most stereos will fit in. Mine slipped right in and it only took less than an hour to get everything working. I still have to add basket-weave material around it to make it look better. I'll post pictures later on that shows more of the interior.
Originally I wanted to install a stock stereo but with a little budget I just installed the CD unit for the time being.
Posted by: dlee6204 Dec 5 2009, 08:13 AM
So I did something SAWEET to my car last night. I installed White LED Strips in the gauges to get rid of the yellow halogen bulbs. It came out looking great.
(I apologize for the blurry pictures)
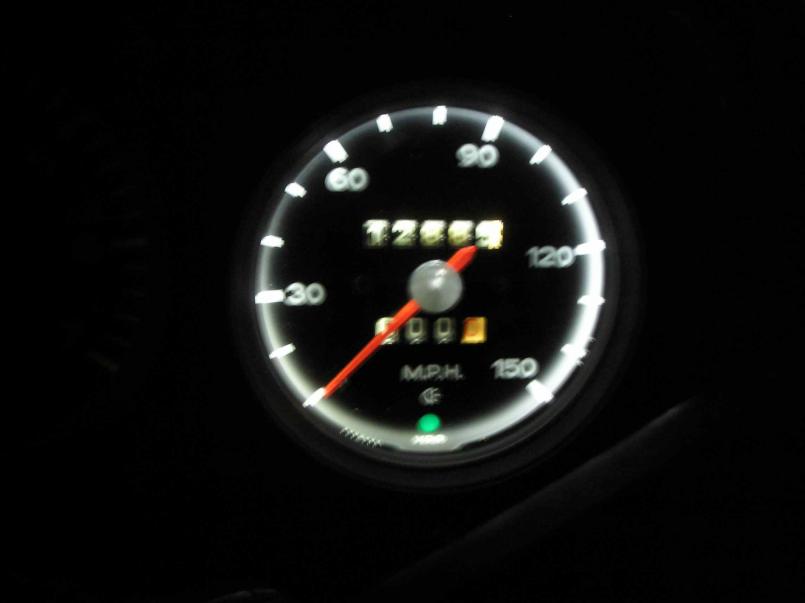
I took the gauges apart, painted the interior housing a more reflective color, and installed a strip of LED's and wired it out the back. The difference is staggering.
The parts...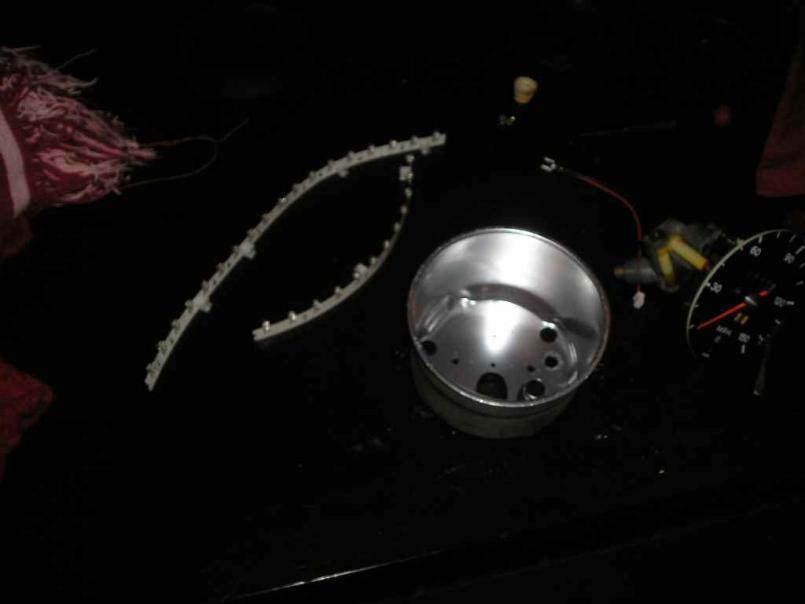
After I finished the speedo. This shows a big difference. I might be able to see my gauges now... 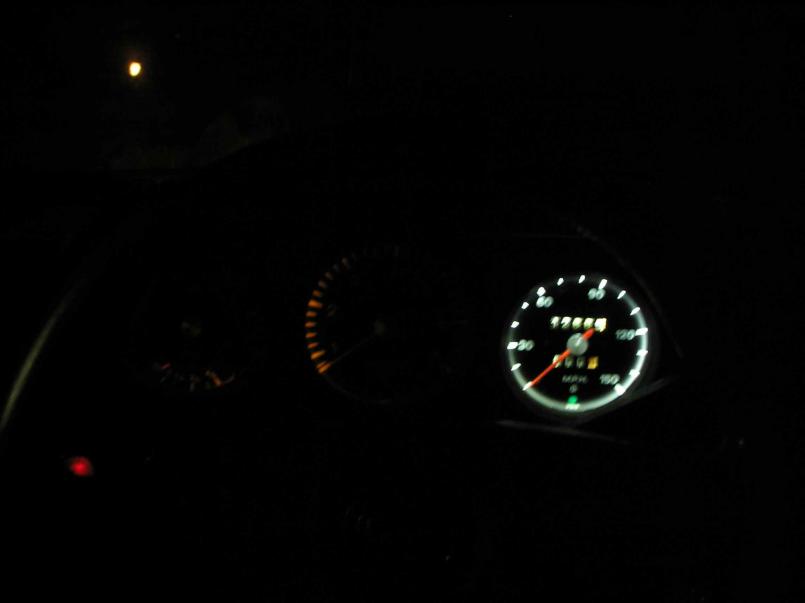
Complete assembly. I also painted the rings on all three gauges as well as the mounting plate.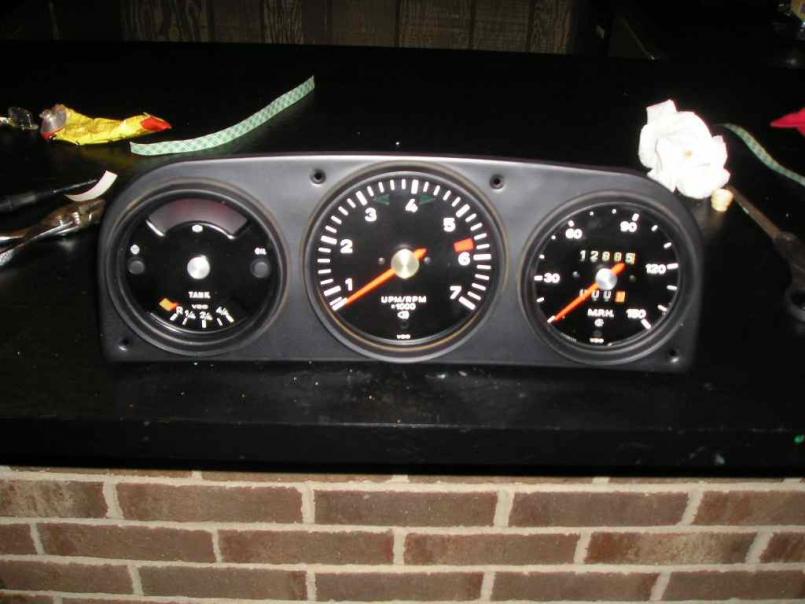
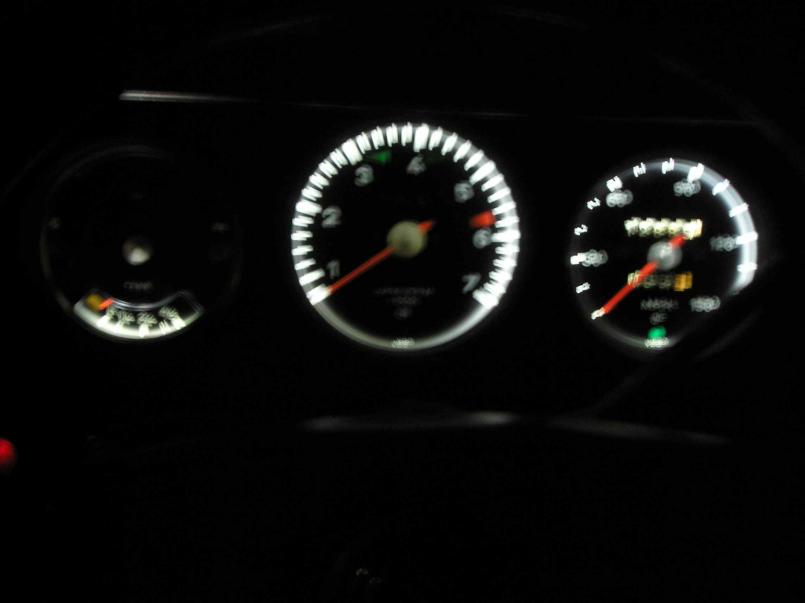
Now I just have to do the center console gauges.
Posted by: dlee6204 Dec 5 2009, 12:54 PM
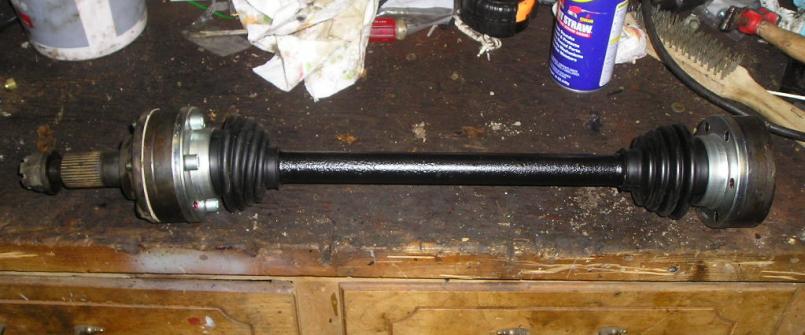
Finished up the second driveshaft...
Oh my...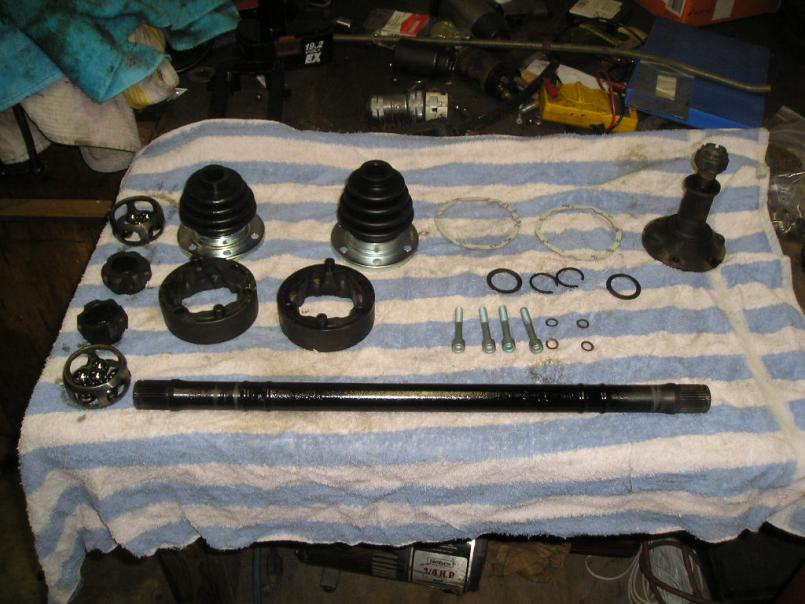
Complete!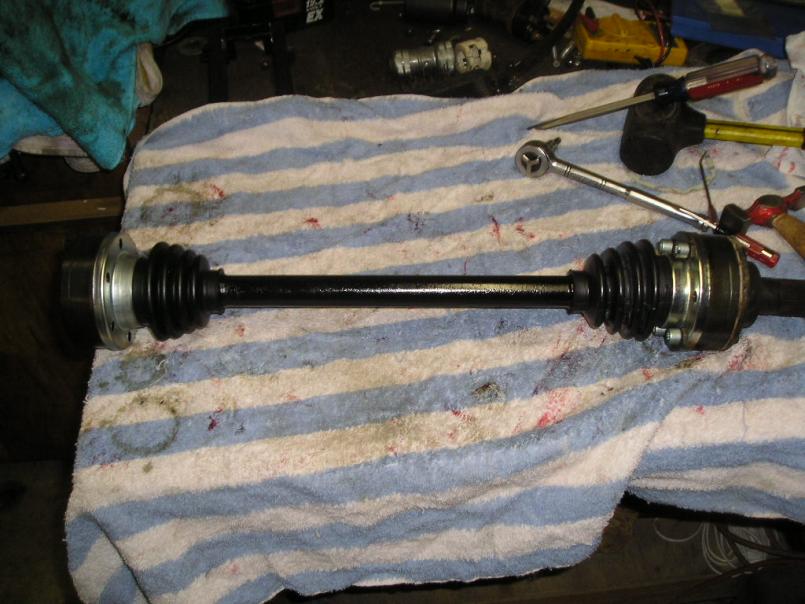
Posted by: hi4head Dec 5 2009, 02:08 PM
Way to go Doug!!
Thing look great and you sure look like you've been busy.
Stop by the house sometime when you're home for the weekend.
Chris
Posted by: sendjonathanmail Dec 5 2009, 09:39 PM
It's coming along great Doug. Please keep the pics coming.
Posted by: dlee6204 Dec 6 2009, 10:21 PM
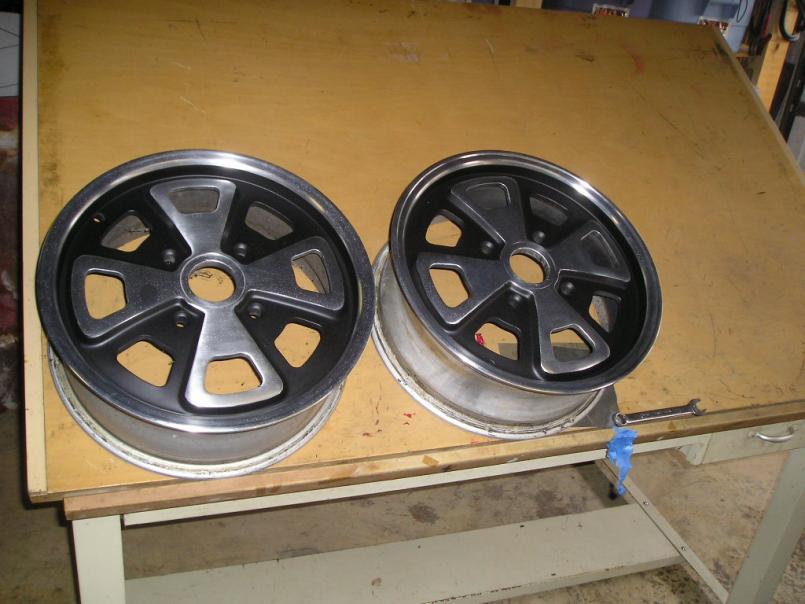
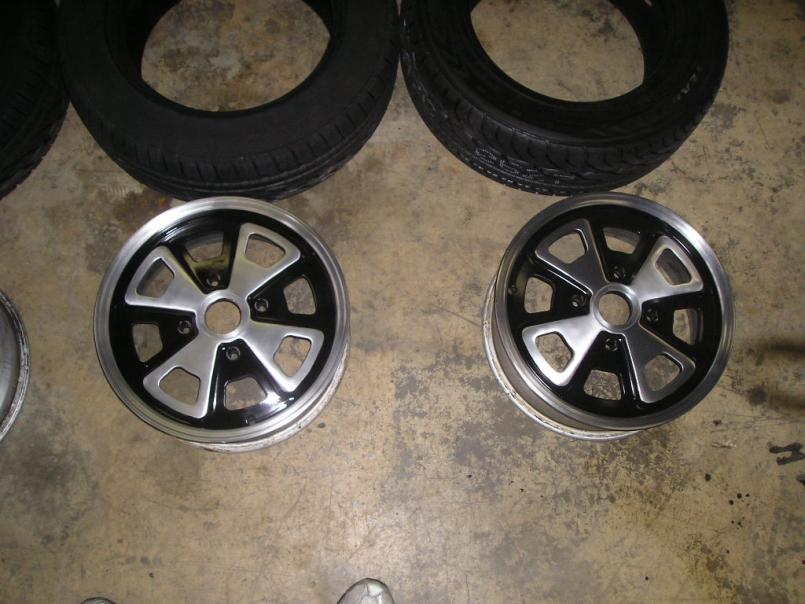
I finished the rest of the wheels today. Here's some pictures of my progress...
Here's a wheel before I started working on it.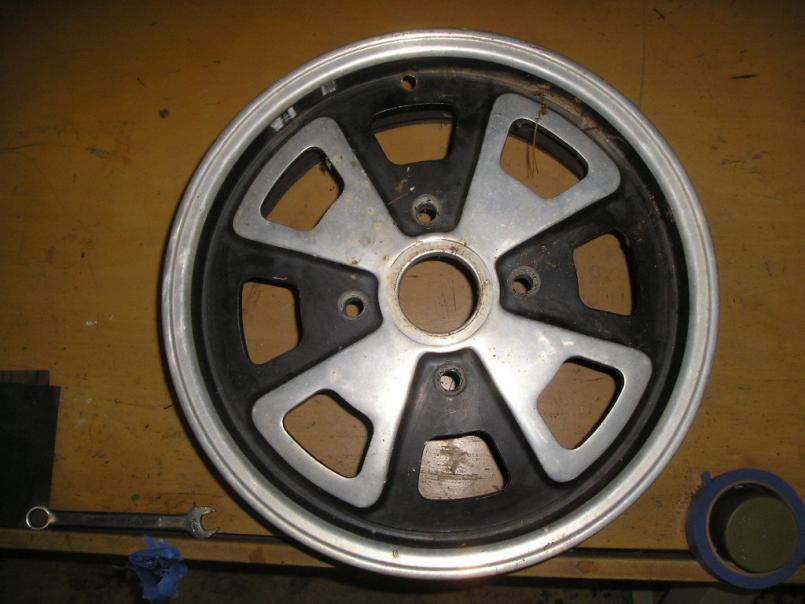
Nobody likes a rash...
Rash gone.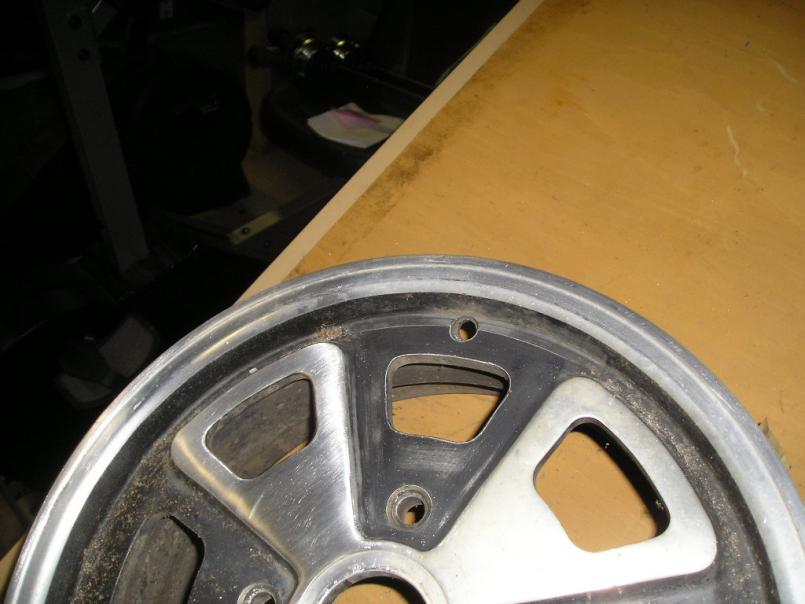
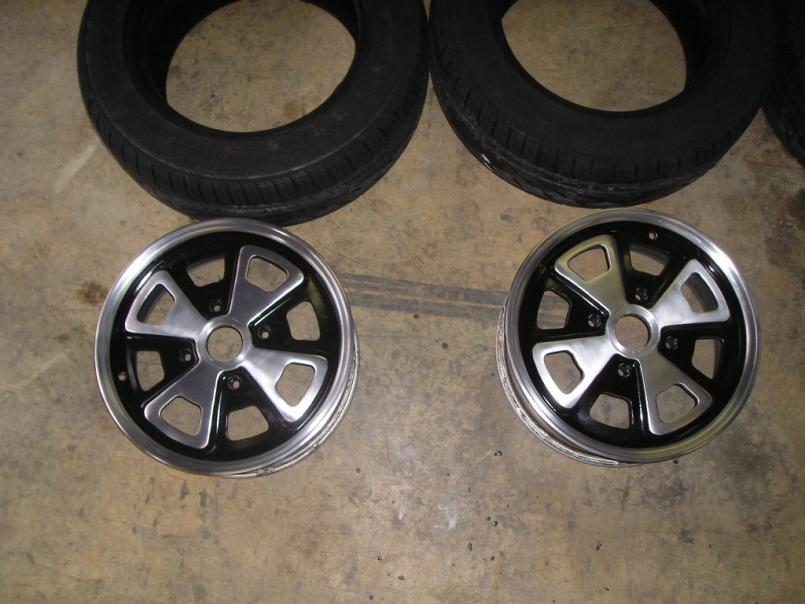
Posted by: dlee6204 Dec 6 2009, 10:25 PM
Finished product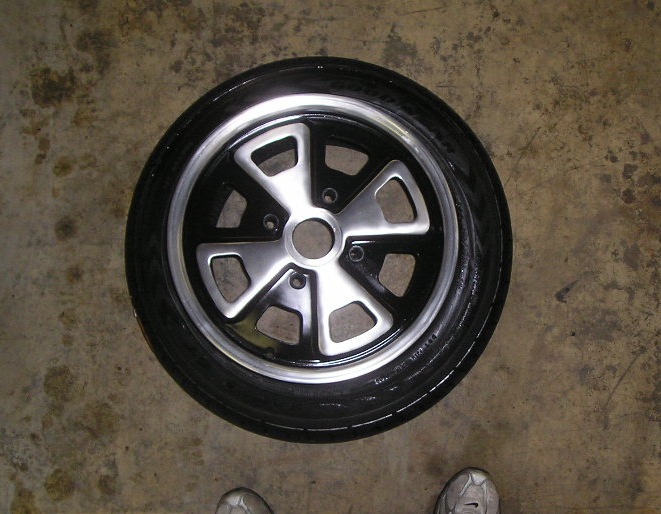
Posted by: dlee6204 Dec 6 2009, 10:26 PM
Now I just need to get the tires mounted. 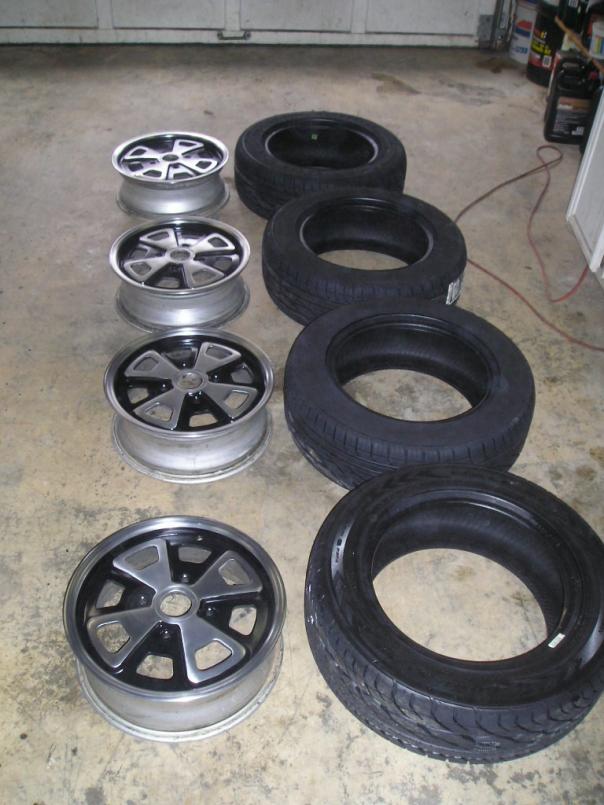
That's all for now. More to come later in the week!
Posted by: dlee6204 Dec 10 2009, 01:41 PM
I started restoring a set of good taillights I had lying around. I finished up the passenger side and installed it. The old one was badly cracked all over and being held together by the gasket. 
Before work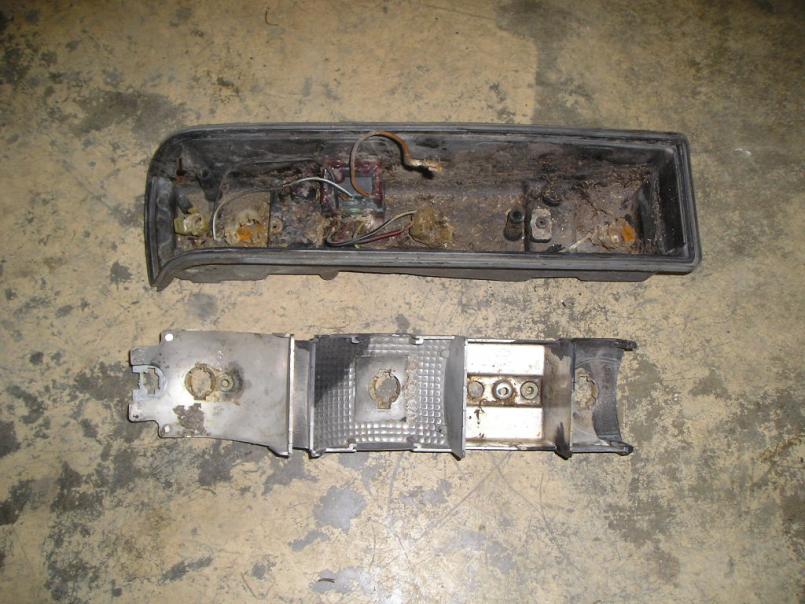
After I painted the innards and the housing. I cleaned all the contacts and installed a new gasket between the lens and housing.
Finished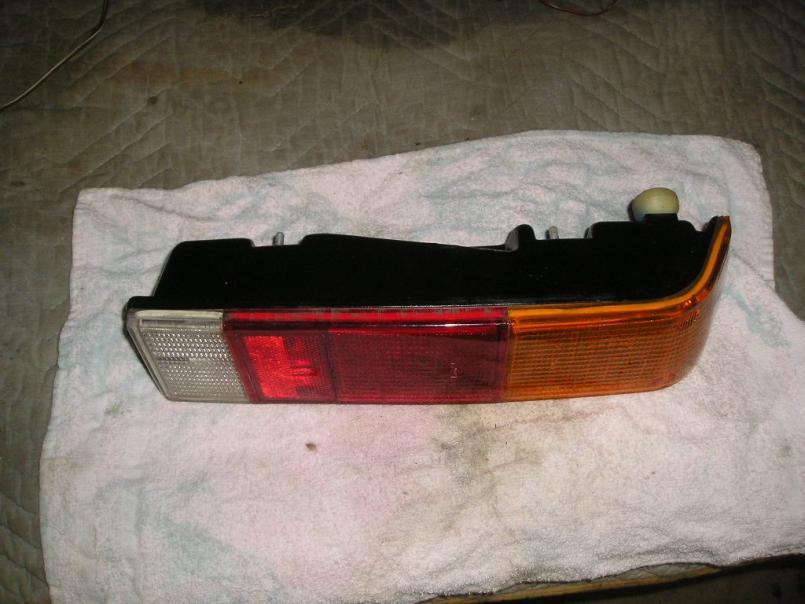
Posted by: dlee6204 Dec 10 2009, 01:44 PM
And sometimes its the small things that bring satisfaction. I painted my heater level knob Last weekend I also got the illumination for the heater knob working too!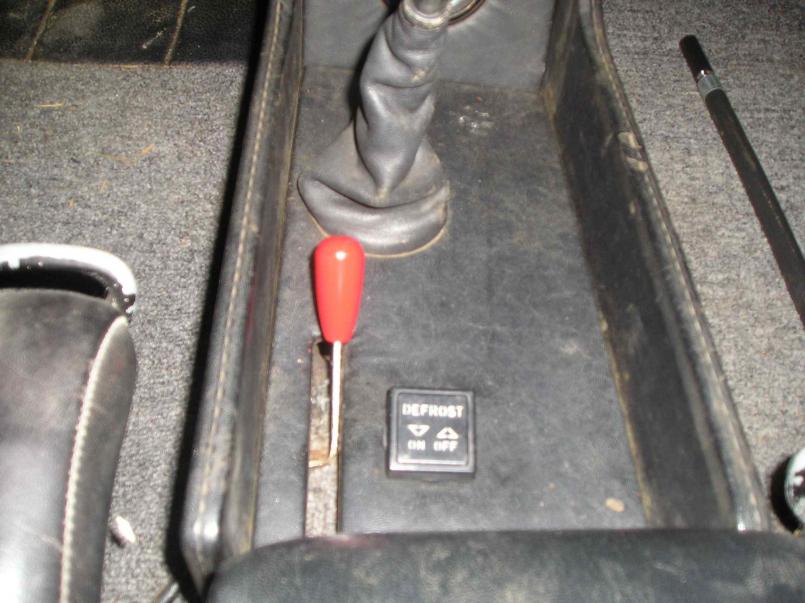
Posted by: dlee6204 Dec 10 2009, 01:48 PM
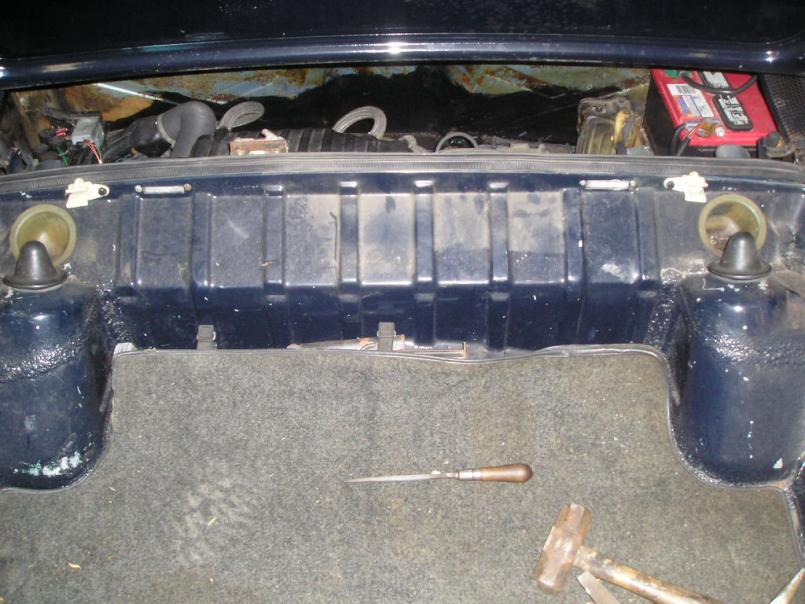
I did some work in the rear trunk. At some point one of the previous owners decided to install a rod to hold up the trunk lid. However when I acquired the car, the trunk lid opens and shuts fine without it and both hinges were already replaced. So the rod is now gone...
Posted by: dlee6204 Dec 10 2009, 01:56 PM
And I did a little "upgrade" to the rear trunk. I added a second light. To me, it made sense to have one on both sides. This setup helps light up the entire trunk also lights up both sides of the engine compartment instead of one.
I painted the top part of the reflective lens and housing with a reflective paint. This keeps the light reflected down in the engine compartment.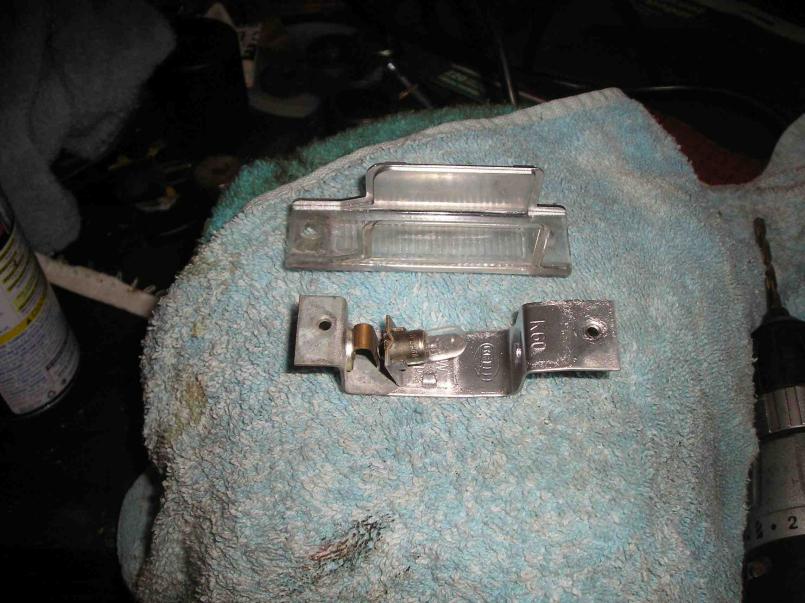
Posted by: Gint Dec 10 2009, 04:45 PM
Those Fuchs look great! And you maintained something like a factory finish it would appear. Are the petals brushed? Did you remove the anodizing?
Posted by: dlee6204 Dec 10 2009, 06:23 PM
Those Fuchs look great! And you maintained something like a factory finish it would appear. Are the petals brushed? Did you remove the anodizing?
Thanks! The petals do have a brushed texture. I started by sanding the entire wheel with 150 grit i believe, then i stepped up to 400. After that I used steel wool on the metal finish areas to give it a very light brushed look. I then masked and painted the black. Then I painted clear over everything. They came out looking better than expected and I'm very pleased with them.
The wheels were in such good shape that I debated whether to polish the entire wheels or paint the insides black. I decided that I liked the black look better.
Posted by: Cevan Dec 10 2009, 06:56 PM
Those wheels came out great! Nice work. 
Posted by: dlee6204 Dec 11 2009, 09:58 PM
Well today I painted some of the heat ducting for the passenger side.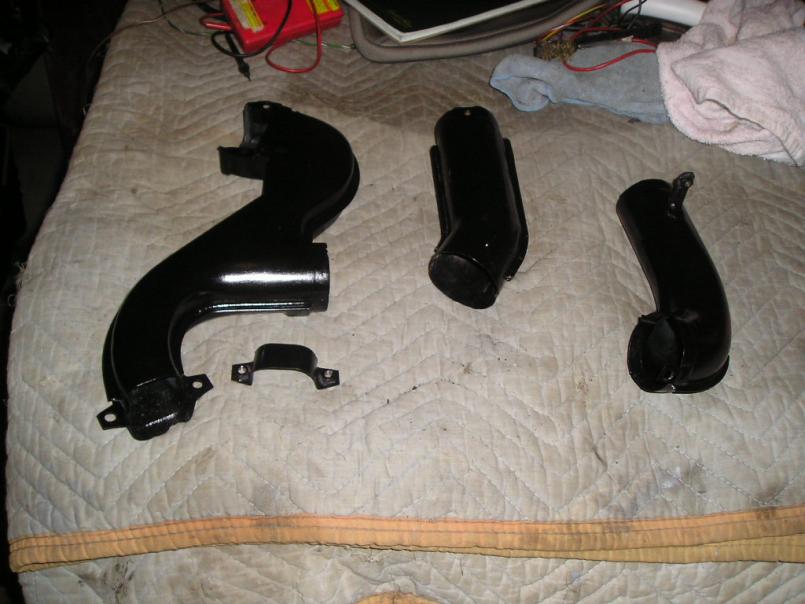
I also painted the steering pan and put new seals on it.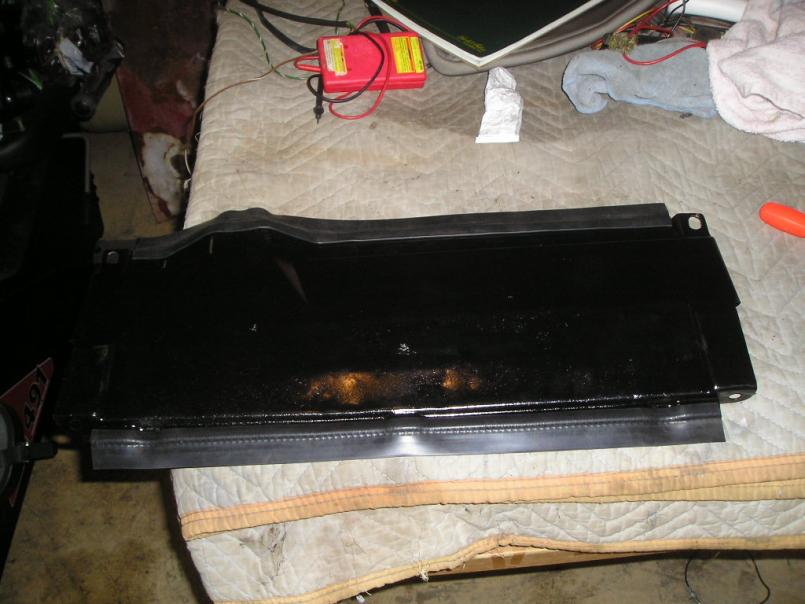
Posted by: dlee6204 Dec 11 2009, 10:10 PM
Currently the fresh air fan doesn't work so I plan on replacing it. I pulled a good working unit off a parts car and did a little work to it. First, the gaskets on the opening/closing valves were completely toast. With the fan on and valves closed, there was an ample amount of air coming out of the ducting. To fix this, I replaced these foam gaskets with a new foam ring that I cut out of a 1/4" sheet of foam we had lying around. Now, the valves keep out the air when they are in the closed position.
Here is a picture of the old gaskets in place. You can see where part of it was missing around the edge.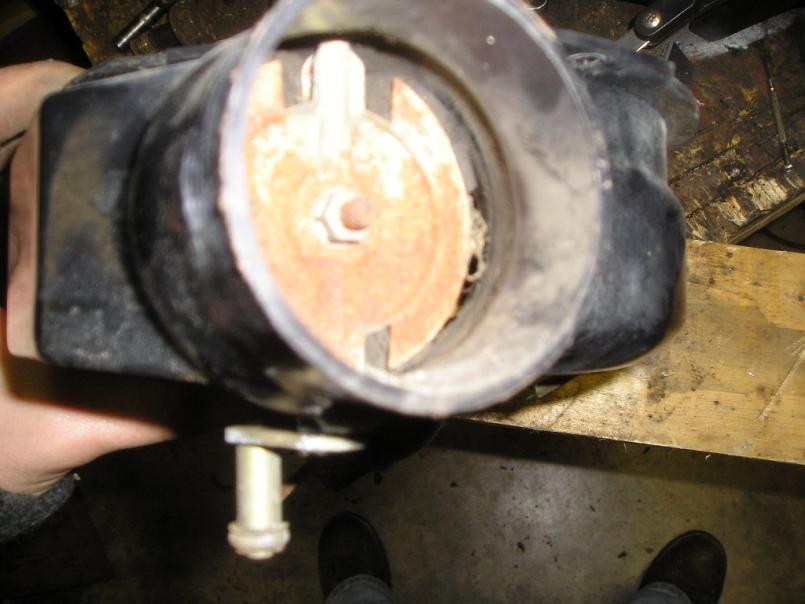
Here is the new gasket I made compared to the old one.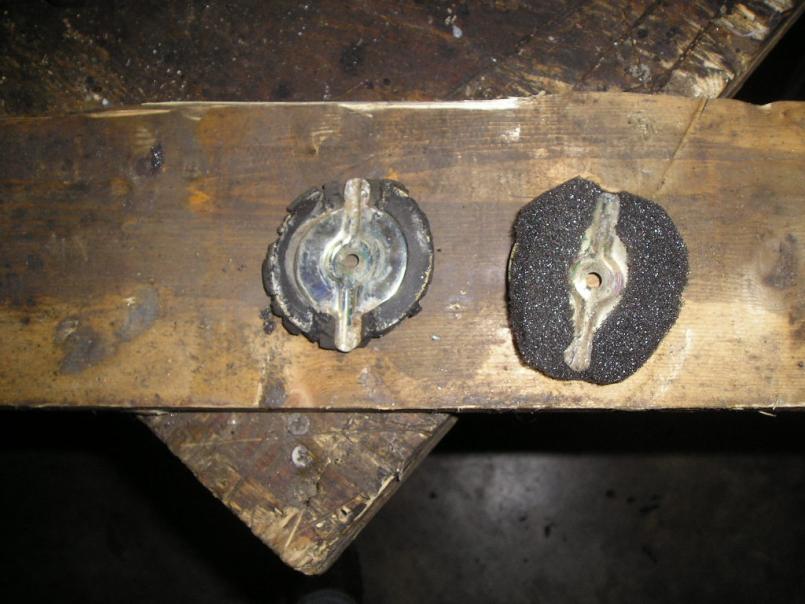
And here it is in the ducting.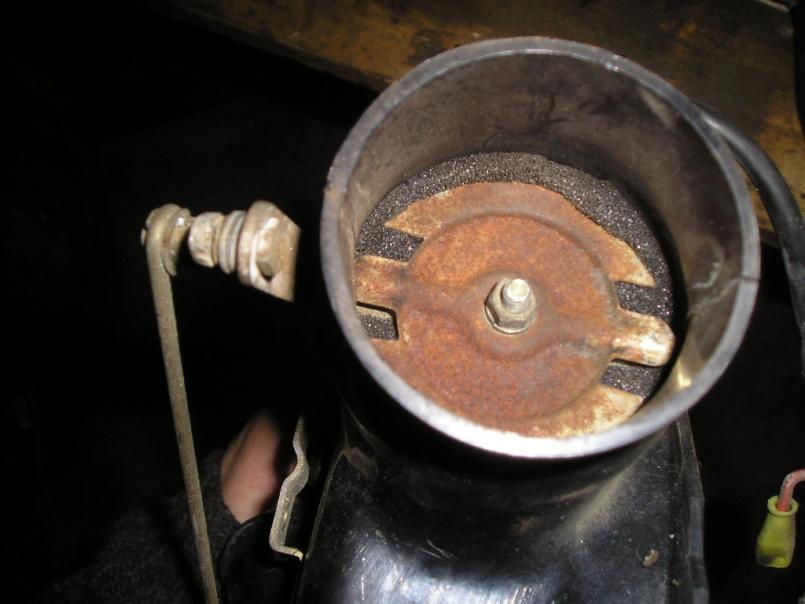
Posted by: dlee6204 Dec 11 2009, 10:14 PM
Here is the fan assembly ready to be installed in the car.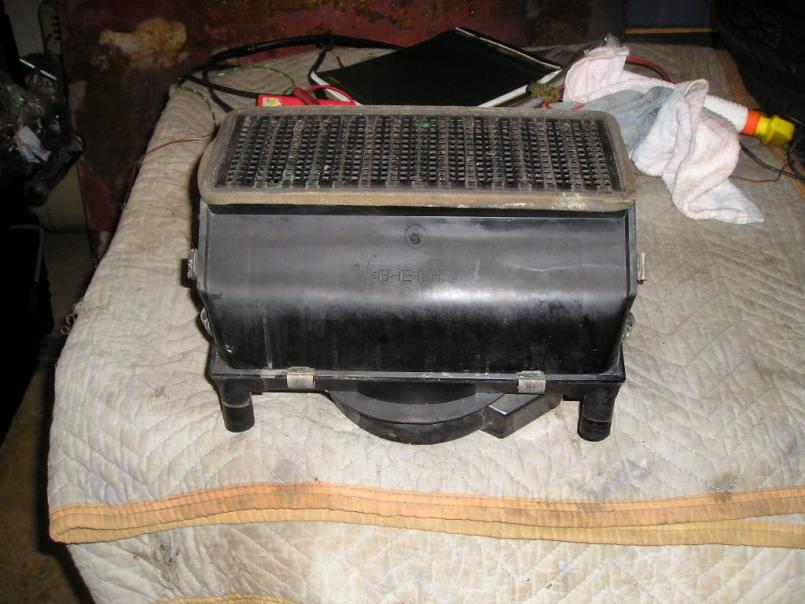
I'm starting to have a pile of parts building up. I need to start installing them on my car!
Posted by: dlee6204 Dec 13 2009, 10:24 PM
So I put the 914 on jack stands this weekend to get some stuff done on it. I started by removing the gas tank and going through the air ducting up front. The air valves weren't in sync with the dash controls so i adjusted them. In the process, I broke one of the cables and that was a real pain to replace. I also replaced the fan and it still doesn't work so I need to make sure all the contacts are clean and attached in the dash.
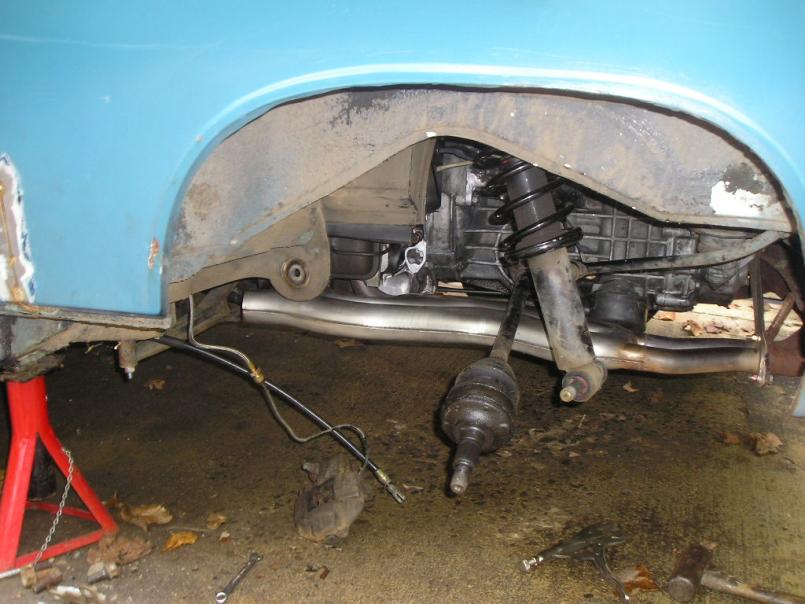
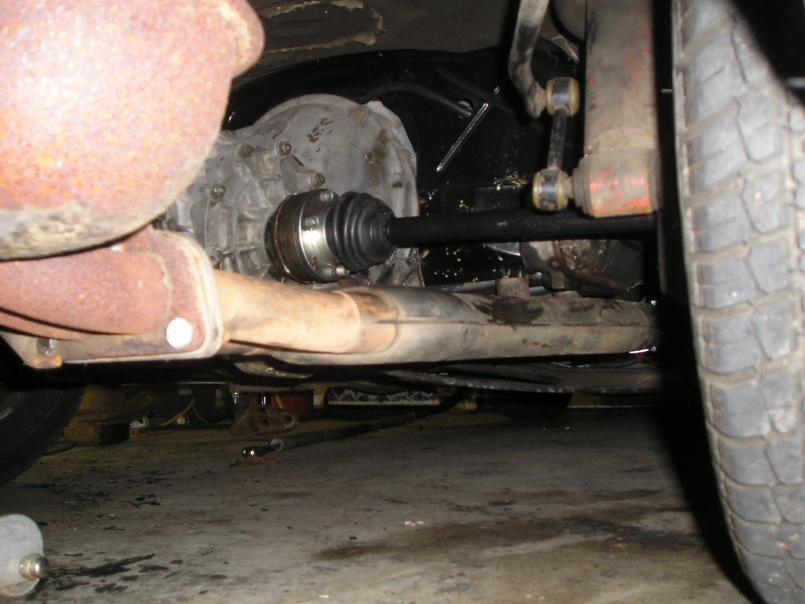
I moved onto the rear end. Recently I've been having a progressive noise coming from the driver's side rear so I wanted to figure out why. I also wanted to fix the negative camber issue and replace the driveshafts while I was in there. After taking off the caliper and rotor, I notice the hub was way too loose in the bearing. I was able to wiggle it back and forth and then it popped out!  (I previously replaced this bearing.)
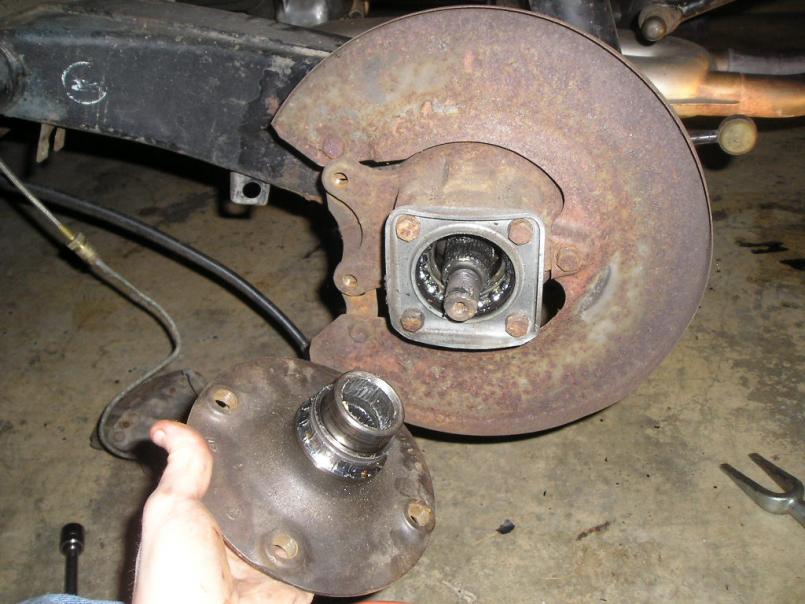
I figured that was the source of the noise so I moved onto the camber issue. I replaced the trailing arm with a spare and it still had too much negative camber so I knew it wasn't a bent trailing arm. I ended up putting in approximately 1 cm of spacers to solve the camber issue. I also put in a new wheel bearing (a different brand than the first) in the second trailing arm so now I should be good to go. The driveshafts were replaced in the process.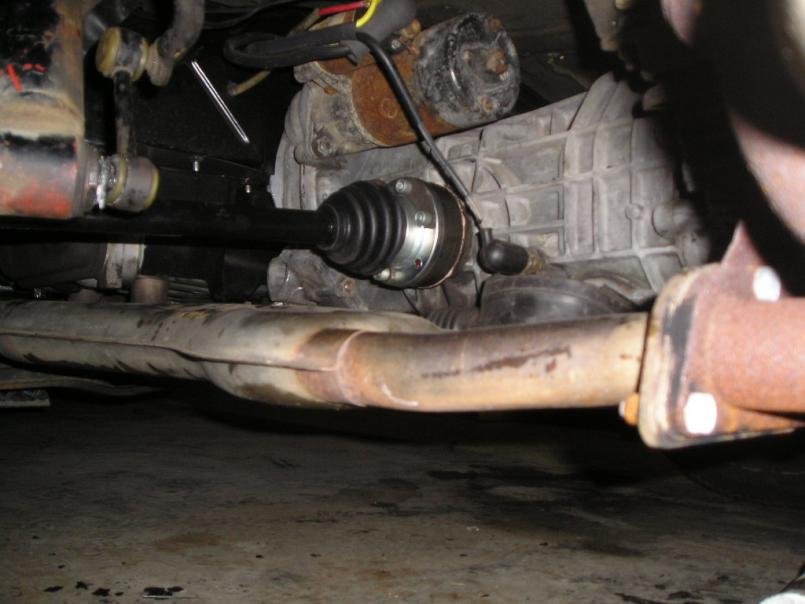
Posted by: dlee6204 Dec 13 2009, 10:29 PM
Hopefully you guys don't think thats ALL I did this weekend I painted my lugnuts to match the wheels.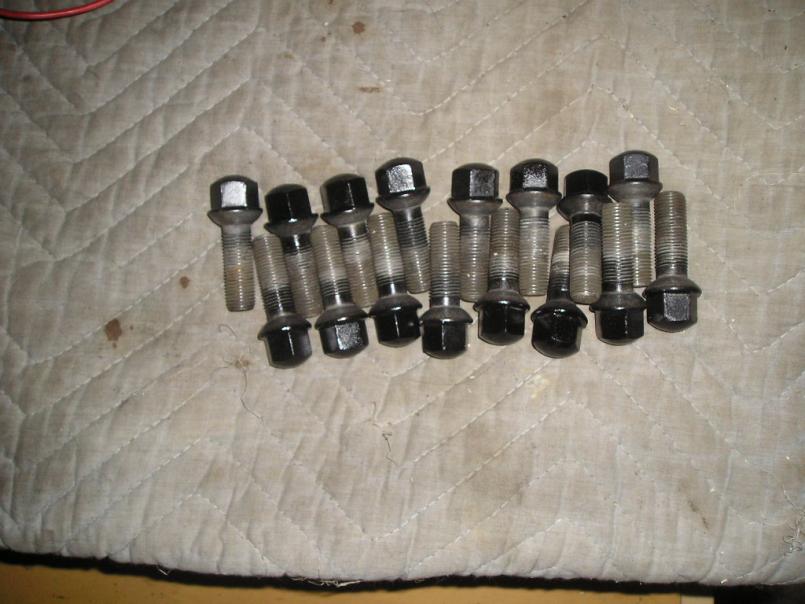
When searching through the loads of parts we have around here I found an original leather steering wheel. SAWEET. I cleaned up the wheel, painted the metal horn button part, and re-glued the horn pad. I think I will install this on my car and sell the old one. 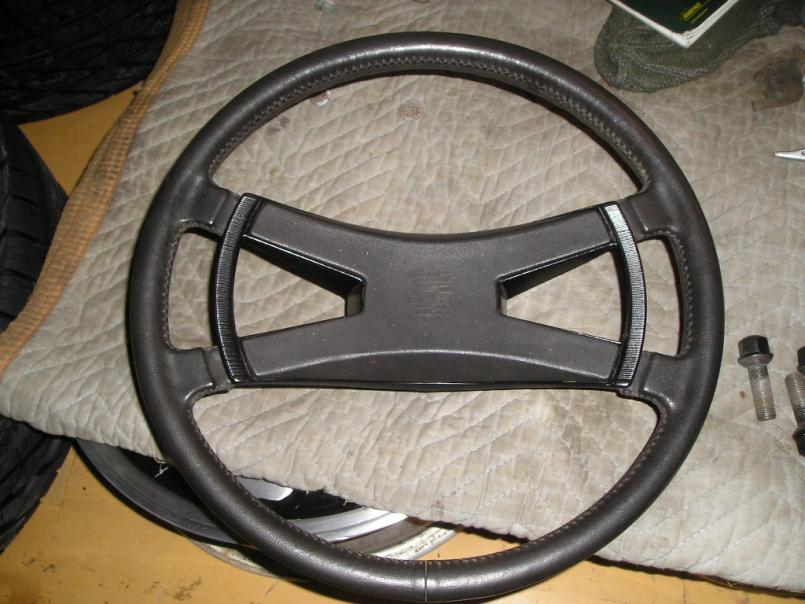
Posted by: dlee6204 Dec 13 2009, 10:43 PM
Oh and I also installed the heat ducting on the car. Now I just have to order some hoses and find a fan splitter so I can cruise in warmth!
Posted by: silver74insocal Dec 14 2009, 12:06 AM
wow waht a great thread thanks for all the info ..good job and happy motoring
Posted by: maf914 Dec 15 2009, 02:02 PM
Doug,
Nice work. It looks like you are making good progress.
What brand tires are those? I will need tires soon and I am also using 205/60-15's. The only high performance tires I can locate are BF-Goodrich G-Force Sports and Yokohama AVS ES-100's. I guess no one cares about 15" wheels anymore. 
Posted by: dlee6204 Dec 16 2009, 02:43 PM
What brand tires are those? I will need tires soon and I am also using 205/60-15's. The only high performance tires I can locate are BF-Goodrich G-Force Sports and Yokohama AVS ES-100's. I guess no one cares about 15" wheels anymore.
Thanks Mike. The tires are Goodyear Eagle GT's that I got off http://www.tirerack.com. The G-Force Sports were my second option however based on reviews i read, Eagle GT's had a little better wet traction and they also had a 50,000 mile warranty. Other than those two things, both tires are very compareable. Here is an interesting article that I read on the Eagle GTs. http://www.speedsportlife.com/2008/08/25/speedsportlife-tire-test-goodyear-eagle-gt-champ-among-the-cheap/. I'll post my review on here once I run them a bit.
Posted by: dakotaewing Dec 16 2009, 04:06 PM
And I did a little "upgrade" to the rear trunk. I added a second light. To me, it made sense to have one on both sides. This setup helps light up the entire trunk also lights up both sides of the engine compartment instead of one.
I painted the top part of the reflective lens and housing with a reflective paint. This keeps the light reflected down in the engine compartment.
Do you have any close ups of the finished product? How did you deal with getting the hole the perfect size for the light? Thanks!
Thom
Posted by: dlee6204 Dec 16 2009, 06:03 PM
I actually don't have any more pictures of the install. The extra light is mounted the same way any stock trunk light is and the hardest part about doing this was getting the rectangular hole cut out. Using the light's gasket I traced out where the holes needed to be. To make the rectangular hole, i drilled a hole on each end and then cut out the section between the holes using a cutoff wheel. I then used a series of square files to get the hole down to a perfect size to fit the light. To wire it, I simply extended the wires over from the original light.
At night this second light really lights up the trunk and the passenger side of the engine down by the injectors and intake runners. It was definitely a worthwhile modification.
Posted by: dlee6204 Dec 19 2009, 02:57 PM
I haven't been able to do much with the car yet due to this...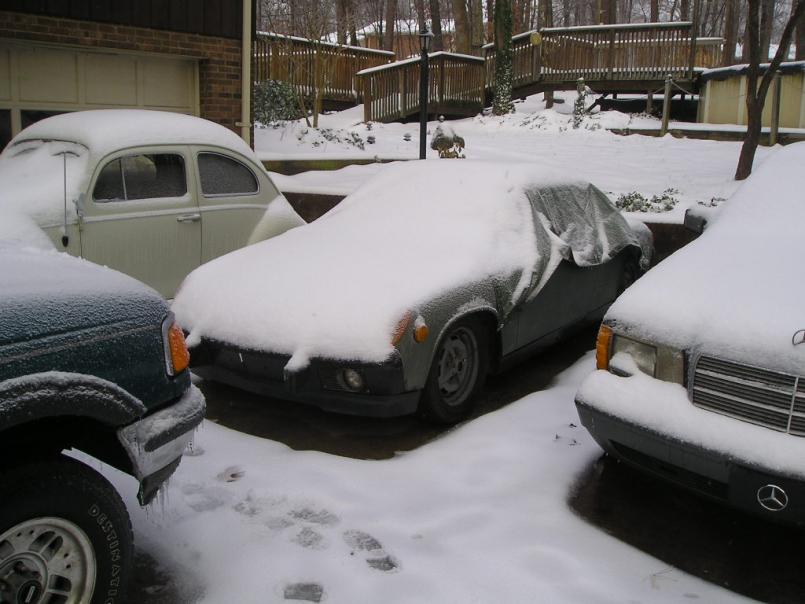
We had to use the garage for other projects so both the Bug and the 914 have had to sit outside.  I did manage to get the heater system fully hooked up. Even with a few inches of snow on it, it still heats up pretty good inside! Hopefully all the salt on the road will wash away in the next day or two.
Posted by: dlee6204 Dec 22 2009, 03:41 PM
Christmas came early yesterday. I got a tow bar adapter and lights so that I will eventually be able to flat tow my 914 anywhere! 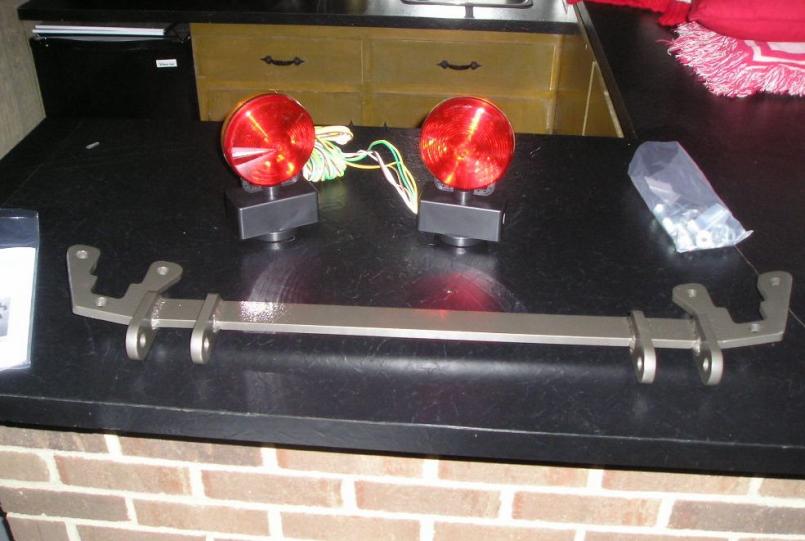
Here it is on a bare shell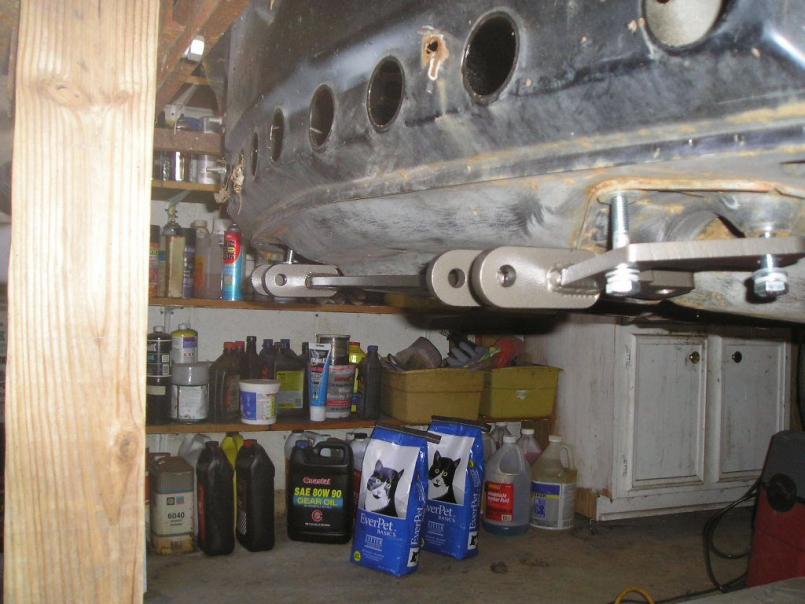
Posted by: dlee6204 Dec 22 2009, 03:51 PM
I also got the tires mounted today 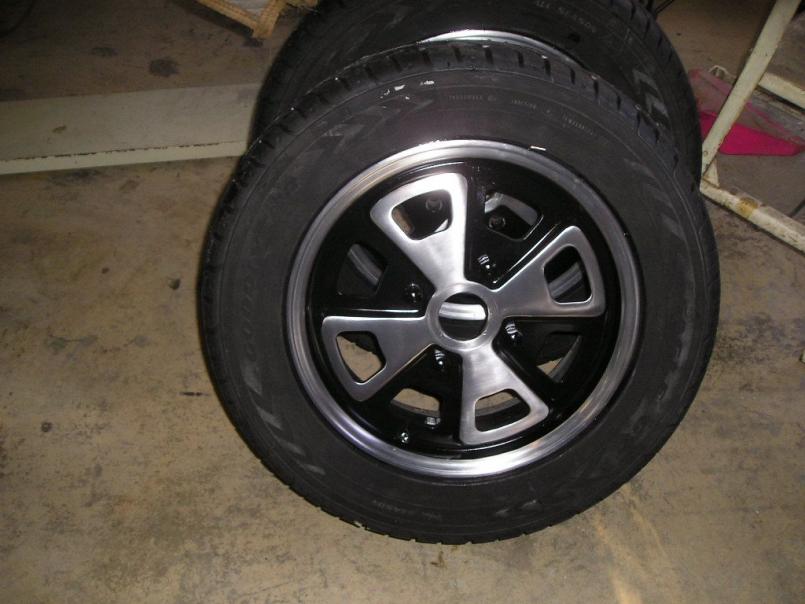
The car looks much better now with the Fuchs added. The tires had a stiffer sidewall than the old ones so it actually raised the car a half inch or so. I drove the car around a bit and the new tires felt much better.
Posted by: dlee6204 Dec 28 2009, 10:22 AM
Not much progress but lots of a driving! I was able to make a Radio faceplate from an original one.
I cut a hole for a standard DIN size radio.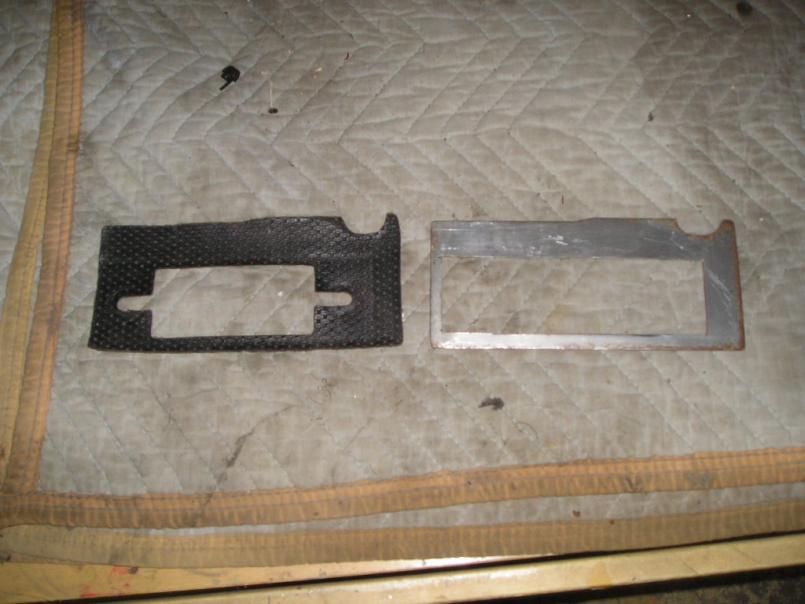
And my high tech weight mechinism to hold it flat while it dries.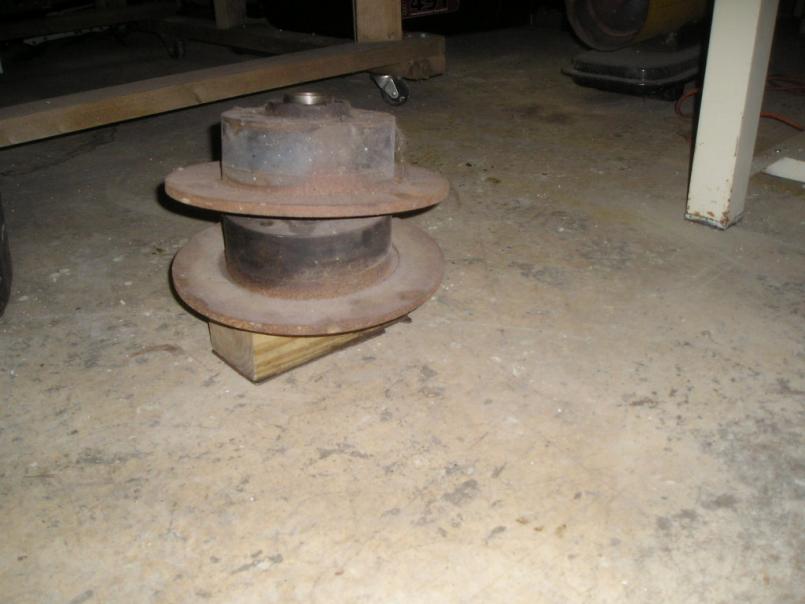
Ta-da!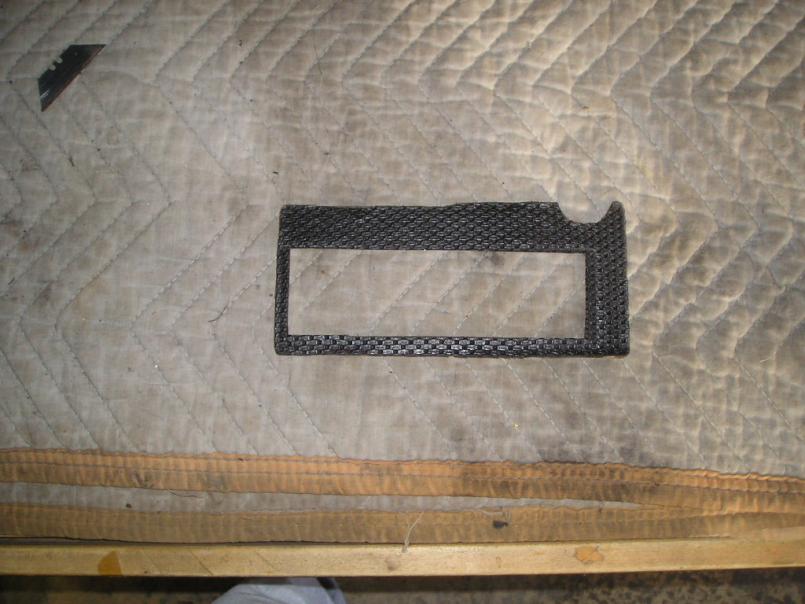
Posted by: dlee6204 Dec 28 2009, 10:25 AM
And here it is in the car. I still need to clean the rest of the dash. 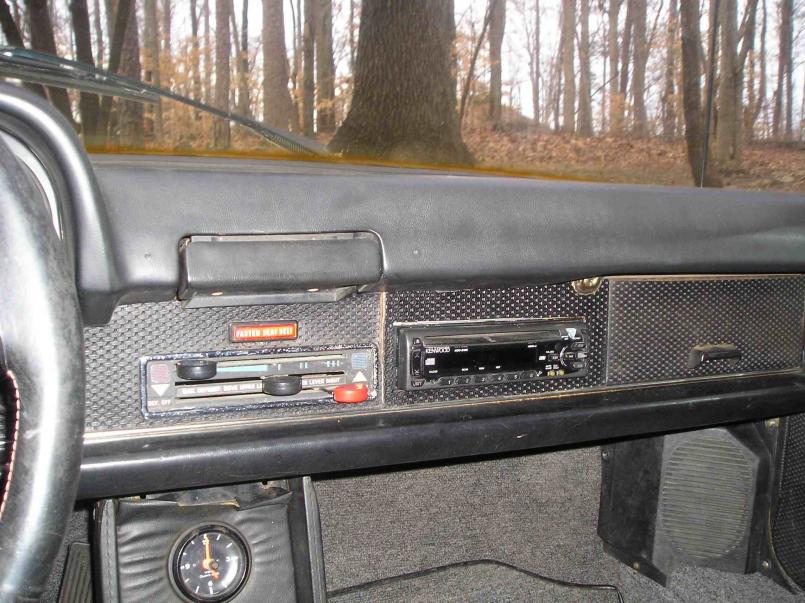
Posted by: dlee6204 Dec 28 2009, 08:16 PM
I'm planning on taking the car out of town for New Years. Its a 300 mile round trip so I have a few things I want to get done before I leave on the 31st.
-change tranny fluid
-adjust the shift linkage
-seal up some areas underneath (wet weather expected)
-clean up the interior
-check CV joint bolts
-check for slop in the front end
-adjust the rear brake clearance
The car should be able to make the trip however anything can happen...
Posted by: bcheney Dec 29 2009, 06:43 AM
Just checked our your thread for the first time. You are doing a great job!! Keep the faith and you're gonna have one helluva nice ride!!
Posted by: wponting Jan 3 2010, 08:15 PM
do you know anywhere i can find those LED strips that you used?
Posted by: dlee6204 Jan 7 2010, 07:12 AM
The LED strips I used were the FLB30 series from http://www.superbrightleds.com/cgi-bin/store/index.cgi?action=DispPage&Page2Disp=%2Fspecs%2FFLB30.htm
Posted by: dlee6204 Jan 7 2010, 08:23 AM
So I got back from my trip on the 2nd and have been too lazy to update this thing. The car made the trip just fine however two things did come up.
1. The ignition switch decided to stop working. It is a new switch so who knows. This didn't bother me much because i placed a jumper wire in the engine bay that leads to the starter. I added this the last time the switch failed just in case.
2. I replaced the cork oil filler gasket before the trip. I noticed after driving the car that it leaks some oil. I guess I just have to make sure it is mating properly.
Here are some pictures from my trip.
If you look through the trees, you can see the lake we were on.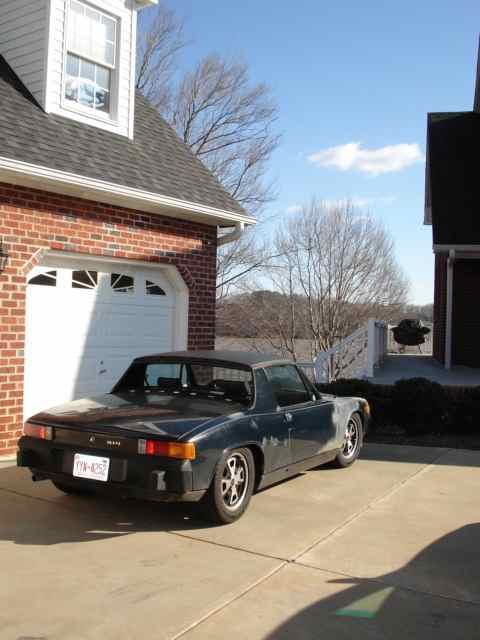
A friend took this of me on the highway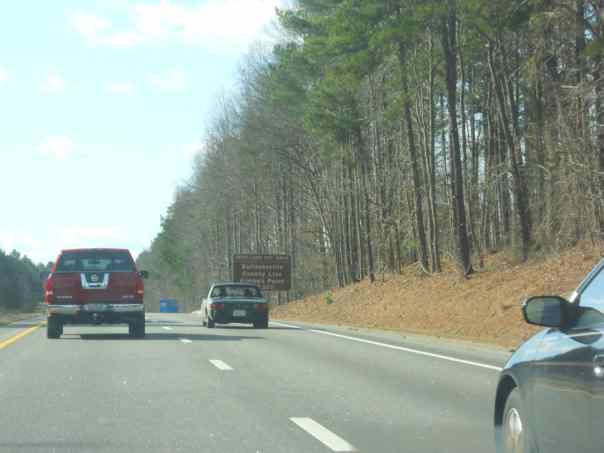
Posted by: dlee6204 Feb 23 2010, 07:14 PM
So as some of you know I had a little accident in my 914 when it snowed here. I slid off into a ditch and hit a tree. You can read about it http://www.914world.com/bbs2/index.php?showtopic=103780&st=0
Well I started to fix the damage. I stripped the front end and I was able to get the front end pulled back out to speck. The headlight bucket was push in a little bit.
This is the channel at the top of the headlight bucket. You can see how its bent.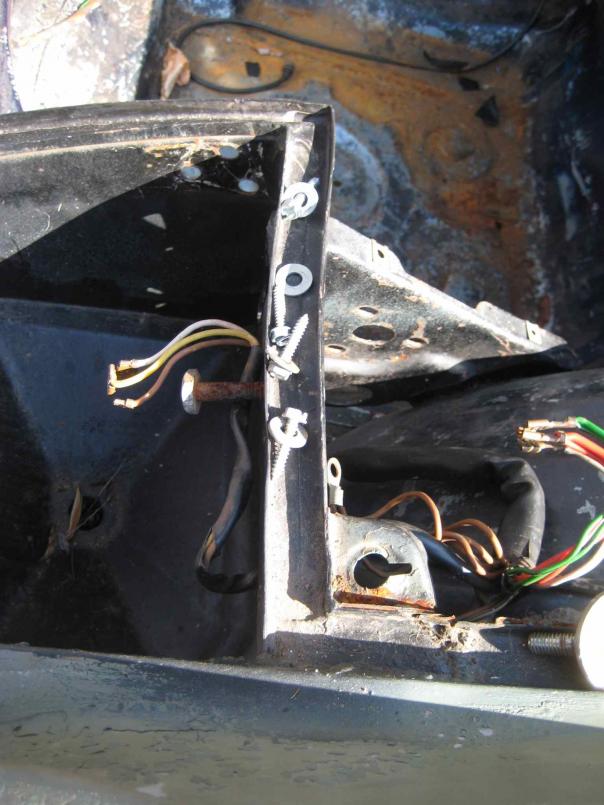
I had to remove the shelf in the front trunk but I already pulled another one from my parts car. I'll replace the vertical support too. 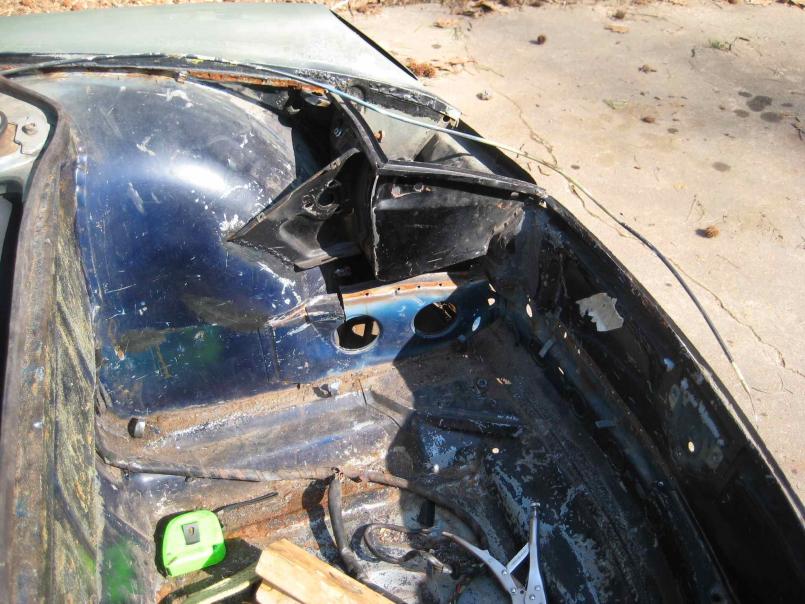
Posted by: Jon Fernandes Feb 23 2010, 07:18 PM
 Looks like its coming along. Let me know if theres any metal you need, I have a parts car at work.
Posted by: dlee6204 Feb 23 2010, 07:27 PM
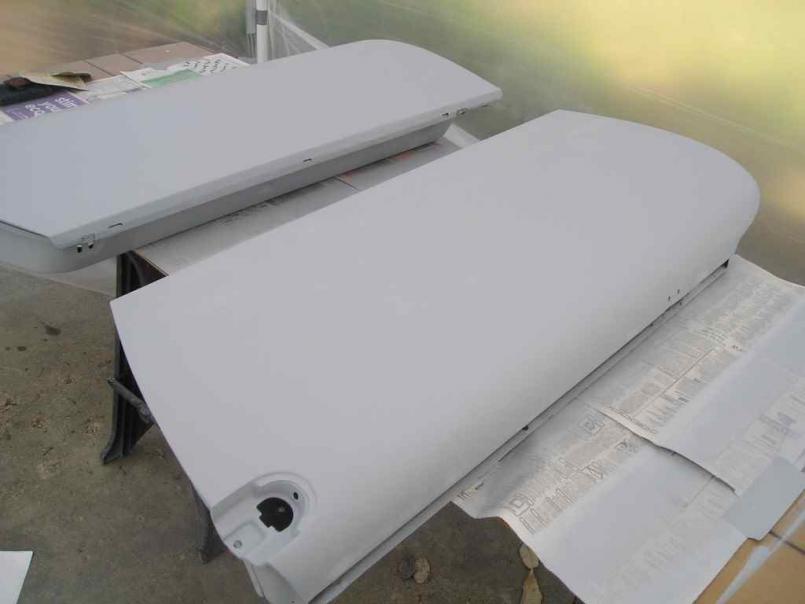
And that's pretty much all I got done this past weekend. I do have bigger news though. I've gotten tired of looking at my multicolored car and have decided to PAINT it. I have my spring break from school coming up the beginning of March and so I have a good 10 days to work on it. My goal is to have most of the bodywork completed by the end of break but we all know how that goes. I plan to strip the exterior of the car down to bare metal and just sand down the trunks. More details to come in a week or so. 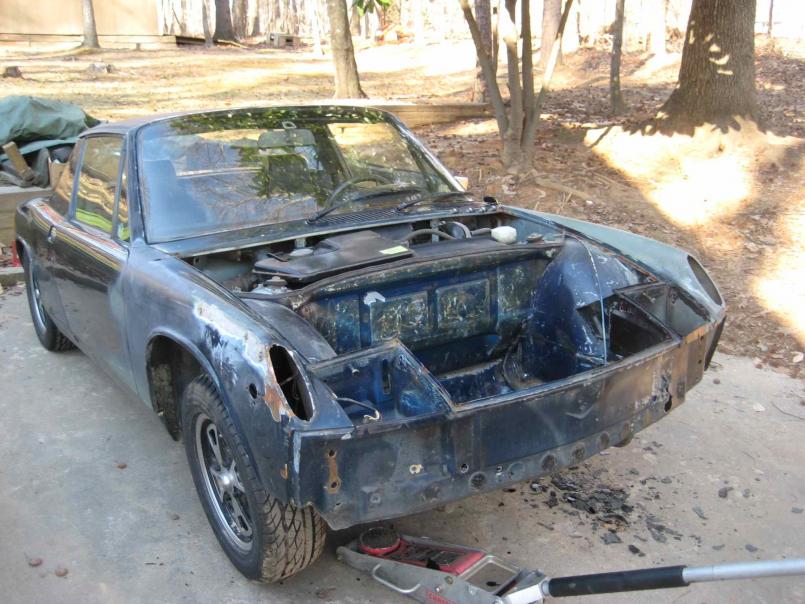
I also had a clean hood that I will use. The old one never fit right even before the accident. 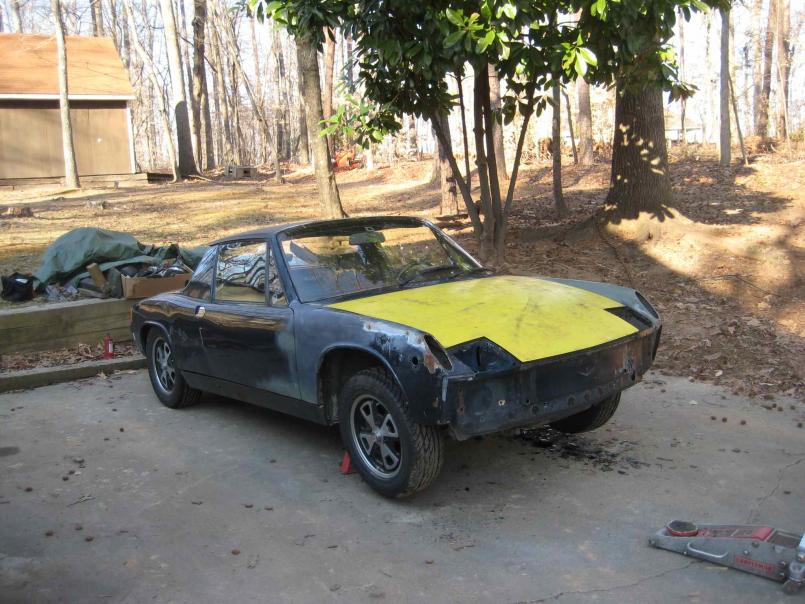
Posted by: dlee6204 Feb 23 2010, 07:28 PM
Thanks Jon. I'll keep that in mind.
Posted by: dlee6204 Feb 27 2010, 05:57 PM
I started to repair the rust in front of the windshield where the fenders meet up. The pass side had been patched before but it still needed a lot of work.
Posted by: dlee6204 Feb 27 2010, 06:00 PM
 The damage...
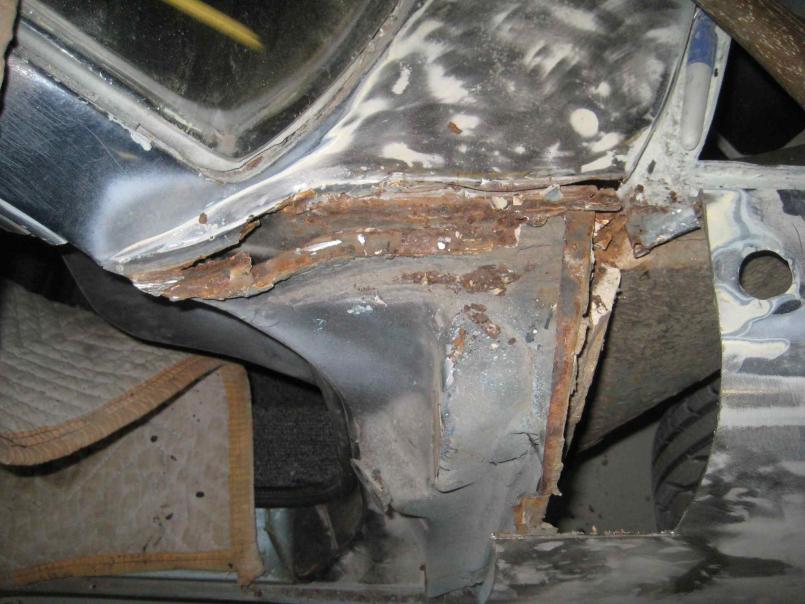
Posted by: dlee6204 Feb 27 2010, 06:03 PM
Ah, I like new metal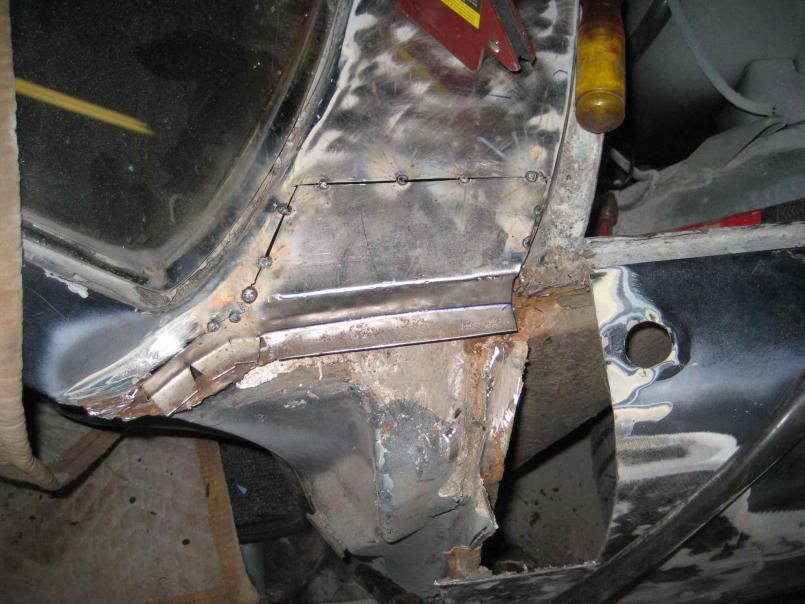
Posted by: dlee6204 Feb 27 2010, 06:14 PM
Here it is with new gaskets. And I finished welding it up on this side but I don't have a pictures. 
So I started on the driver's side. This side was not as bad it was still a pain in the butt to fix. 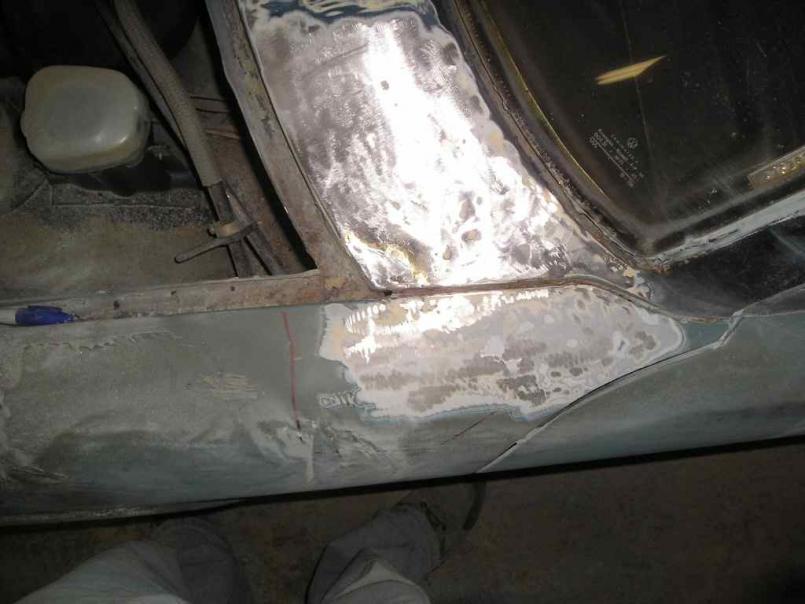
Bad stuff removed...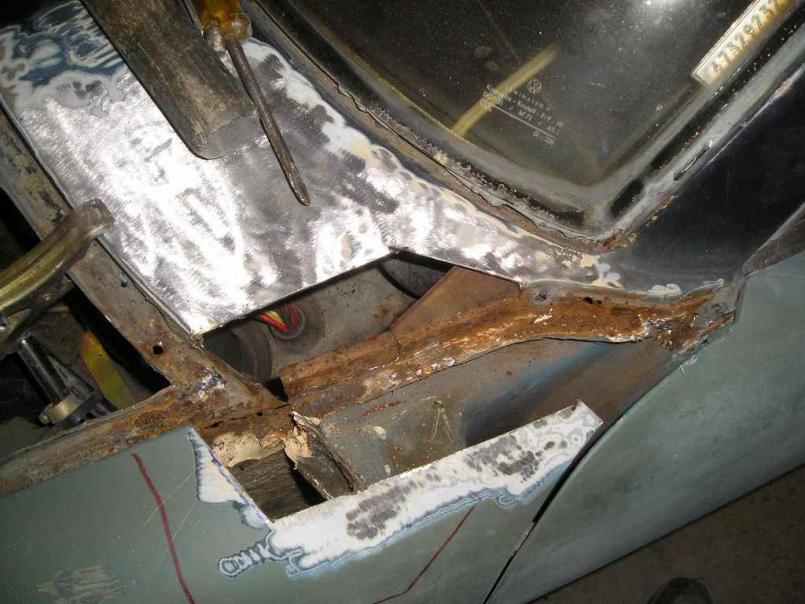

And the finished product 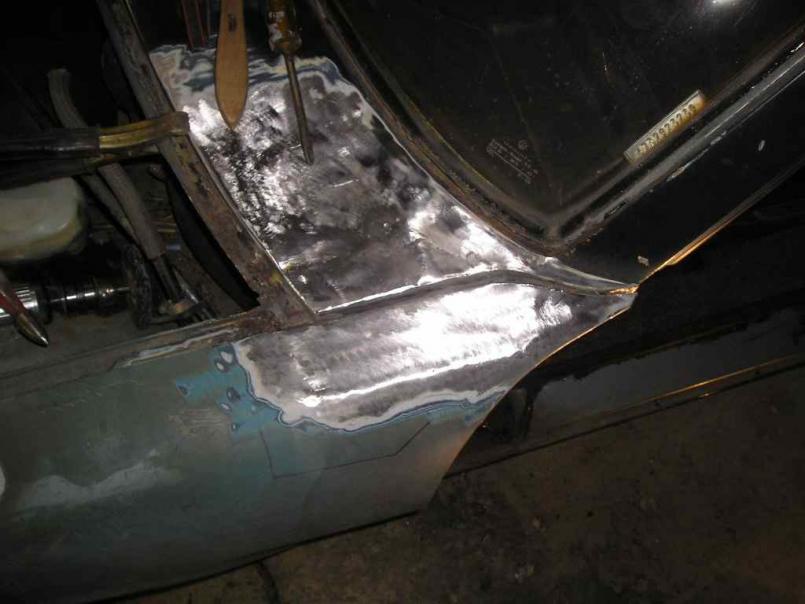
Posted by: dlee6204 Feb 27 2010, 06:19 PM
That's all of the pictures for tonight. There is some rust in the front weatherstrip channel that I started to cut out but haven't finished with that yet.
Tomorrow I will probably start removing the gas tank and all the ventilation ducting to get it ready for paint. The last main thing that needs to be done before i start prepping for paint is to fix some damage in the rear trunk . The fun just doesn't stop!
Posted by: dlee6204 Mar 4 2010, 08:07 PM
More Progress!
So at one time there was rust in the rear trunk and the PO decided to cut out a trunk floor from another car and weld/braze it over the rusted floor. So I cut out the top layer of the floor...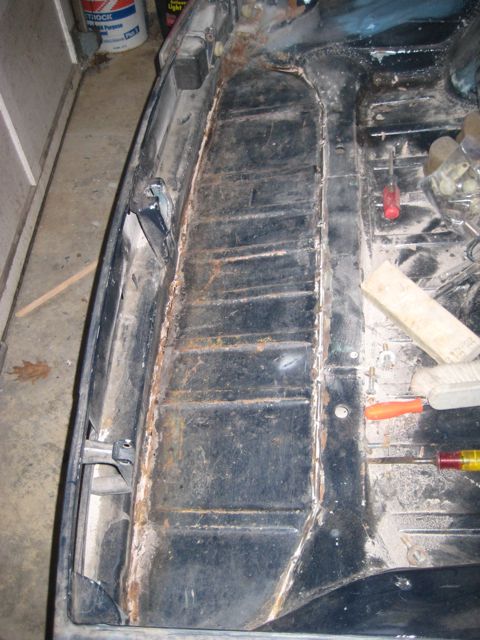
What you're about to see hasn't been seen in many years.....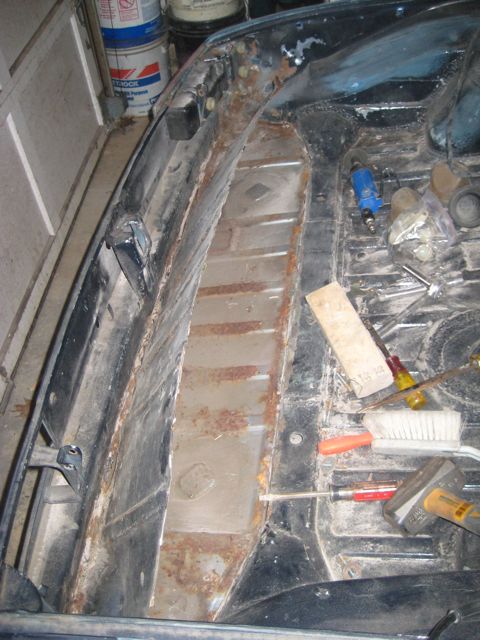
Beautiful!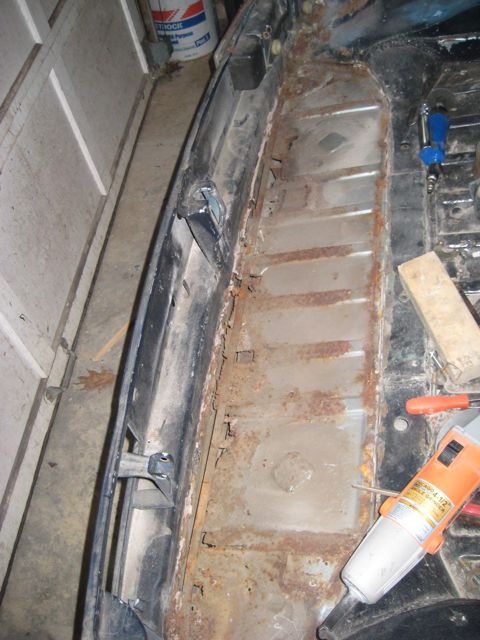

Since the car was hit in the driver's side rear corner at some point, you can still see some of the damage. I will address this with the floor out. 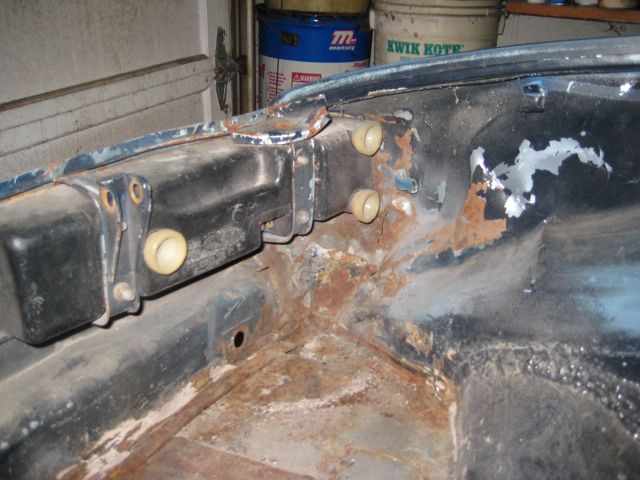
Posted by: dlee6204 Mar 4 2010, 08:12 PM
Most of the trunk floor out. This is as far as I got tonight with the floor.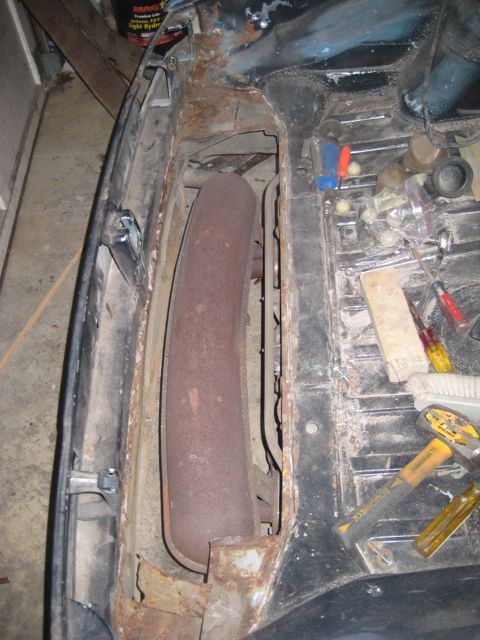
I also removed the windshield... without breaking it! The windshield is not in good shape so I will replace this after paint. 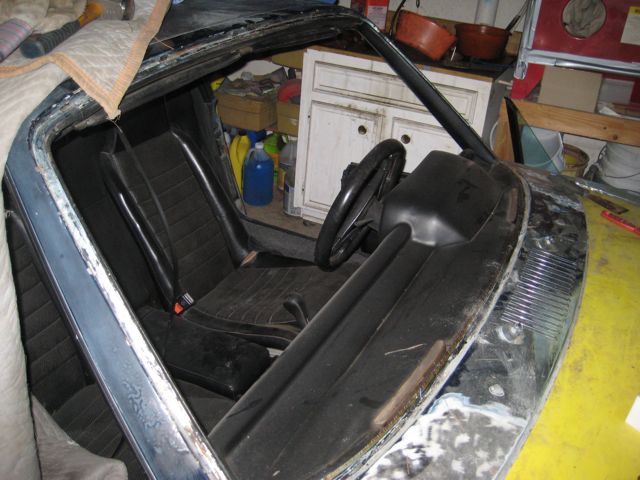
Posted by: dlee6204 Mar 10 2010, 10:04 PM
Lot of progress has been going on
I got most of the rear trunk in. I reused the the floor that was welded in before but I fabricated the corner pieces . I won't finish the driver's side of the trunk until I repair the damage on that side. 
Posted by: dlee6204 Mar 10 2010, 10:21 PM
Today I started to address the damage in the rear. After stripping the rear fender of body filler, the rear half of the fender was obviously beaten back into shape and it was pretty mangled. So I decided to cut out and replace that part of the fender. This also allowed me to beat out some of the damage in the rear trunk.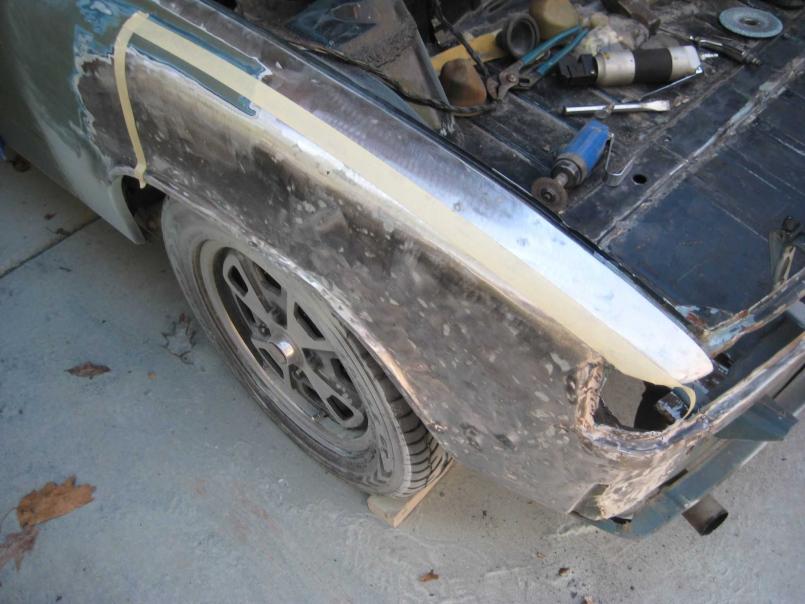
This is as far as I got for tonight. A little more trimming and it should be ready to weld into place. 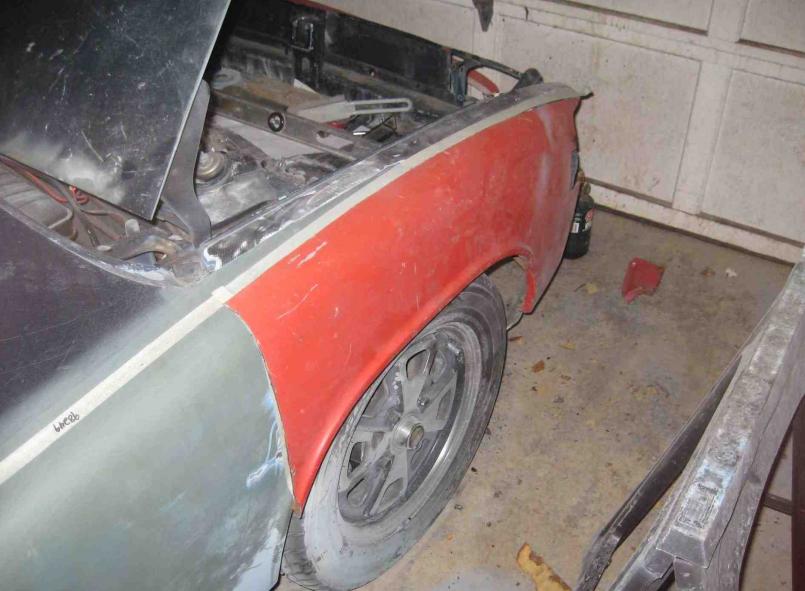
Posted by: dlee6204 Mar 10 2010, 10:26 PM
We're sort of going back in time. Yesterday I started out gutting and stripping the doors.
Posted by: Jon Fernandes Mar 10 2010, 10:29 PM
Doug, great metal work!
Posted by: dlee6204 Mar 10 2010, 10:31 PM
I stripped the door of its layers and layers of paint
And I started working with body filler 
After a sanded first coat...
Posted by: dlee6204 Mar 10 2010, 10:45 PM
And after a few more layers, we are good to go  I started to work on the other door but it needed a little more work so I put it off to the side.
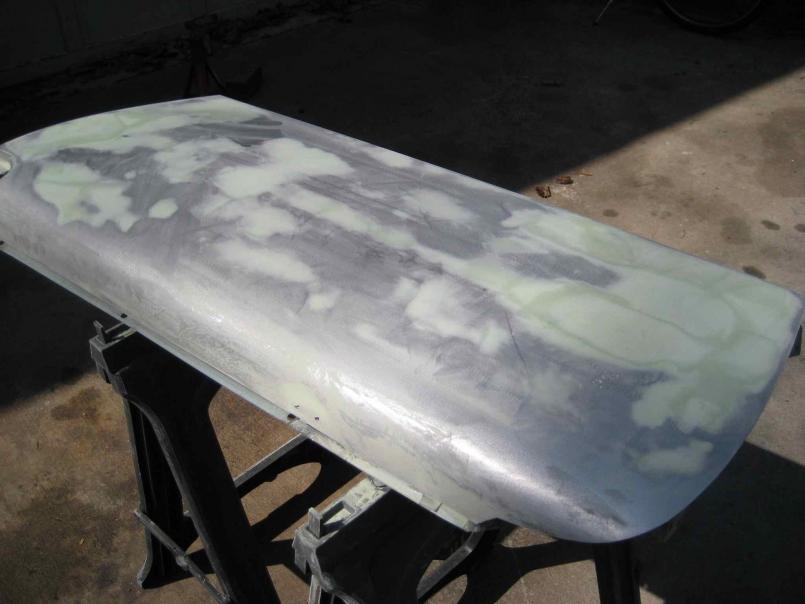
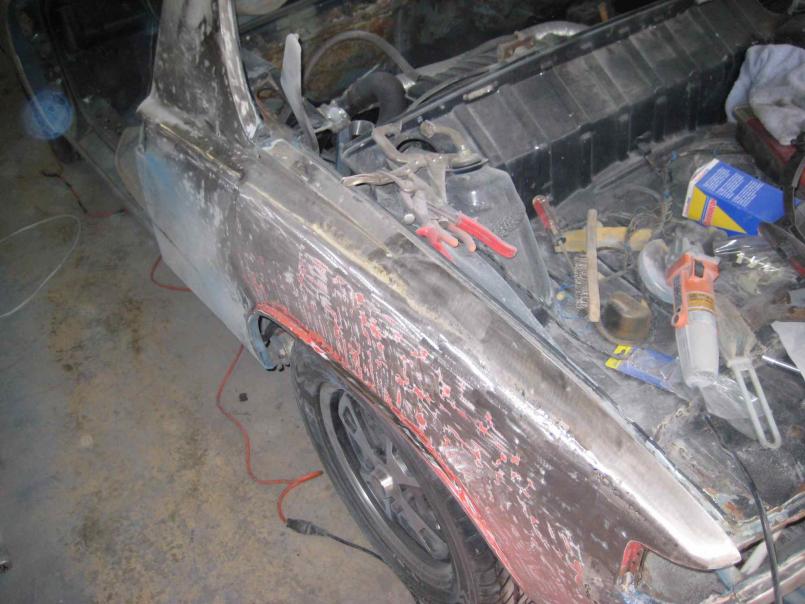
I also stripped the passenger side front fender, welded up the side marker holes and put on some filler. Its looking good! 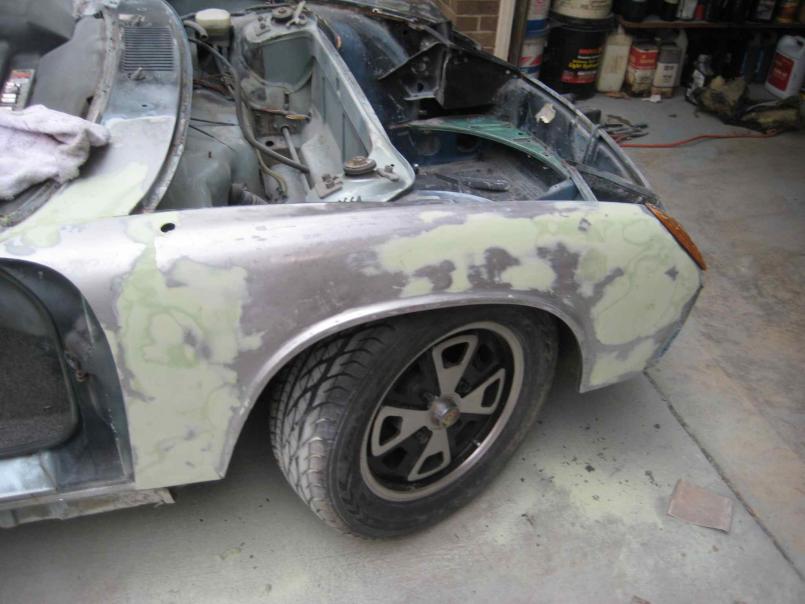
Stripping the other fender.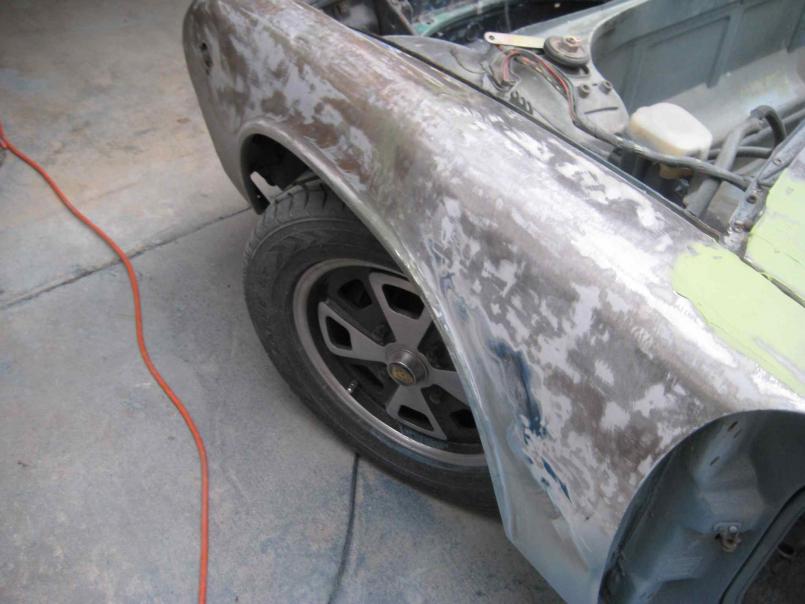
Posted by: dlee6204 Mar 10 2010, 10:51 PM
Stripped passenger side fender with the filled in side marker holes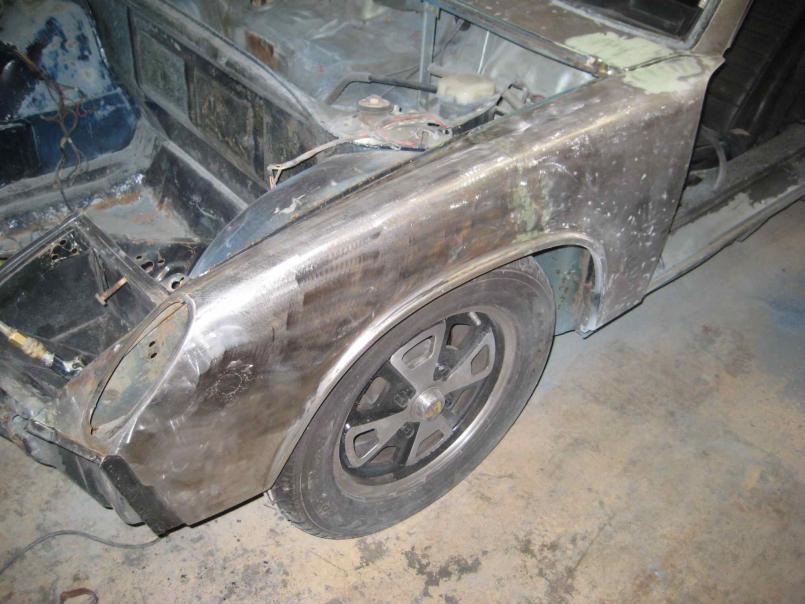
And some filler. I sanded this down too but I forgot to take a picture.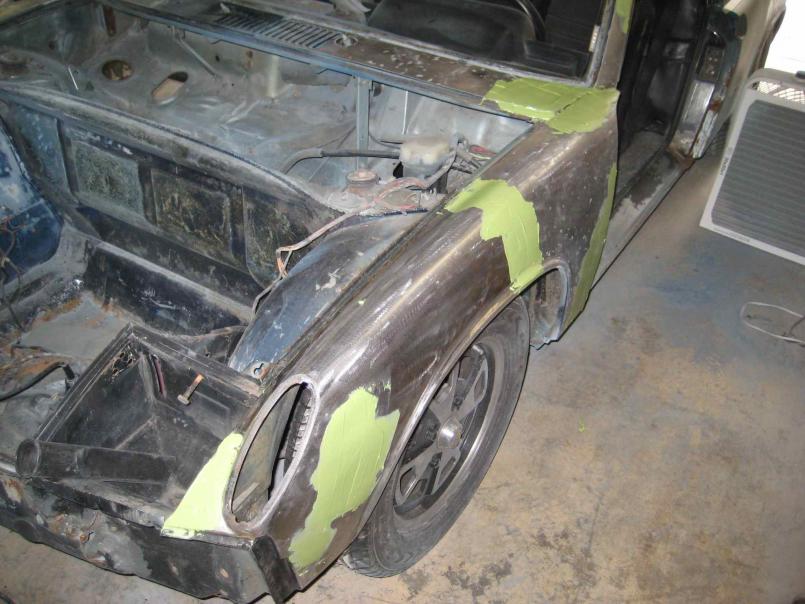
Posted by: dlee6204 Mar 10 2010, 11:05 PM
I also took out the gas tank and all ventilation ducting in the front trunk because I will be painting all those areas. No pictures of this either.
Things left to do:
-Weld up rear driver's side fender
-Weld up rear trunk floor
-Strip rear fenders, trunk lids, and engine lid
-Apply filler to remaining pieces
-Sand trunks
Posted by: watsonrx13 Mar 11 2010, 05:59 AM
Doug great job.
What brand of body filler are you using? What grade sandpaper are you using to remove it? Are you removing it use air-powered tools or by hand?
--Rob
Posted by: dlee6204 Mar 12 2010, 10:09 PM
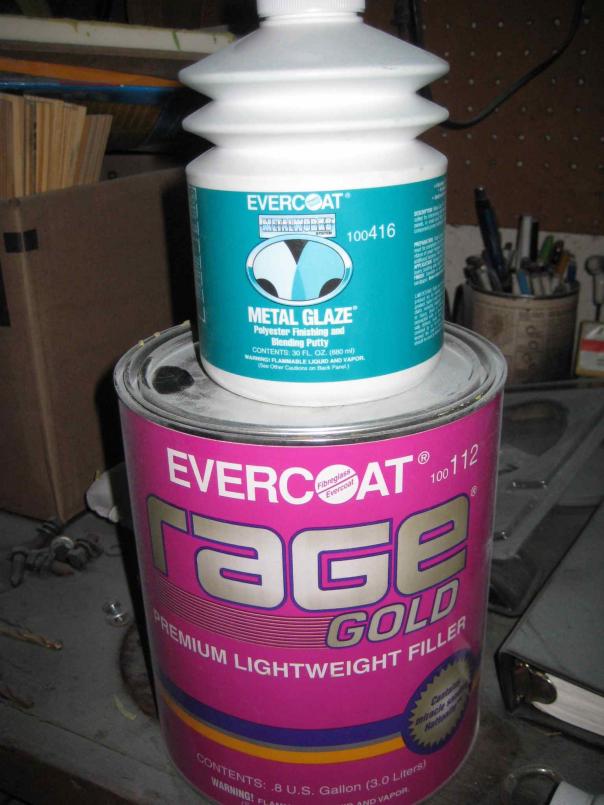
I'm using Evercoat products. I haven't used the Metal Glaze yet but I will after I get done applying the filler. I prepare the metal with 60 grit and then sand down with 60. I will probably step up to 120 before applying the glaze. Most of the sanding so far has been with a RO sander but I have used a long board sanding block in some areas. I should also mention that this is my first time dealing with with any sort of body filler or painting for that matter so I've been learning as I go.
Posted by: dlee6204 Mar 12 2010, 10:31 PM
I finished welding up the rear fender today. I'm so glad I decided to replace this portion. I also stripped the rest of the fender.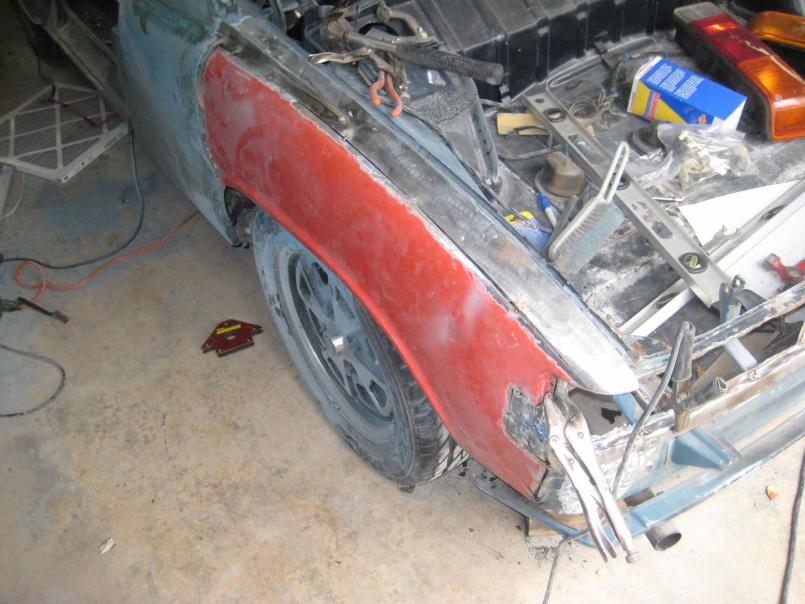
Posted by: dlee6204 Mar 12 2010, 10:36 PM
Gutted front trunk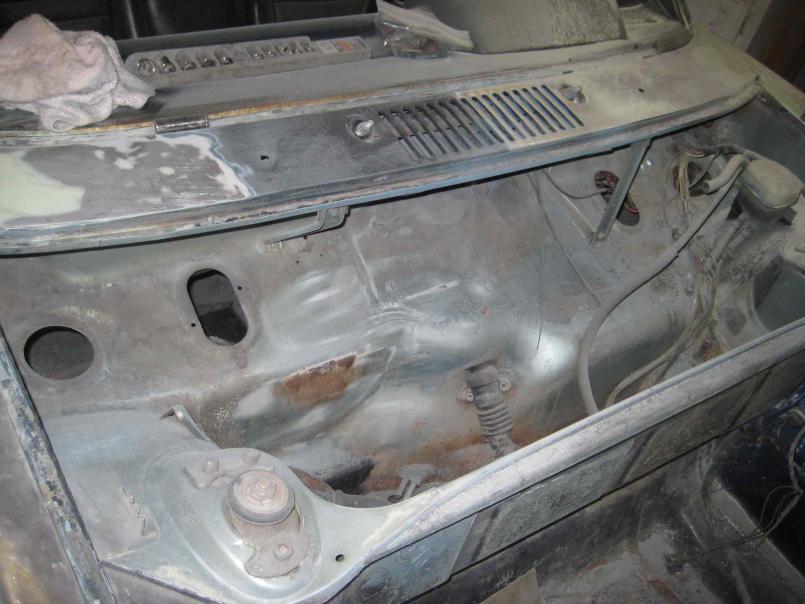
I also stripped the front hood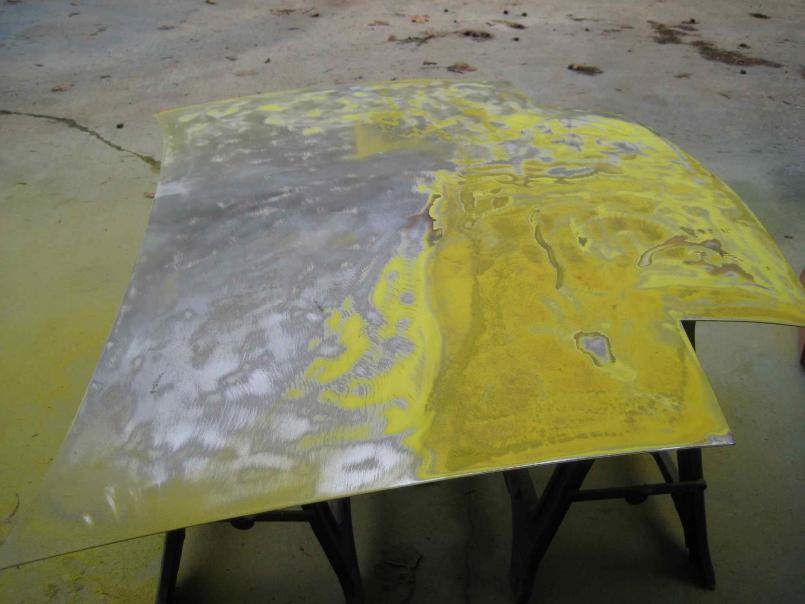
And I mounted the hoot to make sure all gaps are good. 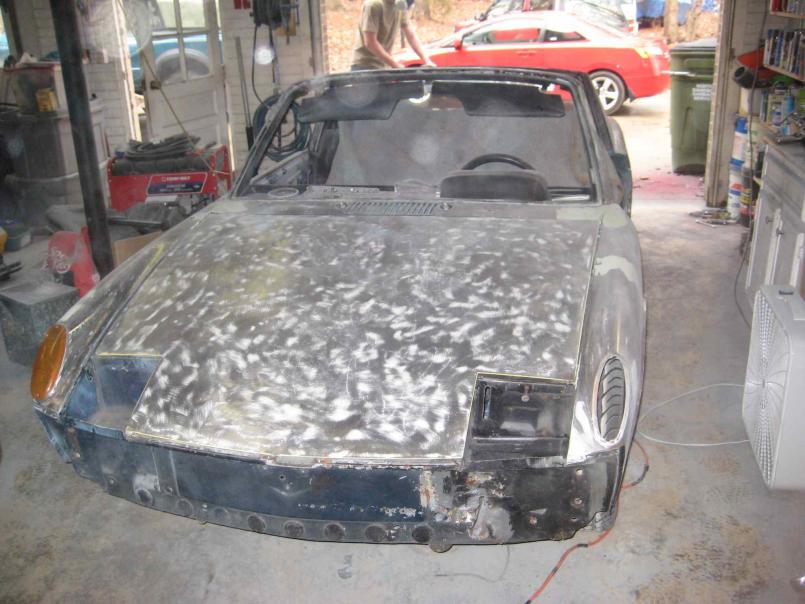
Posted by: dlee6204 Mar 12 2010, 10:39 PM
I somehow roped a friend into coming over and giving me a hand. I let him strip the rear trunk lid. 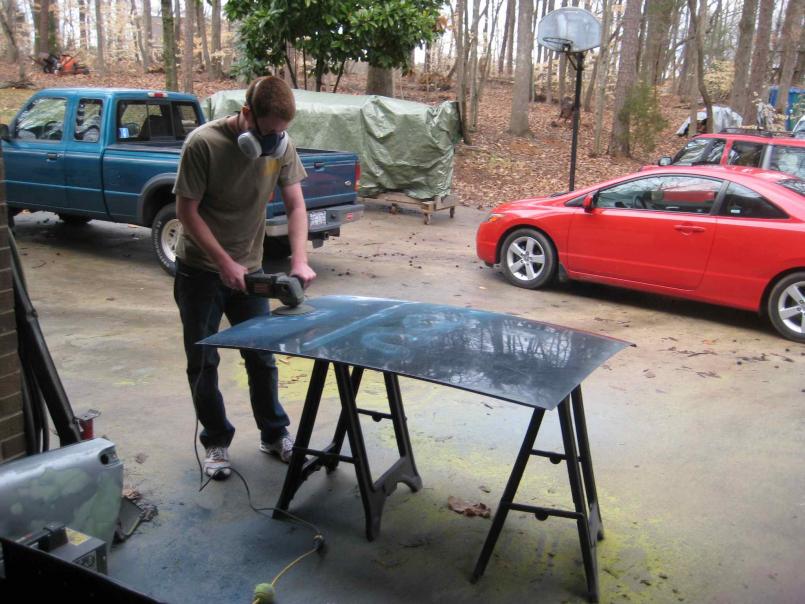
Almost done!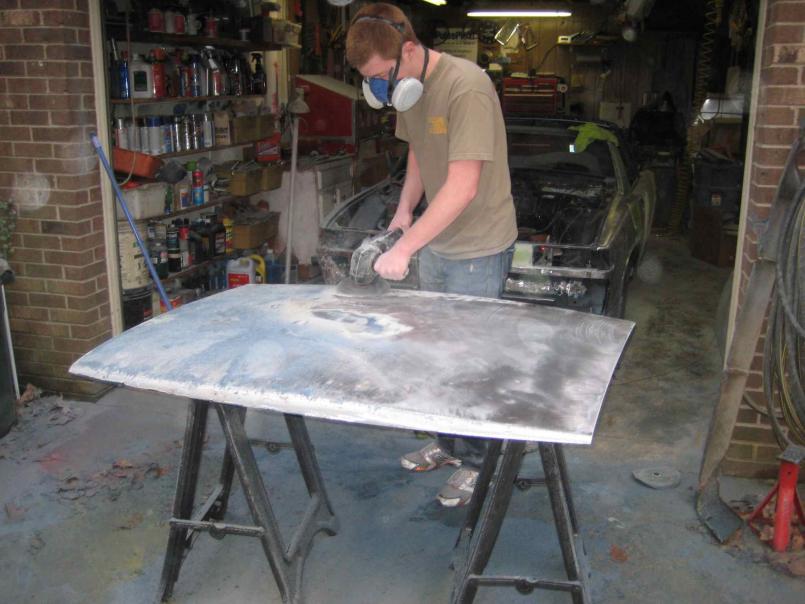
Posted by: dlee6204 Mar 12 2010, 10:43 PM
Stripped the other fender too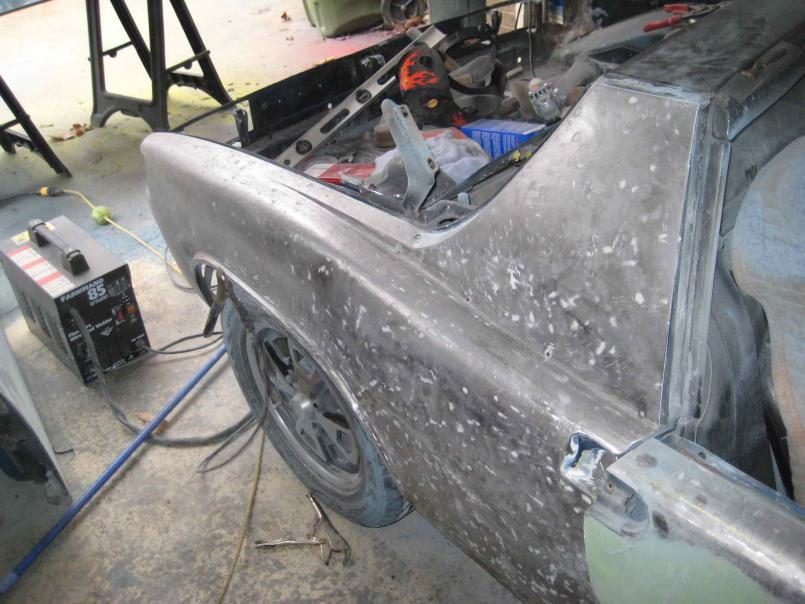
and started the body filler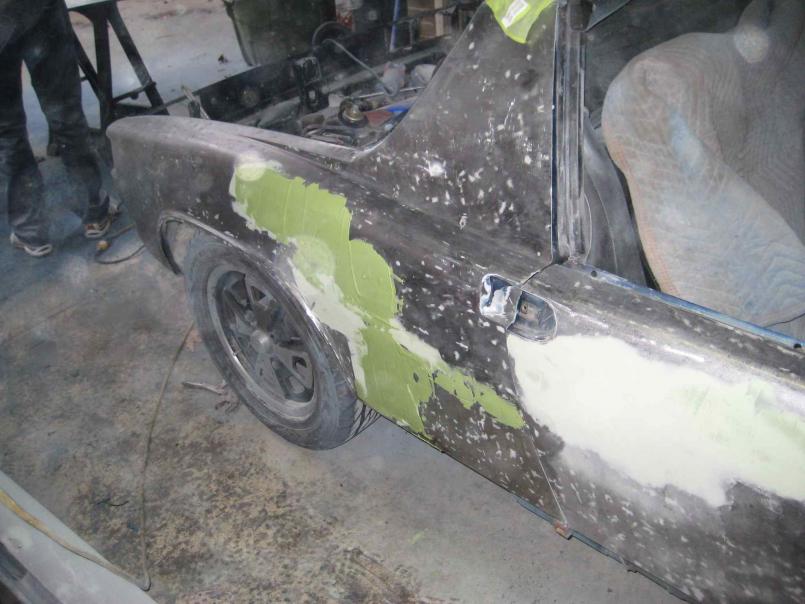
Posted by: dlee6204 Mar 12 2010, 10:48 PM
Only thing left to strip is the engine lid. Pretty much its all body work and sanding from now on.
Posted by: SUNAB914 Mar 19 2010, 06:49 AM
Doug, how humbled I am after going through your thread. I was glad to meet you last night in person, if I had know you were a welding godess I would have plugged in my welder and found something for us to do. Great job, you would be a great instructor!
Posted by: dlee6204 Mar 23 2010, 07:21 PM
Doug, how humbled I am after going through your thread. I was glad to meet you last night in person, if I had know you were a welding godess I would have plugged in my welder and found something for us to do. Great job, you would be a great instructor!
Thanks Chris! If you were going to put me to work, that would have required a longer joy ride around base!
It was nice meeting you too. I made it home safely with the windshield around 2 am. I can't wait to get the car painted and install it.
Posted by: dlee6204 Mar 23 2010, 07:26 PM
Update: I don't have any new pictures of the progress I made but it involves lots and lots of sanding! I have a few small spots of filler left to do and then finish sanding the finishing putty. I'll try to snap some pictures this weekend.
Posted by: dlee6204 Mar 28 2010, 11:13 PM
More progress... I finished welding up the rear trunk and seam sealed it.
Before adding seam sealer (Sorry I don't have an after pic)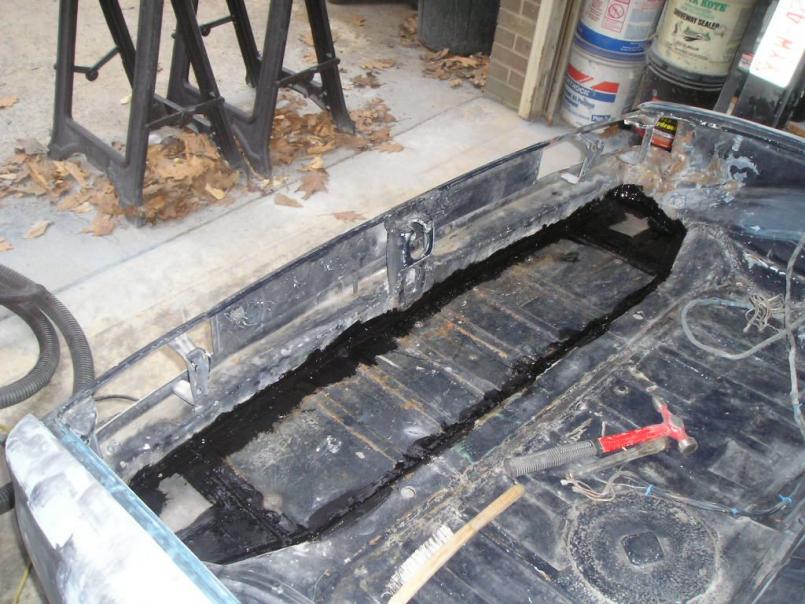
I also sealed up the floor from underneath and welded on the heat shield.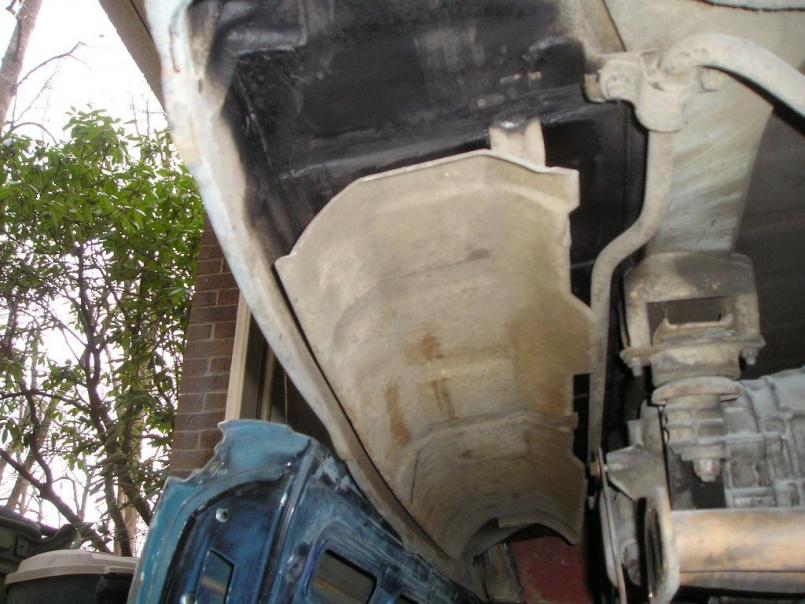
Posted by: dlee6204 Mar 28 2010, 11:21 PM
Here is the driver's side door after some filler and finishing putty. 
I also welded up the portion of the rear fender that I cut out to do rust repair. 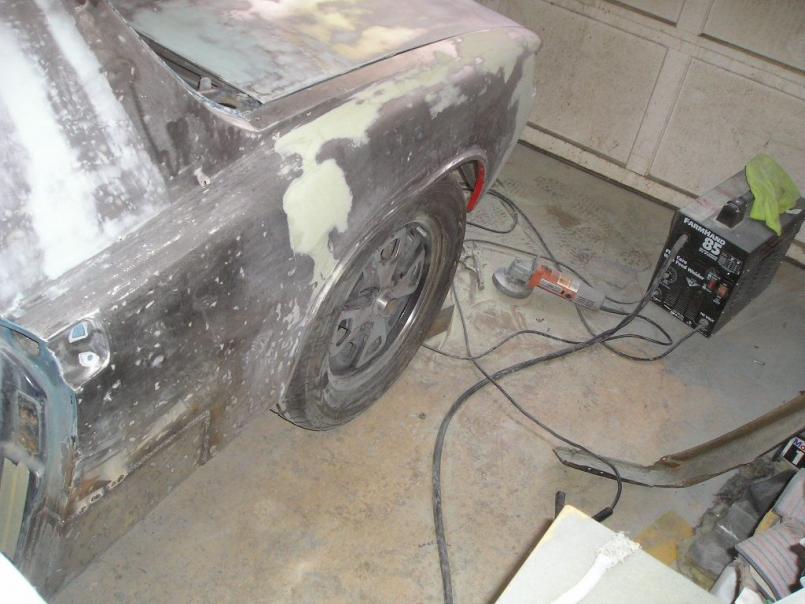
Some more filler...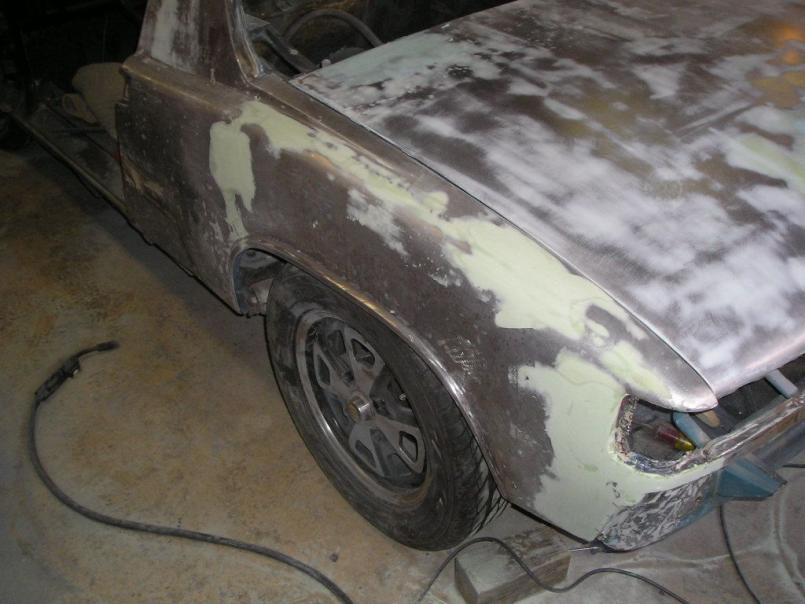
Posted by: dlee6204 Mar 28 2010, 11:41 PM
After I sand this down, this should be the last of the filler. Then I have to cover it in metal glaze. This fender still needs the most work compared to the rest of the car. 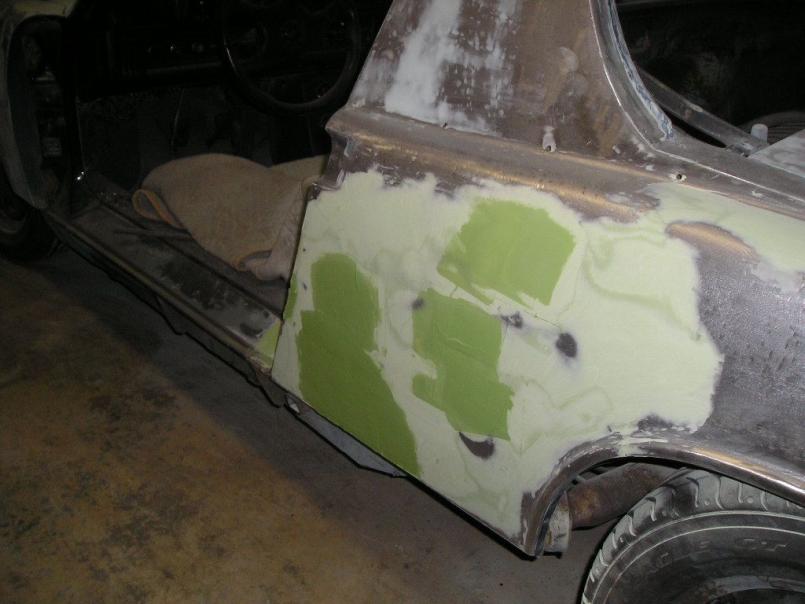
The rest of the car has been covered with glaze and sanded. There are a few spots that need some more attention but nothing major.
Posted by: dlee6204 Mar 28 2010, 11:52 PM
Found some more pictures
I welded a piece to finish off the front weather-strip channel.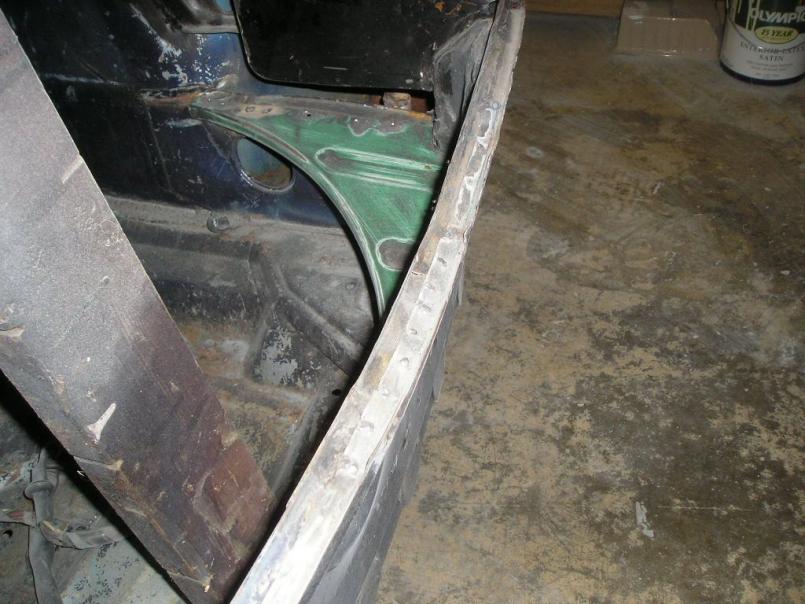
I also bought a like new windshield from Chris (SUNAB914) which will be installed after paint.
Things that need to get done... Trunks need to be sanded, Engine lid needs to be sanded, Headlight covers need to be sanded, Underside of trunk lids need sanding, driver's side rear fender needs some more love, exterior of the car needs final sanding, and door jambs needs a little sanding. So pretty much just some more sanding and I'll be good to go. They are calling for 80's the end of this week so I'm hoping I can get this thing sprayed!
Posted by: FourBlades Mar 29 2010, 08:17 AM
You are kicking some ass on that car!
You will be super stoked once you have the new paint on.
I found it very motivating to finish the car once it was painted.
John
Posted by: Root_Werks Mar 29 2010, 12:29 PM
That is some really good progress. Can't wait to see this one get painted.
Posted by: dlee6204 Apr 3 2010, 08:29 PM
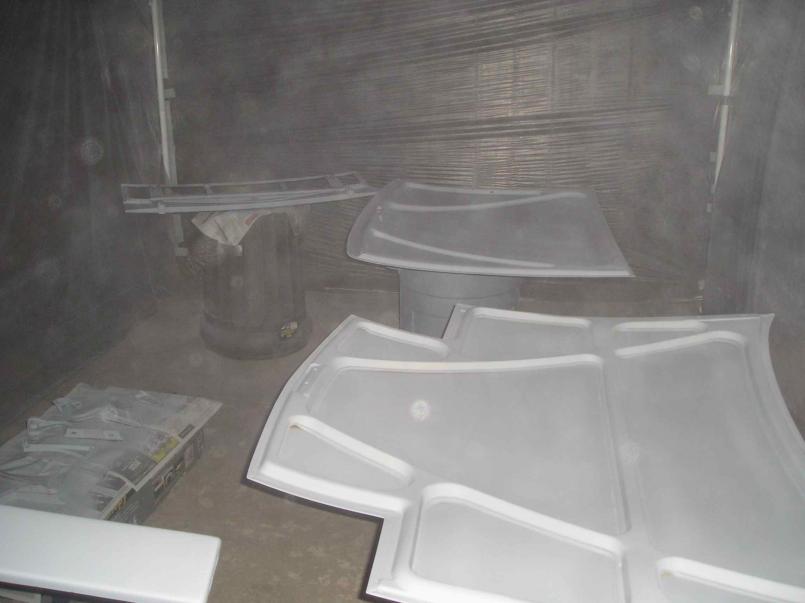
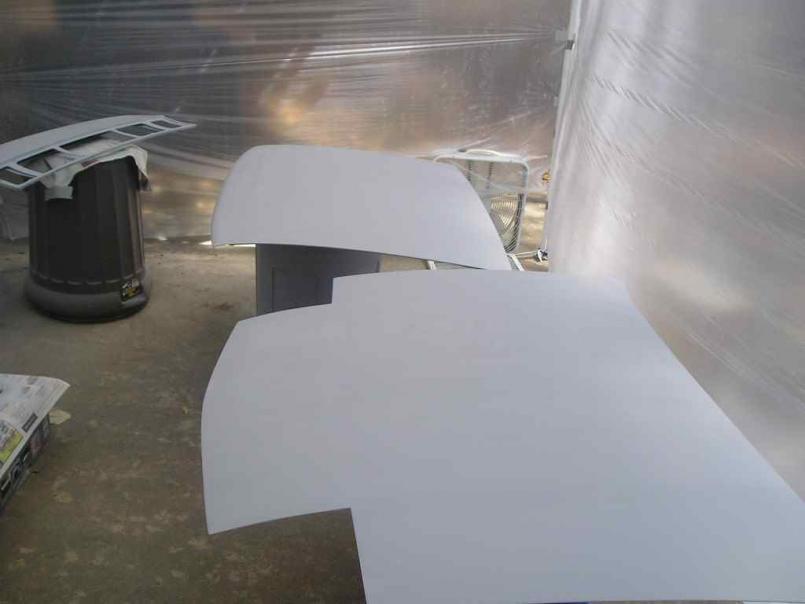
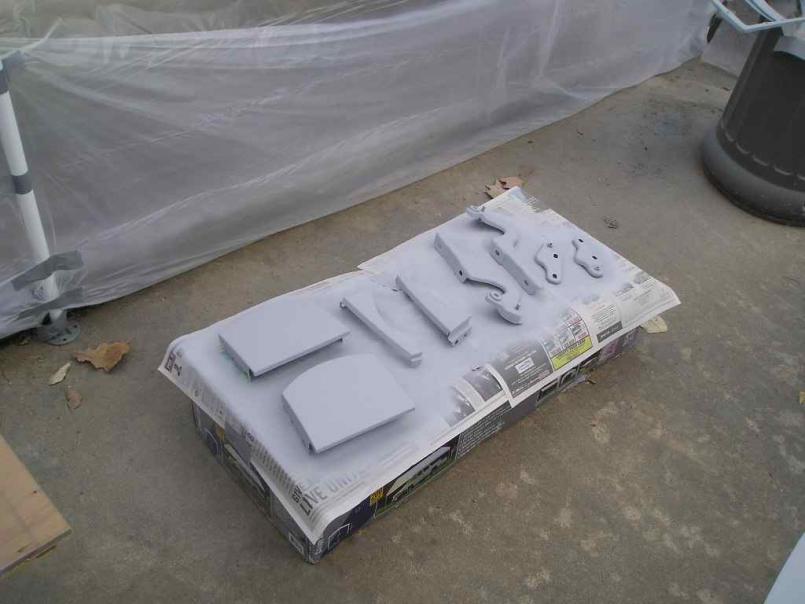
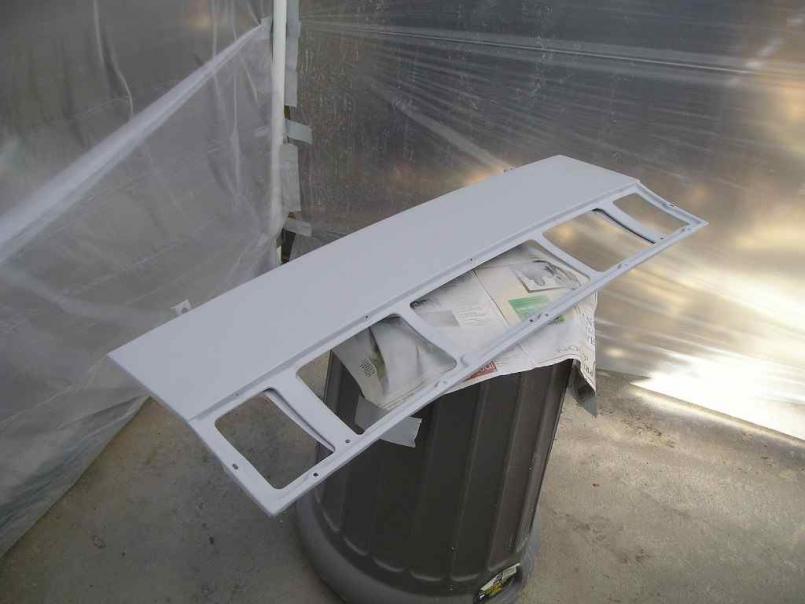
I finished up with sanding the doors, trunk lids, engine lid and the headlight covers. The body of the car still has a few small spots that need some sanding though. I went ahead and set up a paint booth so I could start getting some of this stuff primed. And priming I did!
We bought this carpot/ canopy a long time ago to use for painting so I set it up yesterday and then draped plastic down the sides. It worked really well for my needs. I apologize for the pictures, it was getting dark by the time I stopped. 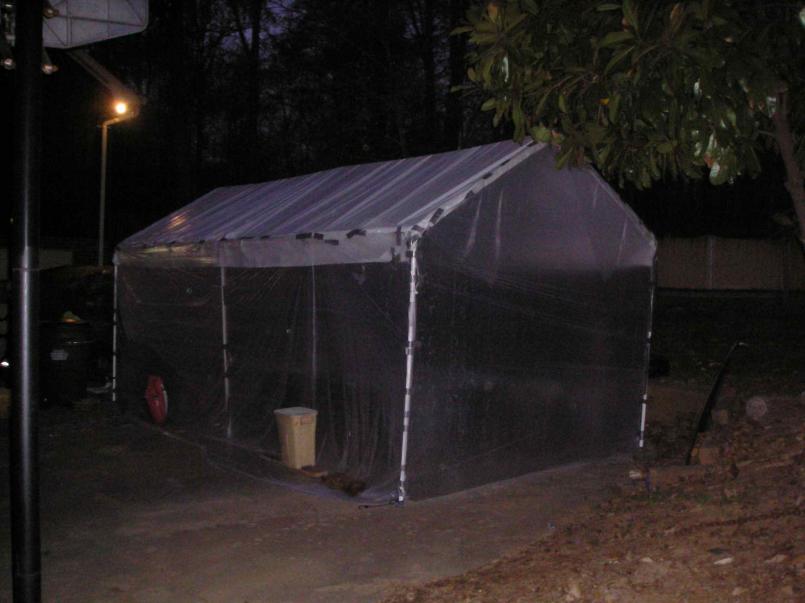
This was my first time painting anything with a gun but I got use to it real fast and was surprised how well it started out. I primed the underside of the lids, the backside of the doors and some smaller pieces. Tomorrow morning I will turn everything over and prime the other sides. I will also get better pictures of everything.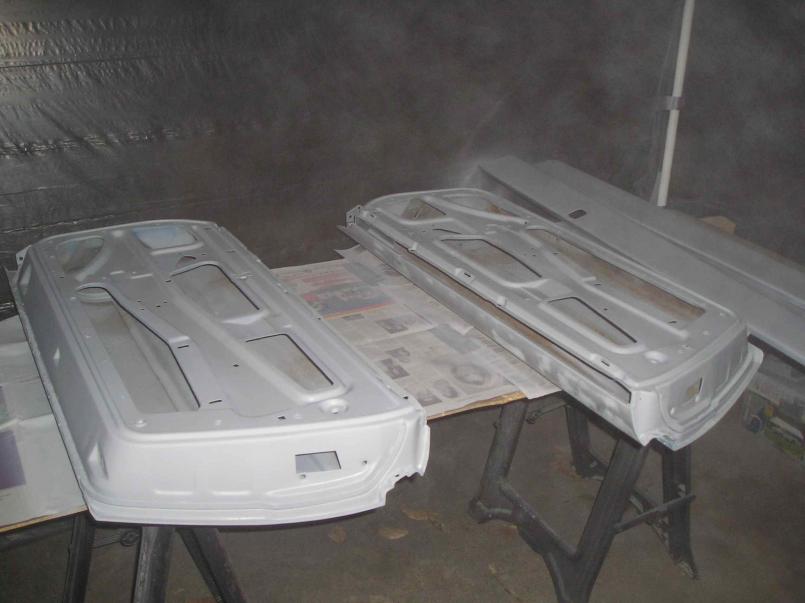
Posted by: dlee6204 Apr 3 2010, 08:33 PM
One more 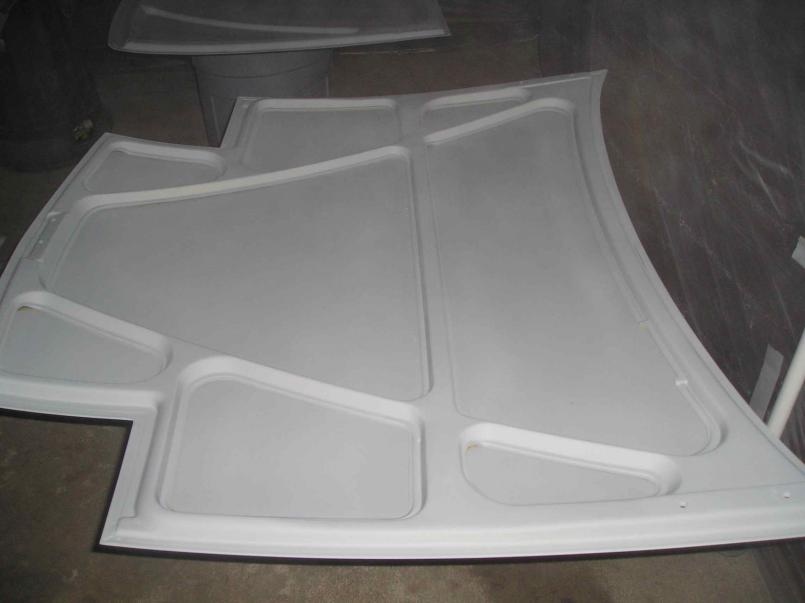
Posted by: al weidman Apr 3 2010, 11:50 PM
There is some serious talent in this "World" and am amazed. There are dreamers, planners and doers. You are definitely a doer and will translate to other aspects or your life. This one looks to be on the short list now. I hope to have my project done before you finish the LE, not to rush you. BTW are you using 20 gauge on your repairs? and welding with flux coated wire besides. Didn't anyone tell you that was hard? Al.
Posted by: dlee6204 Apr 4 2010, 10:24 PM
Ah, you have a quite a while before I even touch the LE.
Most of the repairs were 18-20 gauge depending on the application. My welder is also the biggest piece of crap alive and I hope to never use it again! It probably isn't the best to use, but its what we've always had around.
Posted by: dlee6204 Apr 4 2010, 10:28 PM
Here are some pictures in the daylight. This was only after the first coat of primer.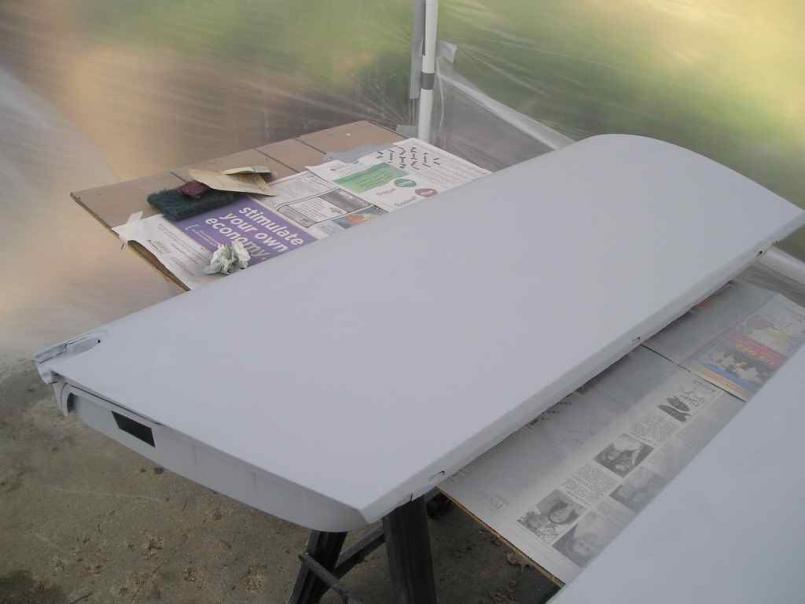
Posted by: rick 918-S Apr 4 2010, 10:32 PM

Posted by: dlee6204 Apr 4 2010, 10:46 PM
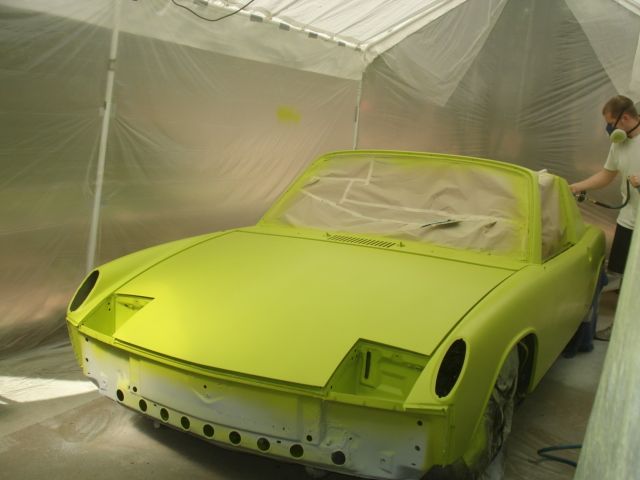
After the first two coats of primer I sanded everything down and applied two more coats. I then moved on to adding some COLOR.
The original color of this car was marathon blue metallic which was partly stripped and painted over several times. I had the option to return it to the original color or another color of my choice. I decided against painting a metallic since I am a complete newb and decided on my favorite 914 color... mmm Ravenna Green. 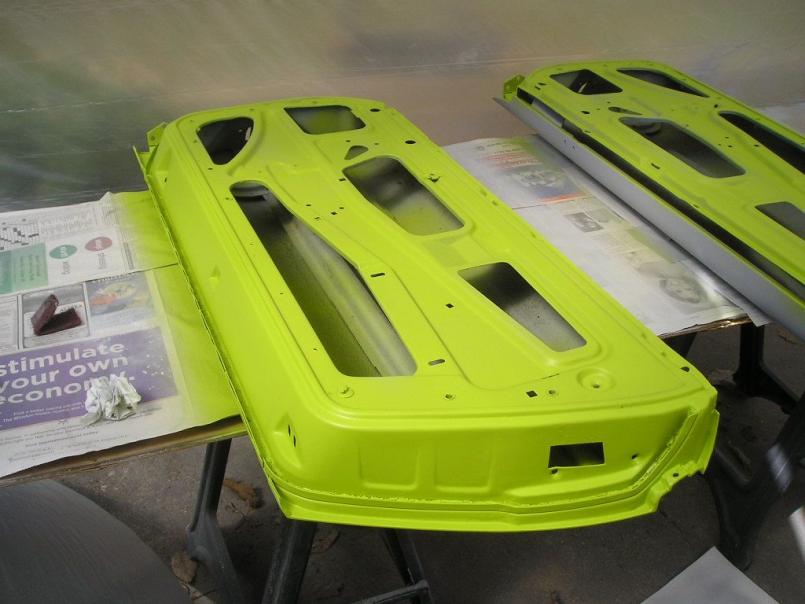
Posted by: dlee6204 Apr 4 2010, 10:49 PM
Two more...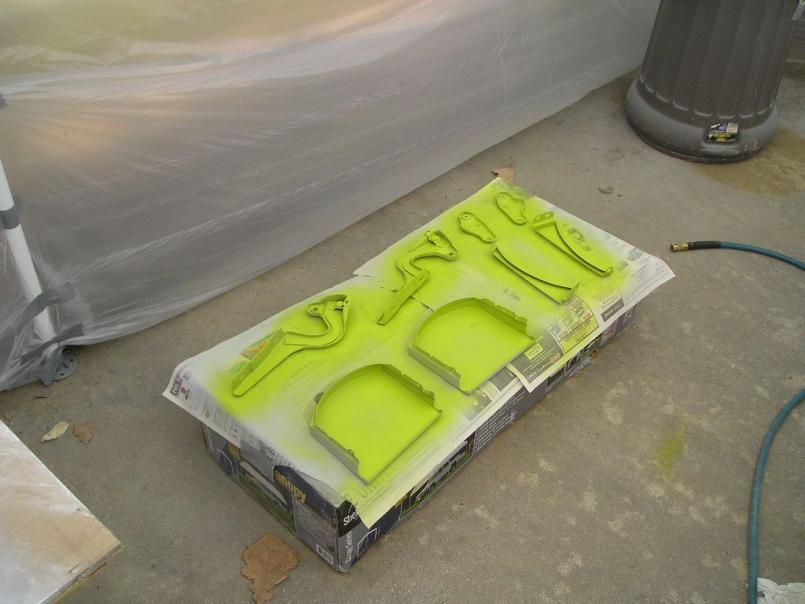
Next weekend I will flip everything over and finish painting the detached pieces. I will hopefully get to paint the car too!
Posted by: Phoenix914 Apr 5 2010, 07:45 AM
Although I am disappointed that you aren't sticking with the original Marathon Blue Metallic (like mine!), that Ravenna Green is a striking color. You are doing an awesome job!
Posted by: Root_Werks Apr 5 2010, 09:02 AM
Well, at least you're doing the color change right. Ravena green is a sweet color and looks like you're off to a great start. Can't wait to see more pics as more gets painted!
Posted by: hi4head Apr 5 2010, 07:31 PM
Way to go Doug!
I came by to check on your status (and to get mine back out on the road to recheck the oil leaks).
No one was home, some parts were in the temp booth, but nothing had been sprayed yet. Glad to see you got to spray some paint.
I can't wait to see your progress when Kris and I get back from vacation.
Chris
Posted by: iamchappy Apr 5 2010, 07:52 PM
Ravenna, Major Stokage.......
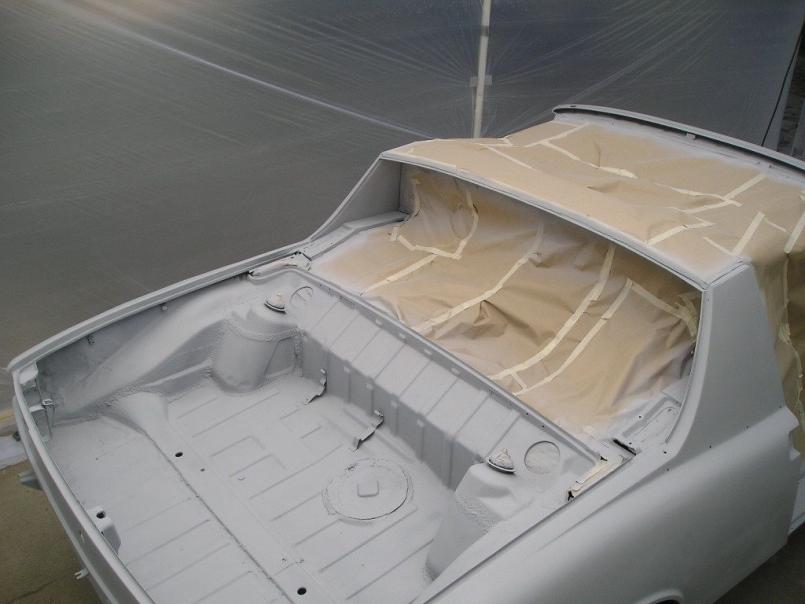
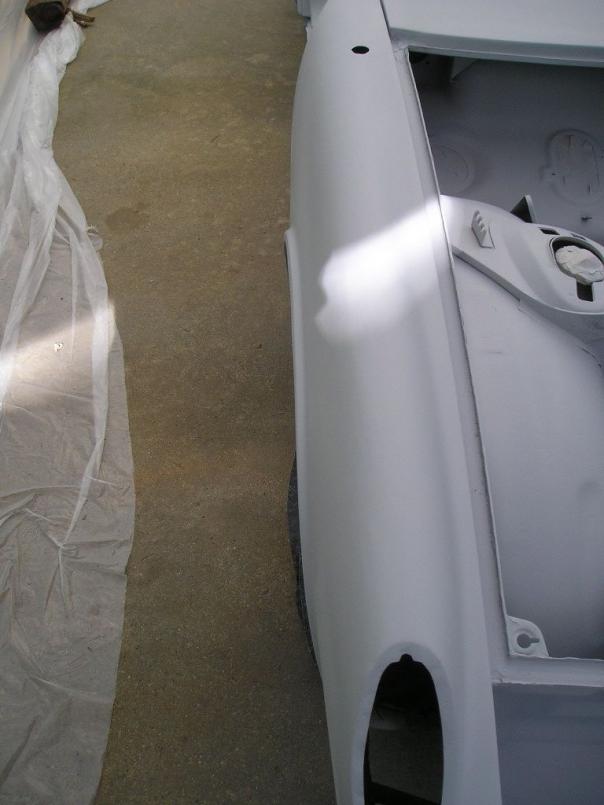
Posted by: dlee6204 Apr 10 2010, 03:12 PM
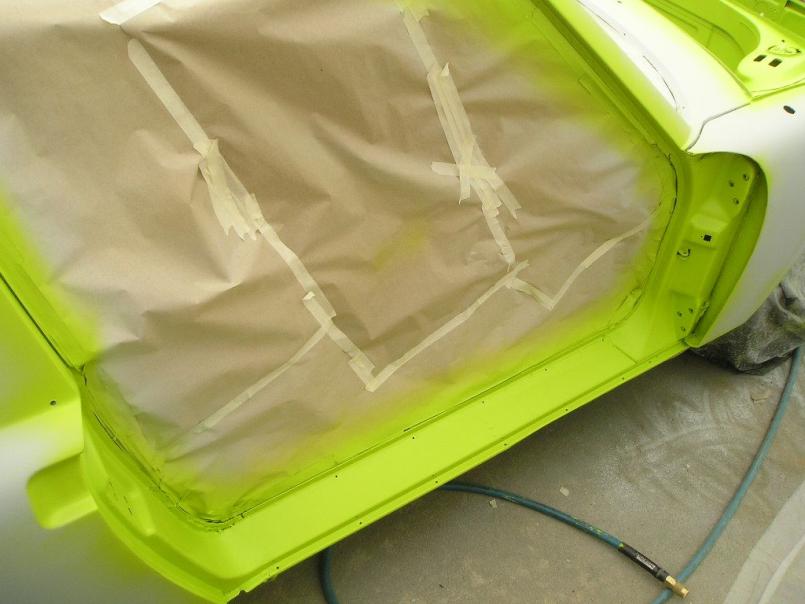
Yesterday it was too cold and rainy here to paint so I spent the day getting the body ready for primer. This morning I masked off the car and finished little things up, then this afternoon I shot the first few coats of primer on the body. Now I can see there are a lot of little things that need sanding and such. 
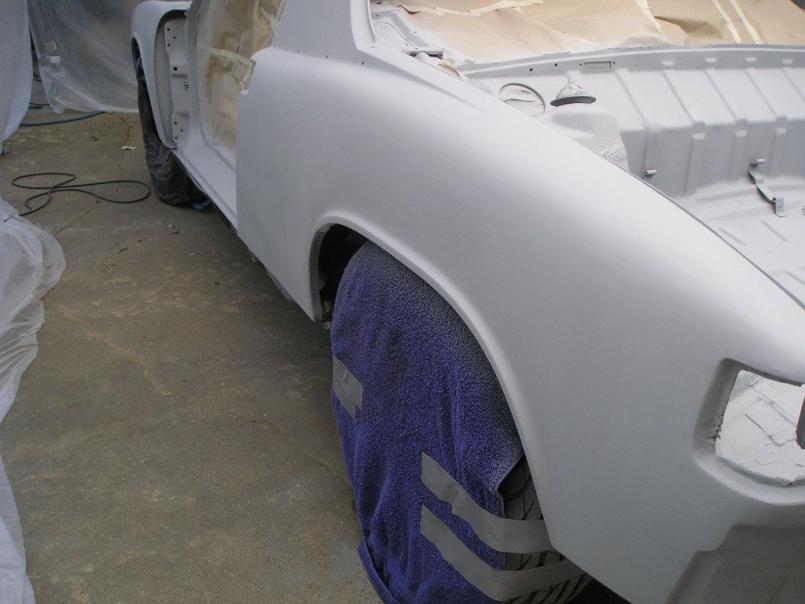
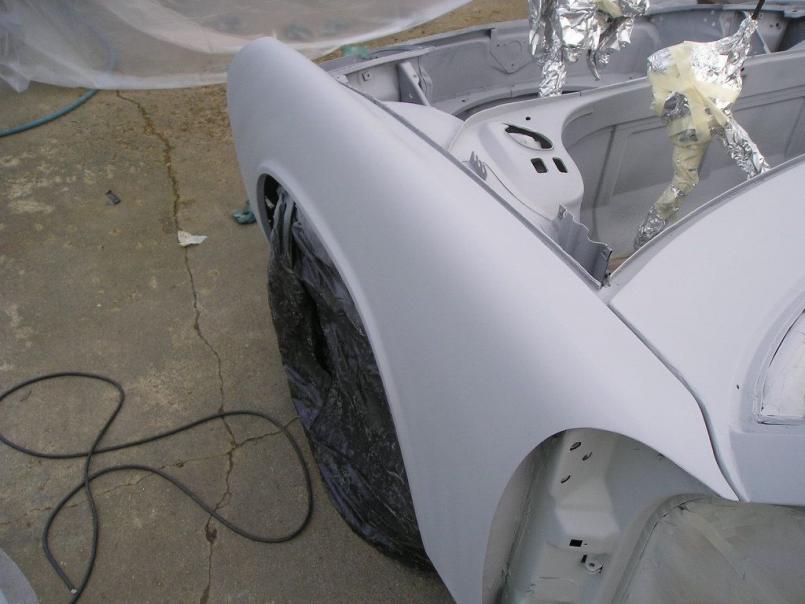
Posted by: dlee6204 Apr 10 2010, 03:14 PM
A few more...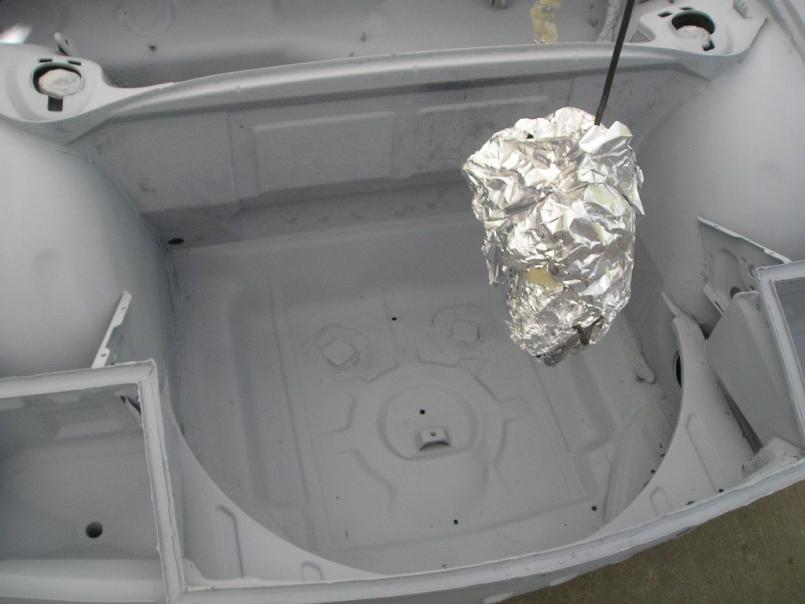
Posted by: dlee6204 Apr 11 2010, 12:52 PM

Posted by: dlee6204 Apr 12 2010, 04:36 PM
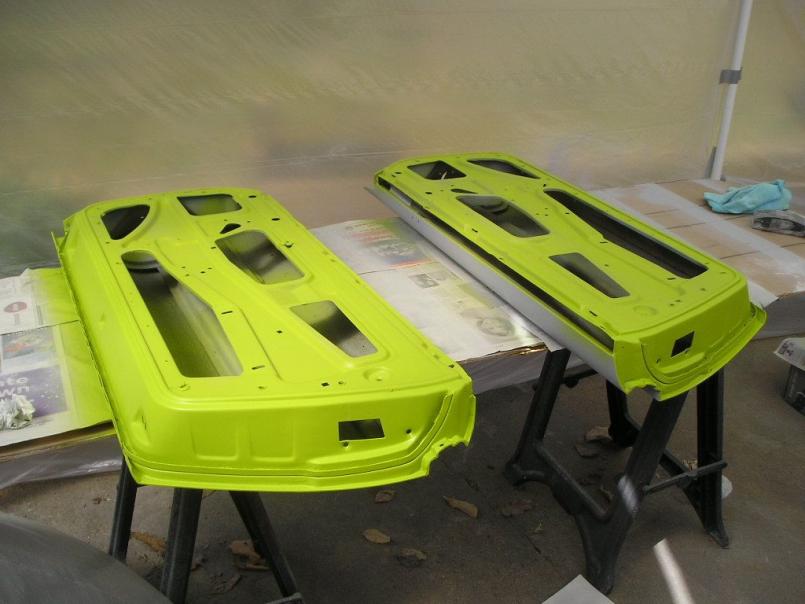
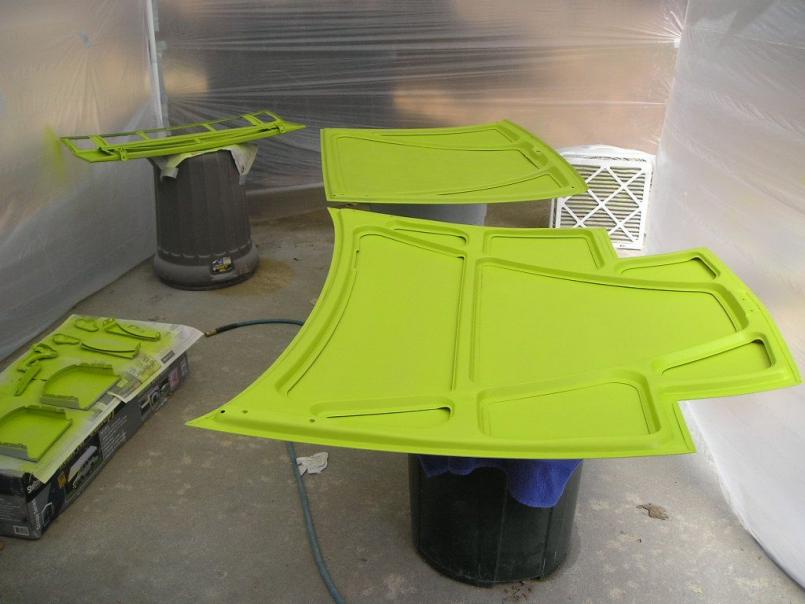
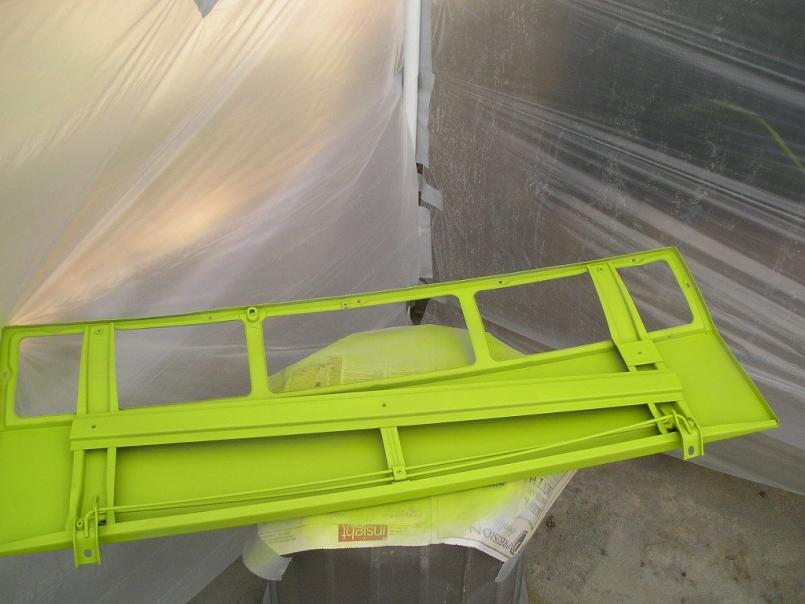
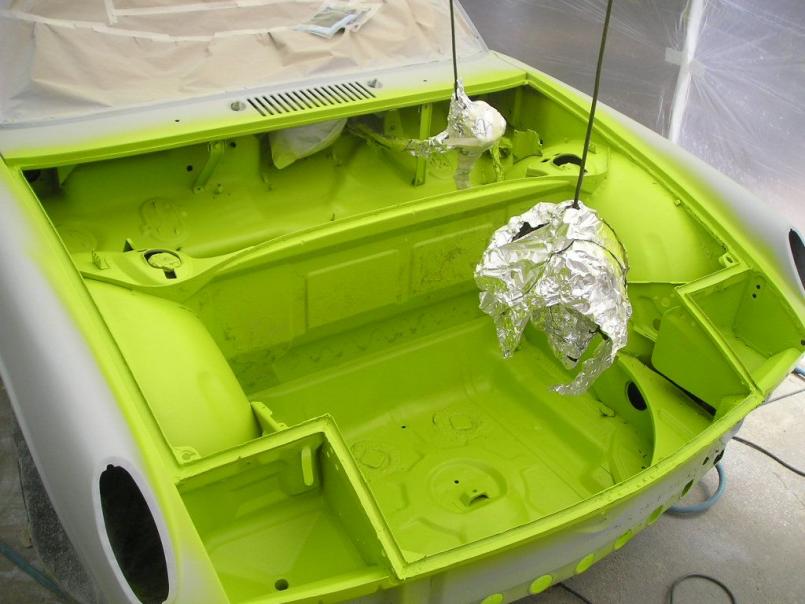
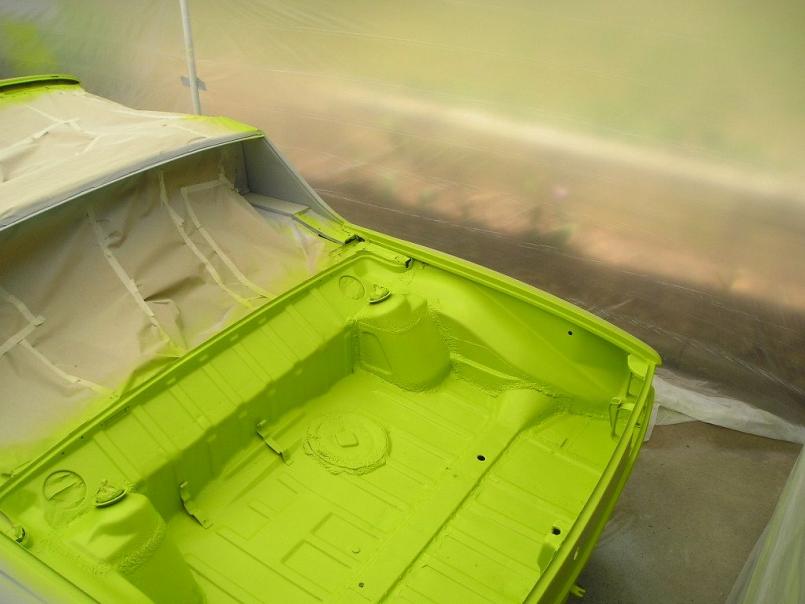
Okay there's some good new and bad news. The good news is that the car is painted. I laid down the color then clear.
some color...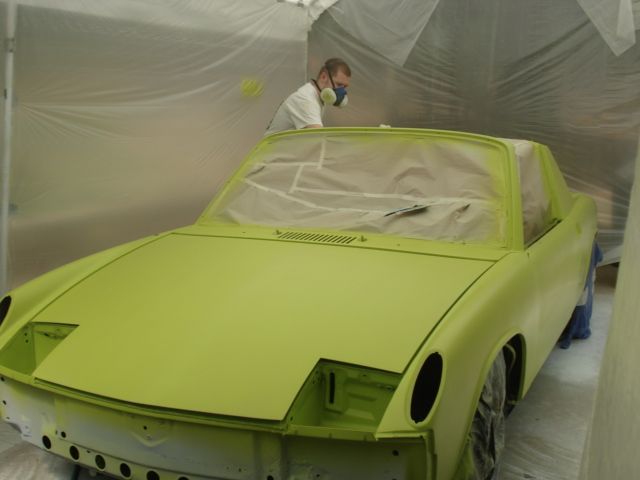
Posted by: dlee6204 Apr 12 2010, 04:42 PM
The bad news is that I really sucked it up when applying the clear and I laid it on in too thin of coats and also my gun adjustments were off. So now I have to sand it down again then apply more clear.
Here are some pictures after the clear was applied. It looks alright in the pictures but far from it in person. 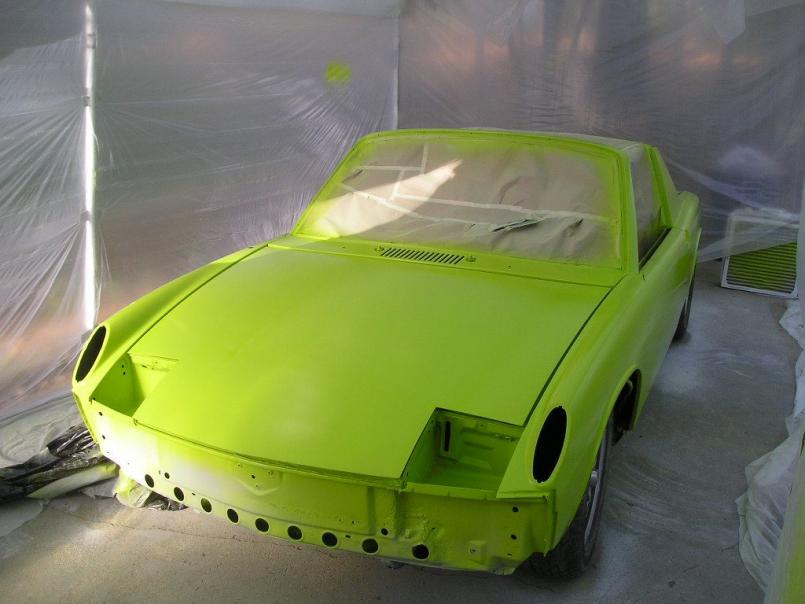
Yikes

Posted by: dlee6204 Apr 12 2010, 04:44 PM
Some more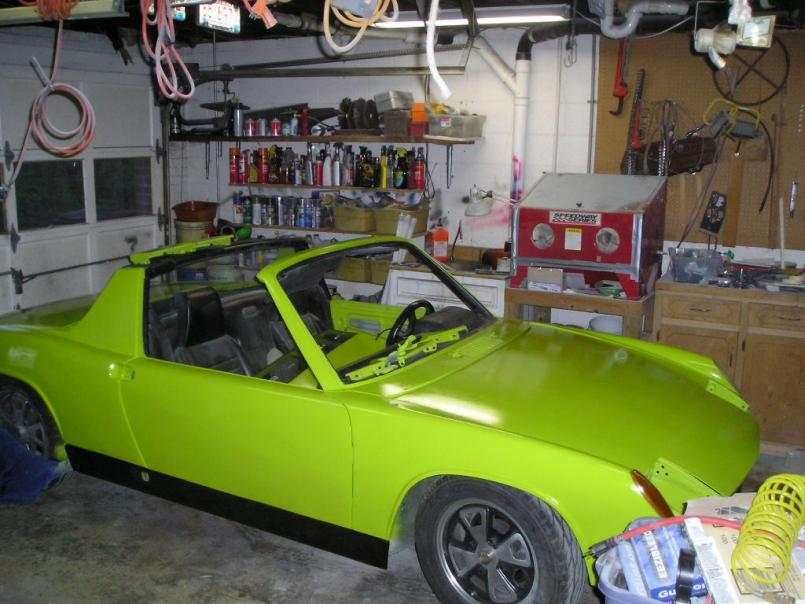

Attached thumbnail(s)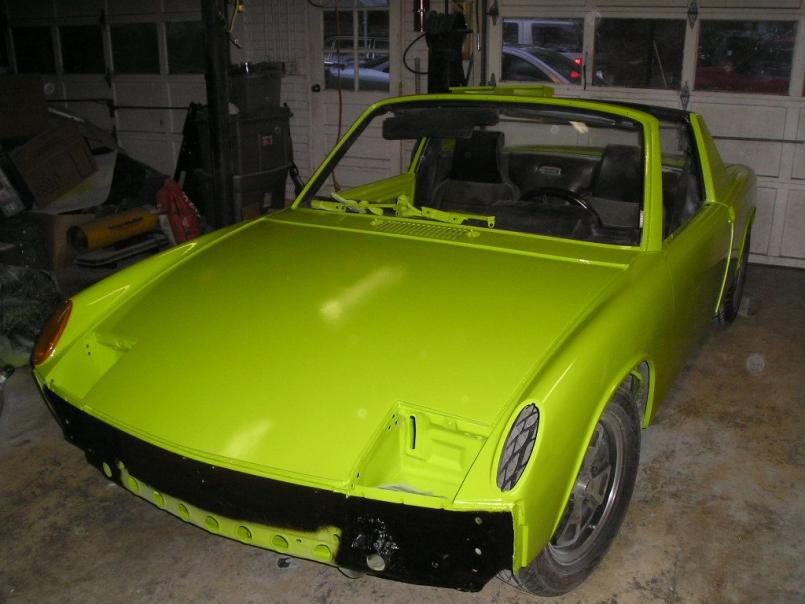
Posted by: arkitect Apr 12 2010, 10:49 PM
Doug,
Very cool build, I've got about half way thru, can't wait to read the rest. When replacing the longs, did you use a backing plate or butt welded?
Good idea of getting it running and all the bugs worked out before putting on paint. One of these days maybe mine will be on the road.
Dave
Posted by: dlee6204 Apr 13 2010, 07:03 AM
Thanks Dave. I butt welded the longs which probably is not the strongest joint but I plan to add an Engman stiffening kit the next time I have the interior out.
Posted by: Root_Werks Apr 13 2010, 10:41 AM
Very cool, looks like it's moving along nicely!
Posted by: gothspeed Apr 17 2010, 03:48 PM
Very inspiring!!!! You are doing a fantastic job!!!
Posted by: Limesoda Apr 17 2010, 06:46 PM
Absolutely amazing. I am in awe. I just got a Ravenna Green 73 2.0. I will definitely use the info in your thread. Thank you so much for documenting this transformation. You should be very proud of yourself.
Chris
Posted by: dlee6204 Apr 18 2010, 07:32 PM
Big Update! After messing up applying the clear the first time, I had to sand everything back down and apply more clear. So I spent Friday wet sanding the car down then Saturday morning I applied more. Late saturday night I began wet sanding again to get everything smooth and then I buffed everything. I finished that up today. I then started to reassemble everything. Ventilation under the cowel, rubber seals, windshield, taillights, some of the headlight stuff all got added to the car. The gas tank will be going in next and that's all thats needed to fire this puppy up. Next weekend will be the big weekend where I take the car out for a drive (after I finish reassembling it of course)
Posted by: AndrewP Apr 25 2010, 10:10 AM
Did you install the windshield yourself?
Andrew
Posted by: corsepervita Apr 25 2010, 10:41 AM
Diggin' the green. Very nice.
Posted by: dlee6204 Apr 25 2010, 02:25 PM
Yes but my father gave me a hand putting in place. I cleaned the channel real well and then laid down a 1/4" bead of butyl tape. I then gently laid the windshield in place and i used a piece of windshield moulding to make sure all the windshield moulding clips had enough room to move and then I pressed the glass firmly in place. And of course installed the trim.
Posted by: dlee6204 Apr 25 2010, 02:36 PM
I've been meaning to post an update but I have been too busy driving the car! I finished putting the car back together on Friday (muffler, rocker panels, door innards, fuel tank, headlight hardware, and cleaning painting and installing a new front bumper.) I also made sure to switch all the trim back to anodized since the trim was black before. I had a few sets lying around so all went together nicely. I still have some small things to do like do a final fitment of lids, install sail vinyl, door pockets etc. Once the car was put back together, it started right up and ran beautifully. I'm so glad I can drive this car again. It is a huge weight off my shoulders now that it is drivable. Anyways I will post some pictures now. 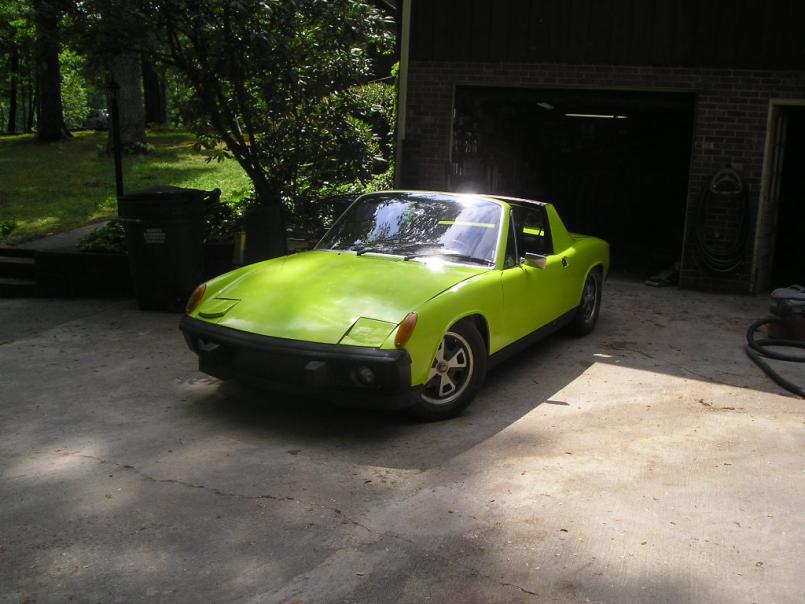
I'll get more pictures of the car up later.
Posted by: oz371 Apr 25 2010, 02:43 PM
I've been meaning to post an update but I have been too busy driving the car!
I finished putting the car back together on Friday (muffler, rocker panels, door innards, fuel tank, headlight hardware, and cleaning painting and installing a new front bumper.) I also made sure to switch all the trim back to anodized since the trim was black before. I had a few sets lying around so all went together nicely. I still have some small things to do like do a final fitment of lids, install sail vinyl, door pockets etc. Once the car was put back together, it started right up and ran beautifully. I'm so glad I can drive this car again. It is a huge weight off my shoulders now that it is drivable. Anyways I will post some pictures now. I'll get more pictures of the car up later.
Love the color. Way to go!!
Posted by: AndrewP Apr 25 2010, 03:45 PM
Definitely inspiring....
Andrew
Posted by: FourBlades Apr 25 2010, 05:00 PM
That is frickin beautiful!!!
I really like the color.
Took me forever to go from paint to drivable, that was quick work.
John
Posted by: dlee6204 Apr 27 2010, 08:26 PM
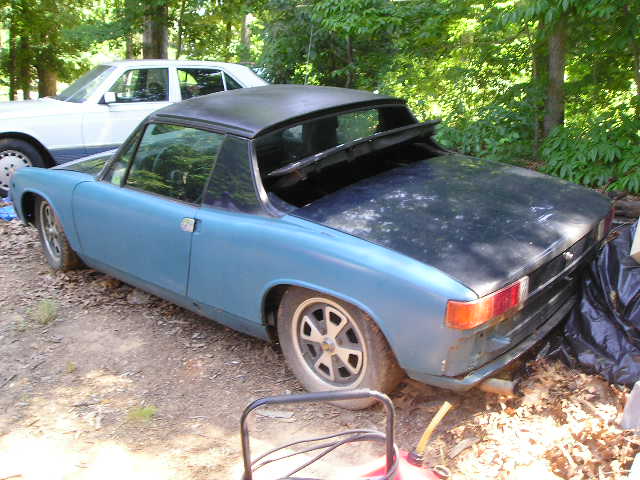
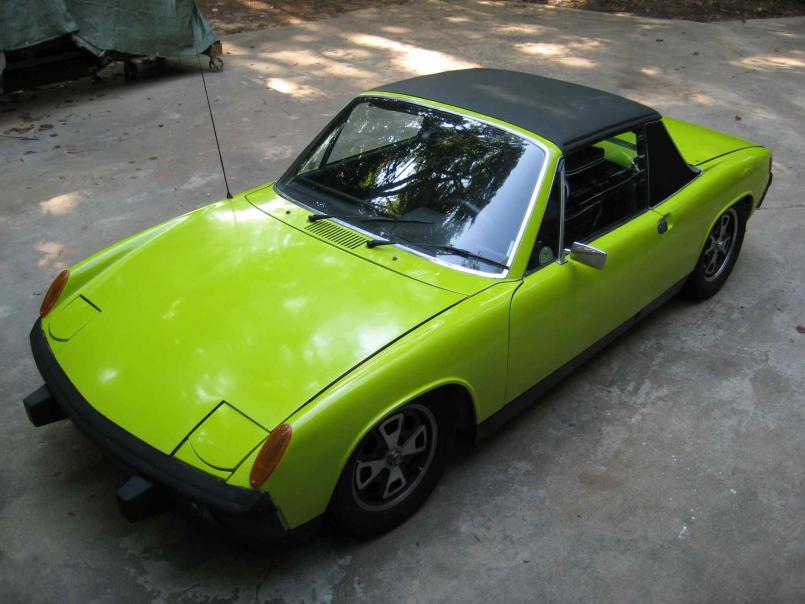
I just realized that its been exactly a year since I really started working on the car. Not bad considering I had a full time job during the summer, and am a full time student the rest of the time plus I was even able to drive it for a few months. I thought I would re-show a few old shots for a better comparison.
Before the work... 
Posted by: dlee6204 Apr 27 2010, 08:32 PM
After all the work...
Posted by: dlee6204 Apr 27 2010, 08:39 PM
I even toyed with the idea of adding a luggage rack but have pretty much decided i like it better without it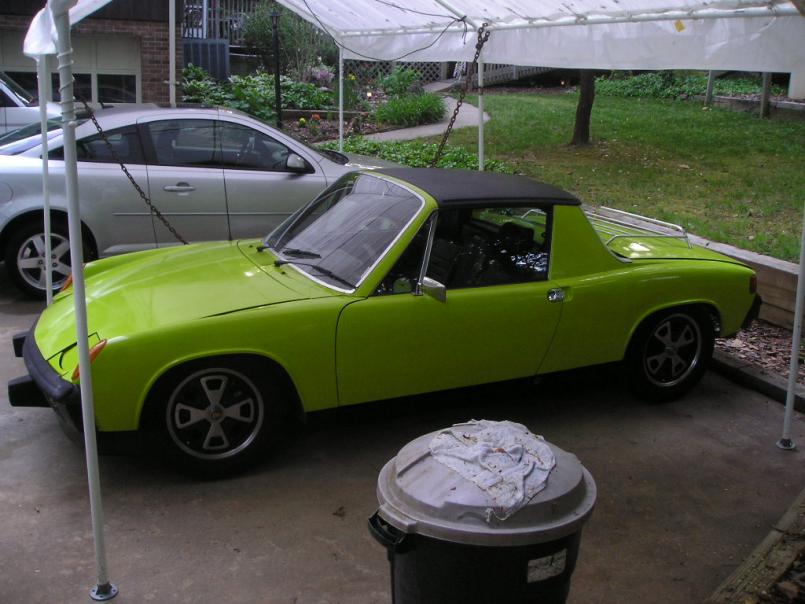
Posted by: dlee6204 Apr 27 2010, 08:53 PM
I *might* be taking my car on a long trip coming up in the next two weeks. I will know for sure after this weekend. Regardless, I will be switching out the transmission this weekend. Ever since I started driving the car, Reverse, first, and second gear all have issues and I have tried adjustment with no luck. Ironically, I've been too lazy to switch it out yet so this weekend will be it! I will also be checking my timing and dwell, and do a valve adjustment while i have the heat exchangers out. Plus a lot of final touches will be done to get the car in tip top shape.
Posted by: Root_Werks Apr 28 2010, 08:54 AM
Looks great!
I like the color, that's very cool.
Oh, and adjust your headlights man!
Posted by: dlee6204 May 1 2010, 10:11 PM
Well I got the transmission changed out yesterday and everything went smoothly. The car shifts much better now and there is finally no more grinding!
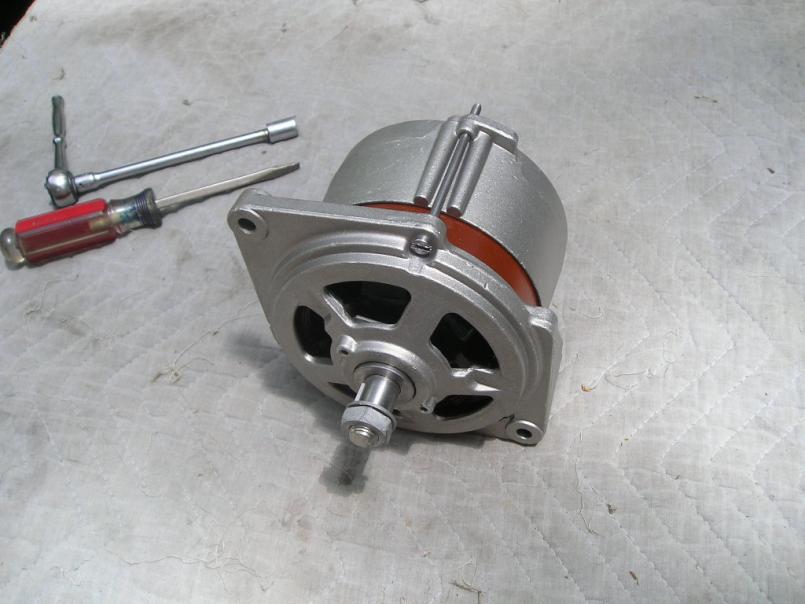
I also ordered a rebuilt alternator because the old one was a bit noisy and on its way out. I got a 75 amp unit which is a pretty good upgrade from the 50 amp I pulled out of the car. I changed it out this afternoon.
It sure is pretty 
Tomorrow I plan to adjust the valves, timing and dwell and just work on smaller things.
Posted by: dlee6204 May 2 2010, 09:59 PM
I got a lot of smaller stuff done today. I adjusted the headlights, added a second horn, straightened the steering wheel, added the chrome strip at the bottom of the sail panels, some other things I can't remember right now and made sure to take it for a test drive I also added my tow bar bracket to the front end. Luckily it tucked up right behind the LE valence. I will probably keep it installed long term just in case the need ever arises.
Front tow bracket
Note: All the specs on the front bumper are bugs not chips 
If you can tell I like posting pictures of my car. 
Posted by: Gudhjem May 6 2010, 01:05 PM
What a great thread. It does make me feel pretty inept though when I think about how much you got done in about the same time it took me to make a list of things I need to do to my car.
What paint did you use? Was it waterborne?
--Steve
Posted by: dlee6204 May 13 2010, 08:22 AM
None of the stuff I used was water-based. Everything I used was PPG Omni Brand.
Posted by: dlee6204 May 13 2010, 08:38 AM
I have been meaning to update this. I ended up taking the car on a trip. It was a 1500 mile round trip to Michigan/ Indiana and back. It was a pretty tight trip time-wise so there wasn't too much time to goof around. Otherwise i would have tried to meet up with some members along the way. The car made the trip just fine with no major problems. The window guide in the door came loose from all the bumpy roads in the north Also when we left on Thursday afternoon, the temperatures were in the upper 80's and 90s and the car was running a little bit on the hot side so I have to go through and make sure everything is sealed tight. I didn't even have to add any oil on the trip either. I'm quite pleased now because I know the car is somewhat reliable. I've put just over 5000 miles on it since last October. Unfortunately I hardly took any pictures.
TUNNEL! It was a fun drive through WV. 80 mph on twisted interstate. 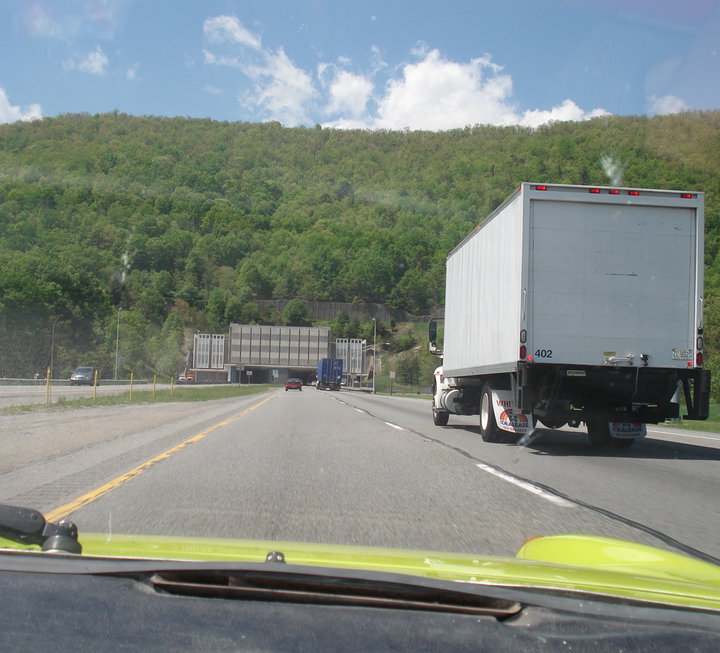
Posted by: rsrguy3 May 13 2010, 10:35 PM
Look's SWEEEEET! Now, you gotta cut those tits the heck off, bingo bango....done, no more to do. Just grin and drive.
Posted by: dlee6204 May 15 2010, 01:30 PM
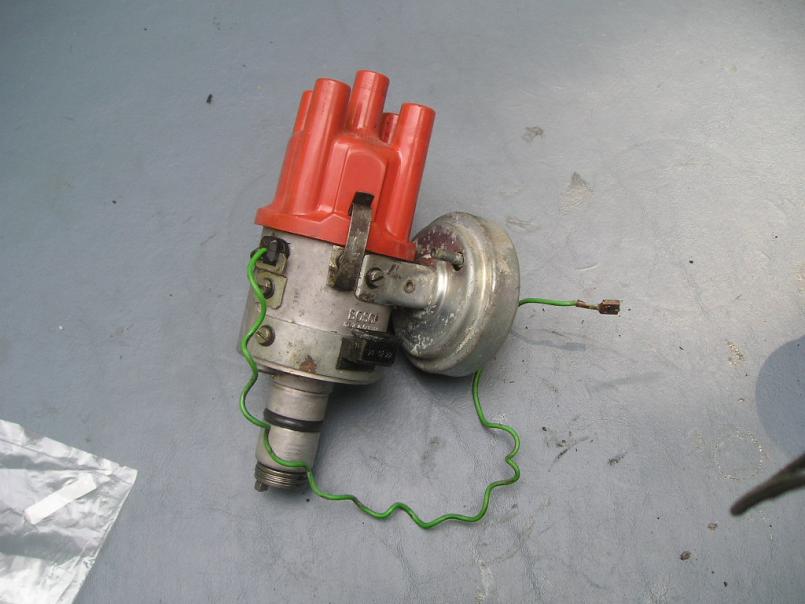
So I've started to get the slightest hesitation on acceleration so I have been trying to trace that down. I have been leaning towards the trigger points in the distributor but also my distributor has a lot of play and i have an oil leak where the it goes into the block so I took it out. Before I took it out, I had a spare that was in much better shape so I took it apart and cleaned it. I also installed a new seal around the shaft. After I got the old distributor out, I checked parts numbers found out that it was the WRONG one for a 2.0L.  That could have been part of my problem. Everything went back in smoothly and I am in the process of getting it timed correctly. Hope this works.
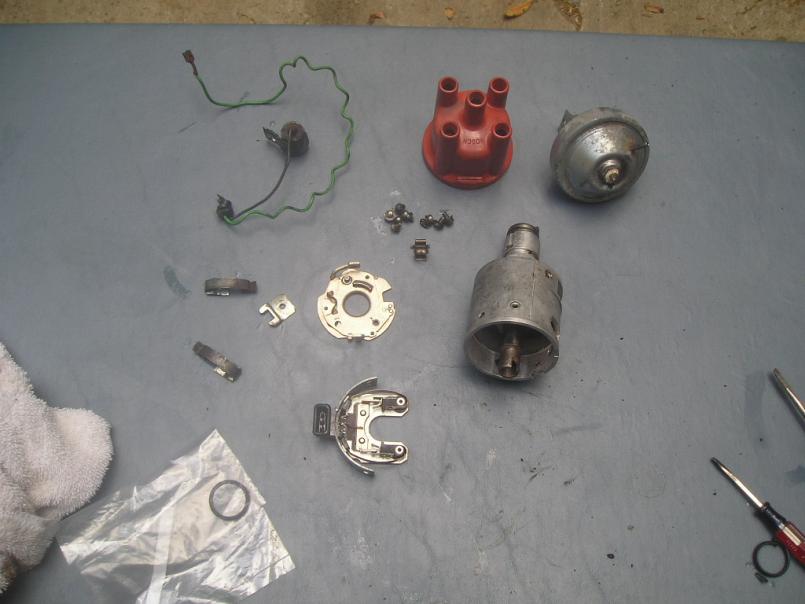
Posted by: dlee6204 May 15 2010, 02:14 PM
Ahh it appears that way before me, the timing was set to 27 degrees at idle based on the position of the distributor body before i took it out. I adjusted it correctly at 3500 rpm so hopefully this will make it perform a little bit better. Time for a test drive.
Posted by: dlee6204 May 15 2010, 10:23 PM
The car drives like sooooo much better now. It idles smoother and lower, accelerates nicely, and is just so fun to drive! Hopefully the car will run a little bit cooler now as well. Now onto more smaller things to fix!
Posted by: dlee6204 May 17 2010, 09:54 PM
Well the other night I had the most interesting encounter yet. I was driving around at 11:30 at night and I pulled up to a stop sign and out from nowhere, a jeep comes flying up behind me honking its horn. It pulled up next to me and it turns out, it was just another crazed 914 fanatic who use to own a few! The conversation was short but my passenger was definitely confused about the whole incident.
Meanwhile I took the girlfriend out last night and we went to a local state park. When leaving I noticed that something about the car wasn't right. I got a lot of hesitation at part load throttle and the car would die if i tried to let it idle. I thought all hell broke loose and something like my MPS gave out. Turns out the connection to my CHT was just loose and all lives were spared! It drove perfectly fine today.
Here is a shot of the GF with the car. 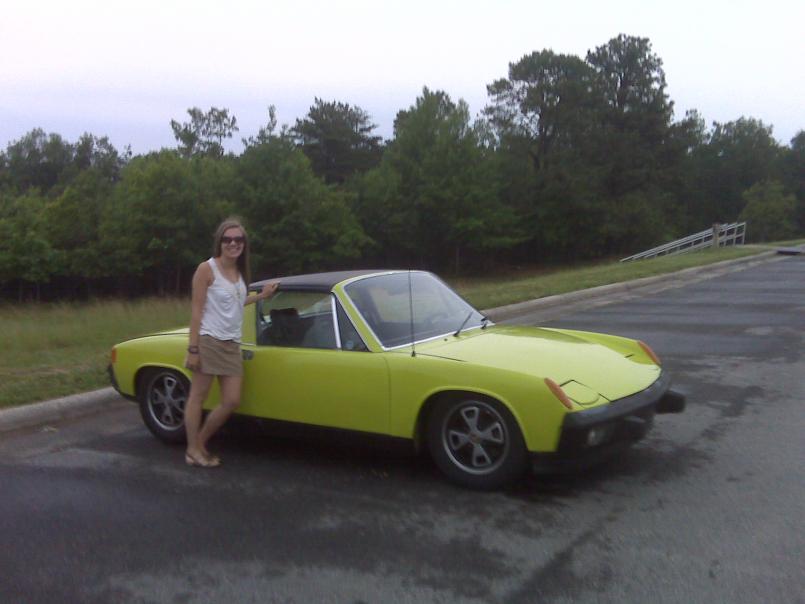
Posted by: Root_Werks May 18 2010, 05:05 PM
Chicks and 914's are always a great combo.
BTW - Your wiper arms are on the wrong sides (L to R), switch them. 
Posted by: shoguneagle Jun 13 2010, 10:10 PM
excellent, excellent, excellent!!! I really enjoy seeing metal work and painting projects come together in a completed project. I think every 914 owner should read this thread. Very nice job.
Steve Hurt
Posted by: dlee6204 Jul 30 2010, 08:36 AM
I haven't been working on this a whole lot, too much driving I'm approaching the 8,000 mile mark with no breakdowns yet! I'm still trying to figure out my lean mixture problem I detailed in another thread but will hopefully get that sorted out soon.
I have managed to paint the sail panels. I haven't bought the vinyl yet so I decided to try painting them to see how it looks and if it fails, I can just install the vinyl over it. It came out "alright". Not perfect but doable for the time being. 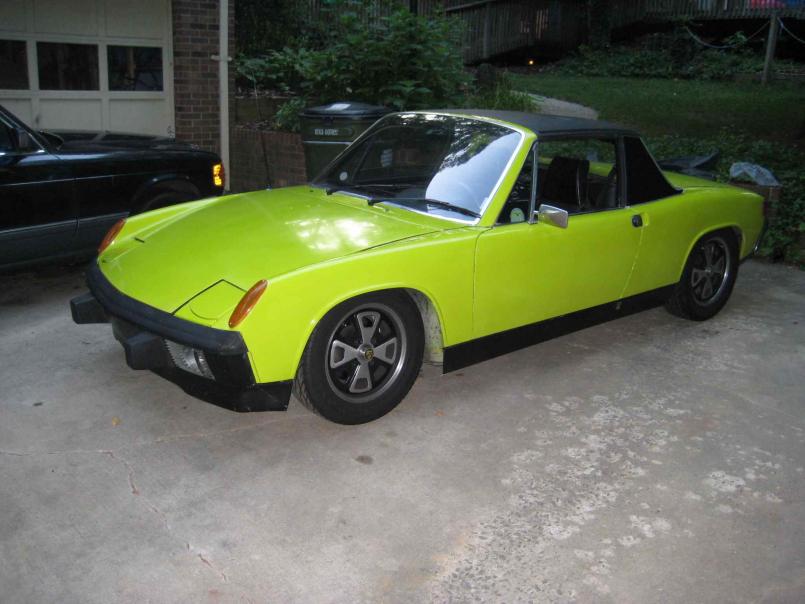
Posted by: dlee6204 Jul 30 2010, 08:43 AM
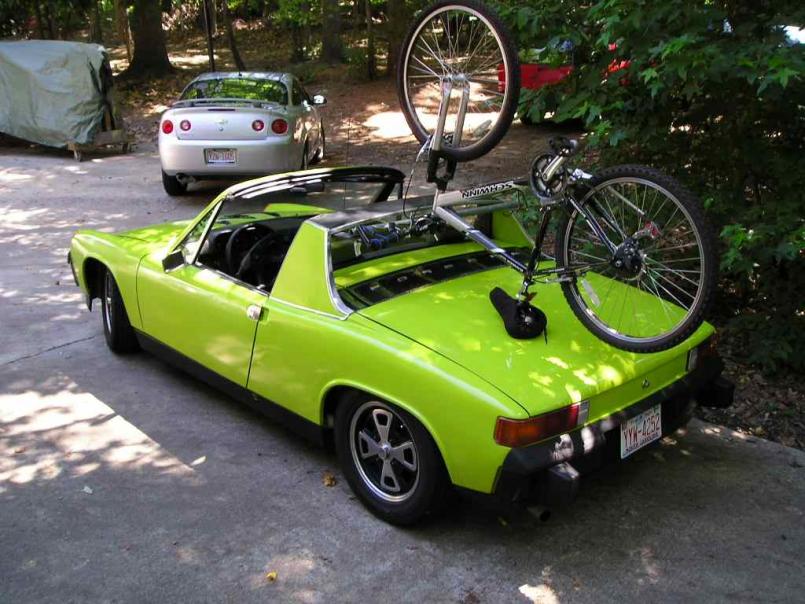
I also started making a bike rack for the car. It attaches under the roll bar and can carry two bikes. I thought about just mounting the bikes to the roof but then I wouldn't be able to take the top off and what fun is that? I still have to make something to hold the seats in place. 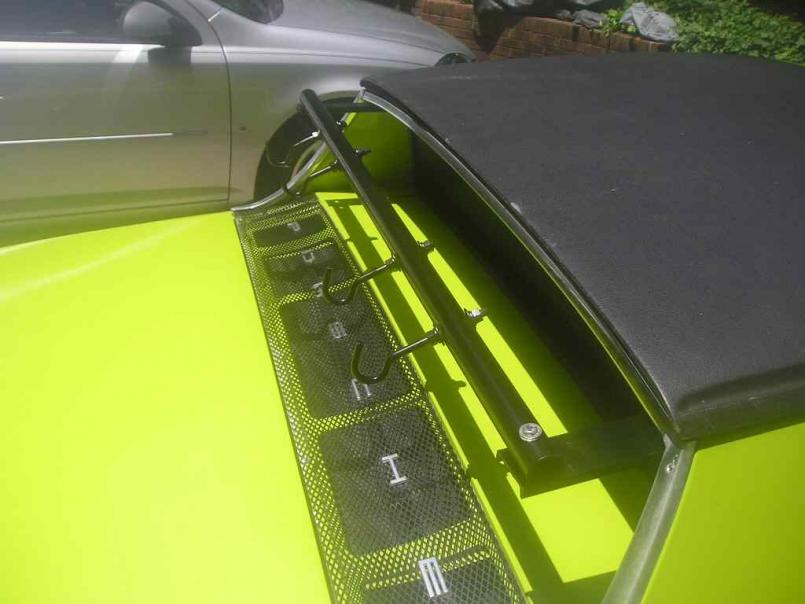

Posted by: mepstein Jul 30 2010, 10:39 AM
There's a good chance you will tuna can your trunk when you hit a bump with that set up. I used to run a bike shop and saw things like that happen quite a bit. That area of the trunk isn't made to handle the impact.
Posted by: type11969 Jul 30 2010, 10:44 AM
Maybe something that ties in to the bumper mounting points that attaches to the bike axle or rear part of the frame to keep the seat off the trunk?
You car looks great by the way!
-Chris
Posted by: dlee6204 Jul 30 2010, 10:46 AM
Yeah I know that's why I still have to make a bracket of some sort that evens out the load. Also the closer to the edge the seat is, the more sturdy the trunk lid is which is where I will have the seat located. The bike was just set on the lid for the picture.
Posted by: dlee6204 Jul 30 2010, 10:49 AM
Something along these lines.
http://bowlsby.net/914/Classic/zAcc_BikeRackHardtD.jpg
Posted by: dlee6204 Aug 21 2010, 07:09 PM
Past 9,000 miles...
I started working on the rest of the bike rack. I made a baseplate to hold the seat down and to distribute the weight. I've only made one but once I make a second one for the passenger side I will attach both together via a bungee cord to hold them in place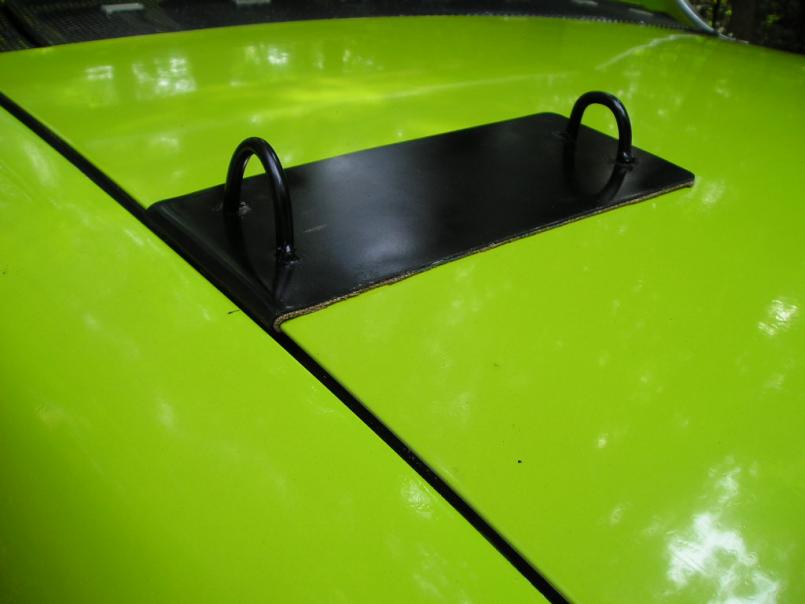
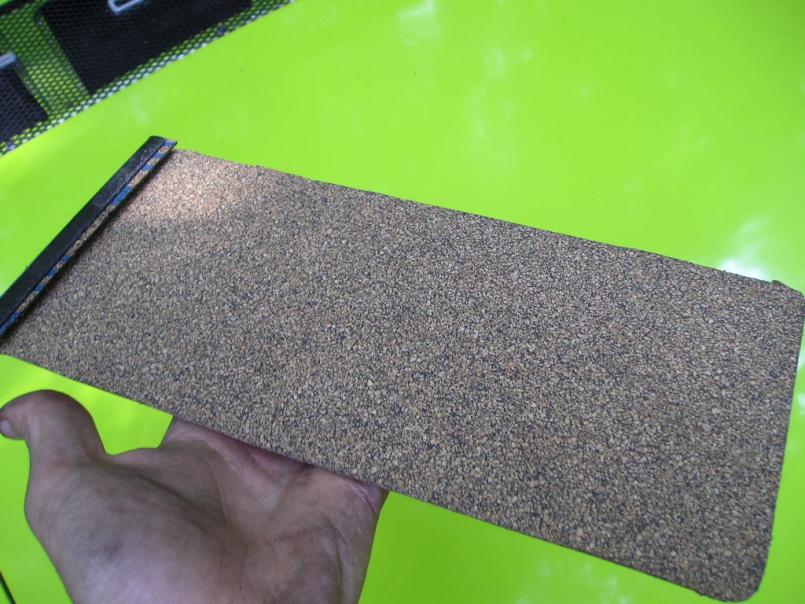
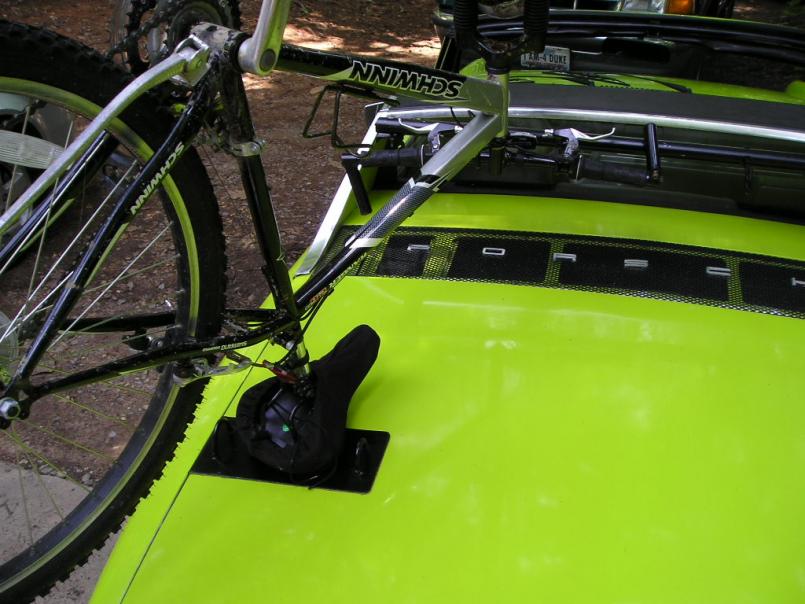
Posted by: dlee6204 Sep 9 2010, 05:23 PM
I've been doing a lot of little things lately. I fixed the fresh air controls. Now I have a working fresh air fan. I also got all the smaller lights working on the controls as well. For the first time since paint, I have functional door switches so my interior light now comes on by opening either door. I know, I know its the little things that get me excited. This past weekend I did a valve adjustment and while I was under there I decided to swap out mufflers to the Bursch muffler that the car originally had when I bought it. I'm happy I switched because I like the sound much better now.
One problem that came up last week was that I starting to hear a rubbing sound from the front when braking. I took the tires off and to my surprise, one of the brake pads on the driver's side was down to bare metal After inspecting it further, I noticed one of the pistons in the caliper had a "chip" missing which caused the pad to angle itself against the rotor causing it to wear funny. I took a spare caliper, rebuilt it, and installed it with new pads and the problem is now fixed I'll be keeping an eye on it though.
I took it for a long drive in the mountains this past weekend and I did notice a bunch of spitting and popping on decel so I have an exhaust leak somewhere that I need to fix. Now that summer is over I also need to get my heater system functioning again. I took part of the system out when I did various things on the car so I need to add it again. I'll be ordering new heater hoses and such in the next few weeks. Once I get rid of my LE, I will also be replacing some of the seals on the car since it leaks quite a bit of water in the rain. Oh and I'll be doing the "foglight mod" shortly as well. Lots of little stuff to be doing before MURS11! 
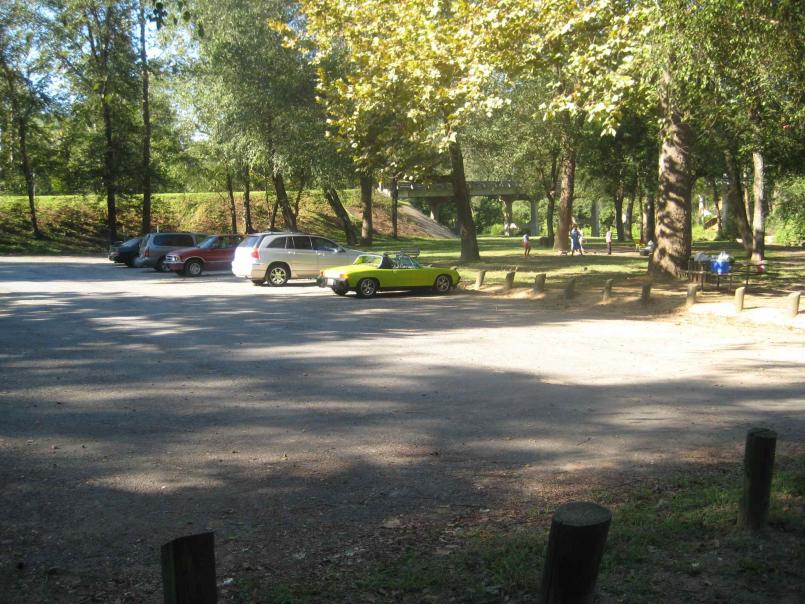
Posted by: dlee6204 Sep 9 2010, 06:52 PM
Here is a short clip from a drive. I need to make my camera mount a little bit stiffer. It makes me dizzy just watching it.
http://www.youtube.com/watch?v=0OSbTmVHDyQ
https://www.youtube.com/watch?v=0OSbTmVHDyQ
Posted by: dlee6204 Sep 25 2010, 07:52 PM
Well my motor bit the dust today. I had just got home after a 60 mile trip with no problem. I parked it. Came back 5 minutes later to move the car, and a knocking sound roared from the engine while attempting to start it. I had an exhaust leak that I was planning to fix today and at first, I thought maybe a heat exchanger was loose. I put the car in the air, checked the exhaust and it wasn't that loose. I took off the valve covers and nothing looked out of place. I then drained the oil and checked the sump plate and that's when I found the surprise. 
And thats only some of it and none of it is looking good. I put the car back together and pushed it to the corner of the driveway until I decide what I want to do. I don't know exactly what my plan will be but I do know that the engine will be replaced within the next two weeks. Having an inoperable 914 is not option for me not to mention its one expensive driveway ornament. Plus I have to have it running for MUSR 11.
I have a few options at this point.
1) We have a used 2.0L longblock that ran long ago (according to PO) and it has been collecting dust for a while now. I can transfer all my parts over to this core and hope its good.
2) We have a complete 1.8L motor that we know is good. It will need to be gone through with new seals and the L-jet sorted through but should be a good option.
3)I can look for a good used longblock or complete engine to buy.
I'm sorta leaning towards option 1 since it is the cheapest, and I can use all my good bits that are currently on my engine now. Obviously a complete rebuild would be the best option but thats not possible right now.
Posted by: rick 918-S Sep 25 2010, 09:35 PM
Well my motor bit the dust today.
I had just got home after a 60 mile trip with no problem. I parked it. Came back 5 minutes later to move the car, and a knocking sound roared from the engine while attempting to start it. I had an exhaust leak that I was planning to fix today and at first, I thought maybe a heat exchanger was loose. I put the car in the air, checked the exhaust and it wasn't that loose. I took off the valve covers and nothing looked out of place. I then drained the oil and checked the sump plate and that's when I found the surprise. And thats only some of it and none of it is looking good. I put the car back together and pushed it to the corner of the driveway until I decide what I want to do. I don't know exactly what my plan will be but I do know that the engine will be replaced within the next two weeks. Having an inoperable 914 is not option for me not to mention its one expensive driveway ornament. Plus I have to have it running for MUSR 11.
I have a few options at this point.
1) We have a used 2.0L longblock that ran long ago (according to PO) and it has been collecting dust for a while now. I can transfer all my parts over to this core and hope its good.
2) We have a complete 1.8L motor that we know is good. It will need to be gone through with new seals and the L-jet sorted through but should be a good option.
3)I can look for a good used longblock or complete engine to buy.
I'm sorta leaning towards option 1 since it is the cheapest, and I can use all my good bits that are currently on my engine now. Obviously a complete rebuild would be the best option but thats not possible right now.
That Sux! At least you weren't 600 miles from home...
If your going to use the 2.0 I would suggest doing a leak down test on it. If the pump is sound swap the parts and drive it like you stole it.
Posted by: Jake Raby Sep 25 2010, 10:37 PM
That's rod bearing material.. Looks like you cooked the oil and lost pressure or had some issue in the lube system. Times like this are when an oil pressure gauge can save thousands of dollars.
Posted by: tradisrad Sep 26 2010, 09:18 AM
That's rod bearing material.. Looks like you cooked the oil and lost pressure or had some issue in the lube system. Times like this are when an oil pressure gauge can save thousands of dollars.
I learned that one the hard way a few years ago. Never will I go w/o a oil pressure gauge.
Sorry to see the destruction...
Posted by: FourBlades Sep 26 2010, 09:31 AM
That is a real bummer man, sorry to see that.
Did you notice high oil temps before this happened?
What are considered "safe" oil temp and pressure ranges.
John
Posted by: dlee6204 Sep 26 2010, 05:56 PM
Not really. It was was the same as it was for any other drive. Additionally it was only around 75 degrees out for the drive so the temps were cooler than those i've been use to. I have stock gauges so exact temperatures are unknown.
The way I see it is that I pulled this car out of the woods and I didn't do anything to this motor other than replace a few seals, valve adjustments and oil changes. I got 11,000 miles out of it and I'm content with that. The previous owners who neglected the car for it to get the state it did, most likely neglected the motor as well. It happens.
Posted by: dlee6204 Sep 26 2010, 06:09 PM
Okay the plan now is to use the 2.0L block i already have. I plan to switch everything over and replace all the seals. My motor and transmission that are currently in the car leak oil like crazy. Every seal possible, leaks. So here is what I plan to replace:
Motor
Front main/pulley seal
Rear Main Seal
valve cover gaskets
pushrod tube seals
oil cooler seals
Sump plate seals
Transmission
Input shaft seal
CV Flange seals
Shift selector shaft seal
Speedo angle drive seal
Am I missing anything? I'm going to do my best to get this thing sealed tight.
Posted by: dlee6204 Oct 8 2010, 02:27 PM
Well the engine came out today. It was my quickest engine removal so far. And... all exhaust studs are in tact :trophy I started disassembly and that's all I was able to get done today.
Engine out!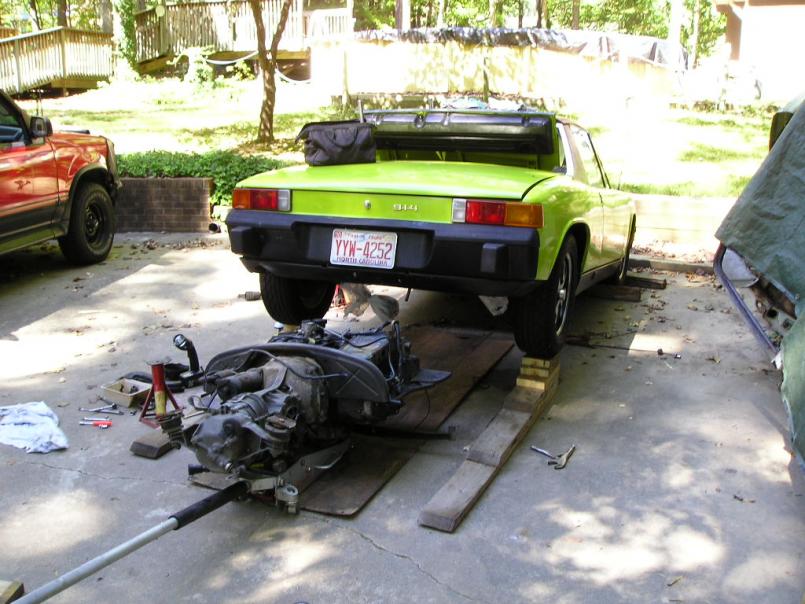
Some of my oil issues...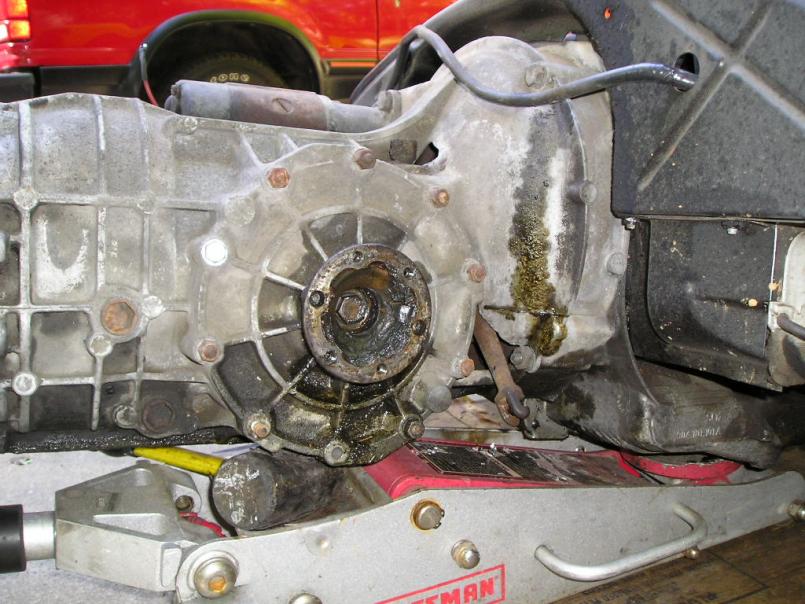
Posted by: dlee6204 Oct 8 2010, 02:32 PM
Just some of the mess that built up in the past year...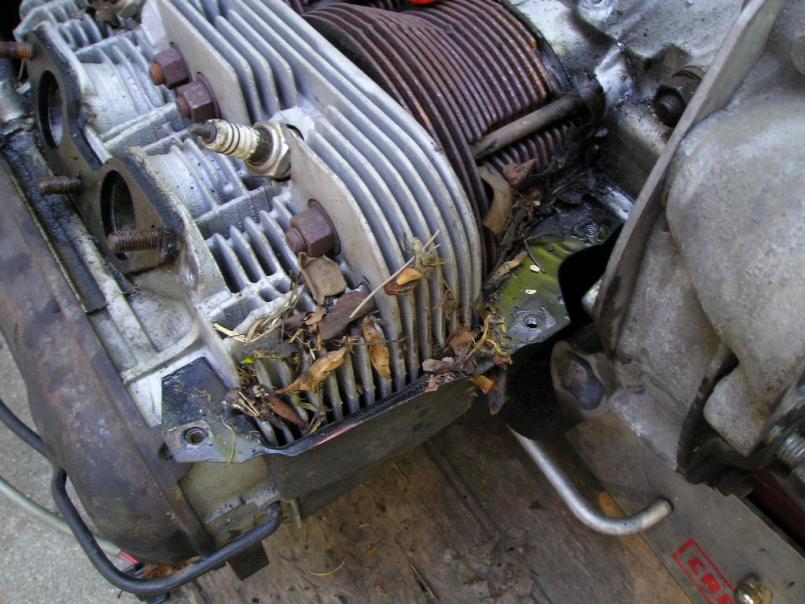
As much as I got done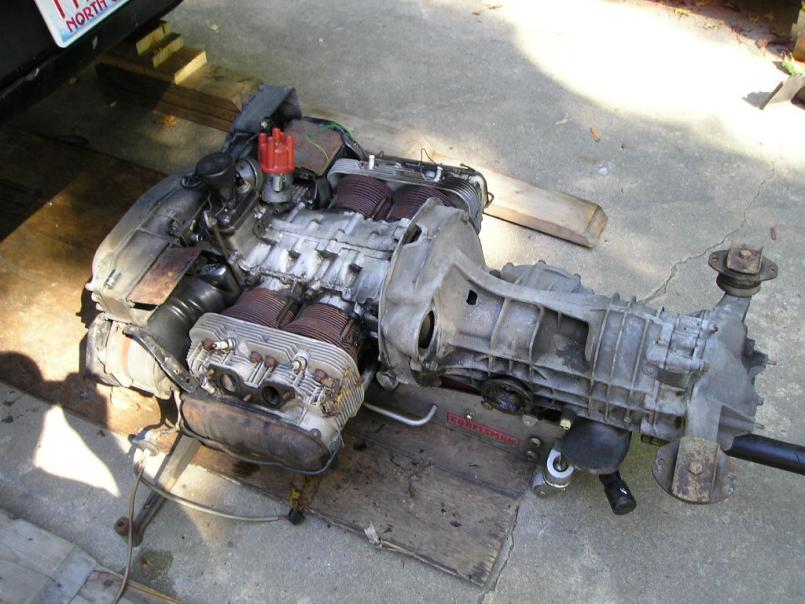
Tomorrow I will put together the replacement engine and hopefully install it. This will leave me plenty of time to test drive the car and do some other work on it.
Posted by: dlee6204 Oct 8 2010, 10:11 PM
Well I found the MAIN reason for my failure...
A picture from one of the heads... notice anything odd?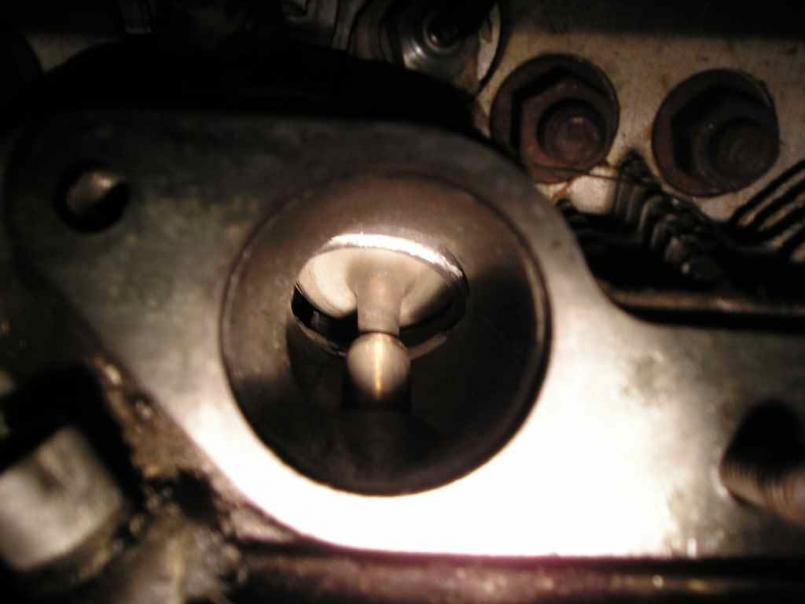
Yup, I dropped a valve seat on an intake valve. I was hoping to reuse these heads on the replacement engine but hopefully I have another one I can use. 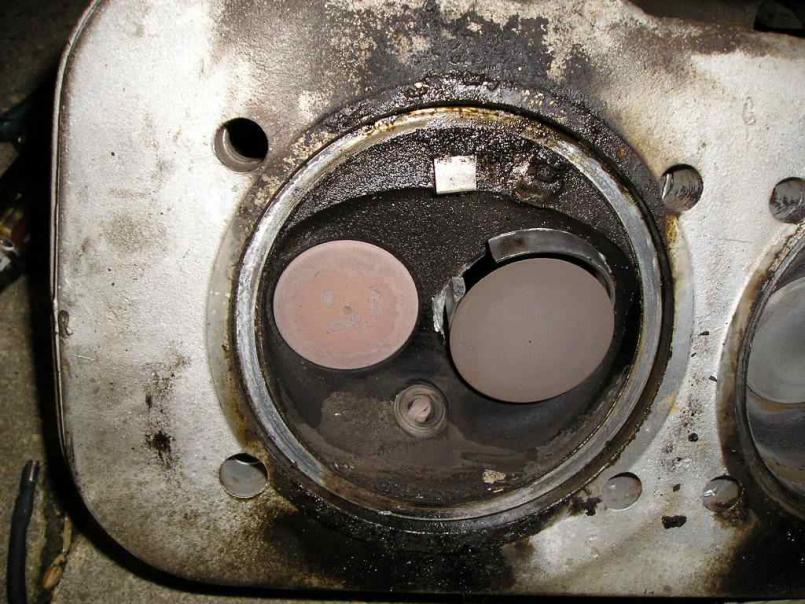
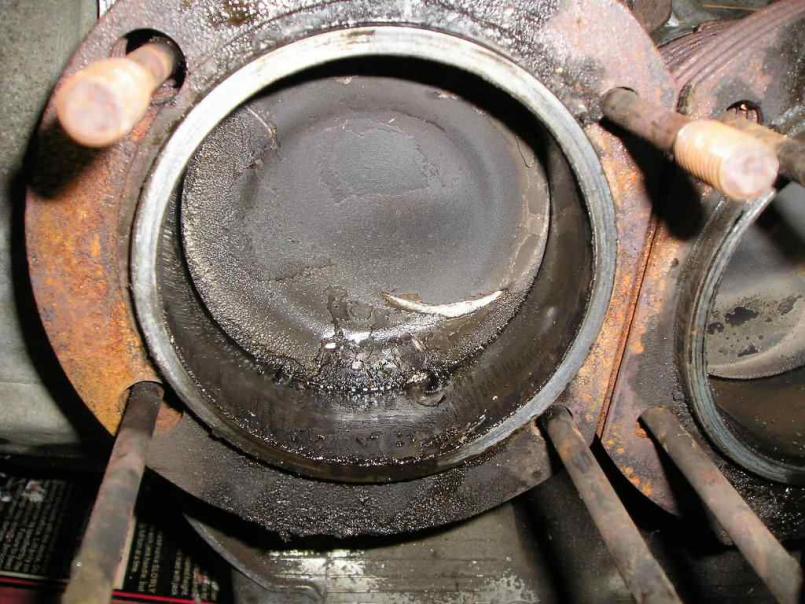
Posted by: dlee6204 Oct 10 2010, 08:47 PM
Okay the engine is back in the car and all hooked up. In the morning I am going to start it for the first time and get the timing set. Hopefully there will be no problems with the motor and I will get to drive it!
Posted by: dlee6204 Nov 25 2010, 08:19 PM
Wow, I haven't updated this is a while. I'll try to bring you up to date. I installed the motor, found out I had low compression due to a leaking valve. I removed the engine again, removed the head, fixed the valve, installed the engine, and was able to get it working enough to drive. Well...... after a thousand miles or so I lost another valve seat. So now I am going to do what I originally should have done and replace it with a complete, low mileage 1.8L motor until I can get around to rebuilding the original motor...
After a trip to MUSR11 and seeing all the fun everyone else was having, I became inspired and have decided to build a 2056 motor for this car. I will gather parts as the budget allows and hopefully have this done in the next year or so.
And now onto the pictures... I started tearing down the engine. This was my first time splitting a case so it was quite exciting.
What I had to work with...
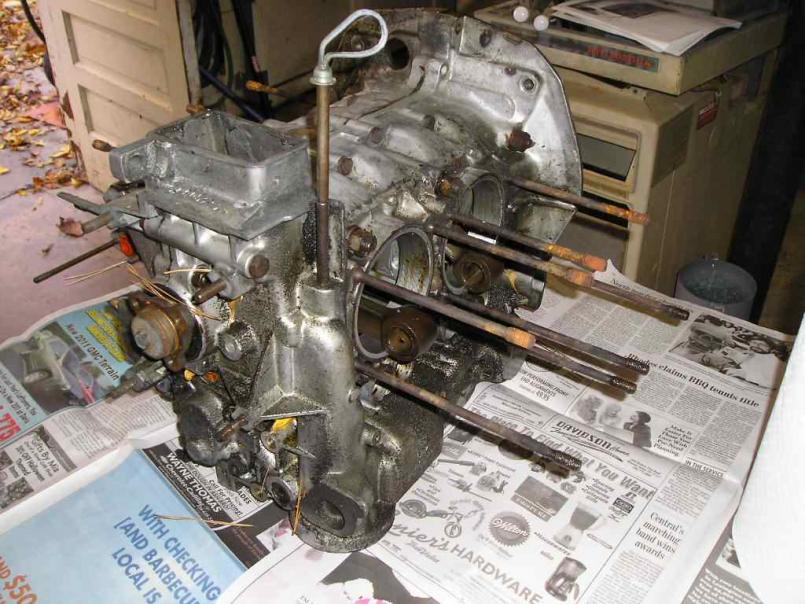
I found some duct tape on this engine. It was covering up the JB Weld on one of the galley plugs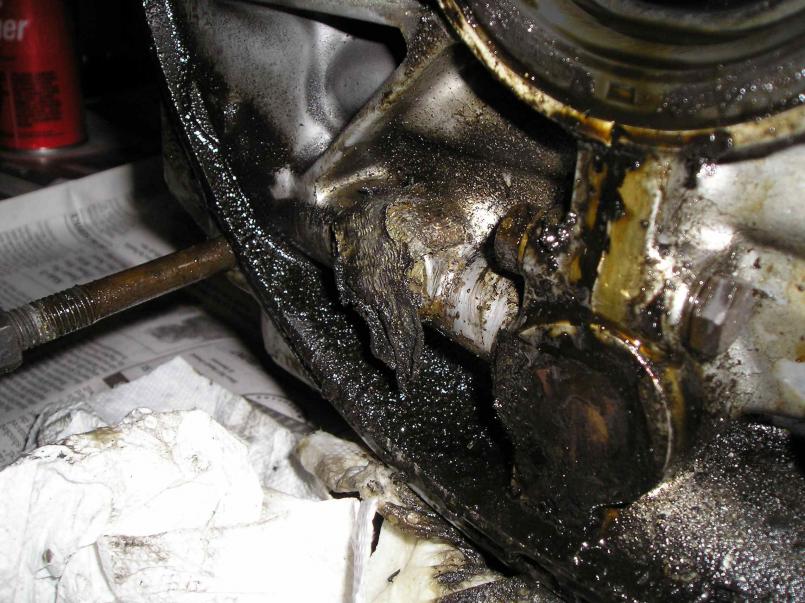
Posted by: dlee6204 Nov 25 2010, 08:21 PM

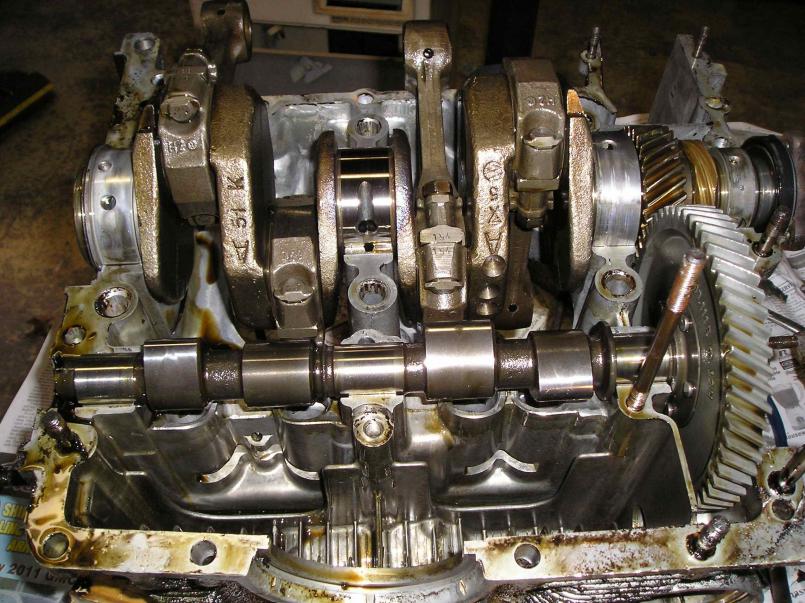
Posted by: dlee6204 Nov 25 2010, 08:24 PM
Remember the metal flakes that I found in the oil? My camshaft bearings were completely trashed and it was immediately obvious once I opened it up.
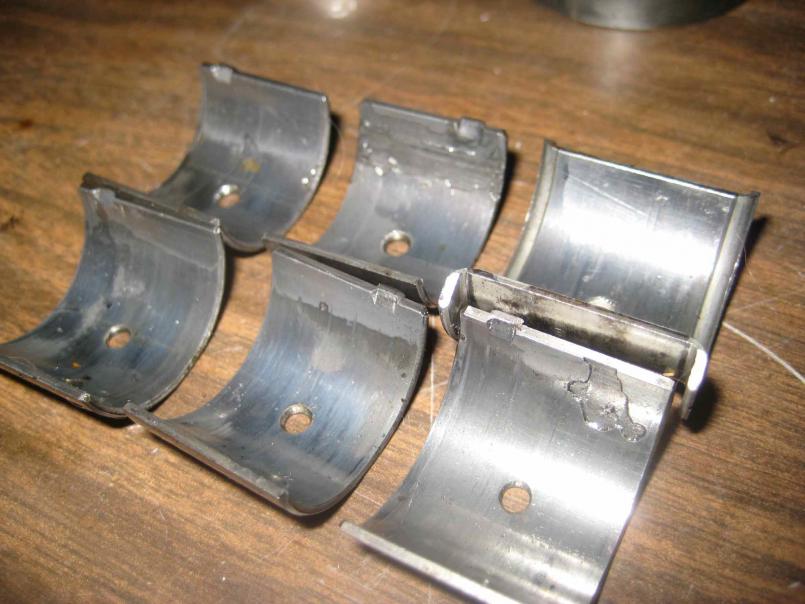
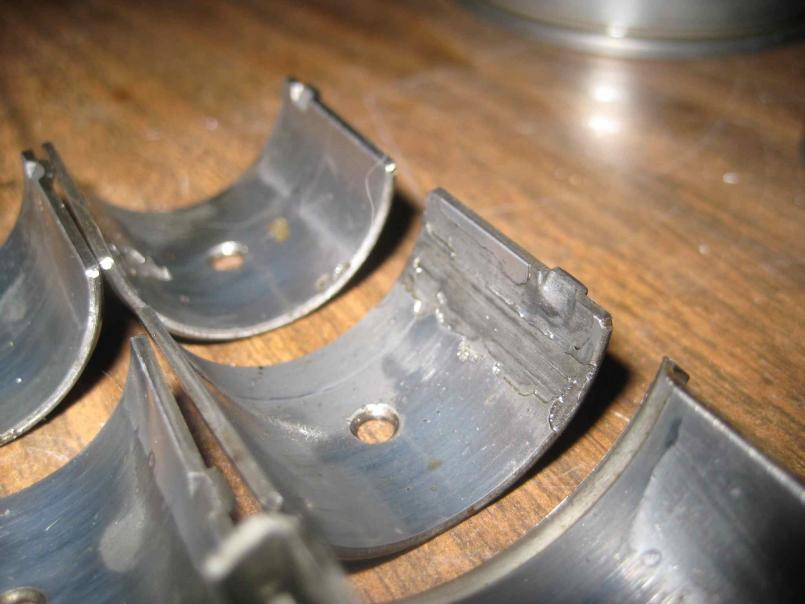
Posted by: dlee6204 Nov 25 2010, 08:29 PM
Despite the cam bearings being trashed, everything else looked remarkably well from a novice's point of view. Nothing I can see seems out of whack but let me know if you guys see something I don't.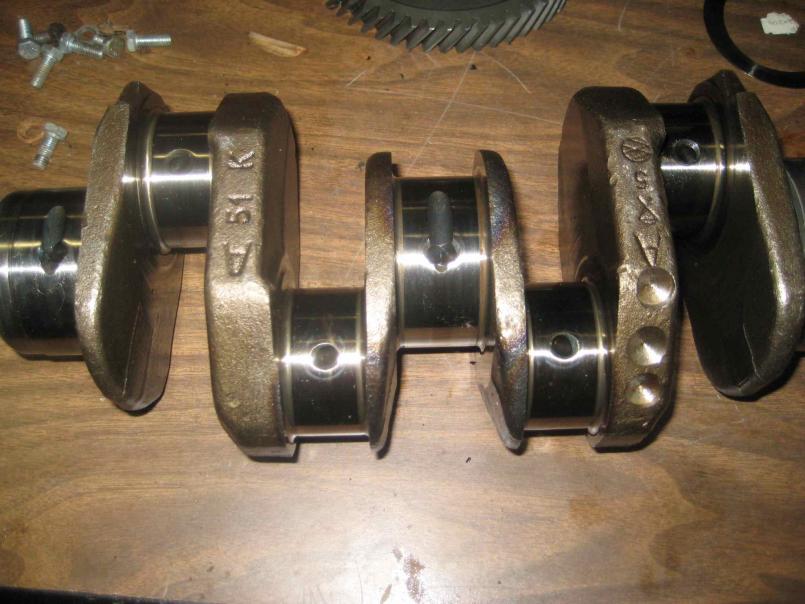
There was some lint on the shaft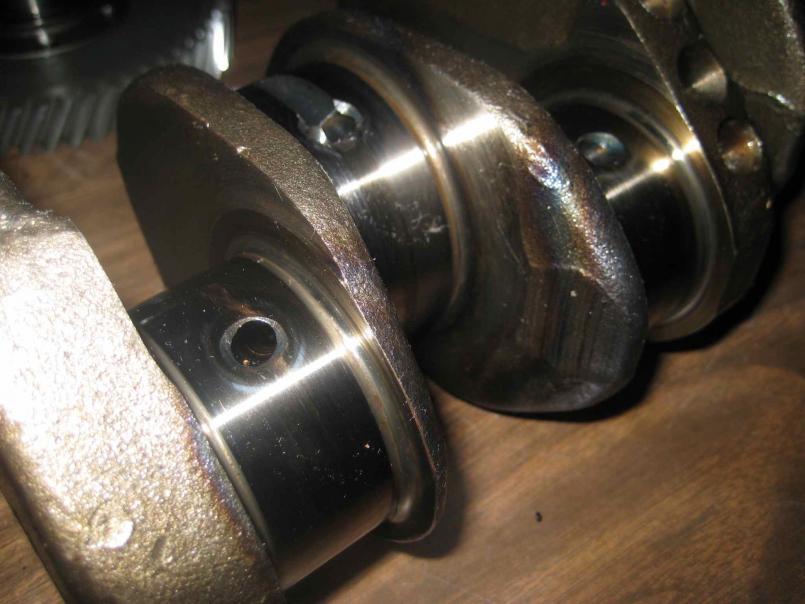
Posted by: dlee6204 Nov 25 2010, 08:31 PM
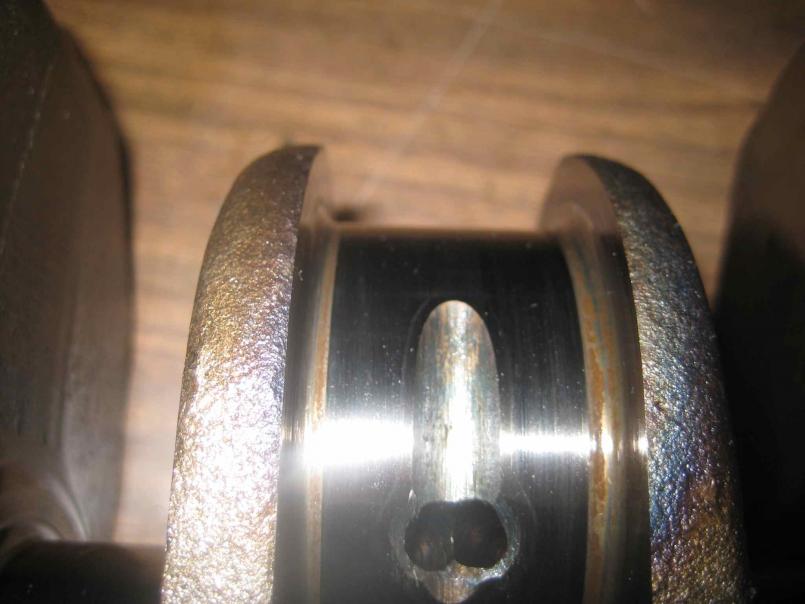
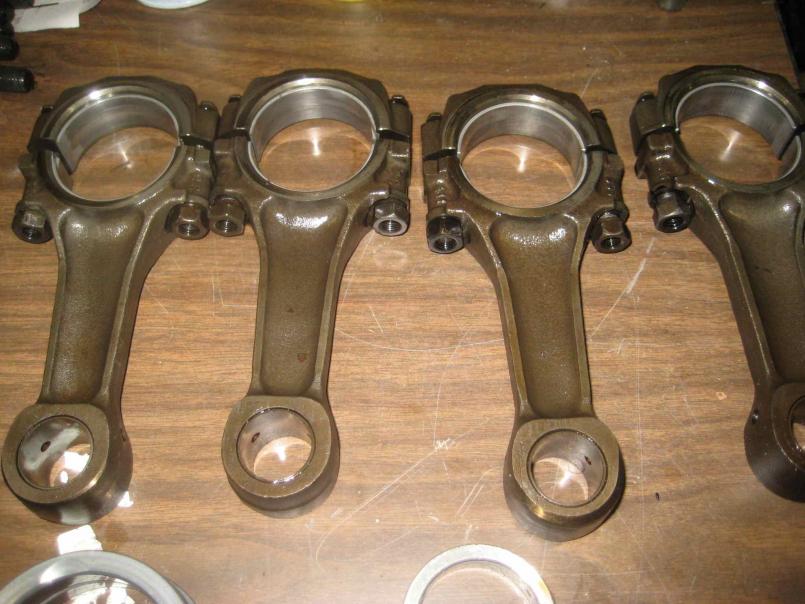
Posted by: dlee6204 Nov 25 2010, 08:32 PM
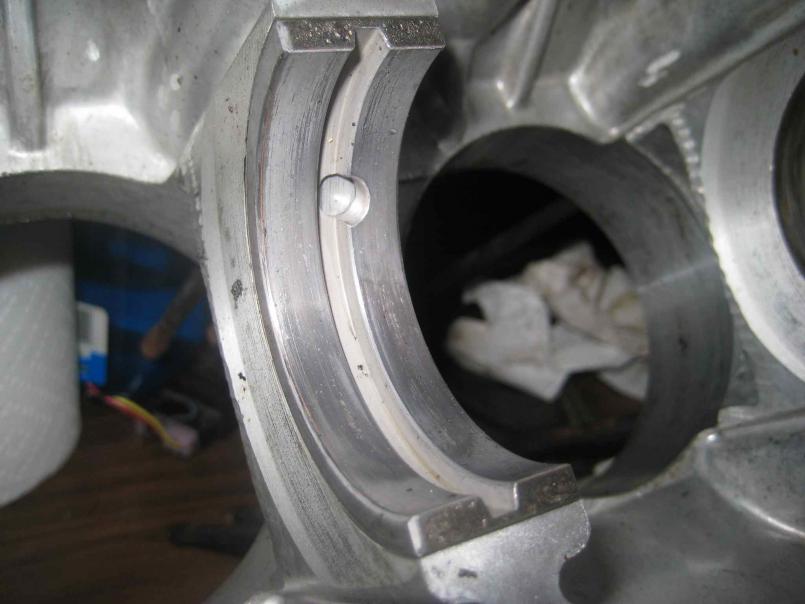
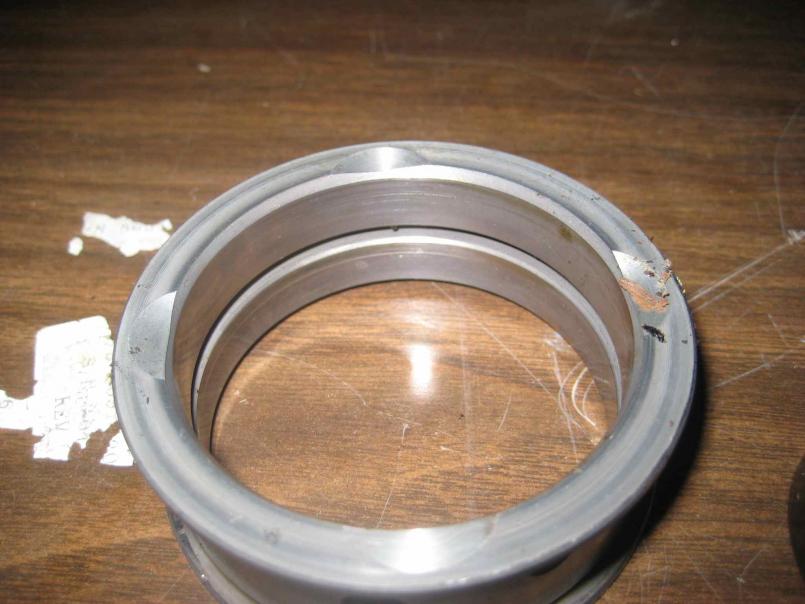
Posted by: dlee6204 Nov 25 2010, 08:34 PM
Camshaft
Some nice wear patterns.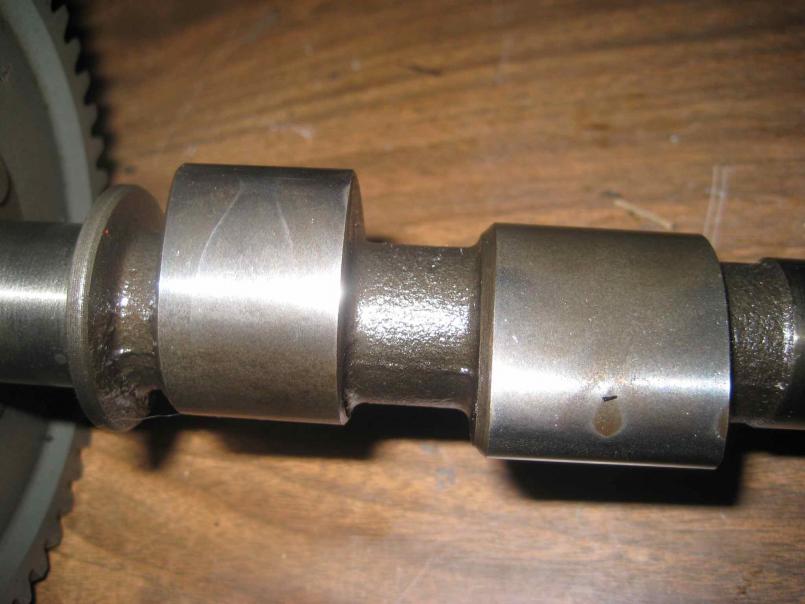
Posted by: dlee6204 Nov 25 2010, 08:35 PM
And finally the galley plugs. You can see where I started removing some of this mess. I will remove everything, tap the holes, and install plugs.
Posted by: dlee6204 Sep 17 2011, 09:18 PM
I thought I would give a little update on this...
So far I've managed to put 17K miles on the car since first getting it on the road 23 months ago. Not too shabby. Currently I'm running a 1.8L engine with CIS injection and it is running beautifully. I'm still planning to build up the original 2.0L to 2056 but all I've managed to do is drill and tap the oil galley plugs so not much progress there.
I have done some little things to the car such as add new horns, a new clutch, rear trunk shocks, and I also ordered new targa vinyl for it but have yet to install it. I will post pics as I get work done but so far too much driving has been happening  Gah, I love this car.
Posted by: dlee6204 Sep 18 2011, 09:26 PM
Today I installed the installed the sail panel vinyl that I got from Camp914. It looks sooo much better. 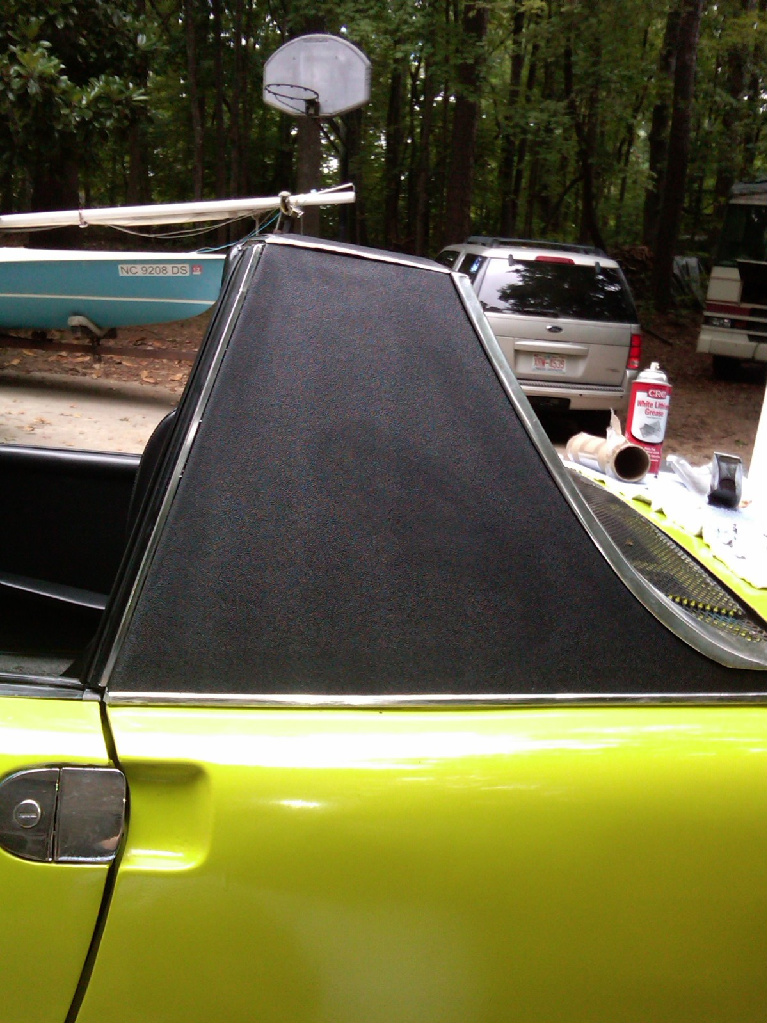

Posted by: dlee6204 Sep 18 2011, 09:29 PM
And an action shot from two weekends ago...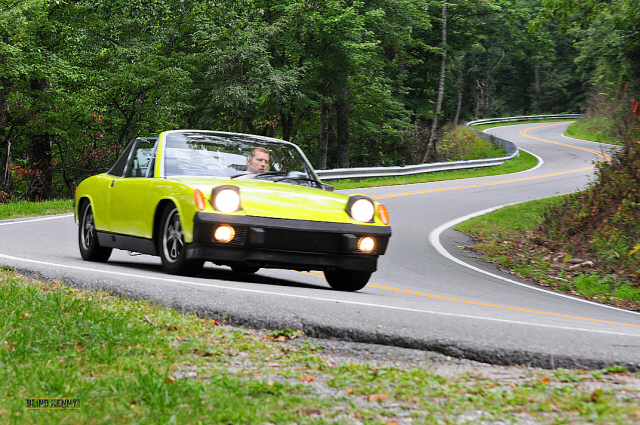
Posted by: euro911 Feb 20 2012, 04:18 AM
I just read through your entire thread and have to say you've done an outstanding job on your car.
Here in California, too many cars with that amount of rust are just parted and the carcasses sent to the bone yard
You've shown remarkable talent with your metal working skills, and I congratulate you for keeping another one on the road.
Powered by Invision Power Board (http://www.invisionboard.com)
© Invision Power Services (http://www.invisionpower.com)