Printable Version of Topic
Click here to view this topic in its original format
914World.com _ 914World Garage _ WOW, my "solid" car aint so solid, but now it is solid!
Posted by: wayne1234 May 5 2009, 08:32 PM
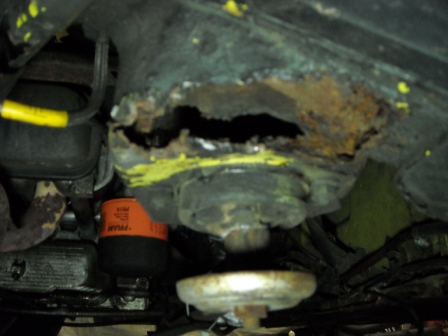
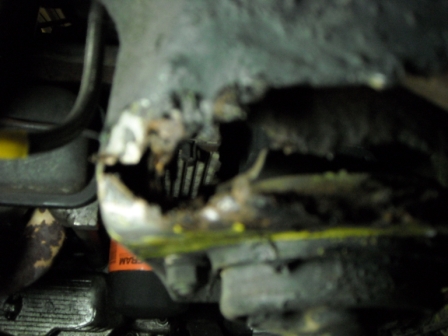
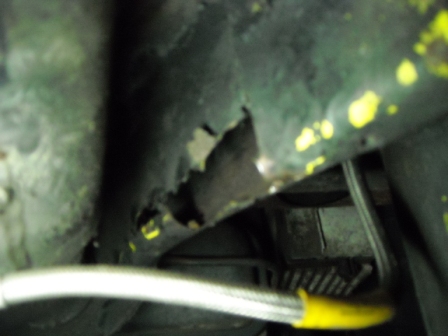
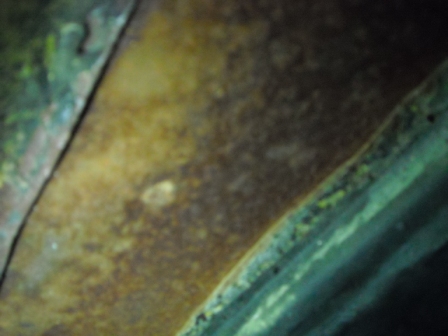
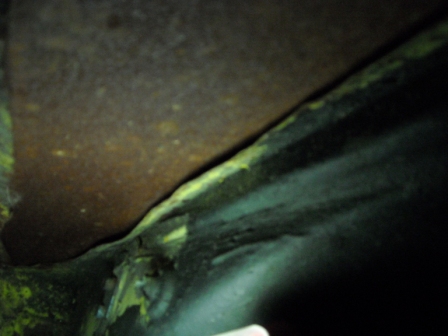
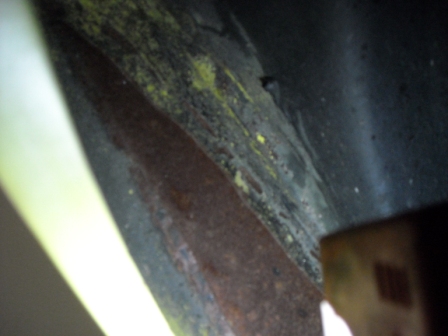
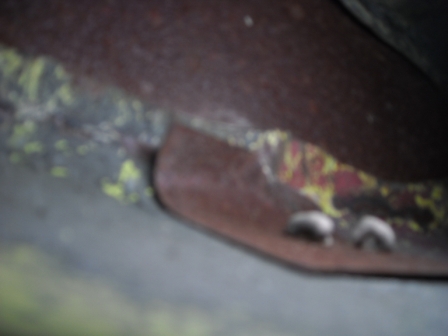
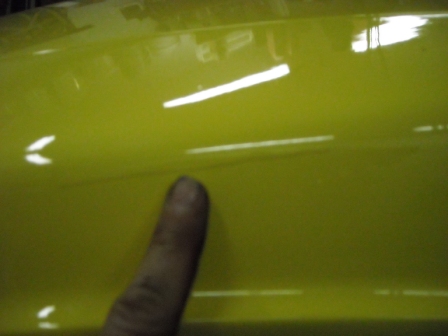
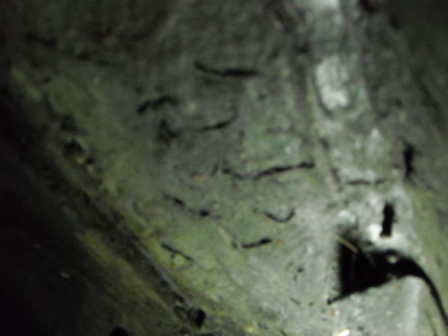
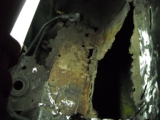
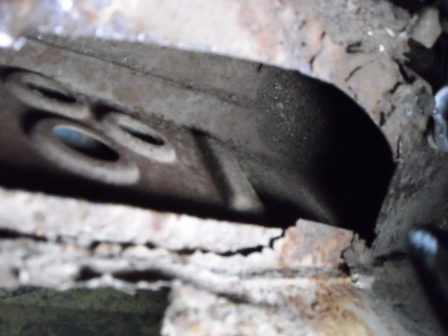
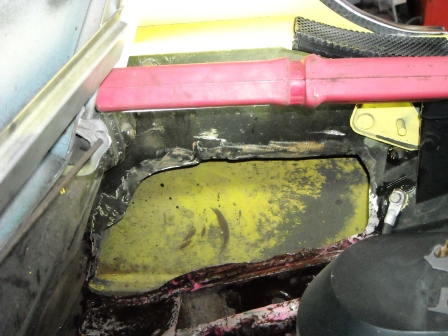
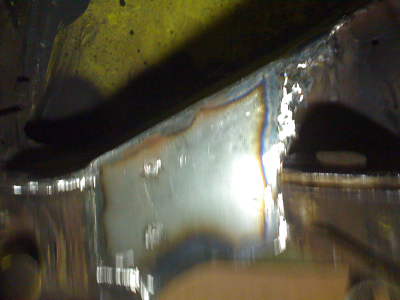
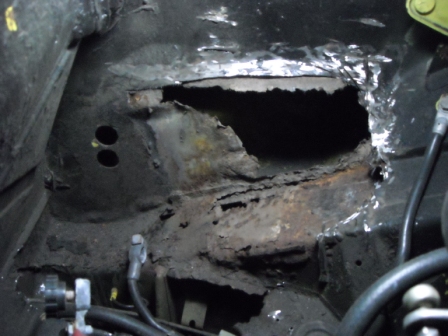
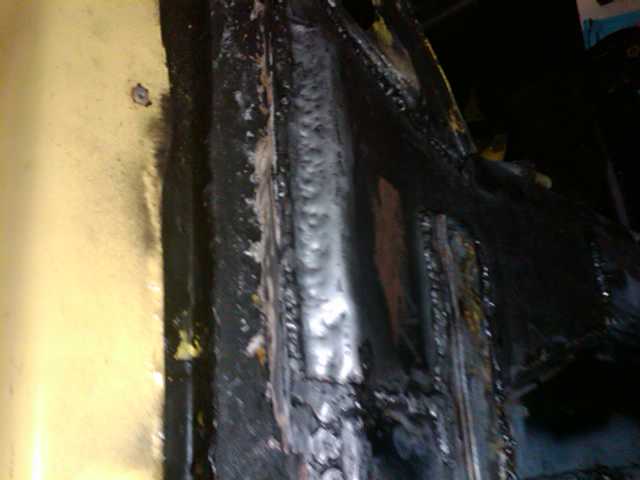
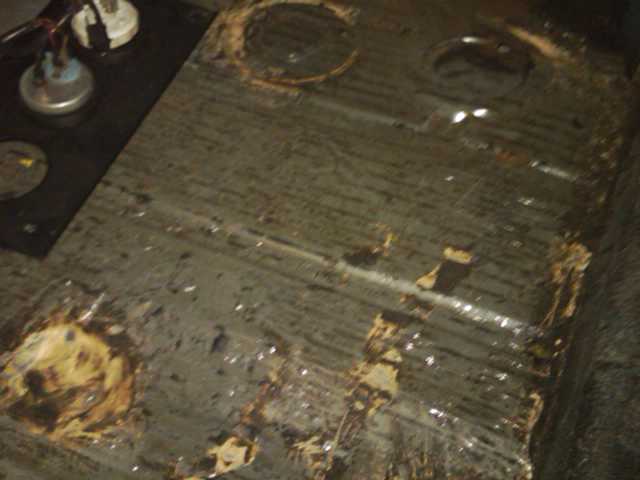
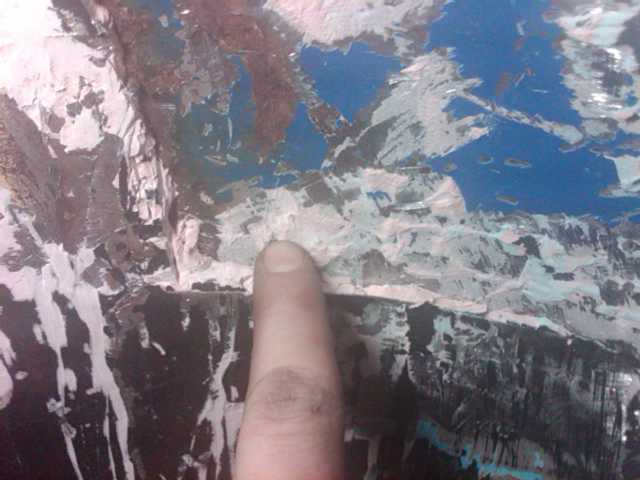
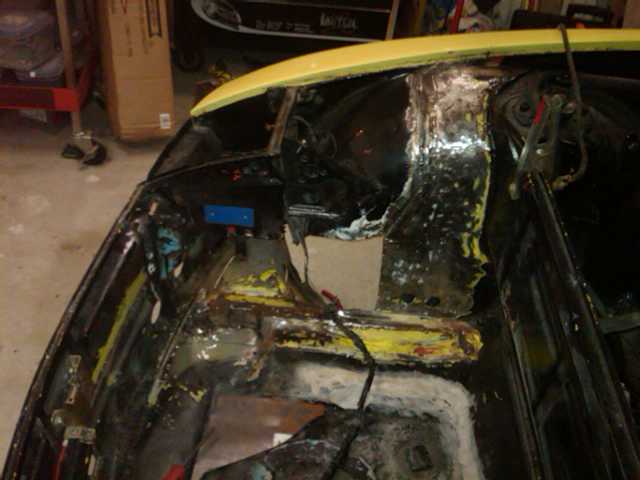
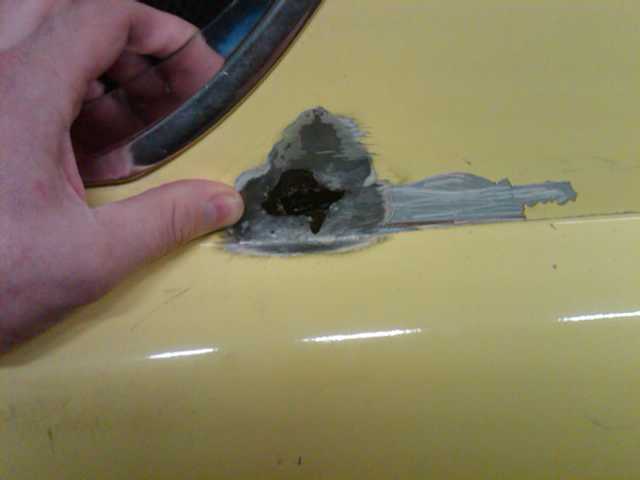
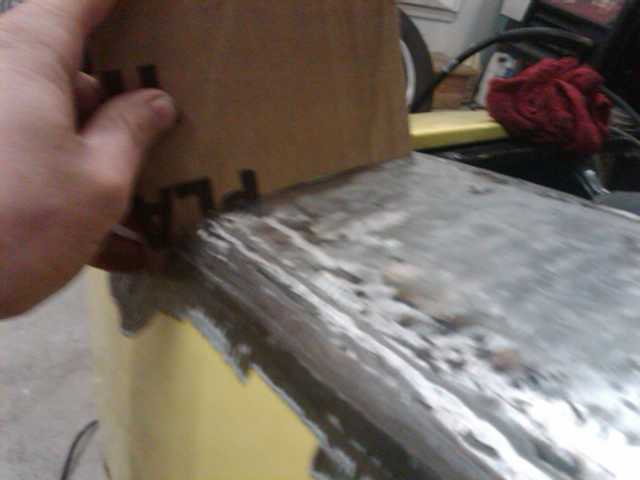
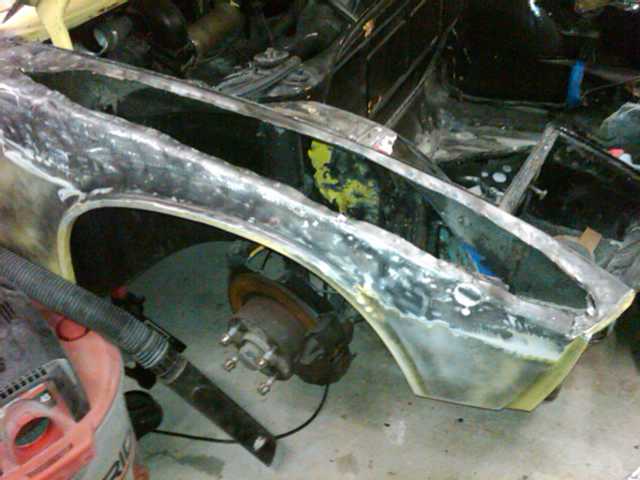
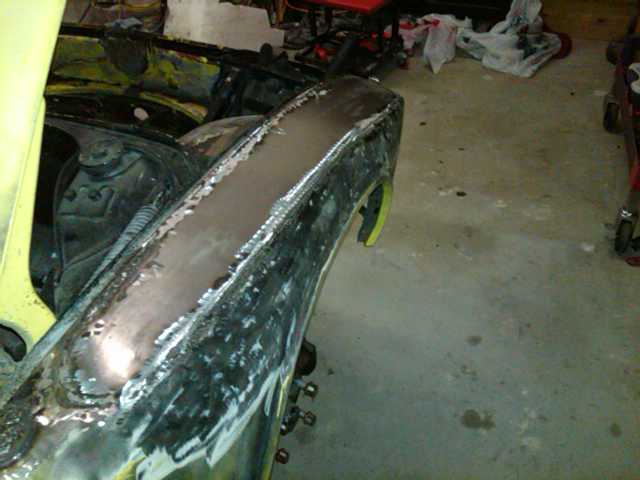
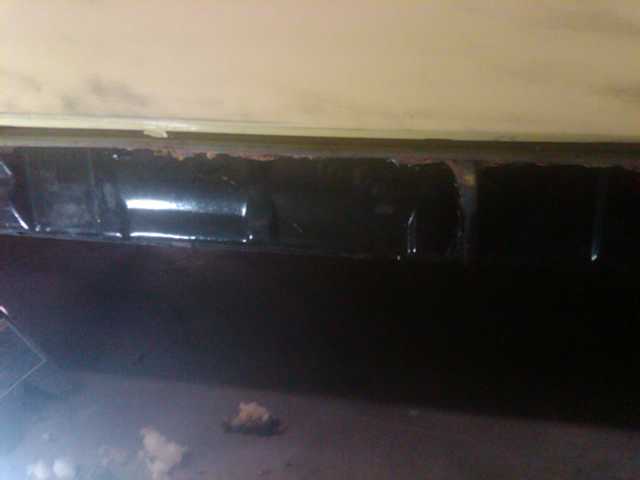
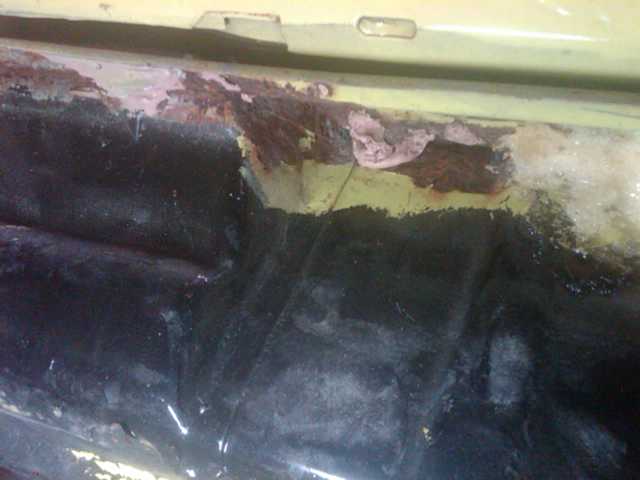
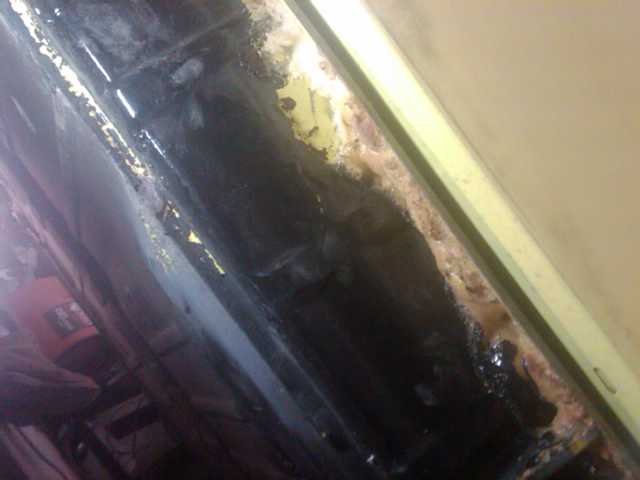
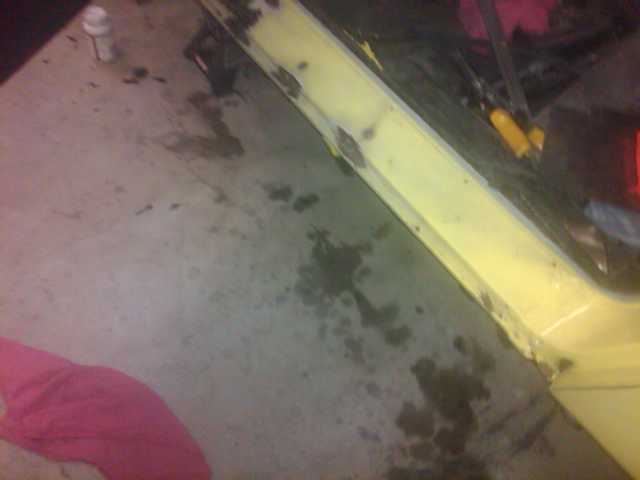
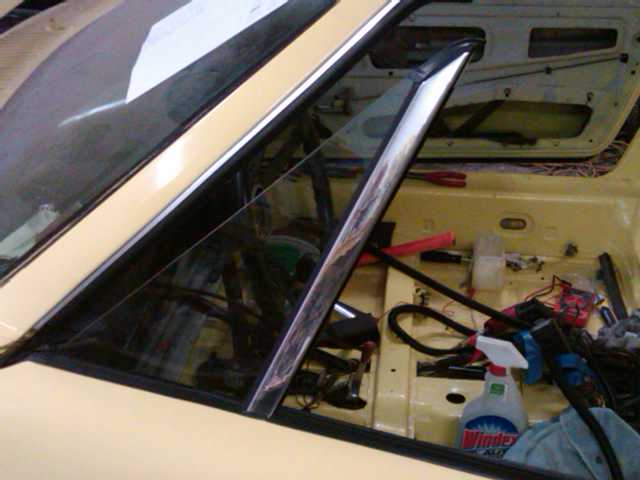
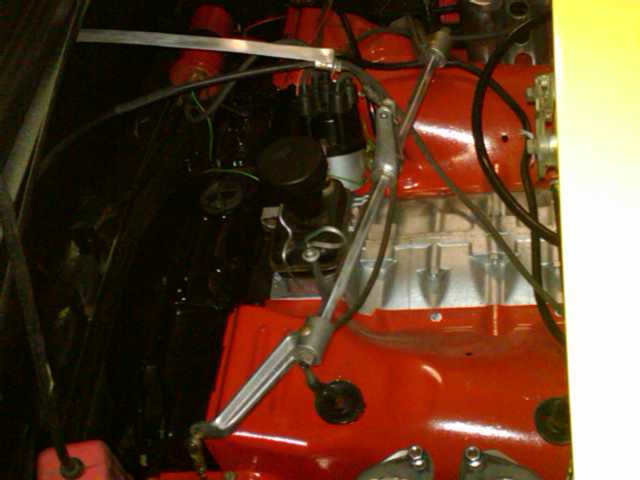
Well, I decided to look into the new car more that I got from a member on here. there was a trunk floor repair that left a little to be desired. I tried using flux cored mig welding and didnt have much luck, so yesterday I got a tank and some gas @ $200 (ouch) and I was doing some survey work on the front trunk. Let me say I was way too excited to get my car and I looked underneath and saw a couple of rust throughts on the passenger side near the rear but the "longs" where I spent most of my 5 minutes looking was solid. and I though no big deal just a couple of pan spots. and under the new battery tray looked solid from the engine compartment. well under the battery tray "hell hole" was described as" not perfect". there is a piece of metal screwed over the bad stuff. making it appear solid. Then the big suprise, there has been por15 used on the motor mount I thought it looked real rough and when i pushed on it with my finger oops a hole. some poking with a screw driver resulted in the hole you see. the I looked further back at the arm that goes to the rear suspension and it is also por15 with a odd look . more poking and you guessed it a hole. I guess some one thinks por15 is structural. NOT,,, Well I dont mind documenting this because I will fix it right. but hopefully my eagerness to finally get my 914 will make someone else take a second look at the car they are looking at. Mine look great in photo's and even pretty good in person. but it had a dark secret. Now the Real question on the motor mount and (trailing arm mount?) guess that's what its called. what should I paint the back of the metal with and what gauge should I use, should I make drain holes so It wont hold water in the future? Im gonna try to do all this welding with the motor in the car. I fear I will never get the car back together if I take out the motor. Thanks for all your input. Wayne
Posted by: wayne1234 May 5 2009, 08:38 PM
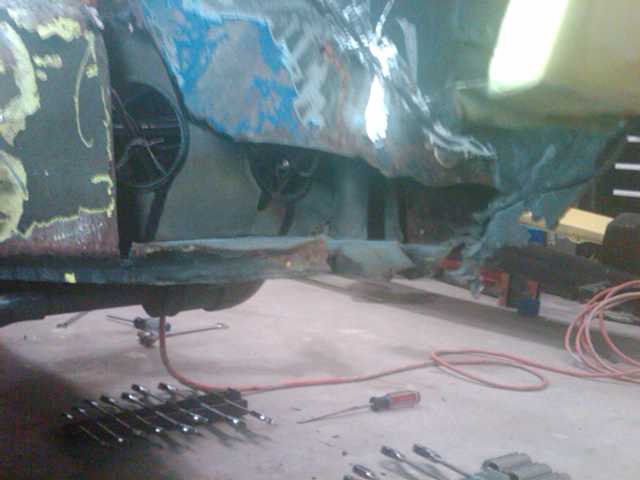
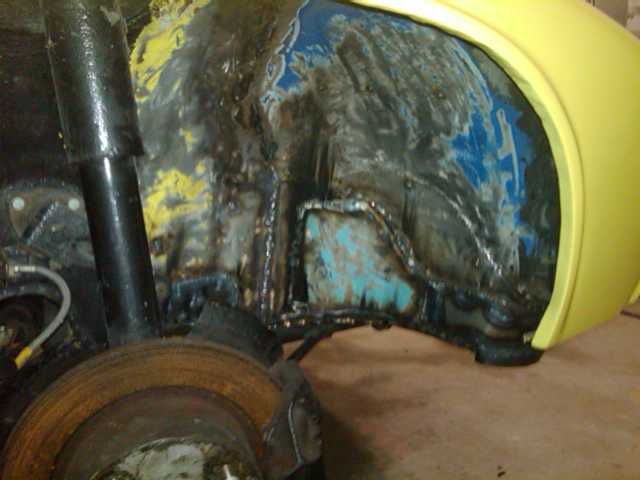
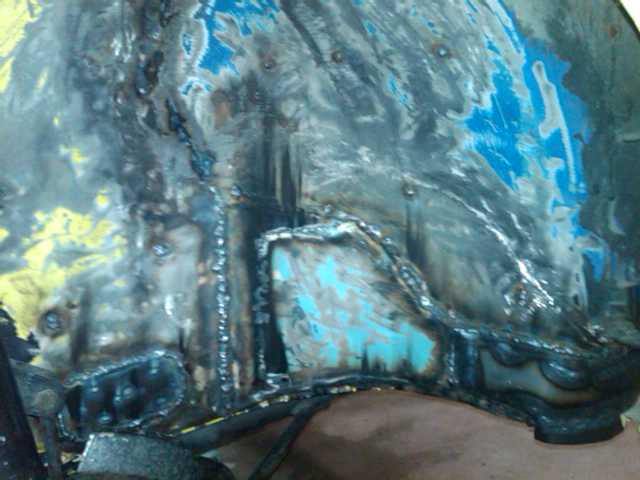
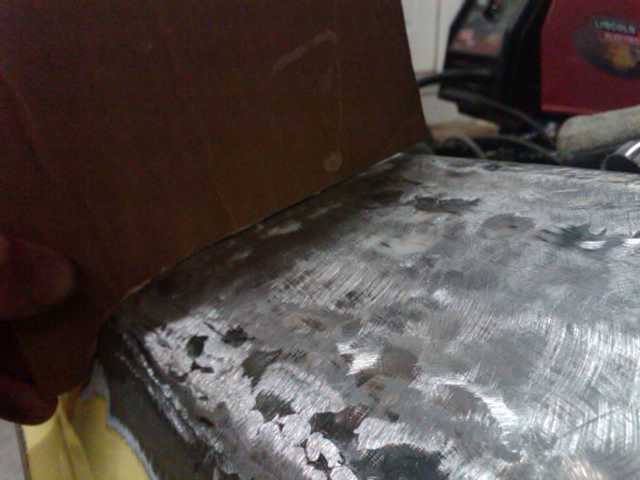
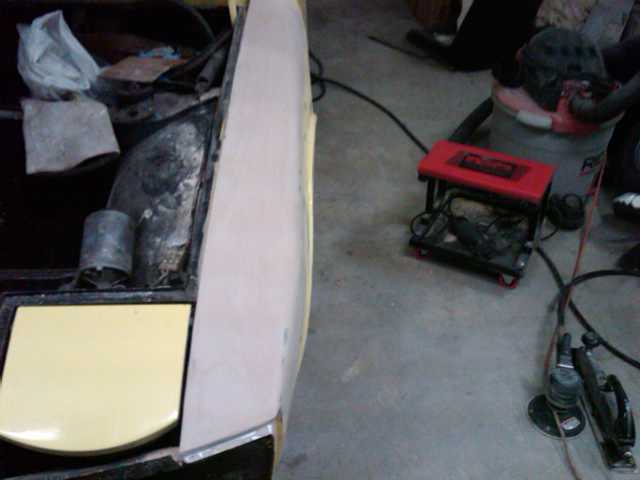
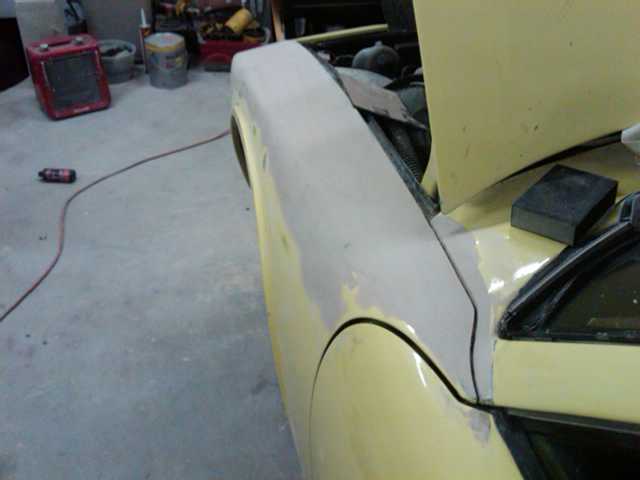
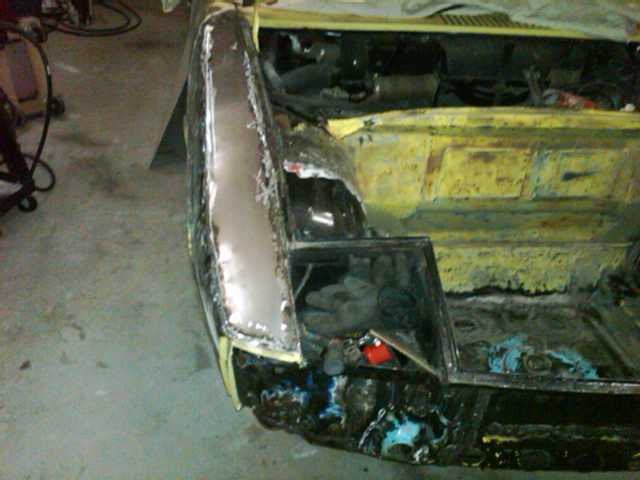
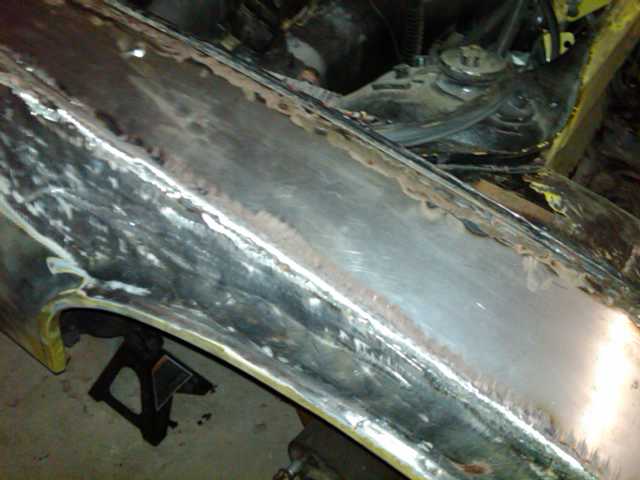
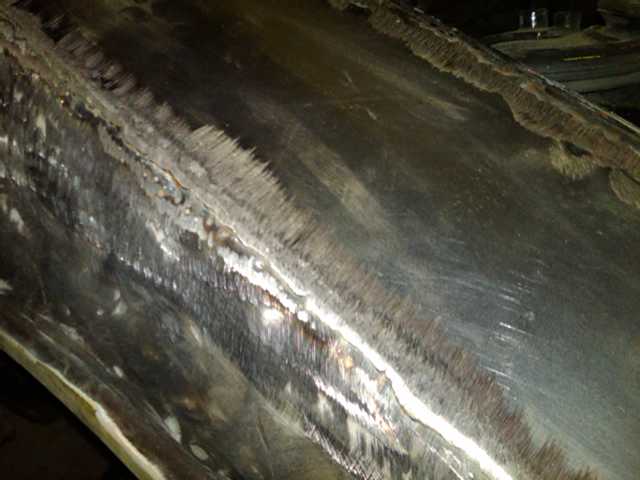
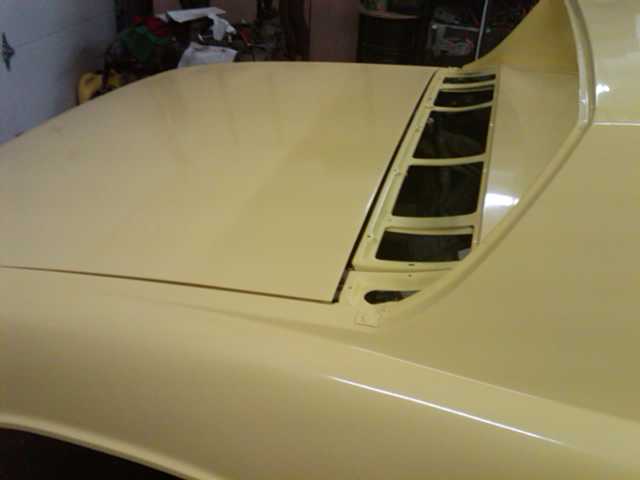
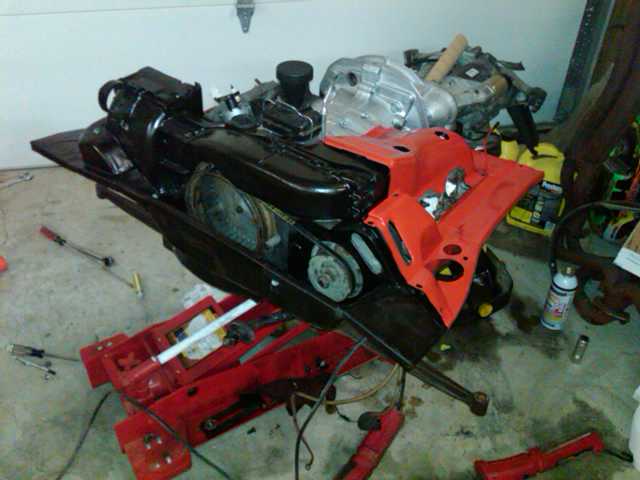
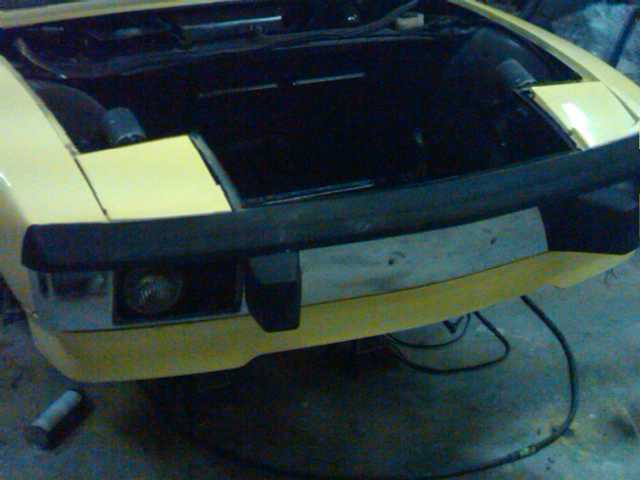
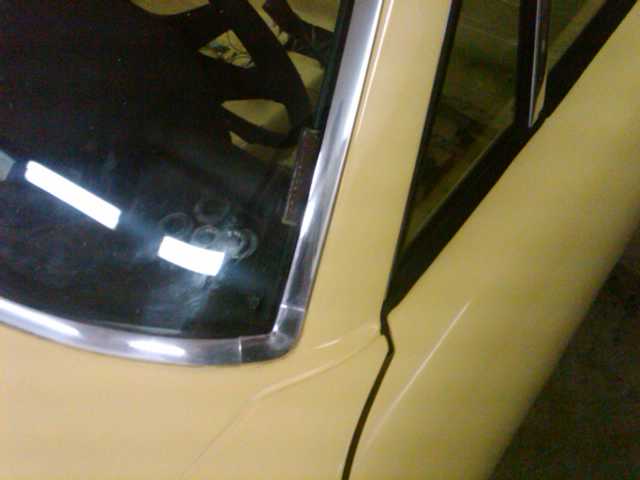
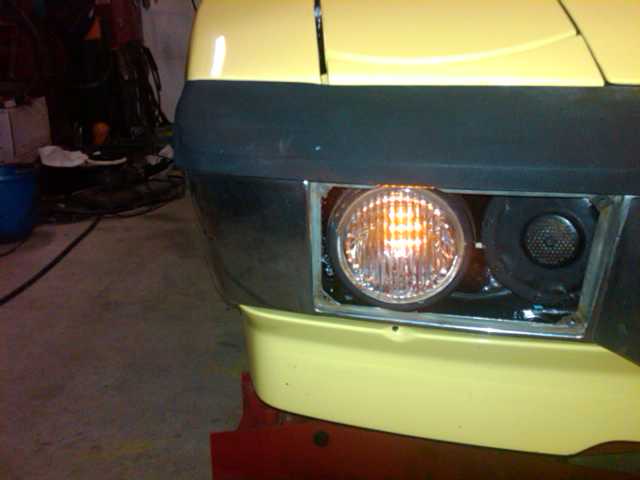
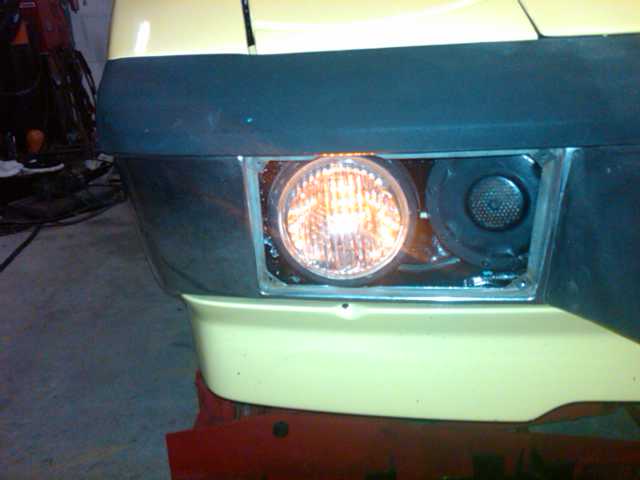
here some more pics... And check out the "All metal" slope nose. there are more screws holding it on than welds. and the back of the metal used isn't even primed.. give me a break and check out the round light on the side "shaved" workmanship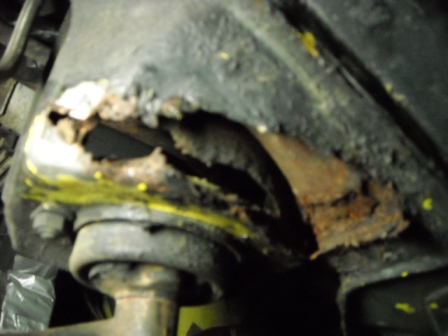

Posted by: wayne1234 May 5 2009, 08:41 PM
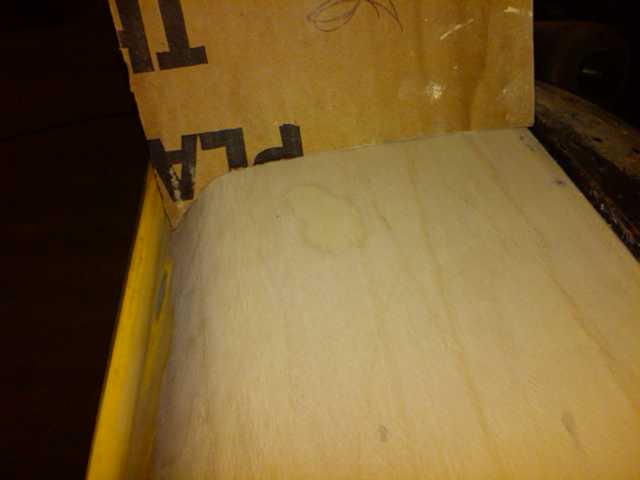
here is more 
Posted by: SirAndy May 5 2009, 08:41 PM
What year is your car?
The color should have been a clue of what you were getting yourself into.
Lemon Yellow 
Btw., i wouldn't even think about fixing this with the engine in the car. It's sooooo much easier to work in there with the engine out.
Plus, seeing those pictures, you're gonna find more rust. Trust me, it's there. Look for it ...

 Andy
Andy
Posted by: wayne1234 May 5 2009, 08:47 PM
Its a 74 one year older than me. yep  lemon yellow
Posted by: wayne1234 May 5 2009, 08:51 PM
My fear is I wont ever get her back together if I pull the engine, I "recently" took over a year for me to put in a timing belt, water pump , tensioner, and a couple of gaskets in my Audi TT. I just got it going this weekend so I could pull the porsche in the garage because its been so rainy here and it has been under a car cover
Posted by: SirAndy May 5 2009, 10:00 PM

Its a 74 one year older than me. yep
lemon yellowIn that case those are the wrong outer motor mounts anyways.
What you have are mounts for a tailshifter and you should have a sideshifter in that car ...
 Andy
Andy
Posted by: wayne1234 May 5 2009, 10:28 PM
how can I tell what trans I have
Posted by: charliew May 5 2009, 11:03 PM
You need to move back and manualy focus your camera. Maybe it needs to be on macro. Those are pretty bad spots. There will be more I'm sure that you haven't found. That will not be a few simple welding jobs in the evening. I'm afraid by the way you are communicating your skills this is way beyond what you can accompolish. Do you have any sheetmetal working tools? There is no way you are going to work in the engine compartment and do a reasonable job with the motor in there.
Tools you will need:
face shield and gloves, fire extinguisher
4 inch electric grinder with grinding wheels and sanding disks and some cup shaped wirewheels
electric shear, or cutoff wheel air tool, tin snips, compressor? I don't use one but maybe a sawzall will help
at least a ballpeen hammer
6r and 11r visegrip clamps, not hf for the clamps, maybe some other tools but not the visegrip clamps
chipping hammer for the flux removal
I would consider these tools bare essentials for a beginner.
Some of the sheetmetal is about 17 ga. the motormount is thicker but you will not be fabbing that you will need another one.
That rust needs to be sand blasted to properly get most of it out. Sand gets everywhere. It will ruin glass. The car really needs to completely be disassembled to do the blasting.
Check it out real close and think about it before you start and decide it's more than you can deal with.
Posted by: Dave_Darling May 5 2009, 11:13 PM
how can I tell what trans I have
Where does the linkage go into the transmission? Through the end cover, or into the side of the trans case? The former is a tailshifter, the latter a sideshifter.
--DD
Posted by: wayne1234 May 5 2009, 11:28 PM
Thanks for the input, tools are not the problem. I have a 80 gallon compressor, yep it as tall as me (and bigger around) thank god.impacts , about every air tool 3 grinders so I dont have to switch out different blades. at least 3 drills and many wire brushes. plenty of safety gear. yep I have 2 sawsalls. I also have a small snap on air saw that will do fine cutting. a real nice Lincoln 175hd 220 volt welder. just got the gas, I have always used flux cored before. I have cut down & welded steel flatbeds. and made from scratch 3 snow plow mounts. this is just my first time working with "sheet" metal. like anything you have to just do it, to get decent. I was just looking for input as should I go thicker on the metal around the engine mount. I do have a small metal brake. as far as other metal forming tools I have helped a buddy make a fender patch with a leather bag of sand. it took some time.. I am defiantly thinking of pulling the engine. I got in there to cut out most of it and it wasn't too bad. I just know if I pull the engine I will want to go through it even it was just rebuilt within the last 1000 miles. and I would rather do that this winter. I actually want to drive this thing a a fair amount this summer. then this winter completly tear it down and go through it . for now I just want to make solid repairs
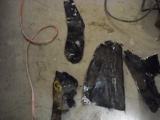
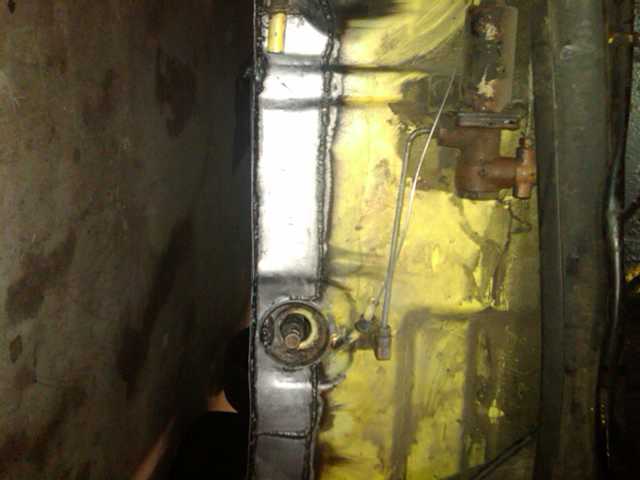
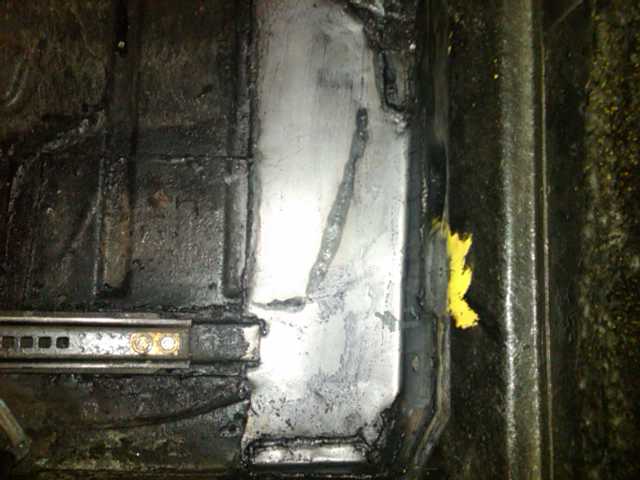
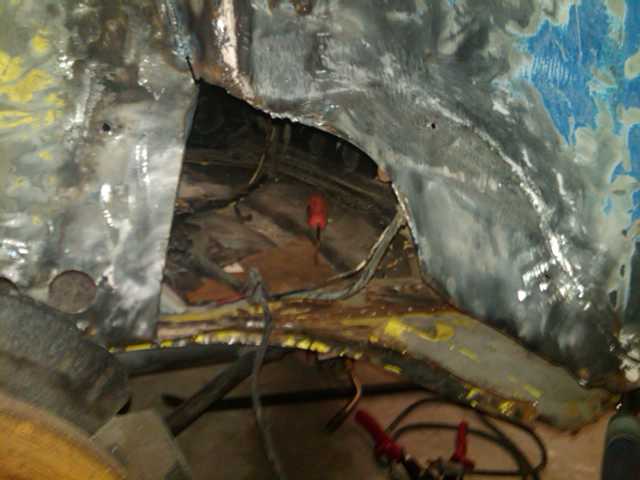
Posted by: wayne1234 May 5 2009, 11:57 PM
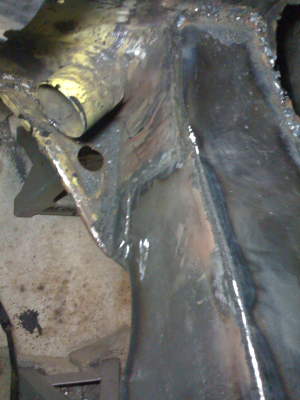
Well I have been busy here is the good and the bad , I tore off the prevoius owners patch that just covered over the problem. Again not even primed on the back. took out the battery tray. and remover the repair over the bad on the engine shelf. guess what the top side of the long was rusted alot. I cut a rough hole in the rusty top to find the only good news of the night it sides and bottom of the long are all very solid. So at least I have that going for me. I agree it is a pain to be bent over in that odd position , but there seems to be room to do the welding. . but I have replaced the head gaskets and installed Time Serts in a newer Cadillac Northstar without pulling the motor. so I know what tight is believe me. I looked at pelican on their engine drop and it doesn't seem to bad. but it would kill me not to fix the couple of small oill leaks it has and other misc before putting it back in. Who knows I'm gonna sleep on it and decide tommorrow evening what to do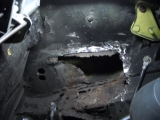

Posted by: wayne1234 May 6 2009, 12:15 AM
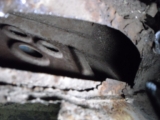
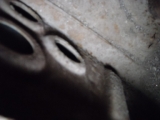
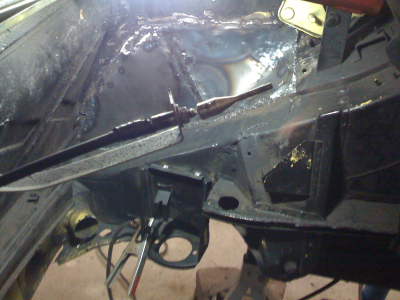
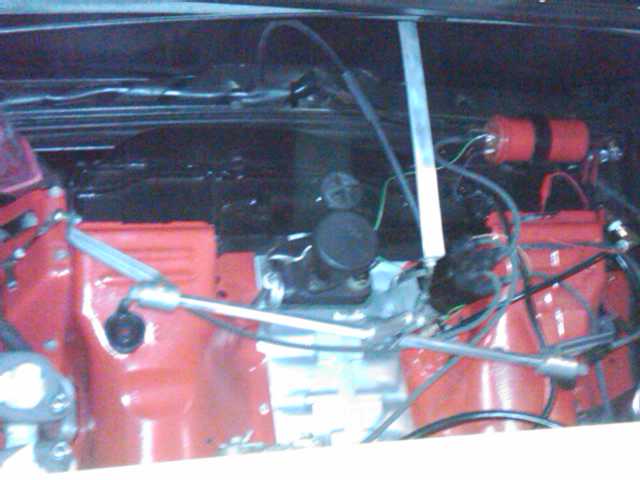
by the way looks like side shift linkage on drivers side just behind the cv axle. Please direct me to the correct mount I need. help finding parts is Always Appreciated, I alread got one order from pelican this week anyways.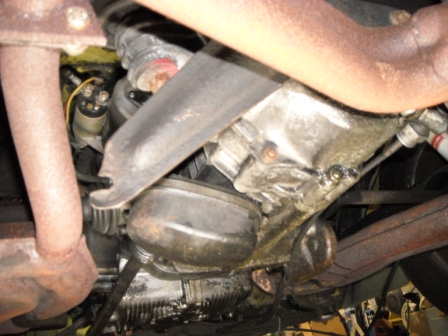
picture taken from rear of car
Posted by: wayne1234 May 6 2009, 12:19 AM
couple of better pics


Posted by: veltror May 6 2009, 03:53 AM
Mine was yellow,...........once
Posted by: Dave_Darling May 6 2009, 08:45 AM
For a side-shift car, your motor mount bar should be a cast piece with some curves to it, and a large hole that the shift linkage passes through. There should be rubber mounts inboard, between the bar and the brackets bolted to the case. The outboard mounts should be solid--pretty much pieces of U channel that fit across the mount pod on the body.
--DD
Posted by: mudfoot76 May 6 2009, 08:46 AM

If you haven't dropped engine yet and aren't in a huge hurry, I'll be happy to lend a hand. My schedule is completely booked up until May 18, but after that I have more availability. It would be nice to have another teener that can show up to local PCA events!
Posted by: Vacca Rabite May 6 2009, 09:03 AM
If your engine mount is rusted out, you are going to find MANY more problems inside the long. it may well be rusting from the inside out.
Be POSITIVE that the DAPO did not just put a clam shell over the outer long (over the rust). I have seen 2 rust bucket cars with longs that looked great due to a clam shell welded over the rusted out long.
I would not put more money into this car until you know how bad the damage is. You may find yourself well ahead (both time and money) if you just use this car as a parts car and move the good stuff over to a known solid tub.
Sorry to be a Debbie Downer.
Zach
Posted by: wayne1234 May 7 2009, 05:17 PM
Thanks for the offer mudfoot. i looked at your sig, I just got rid of a 02 Mini Cooper last weekend. I have a Audi TT also So if you have one as well we must be living in a parallel universe. Any ways I hope it be well on my way with the repair by then. but the offer is much appreciated. I sometimes have the lack of motivation virus. I have really inspected poke and prodded the longs. they are very solid. I think the top section became more rusty due to the fact of a piece of metal being welded over the rust before. trapping moisture. if it had been cut out and replaced I dont think it would have even got as far as it did, but a 10" X 2.5"section only on the top. isn't going to scare me into a new tub. nor the hole in the inner fender . it just gonna take time and patience. as far as the motor mount Again I think the por15 over the old rust did more harm than good. Its just metal it can always be welded back. I plan on taking a ton of pictures. tonight I'm going to clean up all my rough cuts and hopefully make templates. then Friday cut some metal from the templates. Then this weekend a close friend is gonna help and he has done a ton of sheet metal rust repair & welding on a totally rotted Chevy truck (cab corners, door sills, & complete floor). so Ill have a more experienced welding eye behind me.
Posted by: Larouex May 7 2009, 11:38 PM
That's a heartbreak and a totally misrepresented car if someone said it was solid. The rust is severe and because of it being in the places it is, the cancer is pretty bad. So like others have said, you need to decide... DO you save it or cut it.
Posted by: wayne1234 May 8 2009, 05:32 PM
I'm gonna save her, i got all the bad out on the Hell hole and long and top of the motor mount. its all squared off. and it needs a little more finesse, then I can make my templates. I have been a little lazy to post pics.
Posted by: highways May 9 2009, 03:32 PM
It's good you're motivated to save her. There are alot of other things though that you could also consider diving into though to really make the car nice again. Dropping the engine with 2 jacks and the wheels off isn't hard at all (pelicanparts has the how to article). Then you could start doing stuff like getting the engine tin and other parts powder coated all nice. Get all the bolts and hardware zinc plated. Make room so you can really go to town attacking one rust area after another. You have alot of welding ahead of you to make that car right. MIG welder with variable wire speed and variable voltage, at the low settings, is really the only way to go. I did some hell hole repairs, and suspension console replacement on mine. Then I rebuilt all the suspension (all the original rubber bushings will be compressed and shot). Got some rebuilt brake calipers from Eric Shay- you don't want to be driving with 35 year old brakes. 5 lug upgrade parts from various world members. Now I have a solid car and completely rebuilt suspension. Popped the original engine back in with 115k miles and the car runs great as my daily driver. Haven't done paint yet... but I'll get to it. I've put about $4500 into it and spent about 9 months doing it at a pretty leasurely pace. Could've done it a little cheaper if I wasn't replacing mirrors, glass, various details here and there and ofcourse the 5 lug upgrade. But it's worth it.
Judging by your rust situation, you're going to want to examine the suspension console ears, longitudinals behind the rocker panels, jack points, interior floor boards (scrapping out the tar), seat mount brackets, clutch tube firewall bracket, ect. Like some other members said... your rust situation looks heavy. Good rule of thumb is that for every bit of rust you can see... there's 60% more hidden under the paint extending out from what you see. Getting the car apart is the only way to truly evaluate what you're up against and decide if you should shop for a rust free tub instead. Your car probably has nice parts... use them on a solid tub!
Here's a portion of my project: http://www.914world.com/bbs2/index.php?showtopic=54896&st=40
If I was doing it again... I would pay to get the whole thing walnut shell blasted and start fresh. And I wouldn't mess with a tub that's much rustier than mine was.
Posted by: veltror May 10 2009, 11:03 AM
Soda blast it rather then walnut shells, much less damage... glad you are saving it, you should see the state of mine and I am saving it...
Posted by: charliew May 10 2009, 01:07 PM
When a unibody car has a lot of rust that is obvious there is always going to be rust in places you can't imagine. Inside the lower targabar, inside the rear quarters, inside the tops of the front fenders, on the backside of the door hinge pillars, around the door catch inside bracket, up around the door jamb vent, inside the doublewall firewall, on the inside bottom of the doors, there are so many places that are not obvious that are always rusty. Also just because new metal is put in place of the obvious spots the heat from the welding means that unless both sides are treated and sealed it will be back and won't take as long as it originally did as this time the metal was heated way more than the first time it was spot welded together and both side of the metal was coated. Actually a rust free tub may be a impossibility but one that requires singlewall repairs where both sides can be treated is a far better restore than building a complete tub.
Posted by: wayne1234 May 11 2009, 08:41 PM
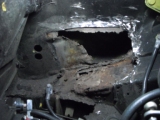
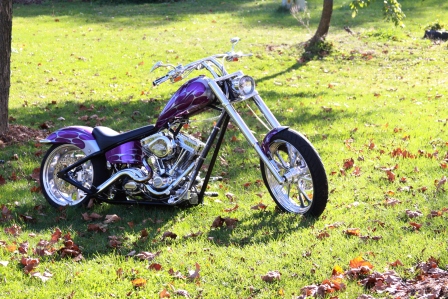
Well I have decided to go the easier route and drop the engine.You guys are right, maybe someone has travled this path already. Ive almost got it out except I didnt have the spline drive needed to get the cv axles out. my engine mount is too far gone to save that is the reason for engine removal. I feel I could have fixed the hell hole with the engine in there. but all I have left are the cv axles and remove the carbs. and I only have a little over a hour in the removal so far. And I'm going to fix the oil leaks. and paint the tins as suggested. and make her nice. here are a couple of shots or the removed rusty areas. and check out what I dug out of my toolbox from like 8 years ago. it is a small sandblaster that recirculates the sand so very little mess. it only does about a nickle size spot at a time. spray for about 2-3 seconds then move on. it will help me get all the tiny rust out without making a huge mess. and it cant be worse than scraping out the tar which will come later. My old project, The chopper in the corner feels lonely. 
Posted by: wayne1234 May 11 2009, 08:44 PM
here is the mini sand blaster and my bike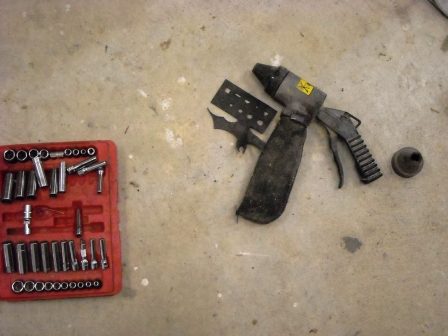
Posted by: wayne1234 Oct 9 2009, 11:29 PM
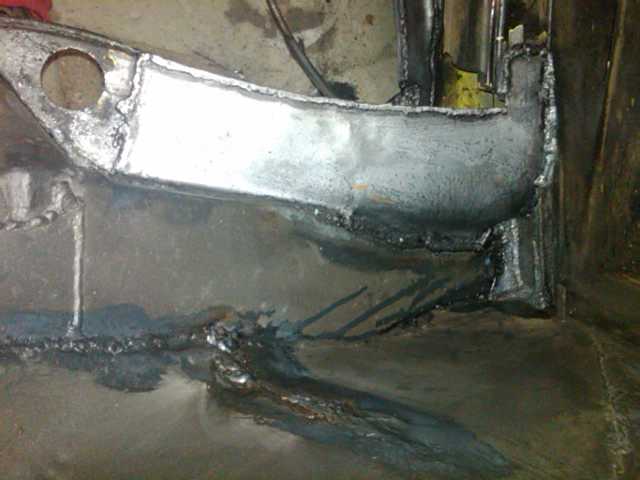
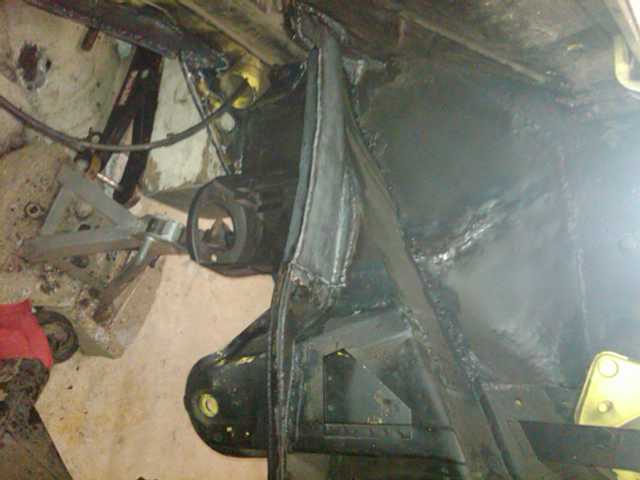
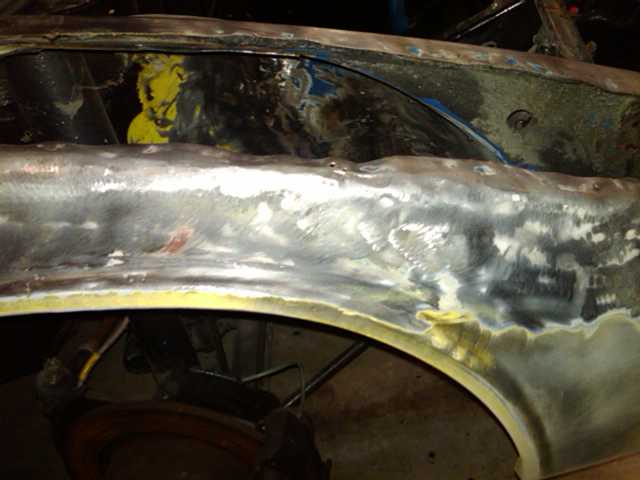
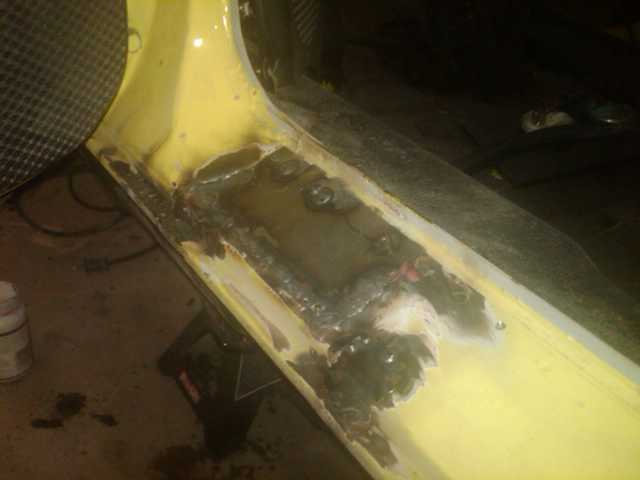
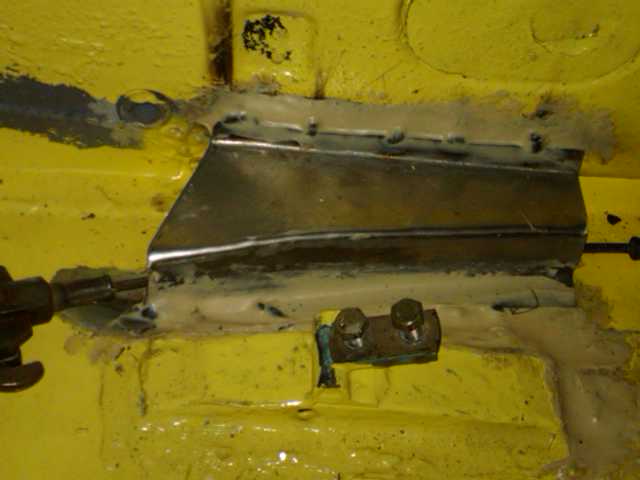
Progress ![]() .. Well after the girlfriend got her newto her car the Porsche got banished from the garage.. and she sat under the car cover... recently a friend has been helping me and we have been working on the car 3-4 hours at a time a couple night a week, man it takes a while... finished getting the motor out.. removed the motor mount and guess what it was pretty flimsy under there, so we cut it out and made up some new metal doing a double layer just like the factory did.. got the mount back in and made a inner fender piece, that was a chore, turned out decent and it is totally strong. now just some more repair on the pan in between the firewall and the inner passenger compartment that 2" strip across the car . it too has some rot.. then I need to finish welding up what the PO had tried to replace .. which is only spot welded in a couple of spots...
.. Well after the girlfriend got her newto her car the Porsche got banished from the garage.. and she sat under the car cover... recently a friend has been helping me and we have been working on the car 3-4 hours at a time a couple night a week, man it takes a while... finished getting the motor out.. removed the motor mount and guess what it was pretty flimsy under there, so we cut it out and made up some new metal doing a double layer just like the factory did.. got the mount back in and made a inner fender piece, that was a chore, turned out decent and it is totally strong. now just some more repair on the pan in between the firewall and the inner passenger compartment that 2" strip across the car . it too has some rot.. then I need to finish welding up what the PO had tried to replace .. which is only spot welded in a couple of spots...
Posted by: wayne1234 Oct 9 2009, 11:49 PM
what was left of the motor mount pics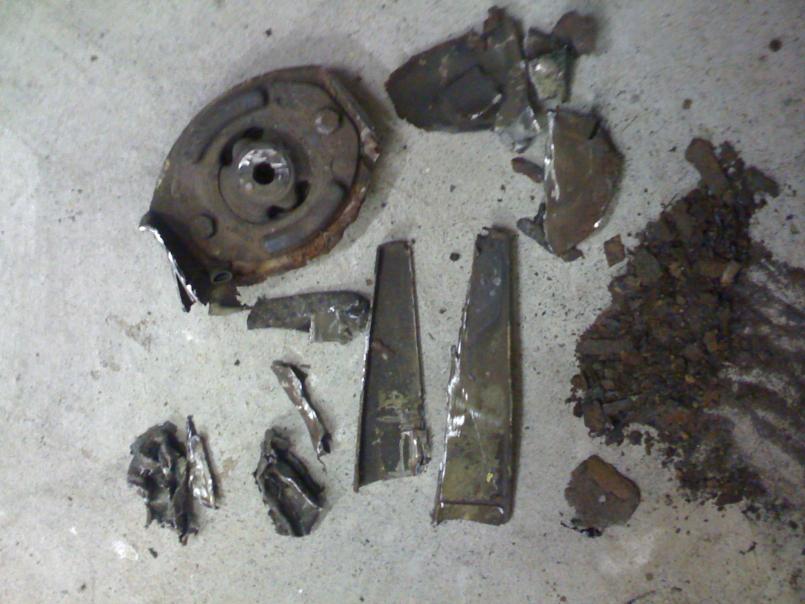
Posted by: wayne1234 Oct 10 2009, 12:21 AM
oops a little big lets try this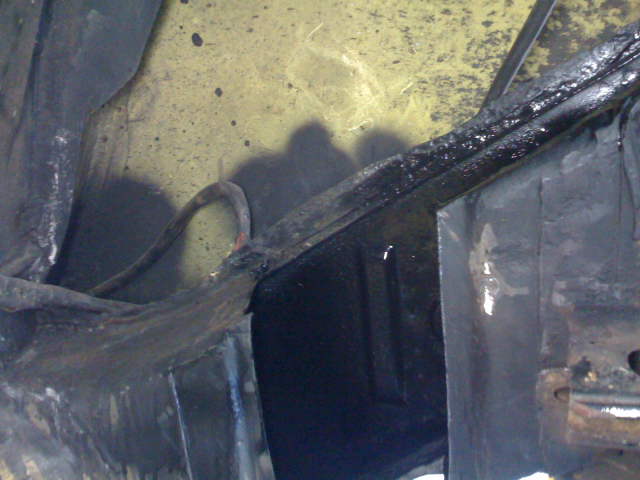
Posted by: wayne1234 Oct 10 2009, 12:33 AM
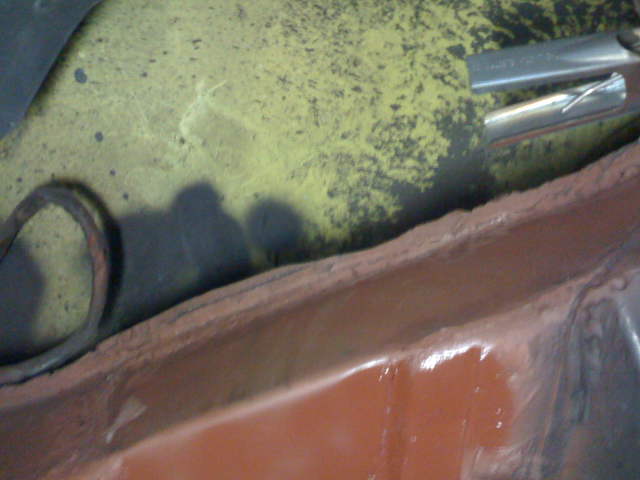
Posted by: wayne1234 Oct 10 2009, 12:38 AM
with the inner fender well in 
reminder of what it was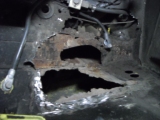
Posted by: wayne1234 Oct 10 2009, 12:50 AM
The girlfriends car that kicked the Porsche out of the way temporally 
Posted by: wayne1234 Oct 10 2009, 11:19 AM
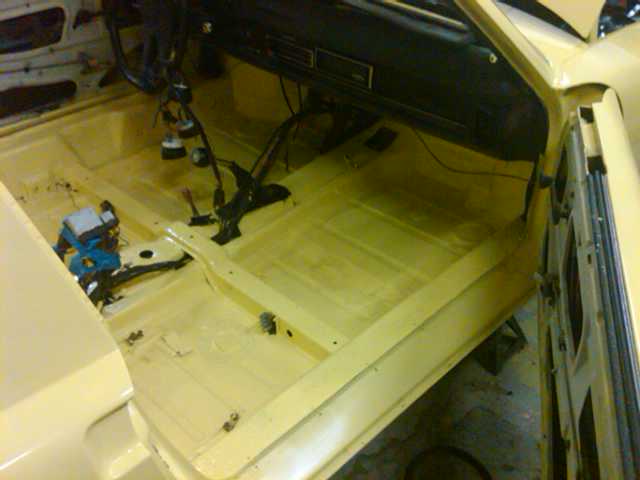
Feels like I'm making some real progress. What do you guys think? Trying to keep my motivation up. I'm also looking for some input. Since I have the engine out I'm going to do a texture/ undercoat , should I go back to yellow in the compartment , Since it has the slope nose it obviously not a factory true "restoration" , but would it put people off if I ever go to sell (I Doubt I ever will) it if I leave it black like the PO has already painted? which also means the front trunk area, and the interior tub.....
Posted by: SirAndy Oct 10 2009, 12:42 PM
Feels like I'm making some real progress. What do you guys think? Trying to keep my motivation up. I'm also looking for some input. Since I have the engine out I'm going to do a texture/ undercoat , should I go back to yellow in the compartment , Since it has the slope nose it obviously not a factory true "restoration" , but would it put people off if I ever go to sell (I Doubt I ever will) it if I leave it black like the PO has already painted? which also means the front trunk area, and the interior tub.....

I'd go with yellow. In my experience, brighter colors make the engine bay look cleaner.
 Andy
Andy
Posted by: Dave_Darling Oct 10 2009, 01:30 PM
In my experience, lighter colors show the dirt a lot more than darker ones. Maybe grey or silver wouldn't, but yellow does.
Light colors really throw the light around, making it easier to see stuff.
--DD
Posted by: faux916 Oct 10 2009, 02:42 PM
Wayne, is that the car that was in the classifieds here at the beginning of summer? If it was he said he just restored it(wtf). I passed on that car at the last minute. Repairs would have been beyond my abilities. Good thing for me on my last minute decision. Good luck with the repair.
Posted by: rick 918-S Oct 10 2009, 02:52 PM
Wayne, is that the car that was in the classifieds here at the beginning of summer? If it was he said he just restored it(wtf). I passed on that car at the last minute. Repairs would have been beyond my abilities. Good thing for me on my last minute decision. Good luck with the repair.
 I almost contacted the seller about that car too.
  Glad to see your fixing it. Keep up the good work
Posted by: wayne1234 Oct 11 2009, 02:15 AM
WTF indeed,,,, Yep I bought it off a member on here this summer... he got rid of it when he got his 5K 911... It was fairly close to me and I got all excited,, and had looked at some of his "rebuild" pictures on here and his paint how to's... Talked to him a few times,,, and had convinced myself I was going to get a 914. I met him halfway and literally took less than 10 minutes looking at it..  my mistake... but there is no going back in time and it is what it is. Ill eventually get her going again and the car will be solid then. I am thinking about getting another one that is more factory without the slope nose. or another crazy idea is to graft back on the fender fronts... havent decided. At first I really liked the slope nose. Now I envy the factory style... Since we already have 8 vehicles whats one more right? Actually the problem is the garage or lack there of... Thanks for the coments it hopefully will keep me motivated at the task at hand
Posted by: veltror Oct 11 2009, 06:07 AM
Keep going, mine is/was bad and I am still with it, it will be worth it in the end.
Roman
Posted by: wayne1234 Oct 31 2009, 08:19 PM

Attached image(s)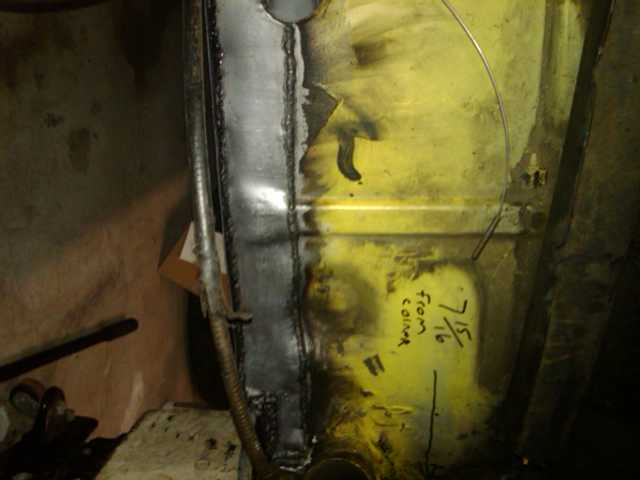
Posted by: wayne1234 Oct 31 2009, 08:27 PM

Attached image(s)
Posted by: wayne1234 Oct 31 2009, 08:31 PM
Posted by: FourBlades Oct 31 2009, 08:35 PM
Your car is looking great, man. 
You will have a solid car ready for 35 more years when you get it done.
Keep the pictures coming, its great for everyone's motivation. ![popcorn[1].gif](style_emoticons/default/popcorn[1].gif)
John
Posted by: wayne1234 Oct 31 2009, 08:38 PM
Finally got some more work done with a buddy helping out. These are some pics of the rear pan area and lower firewall and the engine shelf. Just a bit more and she will b ready to put back together keep the comments comming. Sorry for the duplicate pic I did the whole uPdate on my blackberry and I am still figuring it out
Posted by: 914_teener Oct 31 2009, 08:44 PM
You are a true Hoosier... my Mom is from Indy....keep up the good work!
Posted by: wayne1234 Oct 31 2009, 08:52 PM

Attached image(s)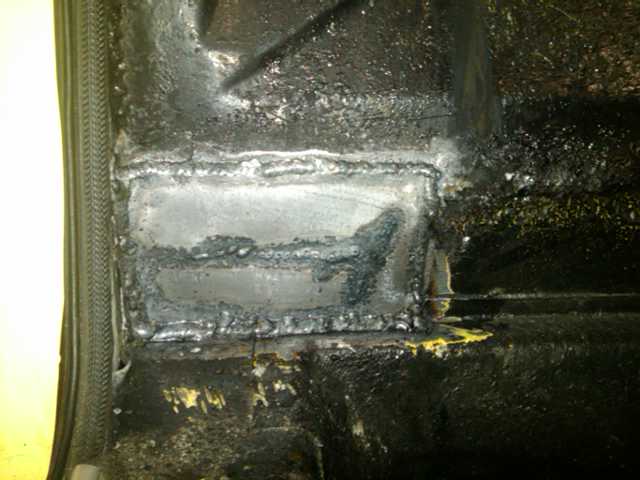
Posted by: wayne1234 Nov 18 2009, 10:23 PM
Well I'm waiting on engine parts  So I fugured I would do a bit more on the chassis I scraped the tar sound proofing off the floor board here are some pics and of course I uncovered a couple of pin holes towards the firewall on the passanger side. I'm gonna run a metal fuel line through the tunnel, any thing else I should run while I'm in there ?
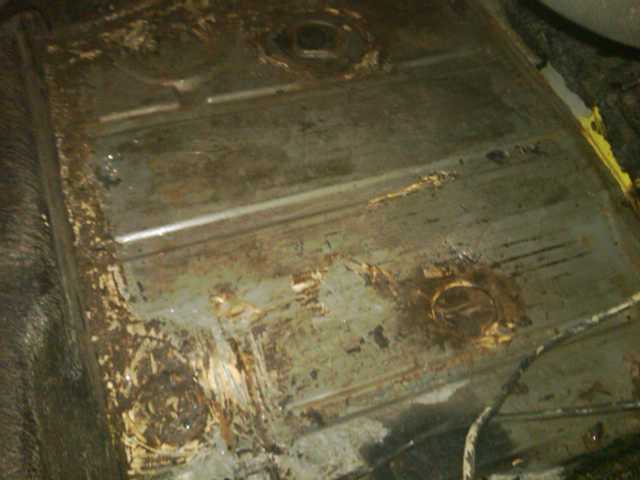

Posted by: rick 918-S Nov 18 2009, 11:54 PM
I ran a metal fuel line through the tunnel but I encased it in shrink wrap to protect it. I have always wondered why Porsche did the lines in plastic. Then one day I thought, what if the wiring in the tunnel becomes damaged. Well, it can't arch on the fuel line. Maybe it's but it worked for me.
Posted by: wayne1234 Nov 19 2009, 10:39 PM
OH NO,,, There is more welding in my future... Well me and my buddy was going to fix a couple of the small holes I found in the floorboard when I removed the sound proofing, and weld up a couple of gaps under the head light I saw a while ago when we uncovered another mess,,, there has been 3 pieces of metal patched together poorly and barley spot welded.. making up the inner fenderwell... Then covered up with the oh mighty bondo... I cant believe it held up in the wheel well... some of it was pretty thick. Oh well I just gotta laugh at this point  , And on top of that the heads I bought off of a guy on another website that were suppose to be 1.8 .... Yep you guessed it they were 1.7 with a 100mm bore for the cylinder jugs.. So they wont work without machine work... Man I am having the worst luck with this car... What is it they say, what doesnt kill you makes you stronger. Well all I have to say is I better have this car till the day I die. There is so much blood, sweat, and almost tears into her . here some pics of mess
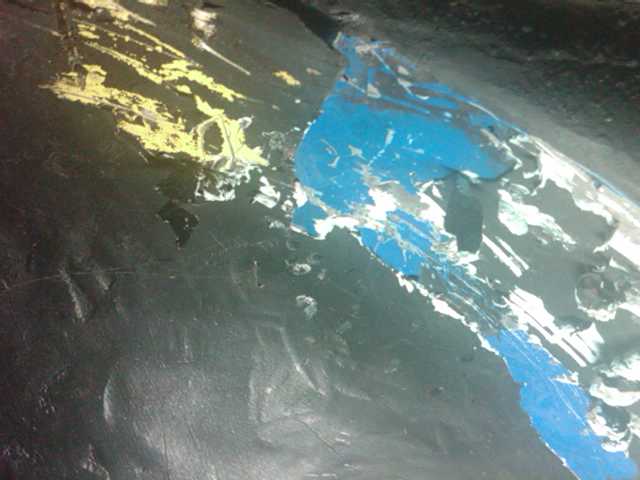
Posted by: wayne1234 Nov 19 2009, 10:42 PM

Posted by: Ferg Nov 20 2009, 02:08 PM
 were those lower gaps/holes covered with bondo and sealer or did you already start to cut away bad metal ?
Ferg
Posted by: wayne1234 Nov 20 2009, 04:49 PM
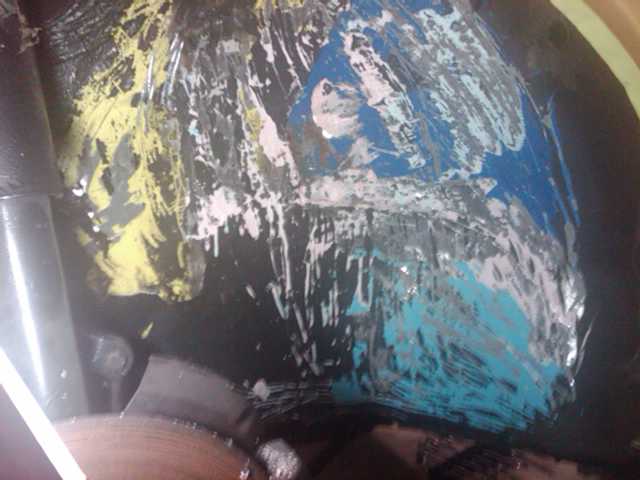
No they were covered by that light blue metal piece.. It had about 6 tack welds holding it in...un painted metal behind there rusting away... Im gonna make up some new metal, to fill in the gaps.
Posted by: wayne1234 Nov 25 2009, 05:51 PM
Getting it sorted out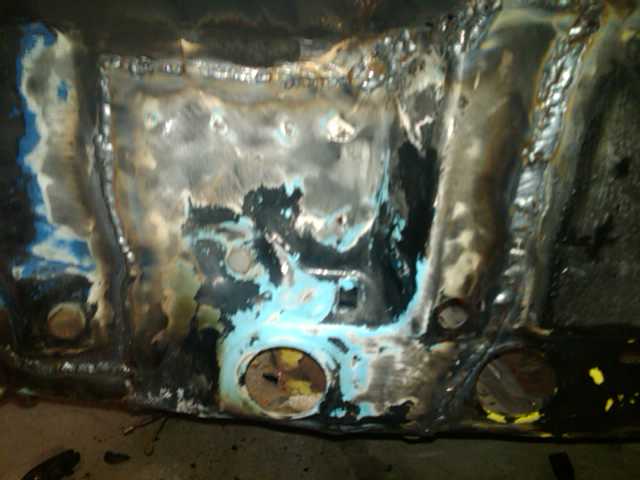
Posted by: wayne1234 Nov 25 2009, 05:53 PM
Keep the comments coming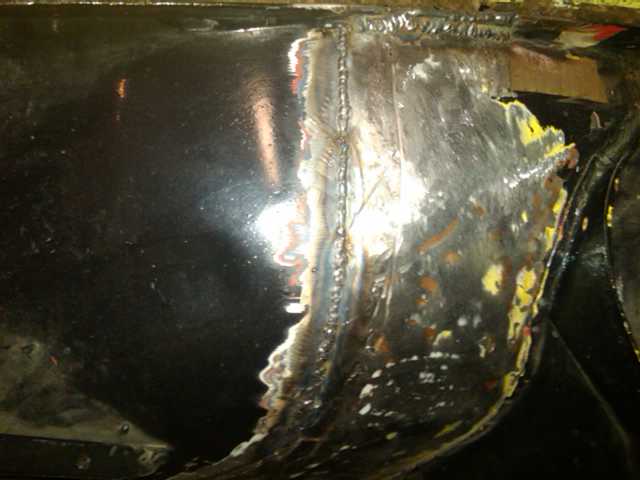
Posted by: wayne1234 Dec 4 2009, 02:56 PM
Welded up a couple of bondo spots that had nothing under them other than fiber tape!!! and also was very glad the PO did not weld up ther fender to cowl joint like he said, he must have meant cold weld like jb weld wonder why it cracked back out? Oh well I got it ground back out and now I heve to take out all the filler around it. 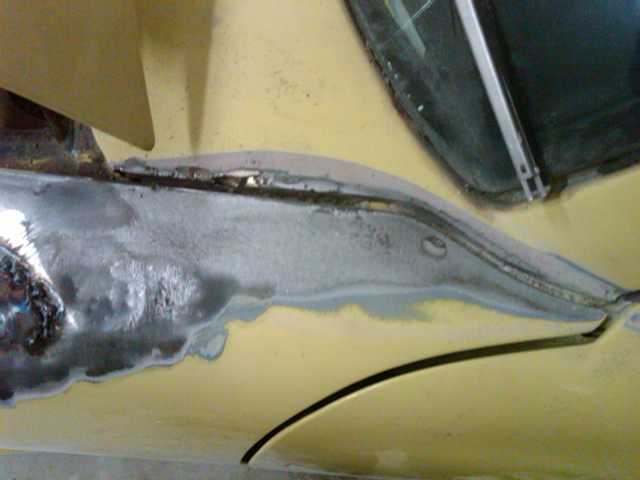

Posted by: SirAndy Dec 4 2009, 03:01 PM
Oh man, every time you post another picture, it just makes me cringe ...
 Andy
Andy
Posted by: wayne1234 Dec 4 2009, 03:07 PM
Also major progress.. We got the passenger inner fender and all supports straight and welded back in  this represents at least 15-20 man hours of repair.
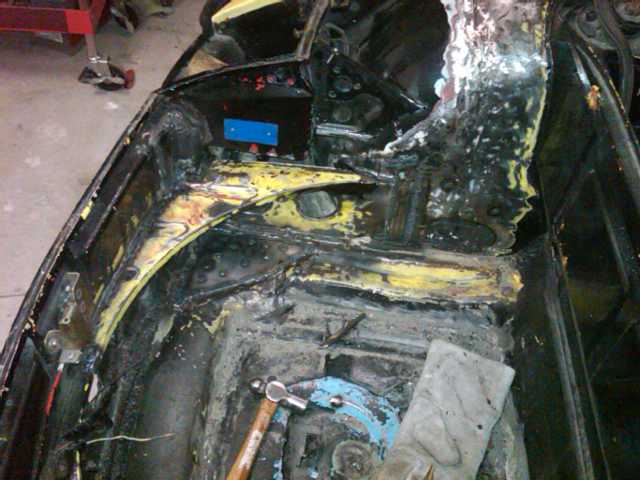
Posted by: wayne1234 Dec 5 2009, 12:07 AM
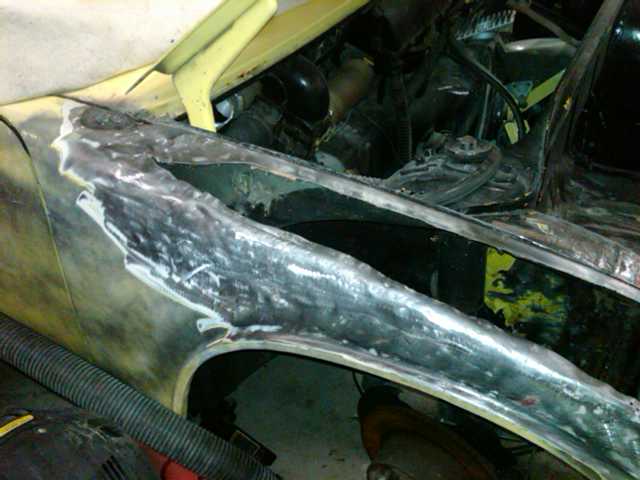
Well we got the front slope nose back into shape the PO had told me that another person did one side he did the other. Hmm Well I can guess which side he did the drivers side had been barley spot welded not primed just bare metal on the underside as you can see in the first few pictures of this original post. So I wheeled it all down. re welded it, then I shaped the metal because he had over 1/2 " of bondo making the shape. then it wasent seam sealed or anything so water got up ther and had cracked the filler I made 3 template of the curve on the other side. so I could transfer the shape over the the driver fender. It worked out great and there is only a light skim coat of filler now.. Paint will be in my furure soon I spent at least 8 hours on this fender today.  most of that was with the body hammers and dolly.... glad thats done
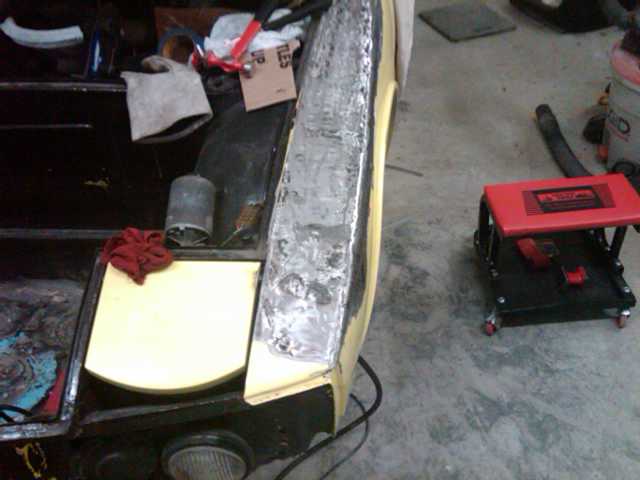
Posted by: wayne1234 Dec 5 2009, 12:09 AM
Posted by: wallys914 Dec 5 2009, 03:03 AM
Also major progress.. We got the passenger inner fender and all supports straight and welded back in
this represents at least 15-20 man hours of repair. Well with those holes, you should just turn it into a v8 car and add a radiator.

Great Work!
Posted by: charliew Dec 5 2009, 11:57 AM
The guy that sold you that car should have his name and location posted so no one else will ever do any transactions with him ever again. Forever, forever and ever. He knew the only way was to sell it before the repairs started to shrink and rerust. I don't care if it was only 2500.00 or 500.00, the deal is he wasn't truthful about the cars original shape before the repairs were attempted. The fact that there were no decent repairs is a subjective thing as to the knowledge of the seller and buyer and their knowledge of real unitized body repair. A unknowing owner can even pay for a "bodyshop" repair and still get marginal work done if the shop is not educated on real quality repairs in unibody construction and metal prep for a long lasting repair with good metal prep. and sealing processes. Once rust is boxed in it's there till it comes back for the next repair. When metal is welded the weld is always going to rust on the inside unless there is a way to clean the weld and coat it with a galvanizing or at least a good epoxy primer. At the very least the cavity should be sprayed with a wax. Thats mainly why the panels are spotwelded so as to not burn the metal so bad and make it so brittle and rust prone on the inside where it is hard to prep. If a panel thats welded to wasn't rusty it will be after it's welded over or too. Condensation happens under any condition in a unibody car unless it's never taken outside of a controlled very dry enviorment.
None the less you are saving your car for awhile to enjoy and be proud of your accomplishment.
Oh yeah, plastic fuel lines never oxidize and are the lightest thing to use and don't rattle.
Posted by: wayne1234 Dec 10 2009, 12:45 PM
Lots of progress ... Well I tore into the passenger side slope nose. I was tempted to leave it alone because there was no cracks, but if you look at the first few posts it was screwed together no welds!.. but I knew that it needed to be cut out and new welded in... so here is the carnage... man it looked grafic with that big hole there. I got a little discouraged, as it felt like a huge step backwards, but I knew I needed to just get to it and get it done. So I did just that and started got it apart and ground down in 1 night then yesterday I got some metal because I didnt have and big enough, and got to cutting and got it welded up last night.. .. now just some more shaping like the other side and it will be good.. my buddy spent some intimate time in the engine bay and front trunk area. it lloks like someone started to paint her red at some point only in the front trunk area.. Im going back to the beetle yellow it was when I got it it just looked right on it so I'm going with my gut and keeping it ... I also got to blocking the drivers side and the door and fender looks pretty good, so that is good news. I guess if you have been following this thread the PO was not really truthful about the car. It Was purchased off a member on here 1bad914 he is in battle creek Michigan. I have alot of mixed thoughts about how this played out. but I have given him at least a few chances to redeem himself. including Pm message, and he was reading the thread about the oil pump that he said was in the car but was not. I asked many questions over the phone like had the fuel lines been replaced, and he said yes but they clearly had not. the listing said HD oil pump but it was stock.. and of course the rust, he clearly said the hell hole had been treated but solid, as you can see from the pictures it defiantly was not. along with the por 15 being used to cover up major rust holes. and the motor mount that I cant believe was actually holding the moter Which is what stared this whole thing.. there is almost always fault on both sides.But I also blame myself for just taking his word, I spent no time looking at the car as I promised and commited over the phone. since we were both driving to meet in the middle. it ran and looked pretty decent but it was hiding alot of dark secrets. Man he was th bondo shaping master I have it give him that But I'm one of those guys that says there is no time machine, you cant go back in time, I have the car, just fix it.. At least now I have almost touched every bolt and almost every inch of metal, so I now know it is going to be around a long time.. and I have almost enjoyed it to some degree. Yeah it sucks finding out you have a ton of work, and $ ahead of you that you had not planned on, But I feel that probably most of us share a certain "love" for these cars. I always wanted one since I was a boy, now I know I will have a good one.. Any was I have been asked many many time about it, so now that that is out of the way I need to get to work on her.. 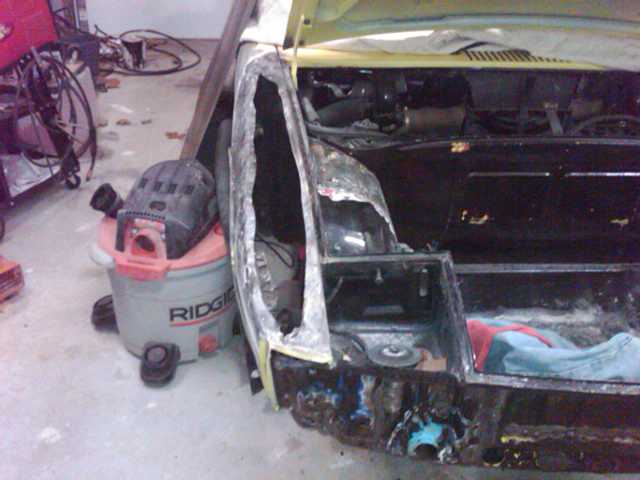
Posted by: wayne1234 Dec 10 2009, 12:47 PM
Posted by: wayne1234 Dec 10 2009, 12:50 PM
Posted by: Rand Dec 10 2009, 01:02 PM
Kudos to you Wayne for showing such a good attitude and fixing everything right. The PO really dumped some crap on you, but you are turning it around. Awesome example!
Posted by: SirAndy Dec 10 2009, 01:03 PM
It Was purchased off a member on here "1bad914"
Judging from his username, he knew exactly what he had ...
 He didn't weld the top of the shaved fender ???
 Posted by: wayne1234 Dec 10 2009, 01:14 PM
Yeah he said it was welded but.... He must have meant J-B weld It came out with a drywall bit in a roto-zip. Yeah it was a "bad914" I just have to laugh it off now
Posted by: 6freak Dec 10 2009, 03:22 PM
I feel for ya man.your a better man then me cause i would have stuffed it up his ass piece by rusty piece..keep up the good work and you`ll be cruz`n in no time
Posted by: wayne1234 Dec 12 2009, 02:25 AM
Wow we have been putting in the hours on the 914. Well I got the passanger fender hammered into shape using my templates from earlier and it came out awesome just a light skim coat to even out the tiny hammer dimples and it will be good.. Shaping that metal takes forever, especially since I'm fairly new at it, but I'm so pleased with how it came out, (I'm pleased at how both of them came out I just had to start from scratch on this side so it was more involved)... I threw in a picture of when I was grinding out some of the old bondo to show how thick the PO had it in spots... then we started to tackle what is hopefully the last of the rust I hope... I had noticed a while ago there was some expanding foam under the sill extension metal on the drivers side up real high the other night, which I thought was odd, so I started scrapping it away and guess what, it was there to hold in the bondo under the sill plate there were rust holes where the outer screws hold on the threshold plate. and a larger hole in the front from who knows what.. I had looked at the longs before and knew they were solid but I hadnt laid down with the car high enough on stands to see this... Not a huge deal as the sill plate covers everything so it doesnt have to look pretty just need to be structural. (And there was zero rust on the actual long)... What I dont understand why would you go the the trouble and time of putting filler in this rust holes and not fixing it right, when its going to under the sill plate it probably only took 2 hours to cut out the bad make up some metal weld it in and grind it down. I know it took longer than that to put in filler sand it down and make it paint worthy, because again the bondo looked decent, Who knows. I just think its funny.. So now thats done the screws will have something to thread into now, imagine that. also my buddy drew the short end of the stick since my ankle was killing me and he wire wheeled every inner fender getting all the grime and grease, and non sticking paint behind there removed, so now the inner fenders and under fenders are getting pretty close to being paint worthy . well here are some pics .. keep the comments coming they keep me motivated.
Before 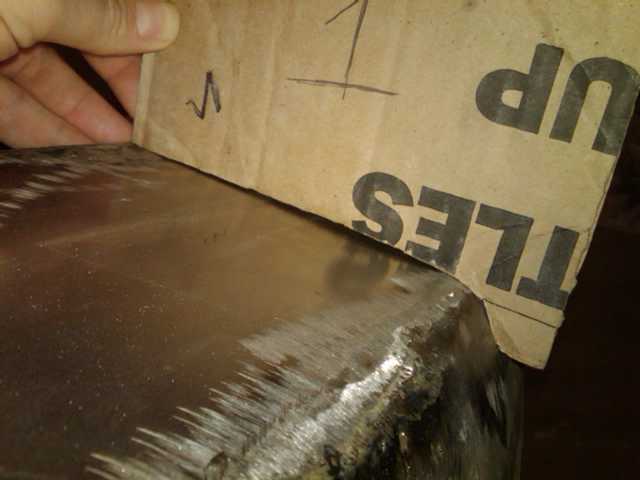
After 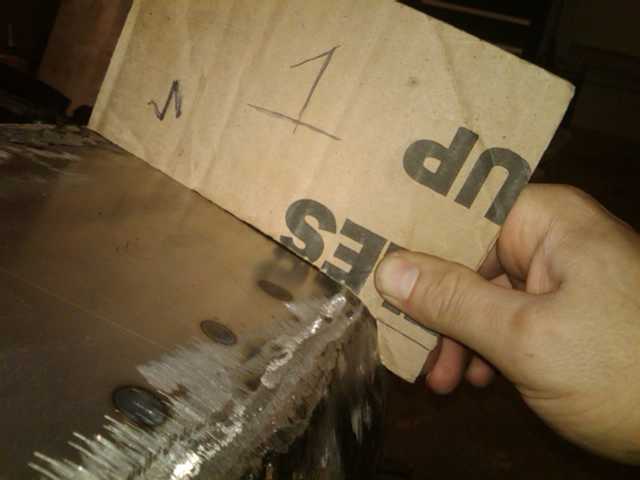
Posted by: wayne1234 Dec 12 2009, 02:35 AM
Before 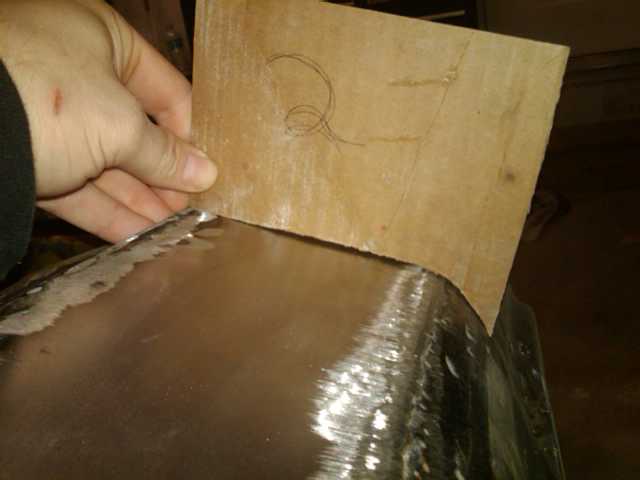
After 
Some of the PO handy work the cars gonna be alot lighter without all that filler 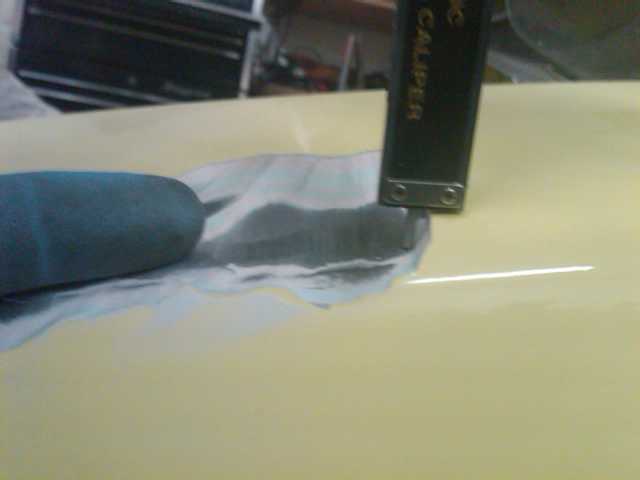
Posted by: wayne1234 Dec 12 2009, 02:41 AM
Success 
The start of the sill plate mess
Posted by: wayne1234 Dec 12 2009, 02:50 AM
This is grafic He though to himself that should hold it, Wrong 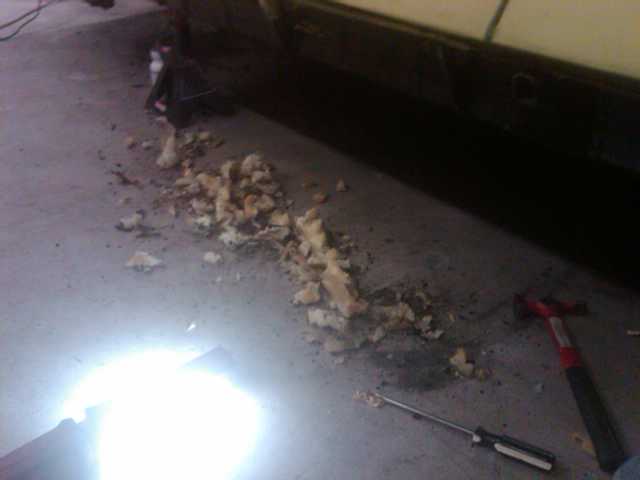
[attachmentid=200200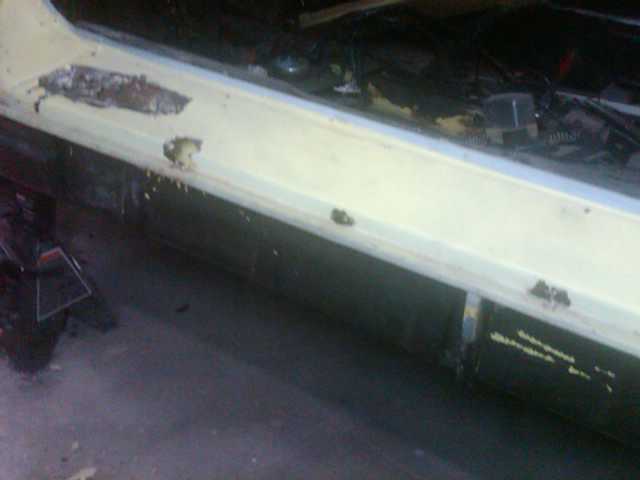 ]
]
Attached image(s)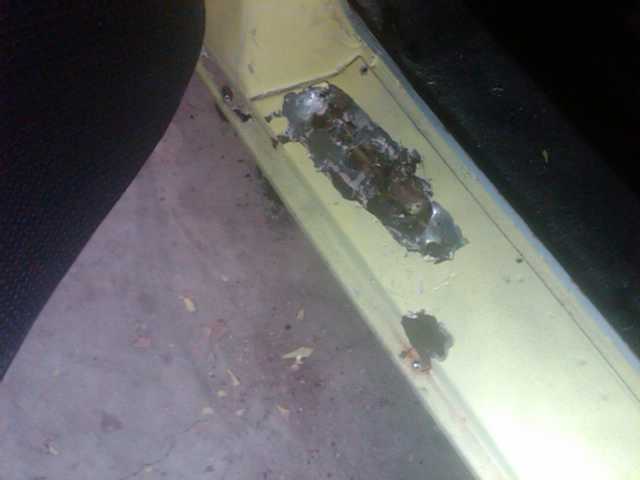
Posted by: wayne1234 Dec 12 2009, 02:53 AM
New metal
Posted by: jd74914 Dec 12 2009, 08:23 AM
Its looking great Wayne! The slope nose is really starting to grow on me. I don't know if its enough to cut the fender tops on one of my cars, but it really does look nice. 
Good attitude too; if only more people thought that way. At least you're getting some good welding practice.
Posted by: Gint Dec 12 2009, 08:53 AM
Sheeesh.... What a mess. Great work cleaning it up! Just get in there and get it done. Nice work.
Posted by: wayne1234 Dec 13 2009, 06:09 PM
Got the drivers side all blocked out!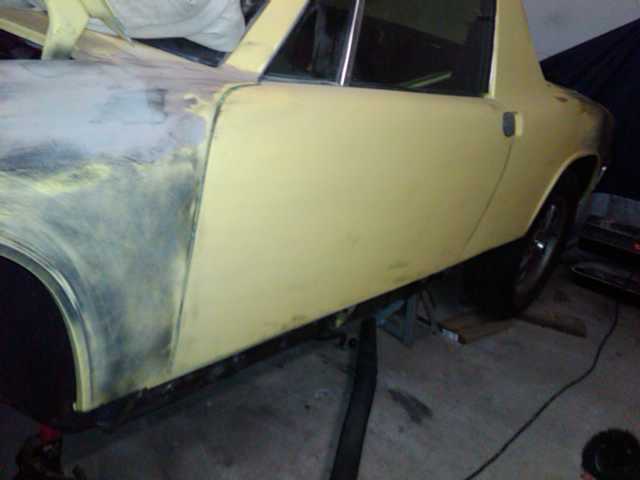
Here is a pic of the newly stripped front trunk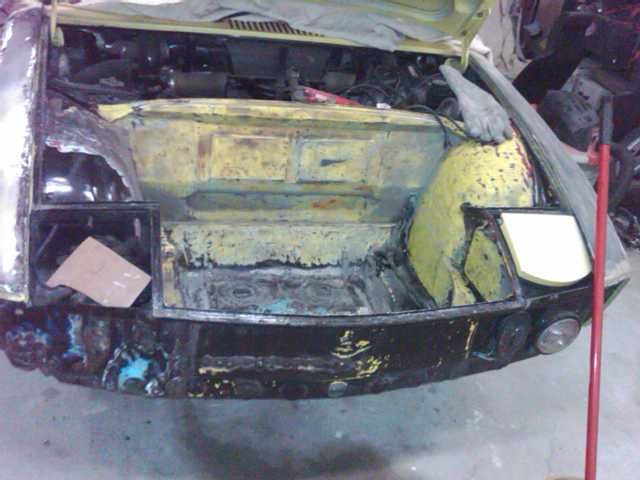
Posted by: wayne1234 Dec 23 2009, 12:56 AM
Well me and my buddy have still been putting int the hours on the car but man the body work and paint prep has been taking forever, every time I think I got it whipped I find another spot. either a small pin hole in some filler or some faint scratch in the old paint or a chip in the old paint,,,, it been a couple of years since I have done any paint and body work (although I used to do quite a bit) and man its been taking longer. but the end is near although it doesnt look much different here is a pic ..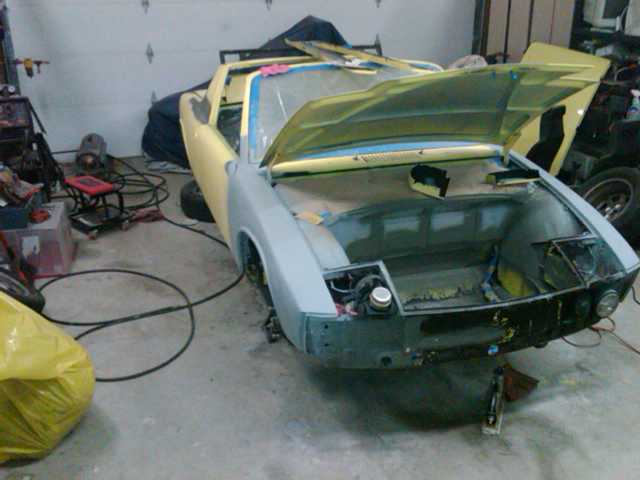
Posted by: Spoke Dec 23 2009, 10:54 AM
Good job. I'm going through some rustoration myself and it seems to take forever to do one little thing. You are doing some fine work.
Posted by: wayne1234 Jan 2 2010, 12:10 AM
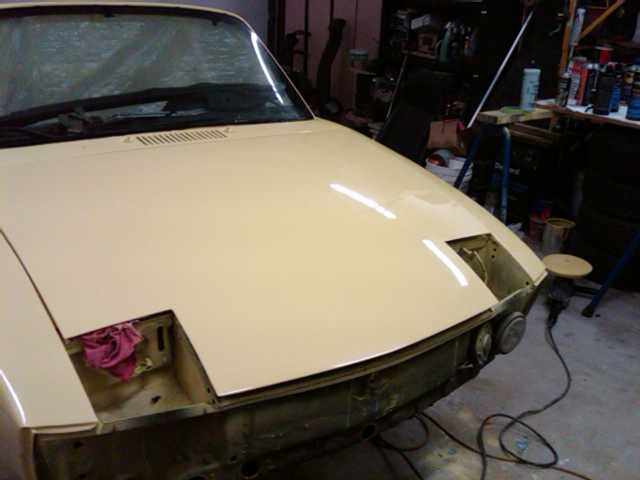
Alot more progress, I finally finished the paint, I ran into some problems since it had been a while since I had done some paint work, Thanks to Rick 918-s, he actually called me over Christmas and helped me out with a problem, talk about going out of your way... Thanks again. The paint came out really nice, I have a couple of spots to buff out but nothing major, The biggest is a condensation drip from my respirator,,, but it will sand and buff out nice< I already got excited and did a quick spot on the hood. Also big news (but no pics sorry) the engine case is back together, the cylinders and heads are also on and the rocker arms are in place, but not adjusted, and I need to finish up the tin and get it painted I think I'm going red.. now I need to do a inventory on the rubber seals I need since the PO did replace some and get them ordered from mike, and I need the carpet, who is good to use for that? here is some pics...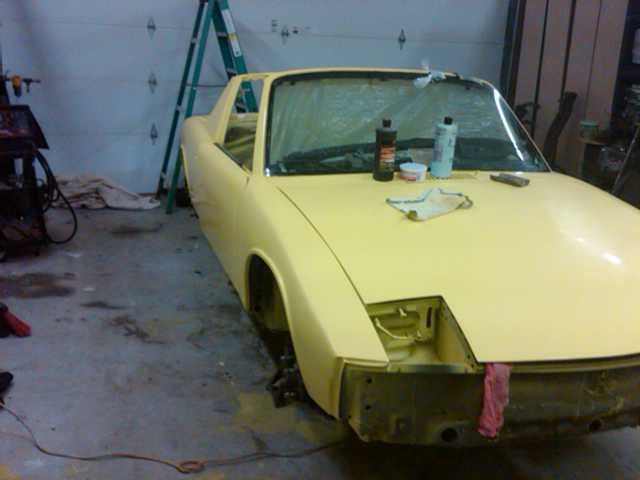
Posted by: wayne1234 Jan 2 2010, 12:13 AM
Posted by: sendjonathanmail Jan 2 2010, 08:20 AM
Try 914ap.com for your carpet and interior needs. I love the yellow!
Posted by: wayne1234 Jan 3 2010, 03:08 PM
I'm really happy with how the paint is coming out, Man I forgot how time consuming it is to buff out paint, especially a single stage, it is so hard to photo the shine but this is the best I can come up with.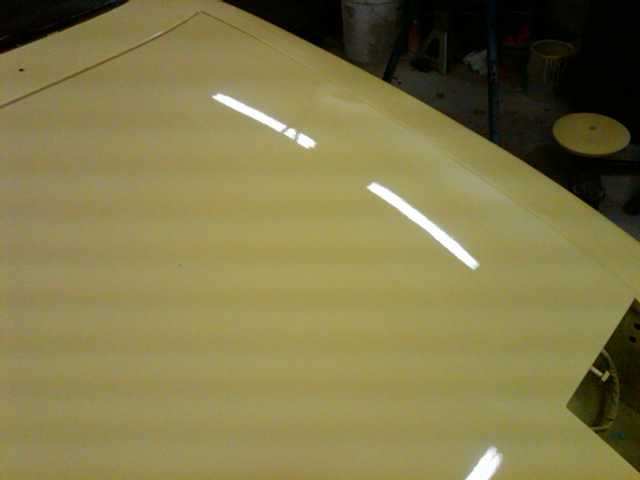
Attached image(s)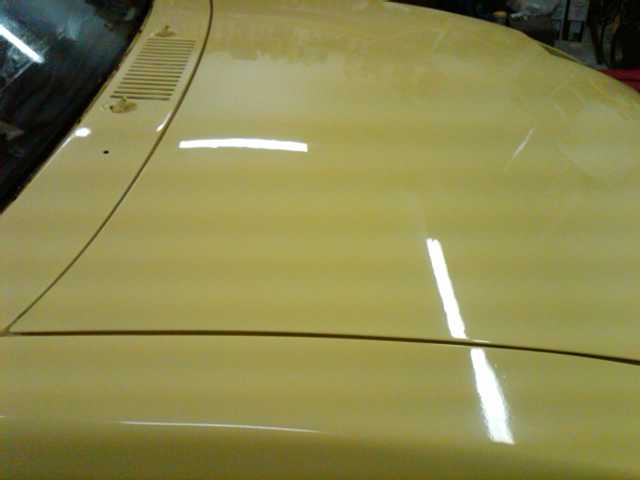
Posted by: Ferg Jan 3 2010, 04:12 PM
Wow, you've been busy, great work! If I was there I'd buy you a Bells!
Ferg
Posted by: rick 918-S Jan 3 2010, 08:16 PM
Looks like your on top of it now! 
Posted by: Sleepin Jan 3 2010, 09:30 PM
Looking good! I wish I could do paint and body work like that!
Posted by: plymouth37 Jan 3 2010, 10:25 PM
Paint looks great! keep up the good work!
Posted by: wayne1234 Jan 6 2010, 02:12 AM
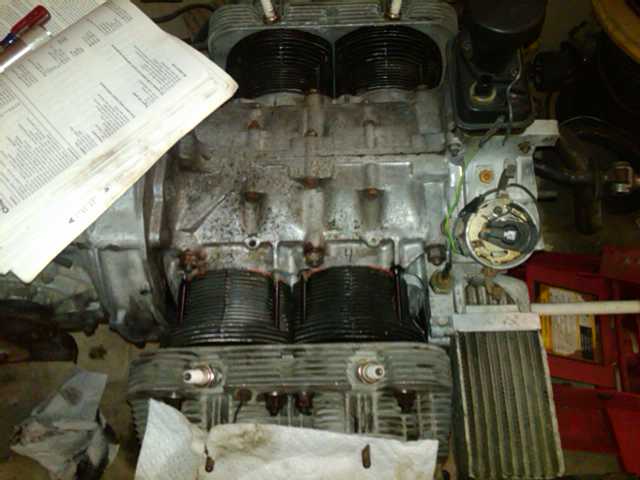
Engine is almost totally together couple of teaser shots, The engine tin came out decent but not perfect, so I did a slight texture using paint blobs like old splatter paint , then a nice coat , it hid most of the surface imperfections. 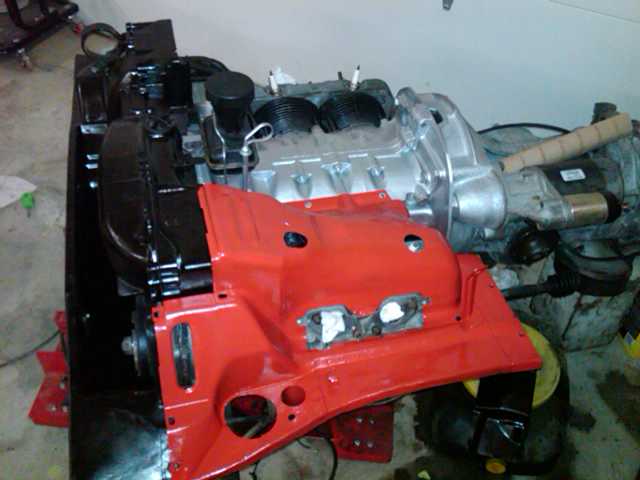
Posted by: wayne1234 Feb 12 2010, 12:28 PM
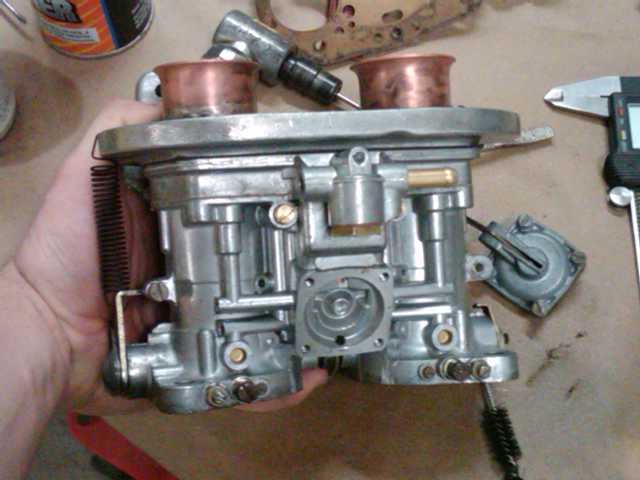
Progress has been SLOW.... the engine is in I made a mistake , I had looked at the carbs and could tell that indeed they had been recently rebuilt, by the new rubber around the accel pump and other clean things, so I assumed they were fine... well I guess from sitting the got crap in them, So we took them back off and tore them down, and I got the rebuild kits. my buddy did the tank treatment at his work and they cleaned up nice ... Then we were putting them back together last night and the accel pump spring looked funn and there was a weak spot in 1 of them so now more waiting on parts Anybody else find this the most frustrating part of owning a 914???? it is driving me crazy.... so anyway I have done a few other things like reassemble the doors with the glass and paint the floorboards, assemble the headlights completely. install door strikers , worked on refinishing the tail lenses.. and generally putting the car back together and sorting out which rubber pieces I need. Here are a couple pics to keep me going .... 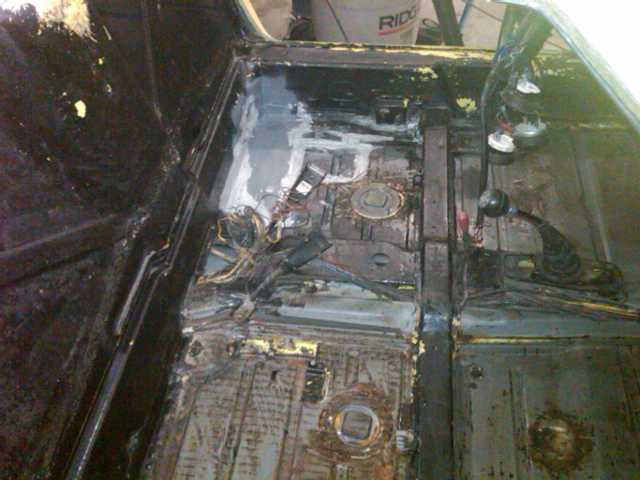
Posted by: wayne1234 Feb 12 2010, 12:40 PM
Posted by: wayne1234 Feb 12 2010, 12:45 PM
Almost forgot I got the bumpers on!! here is my tail lens, I sanded it and heve cleared it about 5 times. It looks pretty good. I just didnt want to spend the $ for new ones. And the freshly cleaned and rebuilt carbs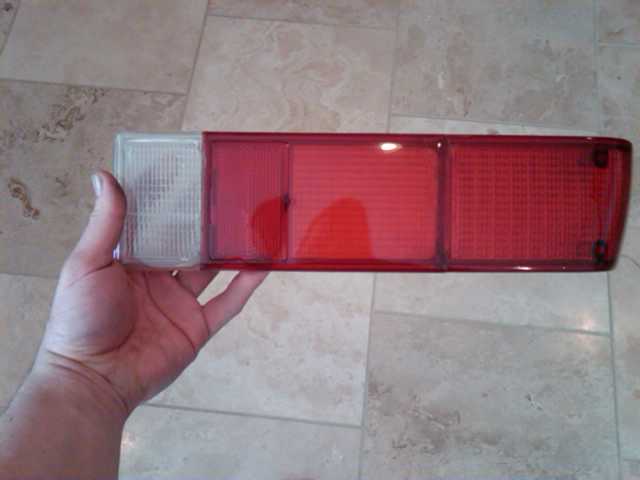
Posted by: wayne1234 Feb 12 2010, 12:56 PM
Also I got the parking brake installed and working!!The PO had just removed the metal guide, due to rust and had taken out all the parts, I used the handle and cable from my parts car, and made the guide piece,,, I am so happy with how my metal skill have come along during this project,, In the beginning I would have tried to source a used piece , trying to hunt it down and going to great lengths to get it and then waiting for it to arrive... now it wasn't much for me to fab this up in about 20 minutes or so... And it turned out great,,, I had to wait to paint it just to show you guys... I know its a small piece , but it was curve and was a little challange,,,this and my engine shelf pieces and the new slope nose pieces that I made have came out great. in the beginning I would have never attempted to make any of this. 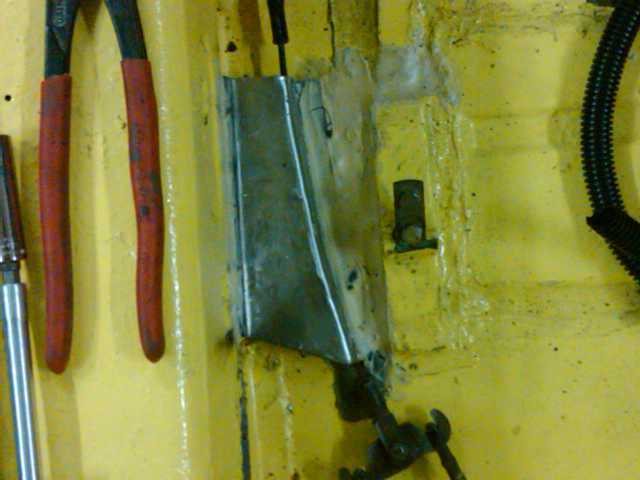
Posted by: 6freak Feb 12 2010, 01:44 PM
ton of work ...nice job .....rubber buggy bumpers look like there on the wrong side
Posted by: oz371 Feb 12 2010, 01:51 PM
Oh man, every time you post another picture, it just makes me cringe ...
Andy Keep it up! Looks like someone took you for a ride. You are the bigger man for not slammin the guy and puttin his name here.
Posted by: SirAndy Feb 12 2010, 02:15 PM
I know its a small piece , but it was curve and was a little challange,,,this and my engine shelf pieces and the new slope nose pieces that I made have came out great. in the beginning I would have never attempted to make any of this.
Now all you need to learn is how to drill holes and spot-weld your pieces and how to use a grinder afterward to make them welds look nice.
Andy
Posted by: wayne1234 Feb 12 2010, 02:26 PM
There is always that I thought about it after the fact.... my next rusty replacement e brake guide plate,,, deal....
Posted by: PanelBilly Feb 12 2010, 02:40 PM
Did I understand you correctly? You sanded and then cleared the rear lenses? I never thought of that one. Did you just doo the outer side?
Posted by: wayne1234 Feb 12 2010, 03:09 PM
Yeah there was a crack in mine So I used the hobby version of super glue,, its called "Zap a gap" you can use a spray accelerator, so it cures instantly,,, then a quick sanding, to flaten out the glue,,,, (600 wet ) Then I smeared red nail polish in the crack to give it some color... then I sprayed some clear in the cap and smeared it in the crack to build it up.... let it dry... then did a meduim coat of clear,,, let dry sand and repeat till it comes out the way you want,, took me about 5 coats... I used Krylon Fusion clear it dries to touch in 15 minutes, and I cheated and put it in our ovens warming drawer to dry it quicker, but dont tell the wife I was baking a tail light lens in the oven.... I figured I only had $6 and some time to loose. But even up close I can hardly tell on the car you will never know...
Posted by: wayne1234 Mar 6 2010, 12:01 AM
Still making small progress, I got almost all the wiring cleaned up, all lights work horn works eliminated the mess the po made under the pass seat, ran the wires for the oil pressure and oil temp.. then we have been polishing all the trim on the car,.. it is coming out great I had done the triangle windows before, we got the windshield trim done and got it put on , what a difference.... 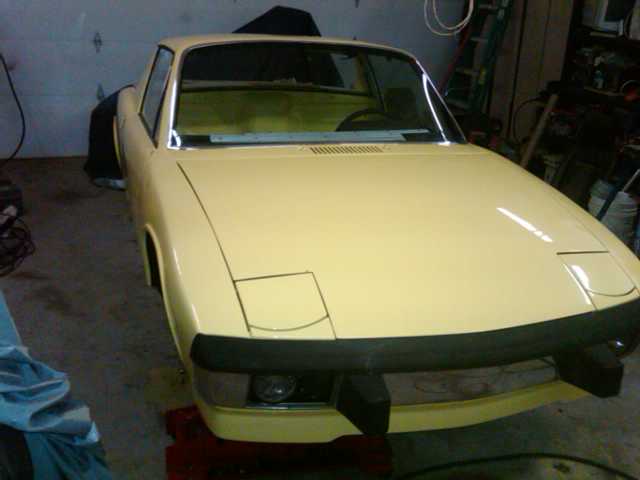
The rear targa trim polished also
Posted by: wayne1234 Mar 6 2010, 12:08 AM
Then the new mod... I realised I have no front parking lights and turn signals up front because of the slope nose. So I took the fog lights apart and added 2 sets of led lights, a small set in the middle for parking lights, then a flexible strip around the ring of the light for the turn signals.. they are bright and because of the reflective piece in the light they can be seen off angle as well. I'm pumped they came out so well. and now I'm legal. What do you guys think? I got the the headlights totally finished also and the rear glass mounted 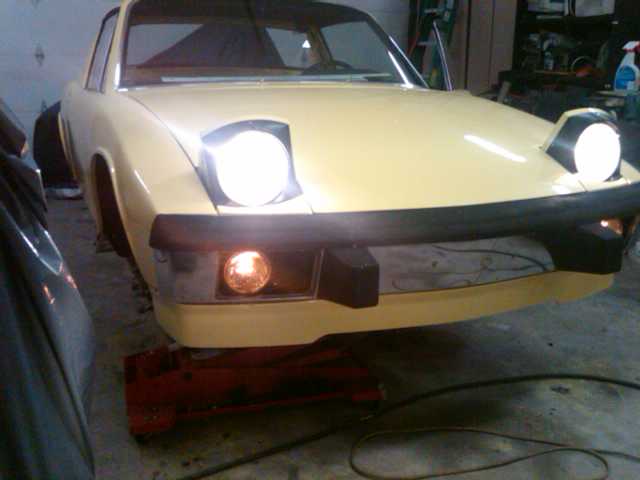
Posted by: FourBlades Mar 6 2010, 06:53 AM
Your car is looking good man.
I like your turn signal lights idea. 
John
Posted by: tradisrad Mar 6 2010, 05:42 PM
Nice car-keep up the good work!
Posted by: wayne1234 Mar 12 2010, 12:10 AM
OMG it is off the jack stands,  and it went for a short trip!!!! got the brakes bled , put the seats in temporally and hit the road. just about 10 miles , no mishaps it ran like a top. now the interior need some work it has no carpet, or console, but we did put on the door panels, it felt a little less dangerous crappy picture but I had to share
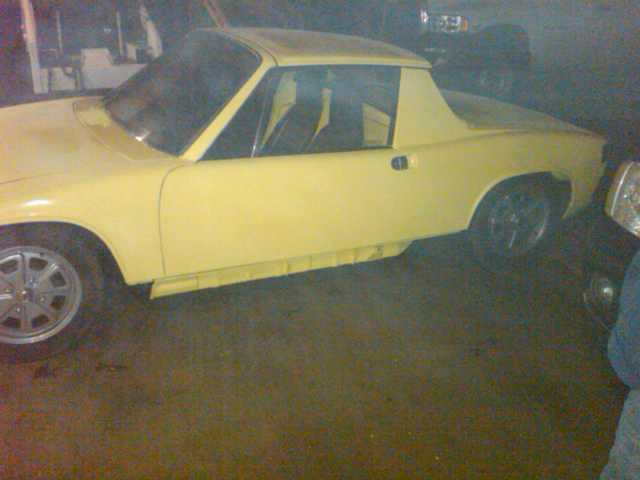
Posted by: Cupomeat Aug 9 2012, 04:23 PM
A Fantastic Journey so far!!!
A couple of things to note:
1. I am so impressed with your attitude that I hope that many can learn from it, given the whining and arguing I see here. Learn from the past and move on.
2. For someone who appeared to be newbie you sure learned quickly and did fantastic work
3. the slant nose is glowing on me.
Very impresseive and congratulations for getting this far!!!
Posted by: ThePaintedMan Aug 9 2012, 04:40 PM
Wow, I missed this build thread. This is incredible! I thought my car had been abused, but this takes the cake. I like your outlook - very similar to mine. Chassis without a lot of pedigree, nothing really special, but worth it to us to restore and learn on. Once I'm done with mine I'll know what NOT to do and the correct way to do things on a better, more valuable car. I'm really, really impressed with the metal work, especially on the fenders.
Posted by: sixnotfour Aug 9 2012, 04:46 PM
you all realize this is the same 914 ???
http://www.914world.com/bbs2/index.php?showtopic=132215
Posted by: carr914 Aug 9 2012, 05:54 PM
Also Realize you Dug up a Thread that was over 2 Years Old. I have since owned it and now Coop has it in Minnesota
Posted by: SirAndy Aug 9 2012, 06:09 PM

Posted by: 914coop Aug 9 2012, 06:23 PM
And it has changed quite a bit from this thread.
http://www.914world.com/bbs2/index.php?showtopic=132215 ll not be stock for sure.
Powered by Invision Power Board (http://www.invisionboard.com)
© Invision Power Services (http://www.invisionpower.com)