Printable Version of Topic
Click here to view this topic in its original format
914World.com _ 914World Garage _ removing the big snap ring on the crank
Posted by: Vacca Rabite May 17 2009, 02:11 PM
How do you remove the big snap ring-like-thing that sits directly in front of the dizzy gear on the crank?
Zach
Posted by: McMark May 17 2009, 03:34 PM
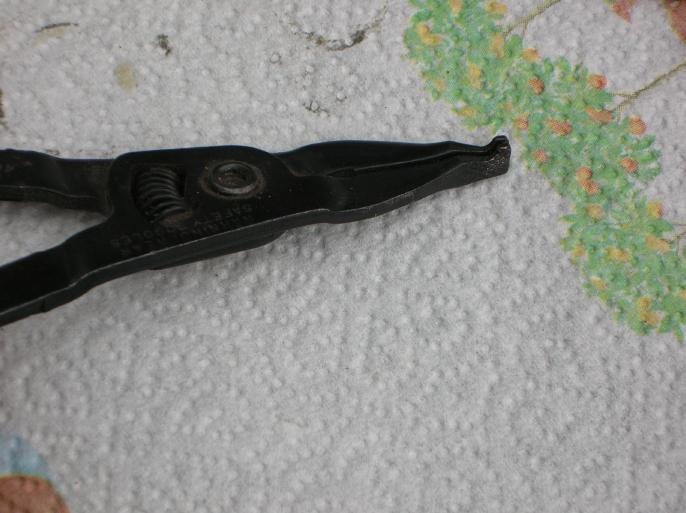
I use these pliers. Available at most hardware stores (Craftsman).
Pictures stolen from Wes Vann's steering rack rebuild article.
Attached image(s)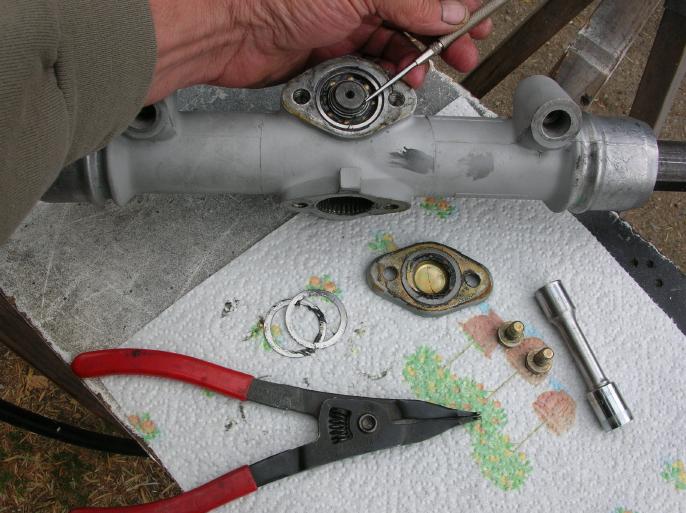
Posted by: Vacca Rabite May 17 2009, 04:34 PM
Looks like just the ticket. I'l stop into Sears on Monday and see if I can find a pair.
Zach
Posted by: orange914 May 17 2009, 04:37 PM
was the bearing damaged on the new motor? you can usually find that pliers at most flaps too.
mike
Posted by: Jake Raby May 17 2009, 05:08 PM
If you are sending the crank into us we can remove this for you... BUT you should buyb the pliers anyway for proper re-installation.
Posted by: r_towle May 17 2009, 05:13 PM
Zach....
Are you gonna share some internal carnage pics to show us what the low oil pressure issue really was?
Rich
Posted by: Vacca Rabite May 18 2009, 06:50 AM
Nothing looks broke. Engine turned freely when I pulled it, and would start and run w/o hesitation. Just made crap oil pressure. I pulled it before it stopped running.
There was certainly too much clearance in the oil pump and maybe too much clearance in the bearings.
I pulled the oil galley plugs and there was zero sludge behind them. Nothing was hiding in the sump when I split the case.
I had a paper gasket between the pump and the plate. Even w/o the gasket there I had .005" clearance, which is too much (Jake wants to see .002 to .003).
I have seen 3 or 4 threads on Jakes forums with symptoms exactly like mine. Most of them seemed to get solved when the pump lash was tightened up. Part of the reason I bought the new cam was to give my self incentive to split the case again instead of just fixing the pump to see if that solved the problem. I cut corners the first time through, partly due to cash (was expecting my first kid), partly due to not knowing I was cutting corners, and partly trusting that the engine was mostly okay before I started taking it apart.
When I built the engine the first time, I put new bearings (except the #2 bearing, since I didn't know how to remove the gears, and figured it was okay anyhow) in after crunching the #1 bearing by missing the pilot hole for the dowel pin by 1/16th of an inch or so. I never checked the clearance for the new bearings. Didn't know I was supposed to. I have to learn by doing, not be reading or watching. This sometimes means learning by failure. Such is life. I watched Jakes vid 3 times before I tried to put the case back together the first time and crunched the bearing.
So, right now if I took pics of my parts, it would just look like an engine apart. I don't know what to look for to see if the crank needs a polish or grind. It looks good to me, but I'm still a noob at this so I am having Jakes boys check it before I put it all back together. I figure that I will need new bearings, and if I don't it will be a nice surprise. But... Its just money, and I am ready for the pay off of driving my car and not wondering what the heck I did wrong.
Zach
Posted by: Cap'n Krusty May 18 2009, 07:25 PM
"Pump lash"? The Cap'n
Posted by: Vacca Rabite May 19 2009, 07:36 PM

"Pump lash"? The Cap'n
Movement of the pump drive gear inside the housing.
Not a stock pump, 30mm Shadeck pump.
I am slowwwwwly facing the pump body with 400 grit paper on glass. Then installing the pump gears and bolting the cover on and measuring how much movement the drive gear has with a dial indicator against the pump gear tang. I got it down to .002 inches today, which is where Jake indicated it should be.
I know you are not a fan of the larger pumps on these engines.
Zach
Posted by: type2man May 20 2009, 07:31 PM
Honestly I don't see how .003" is going to give you a huge boost in oil pressure but if someone says so then I guess they are right.
I'm not a big fan of the melling oil pumps either but chose to use one on my 2733 and so far it's holding up well and has plenty of pressure. My 2.0 and my 1.7 both have the stock pump and the pressure is good.
Posted by: orange914 May 20 2009, 11:57 PM
I'm not a big fan of the melling oil pumps either but chose to use one on my 2733 and so far it's holding up well and has plenty of pressure. My 2.0 and my 1.7 both have the stock pump and the pressure is good.
i ran a 30mm melling with a paper gasket on both the plate and case to housing. no issues:
40 p.s.i. cold
31 steady full hot
12 p.s.i. full hot idle
i REALLY think the .040 shim on the (35 year old) front pressure spring had something to do with the oil pressure, but i think it mostly helped with the tempature (along with the 9550 cam). there used to be a kit with a new spring and valve to help oil pressure, i used it years ago on a 76 2.0 bus and it did help.
i'd at least check both relief springs for height and pressure. i wonder where you'd find these spec.s
Powered by Invision Power Board (http://www.invisionboard.com)
© Invision Power Services (http://www.invisionpower.com)