Printable Version of Topic
Click here to view this topic in its original format
914World.com _ The Paddock _ PolyBronze Bushing Install and other modifications.
Posted by: Mike T Sep 1 2006, 04:23 PM
After a dismal performance plagued by random oversteer at my last AX I decided to that continuing to use the car in it's current state made no sense. I have been accumulating a bunch of suspension pieces and fiberglass body parts and decided that there was no time like the present to get to work.
This was the car on July 16th;
Attached image(s)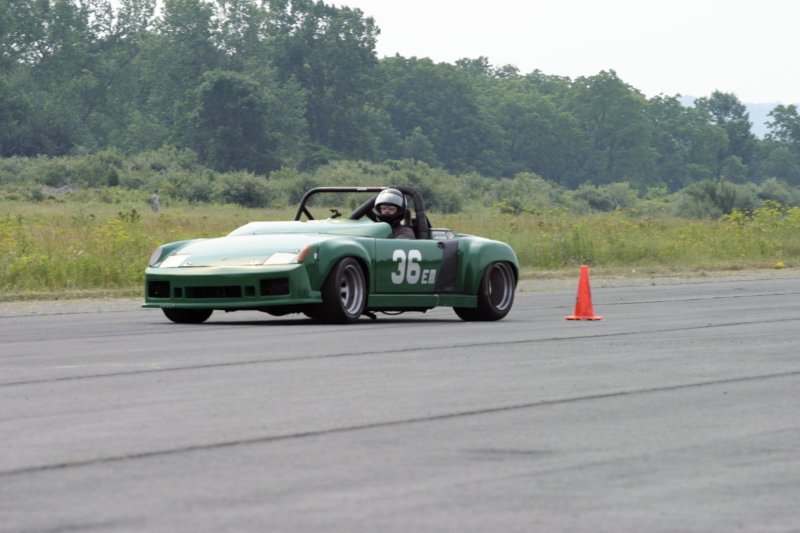
Posted by: Mike T Sep 1 2006, 04:36 PM
I began with the Bushing install.
PolyBronze bushing kit comes with bushings to do both front A-arms and both rear control arms, shims and intructions.
Attached thumbnail(s)
Posted by: Mike T Sep 1 2006, 04:38 PM
The PolyBronze Front Bushings come with 3 thicknesses of steel shim stock to be used to take up any play when fitting up the inner race sleeve on the control arm. .001" .002", .004"
The bushings are marked for "front" and "rear" meaning the front of the control arm and the rear of the control arm. Don't mix them up.
Attached thumbnail(s)
Posted by: Mike T Sep 1 2006, 04:41 PM
Here I'm using a .001" and a .002" shim to snug up the fit. I didn't get any pictures of the operation but from here you just slide the sleeve all the way onto the bearing surface untill it's firmly bottomed against the flange. I had to straighten up the flange a little to get good contact with the sleeve.
After that I used the Loctite product specified in the instructions. About 5 to 7 drops. It wicked into the seam real slick.
Attached thumbnail(s)
Posted by: Mike T Sep 1 2006, 04:47 PM
The finished installation.
I let it set up overnight to cure. I tried to remove it using all my strength with just my hand and it didn't budge. Here is the installed arm. Moves really smooth now. No "sticktion".
Attached thumbnail(s)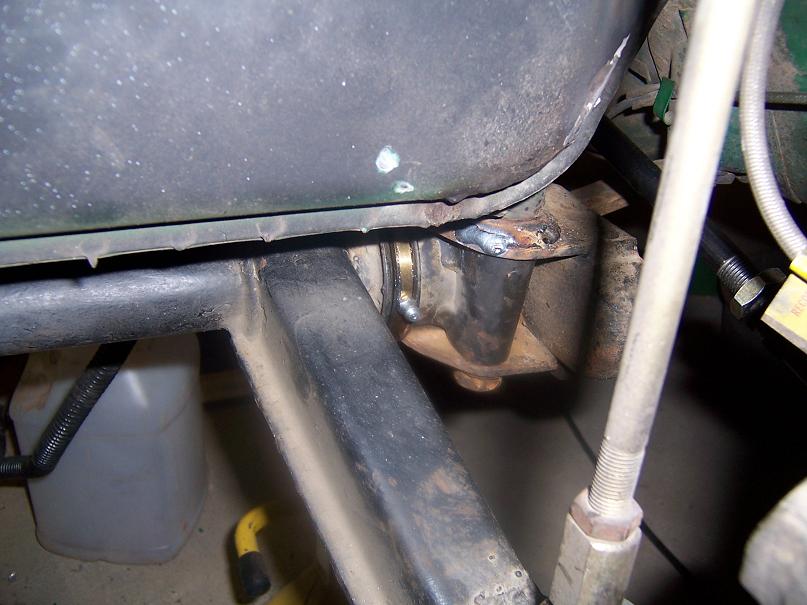
Posted by: Mike T Sep 1 2006, 04:51 PM
When I removed the rear trailing arms I found this: Looks like the Weltmeister Polygraphite bushings were rubbing the inner ear. No cracking or pulled seams though. No "ovaling" of the mounting hole.
Attached thumbnail(s)
Posted by: Mike T Sep 1 2006, 05:01 PM
The trailing arm and all the parts to install the bushings. 
After fitting up the bushings I needed a .004" shim on one end and no shim on the other. I pulled them into place with a threaded rod+big washer.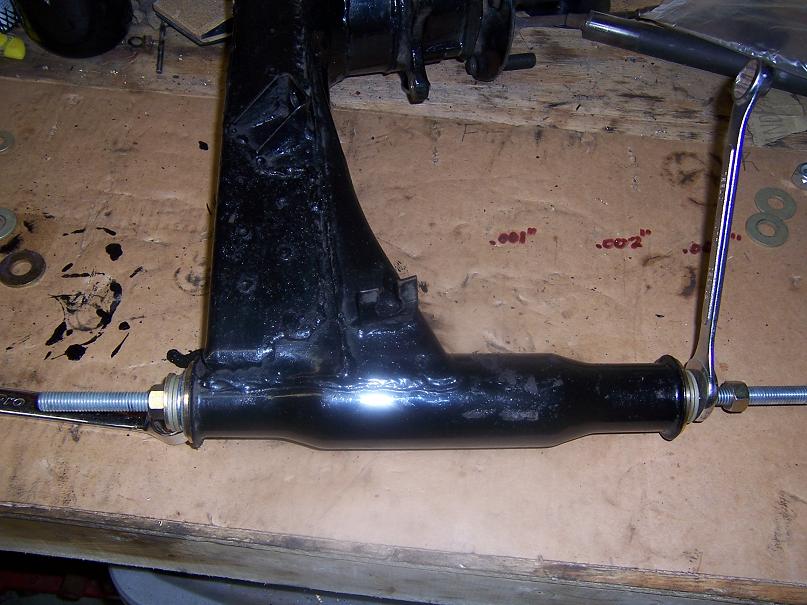
Here is the completed control arm with grease fittings. I used a generous coating of waterproof high pressure boat trailer wheel grease during installation.The paint on this control arm is POR-15 I put on there in 1997. Held up great and is still shiny.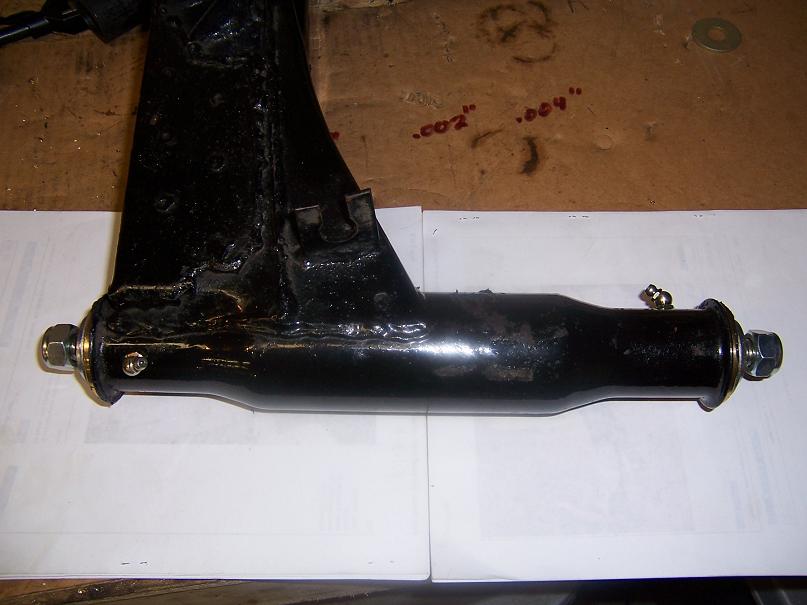
Posted by: Mike T Sep 1 2006, 05:31 PM
Measure over 15/16", drill straight and you nail the grease groove dead center. I used 45° 1/4-28 fittings instead of the 5mm that came with the kit. I had a 1/4-28 tap. 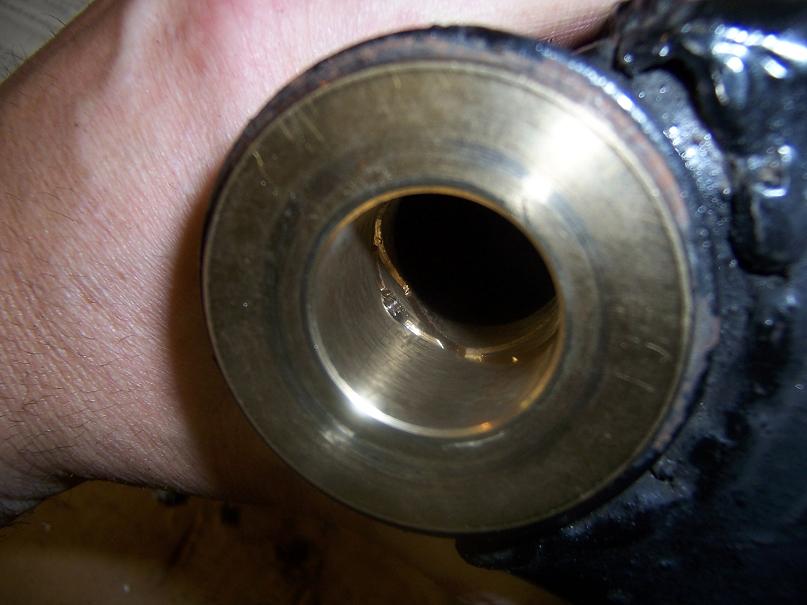
Grease fitting installed.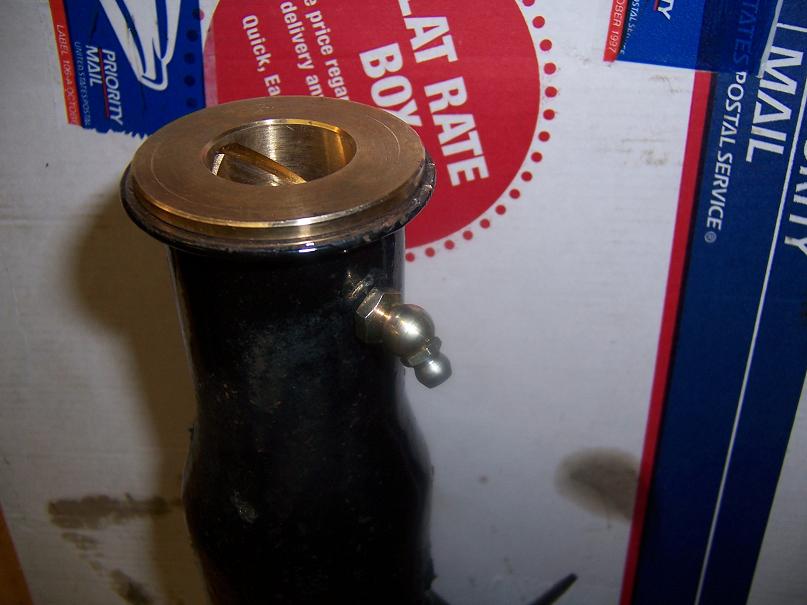
Here is the Rear trailing arm installed with the new PolyBronze Bushings and a fresh coat of POR-15.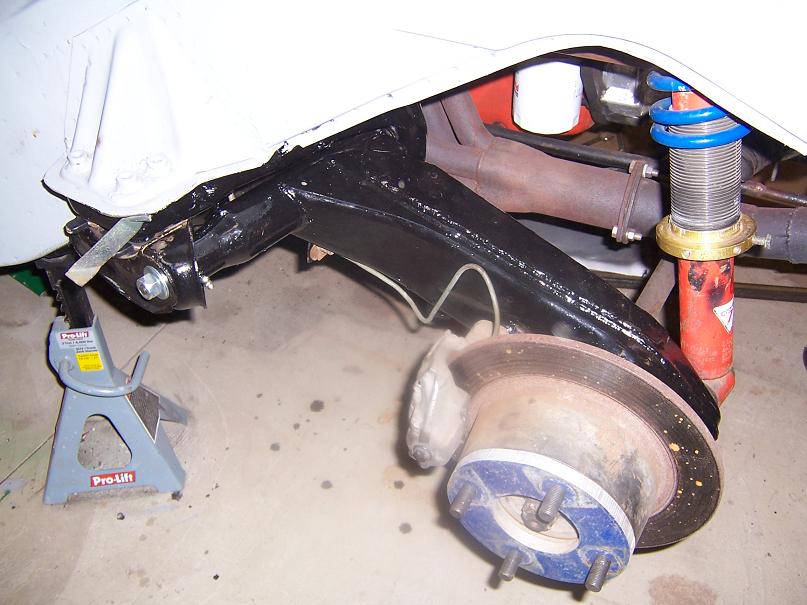
Posted by: Mike T Sep 1 2006, 05:45 PM
I moved on to the chassis work. A few years ago I removed the trunk floor and added some support structure. I decided to get a little more radical.
I stole this design shamelessly from URY914...  Hi Paul..
Begin by welding two 1.75" tubes to 1/4" steel plates and bolting them to the transaxle mounting ears.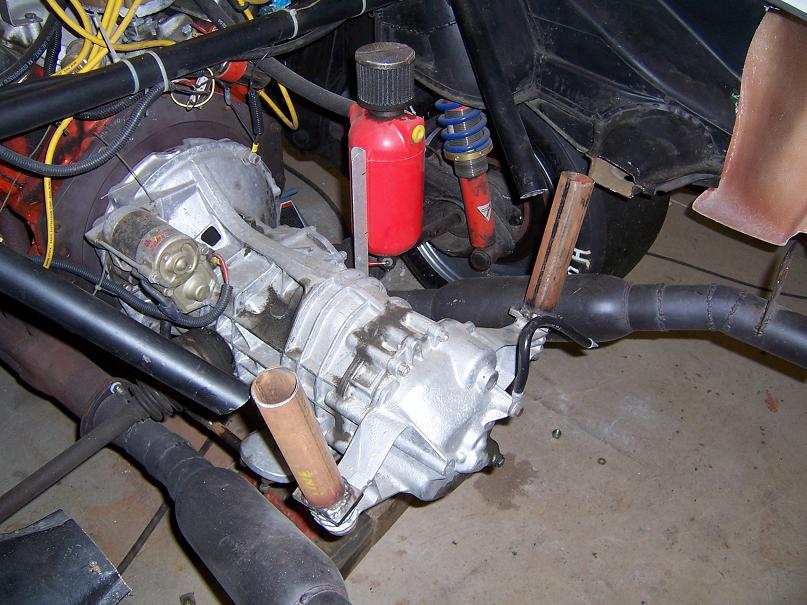
added support tubes from shock towers and from plates welded at rear of inner suspension console.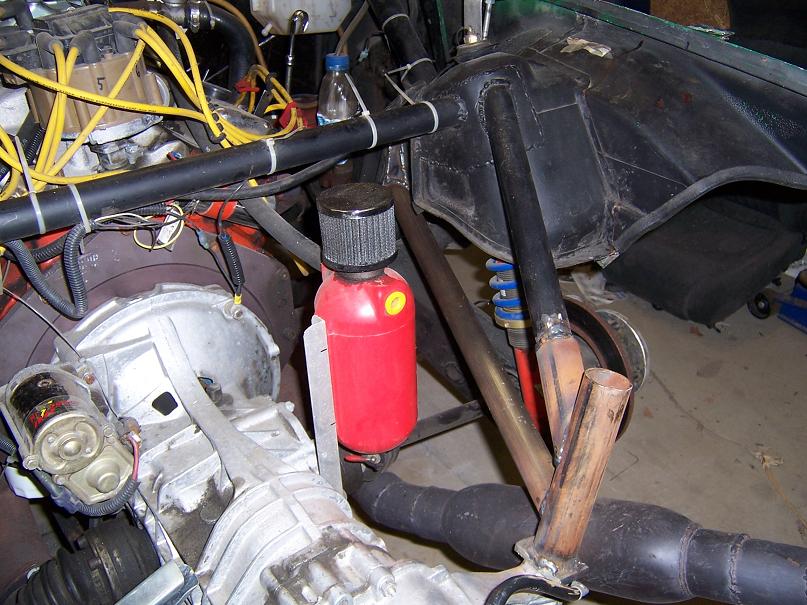
final bar across ties the two uprights together. This tubing only supports the back of the transaxle. I replaced 16lbs of cut away metal with 9 lbs of tubing.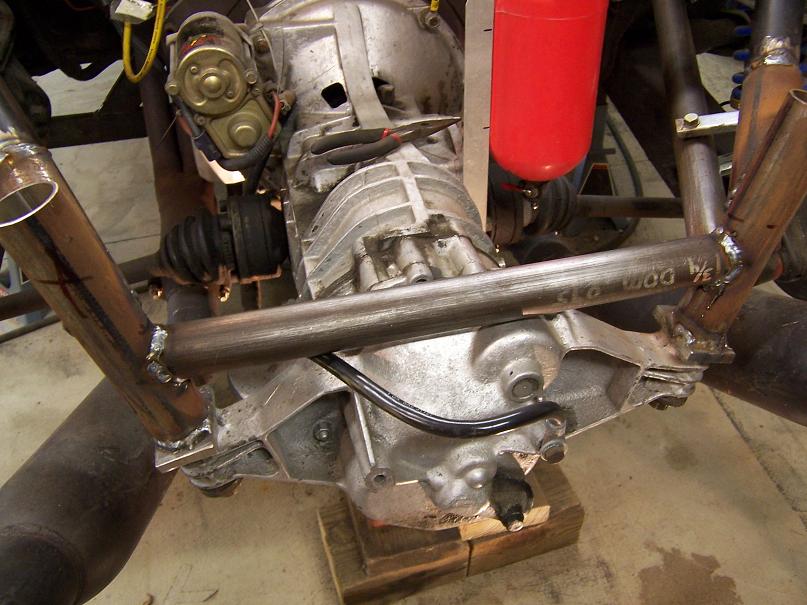
Posted by: Mike T Sep 1 2006, 05:50 PM
With the rear tail light panel cut away along with all the bodywork rearward of the shock towers I lost my exhaust system hanger. I supported the muffler on a jack and made up a template for a bracket.
transfered the template to flat .09" steel plate and cut out a 2 pc muffler hanger. I welded it directly to the upright and the Bullet muffler. Light and simple. Maybe I'll drill a few lightening holes in it...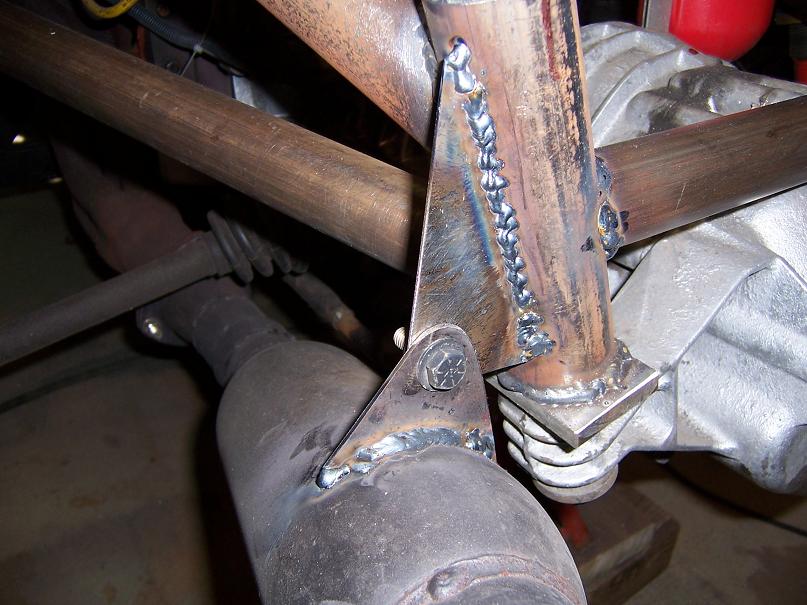
Posted by: Mike T Sep 1 2006, 06:03 PM
I repaired the bent nose by cutting away all the sheetmetal affected by the lousy repair job. With the front end sheetmetal cut away I needed to reinforce the front end.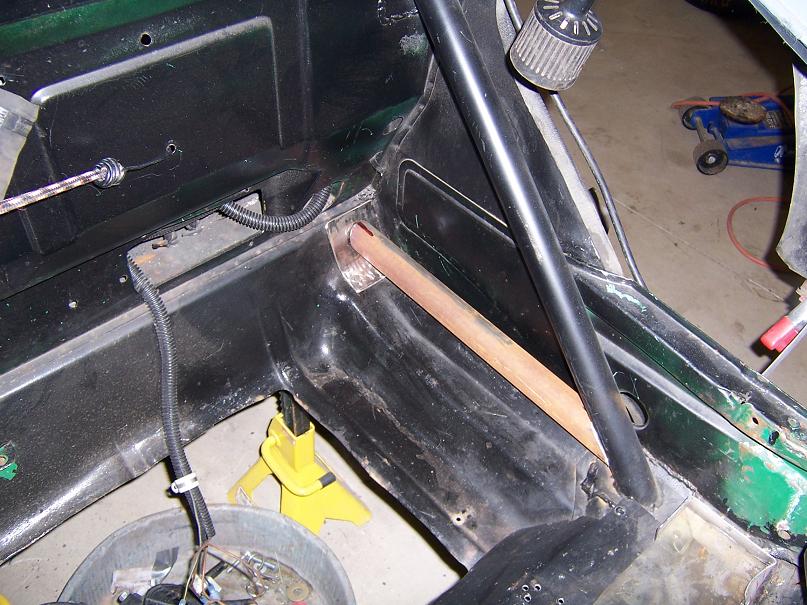
I added bars from the existing angled tubing to the mounting area of the front suspension crossmember. I attached them to 1/8" steel plates to spread the load.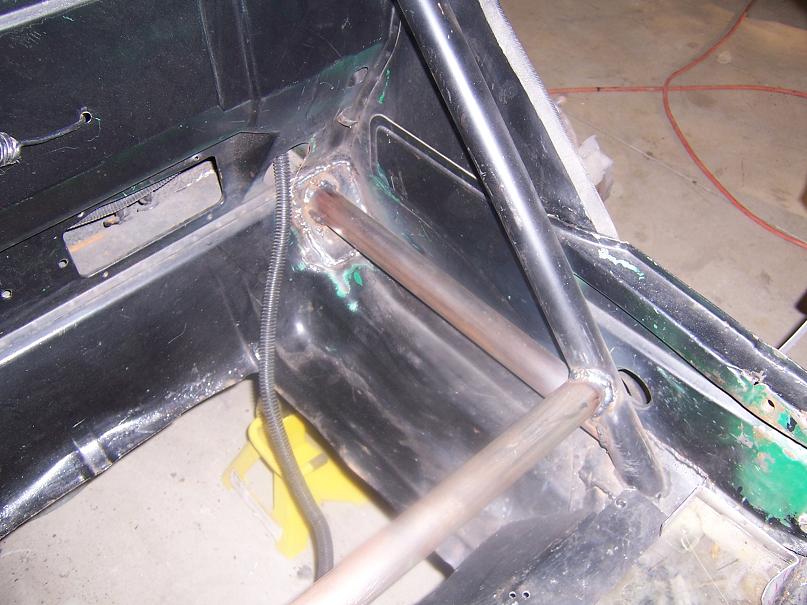
I added a crossbar to stiffen the front of the torsion bar mounts.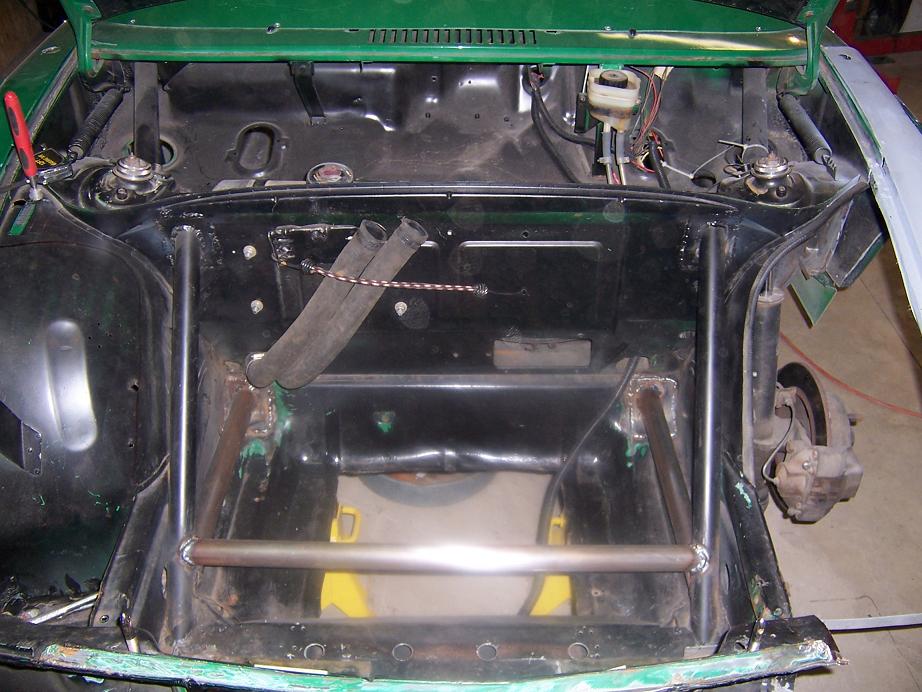
Posted by: Mike T Sep 1 2006, 06:20 PM
I replaced the entire front fender because it had been repaired by welding on a new front half with the seam just about centered over the tire. Whoever did it was careless and the front of the fender ended up 1" higher than the passenger side. I cut off the fender from a parts car and installed it in the proper location.
These will be replaced with fiberglass 1/4's when my budget recovers.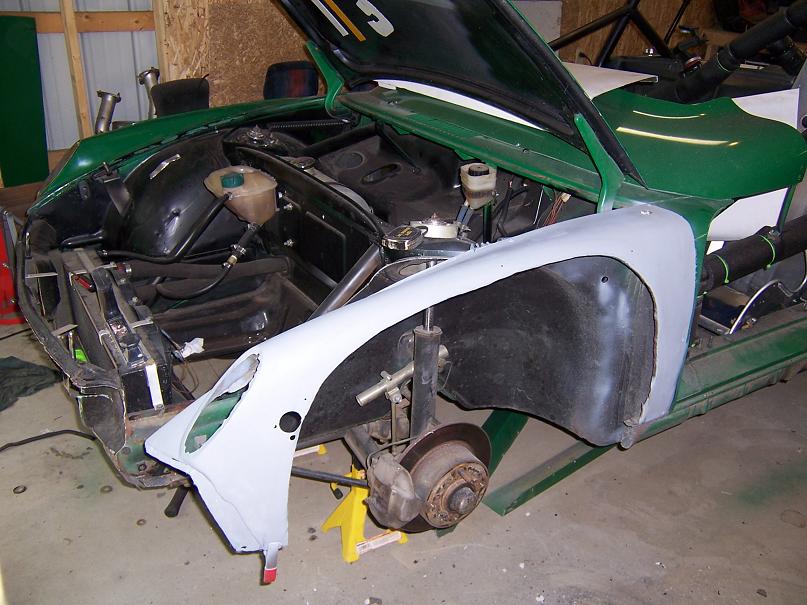
GT Racing 1/4 panel, Rennspeed Fiberglass doorskin. Retained with DZUS type fasteners.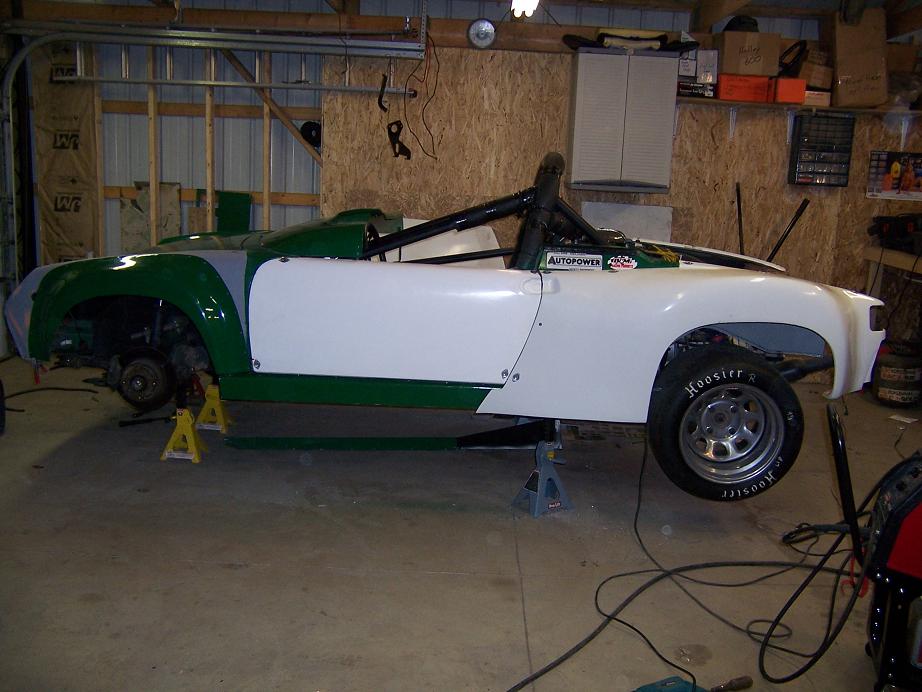
Front IMSA Airdam fastened in place with 5 DZUS plates across top edge.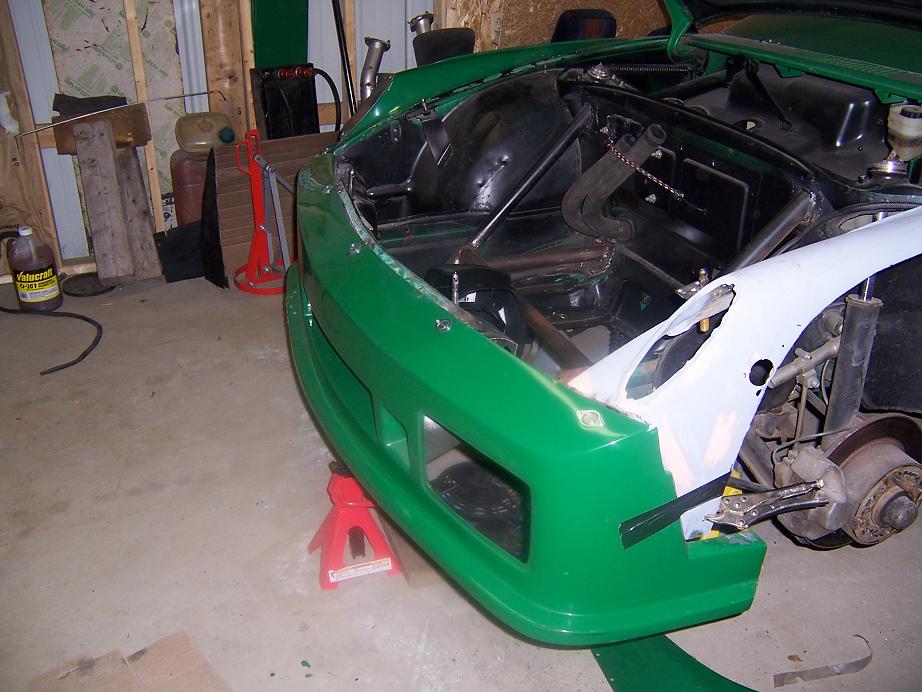
Posted by: Mike T Sep 1 2006, 06:38 PM
Here are the Weltmeister Polygraphite bushings I took out of the rear after 9 years of service and hundreds of autocrosses. Look at the odd wear pattern in the ones on the left. There is also evidence that they deformed a little.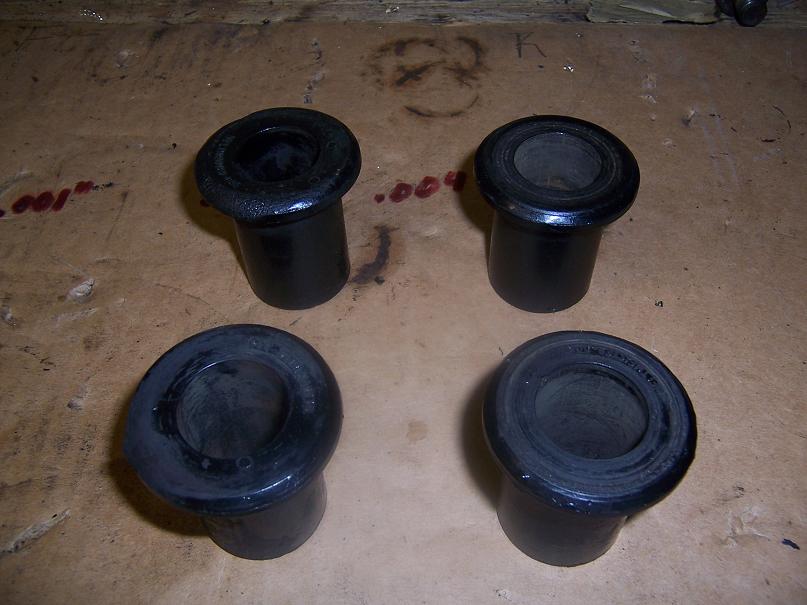
Front end reassembled with 22mm Welt torsion bars, 22mm Welt sway bar. I added Turbo tie rods this time around.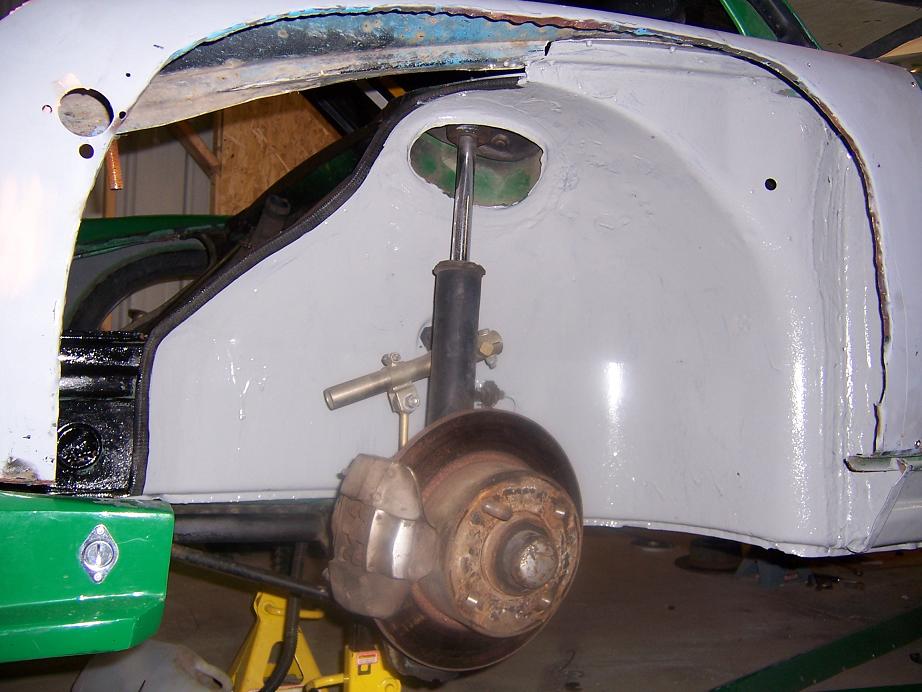
That pretty much brings things up to date. Still have a bunch of assembly to do. Then set ride heights and set camber, caster, toe etc.
Mike T
Posted by: J P Stein Sep 1 2006, 06:45 PM
I'm prolly movin' to E Mod. Glad you doan live around here 
Posted by: trekkor Sep 1 2006, 07:21 PM
Thanks for posting. Glad to see a project moving foward.
KT
Posted by: URY914 Sep 1 2006, 08:03 PM
Great thread and great job, Tim.
Your front trunk tubes looks like mine too. Great minds think alike.
I know how much work all that is, but when you post pictures of it people think you did it all in one night. Fab work is s-l-o-w when you work alone. Keep it up.
Paul
Posted by: Mike T Sep 12 2006, 06:36 PM
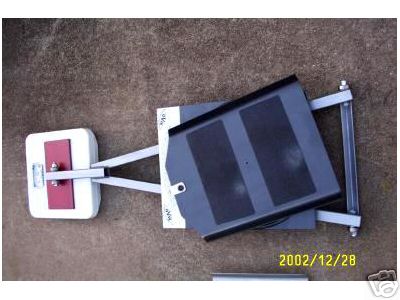 Last Wednesday I bought a set of the lever arm style scales from ebay. The seller was WWW.MADONE.NET. I'm expecting them any day now. I have used the electronic style many times. A local speedshop rents a set of Rebco scales for $20.00 a day and I've rented them 4 times in the last 10 yrs. I'm looking forward to seeing how these compare and how they are to use.
Posted by: 914forme Sep 13 2006, 08:21 AM
![popcorn[1].gif](style_emoticons/default/popcorn[1].gif) Let us know!!!!
Let us know!!!!
Posted by: Mike T Oct 3 2006, 05:22 PM
Just an update on my project. I received the scales I bought from MADONE.NET last friday. They are well built and came well packaged. All the parts were there and the instructions look adaquate to explain operation.
The bad part is it took almost a month to get them. His ebay feedback while generally good indicated slow shipping could happen.
Anyway...
I will be using them this week and report my experience. My race season is over so I have lots of time.
Mike T
Posted by: Mike T Oct 12 2006, 11:24 AM
Another update on the work I did to my car.
I used the MADONE.NET ebay scales and they work pretty well. Fairly easy to set up but it takes a while to get them positioned just right. Chassis setup and adjustment is a little slow because you have to crunch your own numbers. I did my car in about 3 hrs and found them to be very repeatable.
I bought the system with rollers on the frames that are supposed to allow the suspension to settle out any binding. I took 7 readings and the total weight reading varied by 2%. I consider that acceptable. I got the cross weights to 50.1% and couldn't fiddle them any closer.
I'm going to redo the car to see if the results are repeatable. Should I make a thread when I do? With pictures? Anybody interested?
Oh, by the way: After all the cutting and fiberglass body parts the total weight with fuel was 1820 lbs without driver. 56% rear weight, 49% left weight. Not bad for a V8 car with cast iron heads.
Mike T
Posted by: URY914 Oct 12 2006, 12:05 PM
1820! What a PIG!  But I suppose a V8 would make up for some of that.
So your changing to Aluminum heads, what else can you change to aluminum? Intake manifold?
Posted by: Mike T Oct 12 2006, 05:23 PM
I know, I know... I was sort of dissapointed with that after all I did. I did add quite a bit more tubing. It was a little light on bracing so I added more triangulation.
I still have steel front fenders and front hood too and will be going to fiberglass over the winter. So that will cut more off.
The intake is already aluminum as is the waterpump. It's a remote electric from Mezier. Works good.
Not much more can come off the engine but I will be looking. A pound here and there can add up as you know. After a while it gets hard to find more than a few lbs to take off at any one point of the car. To get 85 lbs off all at once was very satisfying.
The wheels are steel from Diamond racing so going to an alloy wheel could get me 4lbs per corner. Alloy wheels as wide as mine are very expensive...
I looked up the weight of your car and found it at 1420 with a full fuel load. So my car is 400lbs heavier. Realistically I can expect to get another 75lbs off the car. That will have to do. The sad part is I can take 75lbs off the driver as well... 


Mike T
Posted by: URY914 Oct 12 2006, 08:55 PM
I hear ya about the driver's weight.
I drank too many rich imported beers during construction. 
Taking pounds off the car is easier and more fun than off the driver.
Posted by: Rough_Rider Oct 13 2006, 04:43 PM
So Mike,
What the skinny on those scales? Are they easy to use? Would you buy them again Or recommend them to others?
Be nice to see them in action, any pics.
Posted by: Mike T Oct 13 2006, 07:41 PM
I think they work pretty well. Easy to use. Strong enough for the task. I'm going to weigh the car again this weekend to check reproducabilty. I will take pictures and do a run through of the process.
I bought the optional turn plates. Probably wouldn't do that again. Don't really need them.
Stay tuned.
Mike T
Posted by: 914forme Oct 13 2006, 08:32 PM
You could allways change your block, http://www.donovanengineering.com/Blocks/SmallBlock.htmlmakes a nice block, and it weighs in at 90 lbs. Easier than taking off 75 pounds.
Posted by: Mike T Nov 6 2006, 07:36 AM
I intended to put pics of the scales and weighing process here as an update for any who were interested but I ended up finishing some projects around the house as Winter is closing in and I need to get my digging done before the ground froze.
The car is up on jackstands again and I won't be weighing again until spring. I will post the process then.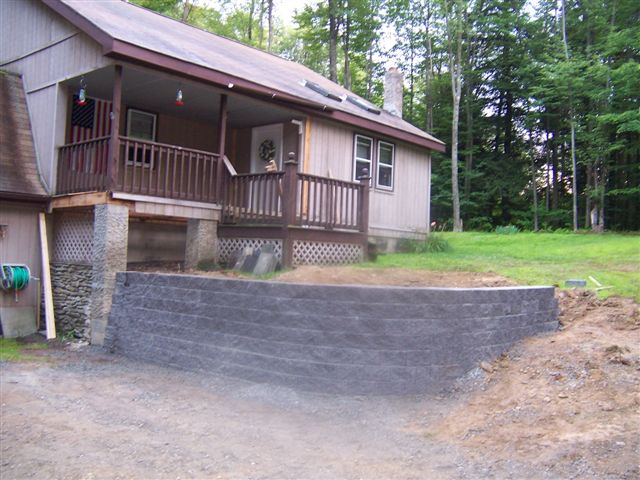
Mike T
Posted by: URY914 Nov 6 2006, 12:58 PM

... before the ground froze.
Mike T


Sorry Mike. Wall looks good.
Posted by: Rotten Robby Nov 7 2006, 10:34 AM
... before the ground froze.
Mike T
Sorry Mike. Wall looks good.
We will see how Paul laughs when the rain comes and it falls sideways in Florida!
Posted by: Mike T Nov 7 2006, 01:13 PM
Yeah, I hear ya. And how those California 914ers can live day to day with the threat of all those earthquakes hanging over their heads... 
Posted by: cali914 Nov 9 2006, 11:08 PM
hey mike I have the meizere water pump dual out 55 gpm. Is this what you are using. HC
Posted by: Mike T Nov 13 2006, 09:07 AM
I have the Bulkhead mount style WP116. Specs out at 35GPM and does the job even on back to back runs on 90°+ days.
1 x 1.25" from radiator and 2 x 3/4" to the block plates.
It's been in the car for 3 seasons now and has been trouble free. Expensive though.
Mike T
Posted by: cali914 Nov 14 2006, 12:25 AM
I have the Bulkhead mount style WP116. Specs out at 35GPM and does the job even on back to back runs on 90°+ days.
1 x 1.25" from radiator and 2 x 3/4" to the block plates.
It's been in the car for 3 seasons now and has been trouble free. Expensive though.
Mike T
Thanks Mike I have a CSR 37 gpm and I use to use it , but I thought it was not enouph with the length and size of our hoses. So I bought the 55 gpm Meizere and your correct it is very exspensive. I first mounted the pump six inches from the radiator and ran two one inch hoses back to the block with a 1 and a quarter inch hose to the radiator. I recently moved the pump back to the engine compartment and now trying to run one inch to pump with dual out and one 1 1/4 to the radiator. Having three lines from the radiator was a bit much. Thanks for the input. Hc
Powered by Invision Power Board (http://www.invisionboard.com)
© Invision Power Services (http://www.invisionpower.com)