Printable Version of Topic
Click here to view this topic in its original format
914World.com _ The Paddock _ has anyone used these springs?
Posted by: mtrotter Oct 8 2006, 09:55 AM
http://www.jegs.com/webapp/wcs/stores/servlet/CategoryDisplay?lang=-1&catalogId=10002&storeId=10001&categoryId=12929
Im thinking they will work with... the stock perches.... any thoughts?
Posted by: drew365 Oct 8 2006, 10:46 AM
What is the diameter of the springs? If they are 2.5", you need aftermarket perches and shocks.
Posted by: URY914 Oct 8 2006, 10:49 AM
You need to know the inside and outside diameters before you do anything.
Posted by: 914forme Oct 8 2006, 11:35 AM
I am taking a set out of my car today, I will let you know and take pictures post backup tonight. I am prepping to install a set of threaded bodies over my Bilstiens. QA1s are great spring for the $$, they are flat ground on each end. I am using hte 14" length, but in retro spec I should have went with a shorter spring and added a set of take up springs.
Jegs is local to me, so I get stuff same day if need be.
Posted by: nebreitling Oct 8 2006, 01:11 PM
those won't work unless you have aftermarket perches on your shocks.
Posted by: Aaron Cox Oct 8 2006, 03:31 PM
yep... 2.5 X length.. works with aftermarket perches
btw 914forme... i used 8" coils on my car and shoulda gone with 10's LOL
8 10 or 12" springs all work on bilsteins...
Posted by: 914forme Oct 8 2006, 03:37 PM
Stock Shock cap is ~4"
Stock Spring Inside is ~3.25"
QA1 OD = 3.45" the ID is 2.563" excatly. 
Attached image(s)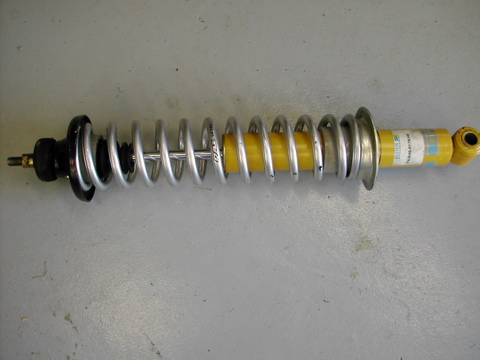
Posted by: 914forme Oct 8 2006, 03:40 PM
I added some 2.5" spacers to keep the springs center on the bilsteins. 14" springs means you can spin hte not down by hand to the last 1/2" turn, they you need a small wrench. This is with the collar at 1/2 way. My old 140lbs where also 14" long. But the problem is a 140 lbs spring will allwow the rear to sit a little lower than the 175 lbs will. Forgot that little detal. Yeap that is PVC Electrical conduit.
Attached image(s)
Posted by: Aaron Cox Oct 8 2006, 08:58 PM
why not buy real coilover sleeves from coleman....
Posted by: nebreitling Oct 8 2006, 09:44 PM
i'm with aaron on that one... a spring that slips on its perch can create some 'interesting' handling.
Posted by: Aaron Cox Oct 8 2006, 10:50 PM
its like 40 bucks per side to do it right......
you got the springs... now get the right perches (and gain corner balancing and infintie ride height adjustability)
cheap... and its made for the task.
Posted by: 914forme Oct 9 2006, 09:15 AM
I am way ahead of you guys, I ordered them all ready, should be here today. That is why the rear shocks are off my car. When I put them together I had to do this, now I am fixing my issues. I know that will never happen
The Coleman pieces are the way togo, cheap, simple, proper solution. Mine was cheap, simple, but rigged to make to the next event.
Posted by: 914forme Oct 9 2006, 02:57 PM
Colemann Parts came in  I am off to the shop and see what I can figure out on the installation.
Attached image(s)
Posted by: J P Stein Oct 9 2006, 04:52 PM
They can be installed properly (without the hat floppin' around) with a bit of messin' with em'.
A pic.
Attached thumbnail(s)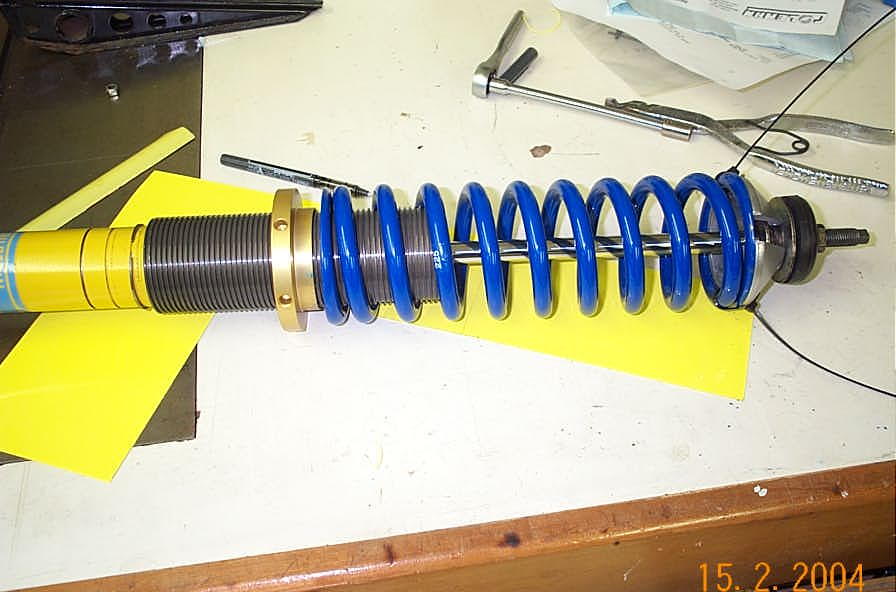
Posted by: Rough_Rider Oct 9 2006, 05:22 PM
Mini-tip: Don't wrench the zip ties down tight. Leave about 1/8" gap so springs can't move away from the hat's lip. Should prevent the ties frm breaking.
Posted by: 914forme Oct 9 2006, 05:38 PM
Okay so did you heat the sleave in the oven or with a torch? I used a oven first, and then got 2/3 of the way down, and then it stuck, so I grabbed my tourch.... Okay just to let you know I am classing myself as an Moron!!!! Got it to slip down and then I walked away to let it cool. Cameback an hour latter to find oil all over the floor.
Anybody know how to rebuild a Bilstein sport????? The DIY method would be great.
How hot do you heat these to to get them on? My buddy suggesed honning them, press them on, and using red locktight, to set them. Hindsight is 20/20!
Posted by: Aaron Cox Oct 9 2006, 06:08 PM
dude.. they slip right on. you bought the wrong collars....
2.04" ID are what i bought... and i bought the magic adapter ring for bilsteins to take up the slack.....
not a press fit... loose... but not scary loose.
LOTS of pics in my blog
AA
Posted by: J P Stein Oct 9 2006, 06:25 PM

Okay so did you heat the sleave in the oven or with a torch? I used a oven first, and then got 2/3 of the way down, and then it stuck, so I grabbed my tourch.... Okay just to let you know I am classing myself as an Moron!!!! Got it to slip down and then I walked away to let it cool. Cameback an hour latter to find oil all over the floor.
Anybody know how to rebuild a Bilstein sport????? The DIY method would be great.
How hot do you heat these to to get them on? My buddy suggesed honning them, press them on, and using red locktight, to set them. Hindsight is 20/20!
Hummm.......no.
You need to give the Coleman folks the OD of your socks.....a tad over 2 inches, IIRC.
The proper threaded sleeves are about .03/.04 ID larger than the shock. I used plastic shim stock to fill the gap twixt the 2. It appears you have the wrong ones.
Bilstein will rebuild/revalve your shocks for 65 bucks + parts.
Bilstein West In Poway, CA. 1 800 537 1085
Since one is hosed, you may as well send both & have them revalved. You need to tell them your spring rates & weight of your car and usage (AX?)
Posted by: Aaron Cox Oct 9 2006, 06:29 PM
JP... 2.04" is the number... and the number shall be 2.04"
my collars were a little loose... they sell an adapter ring that sits on the stock bilsteing spring clip but takes upthe gap between the coleman collar and the bilstein shcok......
ID of adapter = bilstein OD
OD of adapter = ID of collar
5 bucks each... from coleman.
Posted by: J P Stein Oct 9 2006, 06:41 PM
I know....that's good for the bottom, but what about the top?
Posted by: 914forme Oct 9 2006, 07:18 PM
So JP What did you do for the top? I have a busing that will fit there, but then it still has a bit of slop.
[url= http://www.colemanracing.com/catalog/product_info.php?products_id=7848]Coleman Racing Shrink fit[/url] This is what I used, seem to work perfectly except the oil boiling part. I think I will try it again since I need to send the one back might as well send both back and get them redone correctly. Hopefully they don't laugh to hard at my Coleman Engineering debacle!!!
Posted by: J P Stein Oct 9 2006, 07:37 PM
Nomenclature can get us in trouble here, but I'll give it a shot.
If you look at the pic you'll notice the top nut(sleeve nut?) fits inside the aluminum hat.
The radius of the nut does not match the Non radiused hat....thus the flange of the nut does not seat to the inner hat. I butterflied the hat till it did...If you don't have a die grinder, you could use a round rat tail file to make the radii match.
Then...the rubber bushing needs a big flat washer under it...see pic. the rubber bushing needs to be about half as thick as it originally was.....so you can get the lock nut on up on top.
Some set-ups are different....sleeve nut/bushing/yada. Aaron has one of those.
BTW, use 5-6 turns of saftey wire to hold the spring to the hat. Zip ties break.
Posted by: 914forme Oct 9 2006, 07:40 PM
I thought of that tonight, could not figure out how to make the rubber work correctly, I now have all the piece in my head cool. Scary when that happens......
Or Sh___ I am starting to think like an old man.
Thanks J P
Posted by: Aaron Cox Oct 9 2006, 08:34 PM
did you look at the pics in my blog??
Posted by: Aaron Cox Oct 9 2006, 08:41 PM
ok.. time to gang bang your brain with pics....
adapter rings....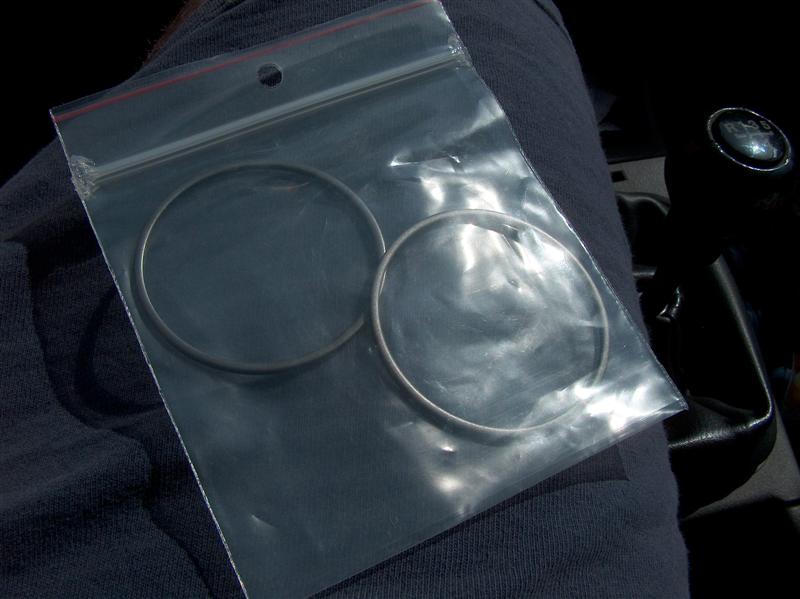
the bottom of the sleeve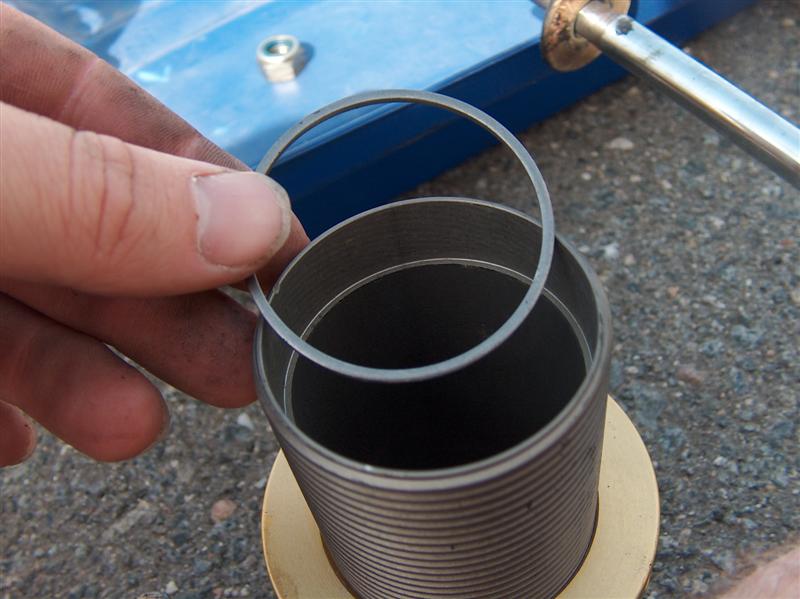
adapter ring inside of sleeve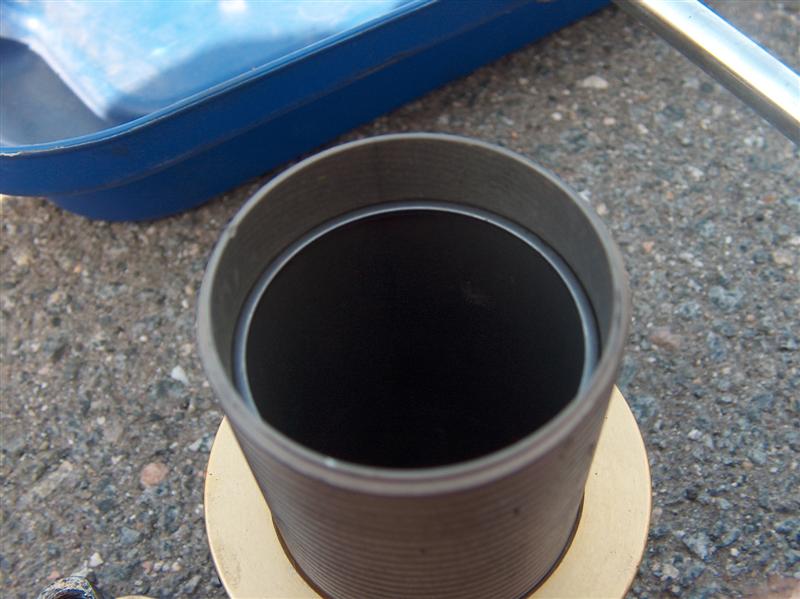
installed...note stock circlip AND adapter ring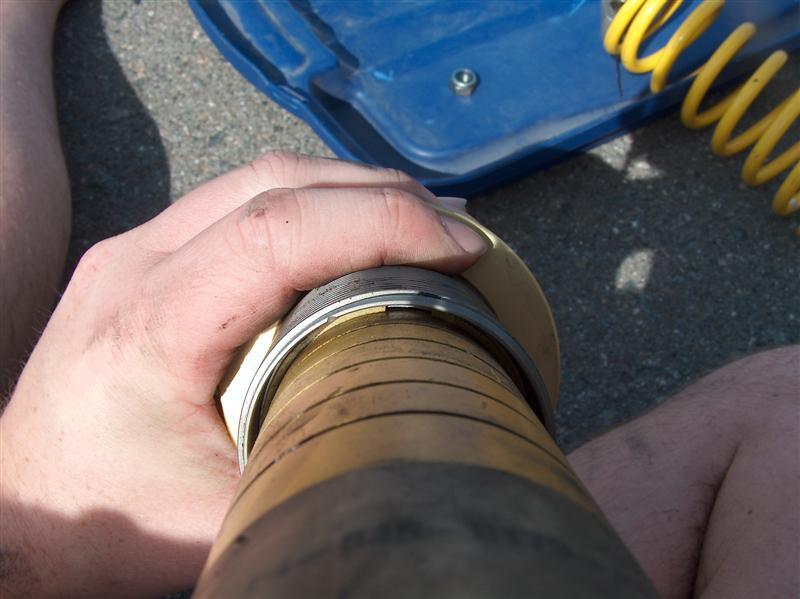
that takes care of the bottom....
top pics coming
Posted by: Aaron Cox Oct 9 2006, 08:46 PM
But wait...theres more johnny!
The top of the piston. has a ridge on it. Install stock washer there...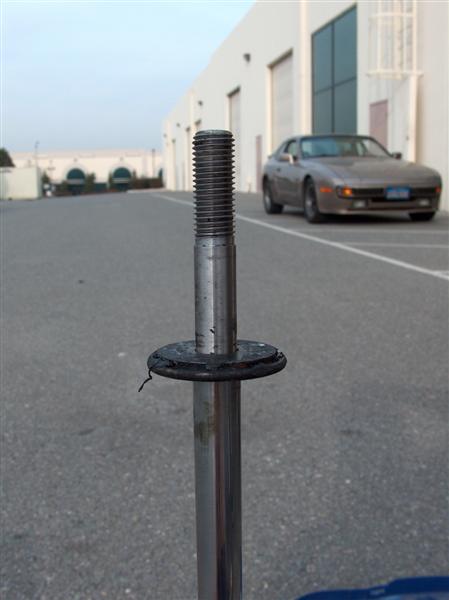
followed by spring hat and ziptied spring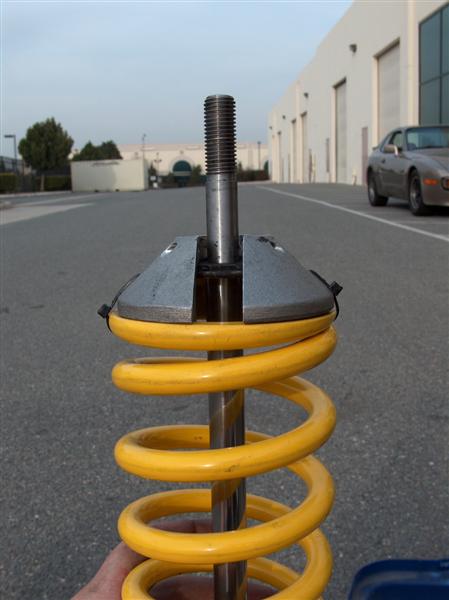
then the BIG flat washer (it wont fit under the hat)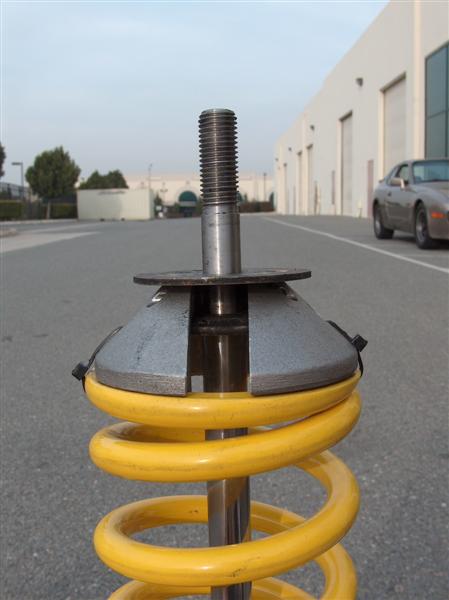
now the fun....
you have to trim the flat part of this ring off..... (aleady done)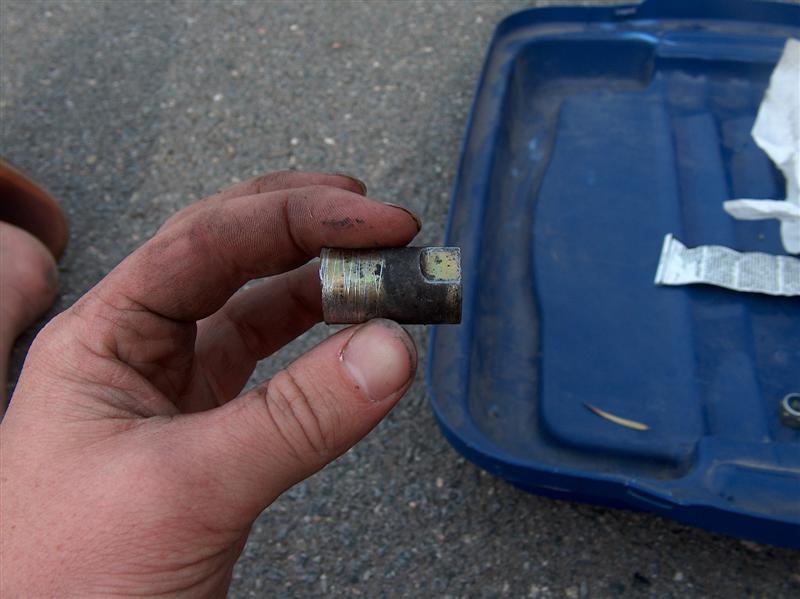
and den.... you tighten it down.... (its a threaded nut and spacer basically)
rubber goes over it....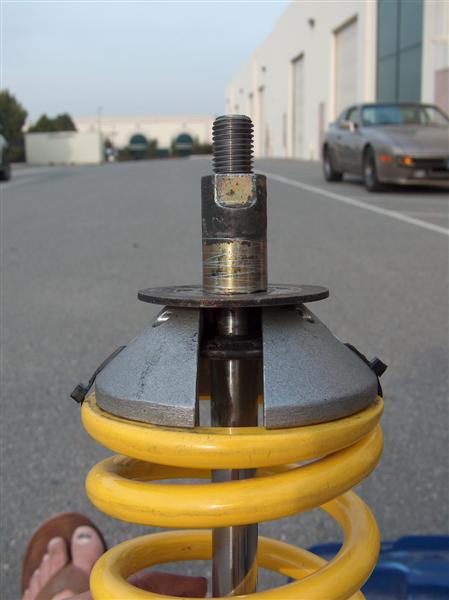
put the rubber over it... install it... put the top rubber on... then the other flat washer... and the nylock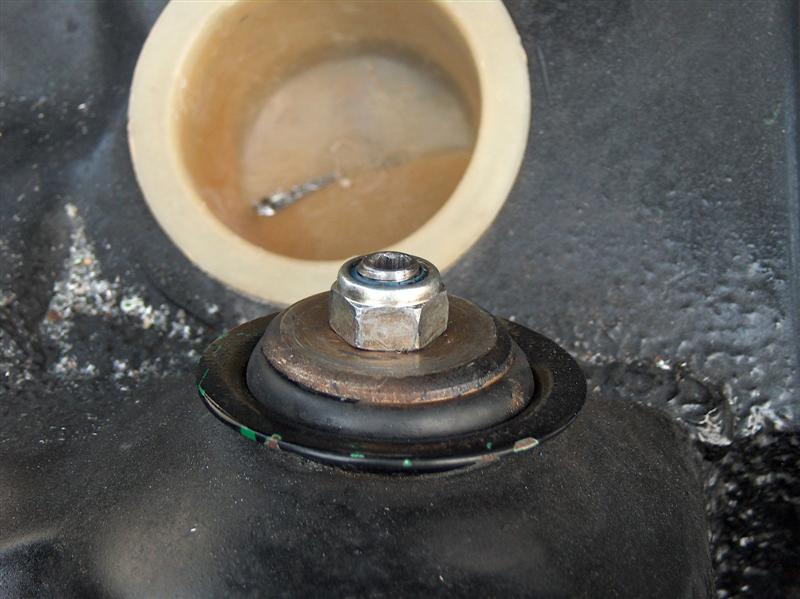
Powered by Invision Power Board (http://www.invisionboard.com)
© Invision Power Services (http://www.invisionpower.com)