|
|
|
Porsche, and the Porsche crest are registered trademarks of Dr. Ing. h.c. F. Porsche AG.
This site is not affiliated with Porsche in any way. Its only purpose is to provide an online forum for car enthusiasts. All other trademarks are property of their respective owners. |
|
|

  |

| michel richard |
 Oct 17 2005, 05:28 PM Oct 17 2005, 05:28 PM
Post
#61
|
|
Senior Member  Group: Members Posts: 1,291 Joined: 22-July 03 From: Longueuil, Québec Member No.: 936 |
On its way !
If I had to do it again, I would brace the vertical members on the rotisserie. I suppose it was fine for a short trip, but I was really nervous. Attached image(s) 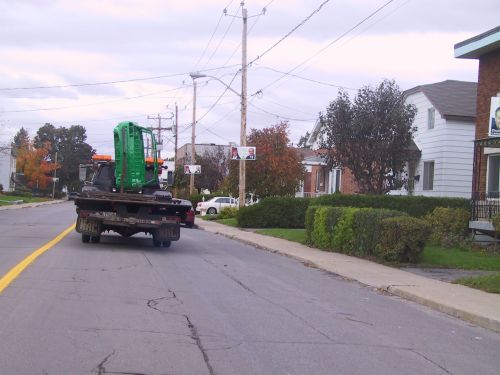
|
   |

 
|
| michel richard |
Oct 17 2005, 05:31 PM
Post
#62
|
|
Senior Member Group: Members Posts: 1,291 Joined: 22-July 03 From: Longueuil, Québec Member No.: 936 |
And back at home.
The Ravenna green car is now stripped and the tub should be picked up by my buyer on Wednesday. The conda green tub is ready to roll into the garage. The body man said he may be ready to take the car back in a couple of weeks, which is much quicker than I thought. Doing two trips may not have been necessary, then, but at least I can now start dealing with a number of things, since the inside is painted. Michel Attached image(s) 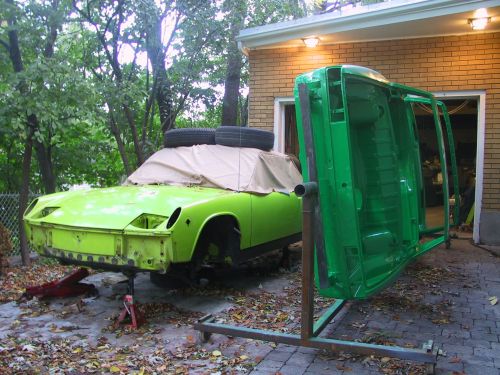
|
|
|
|
| michel richard |
Oct 17 2005, 07:12 PM
Post
#63
|
|
Senior Member Group: Members Posts: 1,291 Joined: 22-July 03 From: Longueuil, Québec Member No.: 936 |
All excited, and I started putting the wring through. First thing is to feed the trunk that goes to the rear of the car through the center tunnel, from the very front of the tunnel.
Here I'm feeding it. You don't see my kind daughter on the other side, gently pulling. We put a messenger on the multi-wire plug that goe to the relay board, and that helped a lot. Attached image(s) 
|
|
|
|
| michel richard |
Oct 17 2005, 07:13 PM
Post
#64
|
|
Senior Member Group: Members Posts: 1,291 Joined: 22-July 03 From: Longueuil, Québec Member No.: 936 |
Main trunk to the rear in place.
Time to go watch some football ! Attached image(s) 
|
|
|
|
| sixnotfour |
Oct 18 2005, 01:19 AM
Post
#65
|
|
914 Wizard Group: Members Posts: 10,435 Joined: 12-September 04 From: Life Elevated..planet UT. Member No.: 2,744 Region Association: Rocky Mountains |
|
|
|
|
| serge914 |
Oct 18 2005, 06:47 AM
Post
#66
|
|
Member Group: Members Posts: 273 Joined: 21-May 03 From: Laval Quebec Canada Member No.: 723 |
It look so nice and clean, why dont you just leave it like that and put it in display in your livingroom ?
|
|
|
|
| michel richard |
Oct 19 2005, 07:16 PM
Post
#67
|
|
Senior Member Group: Members Posts: 1,291 Joined: 22-July 03 From: Longueuil, Québec Member No.: 936 |
Ravenna green car is gone !
Mike Galloway from Ontario came and got it today, with a tow dolly. It was pouring rain. He showed up at my house when I was still at the office and it was 15 - 20 minutes before I could make it home. House was empty. Mike started preparing the 914 for the tow, as it was in the driveway. A neighbor called the cops ! and they arrived promptly. I was there a few minutes later, showed id, and all was settled. There was a house that was robed a few years ago on my street, thieves showed up with a moving truck. Oh well. In any event, had a good time with the Ravenna green teener, even if I did not have it very long. It made two ECRs. Here's Mike towing it home, I'm taking the picture on my way back to the office. Attached image(s) 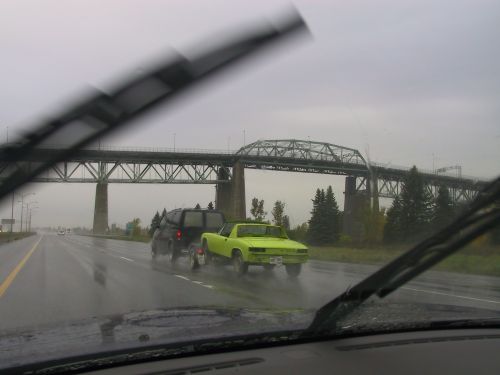
|
|
|
|
| michel richard |
Oct 19 2005, 07:20 PM
Post
#68
|
|
Senior Member Group: Members Posts: 1,291 Joined: 22-July 03 From: Longueuil, Québec Member No.: 936 |
Made a bit of progress on the wiring: I installed the fuse panel. I can't figure out where the two big red wires that are hanging connect to. Any ideas ?
Attached image(s) 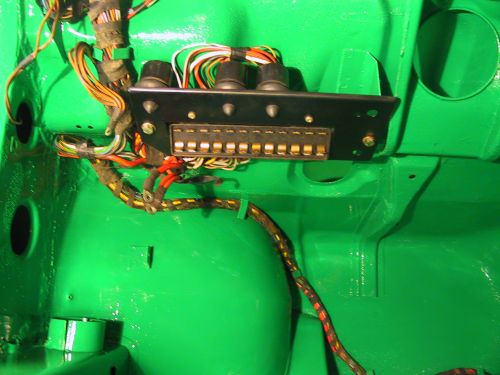
|
|
|
|
| michel richard |
Oct 19 2005, 07:22 PM
Post
#69
|
|
Senior Member Group: Members Posts: 1,291 Joined: 22-July 03 From: Longueuil, Québec Member No.: 936 |
Oh, and I realized that I fed the wiring bundle that goes to th rear wrong. It should go above the very front part of the center tunnel. Means I have to pull it out and re-feed it.
I'm sure it's not the last time I have to re-do a job. Attached image(s) 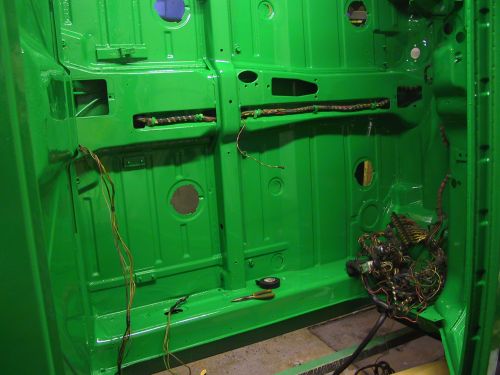
|
|
|
|
| swl |
Oct 19 2005, 07:34 PM
Post
#70
|
|
Senior Member Group: Members Posts: 1,409 Joined: 7-August 05 From: Kingston,On,Canada Member No.: 4,550 Region Association: Canada |
Really nice work Michel. Keep the pictures coming they are inspiring.
|
|
|
|
| michel richard |
Oct 26 2005, 06:29 PM
Post
#71
|
|
Senior Member Group: Members Posts: 1,291 Joined: 22-July 03 From: Longueuil, Québec Member No.: 936 |
I started a separate thread to find help figuring out what was what with the red wires and got these very good responses:
http://www.914world.com/bbs2/index.php?act=...f=2&t=40080&hl= Then, I was not able to find the appropriate part in my stash, so I decided to make one. I found a piece of hard rubber at one of the good local hardware stores and managed to machine these pieces: Attached image(s) 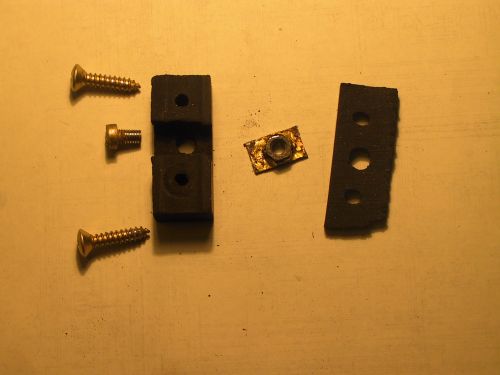
|
|
|
|
| michel richard |
Oct 26 2005, 06:30 PM
Post
#72
|
|
Senior Member Group: Members Posts: 1,291 Joined: 22-July 03 From: Longueuil, Québec Member No.: 936 |
The picture is not the best, but the parts can be seen better here, as installed:
Attached image(s) 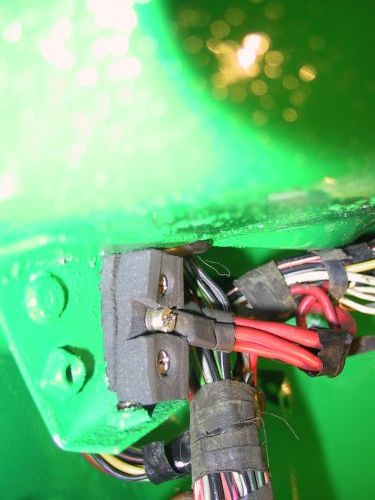
|
|
|
|
| michel richard |
Oct 26 2005, 06:33 PM
Post
#73
|
|
Senior Member Group: Members Posts: 1,291 Joined: 22-July 03 From: Longueuil, Québec Member No.: 936 |
The bracket that's painted green is the one that holds the fuse panel to the tub.
|
|
|
|
| michel richard |
Oct 27 2005, 09:07 PM
Post
#74
|
|
Senior Member Group: Members Posts: 1,291 Joined: 22-July 03 From: Longueuil, Québec Member No.: 936 |
I then started to look at the wiring to the steering column and quickly hit a roadblock when I looked at the wiper stalk connections. I started another thread and quickly resolved the issue, with some generous help.
See: http://www.914world.com/bbs2/index.php?act=...=ST&f=2&t=40446 |
|
|
|
| michel richard |
Oct 29 2005, 05:37 PM
Post
#75
|
|
Senior Member Group: Members Posts: 1,291 Joined: 22-July 03 From: Longueuil, Québec Member No.: 936 |
I put the steel sub-dash in, today. I used contact cement to glue the dash material on, then used a very sharp kitchen nife to open holes in the material (I managed to get the knife back in the kitchen before I got into any trouble). Here's how it looks:
Attached image(s) 
|
|
|
|
| michel richard |
Oct 29 2005, 05:40 PM
Post
#76
|
|
Senior Member Group: Members Posts: 1,291 Joined: 22-July 03 From: Longueuil, Québec Member No.: 936 |
In the previous shot, you may notice a gray splotch in the passenger footwell: I managed to get some work done on the remaining "tub" issues. More on that tomorrow. Also, the switch buttons for the fog lights and the driving ligths are not correct for a 914/6.
I replaced them with what I believe are the correct itmes a few minutes after taking the previous shot. Here's a close-up. Attached image(s) 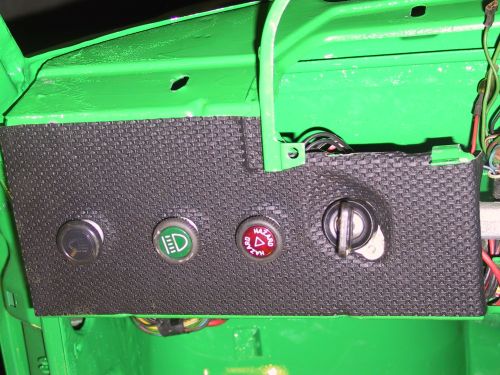
|
|
|
|
| michel richard |
Oct 29 2005, 05:43 PM
Post
#77
|
|
Senior Member Group: Members Posts: 1,291 Joined: 22-July 03 From: Longueuil, Québec Member No.: 936 |
The ignition switch installation is still temporary. The final installation can only be made after the steering column is in.
|
|
|
|
| Verruckt |
Oct 30 2005, 07:05 AM
Post
#78
|
|
Senior Member Group: Members Posts: 716 Joined: 14-July 04 From: Midwest Member No.: 2,348 |
Awesome work, keep it up! It's guys like you that make guys like me look bad! (IMG:http://www.914world.com/bbs2/html/emoticons/smilie_pokal.gif)
(IMG:http://www.914world.com/bbs2/html/emoticons/wink.gif) |
|
|
|
| sixnotfour |
Oct 30 2005, 11:46 AM
Post
#79
|
|
914 Wizard Group: Members Posts: 10,435 Joined: 12-September 04 From: Life Elevated..planet UT. Member No.: 2,744 Region Association: Rocky Mountains |
You didnt get the factory dash tin facia pieces and 2 eyebrow plastic pieces that fit around steering colum?
Just wondering incase there in a box. Attached image(s) 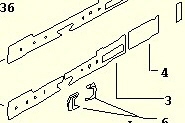
|
|
|
|
| michel richard |
Oct 30 2005, 02:34 PM
Post
#80
|
|
Senior Member Group: Members Posts: 1,291 Joined: 22-July 03 From: Longueuil, Québec Member No.: 936 |
Jeff,
I was wondering about the facia, but no, I don't have the tin pieces. I think I have the eyebrow pieces kicking around somewhere, though. There is quite a gap in the dashboard, and in my simple mind the gap was going to be covered by the "eyebrow pieces". Guess I'm going to have to figure something out. Please keep the comments coming, your help is invaluable. In any event, I got a lot of welding done today, and the "tub" issues are now pretty much taken care of. I welded rear swaybar mounts: Attached image(s) 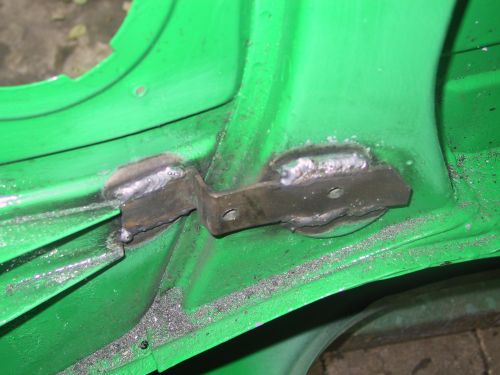
|
|
|
|
|
1 User(s) are reading this topic (1 Guests and 0 Anonymous Users)
0 Members:

|
Lo-Fi Version | Time is now: 8th June 2024 - 07:10 PM |
Invision Power Board
v9.1.4 © 2024 IPS, Inc.