|
|
|
Porsche, and the Porsche crest are registered trademarks of Dr. Ing. h.c. F. Porsche AG.
This site is not affiliated with Porsche in any way. Its only purpose is to provide an online forum for car enthusiasts. All other trademarks are property of their respective owners. |
|
|

  |

| Eric_Shea |
 Jul 21 2004, 04:42 PM Jul 21 2004, 04:42 PM
Post
#1
|
|
PMB Performance  Group: Admin Posts: 19,304 Joined: 3-September 03 From: Salt Lake City, UT Member No.: 1,110 Region Association: Rocky Mountains |
I searched the site for a step-by-step on installing sail panel vinyl. I found people who had done it but no detailed instructions to give you an idea of what’s involved and/or give you the tools to carry on for yourself. With cars that are 28-34 years old, I’m sure there’s more than a few of us driving around out there with peeling, unsightly sail panel vinyl. This is a “Big” job when done right. You’ll have a good portion of your car torn apart. Plan on a weekend where you prep one day and assemble the next. Here’s what it will take to get yours back to new.
Tools and Supplies: Phillips Head Screwdriver – Medium Phillips Head Screwdriver – Small Phillips Head Screwdriver – Short Flat Head Screwdriver – Medium 8mm Socket with Long Extension 10mm Socket 17mm Socket Small 1” Putty Knife Utility Knife with Plenty of Sharp Blades Blue Masking Tape Regular Masking Tape Roll of Butchers Paper (or a bunch of newspapers) Spray Trim Adhesive Adhesive Remover Sail Panel Vinyl Kit (various vendors) Step 1: Remove Trim You’ll obviously need to take off all the trim pieces before digging into this task. Remove your (cars) top and start with the large pieces that trim the back of each sail panel. You may want to remove the rear wheel to access the 8mm nut underneath the car. This holds a clip that holds the trim piece at the base. There is one other mount and that’s a Phillips screw. Next would be the front side of the sail panel where you’ll need to remove the rubber weather strip at the back of the door and then remove the Phillips screws holding the mounting track. Use the putty knife to get under the mounting track trim piece as they are glued on with a nice sticky tar substance. I’ll let you work your way through the remaining pieces (basically un-screw, un-screw, un-screw…) |
   |

 
|
| Eric_Shea |
Jul 21 2004, 04:43 PM
Post
#2
|
|
PMB Performance Group: Admin Posts: 19,304 Joined: 3-September 03 From: Salt Lake City, UT Member No.: 1,110 Region Association: Rocky Mountains |
Step 2: Remove Misc. Interior Pieces and Vinyl
You’ll need to remove the interior pad underneath the top of the roll hoop and to do that you’ll need to remove the seat belt mounts using the 17mm socket, coat hangers (has anyone ever used these?) and the trim screws hiding under all the little black caps (of which you have a few missing…) Check the bottom of the roll hoop pad as there’s more screws and caps hiding there. Remove the rear latches with the 10mm socket. Need to reseal your back window? Now would be a great time. At this point you’ll want to make a mental note or even take a few pictures of where the folks at the factory had trimmed the vinyl. Now simply peel off the old vinyl. It should come easily. Here's a shot of the vinyl off. Attached image(s) 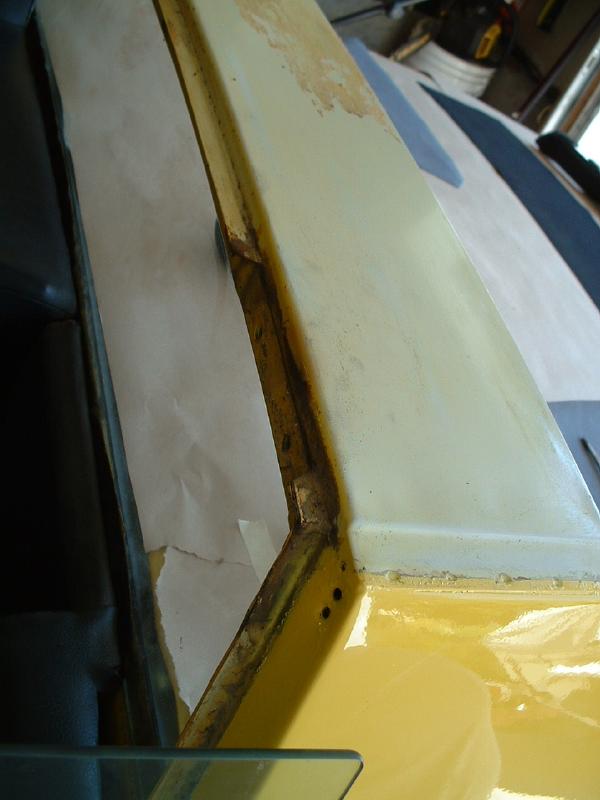
|
|
|
|
| Eric_Shea |
Jul 21 2004, 04:44 PM
Post
#3
|
|
PMB Performance Group: Admin Posts: 19,304 Joined: 3-September 03 From: Salt Lake City, UT Member No.: 1,110 Region Association: Rocky Mountains |
Here's another. You can still see some of the old glue as it was...
Attached image(s) 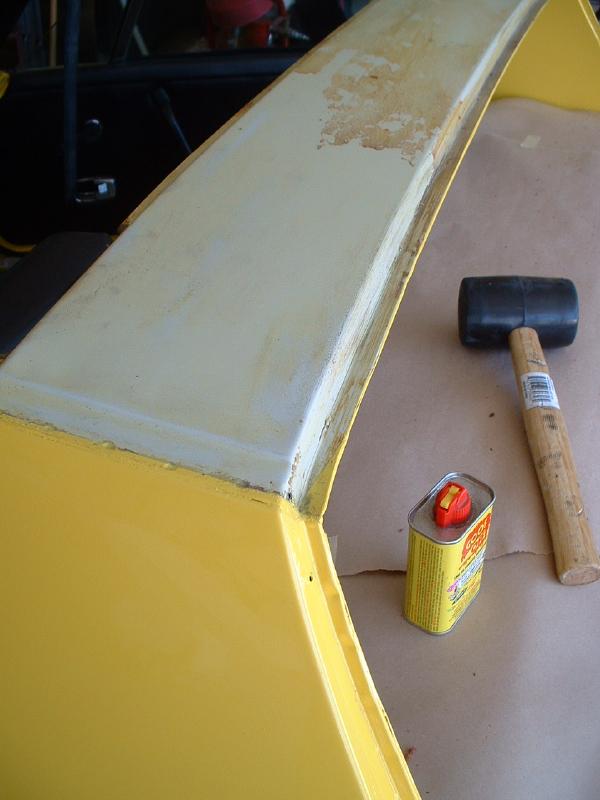
|
|
|
|
| Eric_Shea |
Jul 21 2004, 04:46 PM
Post
#4
|
|
PMB Performance Group: Admin Posts: 19,304 Joined: 3-September 03 From: Salt Lake City, UT Member No.: 1,110 Region Association: Rocky Mountains |
Step 3: Prep
Prep is the most important part to any great job. Once you’ve got everything off you’ll need to prep the car and the surface that you’ll be working on. To prep the car I used the 3M “Blue” tape that is paint friendly on the body and then tapped butcher paper ($15.00 per roll that should last you a lifetime) to mask it off using the regular masking tape. The glue sprays in a definite pattern but it’s best to have everything masked off so you don’t get unwanted overspray. Final prep involves cleaning the surface to be worked and removing all of the old glue (do it damnit… don’t skip this important step.) You’ll especially want to make sure the corners of the roll hoop are clean as the vinyl will have to be bent and somewhat stretched a bit to adhere. Clean, clean, clean. Use the adhesive remover and make sure the entire area is clean. I performed a final wipe down with Acetone. Test fit your vinyl so you know where it’s going during the heat of battle (final installation). Tape on... Attached image(s) 
|
|
|
|
| Eric_Shea |
Jul 21 2004, 04:47 PM
Post
#5
|
|
PMB Performance Group: Admin Posts: 19,304 Joined: 3-September 03 From: Salt Lake City, UT Member No.: 1,110 Region Association: Rocky Mountains |
Little balls of glue coming off...
Attached image(s) 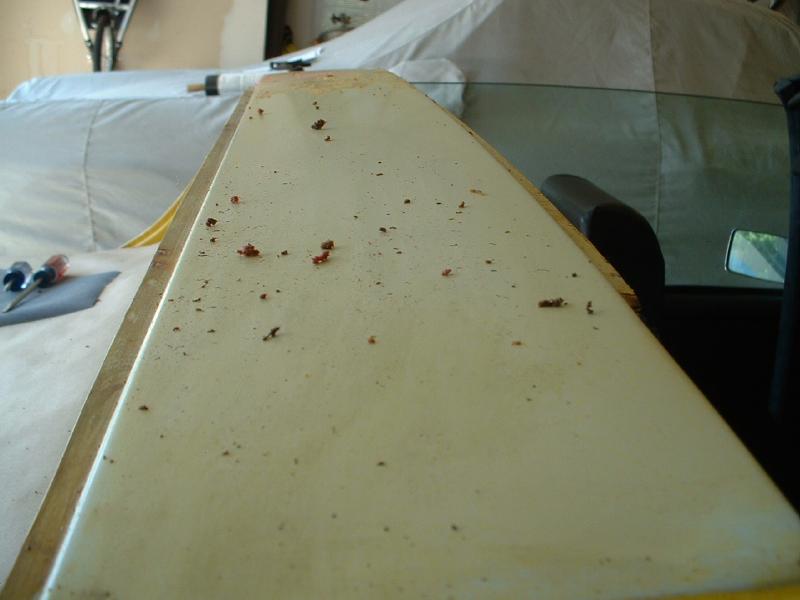
|
|
|
|
| Eric_Shea |
Jul 21 2004, 04:48 PM
Post
#6
|
|
PMB Performance Group: Admin Posts: 19,304 Joined: 3-September 03 From: Salt Lake City, UT Member No.: 1,110 Region Association: Rocky Mountains |
All clean and ready for adhesive...
Attached image(s) 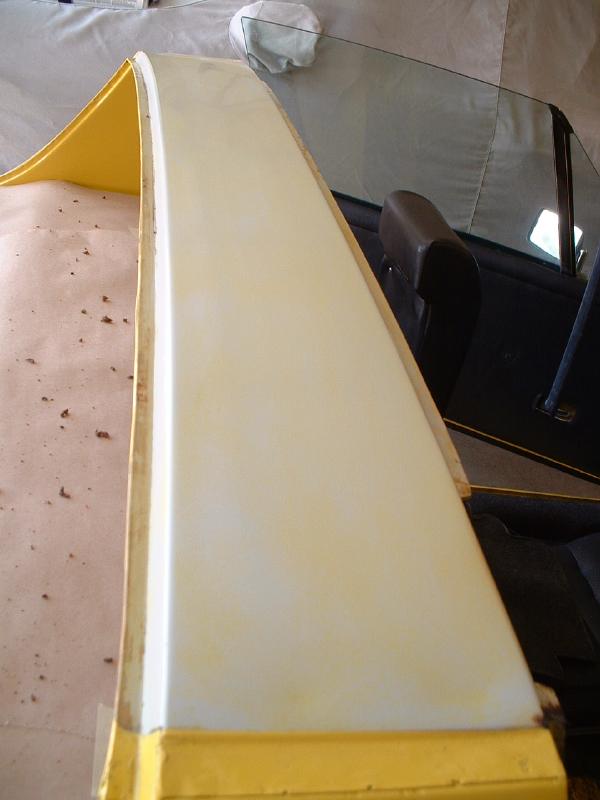
|
|
|
|
| Eric_Shea |
Jul 21 2004, 04:48 PM
Post
#7
|
|
PMB Performance Group: Admin Posts: 19,304 Joined: 3-September 03 From: Salt Lake City, UT Member No.: 1,110 Region Association: Rocky Mountains |
Step 4: Spraying on the Glue
It all goes very fast at this point so you should be well prepared and ready to race the clock. You need to have an area where you can spray both the areas on the car and the backside of the vinyl. I used the butcher paper and covered the rear trunk. It’s an excellent area to lay down the pieces. The glue is sprayed on in two coats on each area (car and vinyl). Each coat goes in a different direction (left to right and then up and down) to ensure even coverage. Attached image(s) 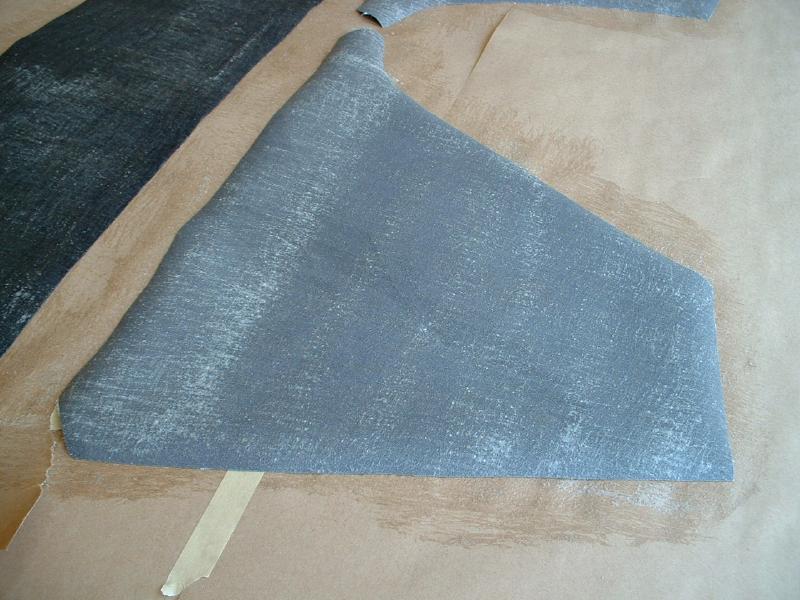
|
|
|
|
| Eric_Shea |
Jul 21 2004, 04:49 PM
Post
#8
|
|
PMB Performance Group: Admin Posts: 19,304 Joined: 3-September 03 From: Salt Lake City, UT Member No.: 1,110 Region Association: Rocky Mountains |
Top.
Attached image(s) 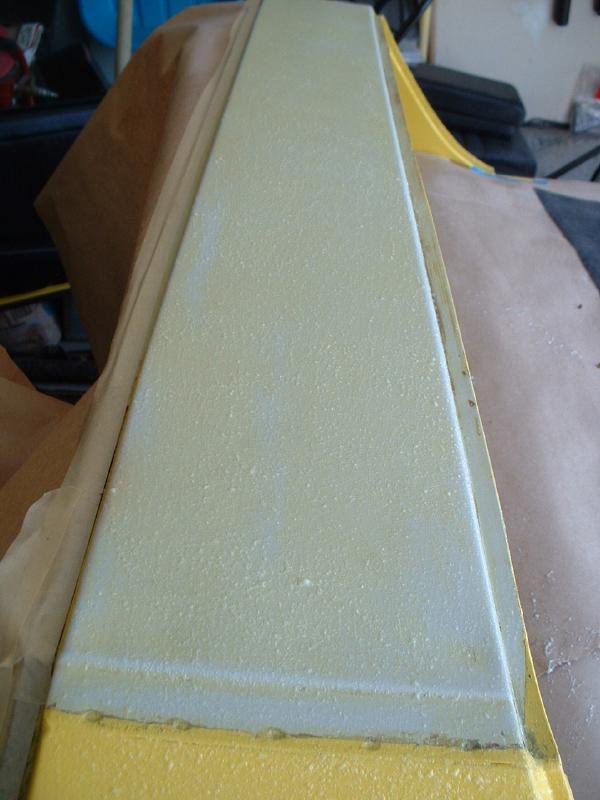
|
|
|
|
| Eric_Shea |
Jul 21 2004, 04:50 PM
Post
#9
|
|
PMB Performance Group: Admin Posts: 19,304 Joined: 3-September 03 From: Salt Lake City, UT Member No.: 1,110 Region Association: Rocky Mountains |
Sail Panel.
Attached image(s) 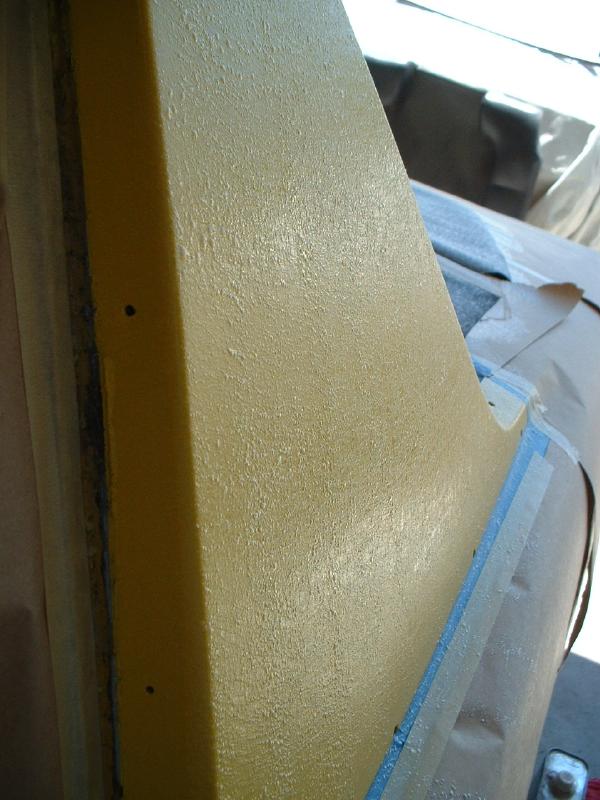
|
|
|
|
| Eric_Shea |
Jul 21 2004, 04:50 PM
Post
#10
|
|
PMB Performance Group: Admin Posts: 19,304 Joined: 3-September 03 From: Salt Lake City, UT Member No.: 1,110 Region Association: Rocky Mountains |
Step 5: Laying Down the Vinyl
First you should remove the paper and tape that you had protecting the car. It will stick to the back of your vinyl making the job impossible. Its job is done now anyway. The vinyl should be applied when each surface is “tacky” to the touch (not dry like most contact adhesives) and this only takes 1-3 minutes. I set the alarm to 3 minutes. You should not let the surface sit for longer than 10 minutes before applying the vinyl… meaning? You’ve got 7 minutes to get the job done. Start with the hoop top. As mentioned earlier I test fit my vinyl before applying the glue. Knowing where I was going I actually laid the top piece over my head and worked my way from the driver’s side to the passenger’s side. Concentrate on starting it straight and concentrate on the flat top surface only. Once it’s down, press it smooth and start rolling those edges down. Hurry, the clock is ticking. Lay on the sidepieces starting in the bottom corner by the handle. There’s a 45 deg. cut there that should straddle the edge of the panel. Hold the back of the vinyl out toward the rear of the car and make sure you will be just covering your mounting holes for the lower trim piece. Smooth each one up and start working the edges over… Whew! The major task is done. Attached image(s) 
|
|
|
|
| Eric_Shea |
Jul 21 2004, 04:51 PM
Post
#11
|
|
PMB Performance Group: Admin Posts: 19,304 Joined: 3-September 03 From: Salt Lake City, UT Member No.: 1,110 Region Association: Rocky Mountains |
Top and Side.
Attached image(s) 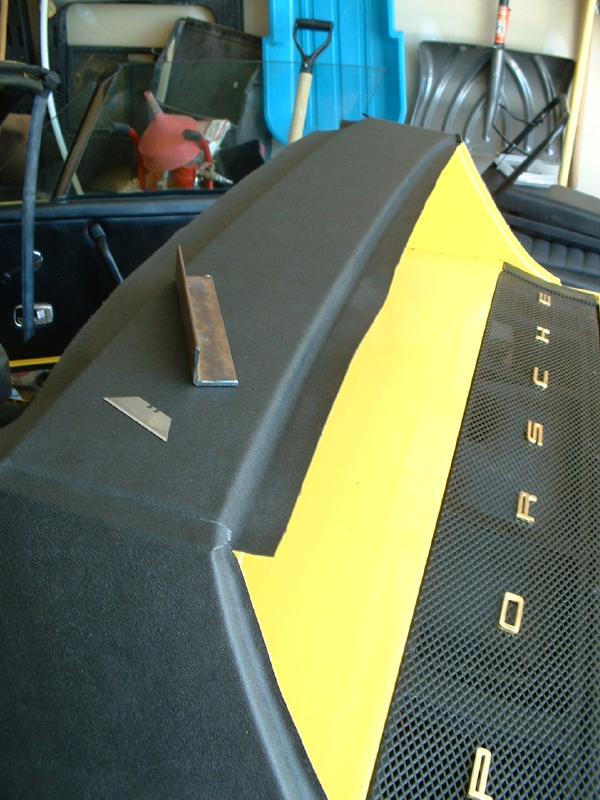
|
|
|
|
| Eric_Shea |
Jul 21 2004, 04:52 PM
Post
#12
|
|
PMB Performance Group: Admin Posts: 19,304 Joined: 3-September 03 From: Salt Lake City, UT Member No.: 1,110 Region Association: Rocky Mountains |
Slices needed to allow the vinyl to bend...
Attached image(s) 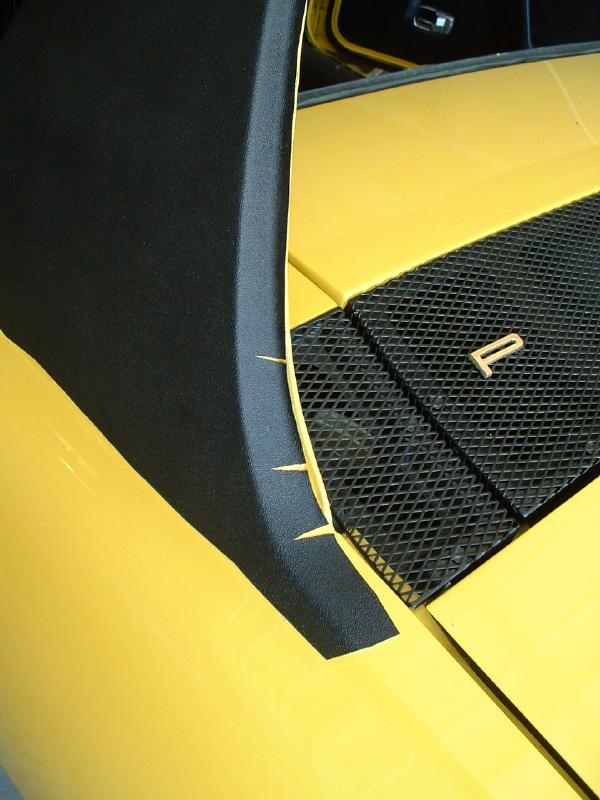
|
|
|
|
| Eric_Shea |
Jul 21 2004, 04:53 PM
Post
#13
|
|
PMB Performance Group: Admin Posts: 19,304 Joined: 3-September 03 From: Salt Lake City, UT Member No.: 1,110 Region Association: Rocky Mountains |
Other Side...
Attached image(s) 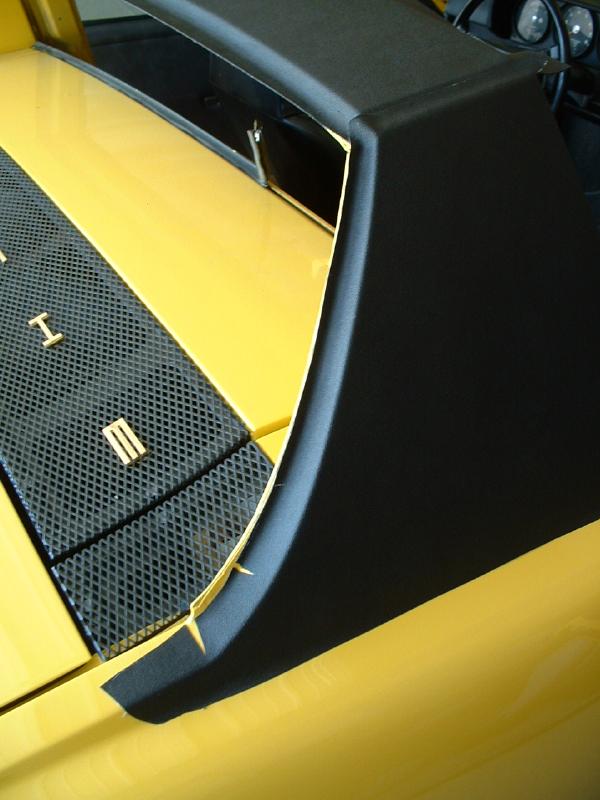
|
|
|
|
| Eric_Shea |
Jul 21 2004, 04:54 PM
Post
#14
|
|
PMB Performance Group: Admin Posts: 19,304 Joined: 3-September 03 From: Salt Lake City, UT Member No.: 1,110 Region Association: Rocky Mountains |
Step 6: Trimming the Vinyl
Next you simply trim off any excess vinyl. Starting with the top piece. The factory simply ran a blade along the base of each bend on the front and back of the hoop. I used a piece of angle iron to press the vinyl into these dips in the metal. This little homemade tool worked great. If you decide to use this make sure there are no sharp edges that would mar the vinyl. A word about blades; KEEP THEM SHARP. By cutting and dragging across metal your blade will dull instantly. Feel free to change them after each long cut or whenever they begin to show a sign of dulling. My first job was hanging wallpaper professionally (years ago) and a sharp blade is one of the most important things when working with vinyl. Trim the sides in a similar manner leaving the bottom for last. When trimming the bottom, you’ll want to test fit the bottom trim piece (without the clips in it) and draw a line on the vinyl in pencil. The line should be made “under” the trim piece on a portion of the vinyl that will be trimmed anyway. Remove the trim piece and cut roughly 1/8” of an inch above your newly drawn line. This is “very” tricky and requires a patient hand and an extremely new blade… better yet, a very sharp, single-edged razor blade. You want to try to cut the vinyl only and not dig into the paint. As you know, water can gather here and any slice through the paint and down to the bare metal will… rust. Attached image(s) 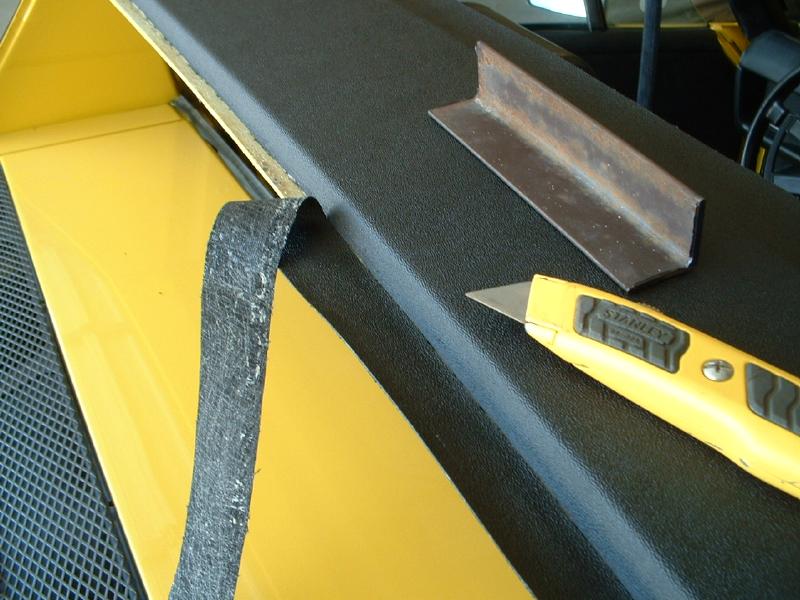
|
|
|
|
| Eric_Shea |
Jul 21 2004, 04:55 PM
Post
#15
|
|
PMB Performance Group: Admin Posts: 19,304 Joined: 3-September 03 From: Salt Lake City, UT Member No.: 1,110 Region Association: Rocky Mountains |
Trimmed out...
Attached image(s) 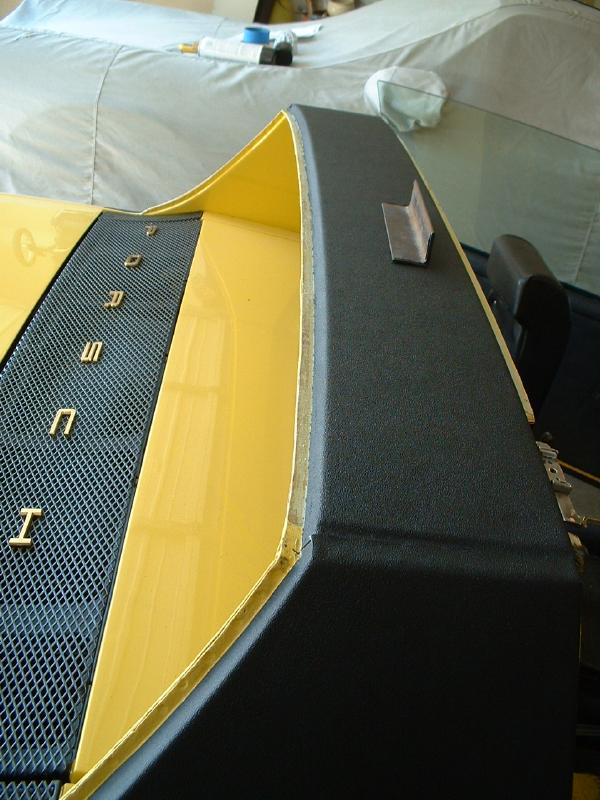
|
|
|
|
| Eric_Shea |
Jul 21 2004, 04:56 PM
Post
#16
|
|
PMB Performance Group: Admin Posts: 19,304 Joined: 3-September 03 From: Salt Lake City, UT Member No.: 1,110 Region Association: Rocky Mountains |
Test fit the trim pieces to gauge final cuts.
Attached image(s) 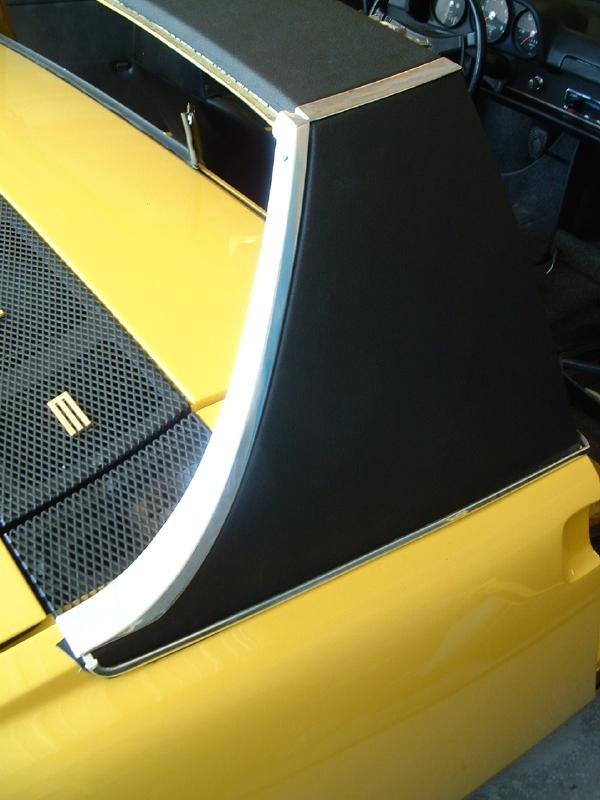
|
|
|
|
| Eric_Shea |
Jul 21 2004, 04:57 PM
Post
#17
|
|
PMB Performance Group: Admin Posts: 19,304 Joined: 3-September 03 From: Salt Lake City, UT Member No.: 1,110 Region Association: Rocky Mountains |
Here's a shot of the final bottom area that needs to be cut. You can barely make out the pencil lines.
Attached image(s) 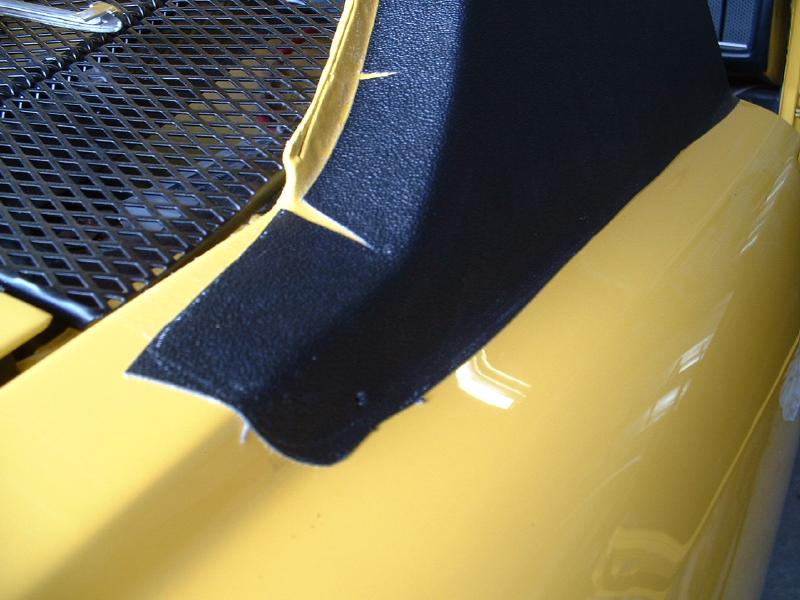
|
|
|
|
| Eric_Shea |
Jul 21 2004, 04:58 PM
Post
#18
|
|
PMB Performance Group: Admin Posts: 19,304 Joined: 3-September 03 From: Salt Lake City, UT Member No.: 1,110 Region Association: Rocky Mountains |
Trimmed...
Attached image(s) 
|
|
|
|
| Eric_Shea |
Jul 21 2004, 05:00 PM
Post
#19
|
|
PMB Performance Group: Admin Posts: 19,304 Joined: 3-September 03 From: Salt Lake City, UT Member No.: 1,110 Region Association: Rocky Mountains |
Step 7: Put it all Back Together
Not much I can tell you here. Start buttoning it back up and enjoy your new sail panels. I'm awaiting new trim pieces (damn that hurt the ole wallet) so no completed pictures until I snap them in. Hope someone will get some use out of this! (IMG:style_emoticons/default/wink.gif) |
|
|
|
| Jenny |
Jul 21 2004, 05:02 PM
Post
#20
|
|
Advanced Member Group: Members Posts: 4,060 Joined: 6-January 03 Member No.: 96 Region Association: None |
Looks awesome. Nice write up as well. You could be Bob Villa. Next week... on this old house... (IMG:style_emoticons/default/smash.gif)
I vote this for best of/classic thread. Good know how. Jen |
|
|
|
|
1 User(s) are reading this topic (1 Guests and 0 Anonymous Users)
0 Members:

|
Lo-Fi Version | Time is now: 9th July 2025 - 06:25 AM |
Invision Power Board
v9.1.4 © 2025 IPS, Inc.