|
|
|
Porsche, and the Porsche crest are registered trademarks of Dr. Ing. h.c. F. Porsche AG.
This site is not affiliated with Porsche in any way. Its only purpose is to provide an online forum for car enthusiasts. All other trademarks are property of their respective owners. |
|
|

  |

| MecGen |
 Mar 20 2005, 02:34 PM Mar 20 2005, 02:34 PM
Post
#1
|
|
8 Easy Steps  Group: Members Posts: 848 Joined: 8-January 05 From: Laval, Canada Member No.: 3,421 |
Hi Everyone !
I have been doing some really cool stuff to my 1974 914. I figure I would post a bunch of pics and show my tub job. This is not a "how to" post but a "how I did". Let me introduce myself, I have been earning money/a living turning wrenches for the better part of my life. I have my garage for 10 years now, and the teener for 13 years. I have had many 914s when I lived on the West coast, North-Eastern Canada is a different story. I have an almost perfect car, stuff dreams are made of, own a garage, and took 3 weeks off. This is what I did. Please note : I always take the full fire and saftey route on these projects, people ask why I bought and extra fire extinguisher. Every time I work on my teener the FE is real close. Chemicals I used are industrial useage, Please take car. PS : I type real slow I have 7 pics to load cheers Joe (IMG:http://www.914world.com/bbs2/html/emoticons/beerchug.gif) |
   |

 
|
| MecGen |
Mar 20 2005, 02:37 PM
Post
#2
|
|
8 Easy Steps Group: Members Posts: 848 Joined: 8-January 05 From: Laval, Canada Member No.: 3,421 |
Ok
So now came all the sealer digging that is explaned in the other Engman threds. Everything was picked clean toothbrush), Then came the POR-15, I spoke for a couple hours with the distributor, to really get the lo-down on it. I used the "Marine wash" 3 times, this product really works. Then "metal ready" bare metal etch, for under the caulking I removed. Bare metal turns white. You should double rinse this one. Taped it up and get ready to shoot. This is before and after cleaning Attached image(s) 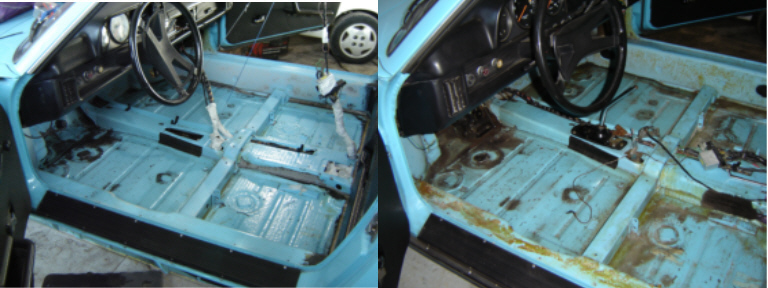
|
|
|
|
| MecGen |
Mar 20 2005, 02:40 PM
Post
#3
|
|
8 Easy Steps Group: Members Posts: 848 Joined: 8-January 05 From: Laval, Canada Member No.: 3,421 |
The Por-15 goes on wet jet black but dries a nice flat
lack. Stuff does stick. The nex tmorning my girlfriend thought that I broke a tooth, it was Por-15 stuck to my tooth, had to use a dental pick. I set up the supports the same way, ruf sanded first, then cleaned, and I sprayed only the inside. My other money pit in the back Attached image(s) 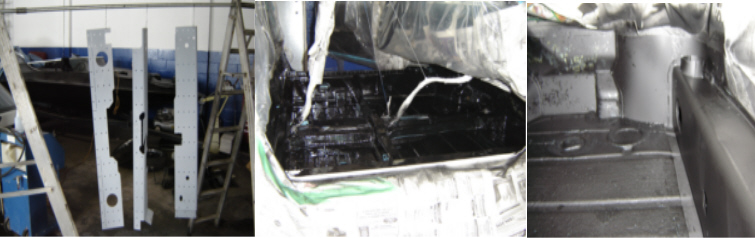
|
|
|
|
| MecGen |
Mar 20 2005, 02:42 PM
Post
#4
|
|
8 Easy Steps Group: Members Posts: 848 Joined: 8-January 05 From: Laval, Canada Member No.: 3,421 |
Well
This whole timing/idea fell on my lap when a bodyshop friend/owner, calls me and needs an "emergency" storage. He drops off a frame machine at my shop on the condition I can use it. I was allready pricing out and exploring frame supports, frame machine arived, found a deal on a set of supports like the day after. To get ready for the supports I squared the tub/frame on the machine, then took measurements, lock everything down. I called over a friend frame tech for a beer and to double check my doings, thumbs up. I have to say that sunny Sunday I was playing on my car, in my shop, using high tech tools, + beer. Sometimes owning a shop has its pirks. Attached image(s) 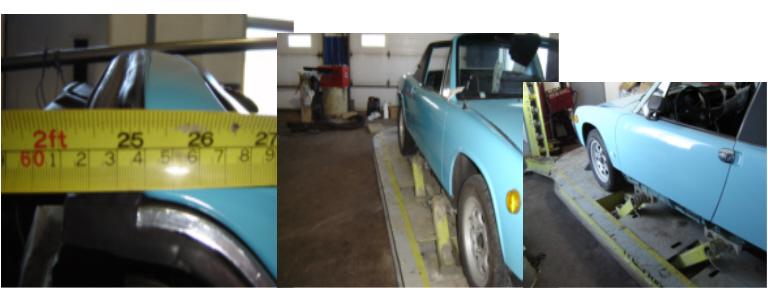
|
|
|
|
| MecGen |
Mar 20 2005, 02:45 PM
Post
#5
|
|
8 Easy Steps Group: Members Posts: 848 Joined: 8-January 05 From: Laval, Canada Member No.: 3,421 |
I installed the inner kits like everybody else, except for a few mods. I noticed the handbrake area knotch out needed "tweeking" in my opinion. This kit is well made and highly recommended by me and just about everybody that put them on. I always suspected this knock out to be a serious flex area. I added holes rite before the bend, I want it locked here and it also made the bending easier. I then made braces in this area to stop a compresion flex (top sagging inwards). I put a long stitch across this area, on the top of the sill.
Attached image(s) 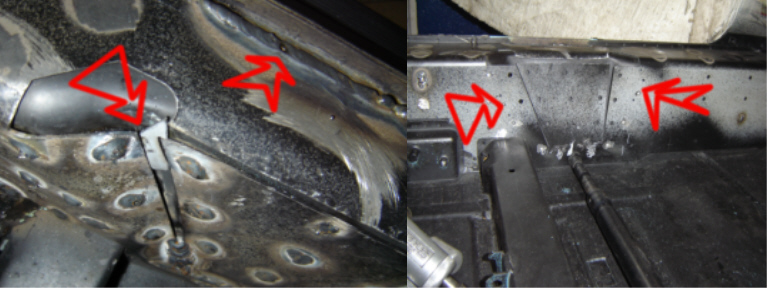
|
|
|
|
| MecGen |
Mar 20 2005, 02:48 PM
Post
#6
|
|
8 Easy Steps Group: Members Posts: 848 Joined: 8-January 05 From: Laval, Canada Member No.: 3,421 |
I included these shots because I think it is important to check your factory welds in this places and in my case reweld the factories work. You should get good pennetration (hot weld), try to tag all three pieces,supports,inners, and body, together. After one side I had a friend stand watch for fire on the other
side, good penentration. when I tagged them to the floors, you have to watch for fire.I don't have a pic but the seatbelt floor bar is 100% welded, all corners and the kockout is welded 3 layers deep, bar+support+inner long. Lots of serious grinding here, use ear plugs, this is only for apperance, I ground every weld smooth. Attached image(s) 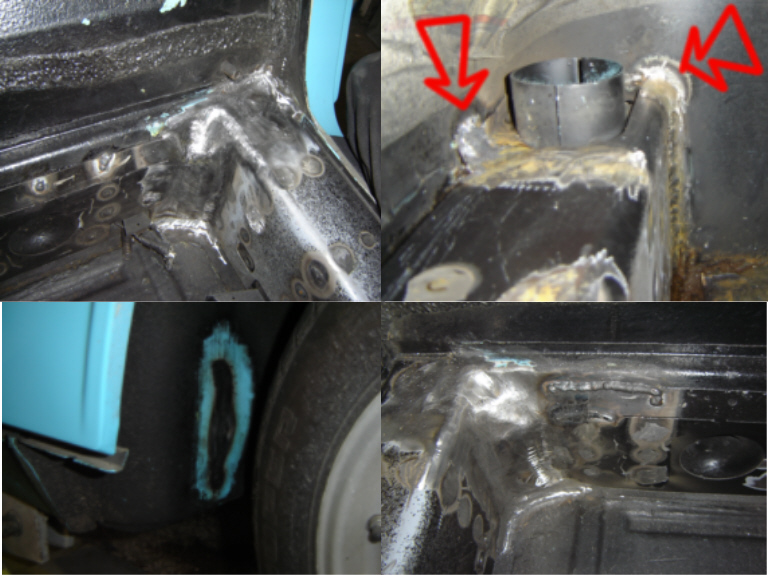
|
|
|
|
| MecGen |
Mar 20 2005, 02:50 PM
Post
#7
|
|
8 Easy Steps Group: Members Posts: 848 Joined: 8-January 05 From: Laval, Canada Member No.: 3,421 |
Ok at this point I was tired after grinding for a week The locks for the frame machine were removed, and all measurement rechecked. I was not worried because I never let the longs heat up anough to distort anywhere.
Then everything was washed,etched and then coated again with a second shot of POR-15, after let dry out, and shoot with por-15 etching primer. This will insure a good stick for the top coat. Attached image(s) 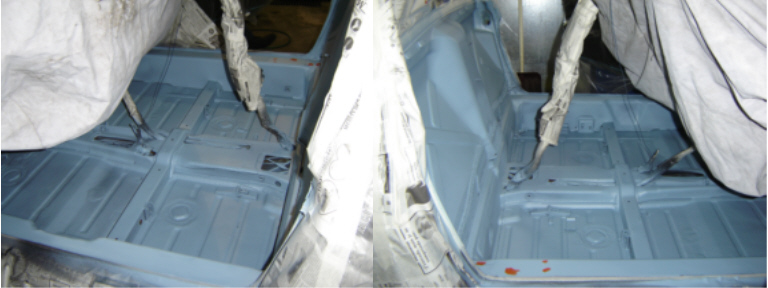
|
|
|
|
| MecGen |
Mar 20 2005, 02:54 PM
Post
#8
|
|
8 Easy Steps Group: Members Posts: 848 Joined: 8-January 05 From: Laval, Canada Member No.: 3,421 |
Ok
Now for my chosen top coat. Its a "colored" spray on bedliner. I mixed some enamile paint for tint. You are seeing the final coat, not all the swearing in-between. Over all I am pleased with the product, the finish is TUFF, but takes 2 times the recomended amount - scam.But again the "grey" primer kinda changed the color, maybe another coat...not. If I would do it again I would have given a quick coat of colored paint to hide the primer, I had to buy a pint anyways. It took one gallon for the tub. If somebody wants to know the proceedure just pm me. I put back all the harnessess and Engman trunk release. Hoped you kike my project Cheers Joe Attached thumbnail(s) 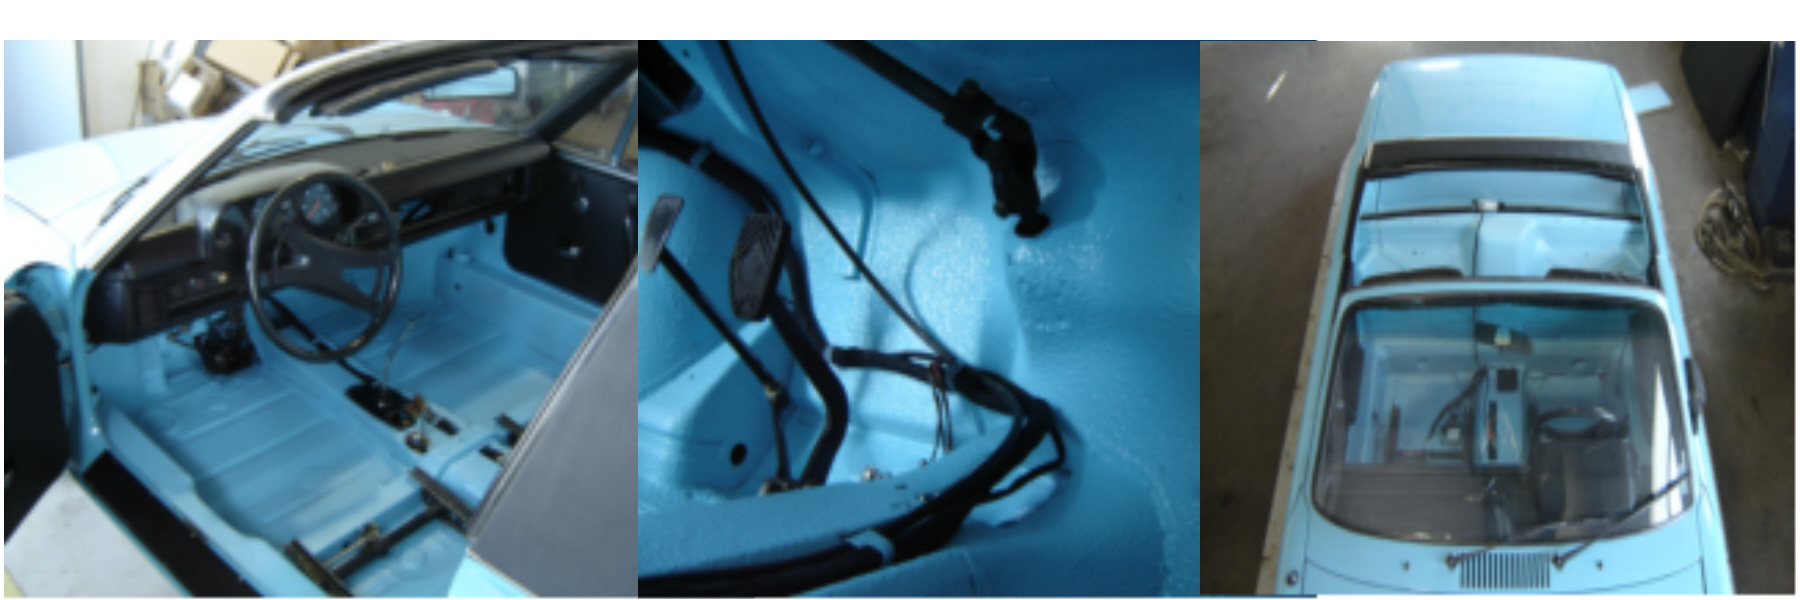
|
|
|
|
| MecGen |
Mar 20 2005, 03:08 PM
Post
#9
|
|
8 Easy Steps Group: Members Posts: 848 Joined: 8-January 05 From: Laval, Canada Member No.: 3,421 |
Hey
I forgot to mention that the liner product was thinned to give a smoother finish, it takes 7 days to fully harden but after 3 it is as hard as a rock but still flexable. This would certainly be my choice of products for the underbelly. Is this why my girlfriend misses me ? thats just Sat afternoon (and I hid the empty beer bottles) Attached image(s) 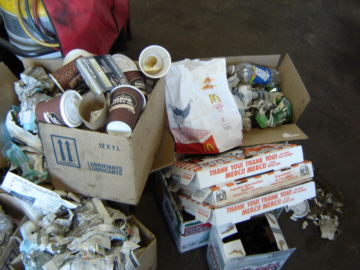
|
|
|
|
| Jeroen |
Mar 20 2005, 03:44 PM
Post
#10
|
|
914 Guru Group: Members Posts: 7,887 Joined: 24-December 02 From: The Netherlands Member No.: 3 Region Association: Europe |
excellent job (IMG:http://www.914world.com/bbs2/html/emoticons/smilie_pokal.gif)
|
|
|
|
| MecGen |
Mar 20 2005, 05:46 PM
Post
#11
|
|
8 Easy Steps Group: Members Posts: 848 Joined: 8-January 05 From: Laval, Canada Member No.: 3,421 |
thanx
Three weeks of work compressed in a few posts Regards Joe (IMG:http://www.914world.com/bbs2/html/emoticons/welder.gif) |
|
|
|
| rhodyguy |
Mar 20 2005, 06:32 PM
Post
#12
|
|
Chimp Sanctuary NW. Check it out. Group: Members Posts: 22,079 Joined: 2-March 03 From: Orion's Bell. The BELL! Member No.: 378 Region Association: Galt's Gulch |
looks very nice. they weren't all that particular in some areas that had 2 or 3 sections welded together. it was smear a little goop to fill the gap that might be around the welds. the stuff is everywhere. this is a fix you will not have to do again.
k |
|
|
|
| MecGen |
Mar 20 2005, 08:03 PM
Post
#13
|
||
|
8 Easy Steps Group: Members Posts: 848 Joined: 8-January 05 From: Laval, Canada Member No.: 3,421 |
Thanx
That was the plan...now to the ....secret Regards Joe (IMG:http://www.914world.com/bbs2/html/emoticons/welder.gif) |
||
|
|
|
||
| markb |
Mar 20 2005, 08:35 PM
Post
#14
|
|
914less :( Group: Members Posts: 5,449 Joined: 22-January 03 From: Nipomo, CA Member No.: 180 Region Association: Central California |
Nice job, Joe! (IMG:http://www.914world.com/bbs2/html/emoticons/smilie_pokal.gif)
|
|
|
|
| 914MF |
Mar 20 2005, 08:54 PM
Post
#15
|
|
Member Group: Benefactors Posts: 176 Joined: 4-September 03 From: Denver, CO Member No.: 1,112 |
That was beautiful. I have a car that I am getting ready to do that exact thing to. (IMG:http://www.914world.com/bbs2/html/emoticons/boldblue.gif) (IMG:http://www.914world.com/bbs2/html/emoticons/clap.gif) (IMG:http://www.914world.com/bbs2/html/emoticons/pray.gif)
|
|
|
|
| brant |
Mar 20 2005, 08:56 PM
Post
#16
|
|
914 Wizard Group: Members Posts: 11,623 Joined: 30-December 02 From: Colorado Member No.: 47 Region Association: Rocky Mountains |
great job!!!!
|
 |
|
| SpecialK |
Mar 21 2005, 02:36 AM
Post
#17
|
|
aircraft surgeon Group: Benefactors Posts: 3,211 Joined: 15-March 04 From: Pacific, MO Member No.: 1,797 |
Definitely looks like you "did it right the first time" Joe! (IMG:http://www.914world.com/bbs2/html/emoticons/aktion035.gif)
Nice work....and garage! (IMG:http://www.914world.com/bbs2/html/emoticons/wub.gif) |
|
|
|
| redshift |
Mar 21 2005, 05:10 AM
Post
#18
|
|
Bless the Hell out of you! Group: Members Posts: 10,926 Joined: 29-June 03 Member No.: 869 |
Another fine example of the restoration artists here, at work.
Excellent! M |
|
|
|
| MecGen |
Mar 21 2005, 05:33 AM
Post
#19
|
|
8 Easy Steps Group: Members Posts: 848 Joined: 8-January 05 From: Laval, Canada Member No.: 3,421 |
Thanx
Kind words I am waiting to work on it somemore...mods Cheers Joe (IMG:http://www.914world.com/bbs2/html/emoticons/beerchug.gif) |
|
|
|
| Gint |
Mar 21 2005, 07:54 AM
Post
#20
|
|
Mike Ginter Group: Admin Posts: 16,071 Joined: 26-December 02 From: Denver CO. Member No.: 20 Region Association: Rocky Mountains |
Nice work Joe. I's really like to see some clearer pics of the bedliner. Color looks good too.
|
|
|
|
|
1 User(s) are reading this topic (1 Guests and 0 Anonymous Users)
0 Members:

|
Lo-Fi Version | Time is now: 13th May 2024 - 09:00 AM |
Invision Power Board
v9.1.4 © 2024 IPS, Inc.