|
|
|
Porsche, and the Porsche crest are registered trademarks of Dr. Ing. h.c. F. Porsche AG.
This site is not affiliated with Porsche in any way. Its only purpose is to provide an online forum for car enthusiasts. All other trademarks are property of their respective owners. |
|
|

  |

| neo914-6 |
 Nov 19 2005, 11:17 PM Nov 19 2005, 11:17 PM
Post
#1
|
|
neo life  Group: Members Posts: 5,086 Joined: 16-January 03 From: Willow Glen (San Jose) Member No.: 159 |
Mark has taken the challenge of metal shaping the front fenders after he welded in a set of fenders he donated to the cause. (IMG:http://www.914world.com/bbs2/html/emoticons/smilie_pokal.gif)
The first attempt of off car metal shaping by Andrew warped them just as John warned us. The welded supports were inadequate and in retrospect it "could" have worked had I cut off more structure or a whole front clip off my parts car. The problem with that is you lose the manuverability of the piece while you're working on it. Ok, back to JK DVD instructions...and yes, Mark used the palm nailer. Attached image(s) 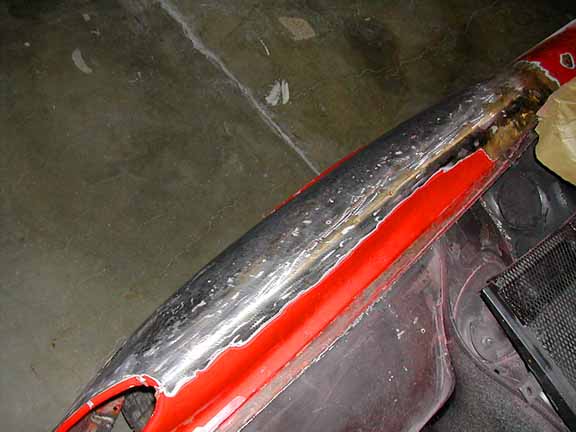
|
   |

 
|
| neo914-6 |
Nov 19 2005, 11:18 PM
Post
#2
|
|
neo life Group: Members Posts: 5,086 Joined: 16-January 03 From: Willow Glen (San Jose) Member No.: 159 |
Some great progress, nice looking low rider (IMG:http://www.914world.com/bbs2/html/emoticons/laugh.gif)
Attached image(s) 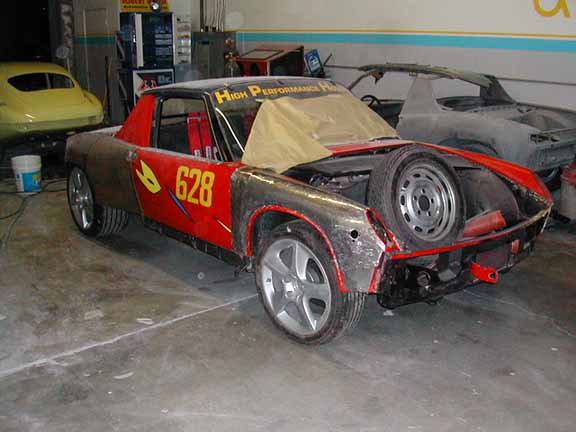
|
|
|
|
| J P Stein |
Nov 20 2005, 01:32 AM
Post
#3
|
|
Irrelevant old fart Group: Members Posts: 8,797 Joined: 30-December 02 From: Vancouver, WA Member No.: 45 Region Association: None |
Makes my hands hurt just lookin' at em'. (IMG:http://www.914world.com/bbs2/html/emoticons/smash.gif)
|
|
|
|
| Andyrew |
Nov 20 2005, 03:41 AM
Post
#4
|
|
Spooling.... Please wait Group: Members Posts: 13,376 Joined: 20-January 03 From: Riverbank, Ca Member No.: 172 Region Association: Northern California |
inch, to an inch and a half...
Not bad!!! My fronts have an inch and a half to 2 inches.. THey werent worth the half an inch... Looks mighty good!! Smoothing is a PITA though..... How long did that all take him? |
|
|
|
| neo914-6 |
Nov 23 2005, 08:37 PM
Post
#5
|
|
neo life Group: Members Posts: 5,086 Joined: 16-January 03 From: Willow Glen (San Jose) Member No.: 159 |
Great progress from the OC (Original Customs) that is...
Attached image(s) 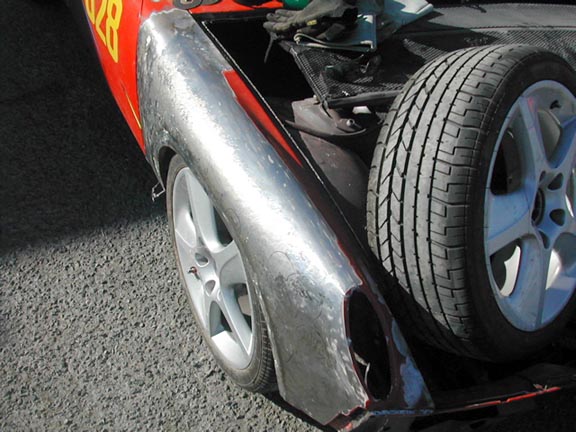
|
|
|
|
| McMark |
Nov 23 2005, 08:56 PM
Post
#6
|
|
914 Freak! Group: Retired Admin Posts: 20,179 Joined: 13-March 03 From: Grand Rapids, MI Member No.: 419 Region Association: None |
The newest picture has sidemarker holes deleted, previous Dzus fasteners holes refilled, and the fender lip shaved. This was a bit of a learning process for me. I used a hammer and dolly set, palm nailer, sandbag, and a John Kelly shrinking disk. Now I just need to talk to John about getting him to make me a planishing hammer. I'm very happy with the results and have already made some progress on the drivers side. The palm nailer is a life saver.... or rather an arm saver. I probably spent about 15 hours on the fender, but there were a few learning mistakes that I had to shrink out. No big deal, but ate up some time. Thanks to Felix for giving me the opportunity to beat up a 914.
|
|
|
|
| J P Stein |
Nov 23 2005, 10:01 PM
Post
#7
|
|
Irrelevant old fart Group: Members Posts: 8,797 Joined: 30-December 02 From: Vancouver, WA Member No.: 45 Region Association: None |
Something you may wwant to consider.
I raised my fender openings 3/4 in. This give better clearance at full lock for a large tire. The more clearance, the lower you can go. I didn't fair the flare back as far as one should to make it more attractive, nor as high.....hay, it's a race car. Once you make the cuts for height, fair them back to zero at the bottom (kinda tricky). do the flare, then break the edge inward....about a 3/8 lip seems fine for stiffness. The increased height is unnoticeable. Attached thumbnail(s) 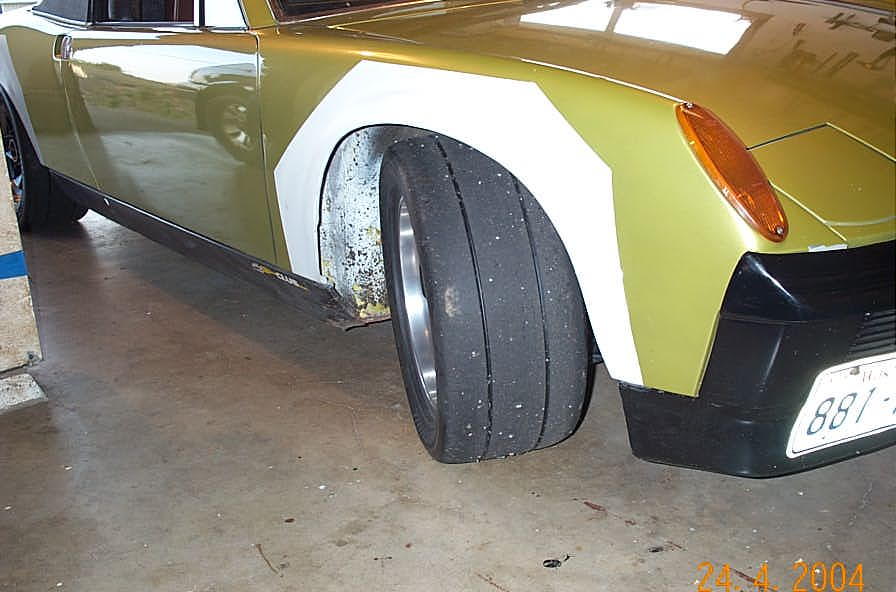
|
|
|
|
| Aaron Cox |
Nov 23 2005, 10:01 PM
Post
#8
|
|
Professional Lawn Dart Group: Retired Admin Posts: 24,541 Joined: 1-February 03 From: OC Member No.: 219 Region Association: Southern California |
love it man. got any more action shots?
|
|
|
|
| J P Stein |
Nov 23 2005, 10:04 PM
Post
#9
|
|
Irrelevant old fart Group: Members Posts: 8,797 Joined: 30-December 02 From: Vancouver, WA Member No.: 45 Region Association: None |
There is room for a pretty big tire under these. This is at full suspension compression and it will turn lock to lock without rubbing anywhere.
Attached thumbnail(s) 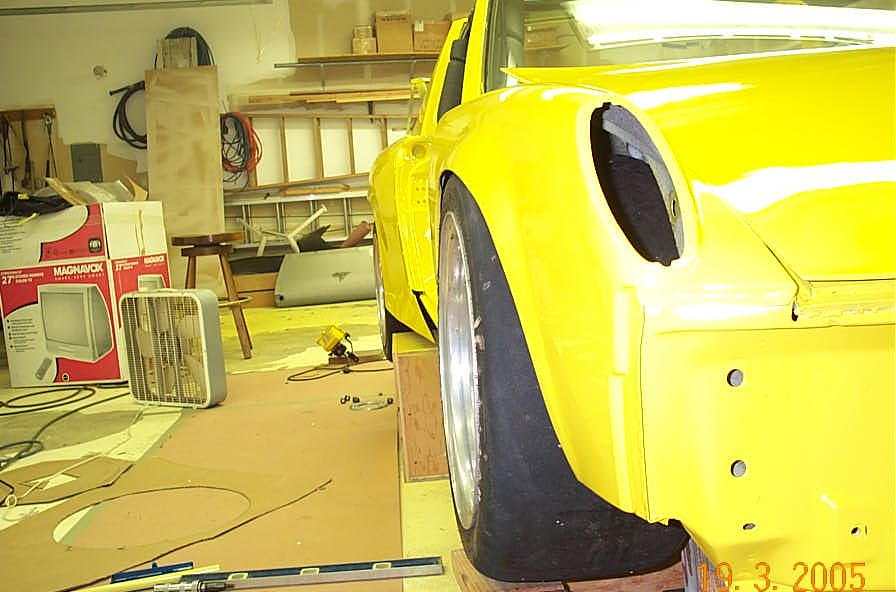
|
|
|
|
| John Kelly |
Nov 24 2005, 07:22 AM
Post
#10
|
|
Senior Member Group: Members Posts: 692 Joined: 1-May 03 From: Moclips WA. Member No.: 640 |
Felix and Mark, the car looks great! It looks like the metal is pretty smooth after all the stretching. Did you make dies for the palm nailer like the ones I posted in this album near the bottom under updated tooling?:
http://allshops.org/cgi-bin/community/comm...d=9980138836765 The flat bar dies make for a much smoother surface than the carriage bolt leaves, so there is less hammer and dolly work. I start with the curvy one, and finish up with the flatter one. I have started using a grade 8 bolt instead of a carriage bolt inside the dies. It lasts longer. You will find it easy to get by without the planishing hammer. But if you want to make one, they are pretty easy. I can get you some close up pictures of the planishing hammer frame if you want. It looks like you might have to do some more stretching to get that tire to fit in turns? Anyway, great progress! Thanks for the update. John www.ghiaspecialties.com |
|
|
|
| McMark |
Nov 25 2005, 10:34 AM
Post
#11
|
|
914 Freak! Group: Retired Admin Posts: 20,179 Joined: 13-March 03 From: Grand Rapids, MI Member No.: 419 Region Association: None |
Thanks John! It was a fun experience. Lots of work though. Definitely not something you could finish in a day. It was your video that gave me the familiarity I needed to get started on this. (IMG:http://www.914world.com/bbs2/html/emoticons/smiley_notworthy.gif)
I just used a standard carriage bolt. And lots of hammer and dolly action. Stretch, smooth, stretch, smooth, etc. The car will not be able to go that low without the tires hitting the fenders, but it would be too low anyway. I had to manually lift the car a bit to get it off the jack. Of course it might need more in order to keep from rubbing under suspension compression in a corner. (IMG:http://www.914world.com/bbs2/html/emoticons/idea.gif) |
|
|
|
|
1 User(s) are reading this topic (1 Guests and 0 Anonymous Users)
0 Members:

|
Lo-Fi Version | Time is now: 23rd April 2024 - 05:24 AM |
Invision Power Board
v9.1.4 © 2024 IPS, Inc.