|
|
|
Porsche, and the Porsche crest are registered trademarks of Dr. Ing. h.c. F. Porsche AG.
This site is not affiliated with Porsche in any way. Its only purpose is to provide an online forum for car enthusiasts. All other trademarks are property of their respective owners. |
|
|

  |

| East coaster |
 Feb 17 2006, 07:56 PM Feb 17 2006, 07:56 PM
Post
#1
|
|
Senior Member  Group: Members Posts: 1,660 Joined: 28-March 03 From: Brigantine, NJ Member No.: 487 Region Association: None |
So after a little brainstorming on an oil cooler layout, I figured I better actually do it.
Started out by figuring out the mounting of the cooler itself. It's a very large (4 x 24 fin area) and I think a good fit for a 3.6 since it doesn't have an engine mounted cooler. I started by cutting sections out of the front support tray for clearance and then re-boxing the area to keep the shelf rigid and serve as a mounting point for the front of the cooler. Here's a pic of the cut outs........... Attached image(s) 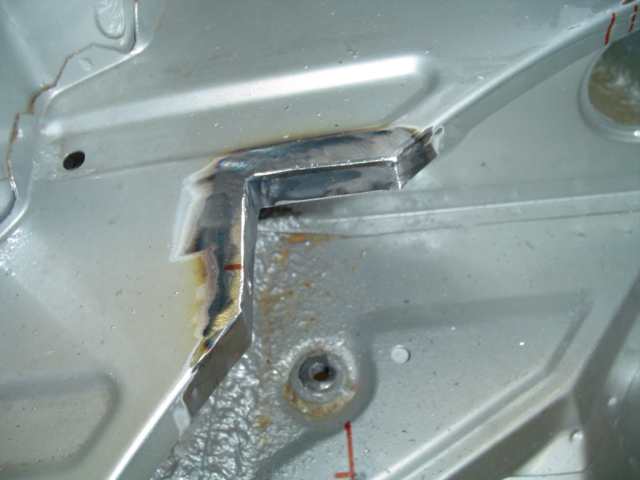
|
   |

 
|
| East coaster |
Feb 17 2006, 07:57 PM
Post
#2
|
|
Senior Member Group: Members Posts: 1,660 Joined: 28-March 03 From: Brigantine, NJ Member No.: 487 Region Association: None |
other side....
Attached image(s) 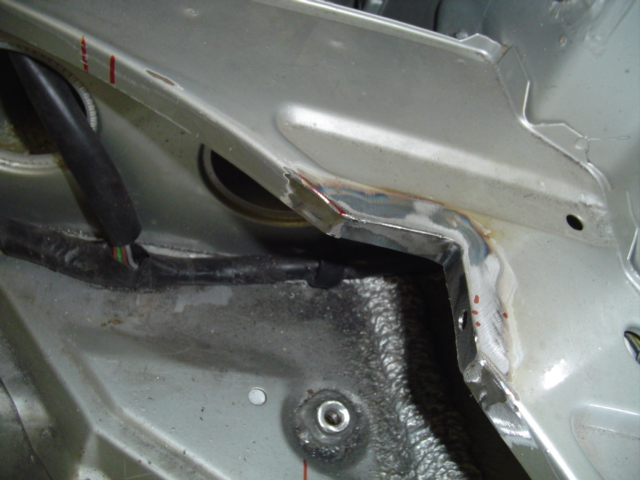
|
|
|
|
| East coaster |
Feb 17 2006, 08:00 PM
Post
#3
|
|
Senior Member Group: Members Posts: 1,660 Joined: 28-March 03 From: Brigantine, NJ Member No.: 487 Region Association: None |
I'm using two isolator mounts from these areas to the front cooler flange and using one large isolator under the cooler. I needed to fab a bracket under the cooler for the isolator to mount to. I used a piece of the scrap I cut out of the fender well (outlets) and bent it up to provide a level mounting point under the cooler.
Pic: Attached image(s) 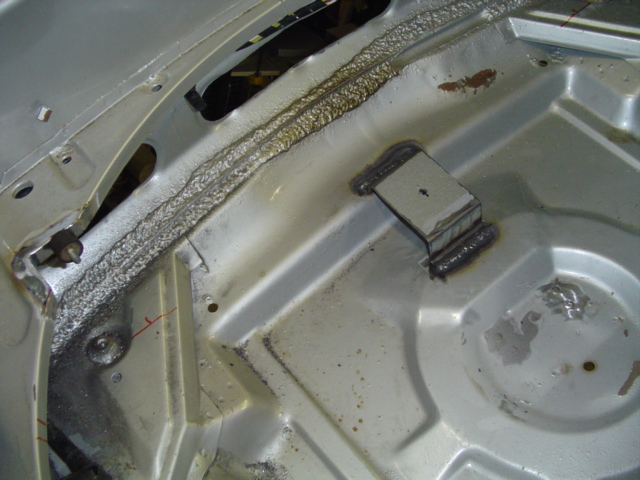
|
|
|
|
| East coaster |
Feb 17 2006, 08:03 PM
Post
#4
|
|
Senior Member Group: Members Posts: 1,660 Joined: 28-March 03 From: Brigantine, NJ Member No.: 487 Region Association: None |
Used a piece of billet aluminum and made a mounting point for the cooler itself. Two recessed machine screws from each side of the cooler flange and the isolator threads into the chunk o' billet.
Attached image(s) 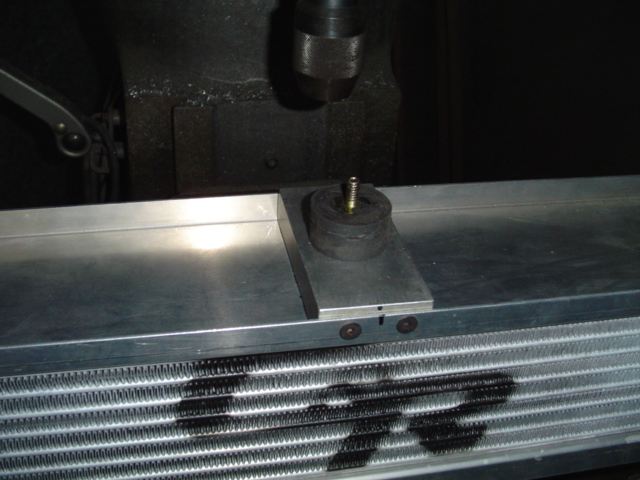
|
|
|
|
| East coaster |
Feb 17 2006, 08:04 PM
Post
#5
|
|
Senior Member Group: Members Posts: 1,660 Joined: 28-March 03 From: Brigantine, NJ Member No.: 487 Region Association: None |
This is what it looks like fit up.....
Attached image(s) 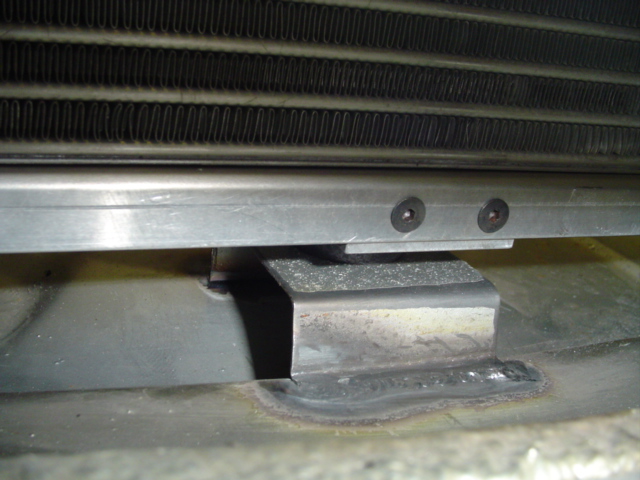
|
|
|
|
| East coaster |
Feb 17 2006, 08:06 PM
Post
#6
|
|
Senior Member Group: Members Posts: 1,660 Joined: 28-March 03 From: Brigantine, NJ Member No.: 487 Region Association: None |
Once the mounting was squared away, it's on to the duct work. Started out with a rather large chuck of foam from a craft store.
Attached image(s) 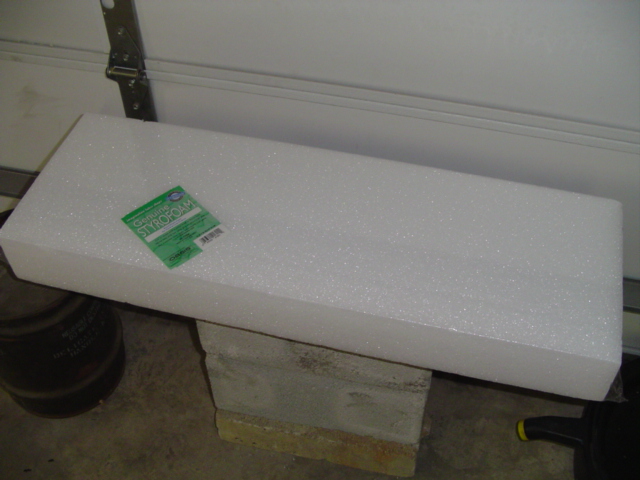
|
|
|
|
| East coaster |
Feb 17 2006, 08:07 PM
Post
#7
|
|
Senior Member Group: Members Posts: 1,660 Joined: 28-March 03 From: Brigantine, NJ Member No.: 487 Region Association: None |
20 minutes with a hacksaw blade and some 36 grit, it started taking shape..........
Attached image(s) 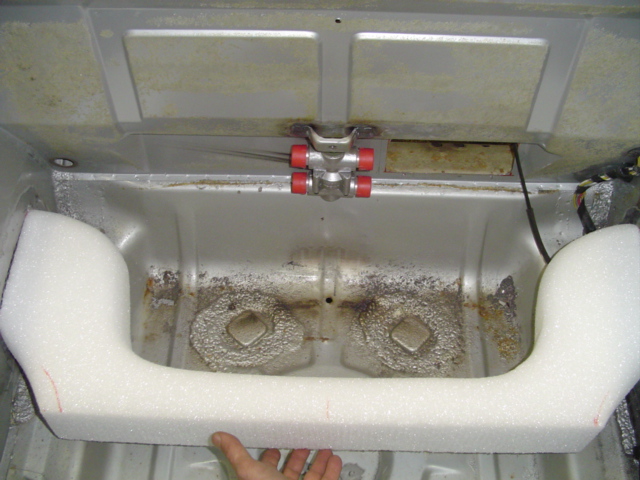
|
|
|
|
| East coaster |
Feb 17 2006, 08:10 PM
Post
#8
|
|
Senior Member Group: Members Posts: 1,660 Joined: 28-March 03 From: Brigantine, NJ Member No.: 487 Region Association: None |
I had to hot glue an additional chunk to this one to get the size I needed. Then it was on to the front (or inlet) duct. Once again out come the blade and sand paper.
Attached image(s) 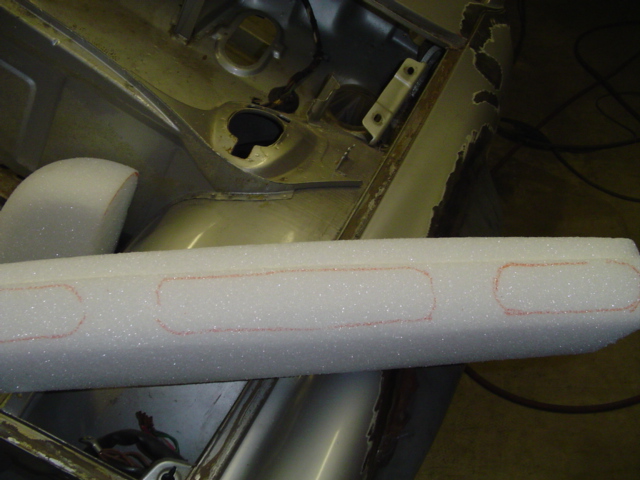
|
|
|
|
| Eric_Shea |
Feb 17 2006, 08:10 PM
Post
#9
|
|
PMB Performance Group: Admin Posts: 19,274 Joined: 3-September 03 From: Salt Lake City, UT Member No.: 1,110 Region Association: Rocky Mountains |
Slick!
|
|
|
|
| East coaster |
Feb 17 2006, 08:11 PM
Post
#10
|
|
Senior Member Group: Members Posts: 1,660 Joined: 28-March 03 From: Brigantine, NJ Member No.: 487 Region Association: None |
All shaping/fitting done and ready for disassembly and a day of fiberglassing.
Attached image(s) 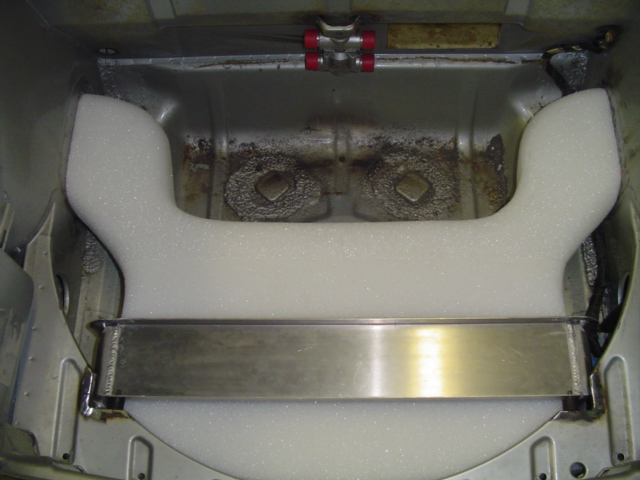
|
|
|
|
| East coaster |
Feb 17 2006, 08:12 PM
Post
#11
|
|
Senior Member Group: Members Posts: 1,660 Joined: 28-March 03 From: Brigantine, NJ Member No.: 487 Region Association: None |
One mo'
Attached image(s) 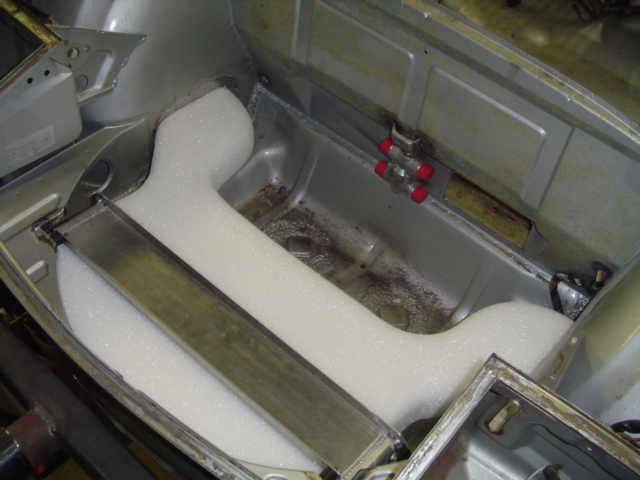
|
|
|
|
| Eric_Shea |
Feb 17 2006, 08:13 PM
Post
#12
|
|
PMB Performance Group: Admin Posts: 19,274 Joined: 3-September 03 From: Salt Lake City, UT Member No.: 1,110 Region Association: Rocky Mountains |
Plans to lay a false floor on there?
|
|
|
|
| East coaster |
Feb 17 2006, 08:15 PM
Post
#13
|
|
Senior Member Group: Members Posts: 1,660 Joined: 28-March 03 From: Brigantine, NJ Member No.: 487 Region Association: None |
You guys bored of the pics yet?
The foam pieces are just junk sacrificial plugs to be glassed over and then torn to pieces. I hope to get them glassed tomorrow, if so I'll post the final product pics. I plan to glass a flange around all the areas where the duct meets the cooler and the body for mouting/sealing purposes. |
|
|
|
| East coaster |
Feb 17 2006, 08:17 PM
Post
#14
|
|
Senior Member Group: Members Posts: 1,660 Joined: 28-March 03 From: Brigantine, NJ Member No.: 487 Region Association: None |
Yeah.....I want to be able to put the factory false floor back in (althought cut out around my space saver spare). I strived to keep everthing under the area for the floor board.
|
|
|
|
| Eric_Shea |
Feb 17 2006, 08:17 PM
Post
#15
|
|
PMB Performance Group: Admin Posts: 19,274 Joined: 3-September 03 From: Salt Lake City, UT Member No.: 1,110 Region Association: Rocky Mountains |
Question/Concern:
With a GT shroud they made the exit hole twice as large as the input (expanded hot air outlet). Did you look into that? That's a seriously trick install. (IMG:http://www.914world.com/bbs2/html/emoticons/smilie_pokal.gif) |
|
|
|
| GTPatrick |
Feb 17 2006, 08:23 PM
Post
#16
|
|
Member Group: Members Posts: 245 Joined: 8-September 05 From: Memphis, Tn. Member No.: 4,768 Region Association: None |
Food for thought . (IMG:http://www.914world.com/bbs2/html/emoticons/huh.gif) Why not somehow vent it out through the trunk lid infront of the windshield instead of into the wheel area ? Why add more heat to the tire/brake area . Wouldn't that be counter productive ? (IMG:http://www.914world.com/bbs2/html/emoticons/unsure.gif) (IMG:http://www.914world.com/bbs2/html/emoticons/screwy.gif)
At least through the top would give you a side benefit of having warm air possibly being blown onto the windshield acting like a defroster/defogger which in the colder climates would be a plus . (IMG:http://www.914world.com/bbs2/html/emoticons/beer.gif) The way you are doing this seems to be well thought out and a damn good idea in its own right. (IMG:http://www.914world.com/bbs2/html/emoticons/smash.gif) (IMG:http://www.914world.com/bbs2/html/emoticons/clap56.gif) |
|
|
|
| East coaster |
Feb 17 2006, 08:25 PM
Post
#17
|
|
Senior Member Group: Members Posts: 1,660 Joined: 28-March 03 From: Brigantine, NJ Member No.: 487 Region Association: None |
I have about 35 % larger outlet than inlet. I would've liked to get the magic 50%, but it would've been a stretch. I saw PMS using just 2 - 4" hoses for outlets and he swears he never gets overheating probs. The wheelwell is supposedly a better low pressure zone ( based on hearsay (IMG:http://www.914world.com/bbs2/html/emoticons/confused24.gif) )
I will be using 2 small (3.5 ") fans on the back side of the cooler just to safeguard against traffic jams. They will fit in the oulet plenum on the rear of the cooler. Maybe unnecessary, but easier now than later! |
|
|
|
| Dave_Darling |
Feb 17 2006, 08:32 PM
Post
#18
|
||
|
914 Idiot Group: Members Posts: 14,981 Joined: 9-January 03 From: Silicon Valley / Kailua-Kona Member No.: 121 Region Association: Northern California |
The cowl area immediately in front of the windshield is a high-pressure area. Air won't flow to there very easily. The wheel wells are a low-pressure area, air will flow to there. The air coming out of the cooler is not going to be enough above ambient to make a big difference to the brakes, which see truly hellish temperatures at their "business end". When you're trying to cool something that's 950F, there's not much difference between using 80F air and (average) 90F air... Near the front of the front hood could work, and might have the side benefit of giving you a little down-force. But that kills almost all of the front trunk for storage. --DD |
||
|
|
|
||
| McMark |
Feb 17 2006, 09:55 PM
Post
#19
|
|
914 Freak! Group: Retired Admin Posts: 20,179 Joined: 13-March 03 From: Grand Rapids, MI Member No.: 419 Region Association: None |
I'm glad to see you're using GENUINE styrofoam. (IMG:http://www.914world.com/bbs2/html/emoticons/av-943.gif)
That's going to be one of the best oil cooler installs I've seen. I'm also fitting everything under the factory floor, but no spare. Either run-flat tires or AAA only. |
|
|
|
| Eric_Shea |
Feb 17 2006, 10:10 PM
Post
#20
|
||
|
PMB Performance Group: Admin Posts: 19,274 Joined: 3-September 03 From: Salt Lake City, UT Member No.: 1,110 Region Association: Rocky Mountains |
Check above the thermostat. He's mounted the 'mount' there and a space-saver will sit upright. |
||
|
|
|
||
|
1 User(s) are reading this topic (1 Guests and 0 Anonymous Users)
0 Members:

|
Lo-Fi Version | Time is now: 3rd May 2024 - 03:18 PM |
Invision Power Board
v9.1.4 © 2024 IPS, Inc.