Printable version of Entry
Click here to view this entry in its original format
McMark's Blog
Heater Controls 1
The official first part has begun... 
These heater controls are the early/european type without words. I like that.
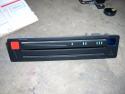
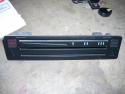
Here's what we had to start with: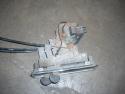
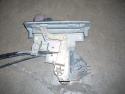
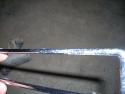
Pulled off the trim ring and hit it with some fine steel wool. Unfortunately the chrome is pitted, so it'll have to be replated.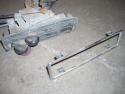
Nasty knobs pop right off. After a thorough cleaning with alcohol and a little polish, they look like new.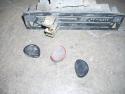
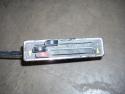
I cut the rivets holding everything together. Two are holding the cast front section to the rear plate. And two are holding the 'circuit board' to the plate. I also removed the control arms by undoing the circlip and pushing out the pivot pin.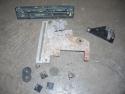
The 'circuit board' cleaned up really nicely with a Dremel using a wire wheel tip for the cleaning and a felt pad tip with Blue Magic metal polish for the shine.
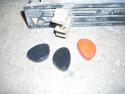
The red and blue colored lenses and the aluminum 'grills' pop out with a little push from the back (through the light bulb hole).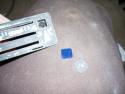
The white and blue accent pieces pop out using the corner and edge of a razor blade. You can see all the blue 'tick marks' and one of the arrows (with a broken tip).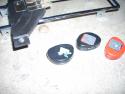
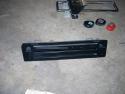
Now that the face was relieved of all the 'extra' pieces, I removed all the old paint and sprayed it with flat black enamel.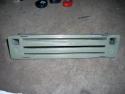
I cleaned each individual blue piece by rubbing it on some 1500 grit sandpaper taped to glass, then rubbing it in some Blue Magic polish. I then glued each one back in with gel type SuperGlue. Keeping track of and working with those little suckers is a major PITA! Then I glued in the lenses, and finally I sanded, painted and glued on the aluminum 'grills'.
All of the arrows were either broken or missing, so I'll have to search for replacements. I wouldn't mind finding some reflective material to use instead of plain white arrows. The arms and plate will be sent out in a batch of yellow zinc plating. So until those come back from the platers, this episode is over.
Time spent this episode: 2.5 hours
Total time overall: 2.5 hours
Total cost of this episode: $0
Total cost overall: $0
Powered by Invision Community Blog (http://www.invisionblog.com)
© Invision Power Services (http://www.invisionpower.com)