|
|
|
Porsche, and the Porsche crest are registered trademarks of Dr. Ing. h.c. F. Porsche AG.
This site is not affiliated with Porsche in any way. Its only purpose is to provide an online forum for car enthusiasts. All other trademarks are property of their respective owners. |
|
|

  |

| mgp4591 |
 Feb 7 2014, 09:14 PM Feb 7 2014, 09:14 PM
Post
#241
|
|
914 Guru  Group: Members Posts: 5,383 Joined: 1-August 12 From: Salt Lake City Ut Member No.: 14,748 Region Association: Intermountain Region |
QUOTE(skeates @ Feb 7 2014, 06:37 PM)  I don't think the problem is that we are pumping "more" water than the pumps are designed for. The volume in the system does increase, but the gpm stays the same. Since it's an enclosed system there is no static head to speak of, so the pump won't notice the additional volume...sort of... We are in effect increasing the pumping head by adding more tubing length. Looking at some generic hose pressure drop chart you could be adding as much as 50 psi more head on the pump (assuming 10 feet of additional length, 3/4" hose, and 60 gpm)! More head = less flow at a given RPM = less ability to cool the motor. Interestingly, if you are running 1" hose for the same length and gpm the pressure drop is only 12 psi. Moral of the story here is to size your hose a bit bigger than stock (in my opinion). I agree with Jamie that the way those hoses are currently routed will make bleeding the system a pain. I'm also wondering if that Gates hose can make that tight 90 degree bend at the front of the long without collapsing (pinching). I'm running the McMaster Carr variant hose and I know it would be pinching really bad with that tight of a radius. A pinch in the hose would mean certain cooling problems (massive flow reduction and likely flashing of the coolant inside the hose). I would double check that before committing - maybe the Gates hose can take tighter bends? I was thinking the same about the increased pumping pressure and wondered if an auxiliary pump could be beneficial at around the halfway point, say the radiator outlet, effectively working to draw the fluid through the radiator and push it back to the engine helping the stock water pump do it's job. An additional bleed port would help at the radiator inlet also being the high point with a bleed tube fished thru the bodywork beneath. Jus' thinkin'... (IMG:style_emoticons/default/idea.gif) |
   |

 
|
| 76-914 |
Feb 9 2014, 11:15 AM
Post
#242
|
|
Repeat Offender & Resident Subaru Antagonist Group: Members Posts: 13,508 Joined: 23-January 09 From: Temecula, CA Member No.: 9,964 Region Association: Southern California |
A lot of good input and thus far things I have already considered. No substitute for experience, though! Jamie, I'm hoping that all goes well with the long install but I won't know until it's running. The only issue I expect might come into play is distance and the number of turns added. OIOW, increased drag. Head pressure will not be an issue with the closed system. I've anticipated the air trap's and will install vents @ the high points on both sides of the cabin if necessary.
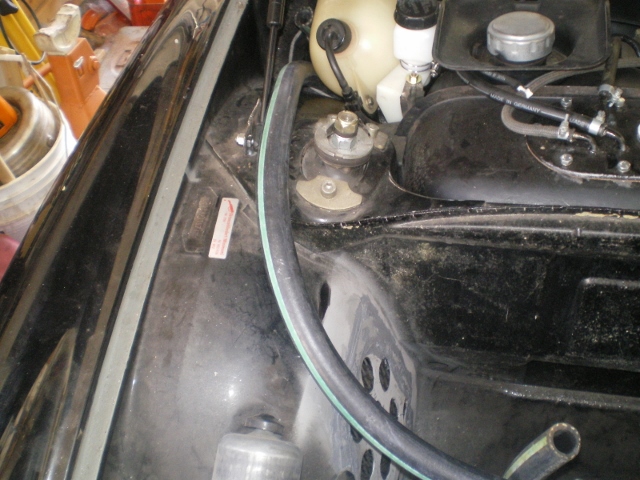
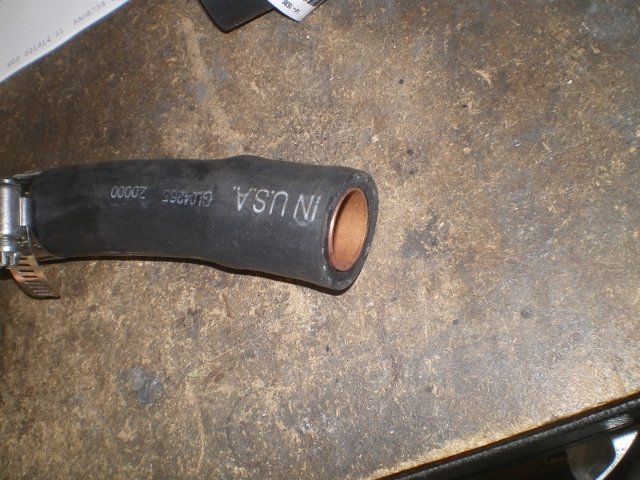
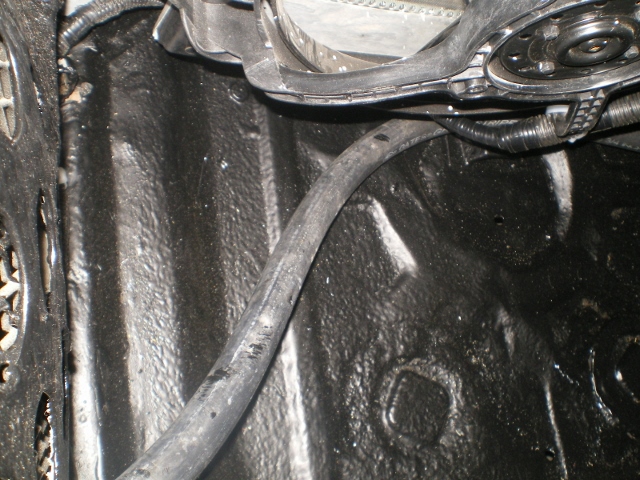
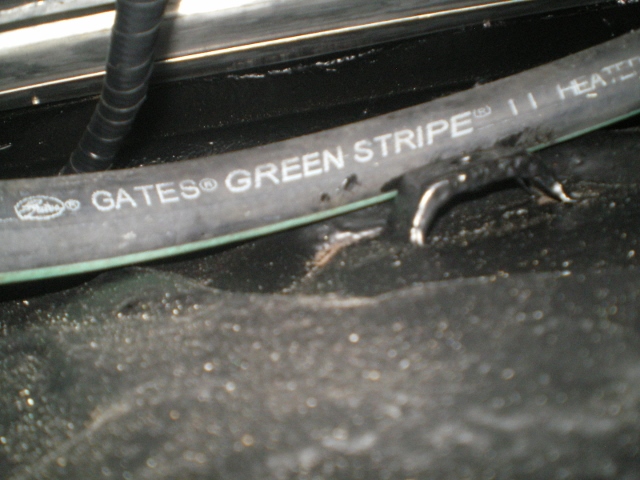
Skeates, I should not have to worry about the line kinking. That is the purpose of using the 2" vac hose. It keeps the hose round when making tight turns. Most of what I've read said I'm headed in the wrong direction but I'm going to try it anyway (I'm 1/2 English and 1/2 Dutch = pedigree hard head) . If I'm wrong it's easy enough to route it beneath the car. But if it works then it is a much cleaner install and aesthetically pleasing to the eyes. So, to continue down this path I have completed the "run" from engine to radiator on the left side. This left side will be run a bit different than the right side because of the radiator in/outs locations. The left side will have 1 high spot which is in the front next to the gas tank. The right side which is the top hose (to both rad and engine) will have 2 high spots. One in the engine bay and one in the front compartment. Here are a few pic's of the left side's route. As you can see in these next 3 pic's, the hose lines up perfectly with the inlet after exiting the long. No up or down travel, yet. 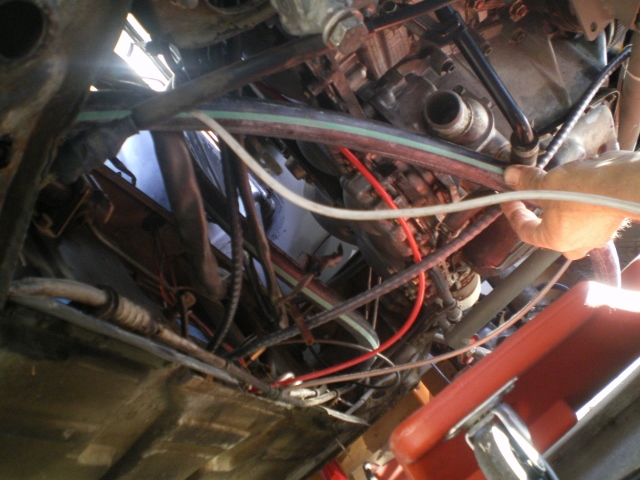 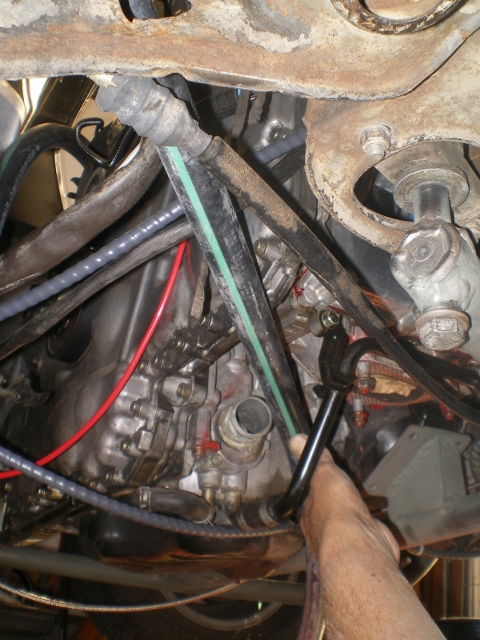 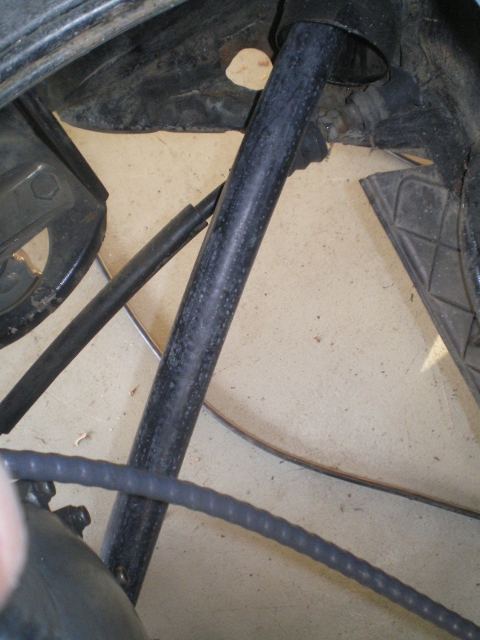 And just like the right side it is double sleeved and goes thru the old duct hole. 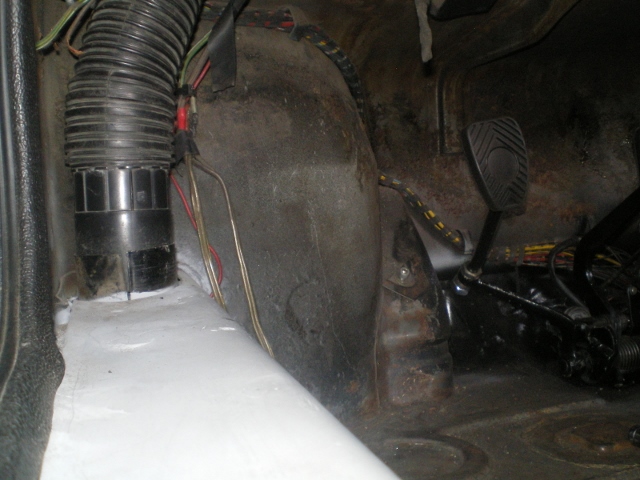 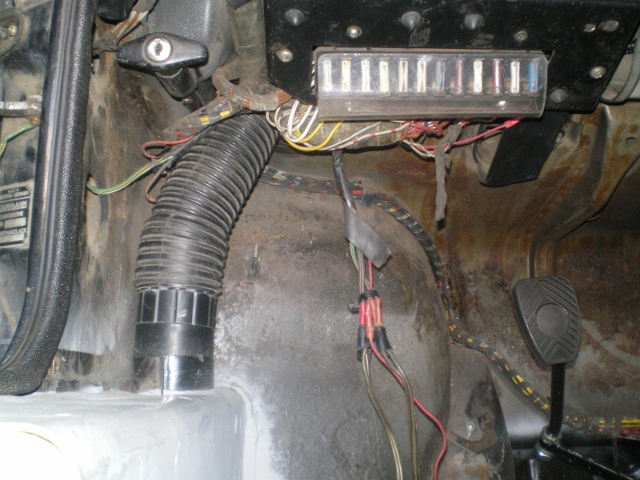 Once inside the front compartment it turns and goes out the fender. Another tight turn but the vac hose keeps it from crimping. (FYI; a 90 degree elbow is = 12' lineal piping. (IMG:style_emoticons/default/blink.gif) ) Notice the metal sleeve. I put that there so the fender wouldn't eat a hole in the hose and it gives it some support. From inside...... 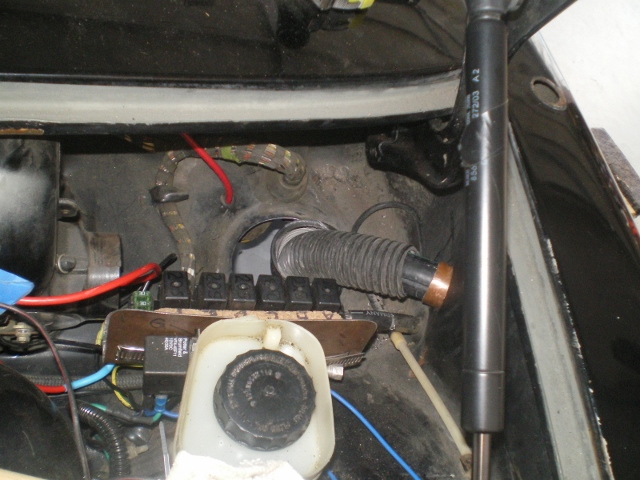 And from the wheel well 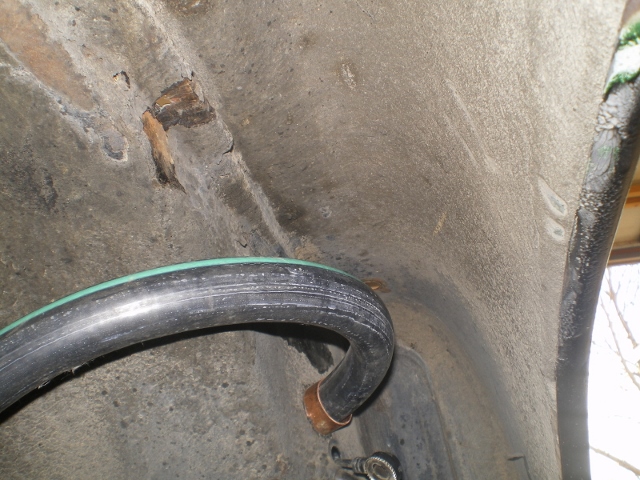 Then it hugs the wheel well behind the shock (where there is no chance of contact with the tire or rim) 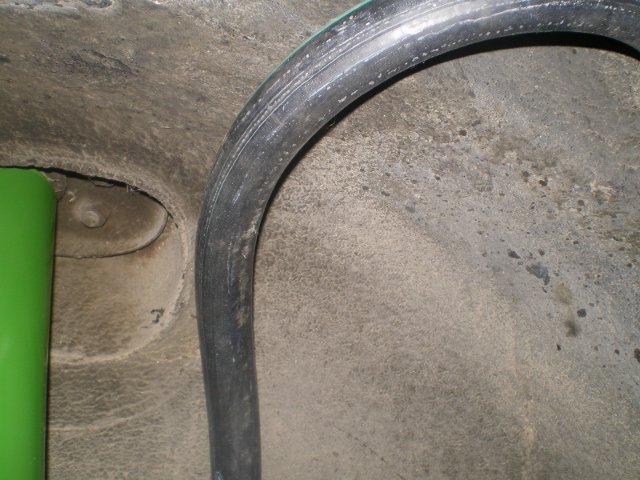 It hugs the wall until it passes thru the fender. There will be another sleeve placed here as it was above. 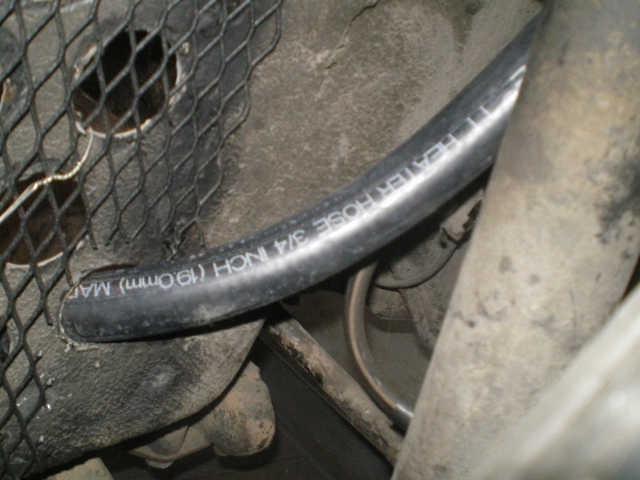 from the inside 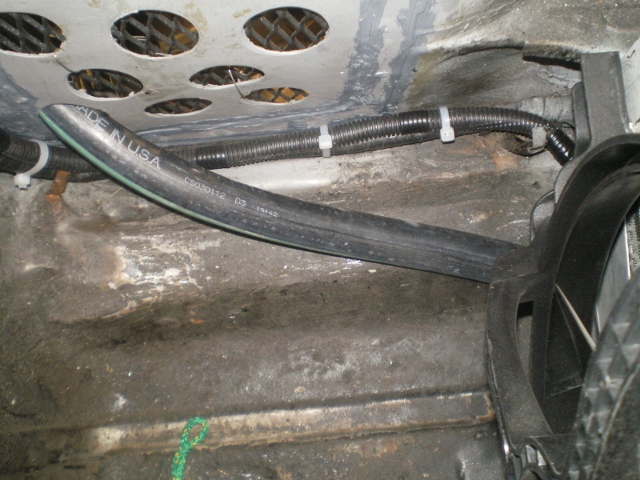 Even though the car is "jacked up" it is difficult to see once installed. It will still need to clamped and secured into place. I suspect only a midget or someone in a go kart would see it. 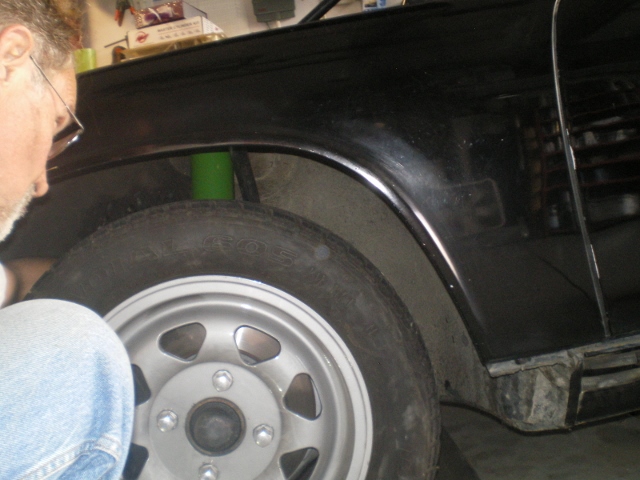 Onward thru the Fog! "Oat Willie" |
|
|
|
| ruby914 |
Feb 9 2014, 12:19 PM
Post
#243
|
|
Senior Member Group: Members Posts: 720 Joined: 26-April 09 From: Hawthorne, Ca Member No.: 10,305 Region Association: None |
Kent,
I used 1.25" ID hose, in and out. I recall referencing the Subaru engineered output ID and reluctantly reduced it down. I am not saying 3/4" will not work but it seems small. I have thought about rerouting my lines behind the rocker panel. I have room over the jack point. It would need putting a bulge in the rocker panel to get around the boxed in area at the lower door jam. Then, I think, I would have to go under the car from there. With 3/4" hose, I think this route would be much easier for you. You may be able to do it with out a rocker mod and up the top of the inner fender well. |
|
|
|
| 76-914 |
Feb 9 2014, 01:45 PM
Post
#244
|
|
Repeat Offender & Resident Subaru Antagonist Group: Members Posts: 13,508 Joined: 23-January 09 From: Temecula, CA Member No.: 9,964 Region Association: Southern California |
QUOTE(ruby914 @ Feb 9 2014, 10:19 AM) Kent, I used 1.25" ID hose, in and out. I recall referencing the Subaru engineered output ID and reluctantly reduced it down. I am not saying 3/4" will not work but it seems small. I have thought about rerouting my lines behind the rocker panel. I have room over the jack point. It would need putting a bulge in the rocker panel to get around the boxed in area at the lower door jam. Then, I think, I would have to go under the car from there. With 3/4" hose, I think this route would be much easier for you. You may be able to do it with out a rocker mod and up the top of the inner fender well. Hey Mike, I was just looking at some old pic's of you in the "what da ya look like" forum. I'll have to post some of my "Redneck Hippie" pic's. (IMG:style_emoticons/default/av-943.gif) Anywho, I'm emulating BigKat's cooling system, somewhat. I do know that he is running 7/8 & 3/4 with good results. It will be interesting to see my results. If it runs too hot the way I've routed the lines vs a str8 shot beneath the car I would think those sizes were marginal. I'm sure many gremlins await me but at least I won't have to find a place to land when they do; just pull over. (IMG:style_emoticons/default/smile.gif) I will go over the fender well on the right side but that is to reduce snaking it up 'n down . It comes off the top of the engine, goes down then thru the long, then up as shown in previous pic. I need to get my hood back on to check clearance as far as going over the wheel well. That one is 7/8 ID so we'll see. (IMG:style_emoticons/default/dry.gif) May have some (IMG:style_emoticons/default/sawzall-smiley.gif) & (IMG:style_emoticons/default/welder.gif) to do. |
|
|
|
| jimkelly |
Feb 9 2014, 05:42 PM
Post
#245
|
|
Delaware USA Group: Members Posts: 4,969 Joined: 5-August 04 From: Delaware, USA Member No.: 2,460 Region Association: MidAtlantic Region |
sheath that rubber hose where ever you can. it can wear surprisingly fast when rubbing against metal/etc.
|
|
|
|
| 76-914 |
Feb 9 2014, 10:33 PM
Post
#246
|
|
Repeat Offender & Resident Subaru Antagonist Group: Members Posts: 13,508 Joined: 23-January 09 From: Temecula, CA Member No.: 9,964 Region Association: Southern California |
Will do, Jimbo. I didn't have much time today and managed to waste most of what I had. I did however reach a "firing solution" as to the right side's route. It would have been easier to run it in the wheel well but this should make burping it easier. I laid this piece across what I thought was the lowest area and closed the hood. Much to my surprise the hood closed.
 I wondered if the hose had just flattened down and allowed the hood to close so I laid this putty about and took a few measurements here and there. And sure enough... see the flat spots in the putty and the corresponding witness mark on the hood. 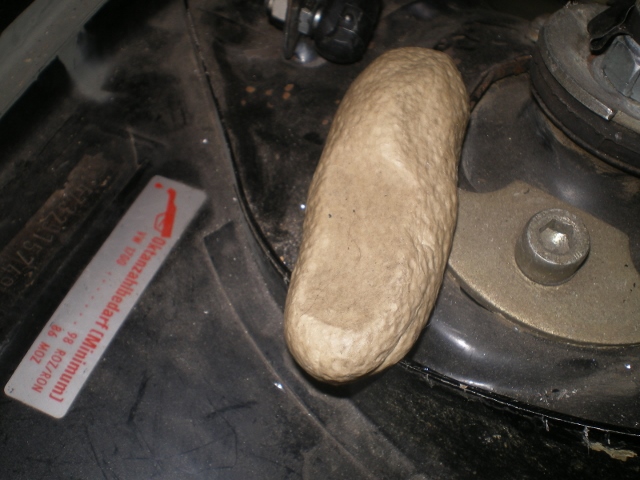 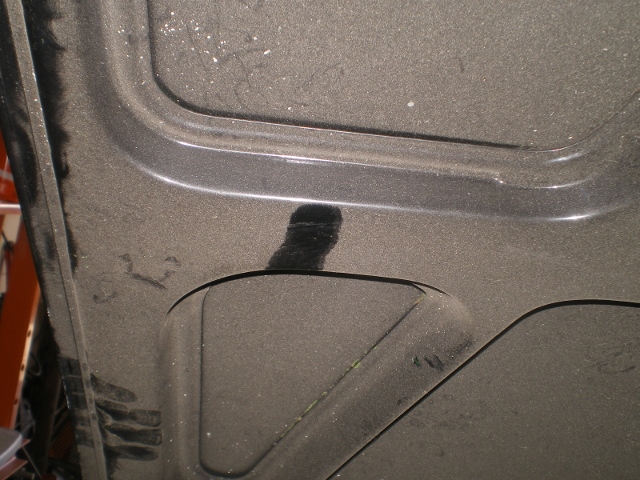 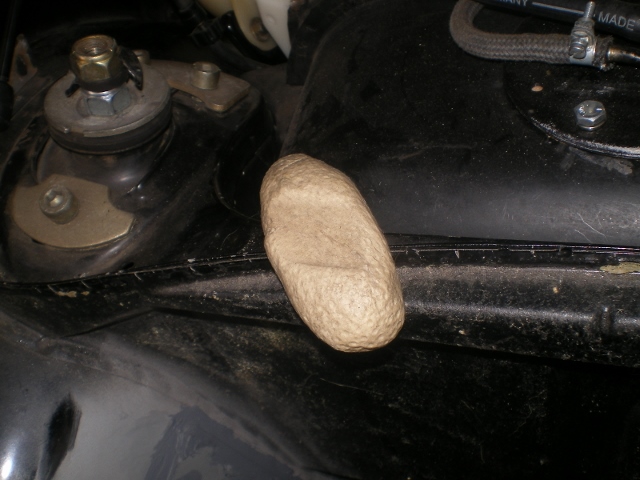 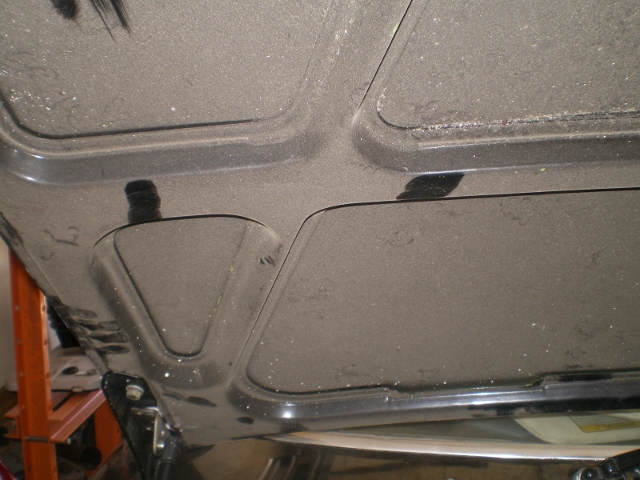 This seemed to be the best location to cut because it was between the tank and shock tower. 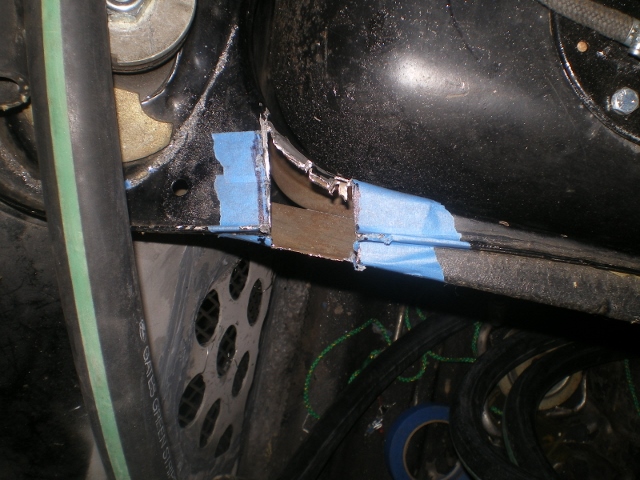 a patch piece 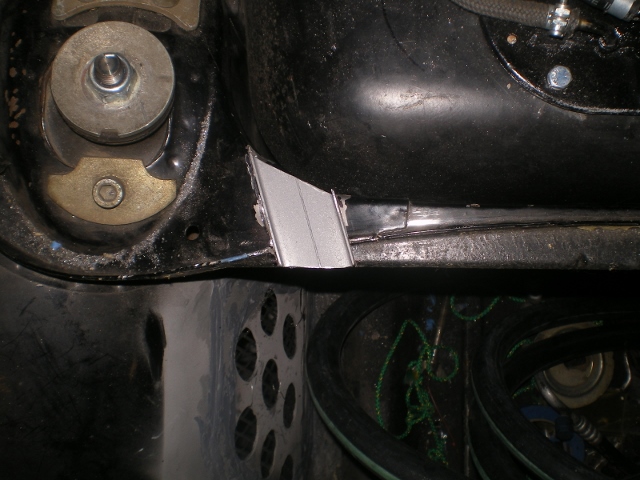 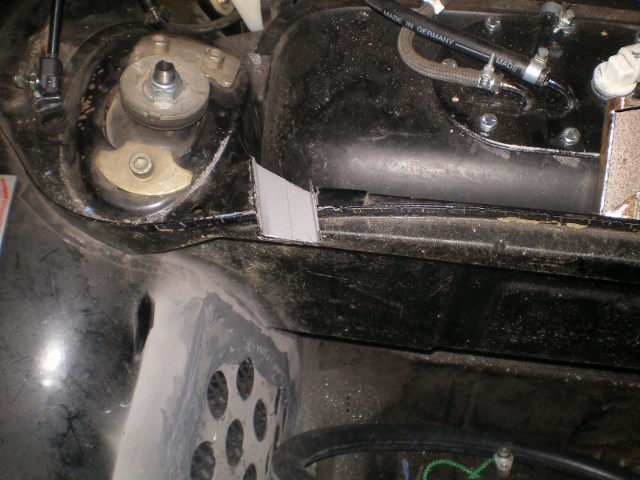 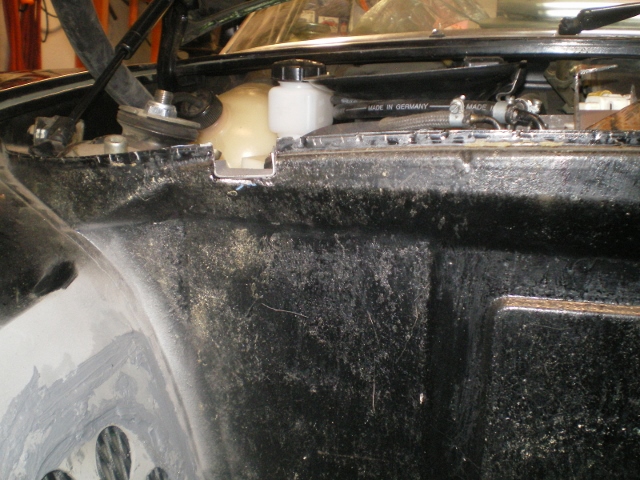 primed and ready to be welded in 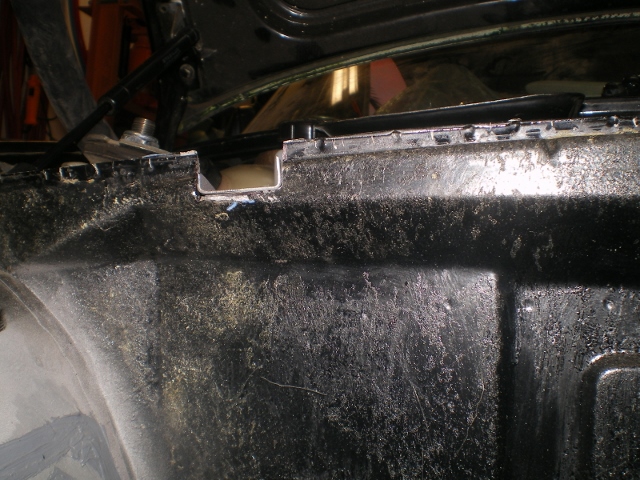 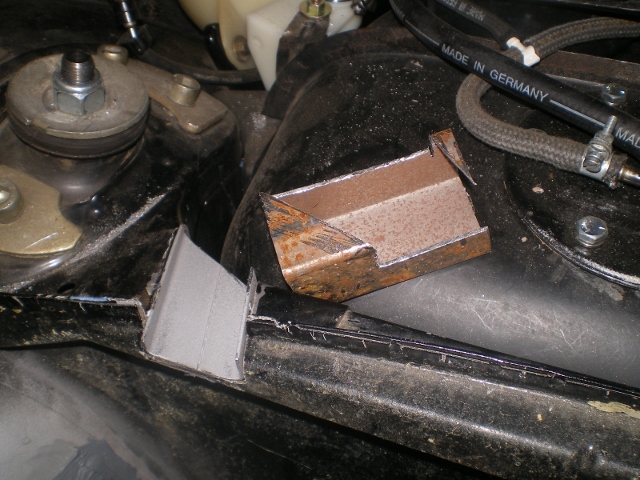 |
|
|
|
| BIGKAT_83 |
Feb 10 2014, 08:26 PM
Post
#247
|
|
Senior Member Group: Members Posts: 1,798 Joined: 25-January 03 From: Way down south Bogart,GA Member No.: 194 Region Association: South East States |
Kent I'll need the end of the subaru axle and the star race for the Subaru CV joint.
If your using the 914 stock axles there is no need to send them. I have plenty here. I was surprized at how easy it was to cut my subaru axle. About 30 seconds with a 4" cut off wheel.  |
|
|
|
| 76-914 |
Feb 10 2014, 11:05 PM
Post
#248
|
|
Repeat Offender & Resident Subaru Antagonist Group: Members Posts: 13,508 Joined: 23-January 09 From: Temecula, CA Member No.: 9,964 Region Association: Southern California |
QUOTE(BIGKAT_83 @ Feb 10 2014, 06:26 PM) Kent I'll need the end of the subaru axle and the star race for the Subaru CV joint. If your using the 914 stock axles there is no need to send them. I have plenty here. I was surprized at how easy it was to cut my subaru axle. About 30 seconds with a 4" cut off wheel. Thx Bob, PM sent. I cut mine on a 12" chop saw and your right, it goes quick. |
|
|
|
| CptTripps |
Feb 11 2014, 05:13 AM
Post
#249
|
|
:: Punch and Pie :: Group: Members Posts: 3,584 Joined: 26-December 04 From: Mentor, OH Member No.: 3,342 Region Association: Upper MidWest |
Rather than all the 'up/down/up/down' would it be better to go through and under the fuel tank, then across to the longs? I'm planning this out right now too. Was thinking of welding up a tube to the frame so in not worried about a soft/hot hose in the cabin.
|
|
|
|
| 76-914 |
Feb 11 2014, 09:34 AM
Post
#250
|
|
Repeat Offender & Resident Subaru Antagonist Group: Members Posts: 13,508 Joined: 23-January 09 From: Temecula, CA Member No.: 9,964 Region Association: Southern California |
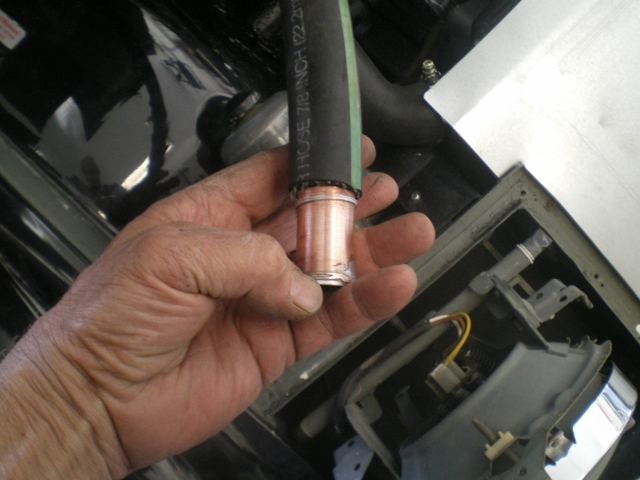
QUOTE(CptTripps @ Feb 11 2014, 03:13 AM) Rather than all the 'up/down/up/down' would it be better to go through and under the fuel tank, then across to the longs? I'm planning this out right now too. Was thinking of welding up a tube to the frame so in not worried about a soft/hot hose in the cabin. If this doesn't work then I will go beneath the tank and run exposed below. Not sure what you mean by thru the tank but pretty sure you didn't mean you would weld a tube thru it. (IMG:style_emoticons/default/lol-2.gif) I was going to weld some tube as conduit thru the wheel well but I stopped myself. (IMG:style_emoticons/default/happy11.gif) Don't worry about the hot hose. (IMG:style_emoticons/default/poke.gif) In fact, in your climate I'm surprised that you aren't taking advantage of this heat source and installing radiant heating in your teener. (IMG:style_emoticons/default/lol-2.gif) I did put some time and effort into running them down the tunnel, which by the way is doable if you've converted to cable shift & hydraulic clutch. It would have involved opening some areas to remove some weld tabs and enlarging an opening in the bulkhead. Here are some quick shots of the patch piece welded in. I need to weld up the back part next time I pull the gas tank and clean up the lower front weld. That should be very soon as I expect the front sway bar to be here within days. (Thx Garold) 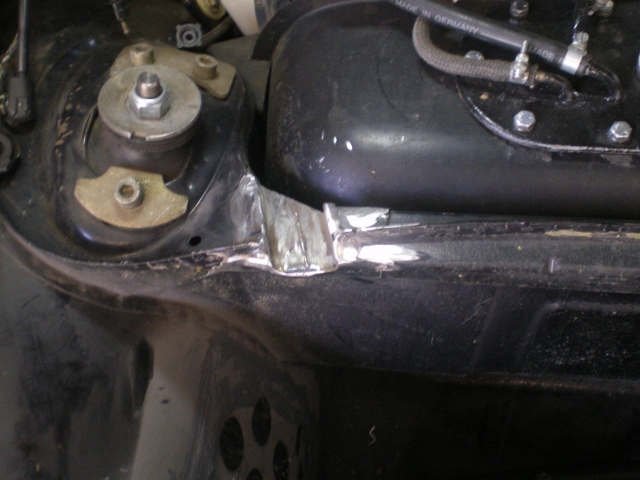 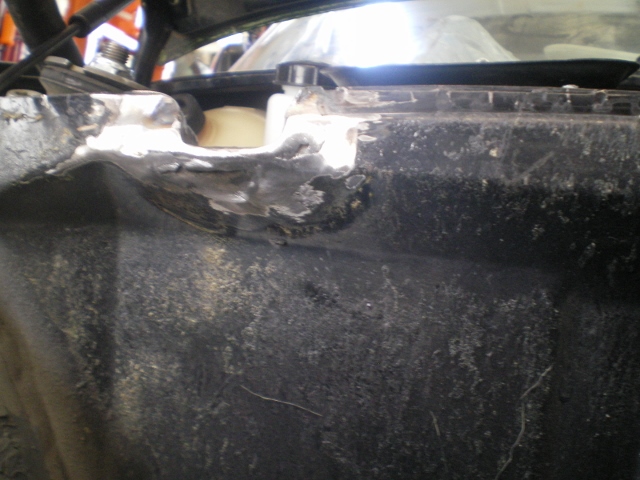 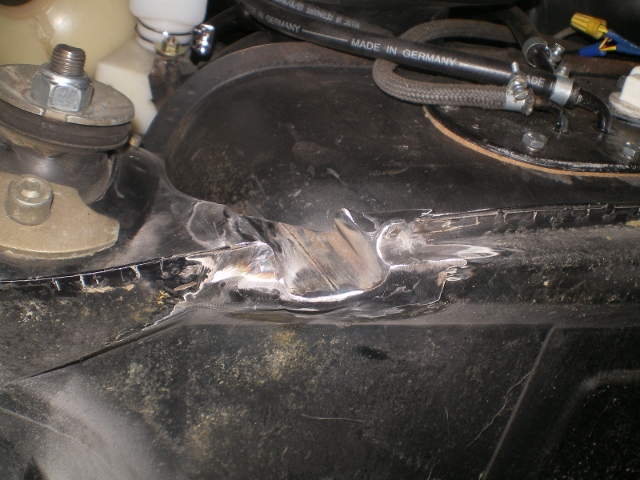 This will get me flamed and yes I have a galvanic chart but I have them on hand and the copper fittings can be changed out for aluminium or brass ones later. I soldered "copper rings" onto it to prevent slipping. This fitting will serve as one of the air vent fittings. 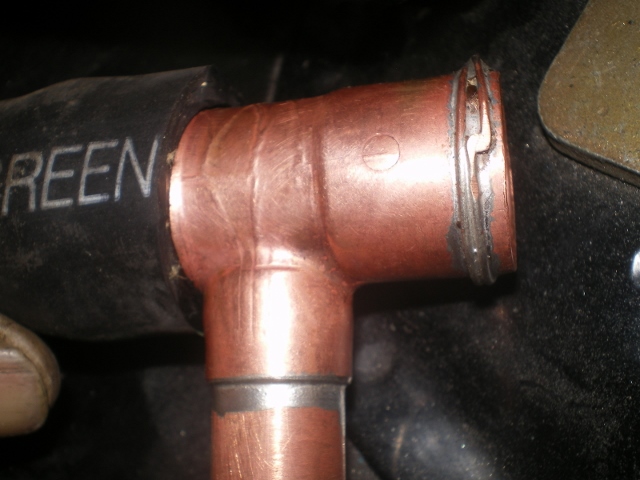 |
|
|
|
| 76-914 |
Feb 16 2014, 05:43 PM
Post
#251
|
|
Repeat Offender & Resident Subaru Antagonist Group: Members Posts: 13,508 Joined: 23-January 09 From: Temecula, CA Member No.: 9,964 Region Association: Southern California |
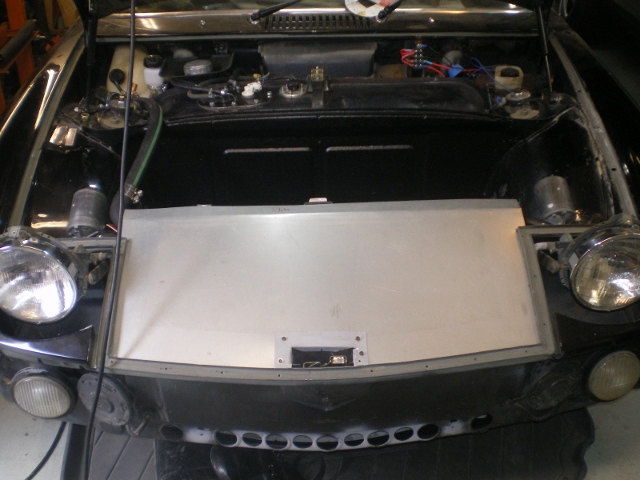
QUOTE(CptTripps @ Feb 11 2014, 03:13 AM) Rather than all the 'up/down/up/down' would it be better to go through and under the fuel tank, then across to the longs? I'm planning this out right now too. Was thinking of welding up a tube to the frame so in not worried about a soft/hot hose in the cabin. After re-reading your post Doug I don't think you should worry. Those "soft hot hoes in the cabin" pose no threat unless your wife were to intervene. (IMG:style_emoticons/default/shades.gif) Back to work............. take a look at this fender. 41 yr old paint. 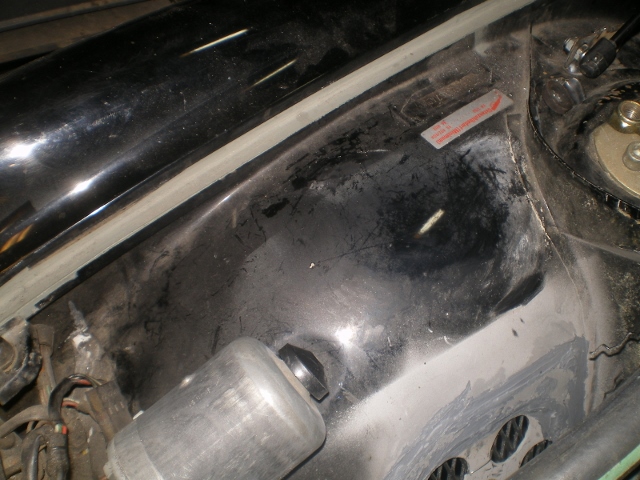 !0 min's on each fender with a foam polishing disc (left over HF Lens Polishing Kit) some 3M compound 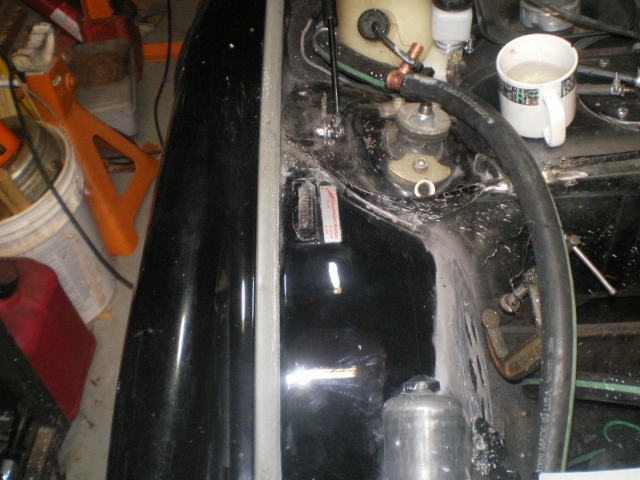 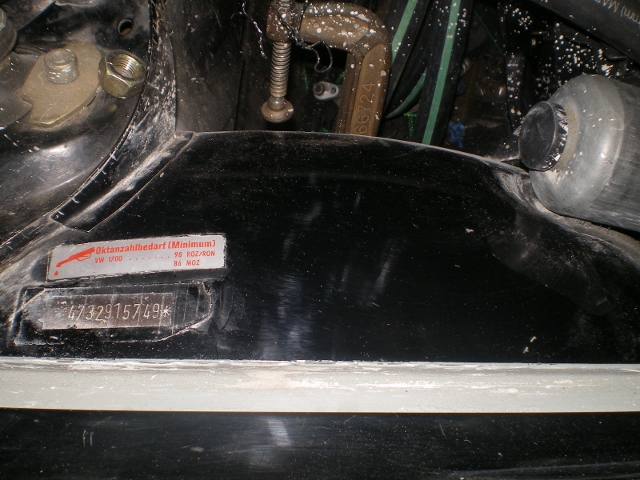 I dug out the sand blaster and hit the front sway bar pieces (thx Garold S) and hit these 2 pieces while I was at it. Primed and painted. Ready for install. 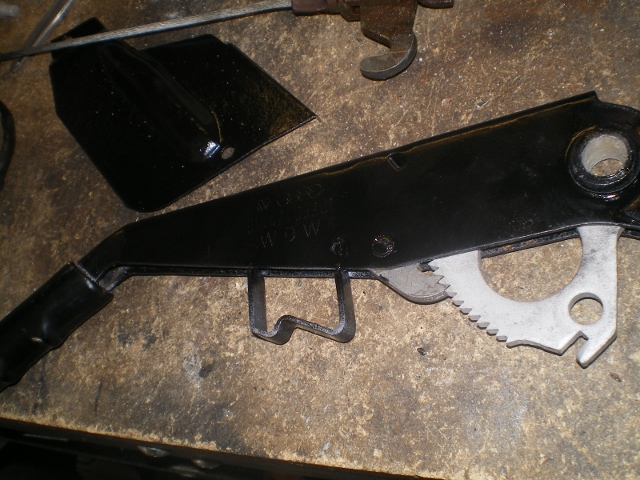 And as long as I was getting paint on myself I applied the Bed Liner to the front radiator area. I wanted something more than paint in this area and it was free.  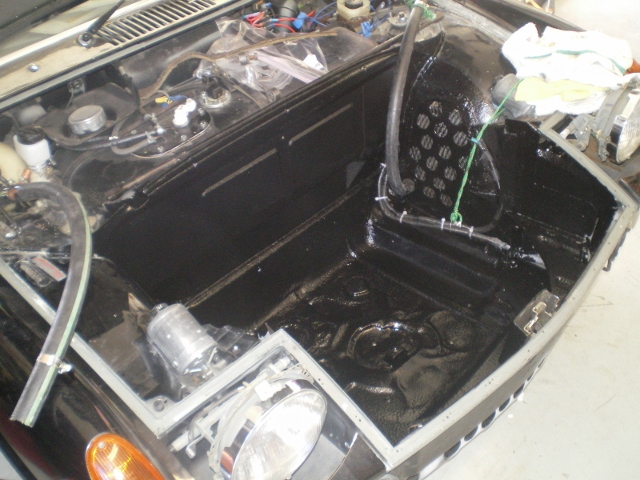 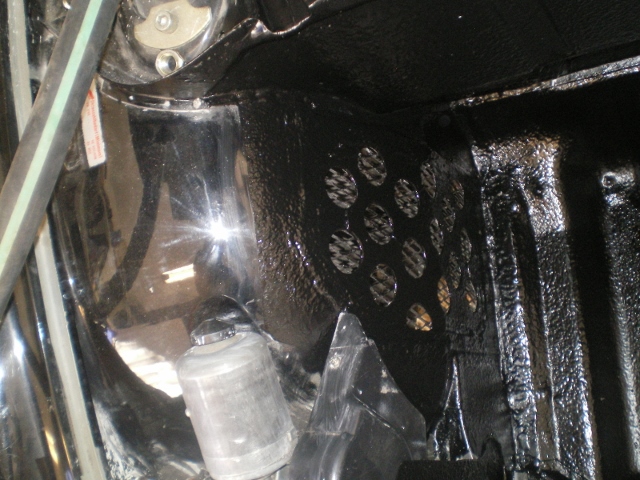 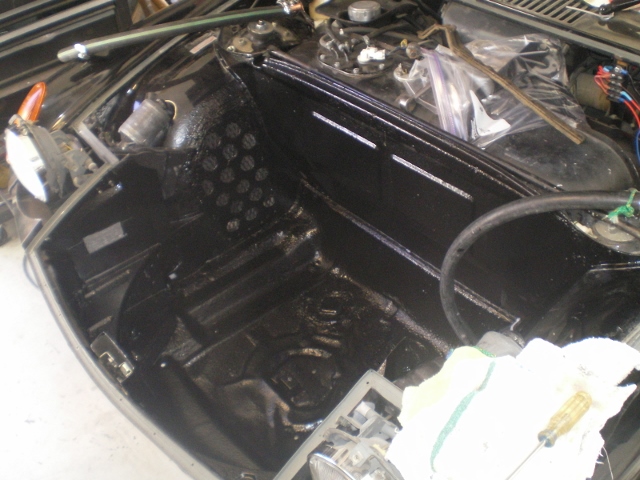  It was necessary to trim the pan a tad. I may or may not make a clam shell cover. The 4 body bolts keep it very steady but................. 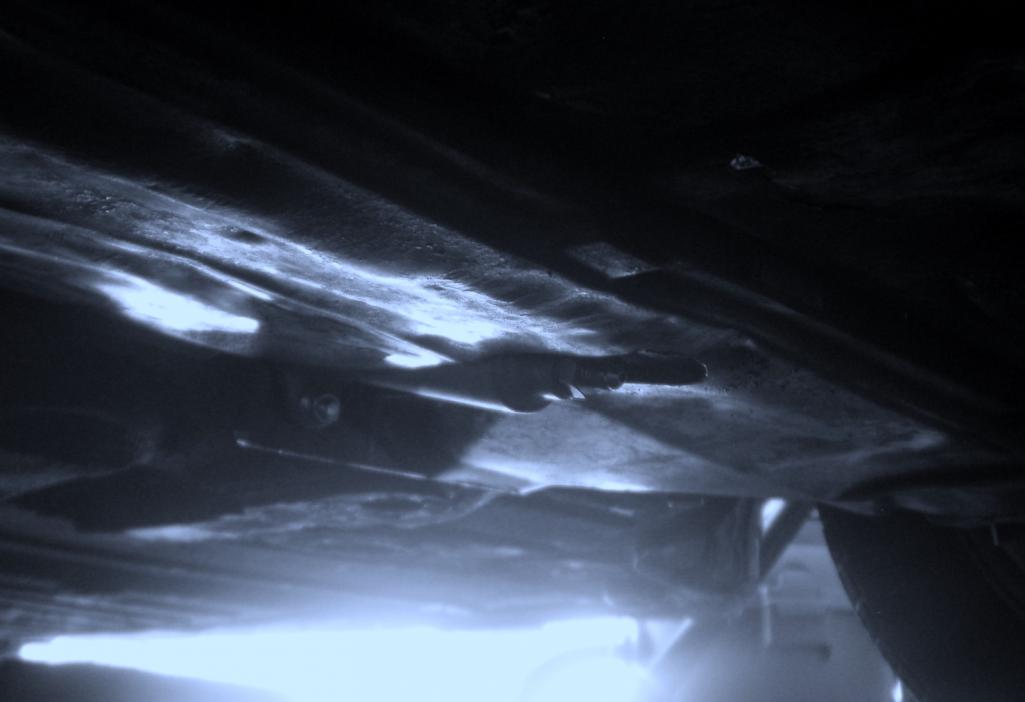 |
|
|
|
| JRust |
Feb 16 2014, 08:48 PM
Post
#252
|
|
914 Guru Group: Members Posts: 6,307 Joined: 10-January 03 From: Corvallis Oregon Member No.: 129 Region Association: Pacific Northwest |
Wow your radiator is so stealth I don't even see it (IMG:style_emoticons/default/evilgrin.gif) You'll have to tell me your secret (IMG:style_emoticons/default/blink.gif)
. . . . . . . . .. .. . . . . . (IMG:style_emoticons/default/lol-2.gif) (IMG:style_emoticons/default/lol-2.gif) (IMG:style_emoticons/default/lol-2.gif) |
|
|
|
| 76-914 |
Feb 16 2014, 11:07 PM
Post
#253
|
|
Repeat Offender & Resident Subaru Antagonist Group: Members Posts: 13,508 Joined: 23-January 09 From: Temecula, CA Member No.: 9,964 Region Association: Southern California |
oops
Attached thumbnail(s) 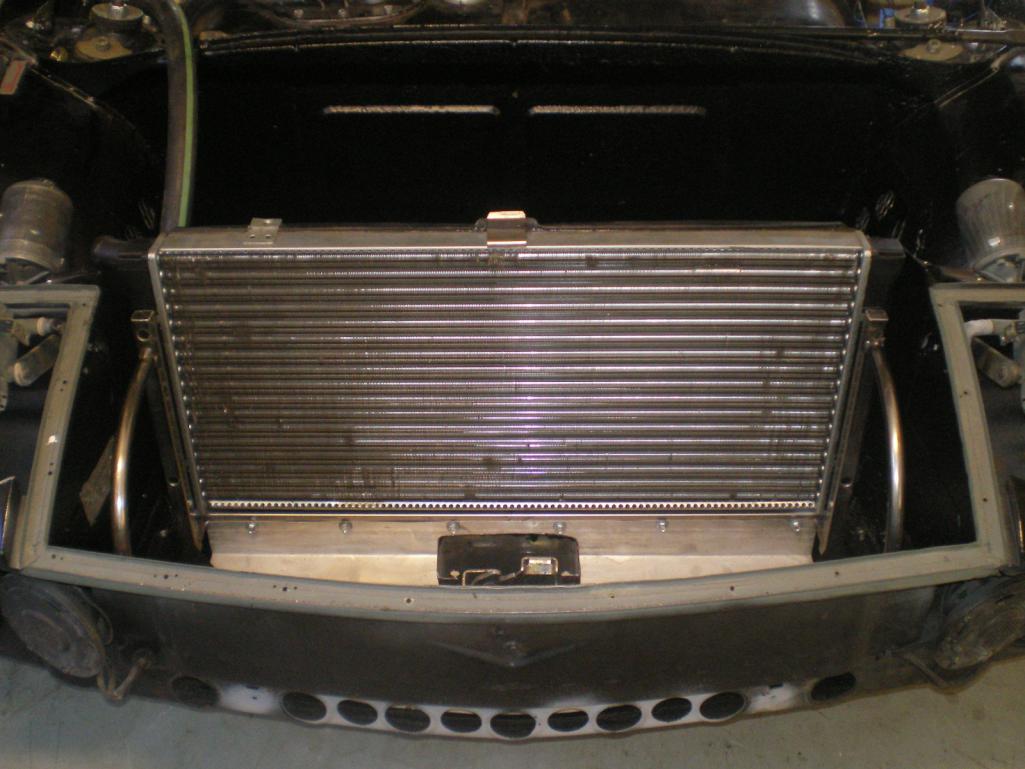 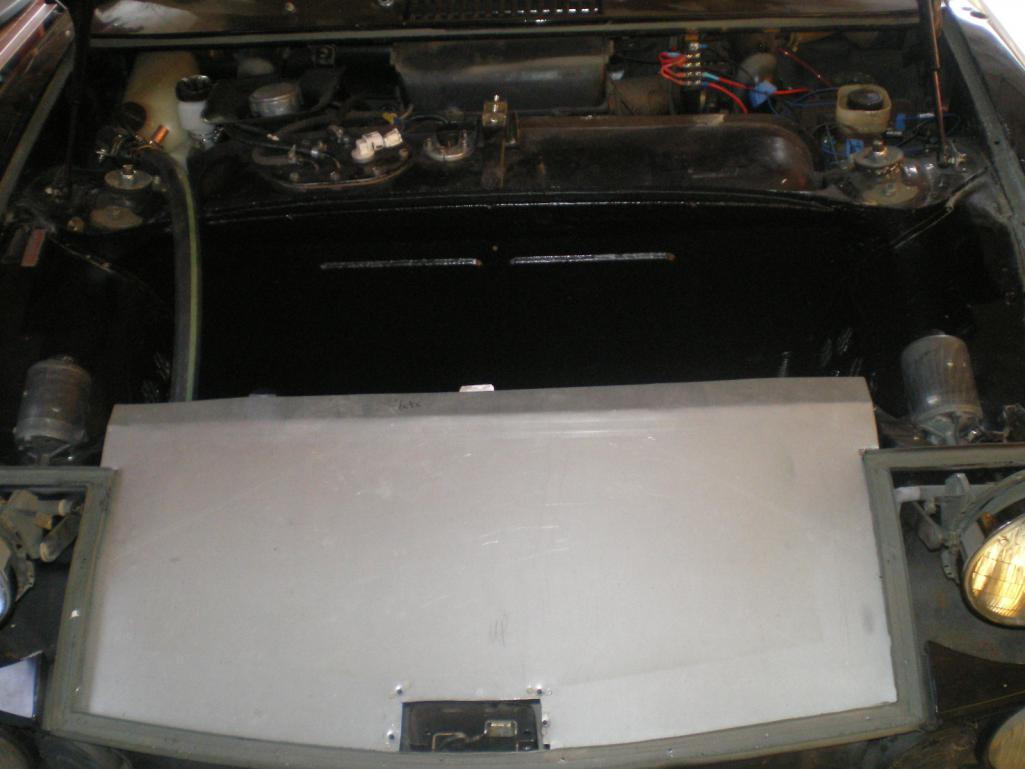 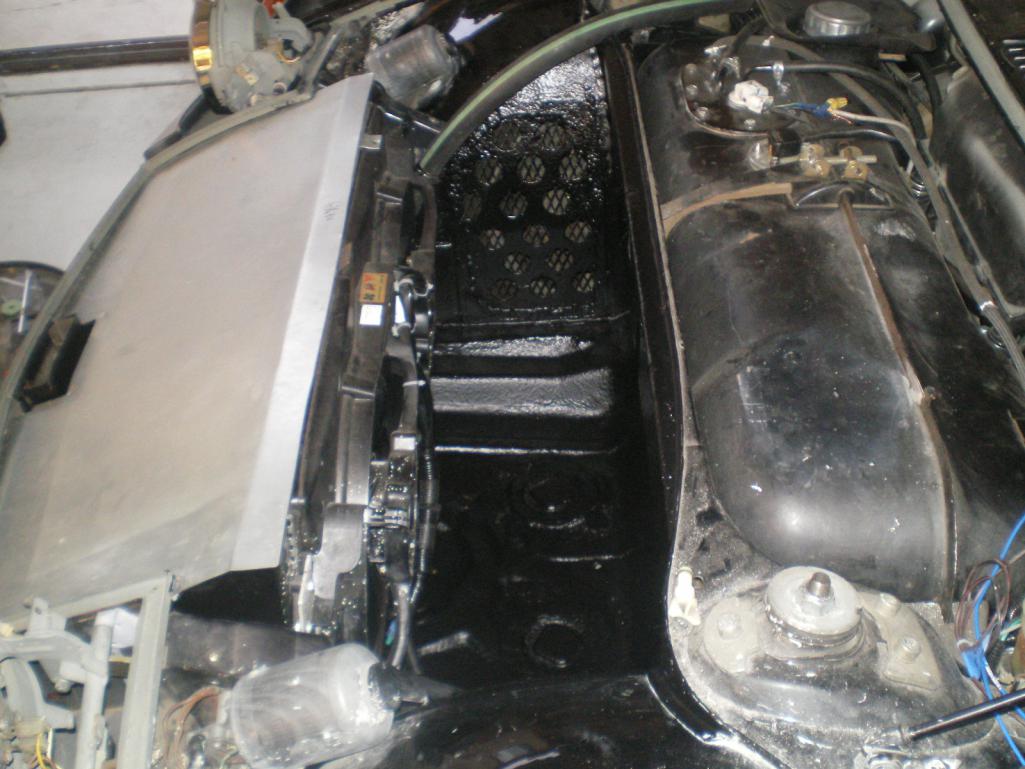 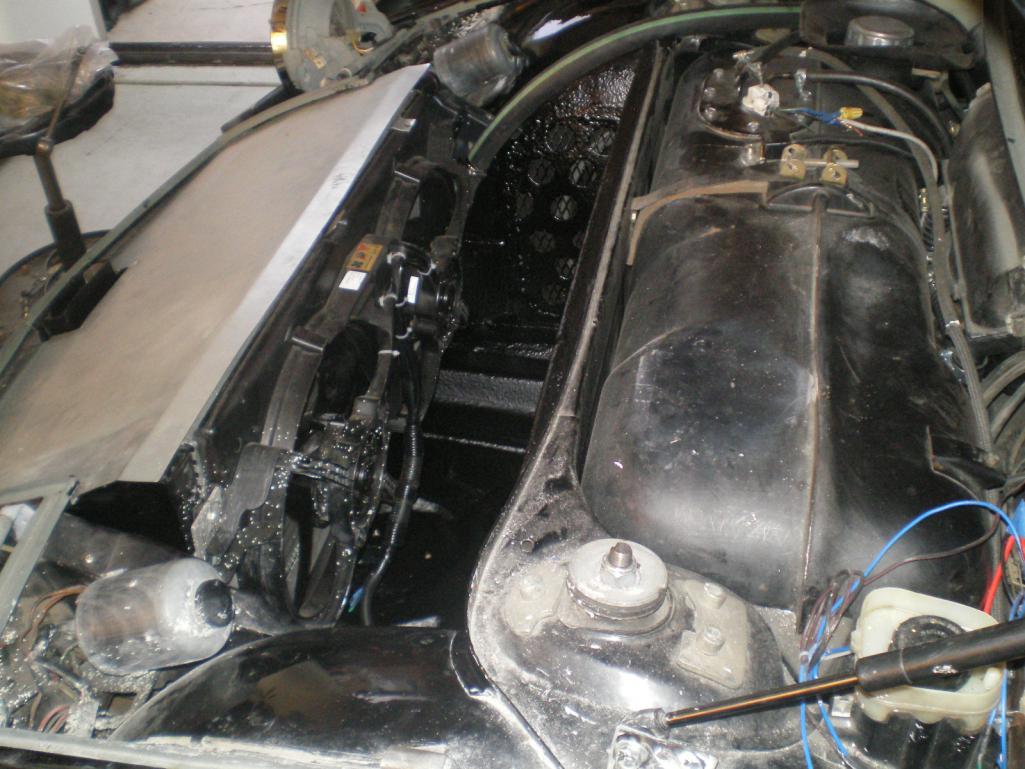
|
|
|
|
| 76-914 |
Feb 26 2014, 07:27 PM
Post
#254
|
|
Repeat Offender & Resident Subaru Antagonist Group: Members Posts: 13,508 Joined: 23-January 09 From: Temecula, CA Member No.: 9,964 Region Association: Southern California |
This is how the 7/8" return line ties into the 1.25". A 3/4" coupling is inserted into the 7/8"
  Then the 7/8" hose is inserted in to the 1.25" and clamped in place. 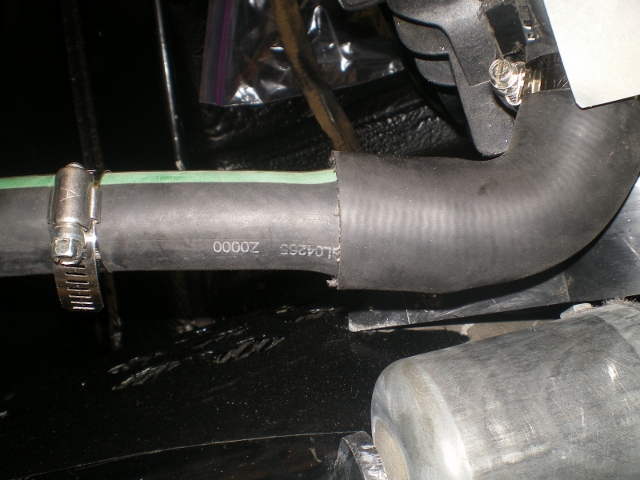 Jumping back a bit I finally finished the clutch sans fluid. A quick check for fit.......... 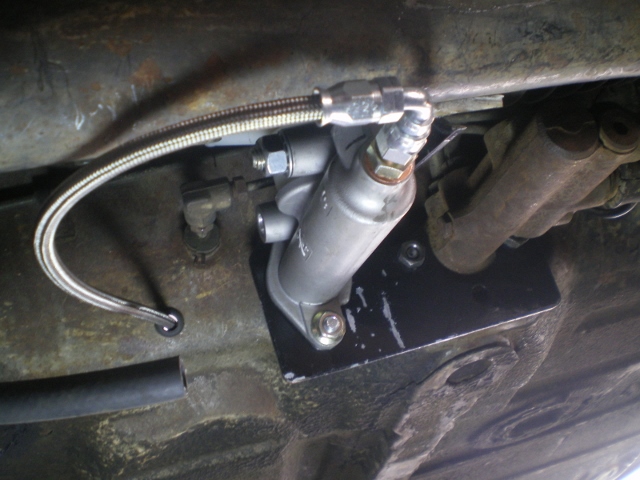 I remembered reading that SS sheathed hoses often fail because road grime gets inside and wears thru the Teflon liner. I should have used heat shrink but I used electrical tape. Either one should make a big difference in this area, for sure. 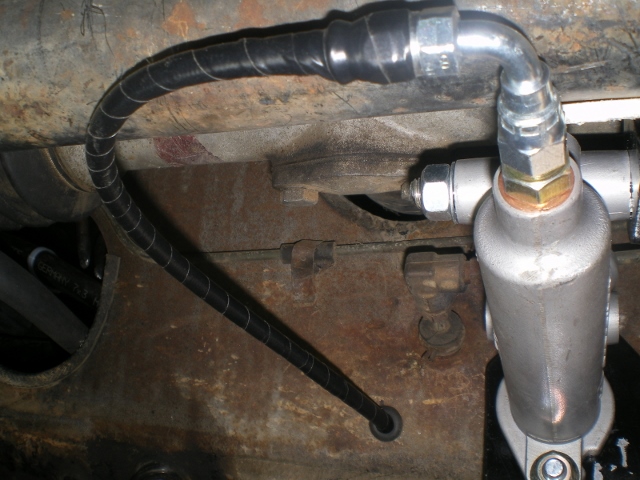 Found this on ebay for $9. It has an 1 1/8" throat which is exactly the same size as the o.d. of 1" copper tube. 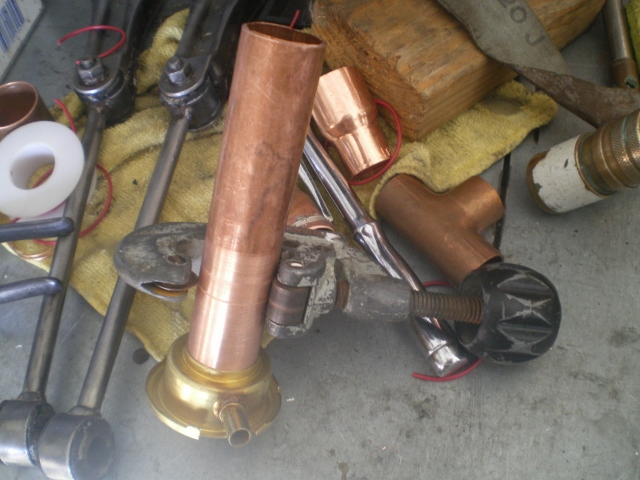  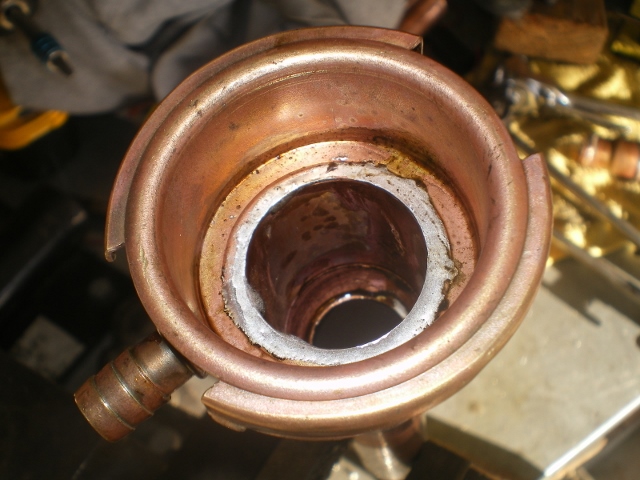 This is the manifold that will connect the 2ea. - 1.25" outlets from the suby engine. (It has one inlet and 2 outlets). I came out of the top of the tee with the fill riser (as seen below) but after thinking about it that tee will be replaced with a long radius 90 then the tee will be re-installed. I think it should greatly improve the flow over a sharp turn that would occur in the tee. I'll post it when I change it. So just know this will change a tad. 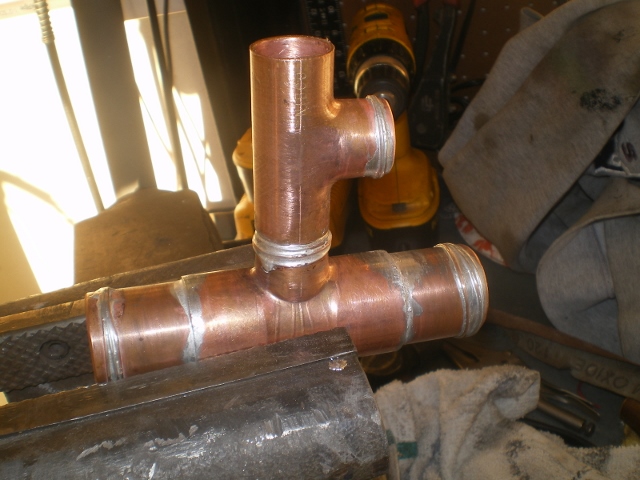 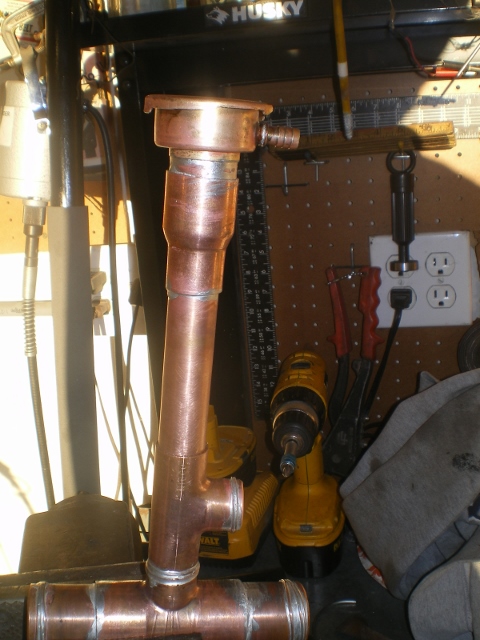 Now you can see what I'm after. This fill cap should be the highest point in the car and for sure, in the engine compartment. It is attached to 2 1.25" horizontal hoses which combined are about 18" in length. This will be anchored later or it would fall down. However, I will make some anchor that is easily removable in case that I need to pull up on it for venting/burping purposes. 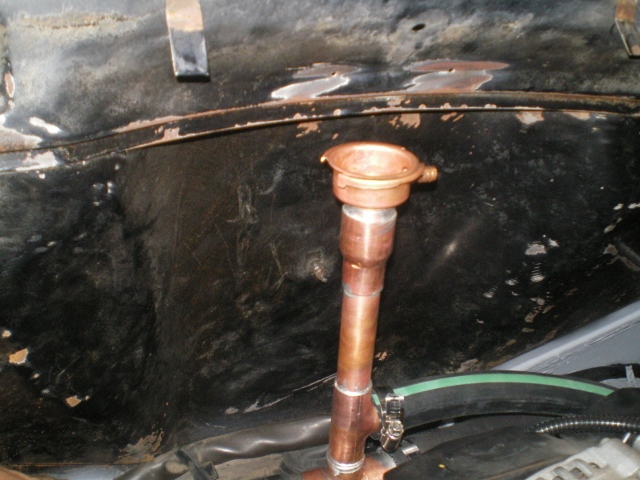 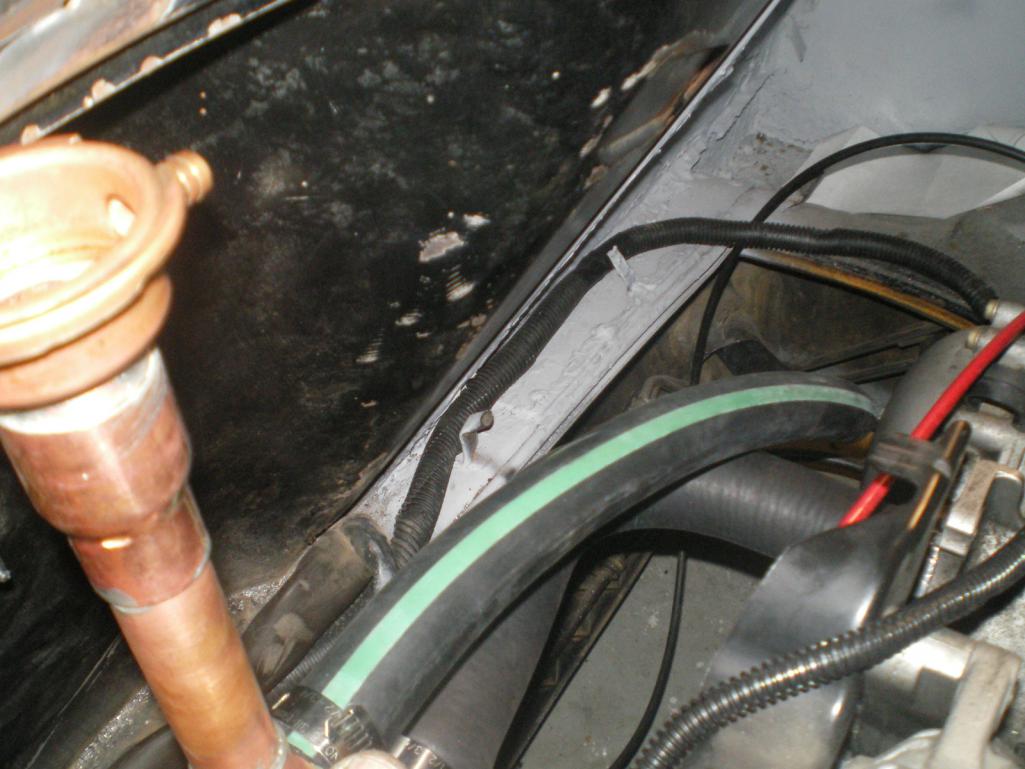 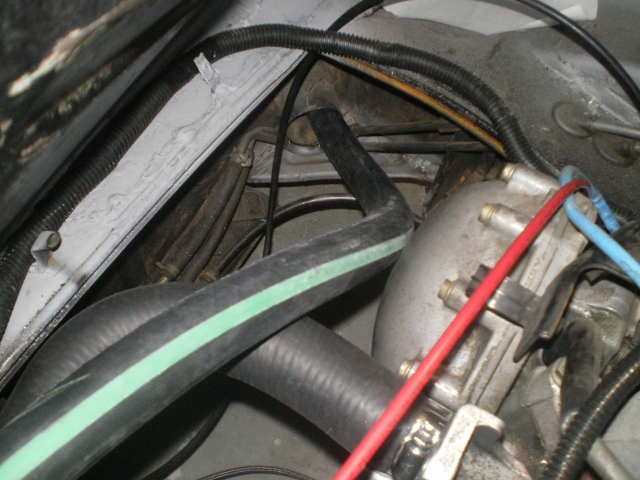 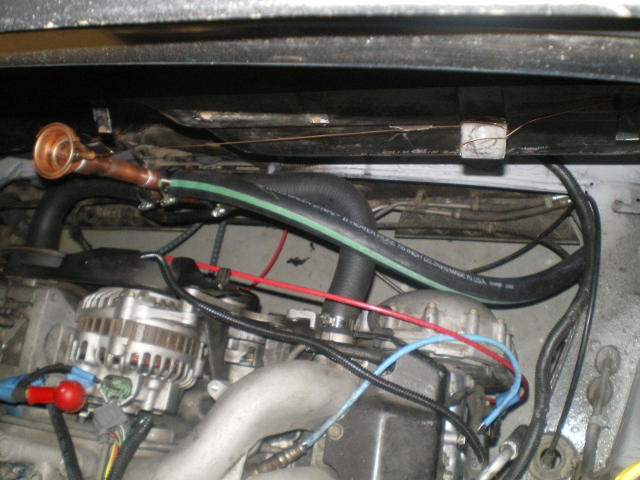 For the most part the work is all but finished in the front trunk area. There may be some additional cutting/venting once it's running. There are a few wires to connect with the Suby wires once I fall back into the wiring phase again. (IMG:style_emoticons/default/barf.gif) I think it was Skeates who mentioned he was tired of playing Concentration with himself when describing the wiring. (IMG:style_emoticons/default/av-943.gif) (IMG:style_emoticons/default/lol-2.gif) (IMG:style_emoticons/default/laugh.gif) Very well put. Overall I'm happy with the way this area has turned out. I forgot to mention that I have about a 3"x 2' x 16" area beneath the radiator that can store tools, etc. And there should be room for a collapsible spare to boot. (would that be a pun in England?)  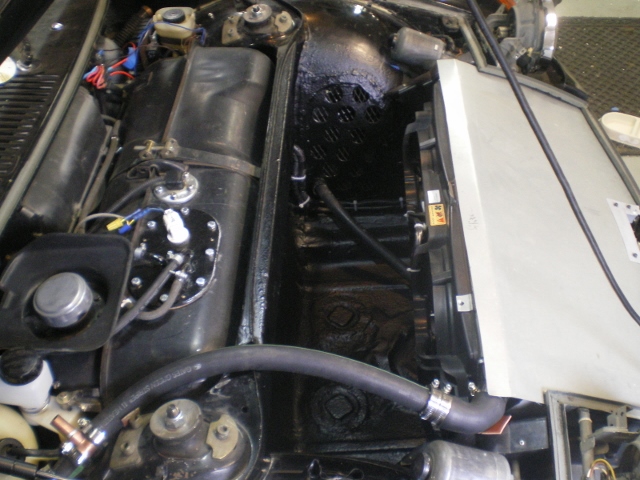 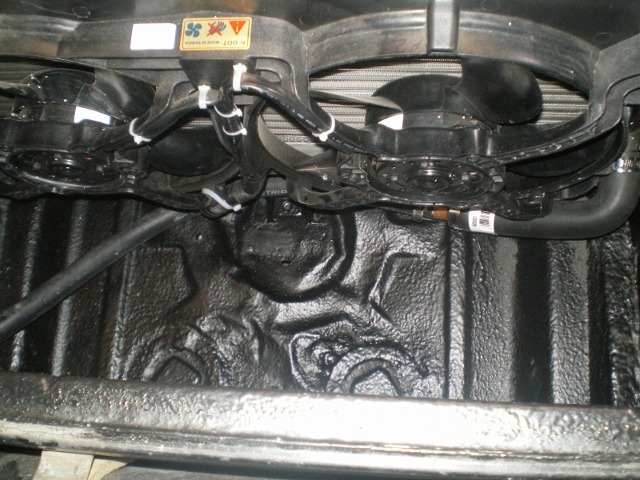 |
|
|
|
| 76-914 |
Feb 26 2014, 07:44 PM
Post
#255
|
|
Repeat Offender & Resident Subaru Antagonist Group: Members Posts: 13,508 Joined: 23-January 09 From: Temecula, CA Member No.: 9,964 Region Association: Southern California |
   Then I moved on to the floor pans. I had plenty more bed liner so I did this area in it also. Besides, it's some tough shit and this area can stand a little extra protection. 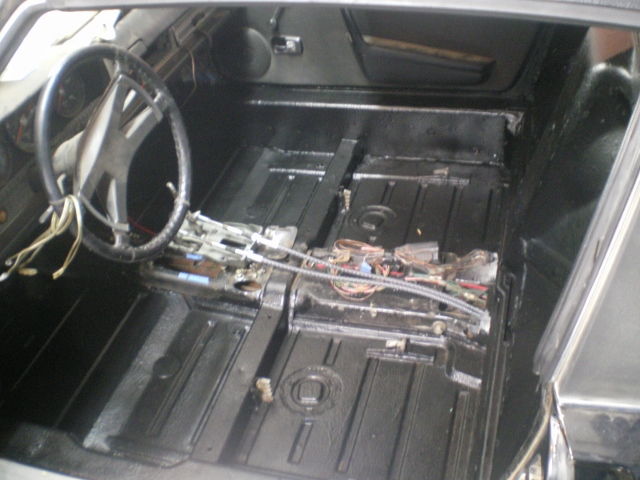 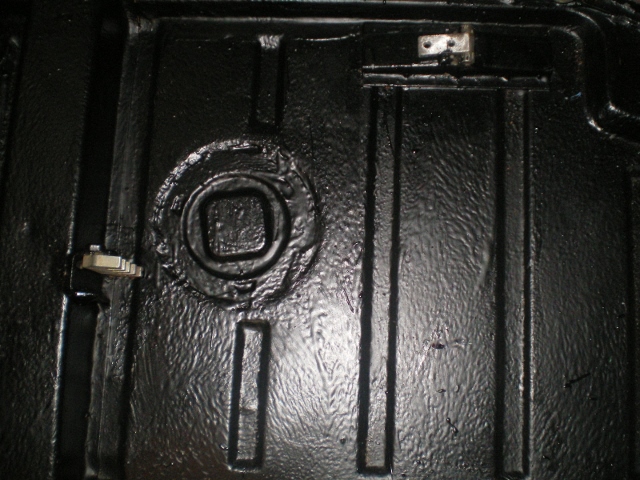 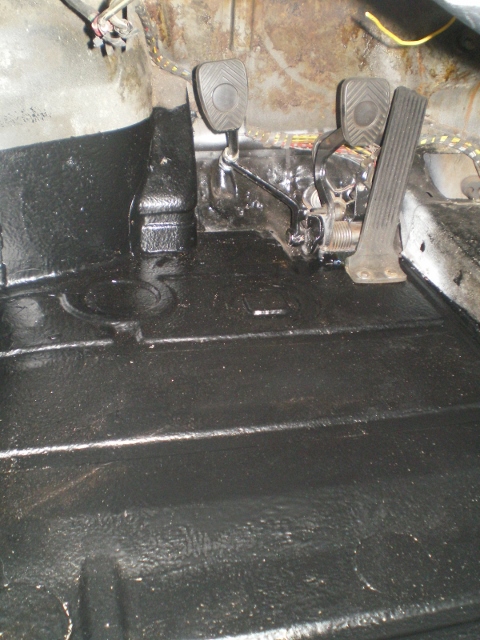 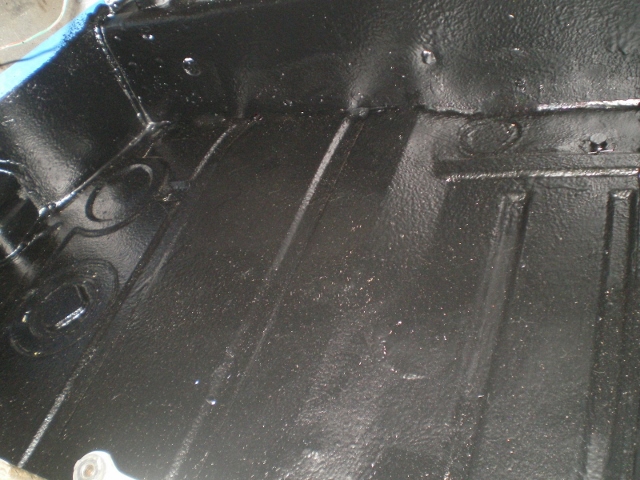 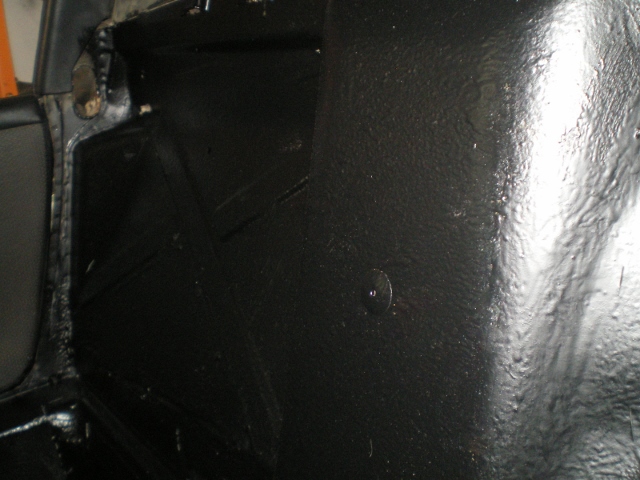 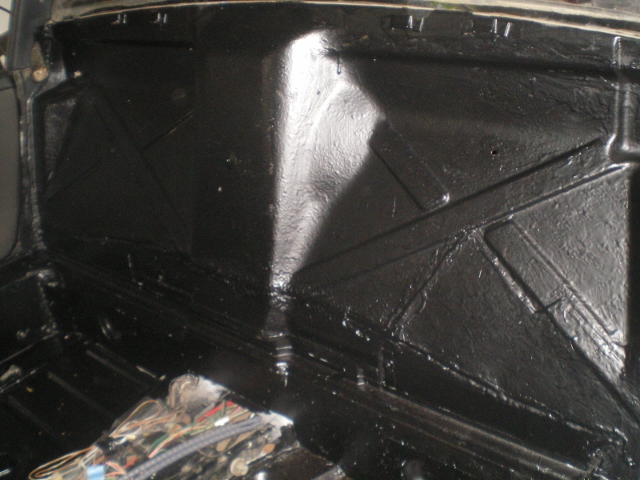 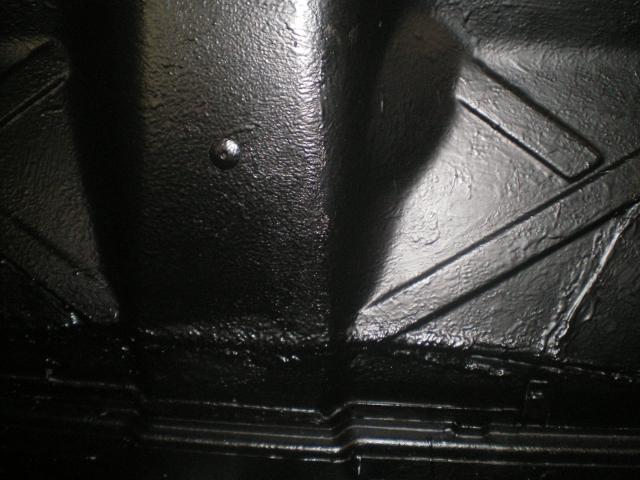  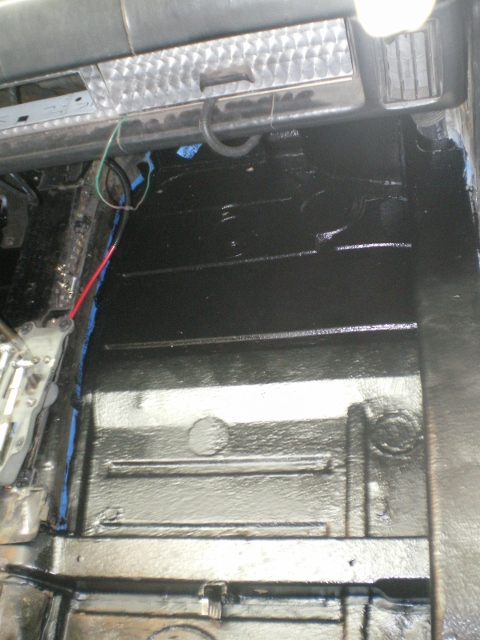 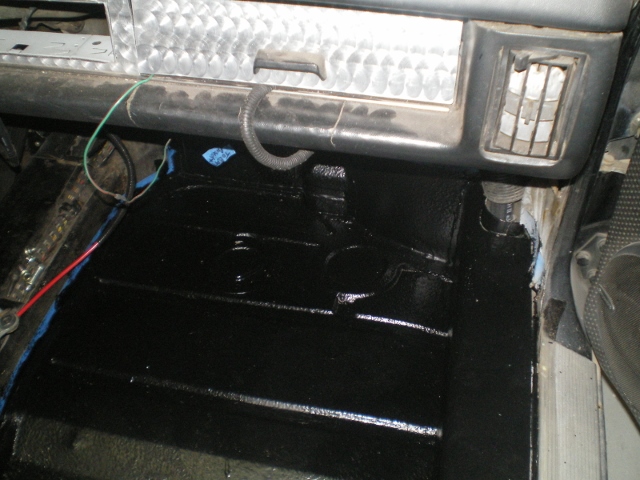 Ross, this is the controller that you need. It was a convenient time for me to snap this shot for you. Everyone else is saying, "What the Hell did he put that in there for?" (IMG:style_emoticons/default/lol-2.gif) 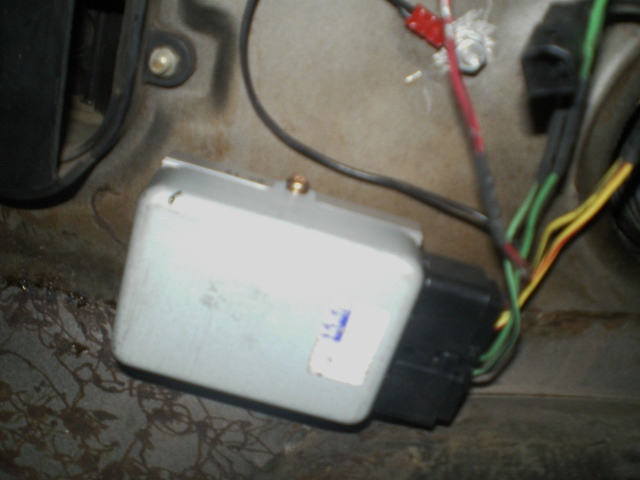 Oops, forgot this shot of the cold inlet tie in at the engine. 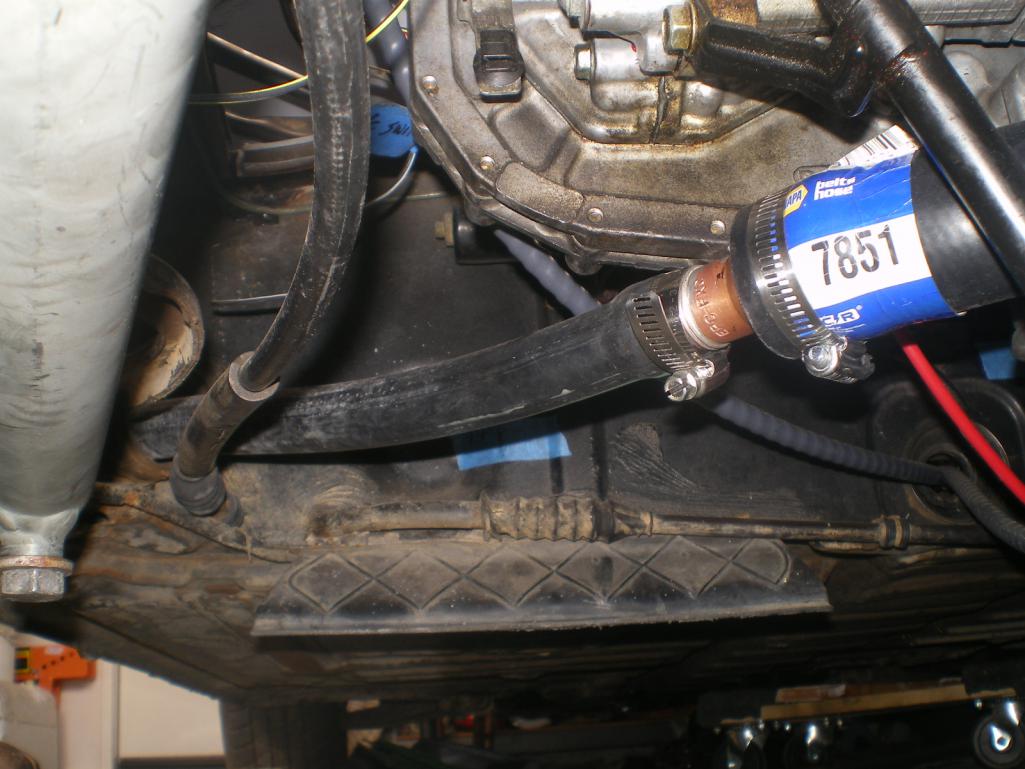 Guess what's next on my list?  |
|
|
|
| rnellums |
Feb 26 2014, 10:15 PM
Post
#256
|
|
Professional Enthusiast Group: Members Posts: 1,646 Joined: 26-November 09 From: Littleton, CO Member No.: 11,072 Region Association: Rocky Mountains |
Kent,
Are there any markings on the box or is it just plain? Also, I thought I had read that using copper in the coolant system with an aluminum black could cause sacrificial corrosion of the engine. Have you heard anything about that? It would be awful nice to be able to use a copper tee for my 1.25" hose. I have been having a devil of a time finding an aluminum one. -Ross |
|
|
|
| 76-914 |
Feb 26 2014, 10:52 PM
Post
#257
|
|
Repeat Offender & Resident Subaru Antagonist Group: Members Posts: 13,508 Joined: 23-January 09 From: Temecula, CA Member No.: 9,964 Region Association: Southern California |
QUOTE(rnellums @ Feb 26 2014, 08:15 PM) Kent, Are there any markings on the box or is it just plain? Also, I thought I had read that using copper in the coolant system with an aluminum black could cause sacrificial corrosion of the engine. Have you heard anything about that? It would be awful nice to be able to use a copper tee for my 1.25" hose. I have been having a devil of a time finding an aluminum one. -Ross Jags that Run doesn't have one? Yea, I read some thing too but couldn't find it. IIRC, the more noble the more sacrificial. And then mass must play some role. This is just messing around as I plan to look at it a year later. This entire project is experimental to some degree and I expect some failure. Cheap failures I hope. I would expect that the copper would die first. If I have it backwards I should find aluminum deposits on the copper. I think I should ground one of the copper fittings to the body and compare it with the others a year later. (IMG:style_emoticons/default/idea.gif) I remember looking at the chart and thinking that they were not that far apart except for voltage values. Maybe this is what I'm missing. Also, Bro Chris sent me a bottle of water wetter. It tastes like shit so I'm going to put it in my engine instead. It claims to reduce this effect. If you find that article shoot me the link. I'll get the markings and pm you manana. |
|
|
|
| CptTripps |
Feb 27 2014, 03:42 AM
Post
#258
|
|
:: Punch and Pie :: Group: Members Posts: 3,584 Joined: 26-December 04 From: Mentor, OH Member No.: 3,342 Region Association: Upper MidWest |
Outstanding progress. One quick question though:
Which bed liner did you end up using? That's on my list, and I don't want to use what I used last time. |
|
|
|
| skeates |
Feb 27 2014, 10:45 AM
Post
#259
|
|
Member Group: Members Posts: 218 Joined: 28-February 05 From: Sacramento, ca Member No.: 3,684 Region Association: Northern California |
QUOTE(76-914 @ Feb 26 2014, 05:27 PM) I think it was Skeates who mentioned he was tired of playing Concentration with himself when describing the wiring. (IMG:style_emoticons/default/av-943.gif) (IMG:style_emoticons/default/lol-2.gif) (IMG:style_emoticons/default/laugh.gif) Very well put. Twas not I who coined that one, but I'll take the credit. (IMG:style_emoticons/default/happy11.gif) Looks like you are making some good progress. I'm particularly interested in seeing how your cooling solution works out as it is much easier to run those smaller diameter hoses. I also went with the 1.25" hose to keep things close to the stock sizes, but it sounds like there may be a significant amount of wiggle room there. Keep up this momentum and you'll be driving before you know it! |
|
|
|
| Chris H. |
Feb 27 2014, 11:24 AM
Post
#260
|
|
Senior Member Group: Members Posts: 4,032 Joined: 2-January 03 From: Chicago 'burbs Member No.: 73 Region Association: Upper MidWest |
(IMG:style_emoticons/default/idea.gif) I'm re-thinking what size pipe to run under the car too...was going with 1 1/4 as well but if that isn't necessary I'll go smaller. Much easier to bend the smaller it is (insert easy joke response here....).
Great progress Kent! BTW guys can you coat the inside of that copper with anything that would keep it from reacting/breaking down into the water? Or slow it down enough to make it less of an issue? |
|
|
|
|
1 User(s) are reading this topic (1 Guests and 0 Anonymous Users)
0 Members:

|
Lo-Fi Version | Time is now: 8th June 2024 - 04:31 AM |
Invision Power Board
v9.1.4 © 2024 IPS, Inc.