|
|
|
Porsche, and the Porsche crest are registered trademarks of Dr. Ing. h.c. F. Porsche AG.
This site is not affiliated with Porsche in any way. Its only purpose is to provide an online forum for car enthusiasts. All other trademarks are property of their respective owners. |
|
|

  |

| Amenson |
 Jul 15 2008, 08:59 PM Jul 15 2008, 08:59 PM
Post
#161
|
|
That's opposite lock!!  Group: Members Posts: 645 Joined: 27-May 05 From: Dublin, OH Member No.: 4,154 Region Association: None |
A couple important things happened today.
I finally have the oil feed line for the turbo. Seems like it would not be such a big deal but the one end was female M12x1.0 and getting to it w/o a load of adapters was a major afare. Eventually I found a shop 4 miles away from my house to make one for me. 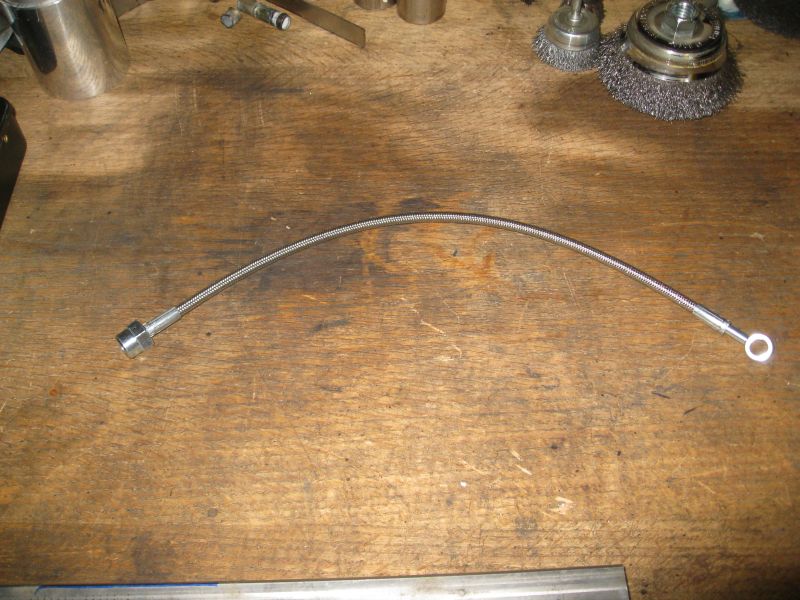 Temporarily installed 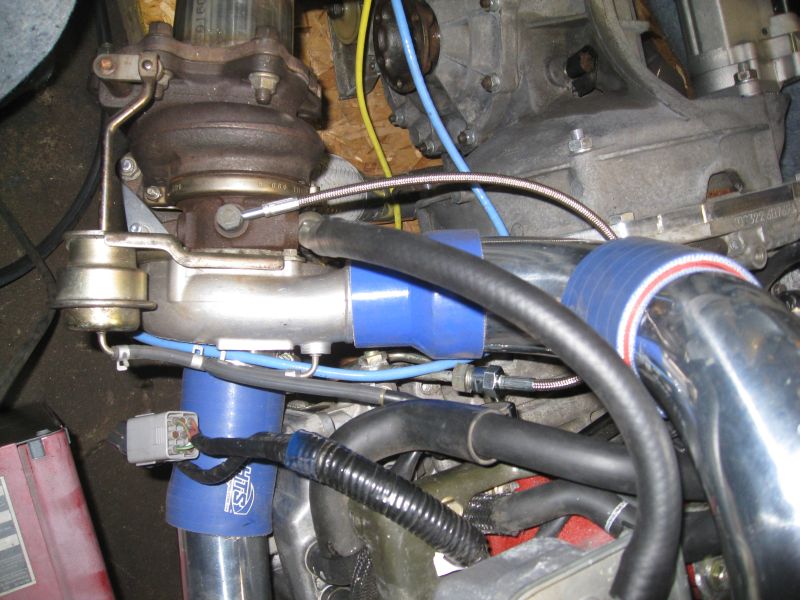 After a panicked search I have a matching seat to the Momo Start seat that I bought at the beginning of the project over 2 years ago. Momo has made 2 revisions since then and the old style was no longer available. I picked up the seat on the right from somebody who bought it a while ago and never used it! It just arrived today (IMG:style_emoticons/default/driving.gif) 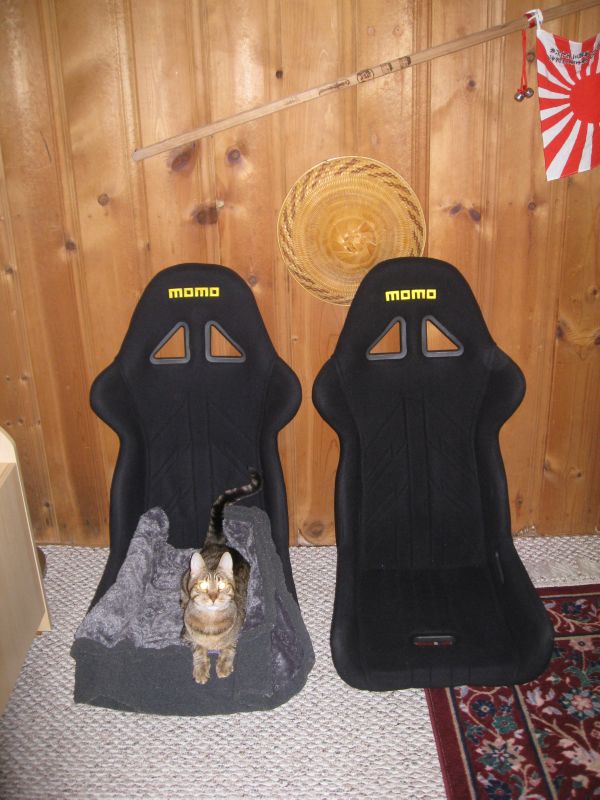 The Puss has made the first seat his. Scott |
   |

 
|
| DBCooper |
Jul 17 2008, 02:35 PM
Post
#162
|
|
14's in the 13's with ATTITUDE Group: Members Posts: 3,079 Joined: 25-August 04 From: Dazed and Confused Member No.: 2,618 Region Association: Northern California |
Look how excited he is! That new seat's made him think he's getting a new little sister....
|
|
|
|
| Zaney |
Jul 17 2008, 07:10 PM
Post
#163
|
|
Deuchland en der Haus Group: Members Posts: 461 Joined: 1-March 04 From: Engine 11 Redmond, WA Member No.: 1,738 Region Association: Pacific Northwest |
Are you going to install flares on your car? What size wheels/tires do you intend to run under all that torque?
Thanks, Nate |
|
|
|
| Amenson |
Jul 17 2008, 10:35 PM
Post
#164
|
|
That's opposite lock!! Group: Members Posts: 645 Joined: 27-May 05 From: Dublin, OH Member No.: 4,154 Region Association: None |
QUOTE(Zaney @ Jul 17 2008, 05:10 PM)  Are you going to install flares on your car? What size wheels/tires do you intend to run under all that torque? Thanks, Nate 205's...maybe 215's on 2.0 Fuchs, this is my trans preservation plan. I have a set of 7x15 phone dials for when I put in the 5 lug parts. Eventually I would like to do a Sheridan body so that it can have some proper rubber. Until then its nickname will be "The Smoke Machine".(IMG:style_emoticons/default/happy11.gif) Scott |
|
|
|
| fat73 |
Jul 18 2008, 07:15 AM
Post
#165
|
|
W9R1 Group: Members Posts: 244 Joined: 7-May 05 From: tampa,fl Member No.: 4,043 Region Association: South East States |
QUOTE(Amenson @ Jul 17 2008, 08:35 PM) QUOTE(Zaney @ Jul 17 2008, 05:10 PM) Are you going to install flares on your car? What size wheels/tires do you intend to run under all that torque? Thanks, Nate 205's...maybe 215's on 2.0 Fuchs, this is my trans preservation plan. I have a set of 7x15 phone dials for when I put in the 5 lug parts. Eventually I would like to do a Sheridan body so that it can have some proper rubber. Until then its nickname will be "The Smoke Machine".(IMG:style_emoticons/default/happy11.gif) Scott My car has the 03 WRX engine with 295/35 Toyo Proxes on 18"x11" s and it will still light 'em up. When you start hard on one of these and get the tires spinning it's almost instant red-line banging off the rev-limiter. (IMG:style_emoticons/default/driving.gif) (IMG:style_emoticons/default/blink.gif) Hope you got a good tranny. Already broke one. It's a blast. Ed aka W9R1 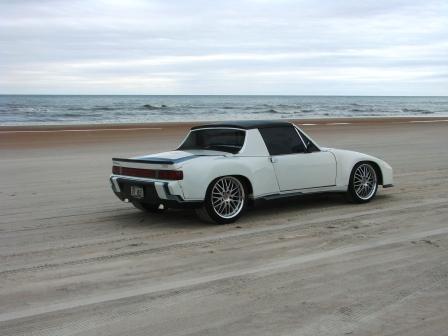 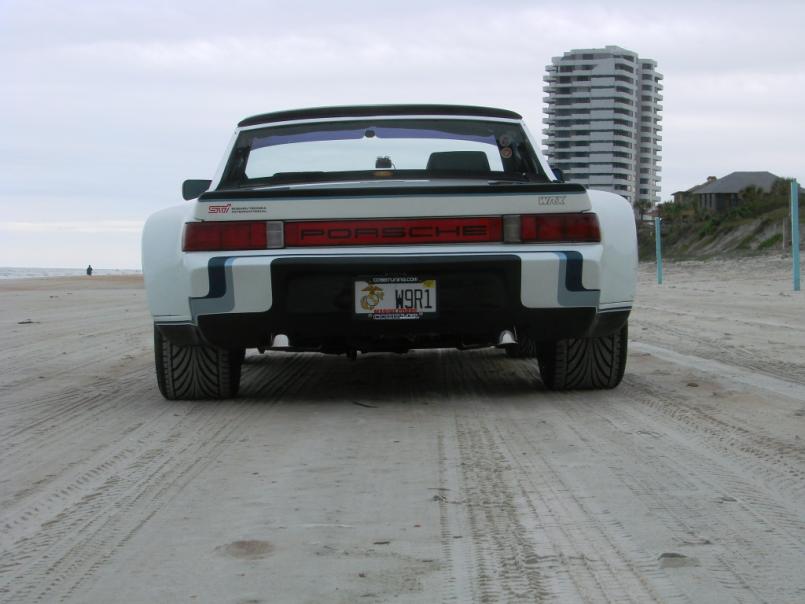 |
|
|
|
| Amenson |
Jul 20 2008, 07:55 PM
Post
#166
|
|
That's opposite lock!! Group: Members Posts: 645 Joined: 27-May 05 From: Dublin, OH Member No.: 4,154 Region Association: None |
QUOTE(fat73 @ Jul 18 2008, 05:15 AM) Hope you got a good trany. Already broke one. It's a blast. The 901 in the car is solid with a recent refresh. I just need to remind myself to be mindful when in 1st. I made some progress this weekend. Mounted the air filter, actually a one of my buddies came over and did this so that I could work on other things: 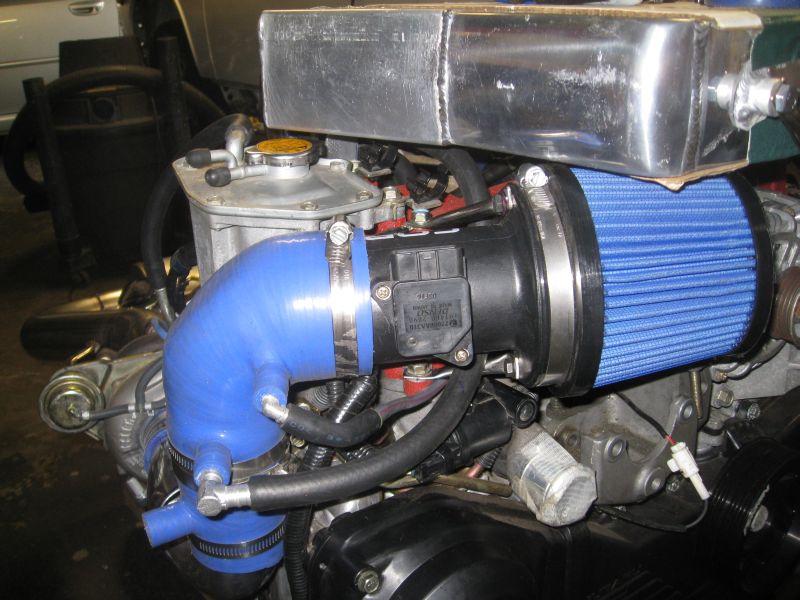 Made the tube from the turbo to the air filter silicone piece. This is the first "real" aluminum part that I welded. Notice the fairly tidy practice weld in the background. Now notice how not tidy the weld is on the part. Welding a odd shape with varying wall thickness and not perfect gaps is considerably more challenging then welding straight test tube. Oh well, not bad for my first part. It is strong and leak free. Hopefully I get better as the parts become more visible. 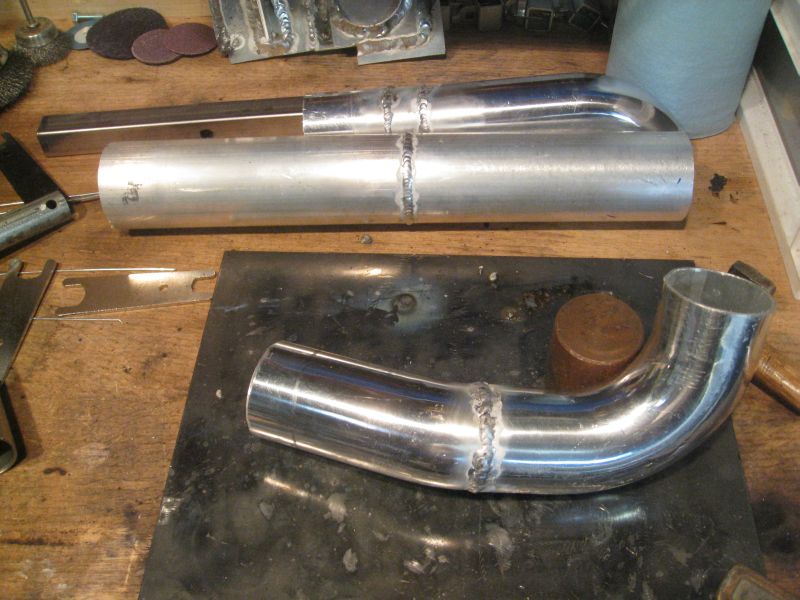 Fits perfectly!! 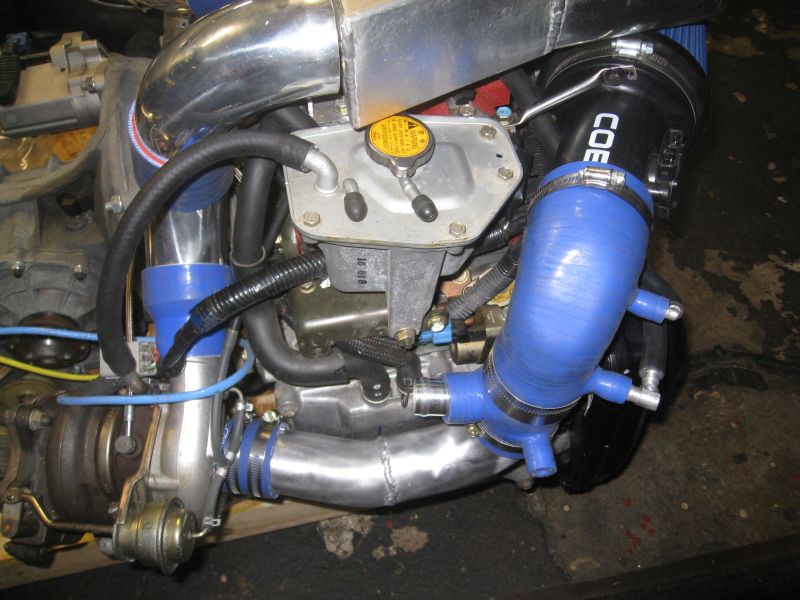 I also started plumbing the remote oil filter. I need to drill another hole in the engine mount for the remote filter housing but can't until I get the engine off of the cart. Eventually it will be straight. 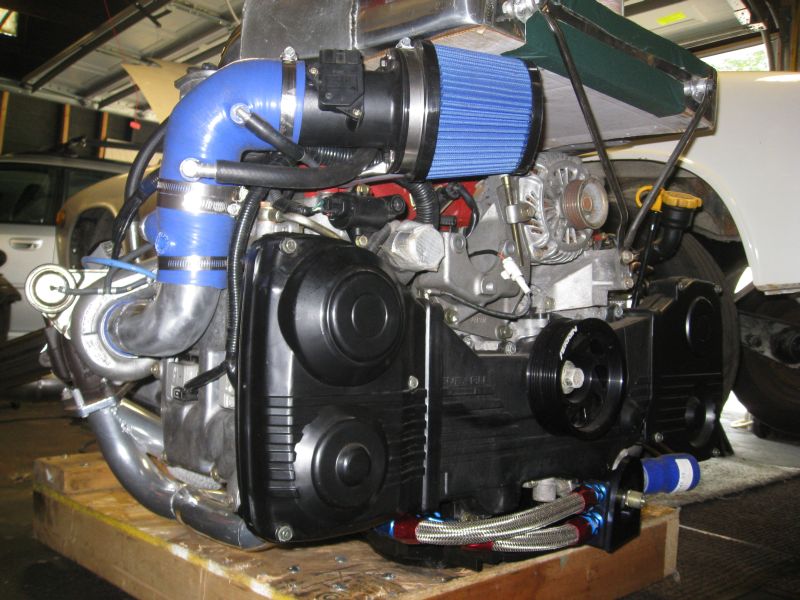 Scott |
|
|
|
| Amenson |
Jul 27 2008, 08:10 PM
Post
#167
|
|
That's opposite lock!! Group: Members Posts: 645 Joined: 27-May 05 From: Dublin, OH Member No.: 4,154 Region Association: None |
Well, still not confident enough to weld the tubes to the intercooler yet so I spent much of the garage time this weekend making practice art.
This is a creation made of 3" diameter .065 aluminum tubing, the same stuff as the IC plumbing...almost ready to weld the real thing (IMG:style_emoticons/default/welder.gif) 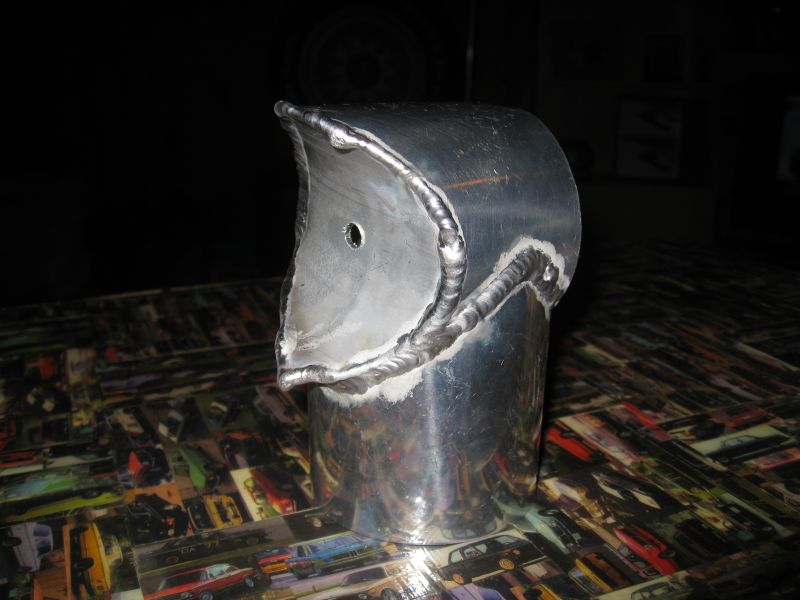 Scott |
|
|
|
| Amenson |
Jul 29 2008, 09:57 PM
Post
#168
|
|
That's opposite lock!! Group: Members Posts: 645 Joined: 27-May 05 From: Dublin, OH Member No.: 4,154 Region Association: None |
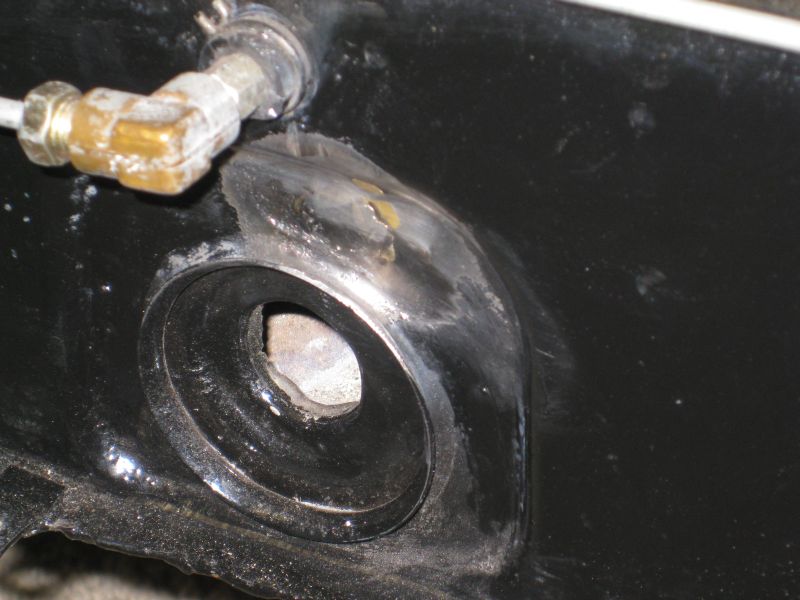
Made another small step tonight. I finally removed the turbo oil return on the head. I could not find any good information on the Subaru sites to I slowly worked it loose with gradually larger tools.
This is what I wanted out: 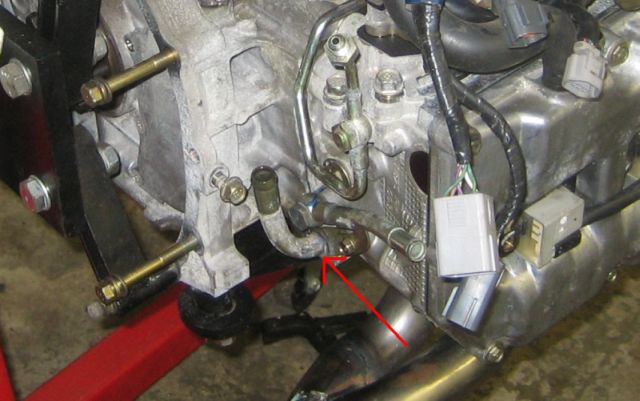 This is what it looks like out: 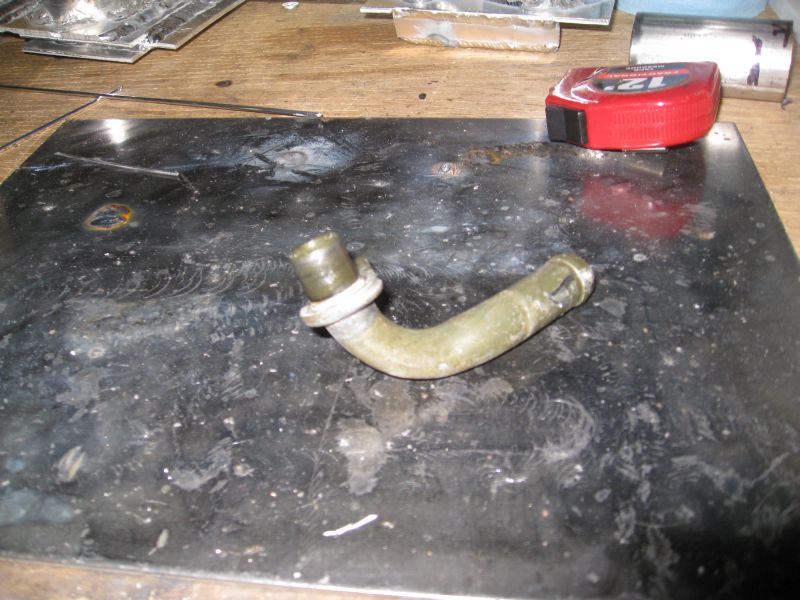 The damn thing was press fit in with a ring of glue for good measure: 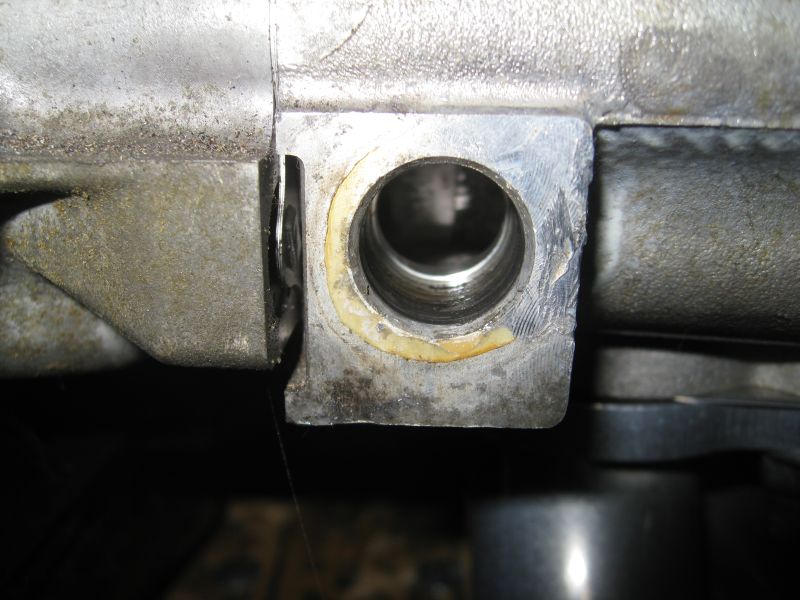 I feel fortunate to get it out without damaging anything. Now I get to modify it (IMG:style_emoticons/default/sawzall-smiley.gif) and put it back together (IMG:style_emoticons/default/welder.gif) so that it points toward the new turbo location. |
|
|
|
| Amenson |
Jul 30 2008, 08:50 PM
Post
#169
|
|
That's opposite lock!! Group: Members Posts: 645 Joined: 27-May 05 From: Dublin, OH Member No.: 4,154 Region Association: None |
Welded up the turbo drain tonight.
Pre-welding: 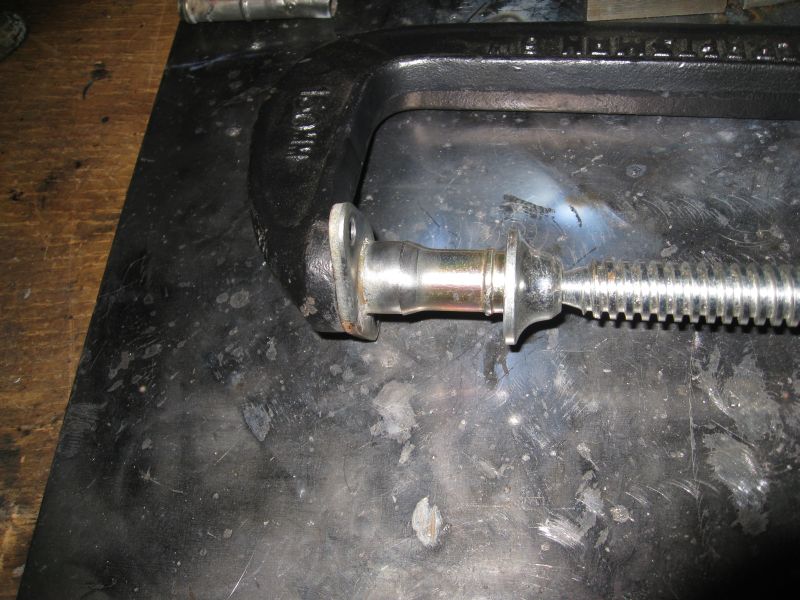 Post welding...steel is so much easier than AL! 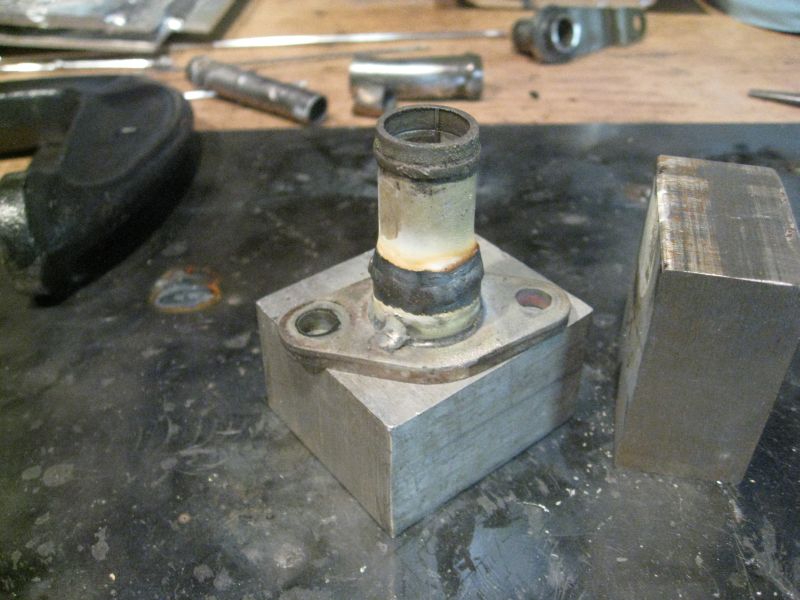 Head side post welding: 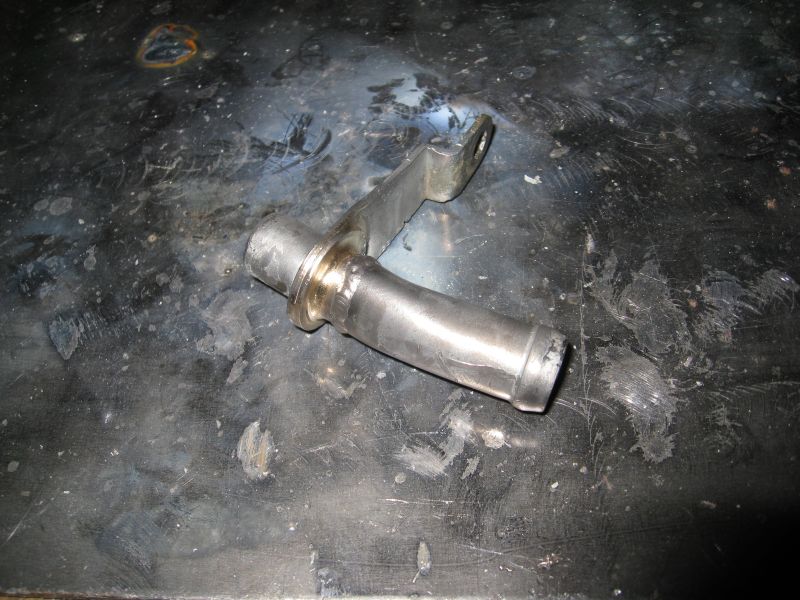 Installed minus tube: 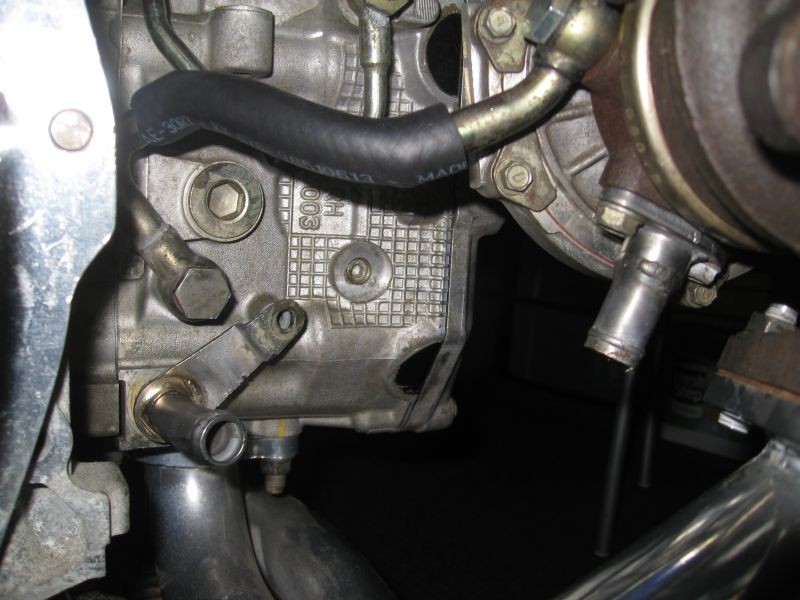 Good night........ 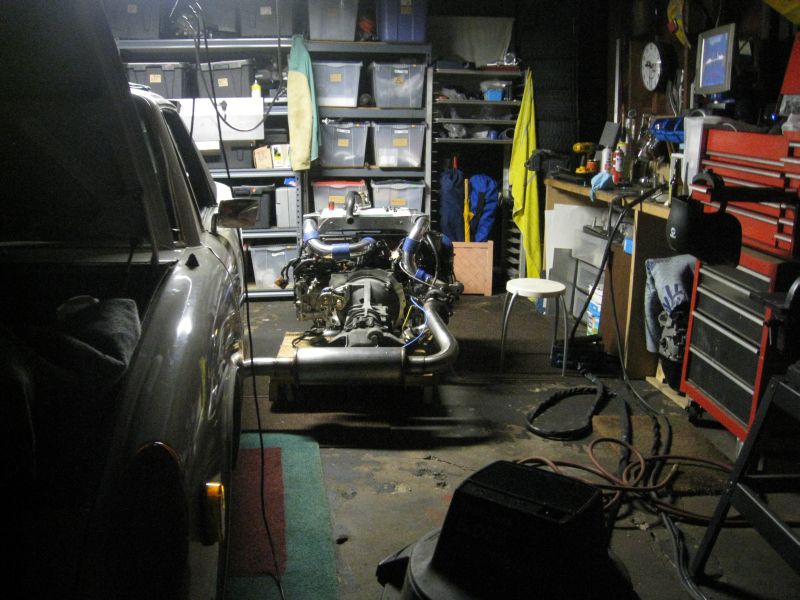 Scott |
|
|
|
| GS Guy |
Jul 31 2008, 04:59 PM
Post
#170
|
|
Member Group: Members Posts: 243 Joined: 8-July 04 From: Columbia, MD Member No.: 2,325 Region Association: North East States |
Looking good Scott!
I may use some of your ideas if my turbo oil drain is a bit off optimum angle. Now I want to see your shift linkage solutions! Especially with the Small Car mount. Jeff |
|
|
|
| Amenson |
Jul 31 2008, 05:47 PM
Post
#171
|
|
That's opposite lock!! Group: Members Posts: 645 Joined: 27-May 05 From: Dublin, OH Member No.: 4,154 Region Association: None |
QUOTE(GS Guy @ Jul 31 2008, 02:59 PM) Looking good Scott! I may use some of your ideas if my turbo oil drain is a bit off optimum angle. Now I want to see your shift linkage solutions! Especially with the Small Car mount. Jeff Jeff, Hopefully you do not have to remove the drain...what a huge pain in the ass. As for the shift linkage, stock works just fine! 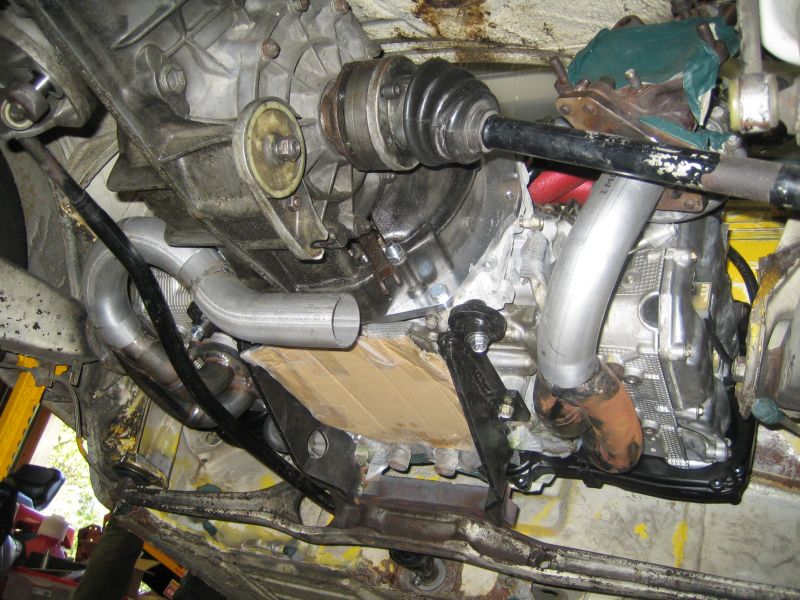 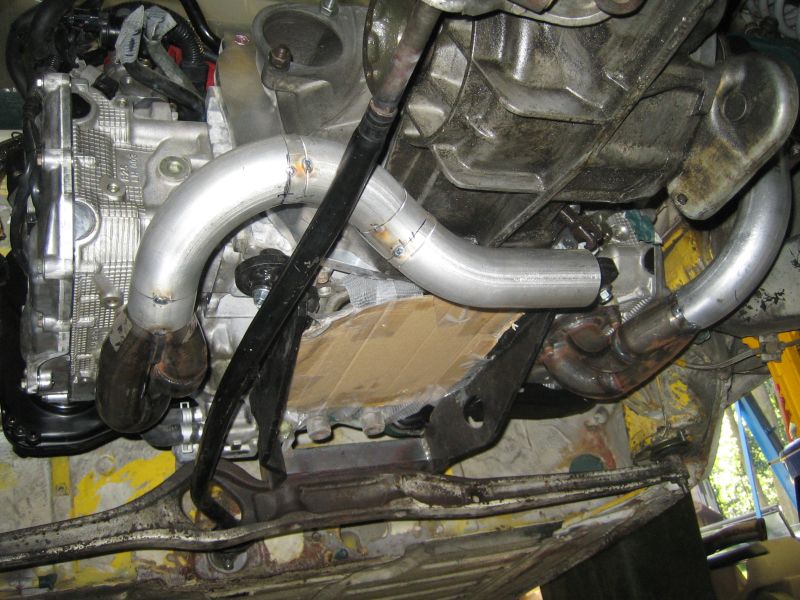 I had to dig through a load of old project pictures to find these. It reminded me how far I have come and renewed my sense of accomplishment. Makes the the first drive seem not so far off (IMG:style_emoticons/default/piratenanner.gif) Scott |
|
|
|
| fat73 |
Jul 31 2008, 08:17 PM
Post
#172
|
|
W9R1 Group: Members Posts: 244 Joined: 7-May 05 From: tampa,fl Member No.: 4,043 Region Association: South East States |
Ahhhhh what a beautiful sight.....Makes you feel good don't it? Great work...Ed aka W9R1 |
|
|
|
| GS Guy |
Aug 2 2008, 07:56 AM
Post
#173
|
|
Member Group: Members Posts: 243 Joined: 8-July 04 From: Columbia, MD Member No.: 2,325 Region Association: North East States |
Rats,
That stock shift rod does fit nice! No such luck on my build - I've got frame and suspension members in-line with the shift rod - almost as if they'd been designed to be in the way! I've noticed other cooling line connections seemed to be "press fit" into the various engine components too - such as the little lines on the throttle body heater, the cockpit heater supply connection into the water crossover on top of the engine. How are you planning to seal that turbo drain back up? Locktite? I may have to do someting similar to the turbo drain fittings? Haven't yet permanantly located the turbo - but the block connection "may" be OK. Still looking for a bolt-on NPT (or similar) adapter for the turbo drain - but may have to make something custom like yours. Not much room for pipe fittings under there - especially in the large sizes required for a good drain. Car is lookig great Scott! Jeff |
|
|
|
| jimkelly |
Aug 2 2008, 08:21 AM
Post
#174
|
|
Delaware USA Group: Members Posts: 4,969 Joined: 5-August 04 From: Delaware, USA Member No.: 2,460 Region Association: MidAtlantic Region |
wow - awesome work - suby sterring column - sweet.
i love the friendly one ups-man-ship on this board - just when you think you've seen the most amazing work - someone else raises the bar. for me - i am pretty proud for weeks - when i install a set of chrome caps on my wheels valve stems - but you guys - wtf! (IMG:style_emoticons/default/smoke.gif) |
|
|
|
| Amenson |
Aug 3 2008, 07:55 PM
Post
#175
|
|
That's opposite lock!! Group: Members Posts: 645 Joined: 27-May 05 From: Dublin, OH Member No.: 4,154 Region Association: None |
QUOTE(GS Guy @ Aug 2 2008, 05:56 AM) I've noticed other cooling line connections seemed to be "press fit" into the various engine components too - such as the little lines on the throttle body heater, the cockpit heater supply connection into the water crossover on top of the engine. How are you planning to seal that turbo drain back up? Locktite? Car is lookig great Scott! Jeff I have not figured out what I will use to seal the oil return. I thought about Loctite but am concerned that it would never come apart again. The oil return is not pressurized so I may just put some high temp RTV type sealant there. Do you have an update progress thread of your project anywhere? The yahoo link you sent a while ago is down. QUOTE(jimkelly @ Aug 2 2008, 06:21 AM) i love the friendly one ups-man-ship on this board - just when you think you've seen the most amazing work - someone else raises the bar. Not so much one ups-man-ship...just the advantage of knowing how other people have done things so that you can see what worked and what did not. Made some small progress yesterday. Mounted the crank case breather tube and boost control solenoid. Both are held in place with nutserts! 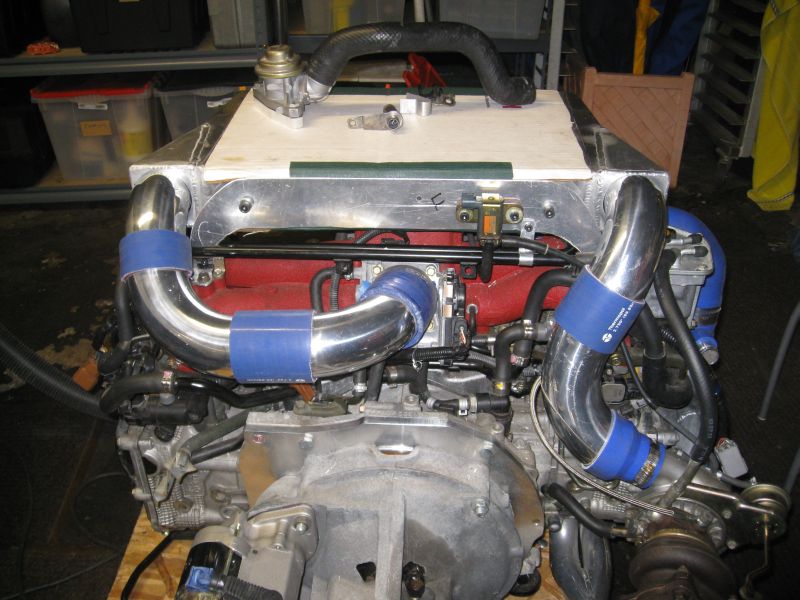 Probably will not have any updates for a couple of weeks. I am getting married next weekend (IMG:style_emoticons/default/wub.gif) and the Woodward Dream Cruise is the weekend following that. Scott |
|
|
|
| Zaney |
Aug 3 2008, 08:01 PM
Post
#176
|
|
Deuchland en der Haus Group: Members Posts: 461 Joined: 1-March 04 From: Engine 11 Redmond, WA Member No.: 1,738 Region Association: Pacific Northwest |
Scott,
Congrats ahead of time for next weekend! (IMG:style_emoticons/default/drunk.gif) The car and workmanship is awesome as usual! (IMG:style_emoticons/default/driving.gif) Cheers to you and the MRS. |
|
|
|
| Amenson |
Aug 24 2008, 09:12 PM
Post
#177
|
|
That's opposite lock!! Group: Members Posts: 645 Joined: 27-May 05 From: Dublin, OH Member No.: 4,154 Region Association: None |
Made it through the wedding!! Everything went well and nobody died on the hike in the mountains, ropes course, rafting trip or any of the late nights out (IMG:style_emoticons/default/beerchug.gif)
My beautiful bride and I, freshly married!!  Driving to the reception the '39 Rolls Royce 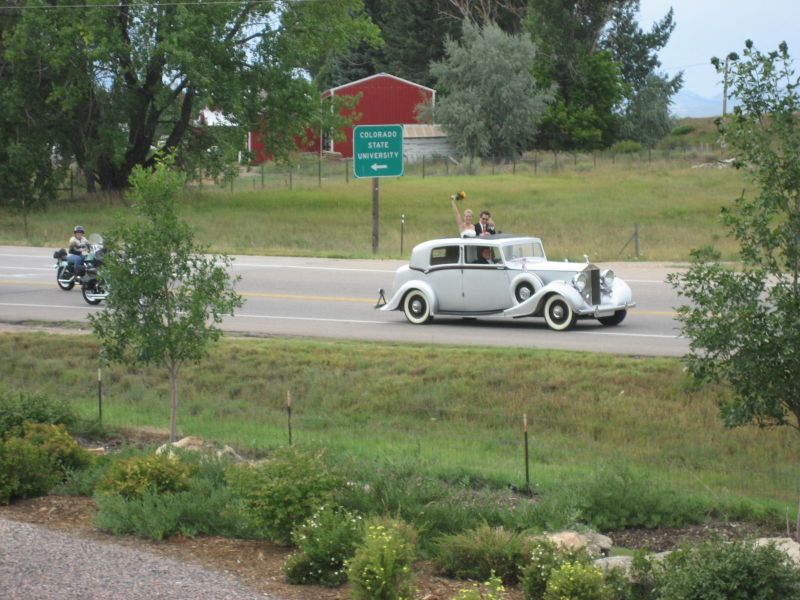 Celebrating with a nice Cab and a Cohiba. The Cohiba is from Cuba thanks to my brother in law from London. And my custom matte finish tungsten carbide ring.  Now back working on the PorSTi... |
|
|
|
| Amenson |
Aug 24 2008, 09:12 PM
Post
#178
|
|
That's opposite lock!! Group: Members Posts: 645 Joined: 27-May 05 From: Dublin, OH Member No.: 4,154 Region Association: None |
Filled in one of the heater control tube holes.
 Removed a load of paint from the driver's compartment.  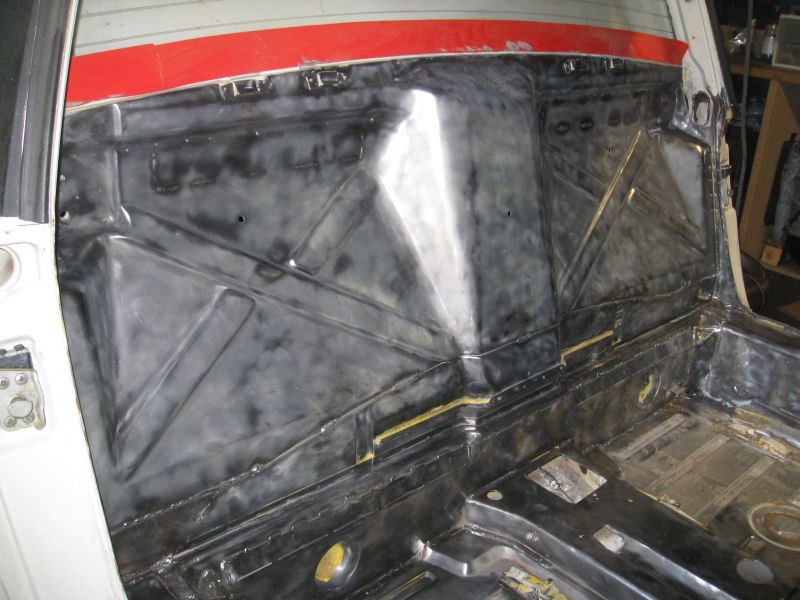 Welded in reinforcements for the shoulder Harness'. 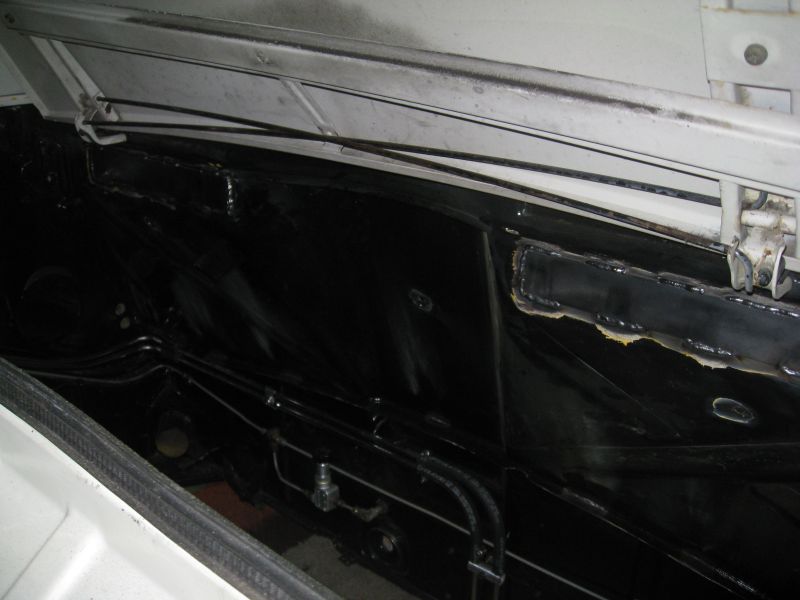 Picked up a welding table and a spot welder. (IMG:style_emoticons/default/welder.gif) 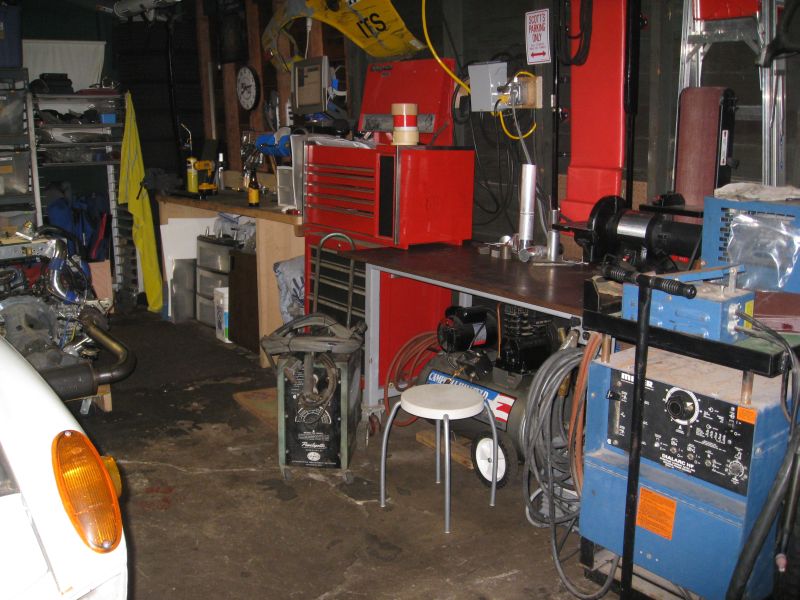 Scott |
|
|
|
| Slider |
Sep 2 2008, 05:30 PM
Post
#179
|
|
Problems are like cockroaches you find 1 and theres a 100 more Group: Members Posts: 223 Joined: 11-March 07 From: Fort Collins Colorado Member No.: 7,591 Region Association: Rocky Mountains |
Cool.. you got hitched in Fort Collins?
QUOTE(Amenson @ Aug 24 2008, 09:12 PM) Made it through the wedding!! Everything went well and nobody died on the hike in the mountains, ropes course, rafting trip or any of the late nights out (IMG:style_emoticons/default/beerchug.gif) My beautiful bride and I, freshly married!! Driving to the reception the '39 Rolls Royce Celebrating with a nice Cab and a Cohiba. The Cohiba is from Cuba thanks to my brother in law from London. And my custom matte finish tungsten carbide ring. Now back working on the PorSTi... |
|
|
|
| Amenson |
Sep 4 2008, 07:20 PM
Post
#180
|
|
That's opposite lock!! Group: Members Posts: 645 Joined: 27-May 05 From: Dublin, OH Member No.: 4,154 Region Association: None |
QUOTE(Slider @ Sep 2 2008, 03:30 PM) Cool.. you got hitched in Fort Collins? Of course, where else??? (IMG:style_emoticons/default/biggrin.gif) My wife got her undergrad at Colorado State. I had never visited Colorado before meeting her...now I can't spend enough time there. Great State, great beer!! (IMG:style_emoticons/default/drunk.gif) |
|
|
|
|
2 User(s) are reading this topic (2 Guests and 0 Anonymous Users)
0 Members:

|
Lo-Fi Version | Time is now: 26th October 2025 - 05:01 PM |
Invision Power Board
v9.1.4 © 2025 IPS, Inc.