|
|
|
Porsche, and the Porsche crest are registered trademarks of Dr. Ing. h.c. F. Porsche AG.
This site is not affiliated with Porsche in any way. Its only purpose is to provide an online forum for car enthusiasts. All other trademarks are property of their respective owners. |
|
|


| type47 |
 Oct 10 2010, 09:44 PM Oct 10 2010, 09:44 PM
Post
#1
|
|
Viermeister  Group: Members Posts: 4,254 Joined: 7-August 03 From: Vienna, VA Member No.: 994 Region Association: MidAtlantic Region |
I did a rear bumper swap; I moved the chrome bumper on the Phoenix Red car and installed it on my new project car and installed a Getty fiberglass bumper on the Phoenix Red car. I'm fortunate to know Rod Rowland (root) who knows how to do just about everything there is a need to know! Anyway, he came over and we did the install. No instructions came with the bumper; when I called Getty on the phone, the person I ordered the bumper from gave me instructions which I relayed to Rod. The bumper comes with fiberglass mounting brackets which need to be fitted to the bumper.
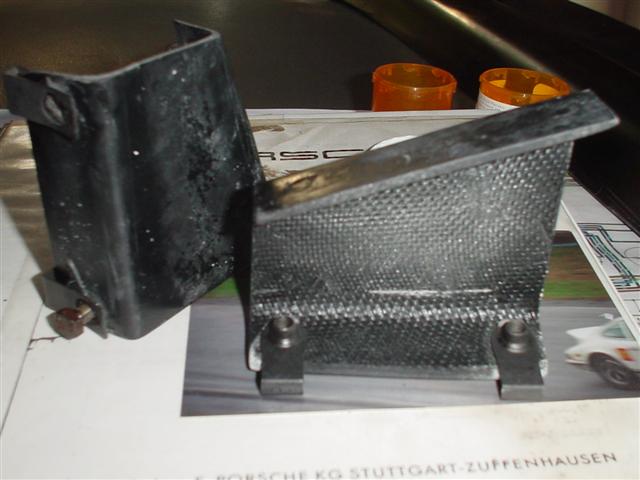 The only problem I see with the brackets is that they use a 6mm bolt for mounting whereas the chrome bumper uses an 8mm. The difference in the size of the bolt hole in the body made us use fender washers and rubber washers to shim and cushion the body. We mounted the brackets to the car so that we could fit the bumper to the car. 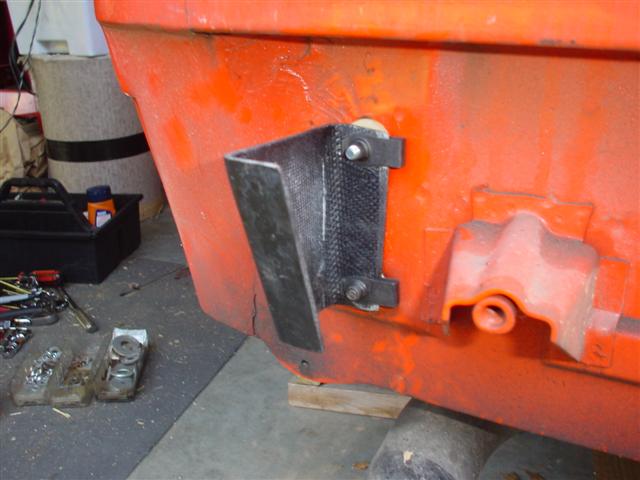 We used a Dremel to trim the bumper to fit the car. The bumper was advertised as a 914-6 GT rear bumper and my car is a 73 so I don't know if there was any difference in the GT application on a 73 but we had to trim the bumper to fit. 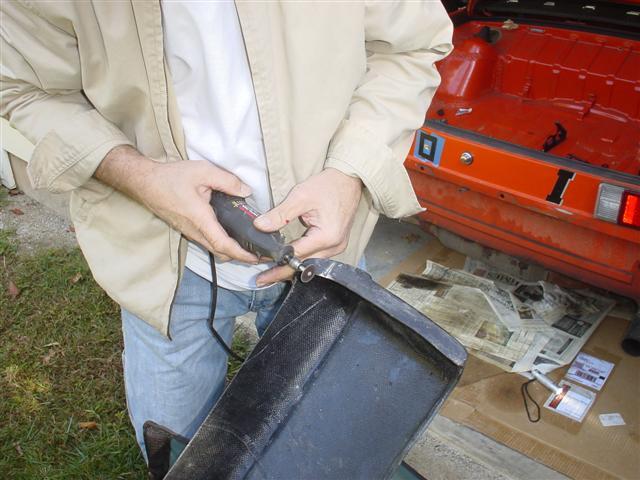 Next, Tiger hair Bondo was used to locate the position of the bracket on the inside of the bumper. Once the bumper was trimmed to fit the car, we mixed the Tiger Hair Bondo and smeared it on the inside of the bumper where the mounting bracket would be located on the inside of the bumper. Then we taped the bumper to the car and let the Bondo dry.  Once the Bondo was dry, I thought the bracket was pretty solidly mounted to the bumper. 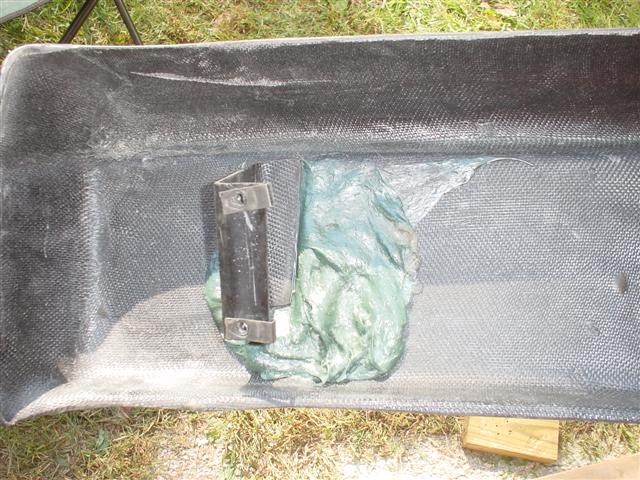 Next we fiberglassed the bracket for reinforcement. 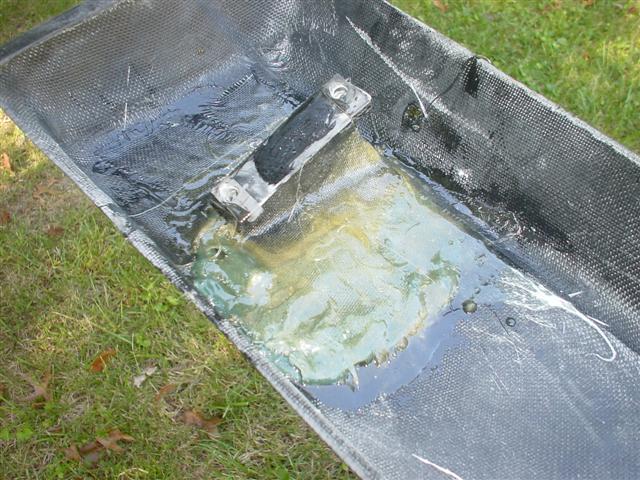 After the fiberglass dried, we mounted the bumper. 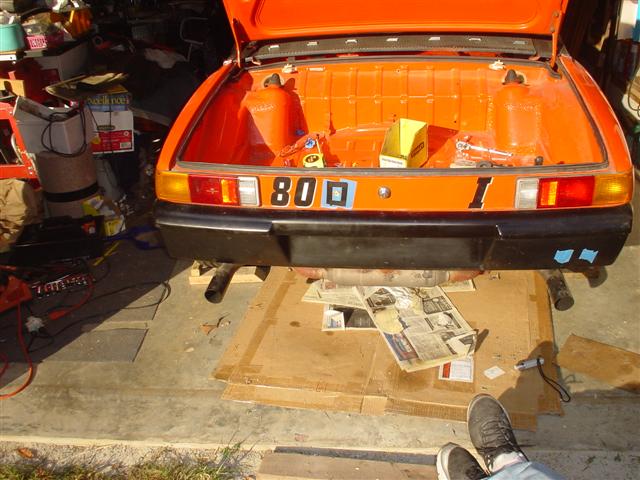 I thought it looked pretty good. I didn't determine the weight difference but I'd guess it's at least 25 pounds. The chrome bumper is in good condition with a good bumper top, so that bumper was bolted on the project car with 8mm x 40mm bolts per the PET. 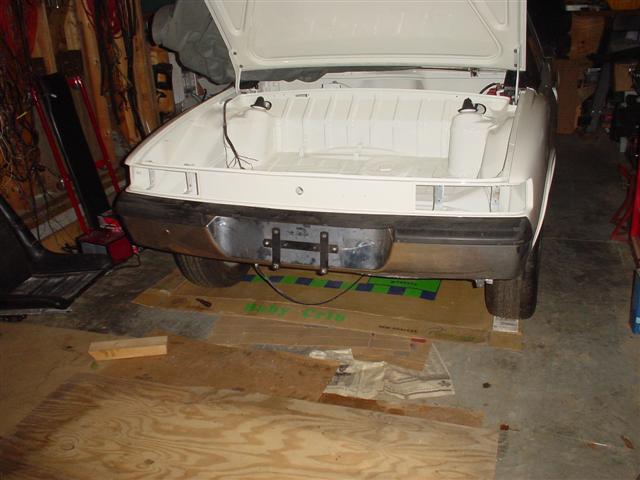 Total cost including bumper, shipping, mounting material was about $300. All that is left is to mount the license plate. |
   |

 
|
Posts in this topic
 type47 Fiberglass bumper install Oct 10 2010, 09:44 PM
 type47 Thanks Rod!
Oct 10 2010, 09:53 PM jaybird840 Nice writeup! Thanks! Oct 10 2010, 10:13 PM nsr-jamie Cool!!, don't forget your license plat... Oct 11 2010, 08:50 AM
type47 Thanks Rod!
Oct 10 2010, 09:53 PM jaybird840 Nice writeup! Thanks! Oct 10 2010, 10:13 PM nsr-jamie Cool!!, don't forget your license plat... Oct 11 2010, 08:50 AM brant If my memory serves...
its closer to 11lbs over th... Oct 11 2010, 09:07 AM
brant If my memory serves...
its closer to 11lbs over th... Oct 11 2010, 09:07 AM  |
1 User(s) are reading this topic (1 Guests and 0 Anonymous Users)
0 Members:

|
Lo-Fi Version | Time is now: 31st May 2024 - 05:46 PM |
Invision Power Board
v9.1.4 © 2024 IPS, Inc.