|
|
|
Porsche, and the Porsche crest are registered trademarks of Dr. Ing. h.c. F. Porsche AG.
This site is not affiliated with Porsche in any way. Its only purpose is to provide an online forum for car enthusiasts. All other trademarks are property of their respective owners. |
|
|

  |

| sean_v8_914 |
 Apr 19 2011, 11:26 PM Apr 19 2011, 11:26 PM
Post
#21
|
|
Chingon 601  Group: Members Posts: 4,011 Joined: 1-February 05 From: San Diego Member No.: 3,541 |
I used to tie a guitar string onto two pc of broom handle or just wrap each end around a screw driver untill the Matco guy sold me this nifty tool for $30 bucks
Attached thumbnail(s) 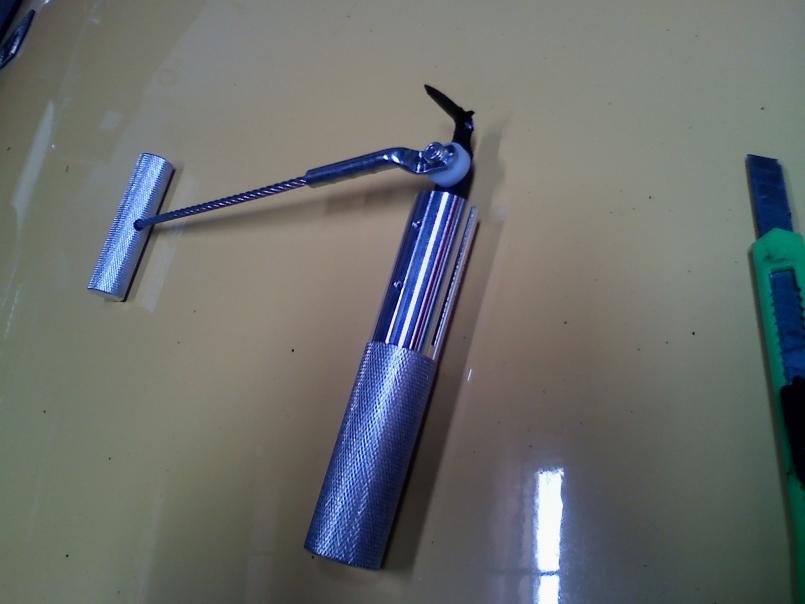
|
   |

 
|
| sean_v8_914 |
Apr 19 2011, 11:28 PM
Post
#22
|
|
Chingon 601 Group: Members Posts: 4,011 Joined: 1-February 05 From: San Diego Member No.: 3,541 |
here is a pic of the trim hilding clip. you only need to cut the small round pin in the center
Attached thumbnail(s) 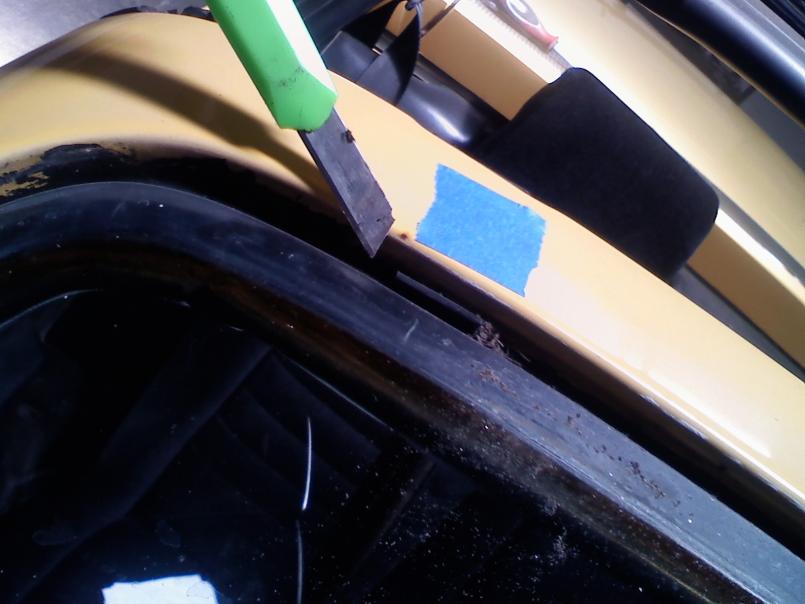
|
|
|
|
| sean_v8_914 |
Apr 19 2011, 11:29 PM
Post
#23
|
|
Chingon 601 Group: Members Posts: 4,011 Joined: 1-February 05 From: San Diego Member No.: 3,541 |
A pillar clip locations
Attached thumbnail(s) 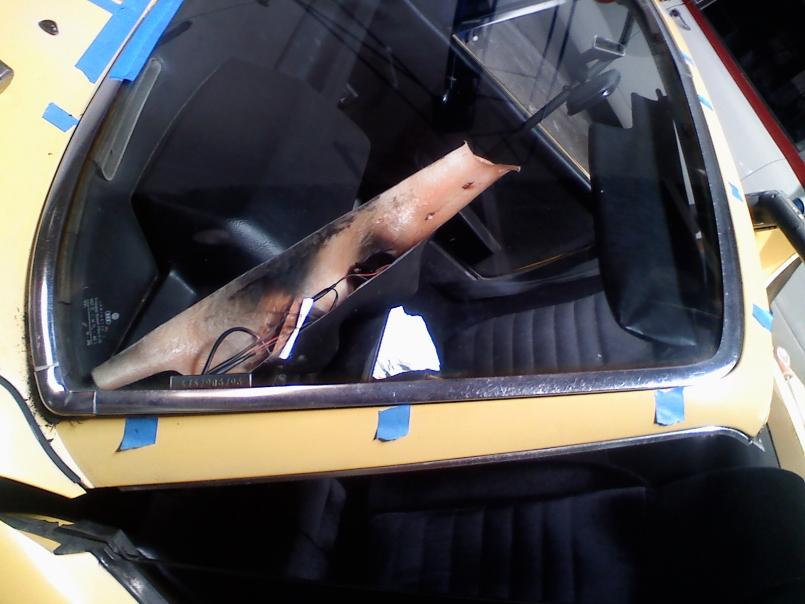
|
|
|
|
| sean_v8_914 |
Apr 19 2011, 11:30 PM
Post
#24
|
|
Chingon 601 Group: Members Posts: 4,011 Joined: 1-February 05 From: San Diego Member No.: 3,541 |
bottom trim clip locations
Attached thumbnail(s) 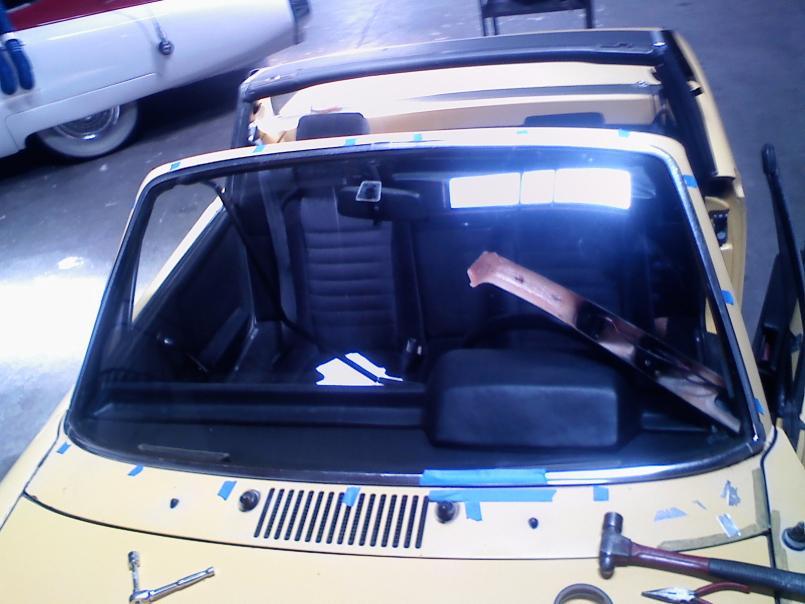
|
|
|
|
| sean_v8_914 |
Apr 19 2011, 11:32 PM
Post
#25
|
|
Chingon 601 Group: Members Posts: 4,011 Joined: 1-February 05 From: San Diego Member No.: 3,541 |
trim should just fall out in one pc still connected
Attached thumbnail(s) 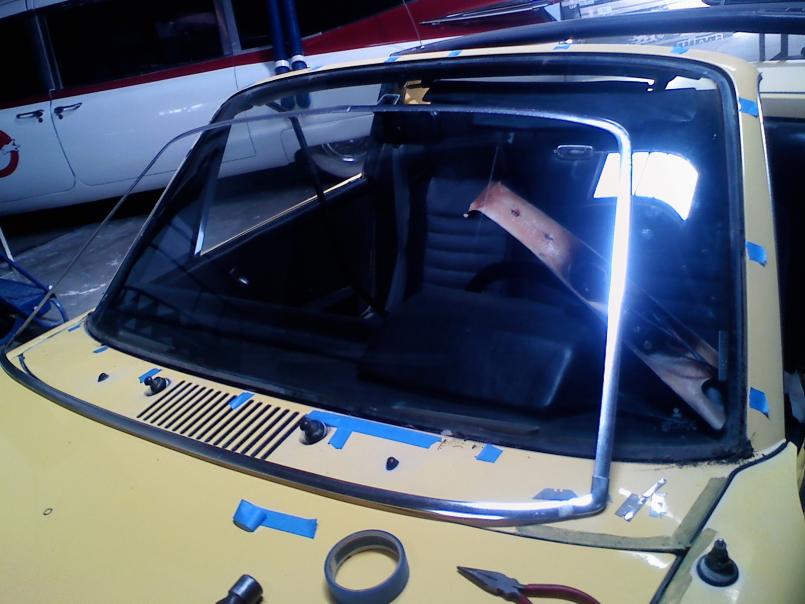
|
|
|
|
| sean_v8_914 |
Apr 19 2011, 11:35 PM
Post
#26
|
|
Chingon 601 Group: Members Posts: 4,011 Joined: 1-February 05 From: San Diego Member No.: 3,541 |
here is how that window cutting out tool works. your other hand goes on teh round vertical handle to hold it up straight as teh other hand pulls the "T" handle along the glue bead
putting the car in teh sun for a frw hours to get the butyl soft makes it easier Attached thumbnail(s) 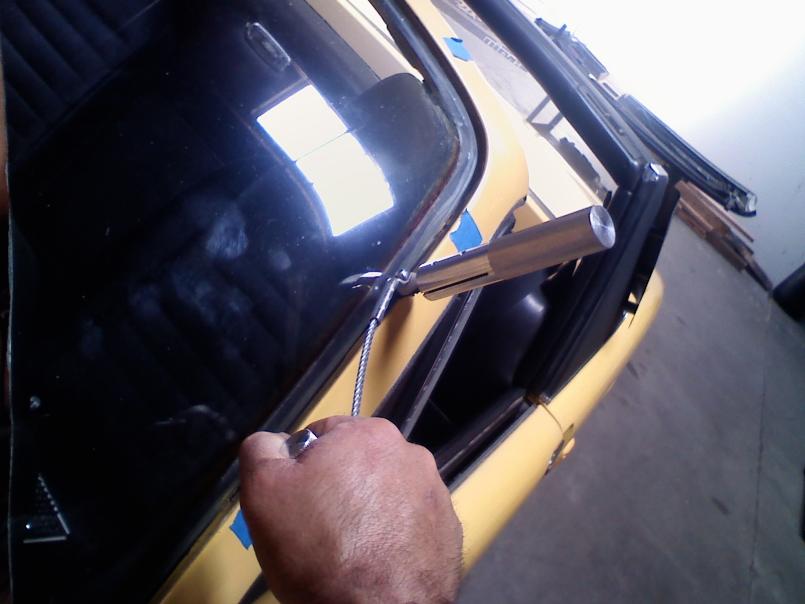
|
|
|
|
| sean_v8_914 |
Apr 19 2011, 11:37 PM
Post
#27
|
|
Chingon 601 Group: Members Posts: 4,011 Joined: 1-February 05 From: San Diego Member No.: 3,541 |
do not nick the glss or try to pull teh window out untill you have completely cut away teh butyl rubber seal bead. 914 windsheilds are very easy to crack. a chip on teh edge will start to crack if the glass is flexed
Attached thumbnail(s) 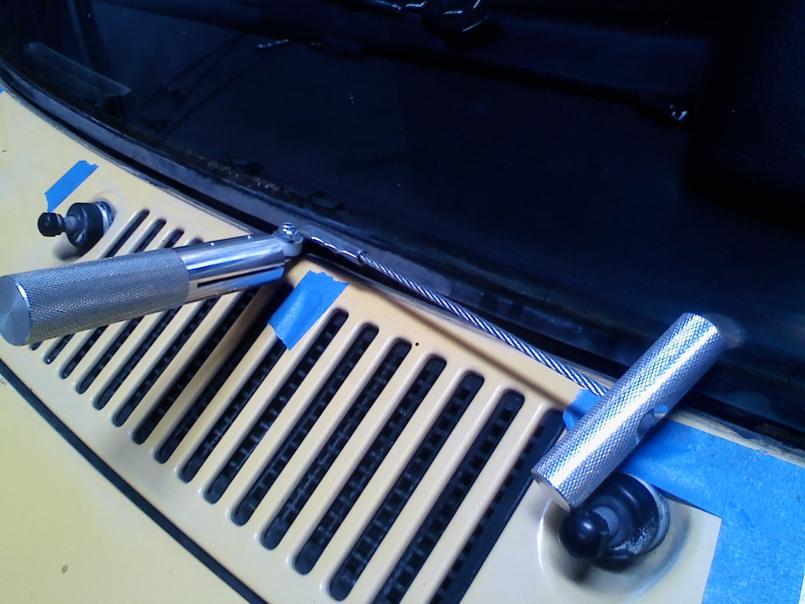
|
|
|
|
| sean_v8_914 |
Apr 19 2011, 11:58 PM
Post
#28
|
|
Chingon 601 Group: Members Posts: 4,011 Joined: 1-February 05 From: San Diego Member No.: 3,541 |
wire wheel...went a little crazy.I pick away at teh cowl gap fairly deep to remove rusty flakes first
the deep pitting rust must be neutrilized. I use SEM rust mort first. let it set on bare metal fro a day. keep it wet and out of teh sun. DO NOT ALLOW IT TO DRY. If you want to stop for teh day, wipe it off with a damp cloth. once teh rust has turned black deep into the pits, i switch to Ospho or PPG DX 530. leave this on all night. teh metal will look dull grey when it is well etched then wipe with damp (almost dry) cloth. blow dry, let dry for a day, use some sunshine now is OK. do not be tempted to grind down rust to clean metal. it will be too thin. let the chemicals do their job POR 15 is applied ONLY on teh rough areas of rust pitting. POR 15 does not stick to clean metal but the etching process described above will make it stick if you get a little sloppy with its spread. Attached thumbnail(s) 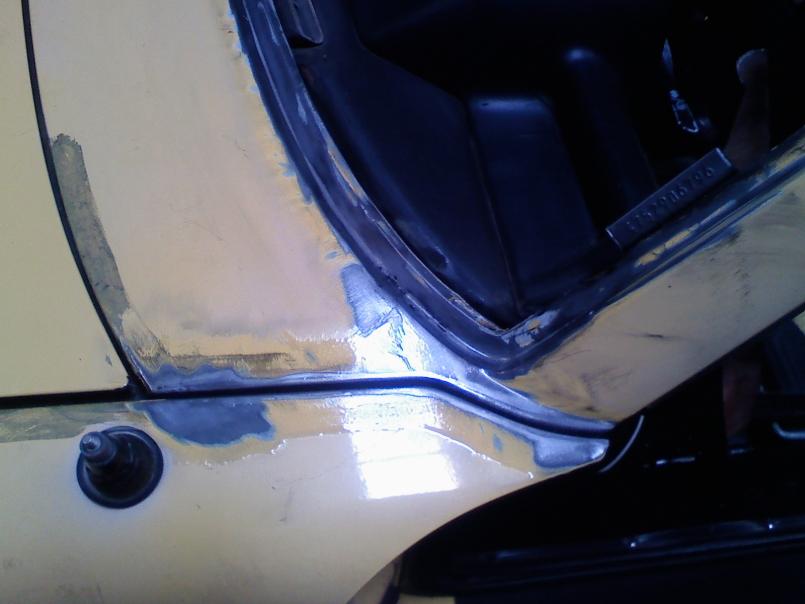
|
|
|
|
| sean_v8_914 |
Apr 20 2011, 12:01 AM
Post
#29
|
|
Chingon 601 Group: Members Posts: 4,011 Joined: 1-February 05 From: San Diego Member No.: 3,541 |
for some reason teh photos make it all look so clean. it was rusty and nasty. the stuff in teh pitted pores is what makes it bubble up in a year. I hate to see that crap.
Attached thumbnail(s) 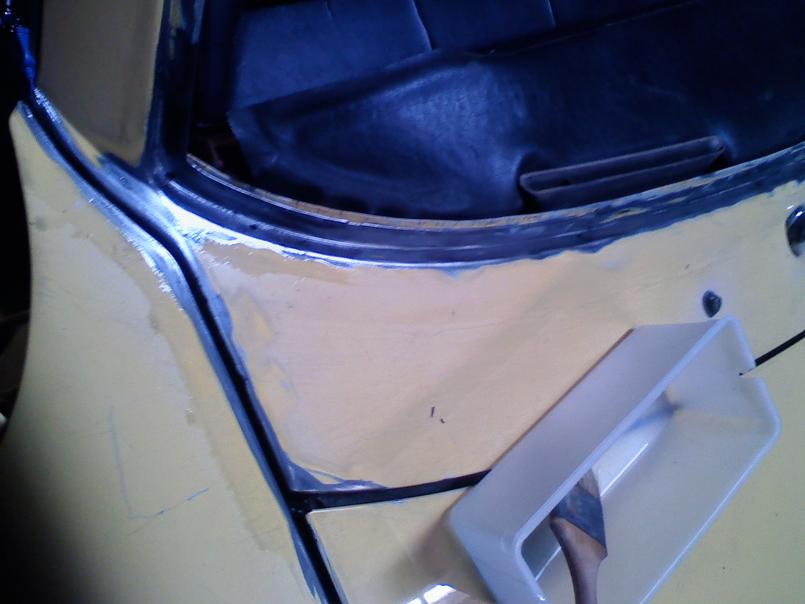
|
|
|
|
| sean_v8_914 |
Apr 20 2011, 12:06 AM
Post
#30
|
|
Chingon 601 Group: Members Posts: 4,011 Joined: 1-February 05 From: San Diego Member No.: 3,541 |
tape lines and over spray are so skanky. there are two 10mm bolts. one on each side of the ventilation box. remove then and you can drop the box and slip in a cardboard mask. the black mesh will make the fresh coat of yellow POP. I removed teh window squirters and wiper hardware. it really takes less time than sanding around it and masking it off.
Attached thumbnail(s) 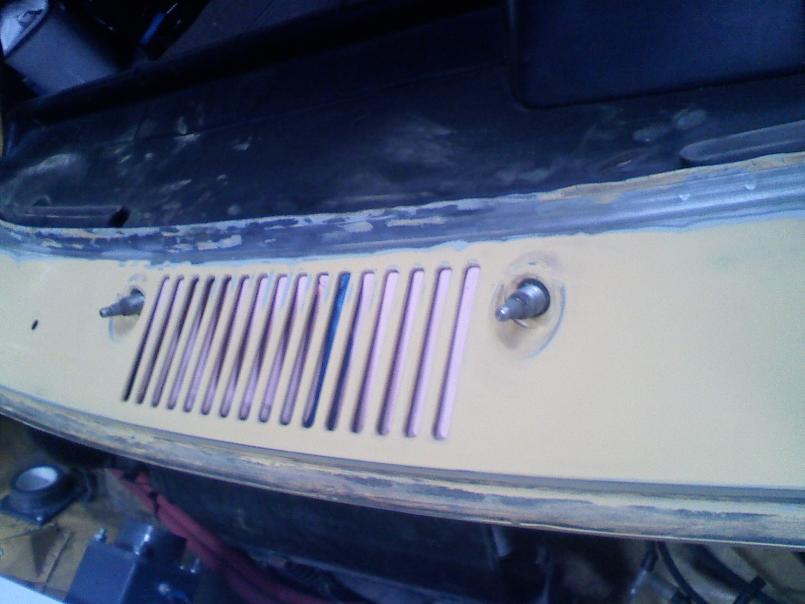
|
|
|
|
| sean_v8_914 |
Apr 20 2011, 12:11 AM
Post
#31
|
|
Chingon 601 Group: Members Posts: 4,011 Joined: 1-February 05 From: San Diego Member No.: 3,541 |
POR 15 is only on the rough metal. I did use it heavily in eh cowl crack. some cars need the cowl gap completely dug out. if you see rust or deformation of the cowl gap seam sealer from inside teh door jamb then you need to remove it to kill that rust also. Peter's car is OK so teh long 3 day soak of chemicals shoujld kill it all without removing the buttom of this seam
Attached thumbnail(s) 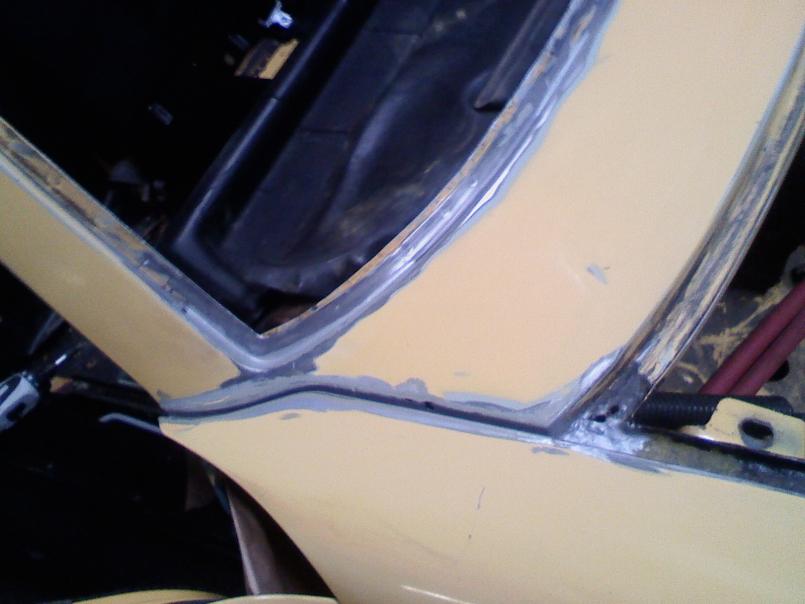
|
|
|
|
| sean_v8_914 |
Apr 20 2011, 12:12 AM
Post
#32
|
|
Chingon 601 Group: Members Posts: 4,011 Joined: 1-February 05 From: San Diego Member No.: 3,541 |
get under these corners with a mirror and teh above described chemical processes, then POR 15 the underside
POR 15 is nasty, mask any drip zones |
|
|
|
| sean_v8_914 |
Apr 20 2011, 12:15 AM
Post
#33
|
|
Chingon 601 Group: Members Posts: 4,011 Joined: 1-February 05 From: San Diego Member No.: 3,541 |
under teh seal trough rust
little rust incubator. often missed Attached thumbnail(s) 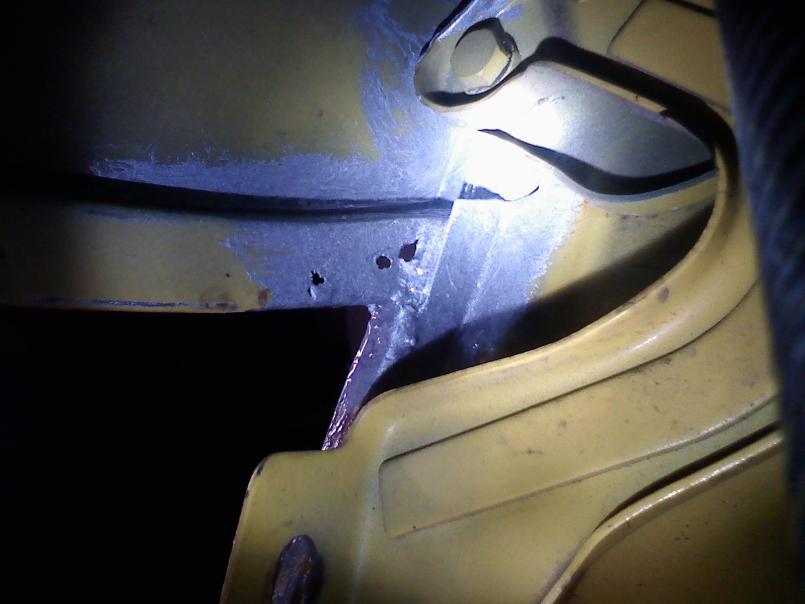
|
|
|
|
| sean_v8_914 |
Apr 20 2011, 12:16 AM
Post
#34
|
|
Chingon 601 Group: Members Posts: 4,011 Joined: 1-February 05 From: San Diego Member No.: 3,541 |
reg
Attached thumbnail(s) 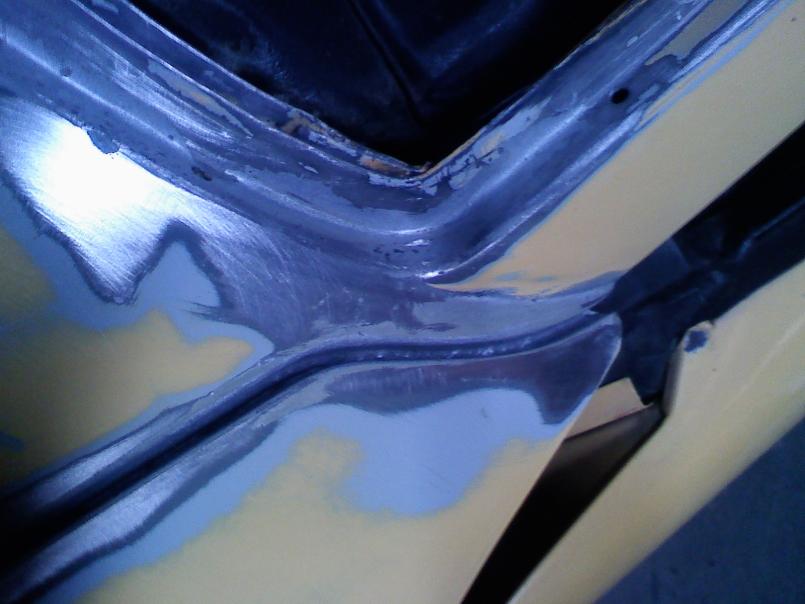
|
|
|
|
| sean_v8_914 |
Apr 20 2011, 12:23 AM
Post
#35
|
|
Chingon 601 Group: Members Posts: 4,011 Joined: 1-February 05 From: San Diego Member No.: 3,541 |
the seal from dash to window was petrified. 914rubber.com sent me a new one.
did I mention that this car is getting all new seals from mikey rubber guy AKA Mark Whitesell since the cowl will be so nice, the rubber seals all new...how could I leave the dash so nasty. remove steering wheel remove dash gauge face with 3 gauges still in place pop the 2 outer gauges from their rubber rings this is to help remove teh dash topper Attached thumbnail(s) 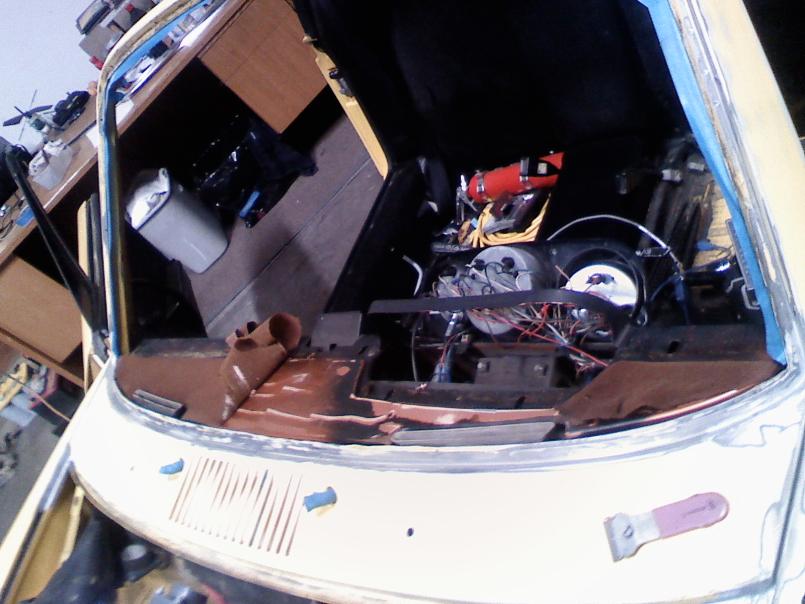
|
|
|
|
| sean_v8_914 |
Apr 20 2011, 12:24 AM
Post
#36
|
|
Chingon 601 Group: Members Posts: 4,011 Joined: 1-February 05 From: San Diego Member No.: 3,541 |
these 2 plastic dash nuts are a bitch. a short 13mm wrench is a blessing here
Attached thumbnail(s) 
|
|
|
|
| sean_v8_914 |
Apr 20 2011, 12:27 AM
Post
#37
|
|
Chingon 601 Group: Members Posts: 4,011 Joined: 1-February 05 From: San Diego Member No.: 3,541 |
sand teh POR 15 with some 220.
then I use Wurth or SEM etching primer on bare metal and over POR 15. Attached thumbnail(s) 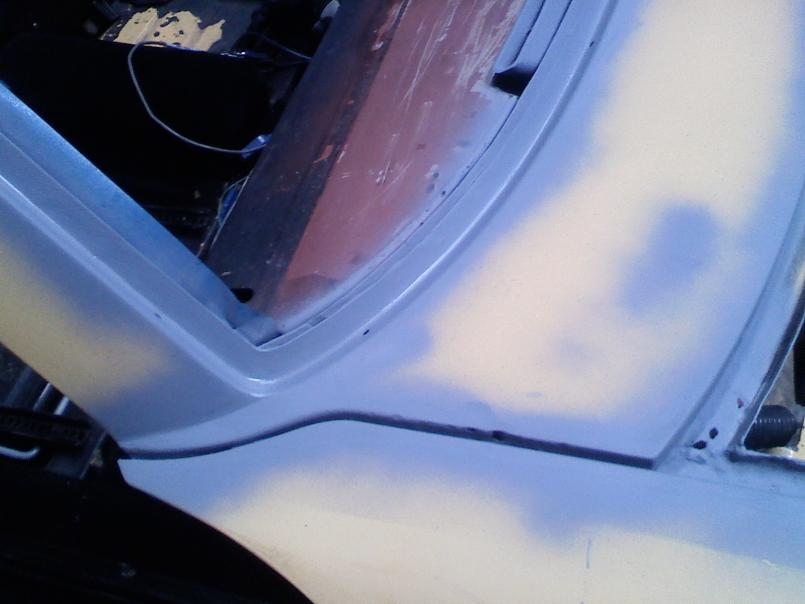
|
|
|
|
| sean_v8_914 |
Apr 20 2011, 12:35 AM
Post
#38
|
|
Chingon 601 Group: Members Posts: 4,011 Joined: 1-February 05 From: San Diego Member No.: 3,541 |
sand etching primer with 220 then I coat with 2 part epoxy primer then sand it again
Attached image(s) 
|
|
|
|
| Rusty |
Apr 20 2011, 06:51 AM
Post
#39
|
|
Wanted: Engine case GA003709 Group: Admin Posts: 7,942 Joined: 24-December 02 From: North Alabama Member No.: 6 Region Association: Galt's Gulch |
Sean, this is GREAT info!! (IMG:style_emoticons/default/beerchug.gif)
|
|
|
|
| sean_v8_914 |
Jun 10 2011, 08:41 AM
Post
#40
|
|
Chingon 601 Group: Members Posts: 4,011 Joined: 1-February 05 From: San Diego Member No.: 3,541 |
sand epoxy smoooooth with 320. stay away from edges. do not sand thru. you must go back and add primer if you go thru.
I maked off teh cowl to paint the defrost vents black. then once dry mask them off to spray contact cement for dash pad foam and vinyl cover Attached image(s) 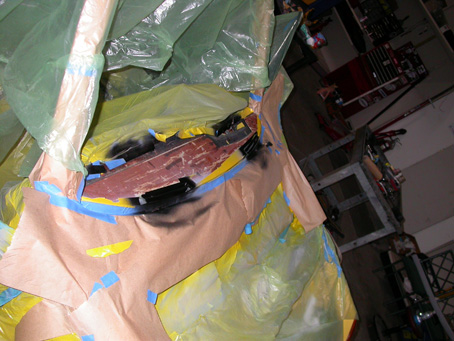 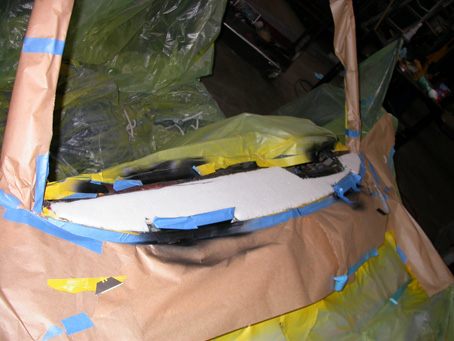 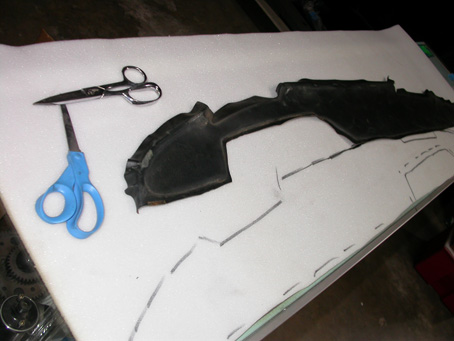
|
|
|
|
|
2 User(s) are reading this topic (2 Guests and 0 Anonymous Users)
0 Members:

|
Lo-Fi Version | Time is now: 4th June 2024 - 12:57 PM |
Invision Power Board
v9.1.4 © 2024 IPS, Inc.