|
|
|
Porsche, and the Porsche crest are registered trademarks of Dr. Ing. h.c. F. Porsche AG.
This site is not affiliated with Porsche in any way. Its only purpose is to provide an online forum for car enthusiasts. All other trademarks are property of their respective owners. |
|
|

  |

| Lilchopshop |
 Mar 22 2020, 07:34 AM Mar 22 2020, 07:34 AM
Post
#41
|
|
Member  Group: Members Posts: 111 Joined: 17-February 20 From: New York Member No.: 23,932 Region Association: North East States |
Scrolling through YouTube this morning and found this inspiration...
https://youtu.be/sjNYZs0Km4c This is the exact paint scheme I am thinking. I love the look of the color-matched valences and rocker covers. (IMG:style_emoticons/default/drooley.gif) |
   |

 
|
| Superhawk996 |
Mar 22 2020, 07:46 AM
Post
#42
|
|
914 Guru Group: Members Posts: 7,842 Joined: 25-August 18 From: Woods of N. Idaho Member No.: 22,428 Region Association: Galt's Gulch |
Yup, that hidden rust at the seat belt anchor could be a real killer. (IMG:style_emoticons/default/sad.gif)
Wish more people were aware of the lurking danger. Nice job getting it deconstructed as quickly as you have. |
 |
|
| Lilchopshop |
Apr 28 2020, 08:35 AM
Post
#43
|
|
Member Group: Members Posts: 111 Joined: 17-February 20 From: New York Member No.: 23,932 Region Association: North East States |
I’ve been chipping away at this project over the past couple of weeks and have made some progress on the passenger side repairs. As with any project like this, there has been considerable scope growth... one thing I am now considering is the addition of a inner long stiffener kit from Mad Dog Motorsports. I figure, since I’m here, now is the right time to do this... the question I have for all of you is, when should I install the stiffeners? Right now, I am just about ready to close up the passenger side long with the new inner rocker panel from RD. Before I do this, I want to coat the inside of the long with something for rust prevention. If I weld on a longitudinal stiffener after I coat the inside, some of the coating will burn off, but if I install the stiffener before I close up the long, I’m worried about warpage. Which is the lesser of the two evils? Anyone have any thoughts?
Attached thumbnail(s) 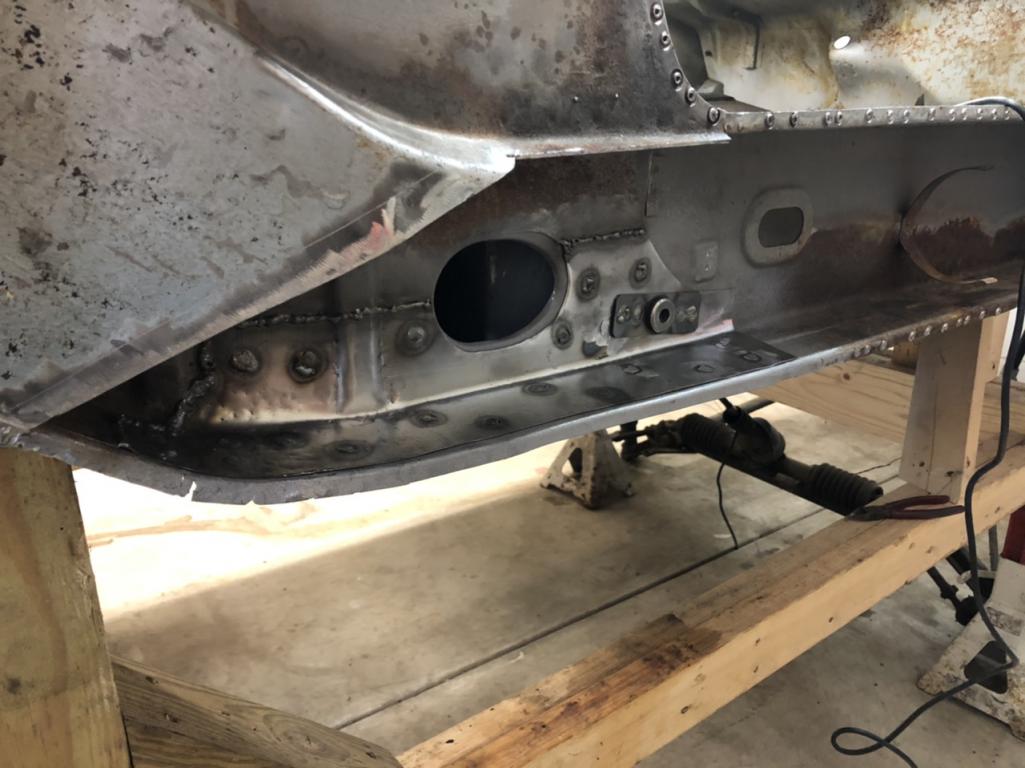 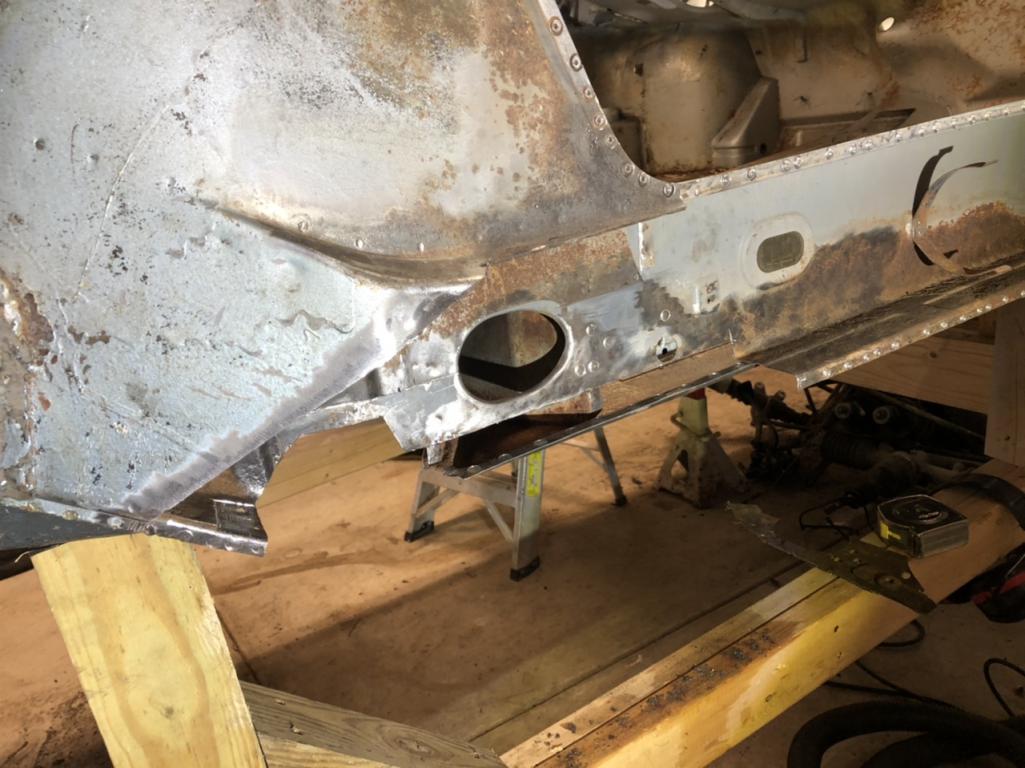 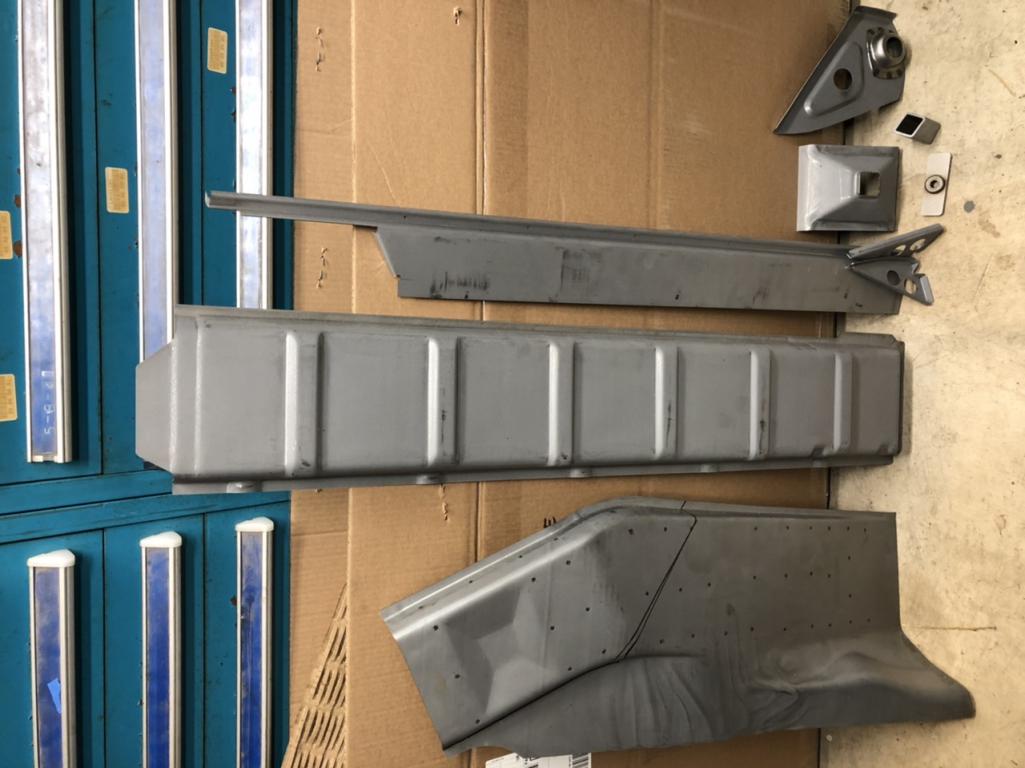
|
|
|
|
| StarBear |
Apr 28 2020, 08:55 AM
Post
#44
|
|
Advanced Member Group: Members Posts: 2,295 Joined: 2-September 09 From: NJ Member No.: 10,753 Region Association: North East States |
QUOTE(Lilchopshop @ Mar 20 2020, 08:23 AM)  QUOTE(bkrantz @ Mar 19 2020, 10:43 PM) Welcome to the resto club. Thanks! (IMG:style_emoticons/default/beerchug.gif) By "club" you really mean, "bunch of crazy people who obsess over weird things and are way out of touch with the real world" (IMG:style_emoticons/default/blink.gif) But, does this club come with any special perks? Like discounts on cutting wheels and spot-weld cutters? Maybe a free tetanus shot once a month for all the exposure to jagged, rusty metal? Yep, you pretty much summed everything up in just a few words (wife has been telling me the same for 30+ years). Best wishes and onward! |
|
|
|
| Lilchopshop |
May 16 2020, 10:21 AM
Post
#45
|
|
Member Group: Members Posts: 111 Joined: 17-February 20 From: New York Member No.: 23,932 Region Association: North East States |
Finally got the passenger side long closed up and new jack point welded in. Alignment with the jack hole in the rocker cover isn’t perfect, but close enough for me.
Question, does anyone have a picture of the ends of the rocker covers where they attach to the fenders. The replacement cover that I got from RD has a notch in the flange at either end. Not sure what I need to add there to mate up with the holes in the fenders. Attached image(s) 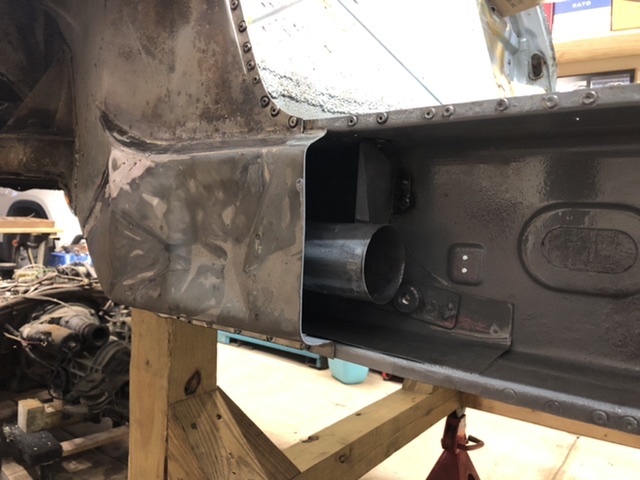 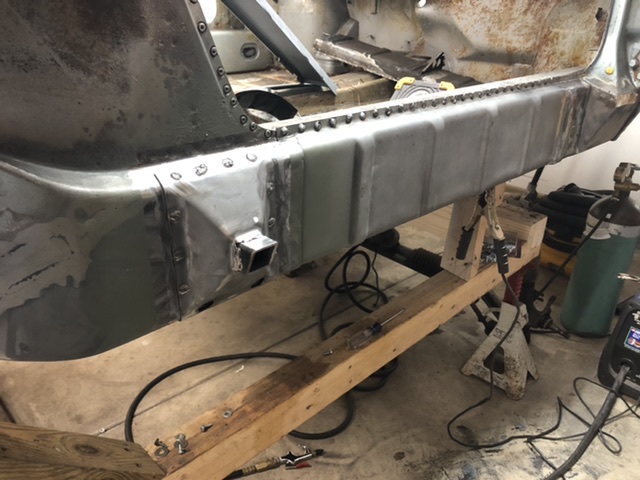 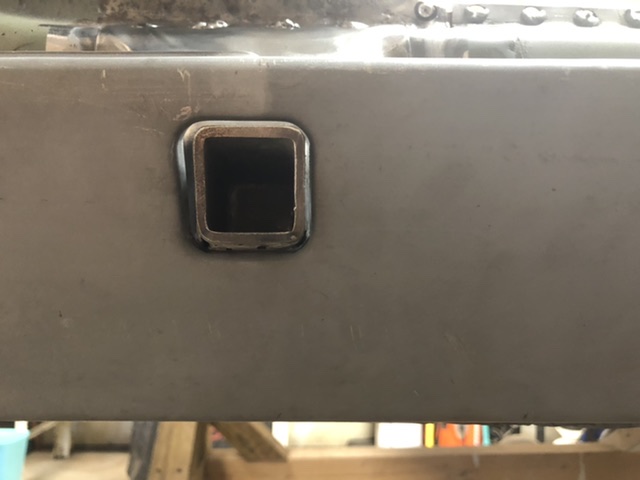
|
|
|
|
| Lilchopshop |
May 18 2020, 10:54 PM
Post
#46
|
|
Member Group: Members Posts: 111 Joined: 17-February 20 From: New York Member No.: 23,932 Region Association: North East States |
Got the sill triangles installed today. Had the same fitment issue with the threshold sills and the sill triangles that bbrock did. Thanks to his well-documented posts, I modified my sill triangles in the same fashion.
Also discovered a small rust hole hiding beneath some bondo in the section of rear fender that I cut out for access to the jack points. Figured it would be easier to fix this now before I reinstalled this section on the car. Passenger side is almost complete. Then I get to do this all over again on the driver’s side! (IMG:style_emoticons/default/piratenanner.gif) Attached image(s) 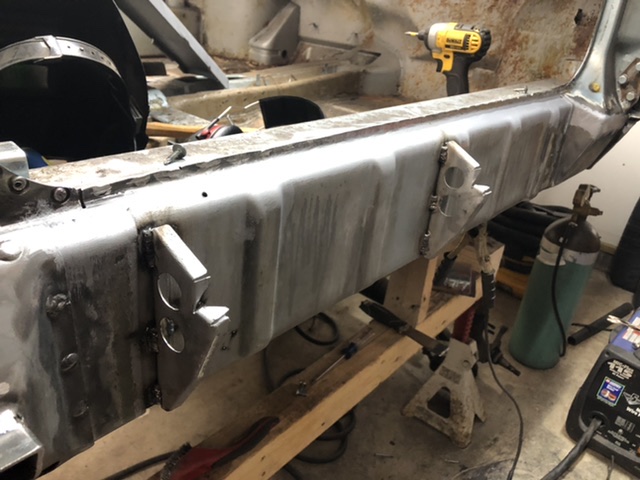  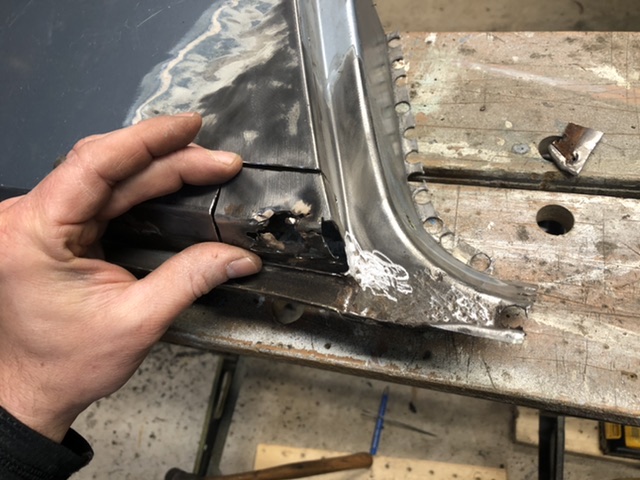 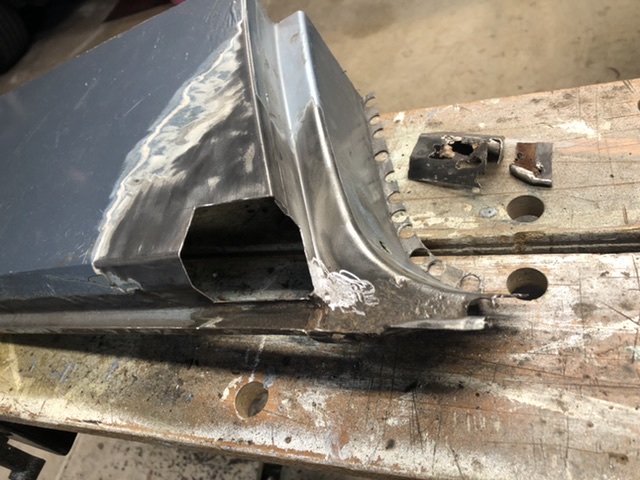 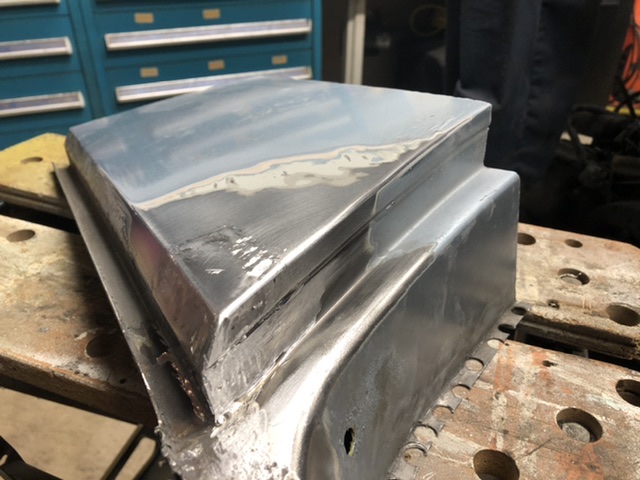
|
|
|
|
| luft |
May 18 2020, 11:39 PM
Post
#47
|
|
Newbie Group: Members Posts: 19 Joined: 11-January 16 From: Carefree AZ Member No.: 19,551 Region Association: None |
nice work Lilchopshop, compliments. One day i start after reading and learning from all contributing 914 Guys here, Pelikan 914 forum and YouTube, thanks.
|
|
|
|
| Lilchopshop |
Jul 9 2020, 06:14 PM
Post
#48
|
|
Member Group: Members Posts: 111 Joined: 17-February 20 From: New York Member No.: 23,932 Region Association: North East States |
Some more progress over the last few weeks... passenger side rust repair is complete. Driver’s side work has begun. Also received the chassis stiffening kit from mad dog motorsports.
Attached image(s) 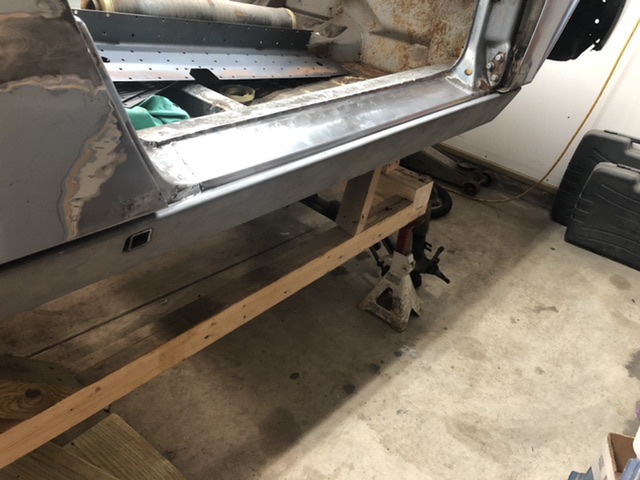 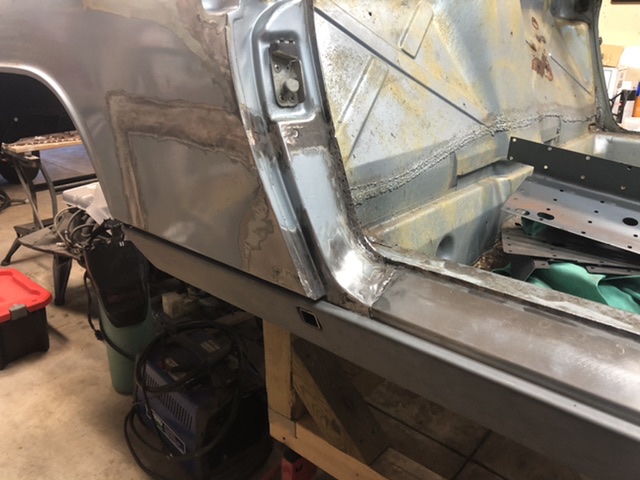 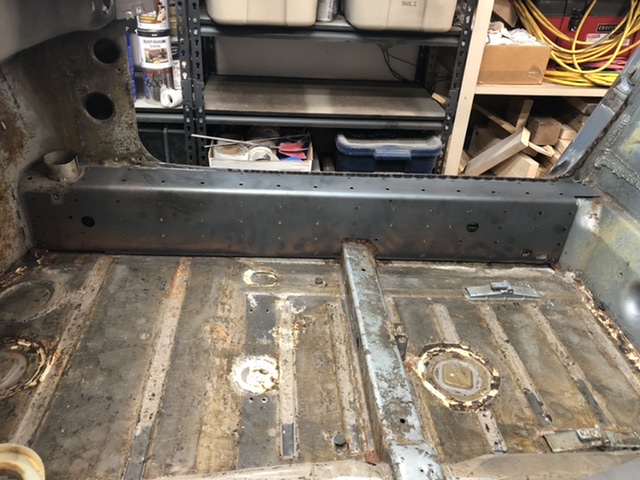 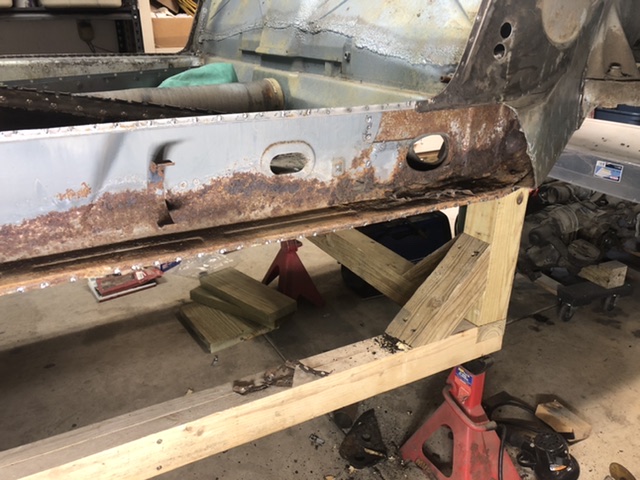 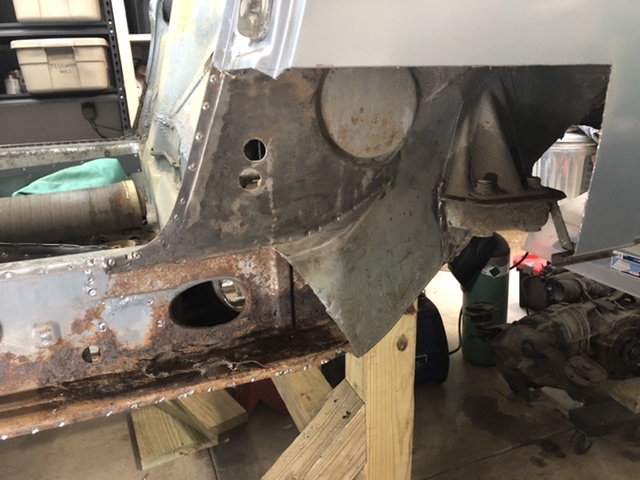 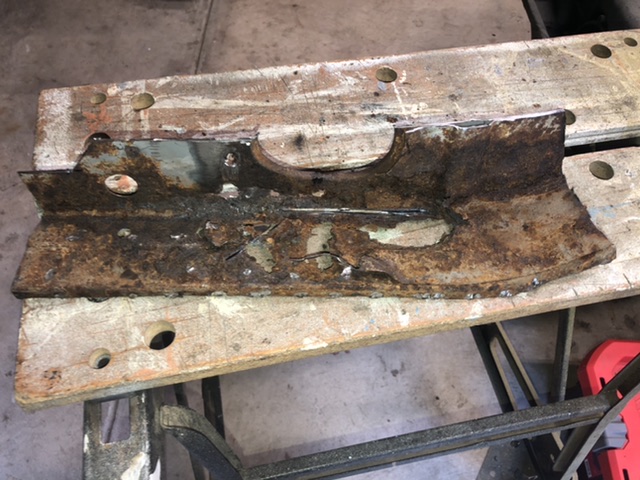 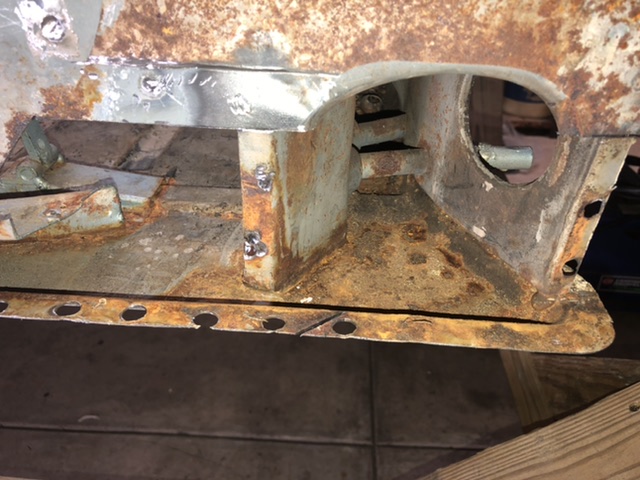
|
|
|
|
| frostyf |
Sep 1 2020, 07:26 PM
Post
#49
|
|
Member Group: Members Posts: 155 Joined: 27-March 14 From: VA 23455 Member No.: 17,168 Region Association: MidAtlantic Region |
QUOTE(Lilchopshop @ Jul 10 2020, 01:14 AM) Some more progress over the last few weeks... passenger side rust repair is complete. Driver’s side work has begun. Also received the chassis stiffening kit from mad dog motorsports. I have avoided this so far but I know it is coming at some stage for my car. Thank you for all the clear photos of yr work; inspiring to see and help novices like myself understand the jigsaw and how it goes back together! |
|
|
|
| 930cabman |
Jan 7 2021, 06:20 PM
Post
#50
|
|
Advanced Member Group: Members Posts: 4,667 Joined: 12-November 20 From: Buffalo Member No.: 24,877 Region Association: North East States |
Great project and great progress. Recent update?
|
|
|
|
| ThePaintedMan |
Jan 7 2021, 06:52 PM
Post
#51
|
|
Advanced Member Group: Members Posts: 3,887 Joined: 6-September 11 From: St. Petersburg, FL Member No.: 13,527 Region Association: South East States |
Nicely done. You really made progress quickly and all the pictures you took will be useful in case you ever sell the car. People will know it was done right. (IMG:style_emoticons/default/aktion035.gif)
|
|
|
|
| euro911 |
Jan 7 2021, 07:23 PM
Post
#52
|
|
Retired & living the dream. God help me if I wake up! Group: Members Posts: 8,937 Joined: 2-December 06 From: So.Cal. & No.AZ (USA) Member No.: 7,300 Region Association: Southern California |
QUOTE(Lilchopshop @ Apr 28 2020, 06:35 AM) I’ve been chipping away at this project over the past couple of weeks and have made some progress on the passenger side repairs. As with any project like this, there has been considerable scope growth... one thing I am now considering is the addition of a inner long stiffener kit from Mad Dog Motorsports. I figure, since I’m here, now is the right time to do this... the question I have for all of you is, when should I install the stiffeners? Right now, I am just about ready to close up the passenger side long with the new inner rocker panel from RD. Before I do this, I want to coat the inside of the long with something for rust prevention. If I weld on a longitudinal stiffener after I coat the inside, some of the coating will burn off, but if I install the stiffener before I close up the long, I’m worried about warpage. Which is the lesser of the two evils? Anyone have any thoughts? Don't know if you ever did this, but some of us have used Eastwood's Internal Frame Coating to protect internal channels and in the center tunnel area.You're doing an awesome job on the repair (IMG:style_emoticons/default/aktion035.gif) |
|
|
|
| Lilchopshop |
Dec 13 2022, 04:38 PM
Post
#53
|
|
Member Group: Members Posts: 111 Joined: 17-February 20 From: New York Member No.: 23,932 Region Association: North East States |
Well, it’s been a few minutes since I last worked on the 914 rust repair. I took what I thought was going to be a short break from the car to install some new flooring in my house. Two years later and I have completely remodeled every room on the first floor. While I haven’t been working on the car, I have been thinking about it a lot and lurking on this site every day so I can keep up with all the other great projects you all are working on. I’ve learned so much from watching your projects and I’ve also chosen to go in a different direction with mine. I’ve been gathering parts and ideas and I plan to start a fresh thread here soon to document the build in a more holistic sense. Spoiler alert… there will be water (cooling) involved.
But, before I start that I thought I’d close the loop on this thread and post some pics from some recent work on those jack points… This is about where I left off two years ago: 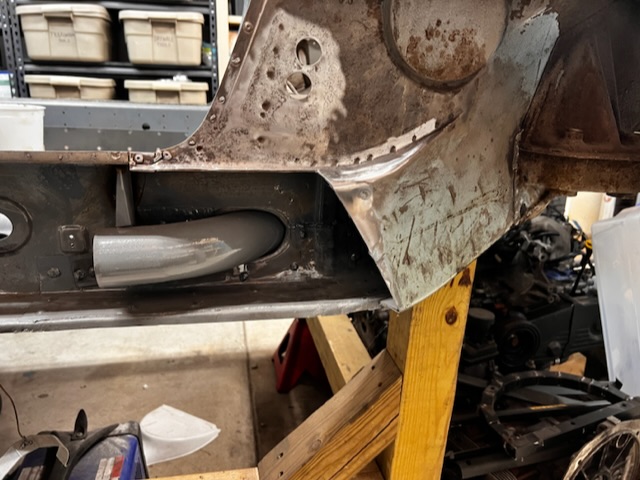 A mold I made from plaster of what was left of the driver side jack point area prior to demo. I wasn’t sure how or if I would use this, but I thought it might be helpful since there are no patch panels for this area. 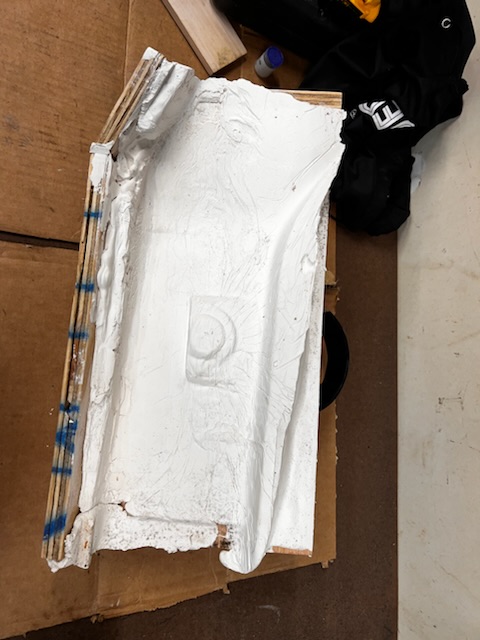 A wood buck I made to attempt to replicate the recess where the jack point tube gets installed: 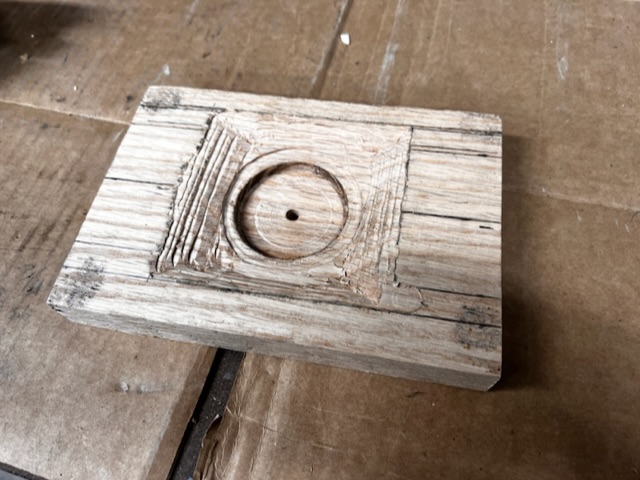 Making the outer skin of my repair section: 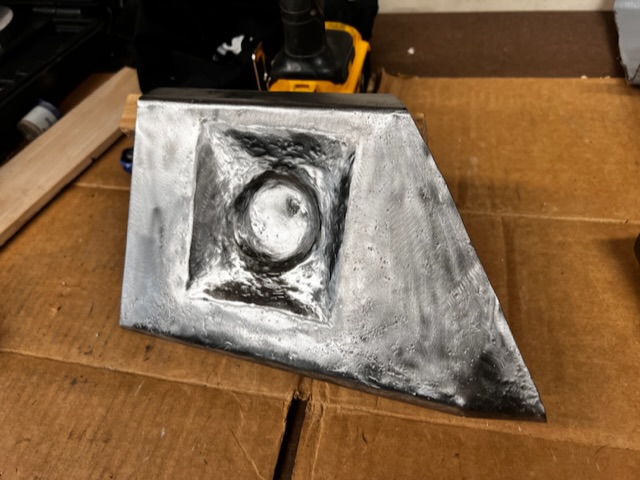 Some test-fitting: 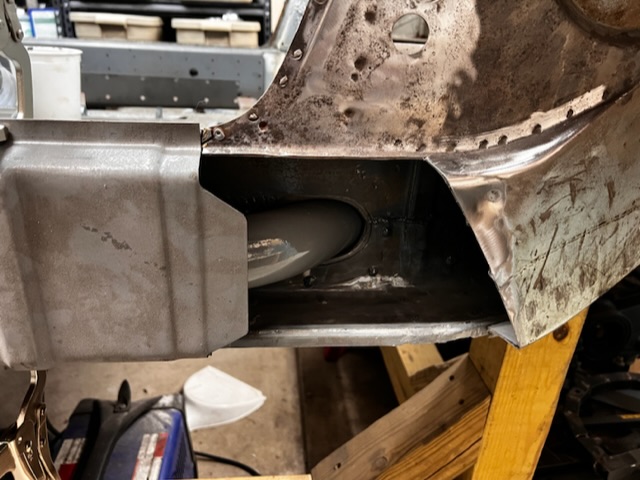 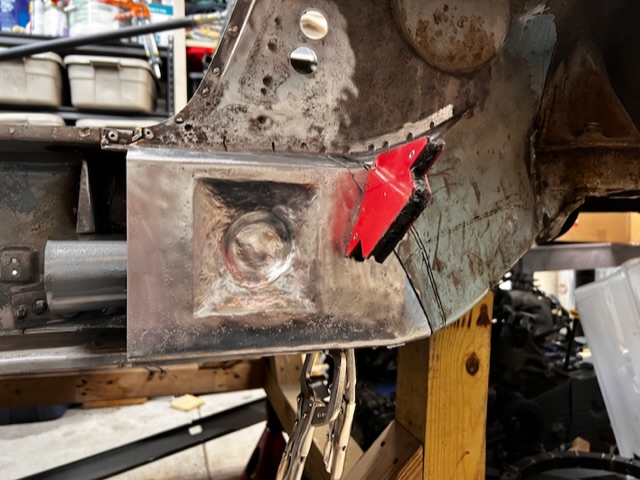 Cutting through the outer layer so I can have some stagger in the weld seam joint: 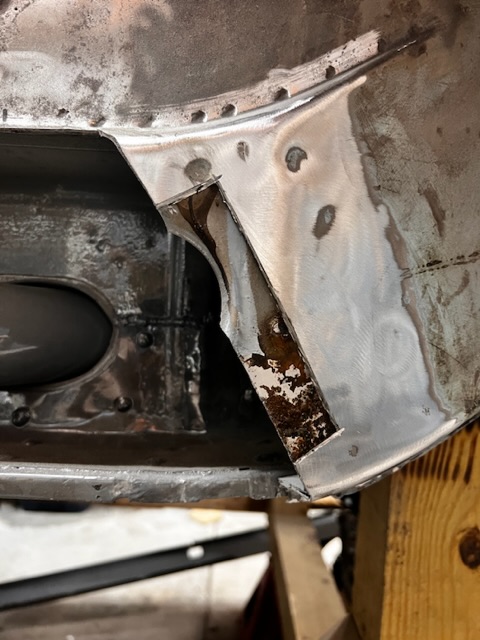 Finished the inner layer and plug-welded the two pieces together: 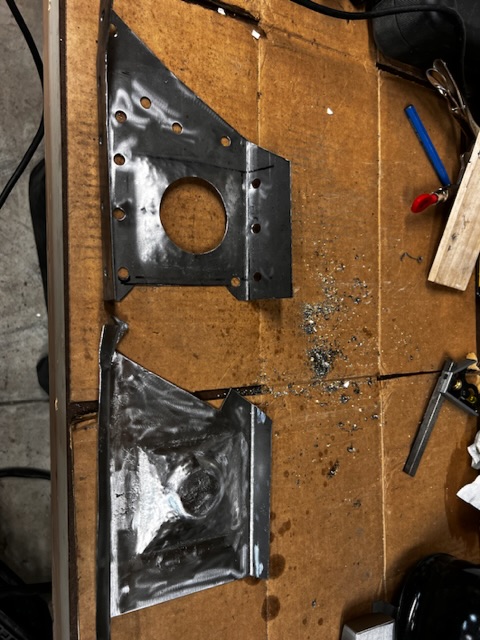 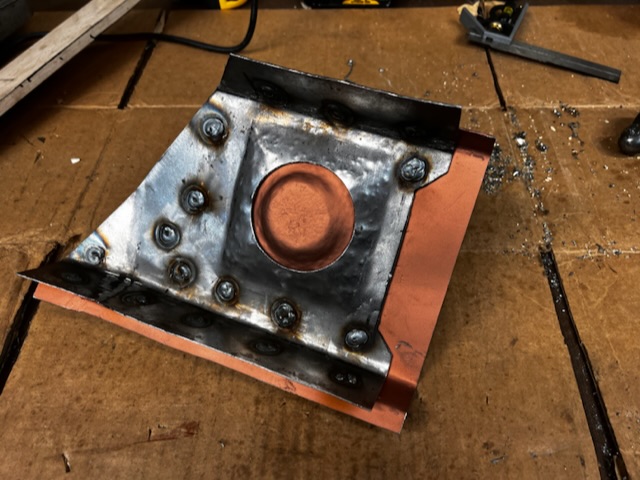 Ready to weld in place: 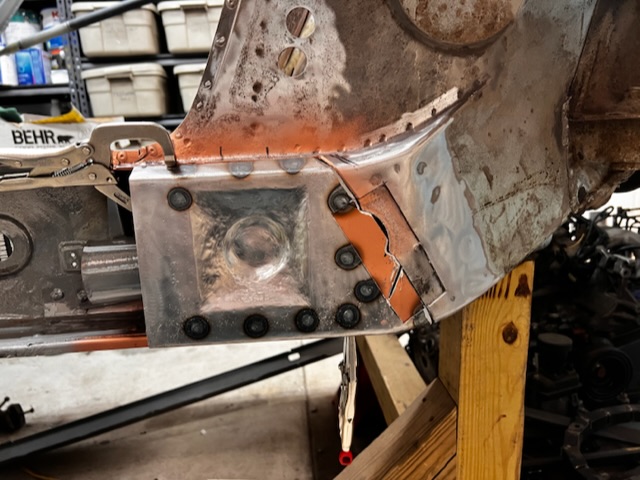 |
|
|
|
| 930cabman |
Dec 13 2022, 05:26 PM
Post
#54
|
|
Advanced Member Group: Members Posts: 4,667 Joined: 12-November 20 From: Buffalo Member No.: 24,877 Region Association: North East States |
Great news, back into the shop. A family member once told me " you are not going to live in the car" progress in the house is always a positive thing. Keep us posted with your progress.
|
|
|
|
|
3 User(s) are reading this topic (3 Guests and 0 Anonymous Users)
0 Members:

|
Lo-Fi Version | Time is now: 19th May 2026 - 11:31 PM |
Invision Power Board
v9.1.4 © 2026 IPS, Inc.