|
|
|
Porsche, and the Porsche crest are registered trademarks of Dr. Ing. h.c. F. Porsche AG.
This site is not affiliated with Porsche in any way. Its only purpose is to provide an online forum for car enthusiasts. All other trademarks are property of their respective owners. |
|
|

  |

| zenocchio |
 Feb 4 2008, 02:16 PM Feb 4 2008, 02:16 PM
Post
#161
|
|
Newbie  Group: Members Posts: 21 Joined: 27-October 07 From: italy Member No.: 8,269 Region Association: Europe |
I have been reading this post all in once!
Great job! may I ask you a quick question, I would like to repalce the rear suspension of my '73 2.0 by myself and I wonder about how hard is that job! I can not high the car so much, just enought for going under (IMG:style_emoticons/default/biggrin.gif) Is an easy job? Ciao, and once again congratulation for your car from Italy! |
   |

 
|
| Spoke |
Feb 4 2008, 05:14 PM
Post
#162
|
|
Jerry Group: Members Posts: 6,992 Joined: 29-October 04 From: Allentown, PA Member No.: 3,031 Region Association: None |
Hi and thanks for the complement.
By the way, (IMG:style_emoticons/default/welcome.png) Have fun on this site. This is the best 914 site on the planet. These guys here will help you out of any jam you get into with your 914. Chances are if you have trouble someone's already had it before and can help. Check the "Lapuwali Classic Thread Forum" here for how-to articles. Removing the rear suspension is quite easy as jobs go. The only difficult part may be that some of the bolts are rusted. I had a major problem on my 71 914 with a shock bolt that was rusted on. I ended up grinding the head off so I could remove the shock. Here's a quick how to remove the rear swing arms: 1) Jack car up, remove tire and remove cotter pin holding center nut. Replace tire and lower jack. 2) With breaker bar and correct size socket, loosen center nut and remove. 3) Put car on jackstands. Use more than one on each side for safety, and stack the tires under the car for added safety. 4) Push on brake pedal and hold down with a stick. This keeps the brake fluid from draining when you remove the rear caliper. 5) Remove brake caliper and disconnect from brake line and emergency brake cable. 6) Remove the shock. One nut at the top and big bolt through the rear swing arm. Support the rear swing arm with a jack or other item to keep it from dropping and the drive shaft hitting the heat exchanger. 7) Remove large nut on swing arm pivot on the inside. Remove outer nut too. Remove 3 bolts holding outer swing arm adjustment plate. Watch out for alignment shims falling to the ground. Keep track of where they go and how many. 8) At this point, I've found I can remove the swing arm without disconnecting the drive axle from the transmission. If the axle spline is stuck in the hub, push it out with a gear puller just to loosen it. It should then come out on its own. You may want to remove the axle from the transmission if you want to repack or inspect the CV joints. I might be forgetting something or other members may want to chime in with their methods or point you to a link. It isn't necessarily a hard job, just takes some time. The rear end will need aligned after replacement. |
|
|
|
| zenocchio |
Feb 5 2008, 04:22 AM
Post
#163
|
|
Newbie Group: Members Posts: 21 Joined: 27-October 07 From: italy Member No.: 8,269 Region Association: Europe |
Thank you very much for your help!
This forum is very helpfull and you guys are nice and kind! I will create a new post soon to show my car, and maybe to show the work that i will do on it (IMG:style_emoticons/default/welder.gif) Ciao! |
|
|
|
| Gint |
Feb 5 2008, 07:30 AM
Post
#164
|
|
Mike Ginter Group: Admin Posts: 16,083 Joined: 26-December 02 From: Denver CO. Member No.: 20 Region Association: Rocky Mountains |
QUOTE(zenocchio @ Feb 5 2008, 03:22 AM)  Thank you very much for your help! This forum is very helpfull and you guys are nice and kind! I will create a new post soon to show my car, and maybe to show the work that i will do on it (IMG:style_emoticons/default/welder.gif) Ciao! Please do! Adding Pictures to Your Post - FAQ thread |
|
|
|
| AgPete139 |
Feb 17 2008, 03:51 AM
Post
#165
|
|
AgPete139 Group: Members Posts: 90 Joined: 12-February 08 From: Houston, TX Member No.: 8,701 Region Association: South East States |
I just read through all 9 pages so far, and I must add that this is inspiring...
How are you going to remove rust from the frame/jack points when you are ready to tackle it, and how did you pick away at all the tar? My car has it undercoated as well, and just short of manually picking it all off and without a sand blaster, what would be a good method? Again, good job on the resto. Have you tried taking a sample of your paint and getting it matched by computer? How many coats of high gloss enamel (from Home Depot) did you use on the front gas tank and other parts? Sorry for all the questions... Pete |
|
|
|
| Spoke |
Feb 17 2008, 10:08 AM
Post
#166
|
|
Jerry Group: Members Posts: 6,992 Joined: 29-October 04 From: Allentown, PA Member No.: 3,031 Region Association: None |
QUOTE(AgPete139 @ Feb 17 2008, 04:51 AM) I just read through all 9 pages so far, and I must add that this is inspiring... How are you going to remove rust from the frame/jack points when you are ready to tackle it, and how did you pick away at all the tar? My car has it undercoated as well, and just short of manually picking it all off and without a sand blaster, what would be a good method? Again, good job on the resto. Have you tried taking a sample of your paint and getting it matched by computer? How many coats of high gloss enamel (from Home Depot) did you use on the front gas tank and other parts? Sorry for all the questions... Pete Thanks for the kind words. I just wish I had more time (and warm weather) to work on the car. I didn't have to pick away the tar on the jack points as the rust had eaten into the metal. On the other areas of the frame where there was no rust, I didn't touch them. In the fender wells, the undercoating tar had hardened and could be scraped off or softened with parts cleaner & steel brush and wiped off. I'll probably do the sample of paint when I'm ready to paint the entire car. At my pace that will be about 3 years from now. I like driving my car too much to want to dismantle it to paint it. I'll get there someday. The paint on the gas tank is from HD. It's made by Rust-oleum and called "Appliance Epoxy/ultra-hard enamel". It's very slow drying and has a real high gloss. I've used it on both sets of fake fuchs on both of my 914s. Cleans up real well on the wheels. |
|
|
|
| TINCAN914 |
Feb 17 2008, 10:39 AM
Post
#167
|
|
Summer's Commin... Group: Members Posts: 2,440 Joined: 18-August 05 From: Colorado Springs, CO. Member No.: 4,611 Region Association: Rocky Mountains |
SPOKE FANTASTIC JOB SIR!!
Very helpful to those with less mechanical experience like myself. Keep up the great work!! (IMG:style_emoticons/default/beerchug.gif) |
|
|
|
| JPB |
Feb 17 2008, 12:21 PM
Post
#168
|
|
The Crimson Rocket smiles in your general direction. Group: Members Posts: 2,927 Joined: 12-November 05 From: Tapmahamock, Va. Member No.: 5,107 |
Nice work homeskillet! Love them flares (IMG:style_emoticons/default/beer.gif)
|
|
|
|
| Spoke |
Nov 30 2008, 11:07 AM
Post
#169
|
|
Jerry Group: Members Posts: 6,992 Joined: 29-October 04 From: Allentown, PA Member No.: 3,031 Region Association: None |
Just a little added insurance tucked right in front of the passenger seat.
Attached image(s) 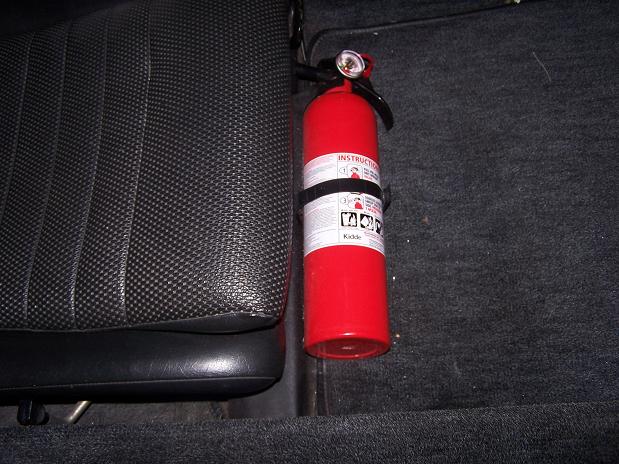
|
|
|
|
| StratPlayer |
Nov 30 2008, 11:29 AM
Post
#170
|
|
StratPlayer Group: Members Posts: 3,278 Joined: 27-December 02 From: SLC, Utah Member No.: 27 Region Association: Rocky Mountains |
Well done, one hellva job....... (IMG:style_emoticons/default/smilie_pokal.gif)
|
|
|
|
| Spoke |
Dec 1 2008, 01:09 AM
Post
#171
|
|
Jerry Group: Members Posts: 6,992 Joined: 29-October 04 From: Allentown, PA Member No.: 3,031 Region Association: None |
Reinstalled the CHT and vacuum gauges which were originally mounted on the steering column.
The vacuum gauge was never on the car from the time I purchased the car. It was in a box of goodies that came with it. When looking behind the dash for the wires for the CHT, I saw a hose for the vacuum gauge which was routed through the tunnel and to the engine compartment and decided to install the gauge. Turns out the hose was disconnected from the engine intake but not plugged up. I've had a vacuum leak for as long as I've had the car. The connection for the gauge was taken from the sense hose to the decel valve. This pretty much means my decel valve hasn't been working because of the vacuum leak at the T. Attached image(s) 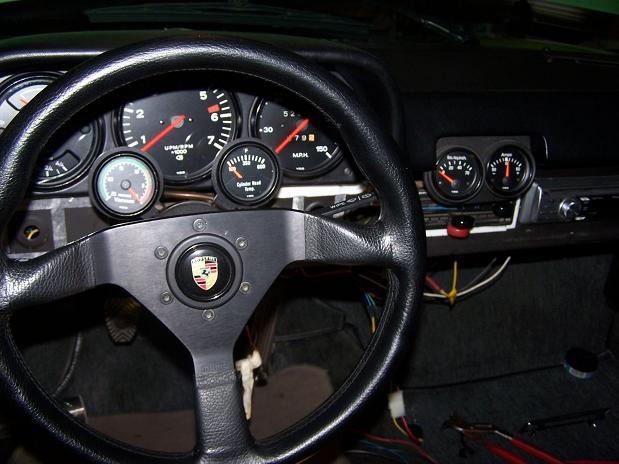
|
|
|
|
| Spoke |
Dec 1 2008, 01:12 AM
Post
#172
|
|
Jerry Group: Members Posts: 6,992 Joined: 29-October 04 From: Allentown, PA Member No.: 3,031 Region Association: None |
The CHT sender was never connected to the head. I didn't know where or how the sender was attached to the head so I just put the sender under a bolt for the tin. Where or how is this sender mounted?
Attached image(s) 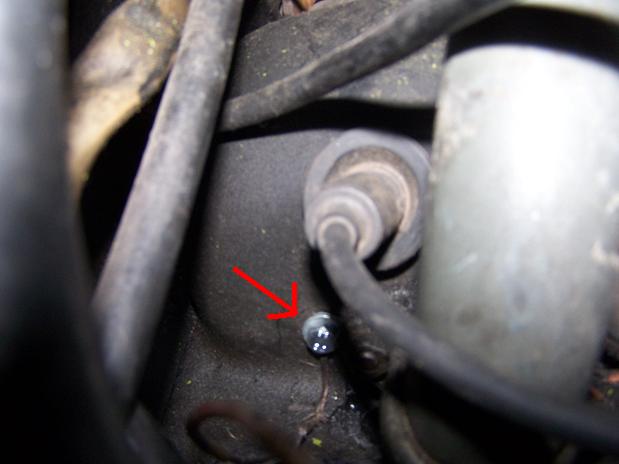
|
|
|
|
| Spoke |
Dec 1 2008, 01:26 AM
Post
#173
|
|
Jerry Group: Members Posts: 6,992 Joined: 29-October 04 From: Allentown, PA Member No.: 3,031 Region Association: None |
The CHT and vacuum gauge install is quite basic. They are panel mount gauges mounted on the steering column. The wiring came through a hole in the dash. I didn't change much except I cleaned up the wiring a bit. I put the wires in shrink wrap tubing.
The bottom wires are for the CHT sender and the top wires are for the lighting. I covered the spades with scrinkwrap too. Using a larger diameter wrap, the wrap was heated and when hot, the loose part of the wrap around the wires was squeezed and folded to conform with the wire. Shrink wrap can be folded on itself when hot and will stick together in that shape when it cools. It is excellent for covering exposed spades. Once I reinstall the dash face, I'll wrap the wires and hose with tape. Attached image(s) 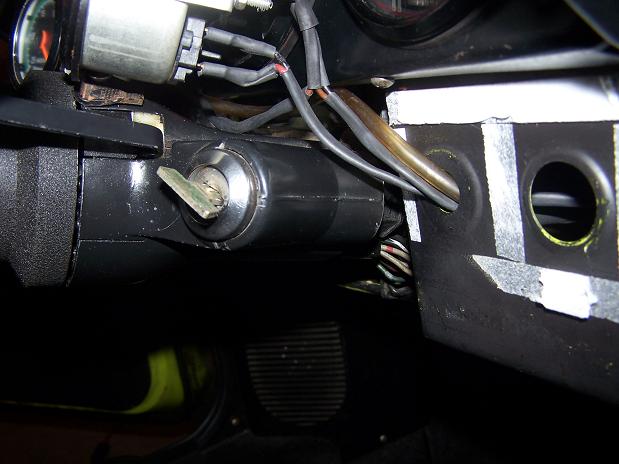
|
|
|
|
| Spoke |
Dec 29 2008, 10:34 AM
Post
#174
|
|
Jerry Group: Members Posts: 6,992 Joined: 29-October 04 From: Allentown, PA Member No.: 3,031 Region Association: None |
The dash background was separating from the dash so I removed it and reglued it. Also sprayed it with interior paint.
Attached image(s) 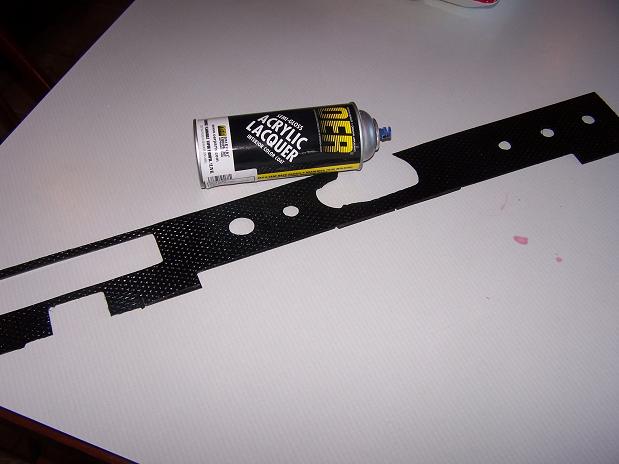
|
|
|
|
| Spoke |
Dec 30 2008, 10:56 AM
Post
#175
|
|
Jerry Group: Members Posts: 6,992 Joined: 29-October 04 From: Allentown, PA Member No.: 3,031 Region Association: None |
Painted the backs of the gauges that mount on the steering column. This way they will look a bit more finished.
Attached image(s) 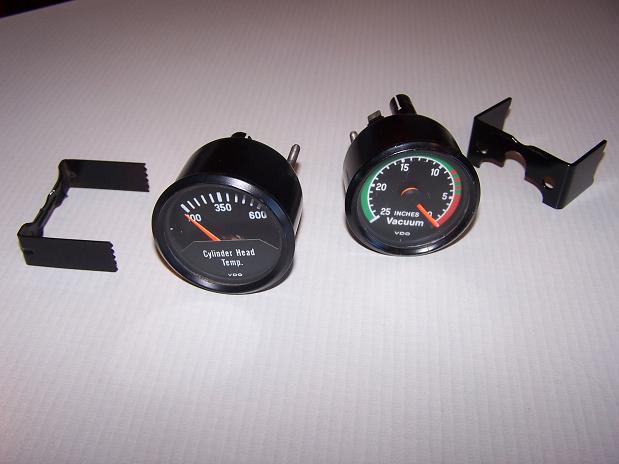
|
|
|
|
| Spoke |
Feb 7 2009, 11:14 PM
Post
#176
|
|
Jerry Group: Members Posts: 6,992 Joined: 29-October 04 From: Allentown, PA Member No.: 3,031 Region Association: None |
Some interior pics after finishing the dashboard background.
Just in time too, sale pending. Attached image(s) 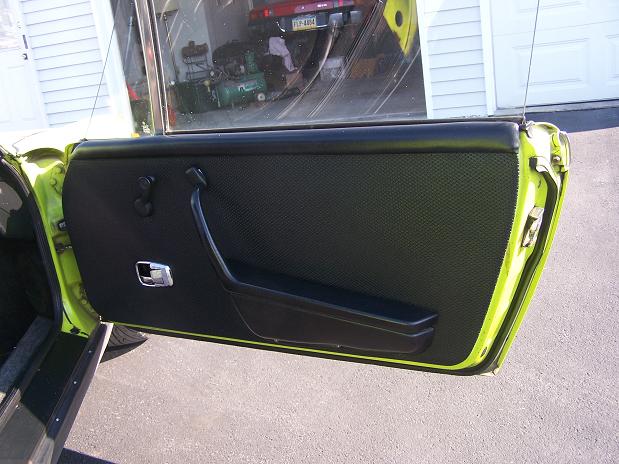 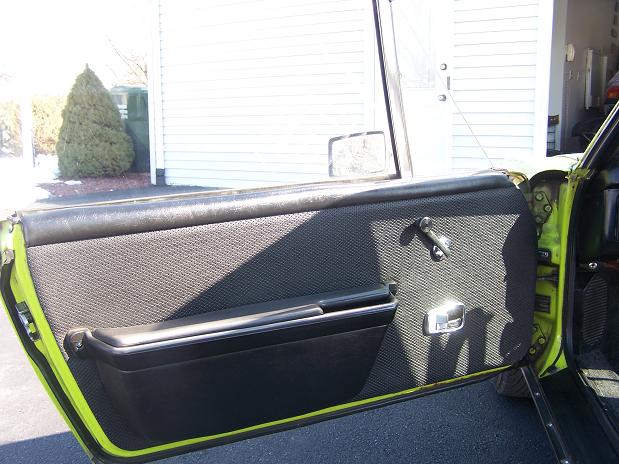 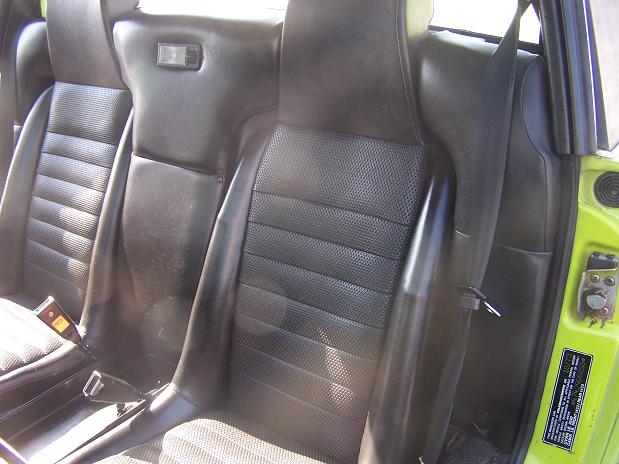 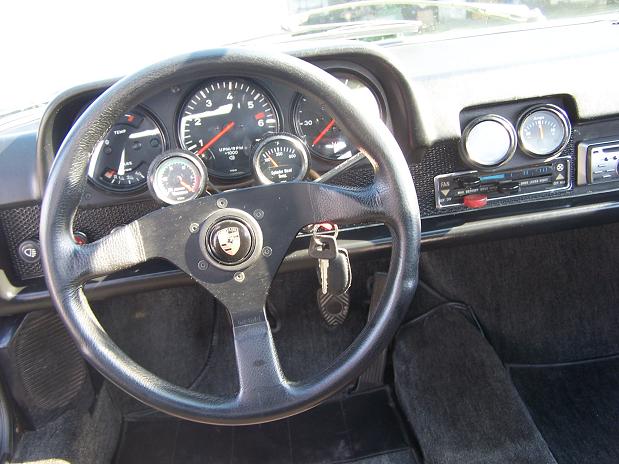 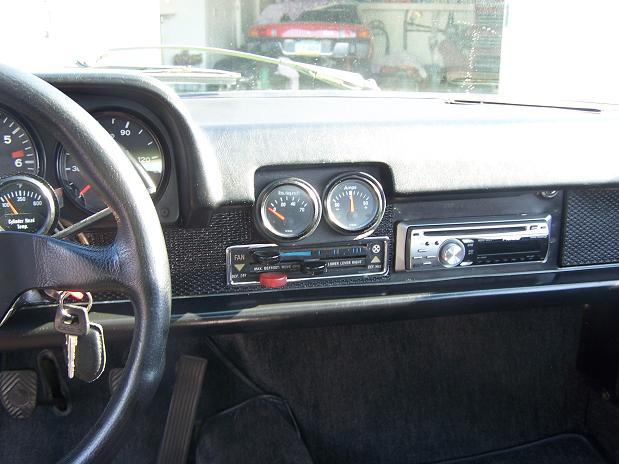
|
|
|
|
| slow914 |
Feb 7 2009, 11:44 PM
Post
#177
|
|
Member Group: Members Posts: 150 Joined: 5-February 08 From: Kirkland, WA Member No.: 8,671 Region Association: Pacific Northwest |
QUOTE(Spoke @ Feb 7 2009, 09:14 PM) sale pending. Damn, what an awesome car |
|
|
|
| Spoke |
Feb 28 2009, 12:11 PM
Post
#178
|
|
Jerry Group: Members Posts: 6,992 Joined: 29-October 04 From: Allentown, PA Member No.: 3,031 Region Association: None |
Sold. The new owner (a 914World member) driving away. I should be sad but this makes room in the garage for a 911. I'm looking for a late 80s to late 90s 911. It'll be a retirement present for me.
I still have the red 71 914 so I'll still be driving a mid-engined Porsche. Attached image(s) 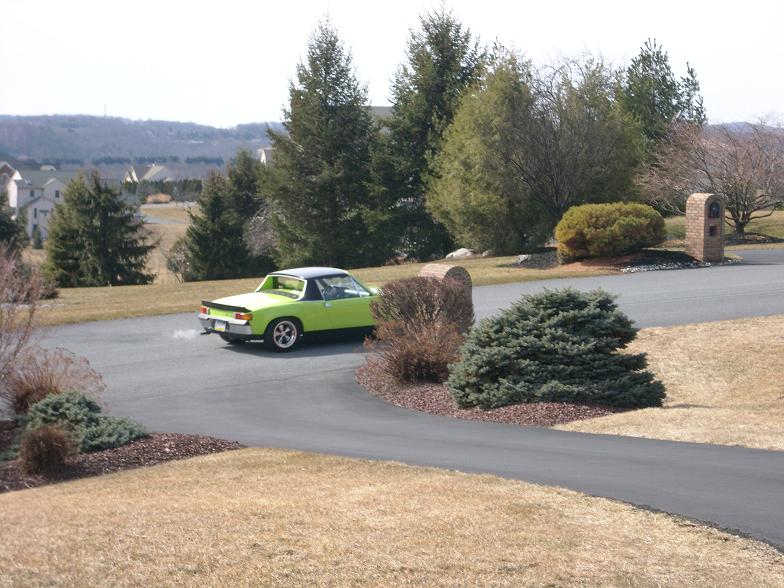
|
|
|
|
|
1 User(s) are reading this topic (1 Guests and 0 Anonymous Users)
0 Members:

|
Lo-Fi Version | Time is now: 16th June 2024 - 05:12 AM |
Invision Power Board
v9.1.4 © 2024 IPS, Inc.