|
|
|
Porsche, and the Porsche crest are registered trademarks of Dr. Ing. h.c. F. Porsche AG.
This site is not affiliated with Porsche in any way. Its only purpose is to provide an online forum for car enthusiasts. All other trademarks are property of their respective owners. |
|
|

  |

| Spoke |
 Dec 6 2009, 07:40 PM Dec 6 2009, 07:40 PM
Post
#101
|
|
Jerry  Group: Members Posts: 7,278 Joined: 29-October 04 From: Allentown, PA Member No.: 3,031 Region Association: None |
While studying the classic clutch tube repair thread, I noticed the 2 pics in the thread show 2 different exit locations for the clutch tube. One is higher than the other. My 71 had the high mounting but it didn't point towards the hole in the engine bar so I'm going with the lower exit position.
High exit position 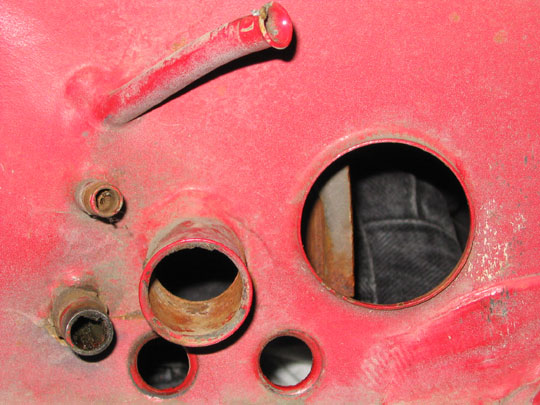 Low exit position  |
   |

 
|
| Spoke |
Dec 6 2009, 10:10 PM
Post
#102
|
|
Jerry Group: Members Posts: 7,278 Joined: 29-October 04 From: Allentown, PA Member No.: 3,031 Region Association: None |
I made a bracket for the front of the tube. There wasn't much left from the old one. I'll weld this one on from the outside of the tunnel.
Attached image(s) 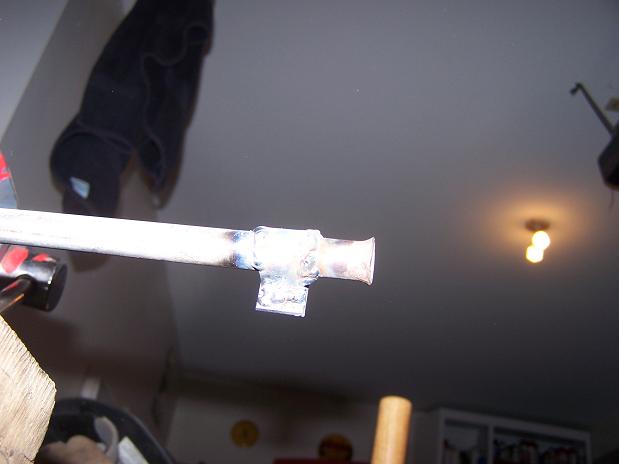
|
|
|
|
| Spoke |
Dec 9 2009, 01:20 AM
Post
#103
|
|
Jerry Group: Members Posts: 7,278 Joined: 29-October 04 From: Allentown, PA Member No.: 3,031 Region Association: None |
I used Duplicolor's Rust Fix to prepare the metal for paint. I scraped as much junk out as possible before painting. Looks nice. Too bad no one will see this once the interior is in place.
Attached image(s) 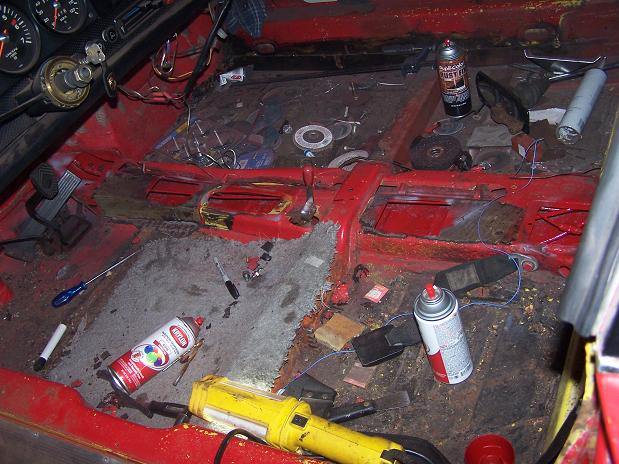 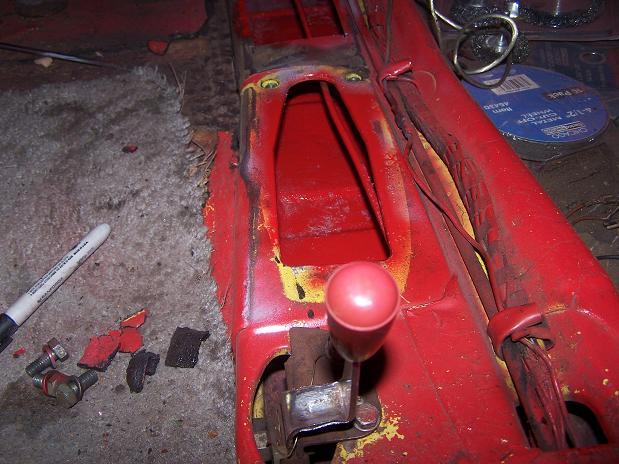 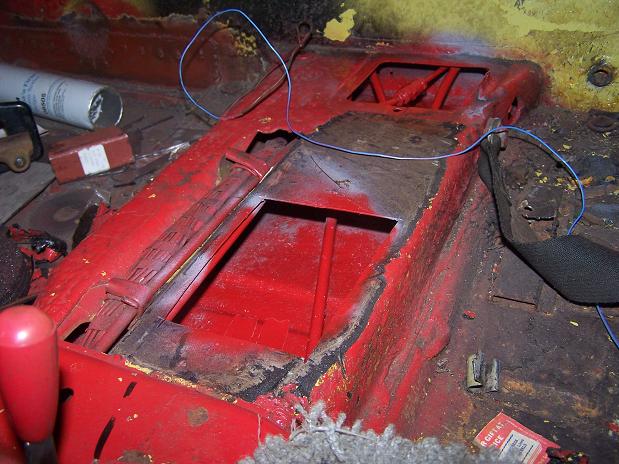
|
|
|
|
| Spoke |
Dec 9 2009, 01:22 AM
Post
#104
|
|
Jerry Group: Members Posts: 7,278 Joined: 29-October 04 From: Allentown, PA Member No.: 3,031 Region Association: None |
Got the tube all straightened out and then bent in the shape needed to fit properly. Sanded and painted it just to look nice even though no one will see it.
Attached image(s) 
|
|
|
|
| Spoke |
Dec 9 2009, 01:24 AM
Post
#105
|
|
Jerry Group: Members Posts: 7,278 Joined: 29-October 04 From: Allentown, PA Member No.: 3,031 Region Association: None |
So I had to pull the 911 out of the garage to work on the 914 tonight. This is what I saw when I pulled it back in. Dammit. No midnight run though the township tonight. Tonight's ride will be about 20 feet back into the garage.
Attached image(s) 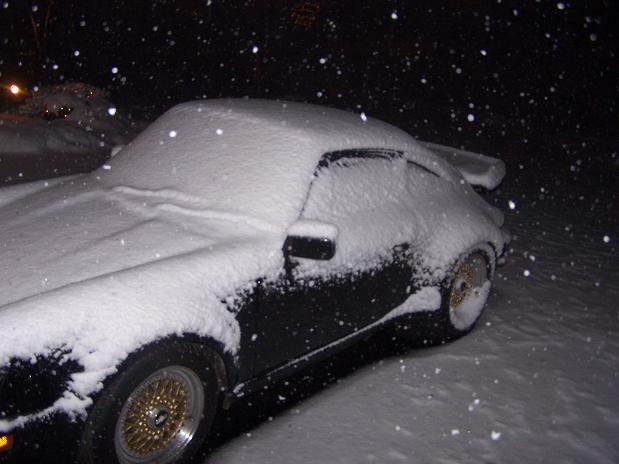
|
|
|
|
| Spoke |
Dec 10 2009, 10:28 PM
Post
#106
|
|
Jerry Group: Members Posts: 7,278 Joined: 29-October 04 From: Allentown, PA Member No.: 3,031 Region Association: None |
Getting ready to weld the clutch tube in. The front of the tube will be welded from the outside of the tunnel.
The center tab will be welded to the floor. I'm using the original front tab as the center tab. Attached image(s) 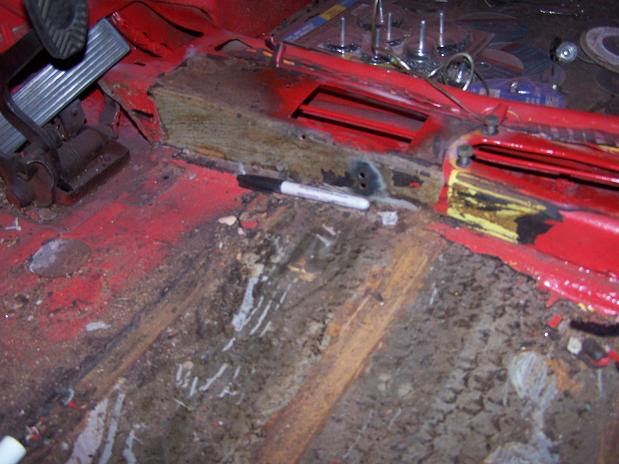 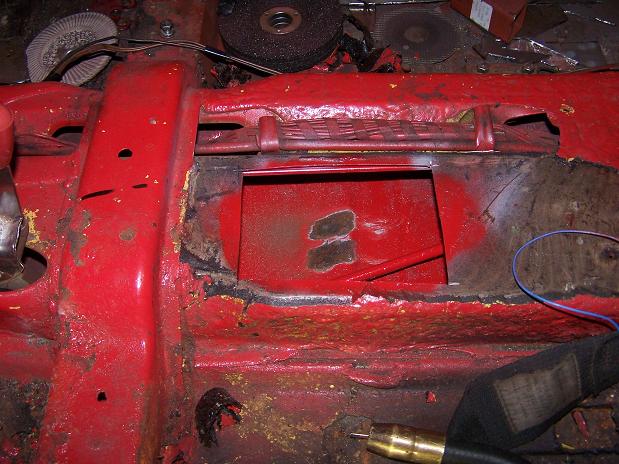
|
|
|
|
| Spoke |
Dec 10 2009, 10:35 PM
Post
#107
|
|
Jerry Group: Members Posts: 7,278 Joined: 29-October 04 From: Allentown, PA Member No.: 3,031 Region Association: None |
Finally welded the tube in. I made the front bracket from a leftover piece of 16 gauge steel. I'll clean up the welds, prime and paint.
The center tab just holds the tube in place. The firewall and the front bracket will provide all the support of the clutch cable. Attached image(s) 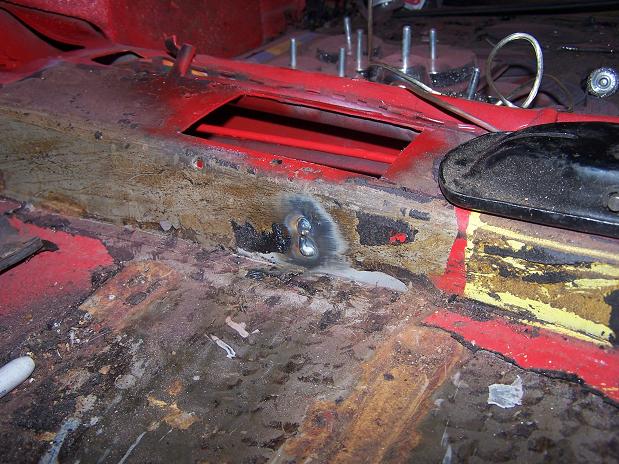 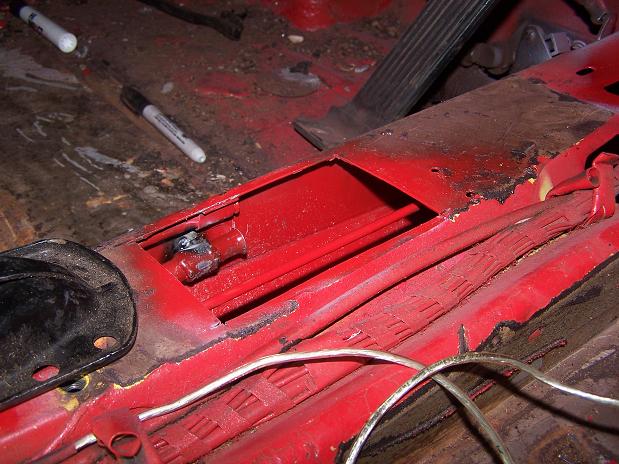 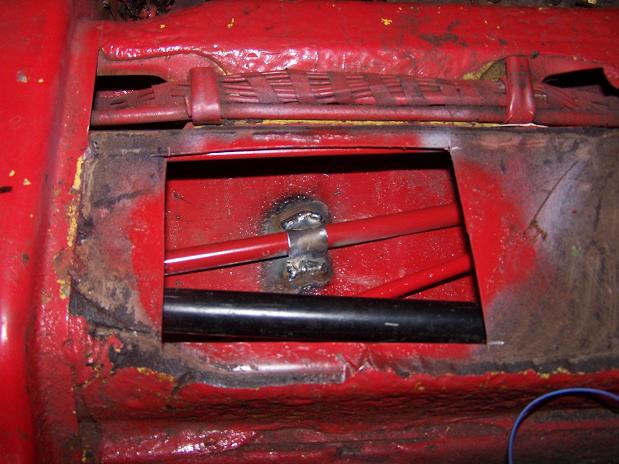
|
|
|
|
| Spoke |
Dec 10 2009, 10:40 PM
Post
#108
|
|
Jerry Group: Members Posts: 7,278 Joined: 29-October 04 From: Allentown, PA Member No.: 3,031 Region Association: None |
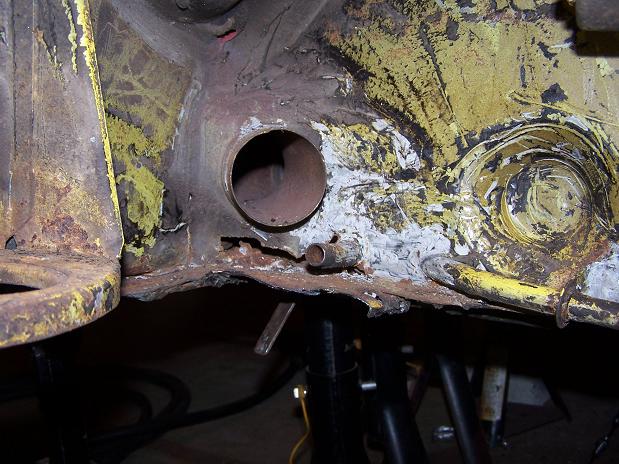
This plate is 2 plates, a large 14 gauge plate and a smaller backup 14 gauge plate. I don't think the clutch tube is going anywhere this time.
Attached image(s) 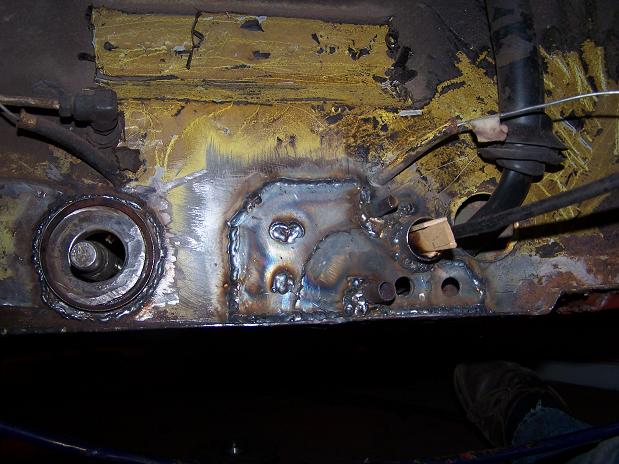 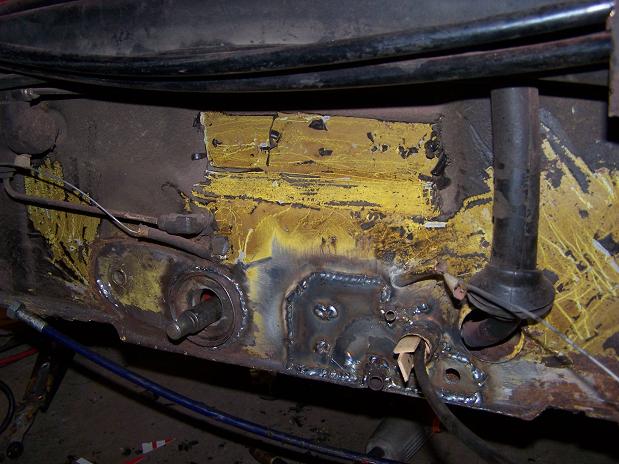
|
|
|
|
| Spoke |
Dec 19 2009, 10:26 PM
Post
#109
|
|
Jerry Group: Members Posts: 7,278 Joined: 29-October 04 From: Allentown, PA Member No.: 3,031 Region Association: None |
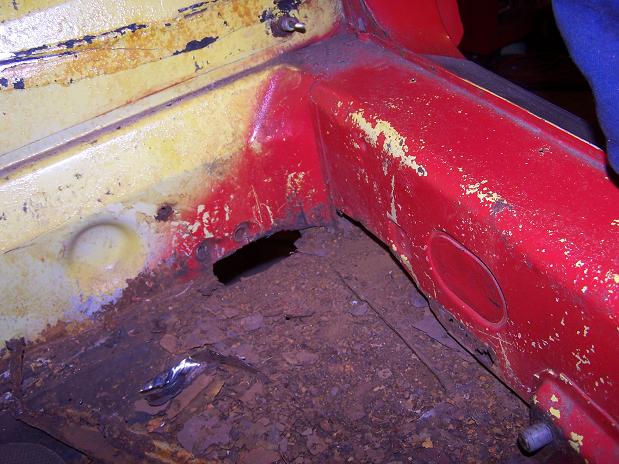
I didn't think the drivers side was as bad as the passenger side but this hole just seems to grow and grow. The triangle plate has just been cut off to investigate this little hole.
 The putty knife is sticking through a hole in the floor from the inside of the cabin.  The condition of my 914 was undoubtedly affected by weather like this. We're supposed to get 4-8 inches today.  |
|
|
|
| Spoke |
Dec 19 2009, 10:37 PM
Post
#110
|
|
Jerry Group: Members Posts: 7,278 Joined: 29-October 04 From: Allentown, PA Member No.: 3,031 Region Association: None |
Started cutting out the bad stuff. All the rust on the floor was hiding inside the long. All this stuff was just loose in there. The seat belt bolt didn't have much holding it in place. I will make a piece to go on the inside of the long from the engine compartment to the interior.
 This part of the inner long is just as bad as the passenger side. I still have more cutting to do to clean this up. Then make some panels and weld in place. 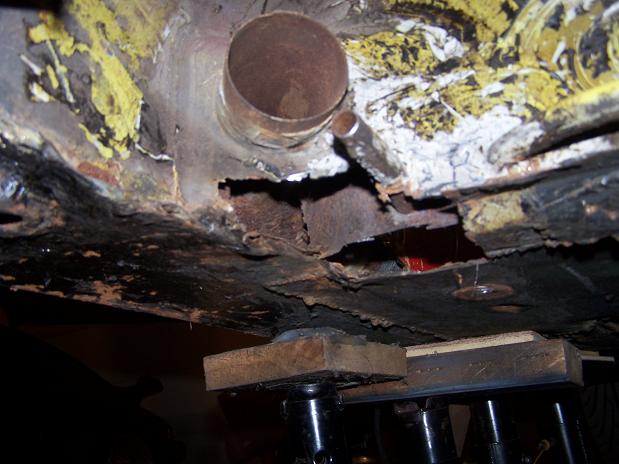 |
|
|
|
| silver74insocal |
Dec 19 2009, 11:46 PM
Post
#111
|
|
Senior Member Group: Members Posts: 736 Joined: 26-November 09 From: rancho cucamonga Member No.: 11,073 Region Association: Southern California |
[
FI runners. Which is the left and which is the right? [/quote] the clips that are welded on for the fuel line go towards the front of the car..good luck |
 |
|
| Spoke |
Jan 16 2010, 04:29 PM
Post
#112
|
|
Jerry Group: Members Posts: 7,278 Joined: 29-October 04 From: Allentown, PA Member No.: 3,031 Region Association: None |
First piece to fab is the inside long. All final cutting is done for the piece.
The horizontal plate had been added by the last guy to replace a totally rusted out bottom of the long. It is 16 ga and the one piece wraps around the outside of the long going about 1/2 way up the outside. There is nothing left of the long on the bottom from in front of the jack tube support to where the bottom long curves upwards. 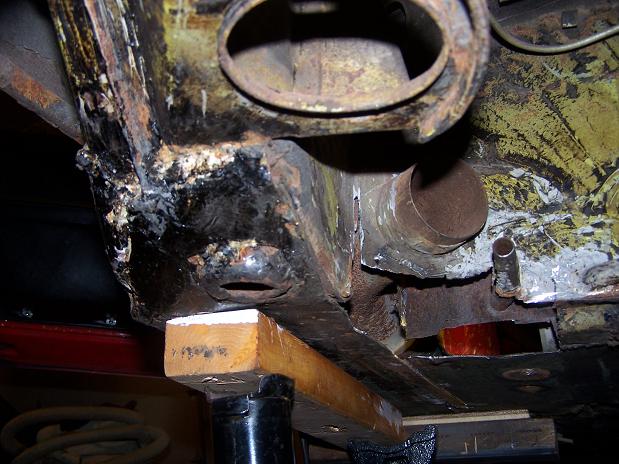 Yes, it's true, there is a jackstand party at Spoke's place. My jackstand and 3 of his buddies are all hanging around where men are working...  Inside view. The corner of the floor has already been replaced by a flat plate of 18 ga. The little sliced hole is actually between the floor piece and long piece. The replacement part will slide right up in this cut and wrap around to the bottom horizontal piece. 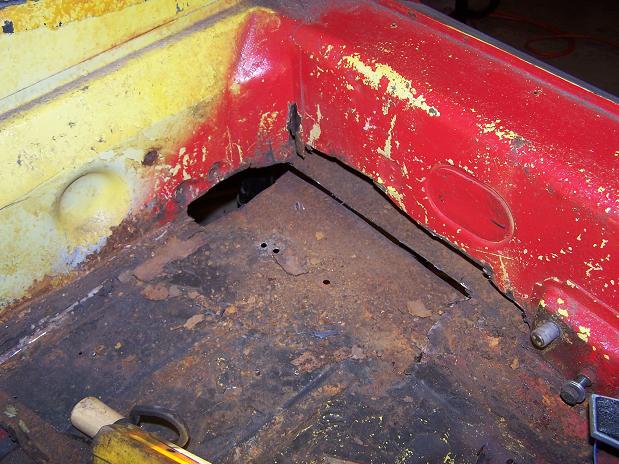 |
|
|
|
| Spoke |
Jan 17 2010, 03:49 PM
Post
#113
|
|
Jerry Group: Members Posts: 7,278 Joined: 29-October 04 From: Allentown, PA Member No.: 3,031 Region Association: None |
Well, no 914 work going on today. Focus today is the rear wheel bearing on my 911 turbo. This thing was singing to me when I bought the car last April and finally gave it up yesterday and refused to turn freely.
Quiz: Guess which rear caliper is from the 914 and which is from the 911 turbo. (hint: the 914 is RED). Attached image(s) 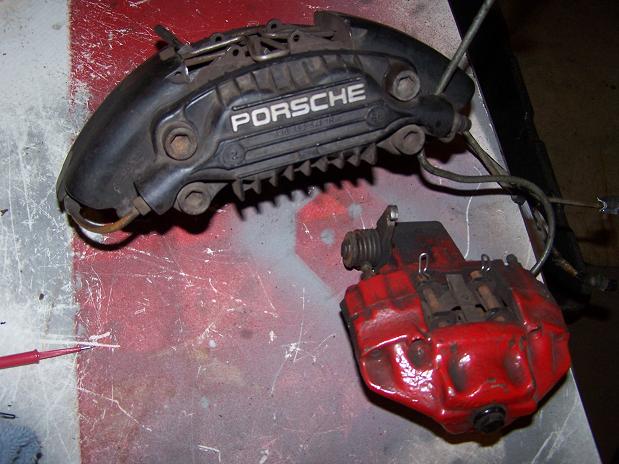
|
|
|
|
| Spoke |
Jan 22 2010, 08:20 PM
Post
#114
|
|
Jerry Group: Members Posts: 7,278 Joined: 29-October 04 From: Allentown, PA Member No.: 3,031 Region Association: None |
Well, I'm not working on the 914 but at least I'm working on a Porsche. Out comes the rear hub on the turbo with a hub puller. It took about 5 medium hits to get this out.
 The inside bearing has lost its cage. All the bearing are huddled at the bottom of the race. 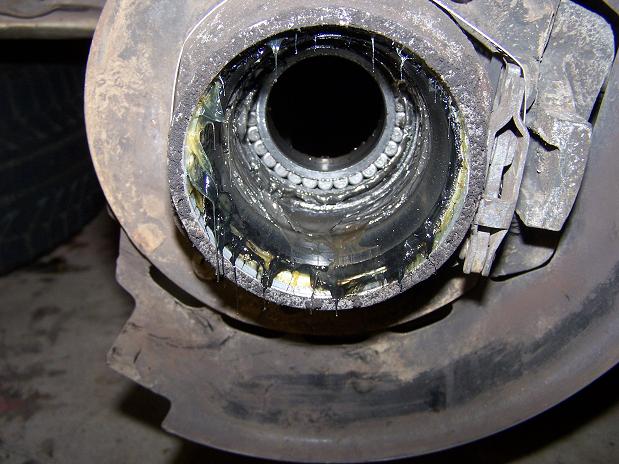 There are no bearings at the top of the race. 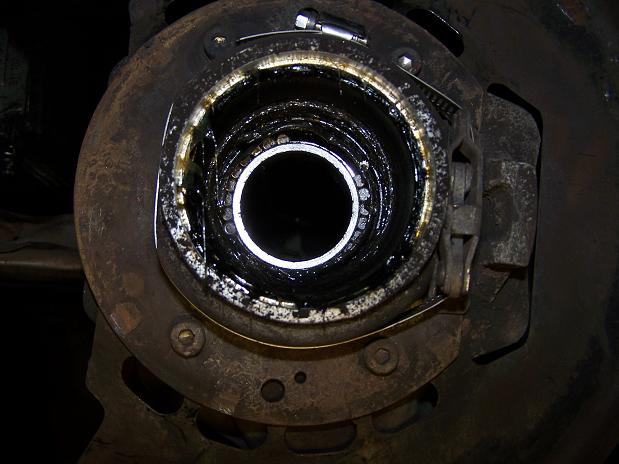 |
|
|
|
| Spoke |
Jan 22 2010, 09:44 PM
Post
#115
|
|
Jerry Group: Members Posts: 7,278 Joined: 29-October 04 From: Allentown, PA Member No.: 3,031 Region Association: None |
Calling the Cap'n: Does this rear drive look ok? The ledge for the grease seal is damaged on the outside. Is this terminal?
Attached image(s) 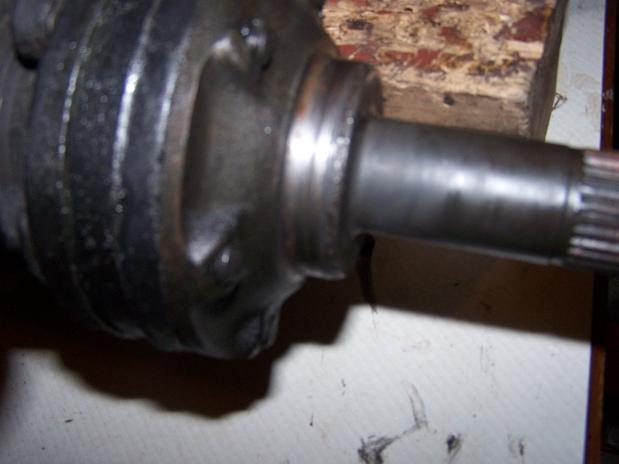 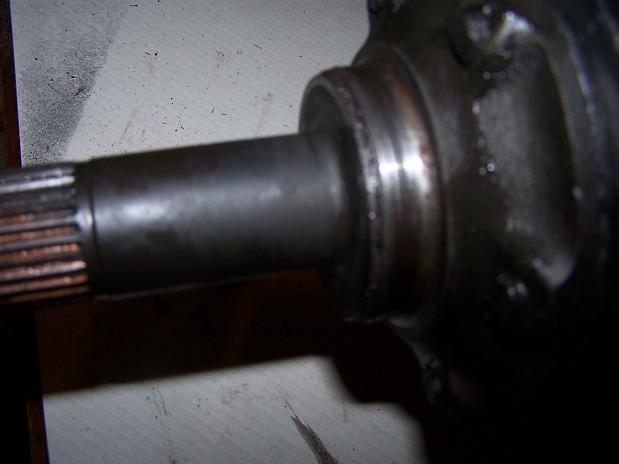
|
|
|
|
| Spoke |
Jan 24 2010, 12:15 PM
Post
#116
|
|
Jerry Group: Members Posts: 7,278 Joined: 29-October 04 From: Allentown, PA Member No.: 3,031 Region Association: None |
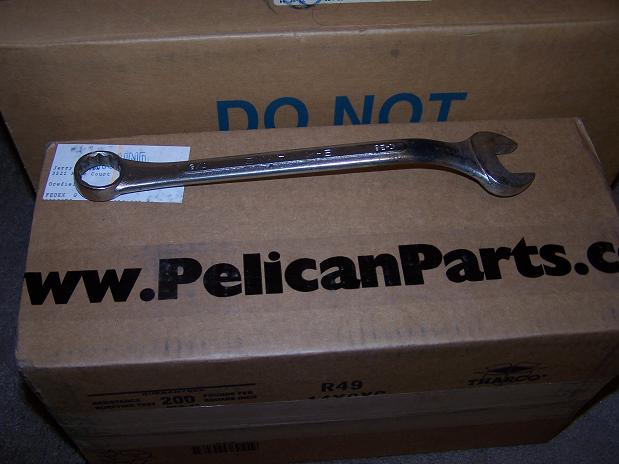
Still working on the 911. Trying to remove the rear swing arm and I can't figure out how to get a wrench between the frame and the tranny to secure the bolt.
Anyone have tips for getting a wrench on this? Attached image(s) 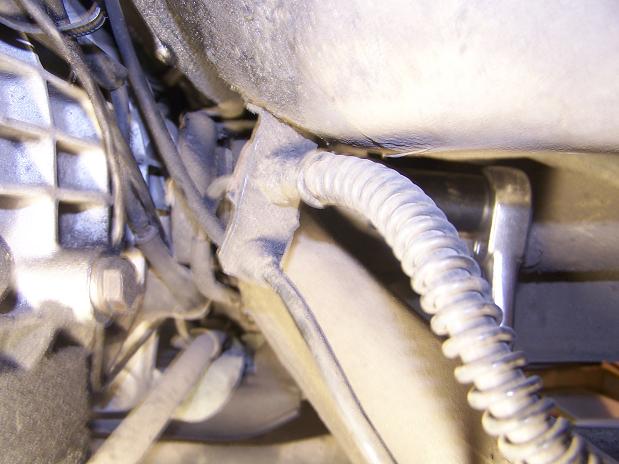
|
|
|
|
| Spoke |
Jan 30 2010, 02:39 PM
Post
#117
|
|
Jerry Group: Members Posts: 7,278 Joined: 29-October 04 From: Allentown, PA Member No.: 3,031 Region Association: None |
Still no 914 content. I finally got the inner swing arm bolt off by bending my wrench to fit around the tranny and secure the nut.
 I've been struggling with the inside race on the hub. I tried a bearing separator but it did nothing. Even tried heat on it and the damn thing wouldn't budge. After about 4 hours fuching with the separator, I got my Dremel tool and sliced the race, stuck a flat head screwdriver in the slot and gave it one hit with the hammer and its off. 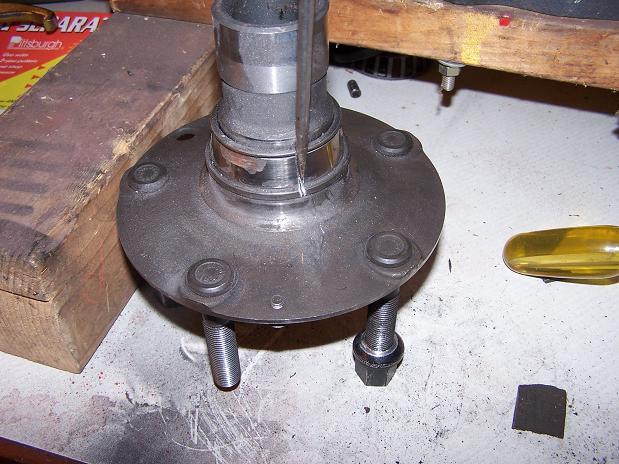 |
|
|
|
| Spoke |
Jan 31 2010, 08:19 AM
Post
#118
|
|
Jerry Group: Members Posts: 7,278 Joined: 29-October 04 From: Allentown, PA Member No.: 3,031 Region Association: None |
Still no 914 content.
Finally got the trailing arm off. The inboard bearing cage is gone. All the boys are present and accounted for but without the cage, there was chaos. 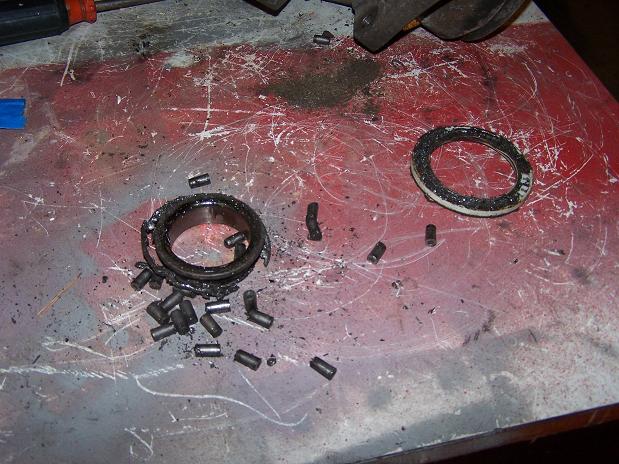 Nice and cleaned up. 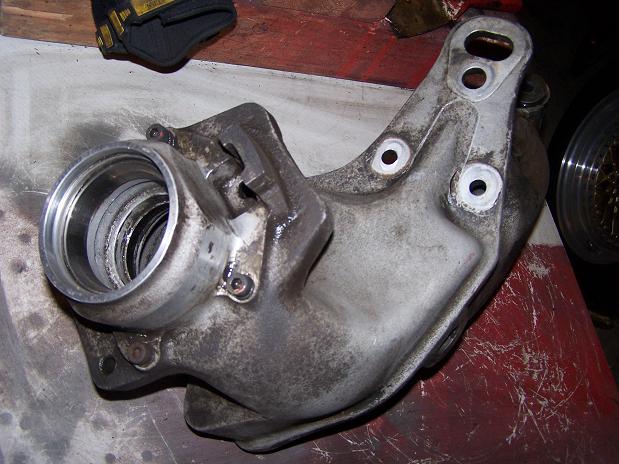 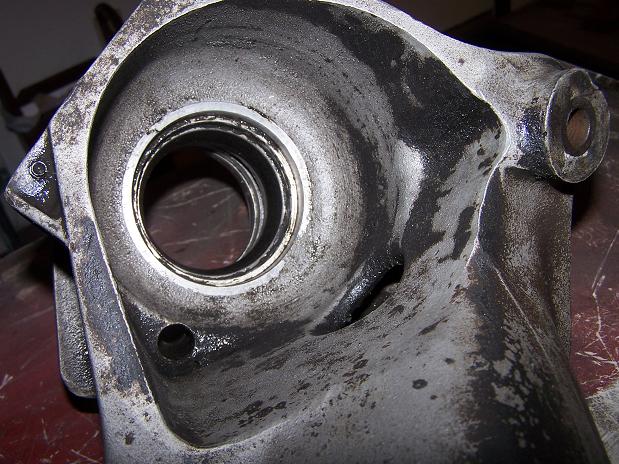 Procedure was to heat the arm really hot then remove the outer races. I'm lazy so I used my Dremel again and one hit with hammer and drift and the outboard outer race is out. 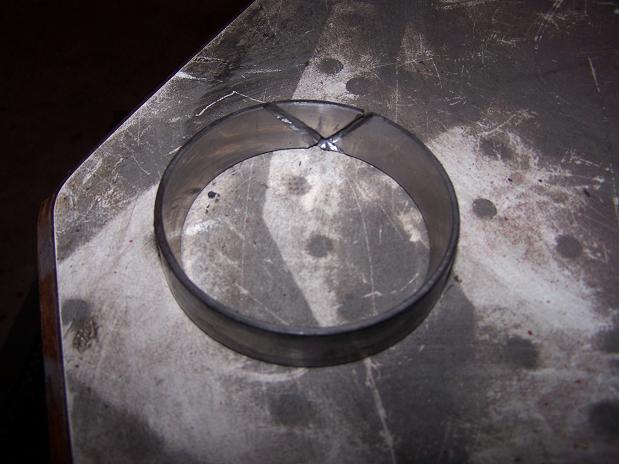 Negligible damage done to the trailing arm by the Dremel. Total time was about 15 minutes to get the outboard race off. 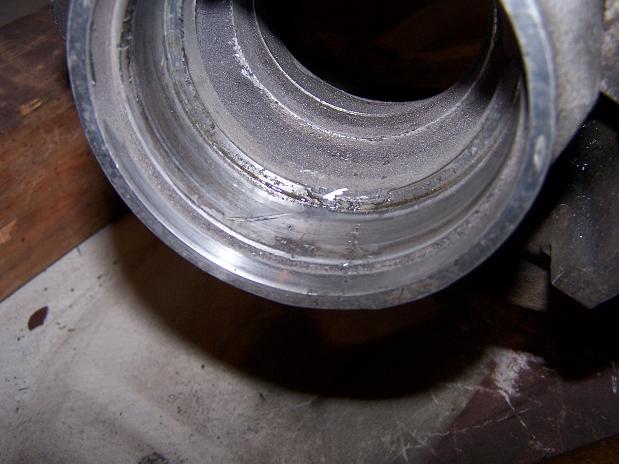 |
|
|
|
| Spoke |
Feb 10 2010, 06:47 AM
Post
#119
|
|
Jerry Group: Members Posts: 7,278 Joined: 29-October 04 From: Allentown, PA Member No.: 3,031 Region Association: None |
Got the 911 back together (IMG:style_emoticons/default/smilie_pokal.gif) (IMG:style_emoticons/default/aktion035.gif) (IMG:style_emoticons/default/beer.gif) (IMG:style_emoticons/default/beer3.gif)
I couldn't press the hub onto the bearing so I took the hub & trailing arm to John at Mr. B's in Maxatawny, PA as he has extensive experience with Porsche, Audi, VW, Mercedes, etc., anything German and has built a 911 racecar before. John did the work in less than 1 day. I hate to pay someone to do a job that I "wish" I could do but it was well worth it to have a knowledgeable guy do the pressing. Also had him make a new hard brake line to the caliper since the original was kinked. There was an awesome brown 72 914 at Mr. B's. This thing was in perfect condition. The interior was perfect and no cracks on the dash. Total cost of wheel bearing replacement: $90 Bearing & seals $90 ebrake shoes $150 bearing press & custom hard brake line $330 Total The messed up rear drive that Cap'n Krusty gave me advice on was actually in pristine condition. When I finally went to clean it up, it turns out the damaged end was only hardened crud. Once cleaned up, it was in perfect condition. Thanks to the CAp'n for you advice. (IMG:style_emoticons/default/beerchug.gif) |
|
|
|
| Spoke |
Feb 10 2010, 07:02 AM
Post
#120
|
|
Jerry Group: Members Posts: 7,278 Joined: 29-October 04 From: Allentown, PA Member No.: 3,031 Region Association: None |
Back to my regularly scheduled 914 rustoration:
This piece will go on the driver side inner long. 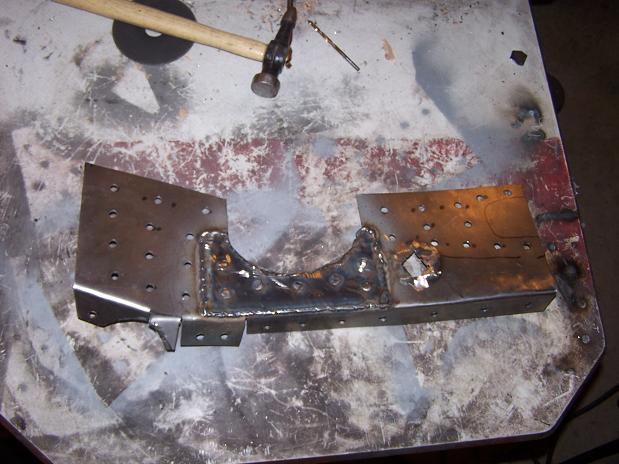 All welded in. The hole is for the seat belt mount. I will weld a bolt onto a piece of 14 gauge steel and weld the plate in place. Since I slid this piece up through a slice between the long bottom and the floor, I didn't want to cut a hole in the bottom long to make clearance for the bolt. 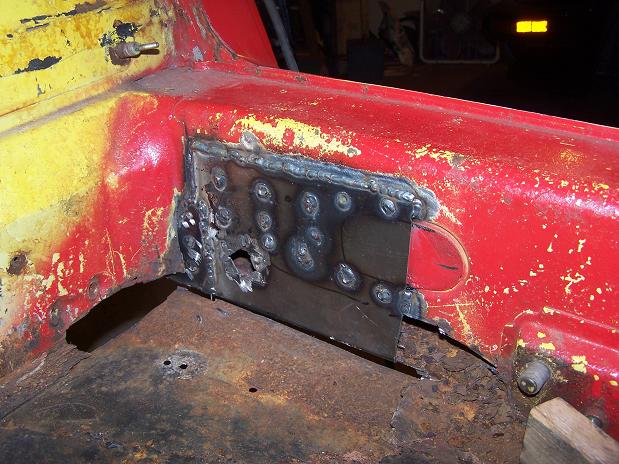 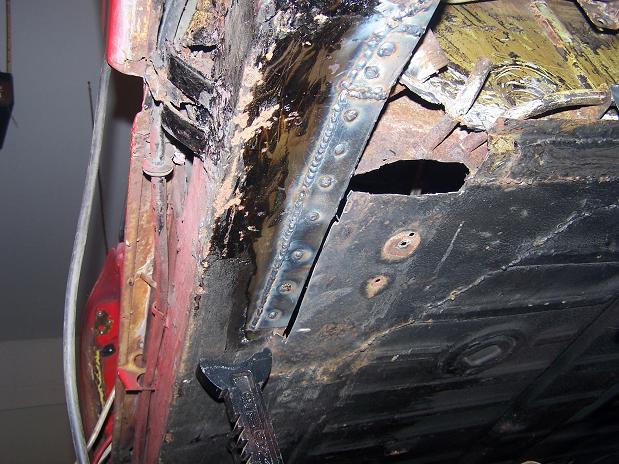 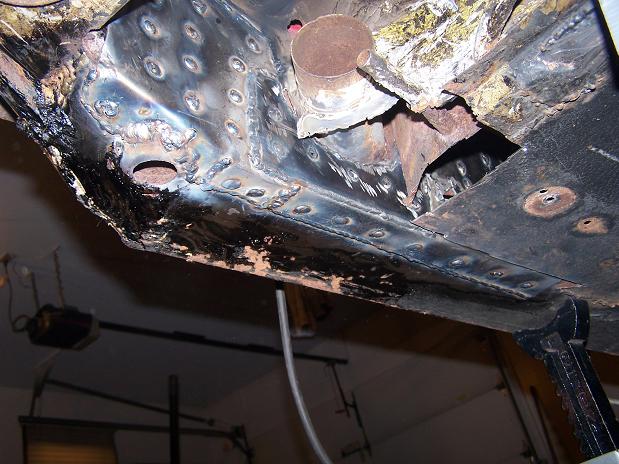 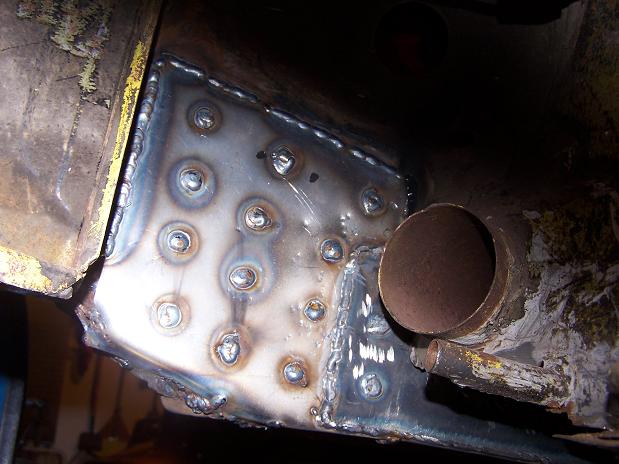 |
|
|
|
|
1 User(s) are reading this topic (1 Guests and 0 Anonymous Users)
0 Members:

|
Lo-Fi Version | Time is now: 8th December 2025 - 01:06 PM |
Invision Power Board
v9.1.4 © 2025 IPS, Inc.