|
|
|
Porsche, and the Porsche crest are registered trademarks of Dr. Ing. h.c. F. Porsche AG.
This site is not affiliated with Porsche in any way. Its only purpose is to provide an online forum for car enthusiasts. All other trademarks are property of their respective owners. |
|
|

  |

| Spoke |
 Sep 13 2009, 02:13 PM Sep 13 2009, 02:13 PM
Post
#61
|
|
Jerry  Group: Members Posts: 7,278 Joined: 29-October 04 From: Allentown, PA Member No.: 3,031 Region Association: None |
One last hole in the longitudinal patched.
Engine tin piece is in too. Previous engine tin replacement didn't match up well with the hell hole and firewall. Attached image(s) 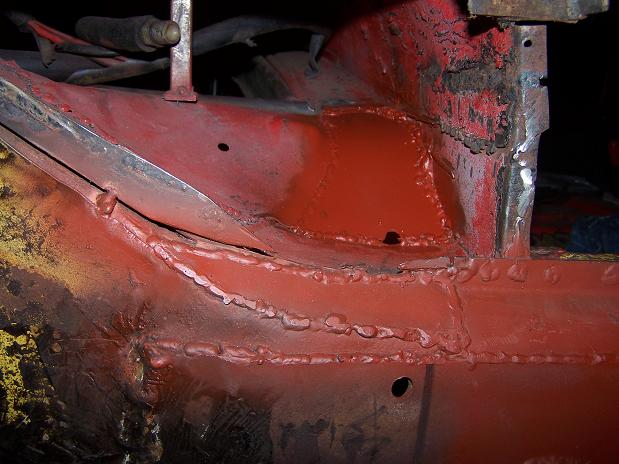
|
   |

 
|
| Spoke |
Sep 13 2009, 02:33 PM
Post
#62
|
|
Jerry Group: Members Posts: 7,278 Joined: 29-October 04 From: Allentown, PA Member No.: 3,031 Region Association: None |
I have a metal bar sitting around so I thought I would try to strengthen the long by weliding the bar into the top of the long.
 Added 2 more bars under the hell hole. 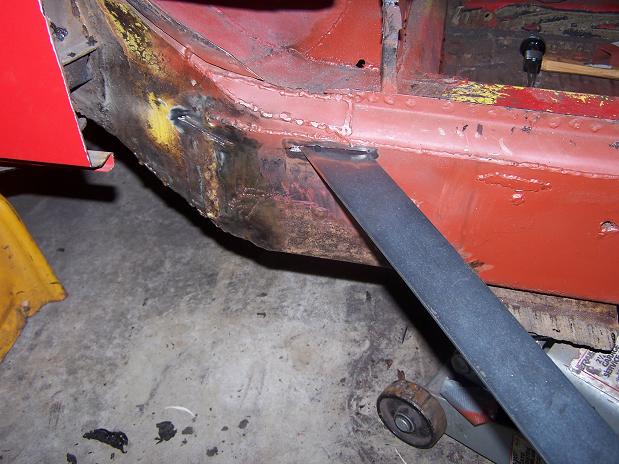 Bars are cut and welded in. Don't know if this will help the rigidity of the long but it's easy to do. 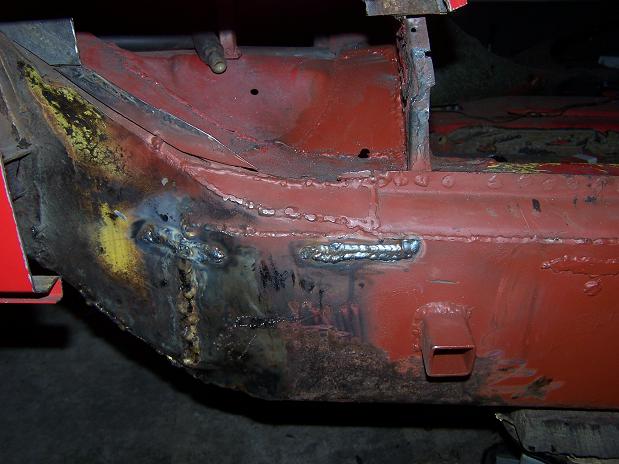 |
|
|
|
| Spoke |
Sep 13 2009, 09:51 PM
Post
#63
|
|
Jerry Group: Members Posts: 7,278 Joined: 29-October 04 From: Allentown, PA Member No.: 3,031 Region Association: None |
Put a couple more steel bar supports in the long.
Cleaned up all the brushed-on tar on the outside of the long and primed it. Looks like a blank canvas to me. Attached image(s) 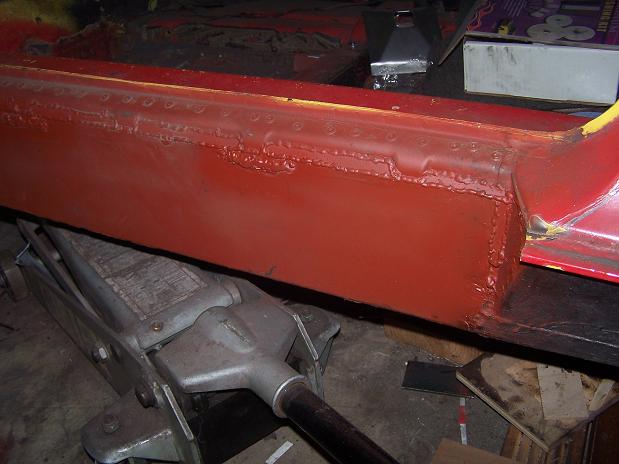 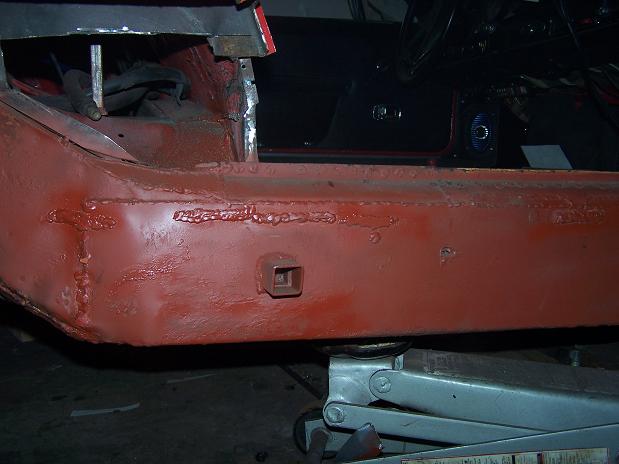 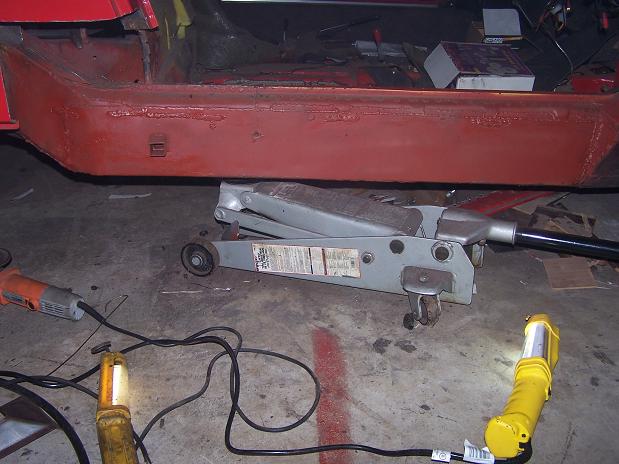
|
|
|
|
| Spoke |
Sep 14 2009, 05:57 AM
Post
#64
|
|
Jerry Group: Members Posts: 7,278 Joined: 29-October 04 From: Allentown, PA Member No.: 3,031 Region Association: None |
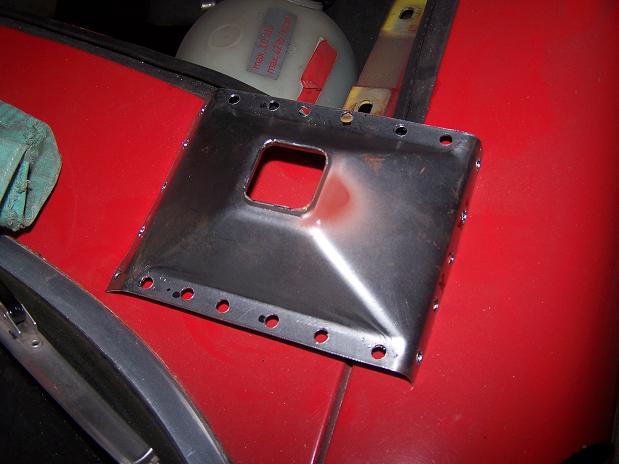
Jack support plate ready for welding.
 Presto! 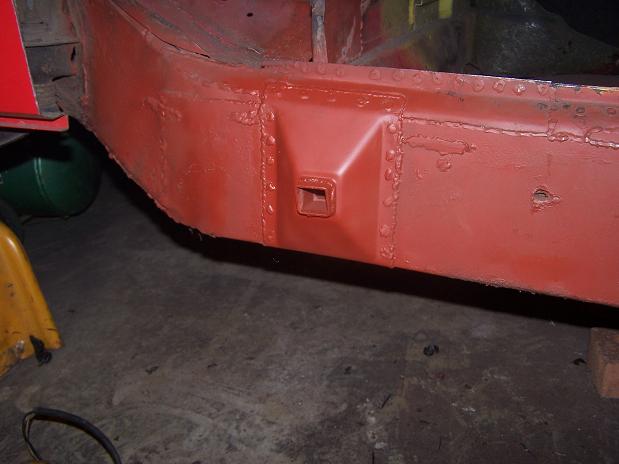 For the first time in probably 15 years, the car can be jacked up by the jack tube. 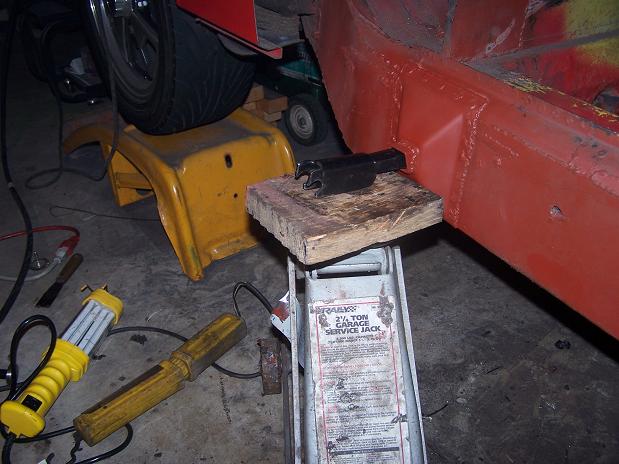 |
|
|
|
| Spoke |
Sep 21 2009, 08:54 PM
Post
#65
|
|
Jerry Group: Members Posts: 7,278 Joined: 29-October 04 From: Allentown, PA Member No.: 3,031 Region Association: None |
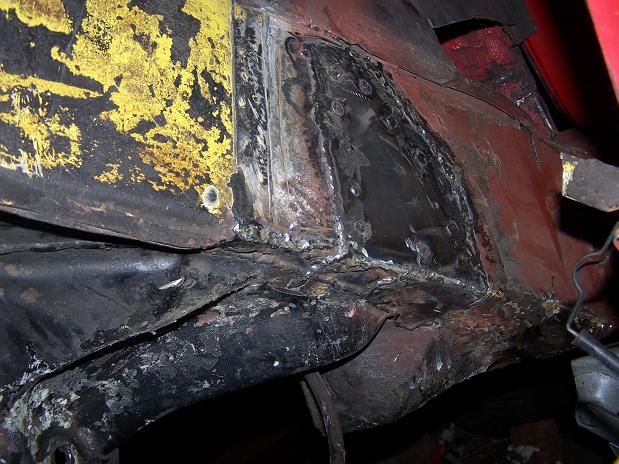
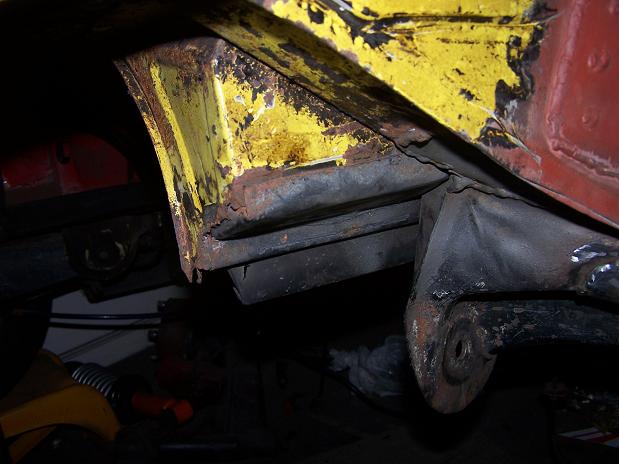
After some deliberation, I decided to investigate what is under the outside suspension pickup. There used to be more metal under there.
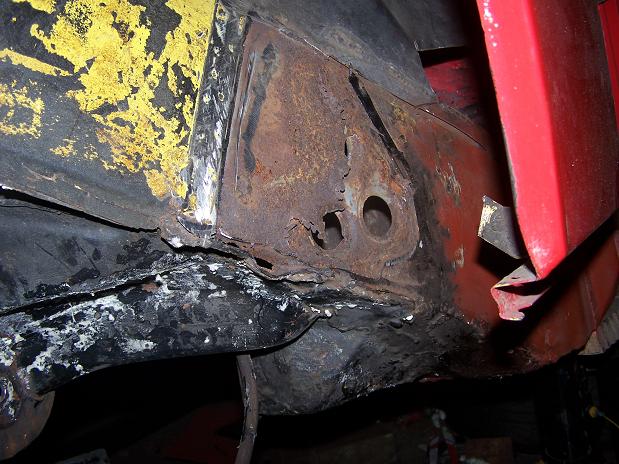 There is still some metal left on the pickup. I'll build up with new steel what has thinned out. 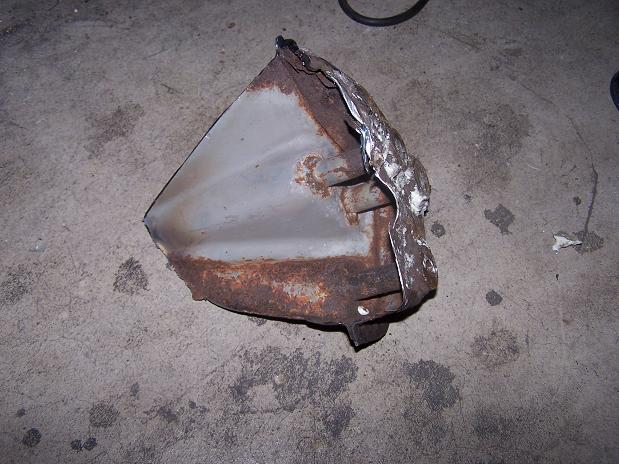 |
|
|
|
| Spoke |
Sep 22 2009, 05:44 AM
Post
#66
|
|
Jerry Group: Members Posts: 7,278 Joined: 29-October 04 From: Allentown, PA Member No.: 3,031 Region Association: None |
Cleaned back to good metal and patched. That looks better.
 Home made clamshell ready to be welded in place. This will go from above the suspension pickup all the way to the jack support. 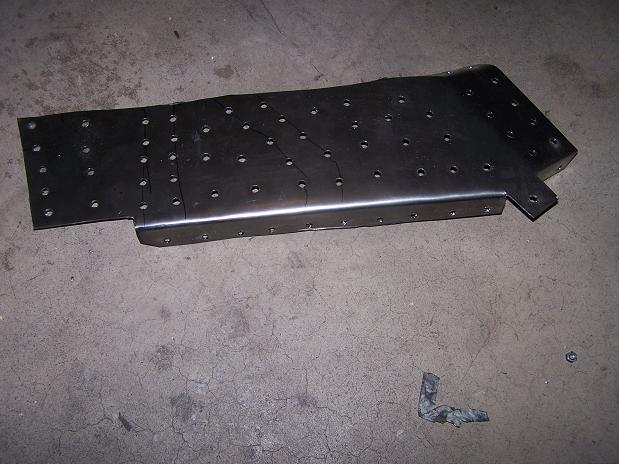 |
|
|
|
| Spoke |
Sep 24 2009, 10:08 PM
Post
#67
|
|
Jerry Group: Members Posts: 7,278 Joined: 29-October 04 From: Allentown, PA Member No.: 3,031 Region Association: None |
The long is ready for the support plate. The gray weld-through primer.
  |
|
|
|
| Spoke |
Sep 24 2009, 10:12 PM
Post
#68
|
|
Jerry Group: Members Posts: 7,278 Joined: 29-October 04 From: Allentown, PA Member No.: 3,031 Region Association: None |
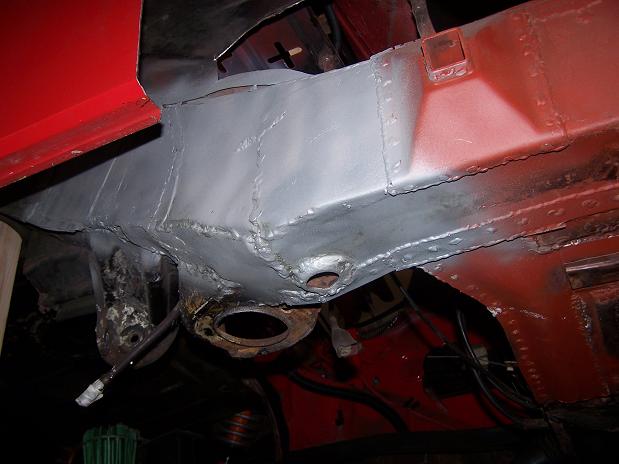
The support plate is welded in. Gray weld-through primer is on where the suspension pickup will be welded on.
Attached image(s) 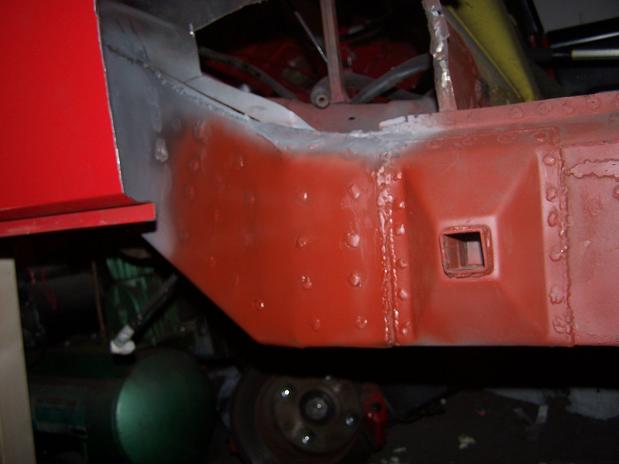 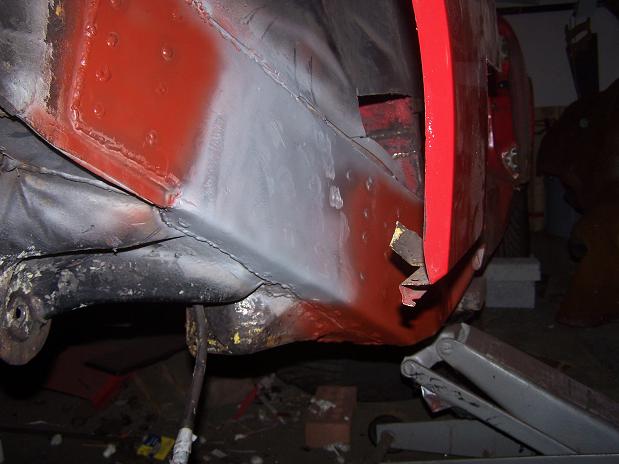 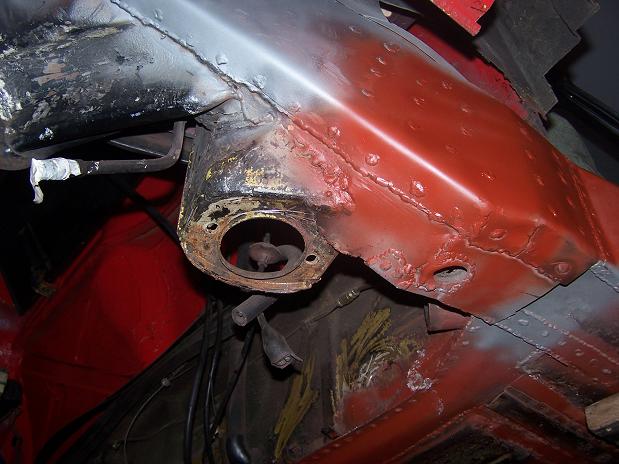
|
|
|
|
| Spoke |
Sep 24 2009, 10:51 PM
Post
#69
|
|
Jerry Group: Members Posts: 7,278 Joined: 29-October 04 From: Allentown, PA Member No.: 3,031 Region Association: None |
What to do if your nuts are too small: weld 2 together (IMG:style_emoticons/default/biggrin.gif)
The PO drilled out the existing bolts probably when they rusted and snapped. So weld 2 nuts together and weld on top of the existing drilled-through sleeve. 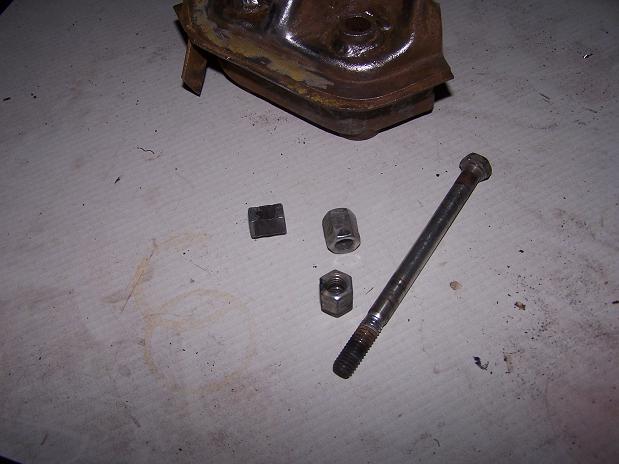 Nuts are welded on now. I just need to find something to cover the top of the nuts like the original plastic cap did. 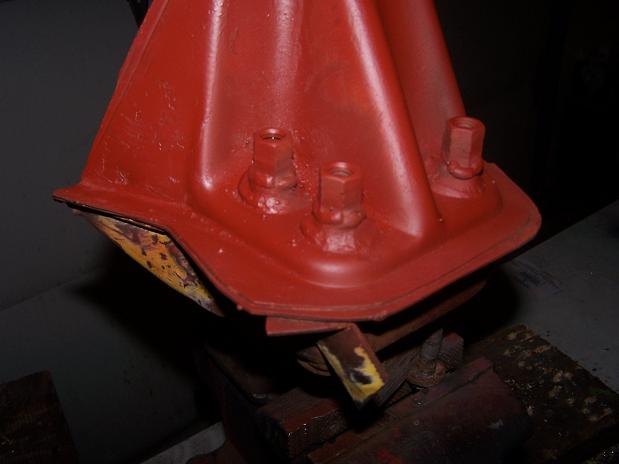 |
|
|
|
| Spoke |
Nov 16 2009, 04:05 AM
Post
#70
|
|
Jerry Group: Members Posts: 7,278 Joined: 29-October 04 From: Allentown, PA Member No.: 3,031 Region Association: None |
The suspension pick-up will be seam welded, then these 16 gauge plates will secure the pick-up on the long.
Attached image(s) 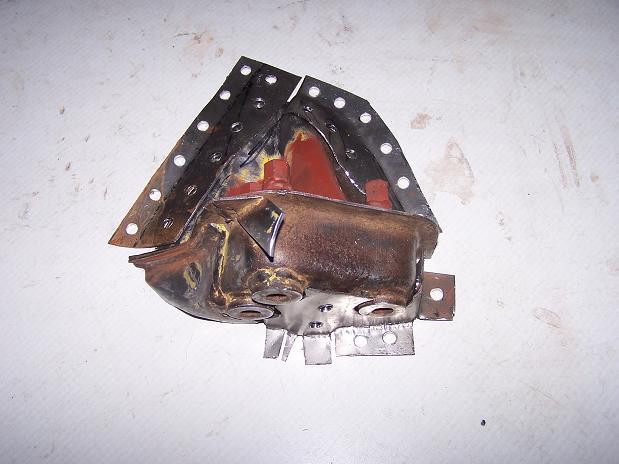
|
|
|
|
| Spoke |
Nov 16 2009, 04:17 AM
Post
#71
|
|
Jerry Group: Members Posts: 7,278 Joined: 29-October 04 From: Allentown, PA Member No.: 3,031 Region Association: None |
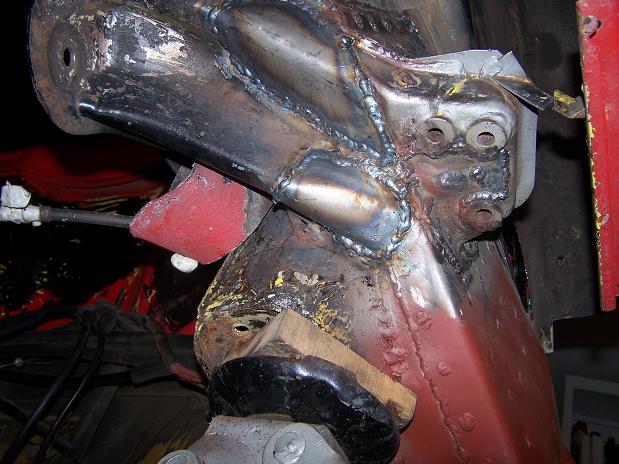
The suspension pick-up is welded on including the support plates.
The geometry of this corner is all messed up from the previous hell hole repair where the inside suspension pick-up was replaced and mounted about 3/4 of an inch too low. This means for proper camber I needed almost 1 inch of shim plates. Since I would never be removing the inside suspensino pick-up, I decided to lower the outside suspension pick-up about 5/8 of an inch to minimize the stack of shims needed. This drop can be observed by looking at the support strap to the fender. Attached image(s) 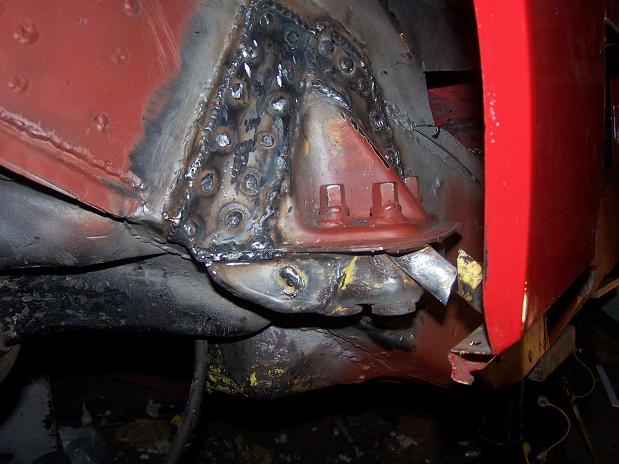 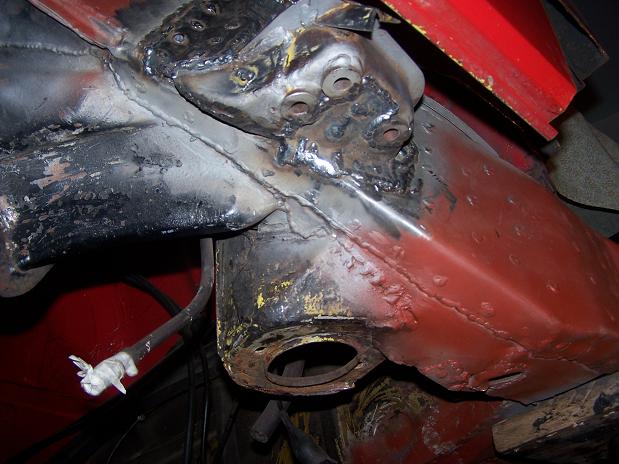 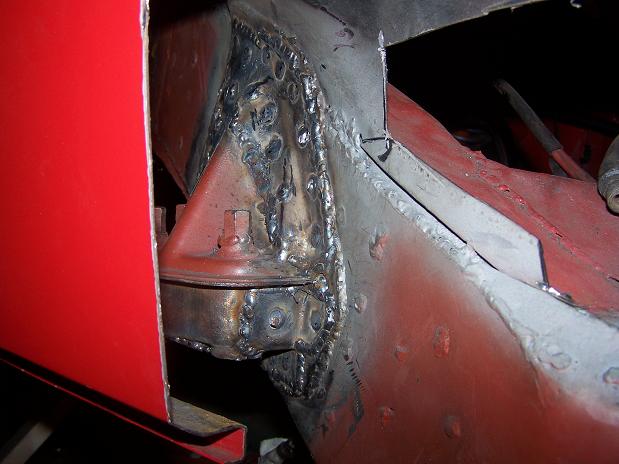
|
|
|
|
| Spoke |
Nov 16 2009, 04:23 AM
Post
#72
|
|
Jerry Group: Members Posts: 7,278 Joined: 29-October 04 From: Allentown, PA Member No.: 3,031 Region Association: None |
Finally time to patch up the hole looking into the hell hole. All work in the hole is done.
The replacement plate is 16 gauge. Attached image(s) 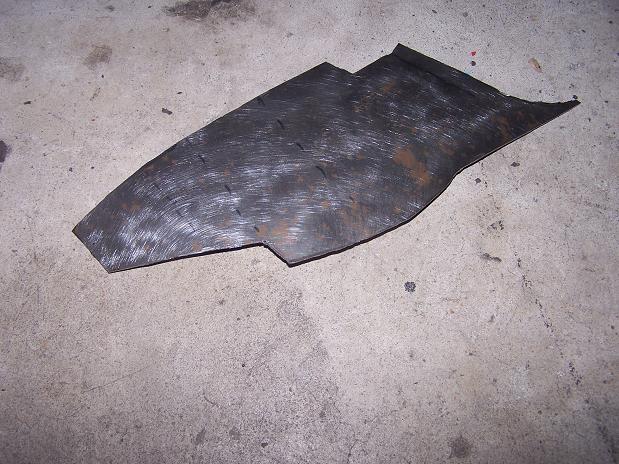 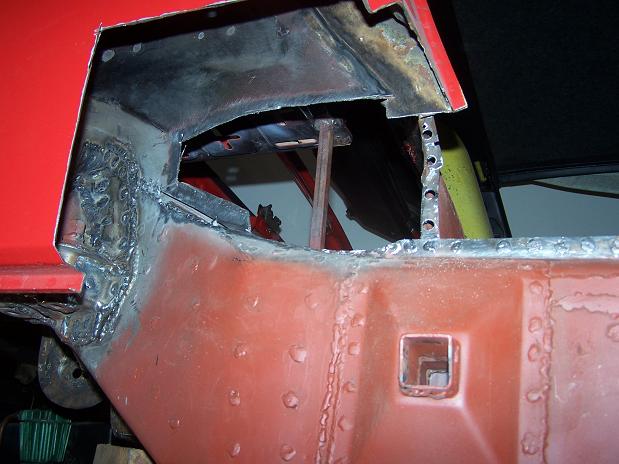 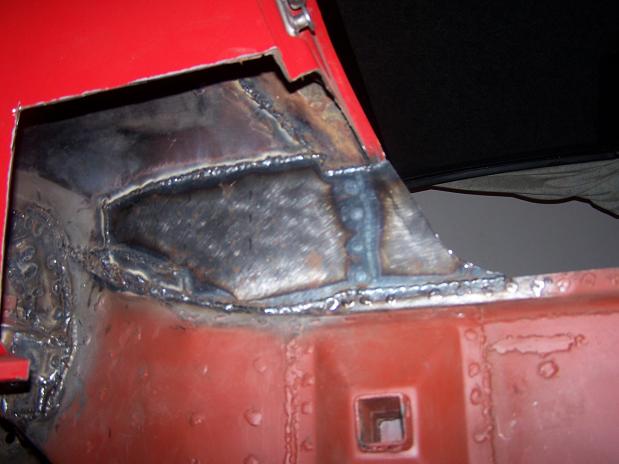
|
|
|
|
| Spoke |
Nov 16 2009, 05:03 AM
Post
#73
|
|
Jerry Group: Members Posts: 7,278 Joined: 29-October 04 From: Allentown, PA Member No.: 3,031 Region Association: None |
Support plates between inner and outer suspension pick-ups are welded in.
 A PO repair to the inner fender wall only seam welded the new wall from the inside. Now the replacement piece is welded from the outside as well. Attached image(s) 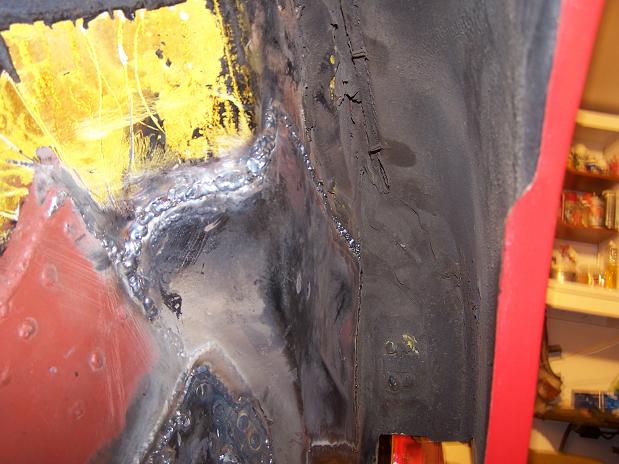
|
|
|
|
| veltror |
Nov 16 2009, 09:17 AM
Post
#74
|
|
Senior Member Group: Members Posts: 930 Joined: 27-April 08 From: Potters Bar Herts UK Member No.: 8,978 Region Association: None |
Excellent thread, I thought mine was the only one with a rotten outside mount!!
|
|
|
|
| FourBlades |
Nov 16 2009, 09:19 AM
Post
#75
|
|
From Wreck to Rockin Group: Members Posts: 2,056 Joined: 3-December 07 From: Brevard, FL Member No.: 8,414 Region Association: South East States |
That is some great looking repair work! (IMG:style_emoticons/default/smilie_pokal.gif) That should be good for 35 more years. I would seam seal all the welding joints for extra corrosion protection. I would not grind the welds at all because they will be covered up anyway. John |
|
|
|
| raw1298 |
Nov 16 2009, 12:14 PM
Post
#76
|
|
Senior Member Group: Members Posts: 616 Joined: 9-March 09 From: Rocklin,Ca. Member No.: 10,148 Region Association: Northern California |
Awesome job (IMG:style_emoticons/default/welder.gif) (IMG:style_emoticons/default/aktion035.gif) . Gets me pumped to finish mine!!
|
|
|
|
| Spoke |
Nov 21 2009, 08:43 AM
Post
#77
|
|
Jerry Group: Members Posts: 7,278 Joined: 29-October 04 From: Allentown, PA Member No.: 3,031 Region Association: None |
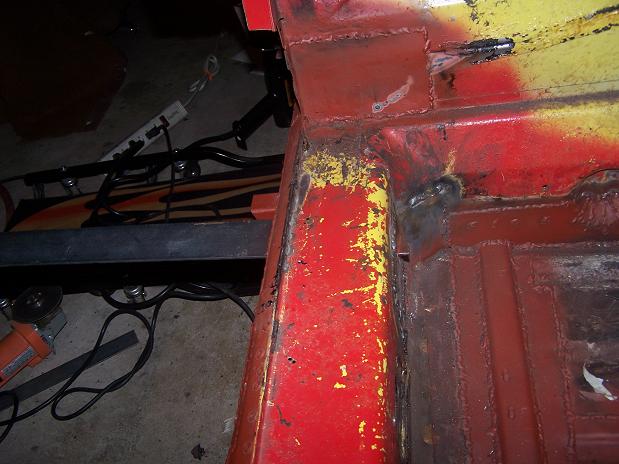
The original hell hole repair put that little patch on the firewall over the long. It's thin metal. I can't tell if 18 or 20 gauge. So I will put a support plate of 16 gauge over it.
 Same thing with the inner fender wall. Another plate of 16 gauge will cover this area although it has a 2nd purpose. The front part of the plate makes up the seam around the door where the weatherstipping goes. 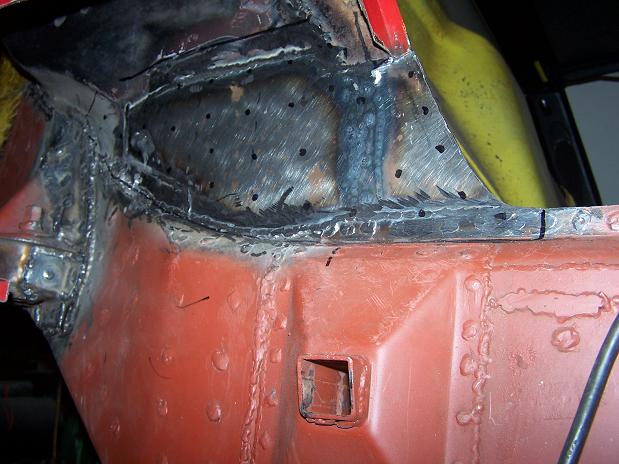 Plates ready to go. 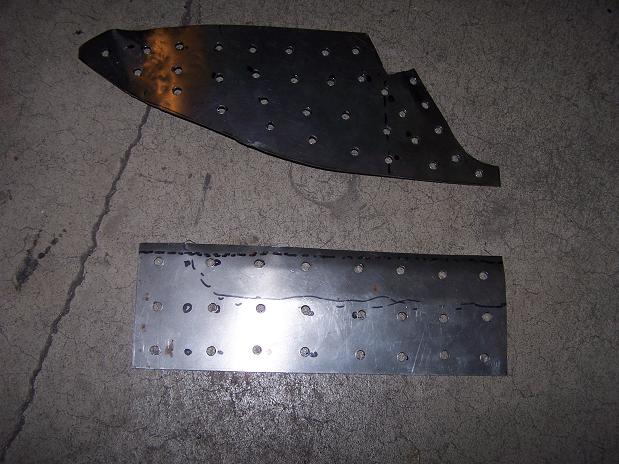 |
|
|
|
| Spoke |
Nov 21 2009, 08:48 AM
Post
#78
|
|
Jerry Group: Members Posts: 7,278 Joined: 29-October 04 From: Allentown, PA Member No.: 3,031 Region Association: None |
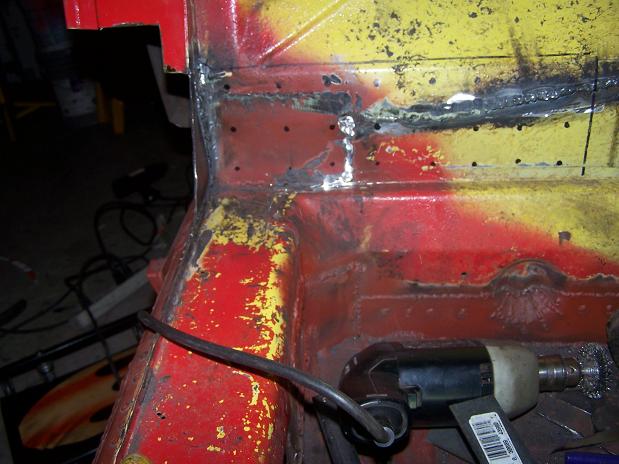
And Presto! The 2 plates may add a little bit to the rigidity of the chassis.
Attached image(s) 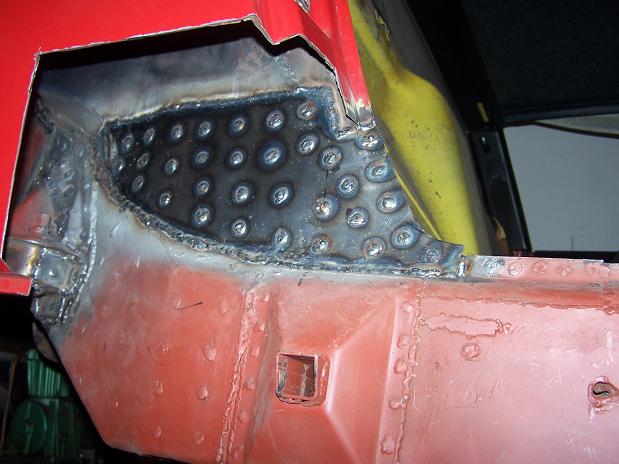 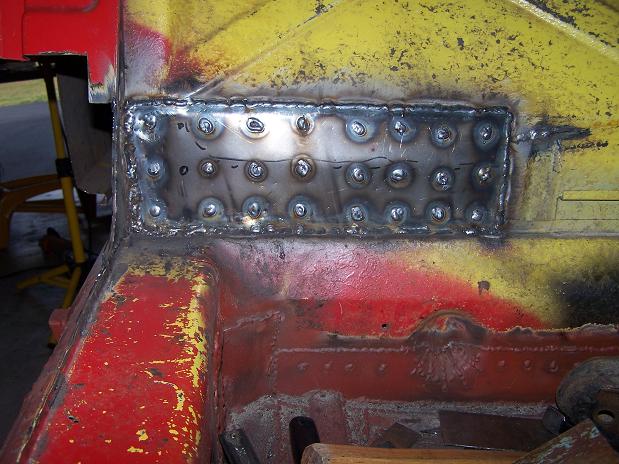 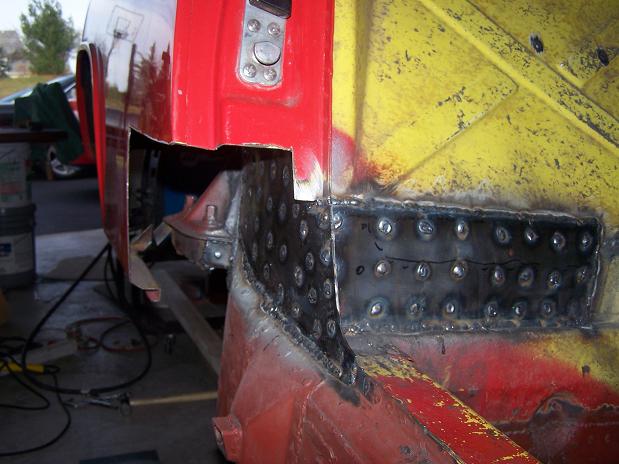
|
|
|
|
| my928s4 |
Nov 21 2009, 08:57 AM
Post
#79
|
|
Member Group: Members Posts: 349 Joined: 18-August 07 From: Spokane, WA Member No.: 8,018 Region Association: Pacific Northwest |
Nice work, that looks like it will last a looooong time!.
|
|
|
|
| Spoke |
Nov 21 2009, 10:32 PM
Post
#80
|
|
Jerry Group: Members Posts: 7,278 Joined: 29-October 04 From: Allentown, PA Member No.: 3,031 Region Association: None |
The passenger side engine shelf is a replacement. Here's the backside of the replacement engine shelf folded up under the existing metal.
 It's a lot more fun welding 16 gauge steel versus half rusted 18 or 20 gauge, whatever the engine tin is. Also seam welded the part of the long over the rear suspension. That looks better. 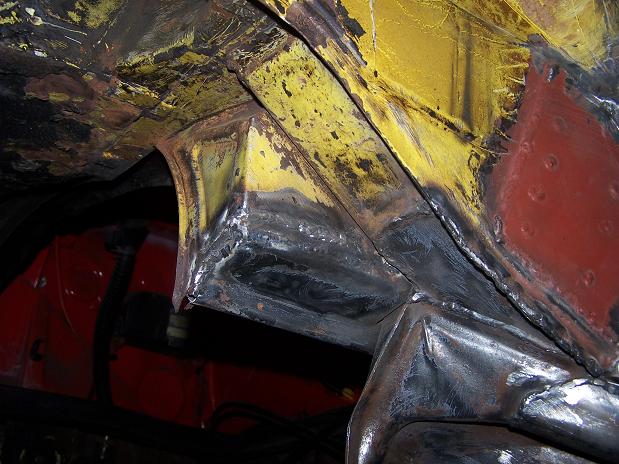 |
|
|
|
|
1 User(s) are reading this topic (1 Guests and 0 Anonymous Users)
0 Members:

|
Lo-Fi Version | Time is now: 8th December 2025 - 11:55 AM |
Invision Power Board
v9.1.4 © 2025 IPS, Inc.