|
|
|
Porsche, and the Porsche crest are registered trademarks of Dr. Ing. h.c. F. Porsche AG.
This site is not affiliated with Porsche in any way. Its only purpose is to provide an online forum for car enthusiasts. All other trademarks are property of their respective owners. |
|
|

  |

| Amenson |
 Sep 14 2008, 08:45 PM Sep 14 2008, 08:45 PM
Post
#181
|
|
That's opposite lock!!  Group: Members Posts: 645 Joined: 27-May 05 From: Dublin, OH Member No.: 4,154 Region Association: None |
Finally, enough free time for an update. I have been overly busy the past few weeks with events away from the house but have still managed to find time to work on the project...actually took Thursday off from work to spend in the garage gussying up the PorSTi for the party that I had yesterday. The goal is to get everything painted and the engine in for the final time. Several things needed to be done to meet this goal...
First on the to do list was to clean up all of the repairs around the longs and engine compartment so that I could seal them with Por15. While working away with the wire brush I found some more rust hiding under bondo/seam sealer. (IMG:style_emoticons/default/ar15.gif) (IMG:style_emoticons/default/headbang.gif) Time to (IMG:style_emoticons/default/sawzall-smiley.gif) (IMG:style_emoticons/default/welder.gif) 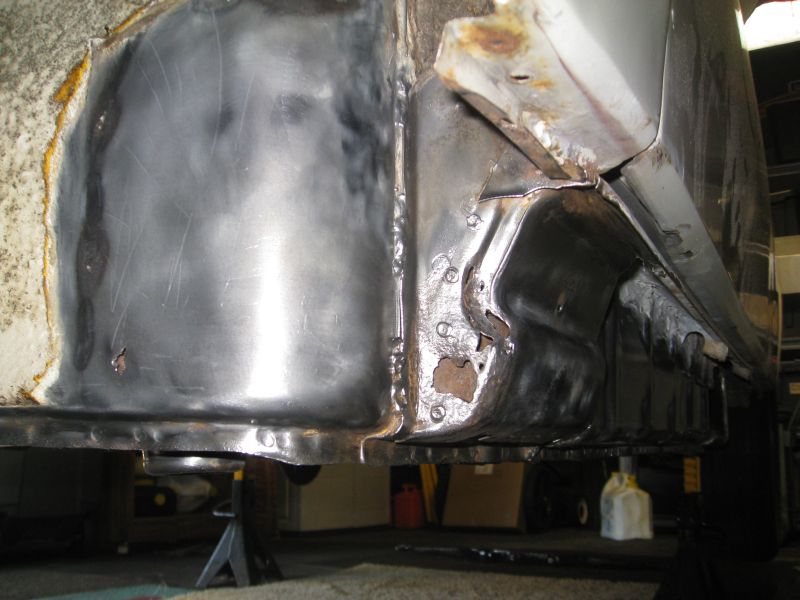 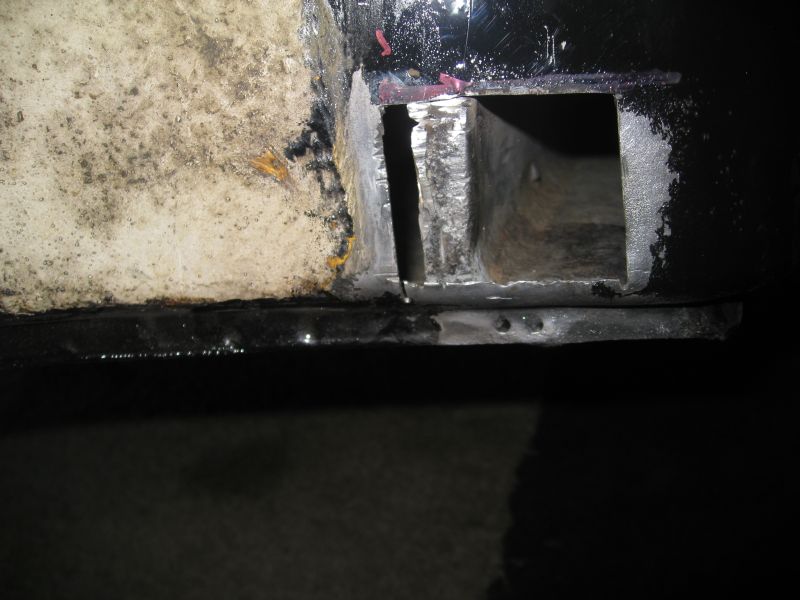 No more hole...still need to fix the other problem. Decided to put that off for a bit as it will not keep me from finishing the inside of the longs so that I can run the cooling lines.  Next I needed to get the intercooler tubes and blow off valve tacked in place. First I had to convince myself that I could make pretty enough welds...several hours of practice later (IMG:style_emoticons/default/welder.gif) I think that I am ready. 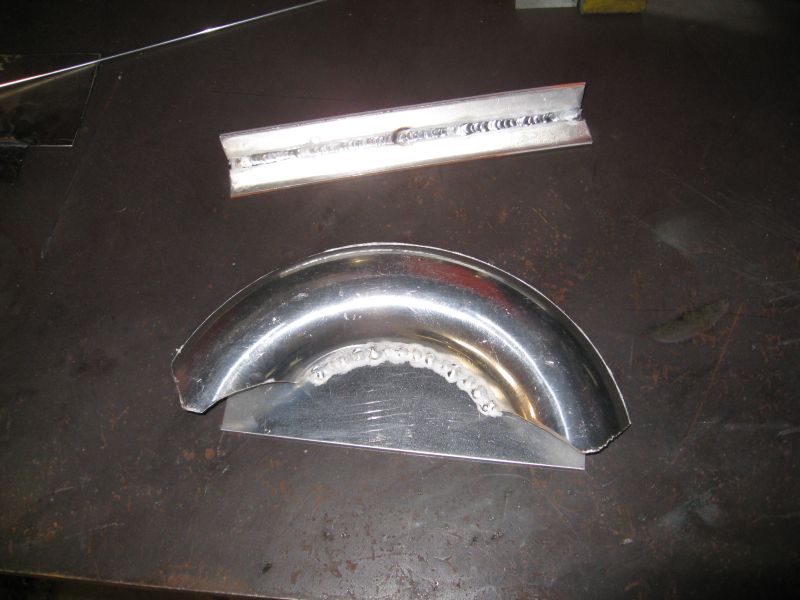 Make the holes for the BOV mounting plate... 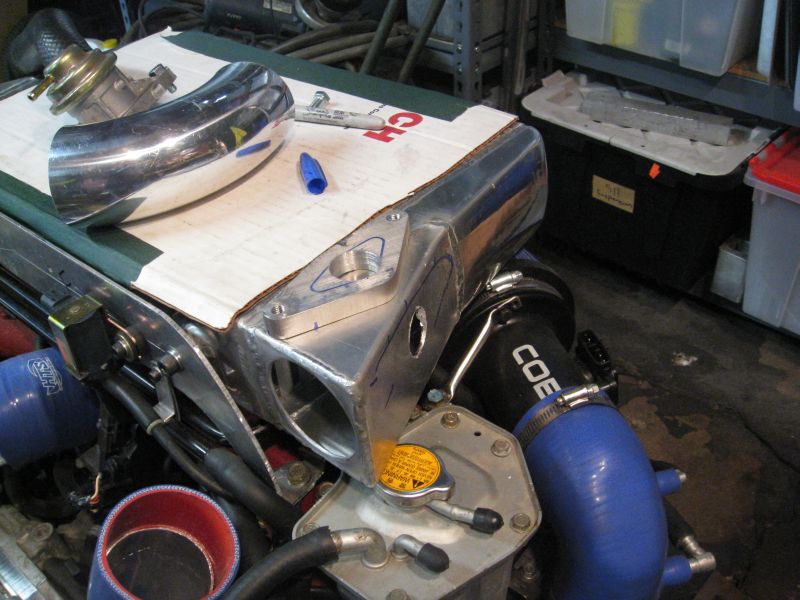 Attached without blowing any holes (IMG:style_emoticons/default/cheer.gif) Still need to figure out how to get the BOV tube to run to the intake. 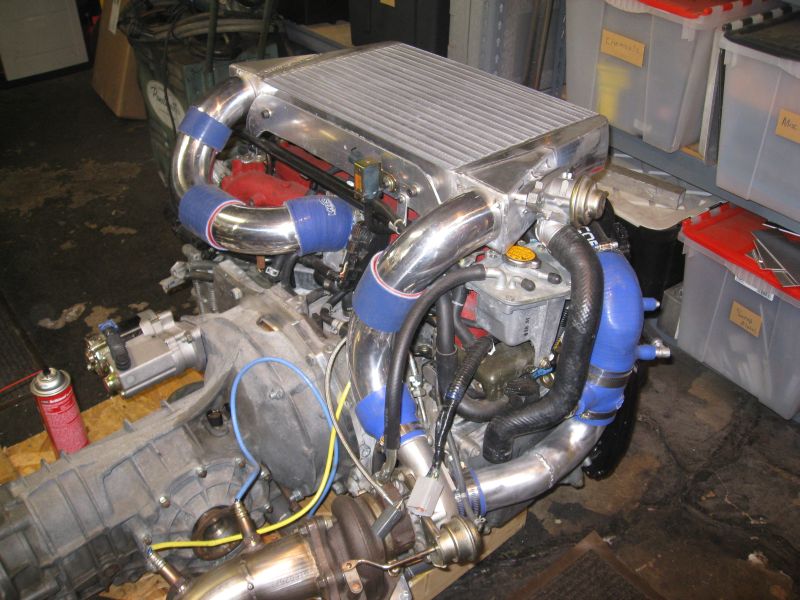 ... |
   |

 
|
| fat73 |
Sep 14 2008, 08:47 PM
Post
#182
|
|
W9R1 Group: Members Posts: 244 Joined: 7-May 05 From: tampa,fl Member No.: 4,043 Region Association: South East States |
QUOTE(Amenson @ Sep 14 2008, 06:45 PM)  Finally, enough free time for an update. I have been overly busy the past few weeks with events away from the house but have still managed to find time to work on the project...actually took Thursday off from work to spend in the garage gussying up the PorSTi for the party that I had yesterday. The goal is to get everything painted and the engine in for the final time. Several things needed to be done to meet this goal... First on the to do list was to clean up all of the repairs around the longs and engine compartment so that I could seal them with Por15. While working away with the wire brush I found some more rust hiding under bondo/seam sealer. (IMG:style_emoticons/default/ar15.gif) (IMG:style_emoticons/default/headbang.gif) Time to (IMG:style_emoticons/default/sawzall-smiley.gif) (IMG:style_emoticons/default/welder.gif) No more hole...still need to fix the other problem. Decided to put that off for a bit as it will not keep me from finishing the inside of the longs so that I can run the cooling lines. Next I needed to get the intercooler tubes and blow off valve tacked in place. First I had to convince myself that I could make pretty enough welds...several hours of practice later (IMG:style_emoticons/default/welder.gif) I think that I am ready. Make the holes for the BOV mounting plate... Attached without blowing any holes (IMG:style_emoticons/default/cheer.gif) Still need to figure out how to get the BOV tube to run to the intake. ... Why not just let the BOV vent into the atmosphere? Would save you the trouble. Ed aka W9R1 |
|
|
|
| Amenson |
Sep 14 2008, 08:53 PM
Post
#183
|
|
That's opposite lock!! Group: Members Posts: 645 Joined: 27-May 05 From: Dublin, OH Member No.: 4,154 Region Association: None |
...Next is to get the car out of the garage and give it a good cleaning to get rid 2 years of restoration residue. It has been a long time since it has seen natural light!!
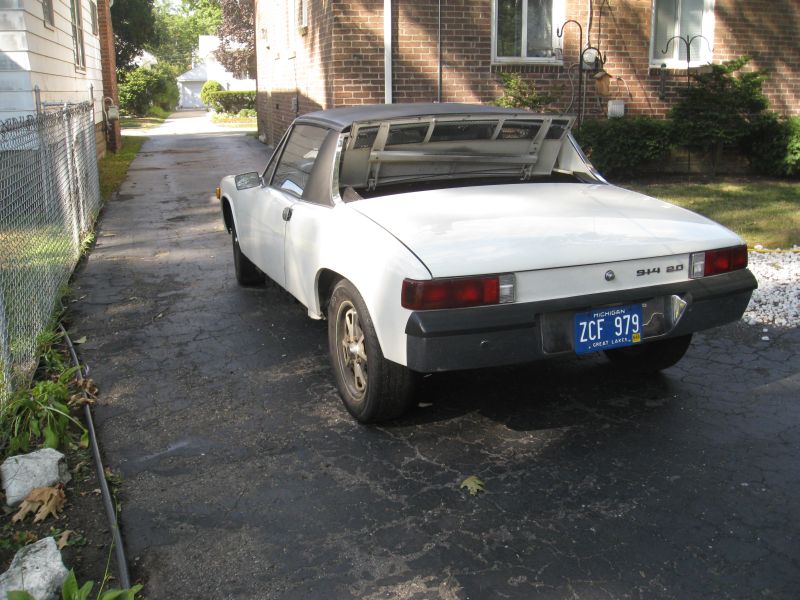 After a good cleaning I installed the front shift rod and pulled the Gates tube through the longs. I somehow did not take any pictures of the cooling lines. Will get some next time I am in the garage. Time to get ready... 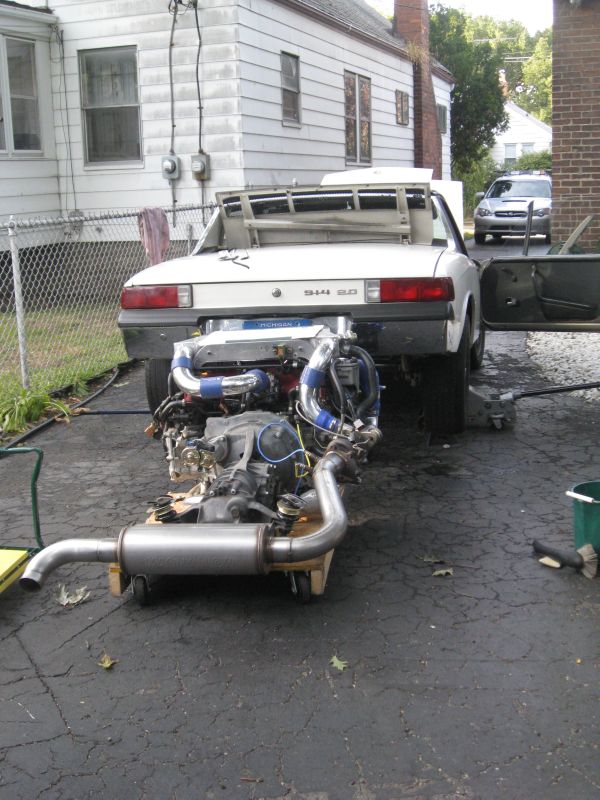 Stick it in there 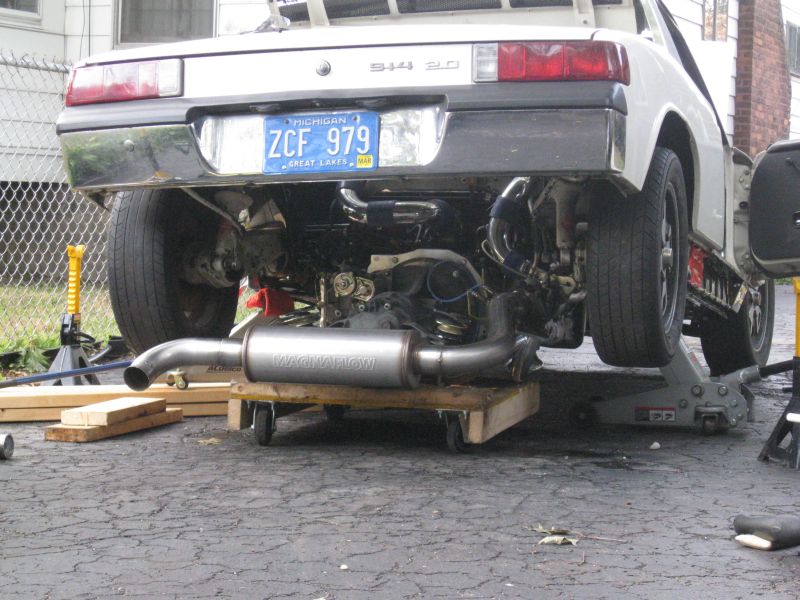 Looks a little tight around the turbo intake tube.  Maybe there is some room on the other side. ... |
|
|
|
| Amenson |
Sep 14 2008, 09:03 PM
Post
#184
|
|
That's opposite lock!! Group: Members Posts: 645 Joined: 27-May 05 From: Dublin, OH Member No.: 4,154 Region Association: None |
...Nope. Going to have to remove the tube. One of the goals for the project was to be able to get the engine in/out without having to take any parts off of the engine. I guess taking one part off is not soo bad (IMG:style_emoticons/default/confused24.gif)
 Still Fits (IMG:style_emoticons/default/aktion035.gif) 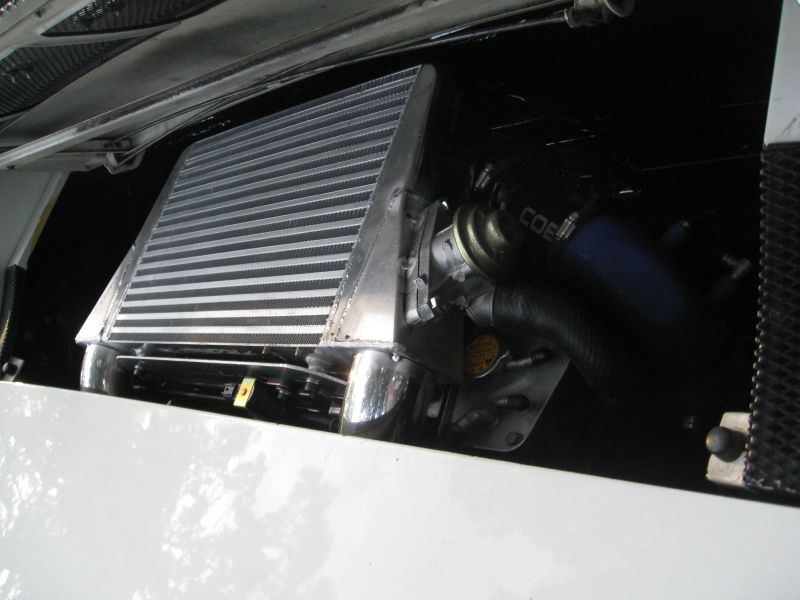 Next on the to-do list is to finish painting the passenger compartment. A few more hours with the wire brush.  And a few more with the paint brush. Por15 is great stuff.  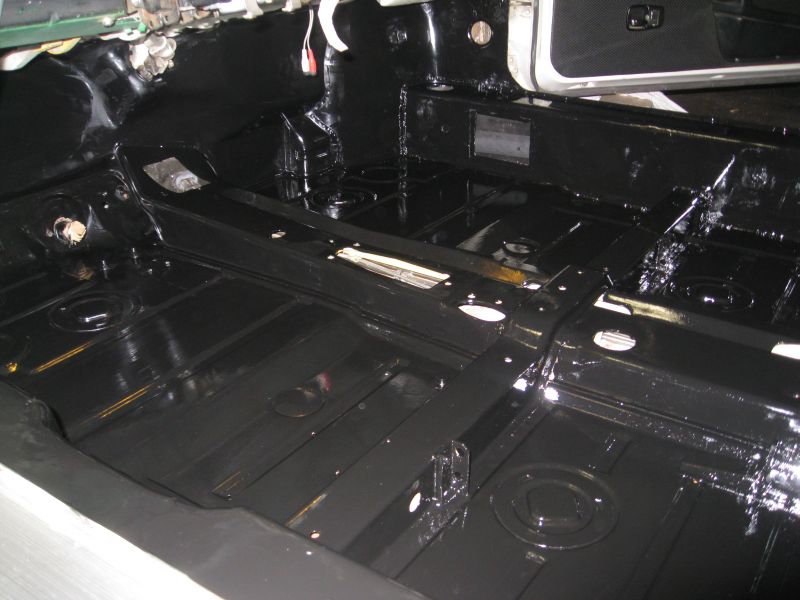 Ready for the party 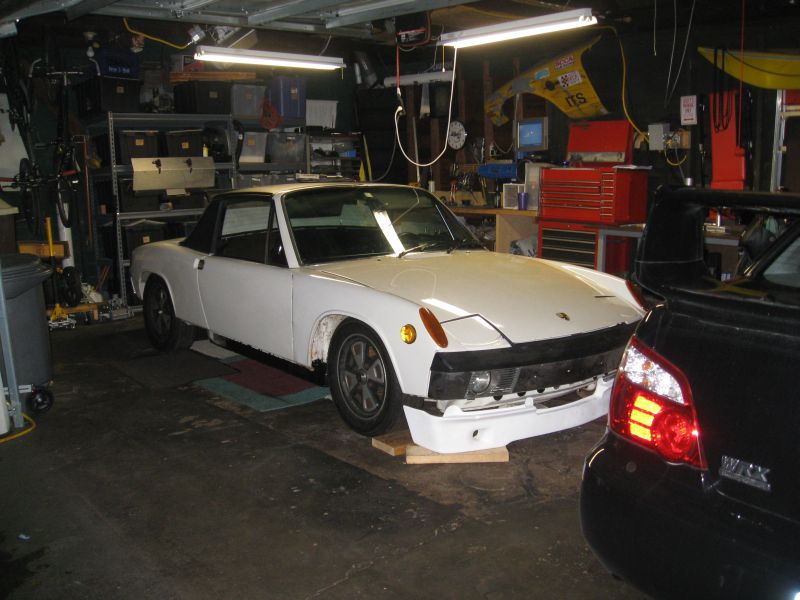 (IMG:style_emoticons/default/beerchug.gif) |
|
|
|
| Amenson |
Sep 14 2008, 09:30 PM
Post
#185
|
|
That's opposite lock!! Group: Members Posts: 645 Joined: 27-May 05 From: Dublin, OH Member No.: 4,154 Region Association: None |
QUOTE(fat73 @ Sep 14 2008, 06:47 PM) Still need to figure out how to get the BOV tube to run to the intake. ... Why not just let the BOV vent into the atmosphere? Would save you the trouble. Ed aka W9R1 Venting to the atmosphere will alter MAF calulation a bit and could cause some, likely small, drivability issues with a stock ECU. Although...it could lead to off throttle tailpipe flames (IMG:style_emoticons/default/happy11.gif) Maybe I will reconsider. Scott |
|
|
|
| charliew |
Sep 14 2008, 11:10 PM
Post
#186
|
|
Advanced Member Group: Members Posts: 2,363 Joined: 31-July 07 From: Crawford, TX. Member No.: 7,958 |
It will run way rich without the air going back into the intake after the maf. You can switch to speed density though.
|
|
|
|
| fat73 |
Sep 15 2008, 12:03 AM
Post
#187
|
|
W9R1 Group: Members Posts: 244 Joined: 7-May 05 From: tampa,fl Member No.: 4,043 Region Association: South East States |
QUOTE(charliew @ Sep 14 2008, 09:10 PM) It will run way rich without the air going back into the intake after the maf. You can switch to speed density though. Doesn't bother mine, with a stock ECU. Ed aka W9R1 http://rides.webshots.com/photo/2030710190...CLB?vhost=rides |
|
|
|
| Wilhelm |
Sep 15 2008, 01:18 AM
Post
#188
|
|
Member Group: Members Posts: 408 Joined: 7-September 07 From: Hooterville, OR Member No.: 8,088 Region Association: None |
"After a good cleaning I installed the front shift rod and pulled the Gates tube through the longs. I somehow did not take any pictures of the cooling lines. Will get some next time I am in the garage. Time to get ready..."
Few inquiries........ What size gates tubing did you use, its rating (temp/pressure) and supplier. How did you shove it through the longs? Mine seems to get hung up about a foot in when shoved in from the engine compartment. I suspect its getting tangled in the tube insulation. Are you going to exit the longs on the front vertically of horizontally? Thanks, Wilhelm |
|
|
|
| Amenson |
Sep 15 2008, 09:25 PM
Post
#189
|
|
That's opposite lock!! Group: Members Posts: 645 Joined: 27-May 05 From: Dublin, OH Member No.: 4,154 Region Association: None |
QUOTE(fat73 @ Sep 14 2008, 10:03 PM) Doesn't bother mine, with a stock ECU. Ed aka W9R1 http://rides.webshots.com/photo/2030710190...CLB?vhost=rides Ed, Ya, I am sure that it would be ok for me as well...I have it pretty much set up for recirc already so I am just going to finish it off. QUOTE(Wilhelm @ Sep 14 2008, 11:18 PM) "After a good cleaning I installed the front shift rod and pulled the Gates tube through the longs. I somehow did not take any pictures of the cooling lines. Will get some next time I am in the garage. Time to get ready..." Few inquiries........ What size gates tubing did you use, its rating (temp/pressure) and supplier. How did you shove it through the longs? Mine seems to get hung up about a foot in when shoved in from the engine compartment. I suspect its getting tangled in the tube insulation. Are you going to exit the longs on the front vertically of horizontally? Thanks, Wilhelm Wilhelm, I am using Gates 75w 1.5 and 1.75. The spec's are at the link. I purchased it through a local branch of Motion Industries. If you look a few pages back there are some pictures of the full coolant plumbing. I replaced the heater mufflers (or whatever they are called) in the longs with aluminum tubes to avoid the hangups that you are having. The 1.5 pushed right through. It took a rope and a a little lube to pull the 1.75 through the bend. Scott |
|
|
|
| LarryR |
Sep 15 2008, 10:31 PM
Post
#190
|
|
Senior Member Group: Members Posts: 929 Joined: 15-March 07 From: E. Bay Area, N. California Member No.: 7,604 |
QUOTE Next on the to-do list is to finish painting the passenger compartment. A few more hours with the wire brush. And a few more with the paint brush. Por15 is great stuff. Wow clean pans nice! |
|
|
|
| Amenson |
Sep 20 2008, 05:41 PM
Post
#191
|
|
That's opposite lock!! Group: Members Posts: 645 Joined: 27-May 05 From: Dublin, OH Member No.: 4,154 Region Association: None |
Made some progress today. I pulled out the engine mount so that I could make the second hole for the remote oil filter. I also plumbed the driver's side cooling line. The shift rod is pretty darn close to the oil filter. I think that the rubber cover might rub a bit. Will have to keep an eye on it.
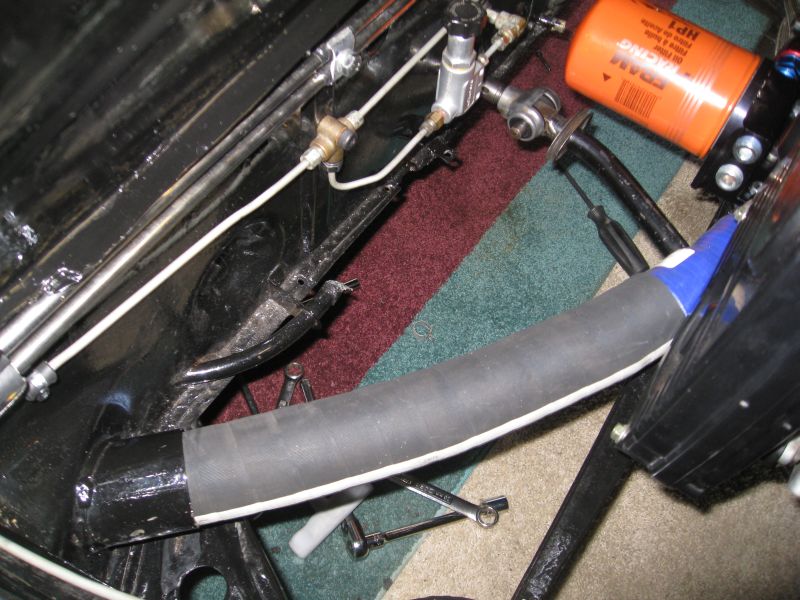 While working down there I was reminded of one of the critical points when mounting the Suby engine the way that I am. The hump for the shift rod hole is very close to the driver's side coolant housing when the engine is mounted close to horizontal. In the picture below you can see that the hump is actually pinching the silicone adapter a bit. 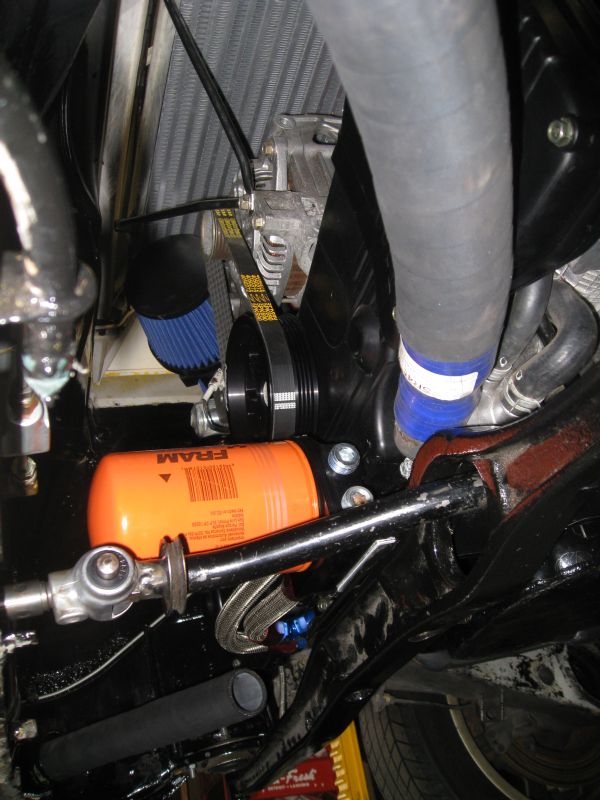 Scott |
|
|
|
| charliew |
Sep 21 2008, 12:09 AM
Post
#192
|
|
Advanced Member Group: Members Posts: 2,363 Joined: 31-July 07 From: Crawford, TX. Member No.: 7,958 |
Scott you could make a new thermostat housing and go to the 1.75 od size aluminium tube and run the housing tube out past the hump and put the hose on it out there.
|
|
|
|
| Wilhelm |
Sep 21 2008, 04:01 AM
Post
#193
|
|
Member Group: Members Posts: 408 Joined: 7-September 07 From: Hooterville, OR Member No.: 8,088 Region Association: None |
Thanks for the hose links! Looking at your pic of the 1.75" hose entering the air tube in the long, I am amazed you got that giant hose through there. Curious as to why you use such big coolant lines? It seems a lot of the V8 guys are running 1.25" to the radiator and back.
The floor cleaning with wire wheel seems quite meticulous. I tried this approach and got tired of getting wacked by bristles flying out of the wheel or nearly losing skin ever time I would catch an edge with wheel nearly ripping the grinder out of my hands. I ended up sandblasting which certainly has it downsides. Your doing a great job. |
|
|
|
| Amenson |
Sep 21 2008, 09:18 AM
Post
#194
|
|
That's opposite lock!! Group: Members Posts: 645 Joined: 27-May 05 From: Dublin, OH Member No.: 4,154 Region Association: None |
QUOTE(charliew @ Sep 20 2008, 10:09 PM) Scott you could make a new thermostat housing and go to the 1.75 od size aluminium tube and run the housing tube out past the hump and put the hose on it out there. The clearance really is not an issue, just something to keep in mind if doing a swap similar to this. QUOTE(Wilhelm @ Sep 21 2008, 02:01 AM) Thanks for the hose links! Looking at your pic of the 1.75" hose entering the air tube in the long, I am amazed you got that giant hose through there. Curious as to why you use such big coolant lines? It seems a lot of the V8 guys are running 1.25" to the radiator and back. The floor cleaning with wire wheel seems quite meticulous. I tried this approach and got tired of getting wacked by bristles flying out of the wheel or nearly losing skin ever time I would catch an edge with wheel nearly ripping the grinder out of my hands. I ended up sandblasting which certainly has it downsides. Your doing a great job. The stock Suby lines are 1.5" and I arbitrary matched the return line to the radiator that I purchased. Did not want to take any chances with cooling issues. A boosted 4 banger can get pretty hot. I sand blasted part of the engine compartment. Afterwords when I was digging around fixing the longs, I found a lot of sand. I really enjoy sand blasting and will continue to do it but not for anything where the sand has a place to become trapped. Although picking wire slivers is not so much fun either. Time to get back to the garage. Scott |
|
|
|
| Amenson |
Sep 28 2008, 09:56 AM
Post
#195
|
|
That's opposite lock!! Group: Members Posts: 645 Joined: 27-May 05 From: Dublin, OH Member No.: 4,154 Region Association: None |
Worked on the cooling system a bit yesterday. I did not like how the elbows were unsupported coming out of the longs so I took them back out and made some tabs.
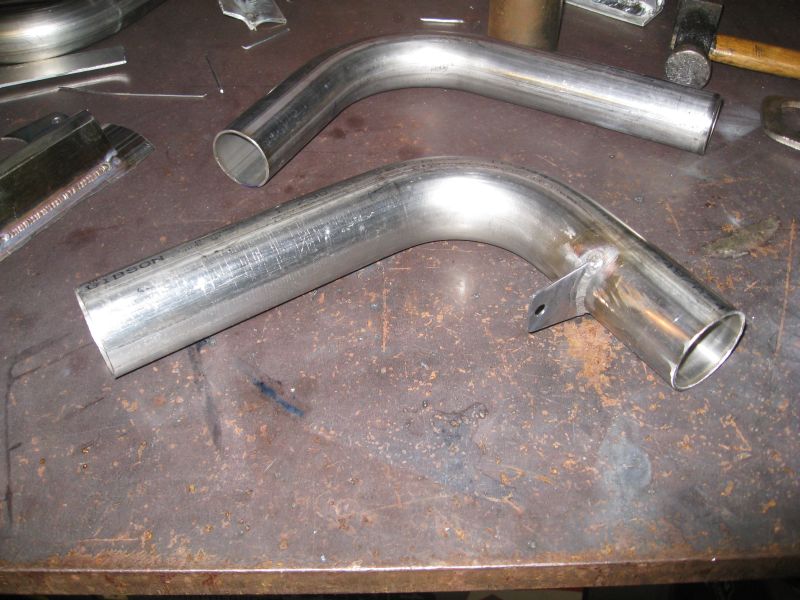 Installed: 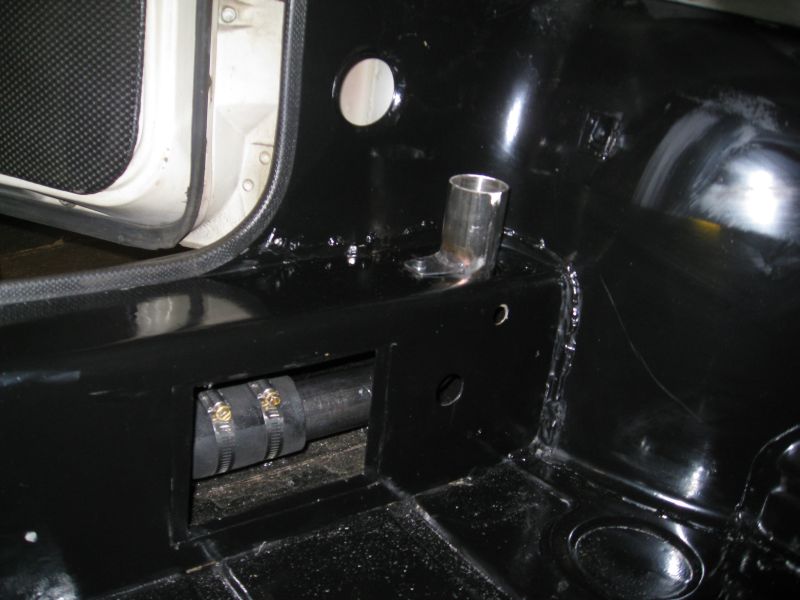 Really Installed 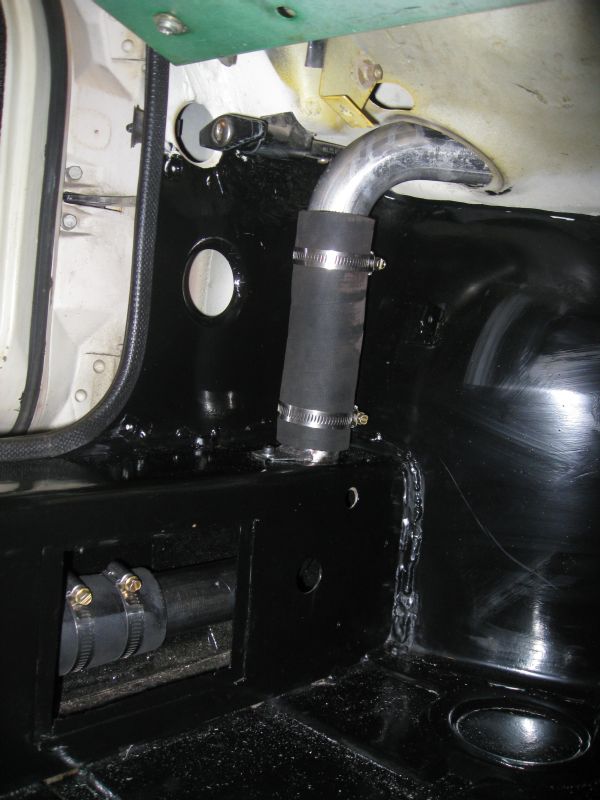 Passenger side, partially installed 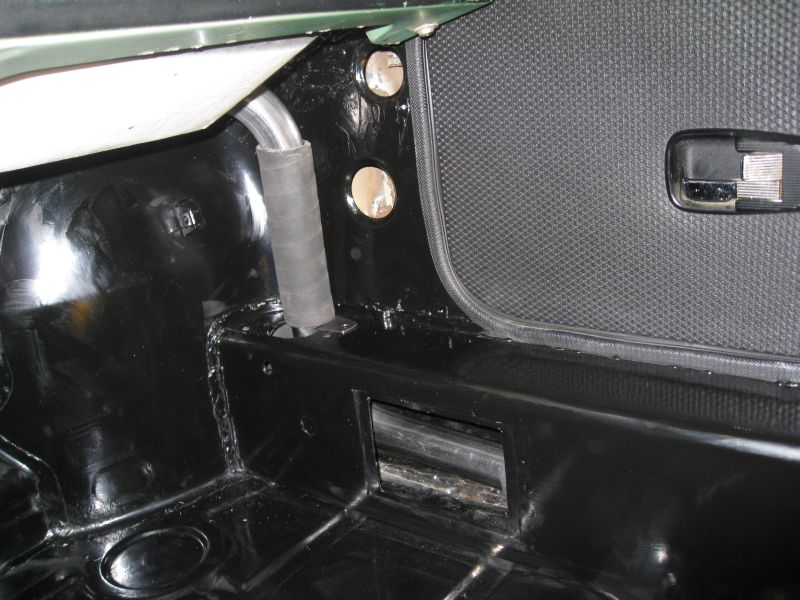 I also installed the oil pan pickup yesterday. The project parts bins are starting to empty out (IMG:style_emoticons/default/cheer.gif) Scott |
|
|
|
| pktzygt |
Oct 1 2008, 09:22 AM
Post
#196
|
|
Member Group: Members Posts: 328 Joined: 20-March 07 From: Chesapeake, VA Member No.: 7,611 Region Association: MidAtlantic Region |
I'm anxious for you. I can't wait for you to post driving impresions.
|
|
|
|
| Amenson |
Dec 14 2008, 04:54 PM
Post
#197
|
|
That's opposite lock!! Group: Members Posts: 645 Joined: 27-May 05 From: Dublin, OH Member No.: 4,154 Region Association: None |
Sorry for the lack of updates lately. PorSTi has a new home that I hope to get up and running over the holiday. See details here:
Relocation Thread 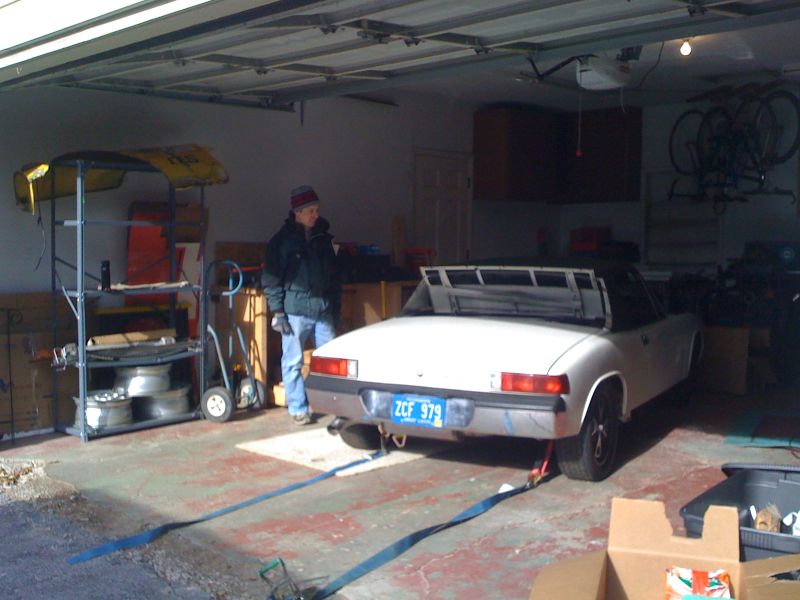 Should be making progress again soon. Scott |
|
|
|
| Amenson |
Jan 4 2009, 05:21 PM
Post
#198
|
|
That's opposite lock!! Group: Members Posts: 645 Joined: 27-May 05 From: Dublin, OH Member No.: 4,154 Region Association: None |
Finally, home enough to get things settled inside the house so that I could organize the garage. The Suby still has to live outside but there is plenty of room to work on the PorSTi:
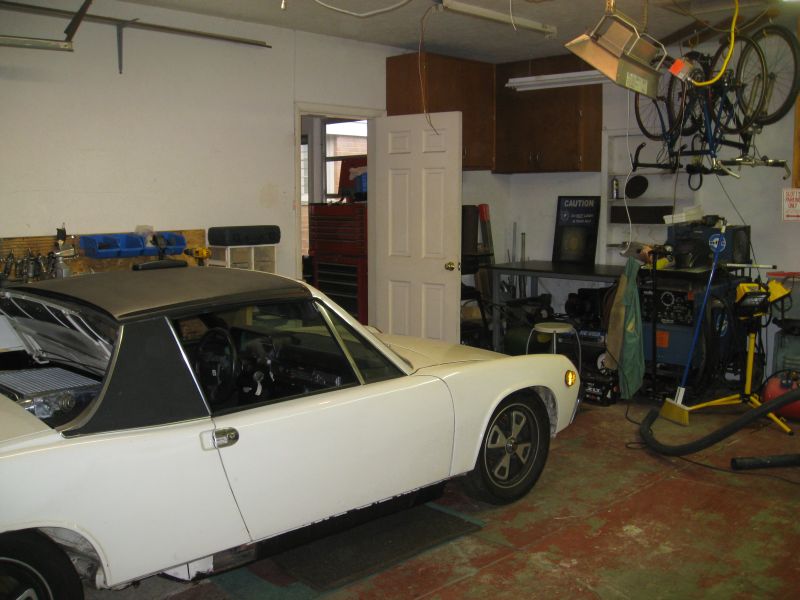 The breezeway is considered part of the garage (IMG:style_emoticons/default/aktion035.gif)  First task to complete was to get some measurements that malaga_red75 has been wanting for quite some time: The distance from the bottom of the engine to the bottom of the engine mount/top of the cross bar is 70mm. You can see where I took the measurement in this picture: 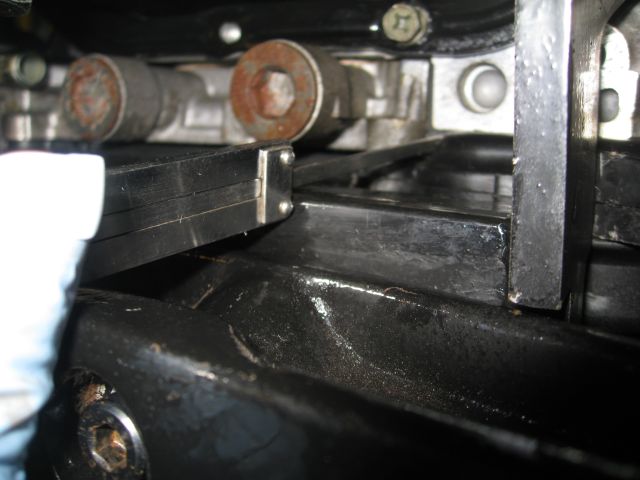 The distance from the engine to the vertical plane of the angle iron is 9mm. The bottom of the angle iron is 2 inches wide and the cross bar sits almost flush with the front edge. You can see where I took the measurement in this picture: 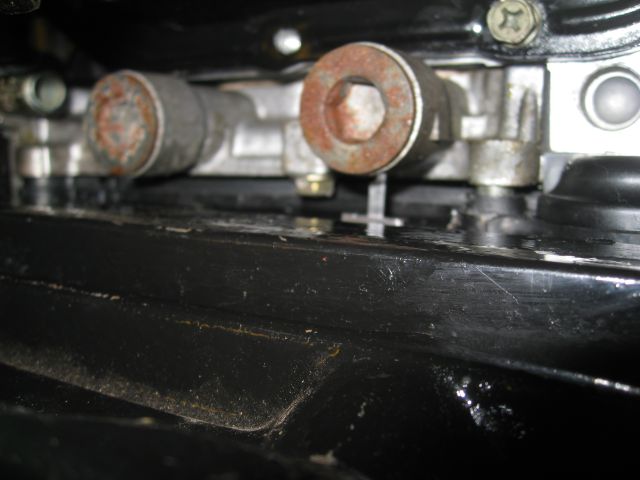 I also removed the passenger side seat mounts so that I can install the new seats. Finally back to work. Scott |
|
|
|
| malaga_red75 |
Jan 4 2009, 07:29 PM
Post
#199
|
|
'74 2.5L N/A Subie Group: Members Posts: 454 Joined: 5-March 06 From: Menlo Park, CA Member No.: 5,674 Region Association: None |
Scott,
First, thanks so much for getting these to me. I am still a little confused though. Does the bottom piece of the cross bar sit flush with the original bottom of the engine mount, or does it sit flush with the notches you made? Thanks. -Peter |
|
|
|
| Amenson |
Jan 4 2009, 08:26 PM
Post
#200
|
|
That's opposite lock!! Group: Members Posts: 645 Joined: 27-May 05 From: Dublin, OH Member No.: 4,154 Region Association: None |
QUOTE(malaga_red75 @ Jan 4 2009, 05:29 PM) Scott, First, thanks so much for getting these to me. I am still a little confused though. Does the bottom piece of the cross bar sit flush with the original bottom of the engine mount, or does it sit flush with the notches you made? Thanks. -Peter The cross bar sits flush with the notches. Here are a few pictures to clarify. The notch on the top is a mistake. The bottom notch on the passenger side has been made flush since these pictures. 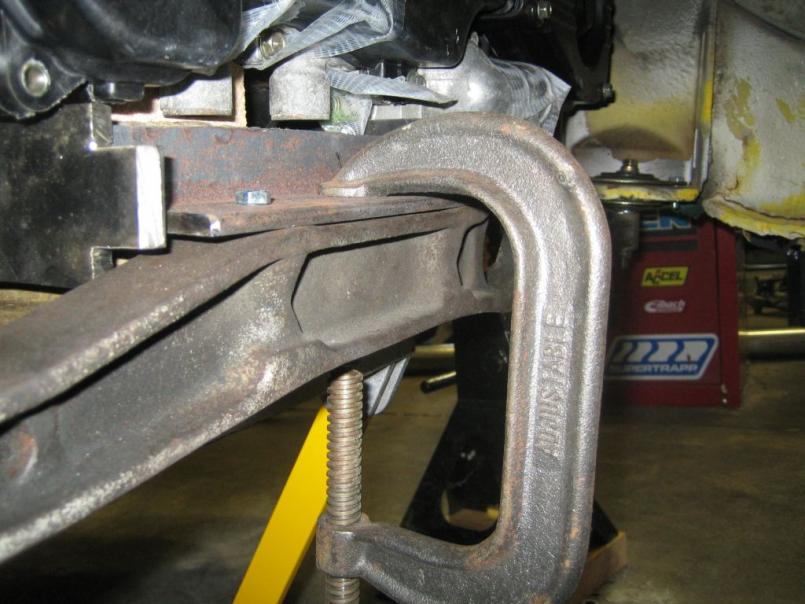 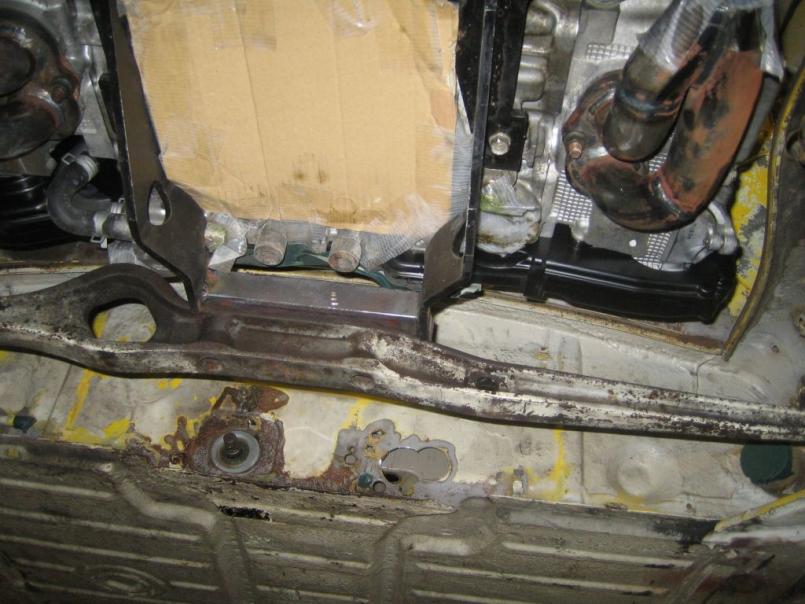 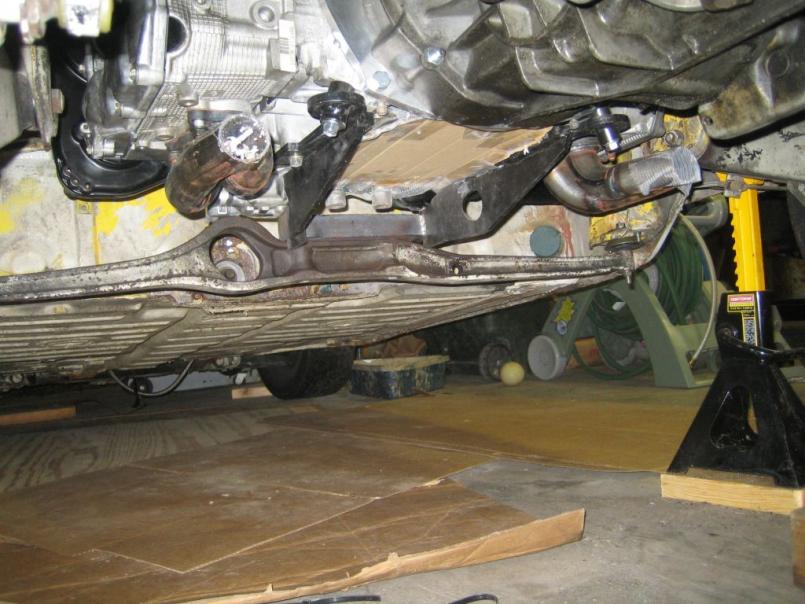 Let me know if you need any more details. Scott |
|
|
|
|
1 User(s) are reading this topic (1 Guests and 0 Anonymous Users)
0 Members:

|
Lo-Fi Version | Time is now: 9th June 2026 - 09:53 AM |
Invision Power Board
v9.1.4 © 2026 IPS, Inc.