|
|
|
Porsche, and the Porsche crest are registered trademarks of Dr. Ing. h.c. F. Porsche AG.
This site is not affiliated with Porsche in any way. Its only purpose is to provide an online forum for car enthusiasts. All other trademarks are property of their respective owners. |
|
|

  |

| bondo |
 Oct 5 2004, 05:09 PM Oct 5 2004, 05:09 PM
Post
#21
|
|
Practicing my perpendicular parking  Group: Members Posts: 4,277 Joined: 19-April 03 From: Los Osos, CA Member No.: 587 Region Association: Central California |
Once you get the shafts out of the intermediate plate, the two bearing races that were holding them on will fall off. In the picture here, the intermediate plate would go between the shafts and the races on the right (note matching races still on the shaft)
Attached image(s) 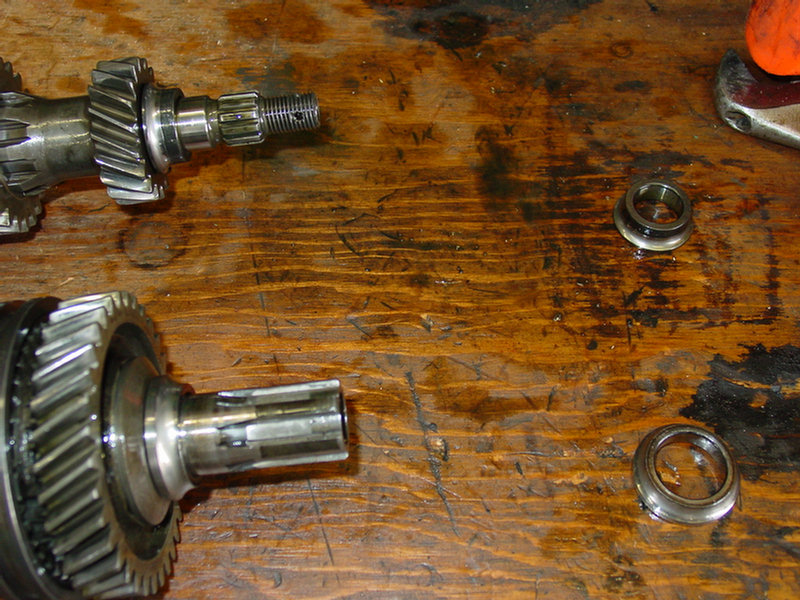
|
   |

 
|
| bondo |
Oct 5 2004, 05:11 PM
Post
#22
|
|
Practicing my perpendicular parking Group: Members Posts: 4,277 Joined: 19-April 03 From: Los Osos, CA Member No.: 587 Region Association: Central California |
Ok, for a while we'll concentrate on the pinion shaft (that's the shorter one). Remove the other bearing race. To get it to come off you may need to hold the gears and tap the end of the shaft with the brass hammer.
Attached image(s) 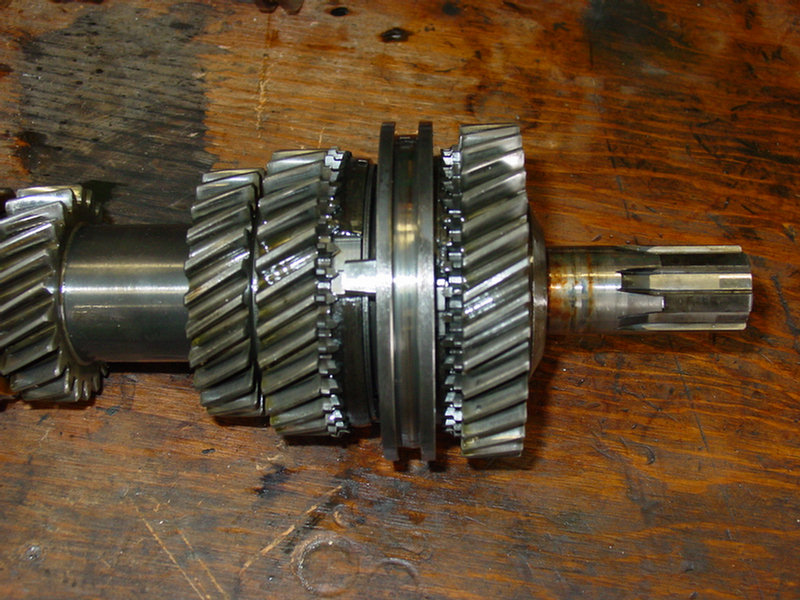
|
|
|
|
| bondo |
Oct 5 2004, 05:16 PM
Post
#23
|
|
Practicing my perpendicular parking Group: Members Posts: 4,277 Joined: 19-April 03 From: Los Osos, CA Member No.: 587 Region Association: Central California |
Next is the second tapered washer. The washer is about 6.6 mm thick at its thickest, and the flat side is against 2nd gear. Then remove second gear and it's associated roller bearing and inner race.
Attached image(s) 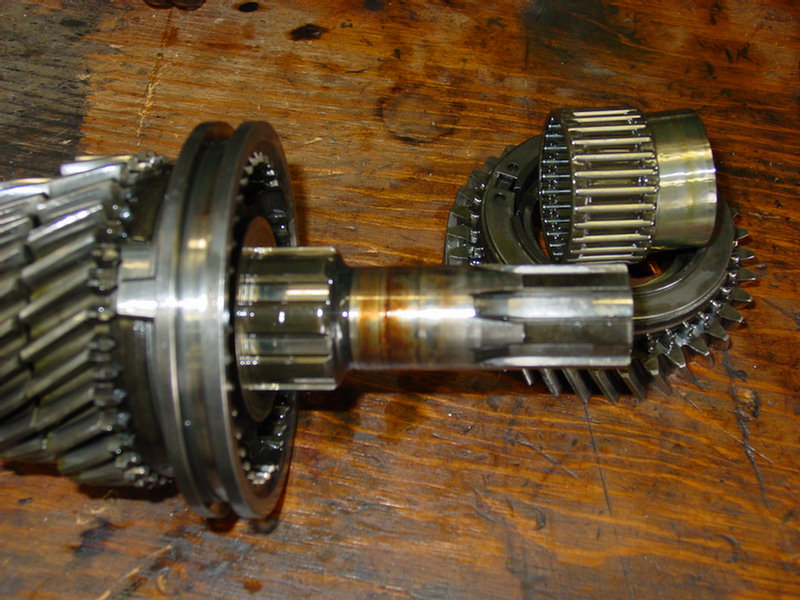
|
|
|
|
| bondo |
Oct 5 2004, 05:17 PM
Post
#24
|
|
Practicing my perpendicular parking Group: Members Posts: 4,277 Joined: 19-April 03 From: Los Osos, CA Member No.: 587 Region Association: Central California |
Now remove the 2/3 slider and its hub.
Attached image(s) 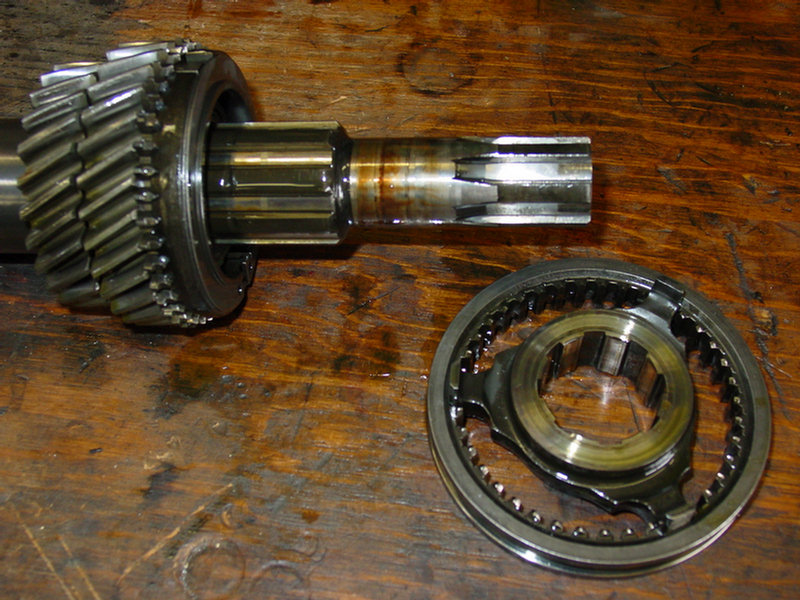
|
|
|
|
| bondo |
Oct 5 2004, 05:24 PM
Post
#25
|
|
Practicing my perpendicular parking Group: Members Posts: 4,277 Joined: 19-April 03 From: Los Osos, CA Member No.: 587 Region Association: Central California |
Next 3rd gear comes off, with it's roller bearing and inner race.
Attached image(s) 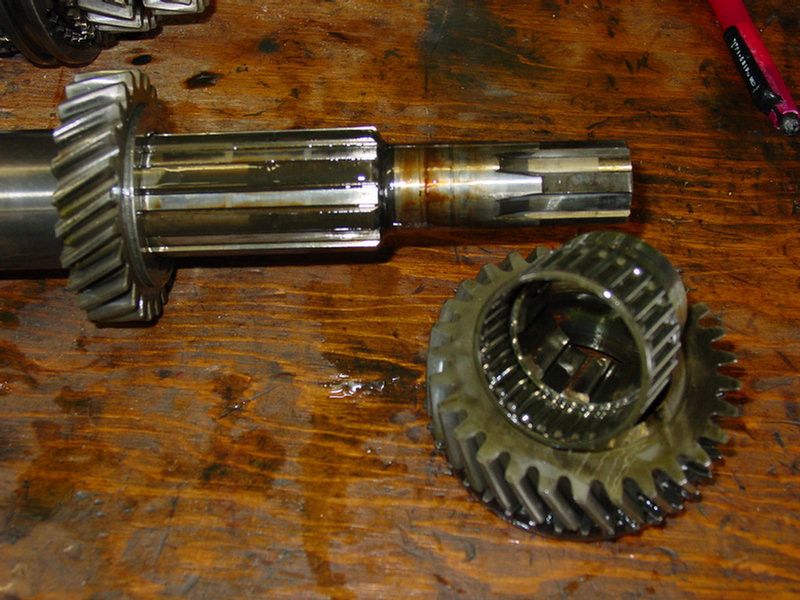
|
|
|
|
| bondo |
Oct 5 2004, 05:25 PM
Post
#26
|
|
Practicing my perpendicular parking Group: Members Posts: 4,277 Joined: 19-April 03 From: Los Osos, CA Member No.: 587 Region Association: Central California |
Then take off the 2.5mm thick flat washer.
Attached image(s) 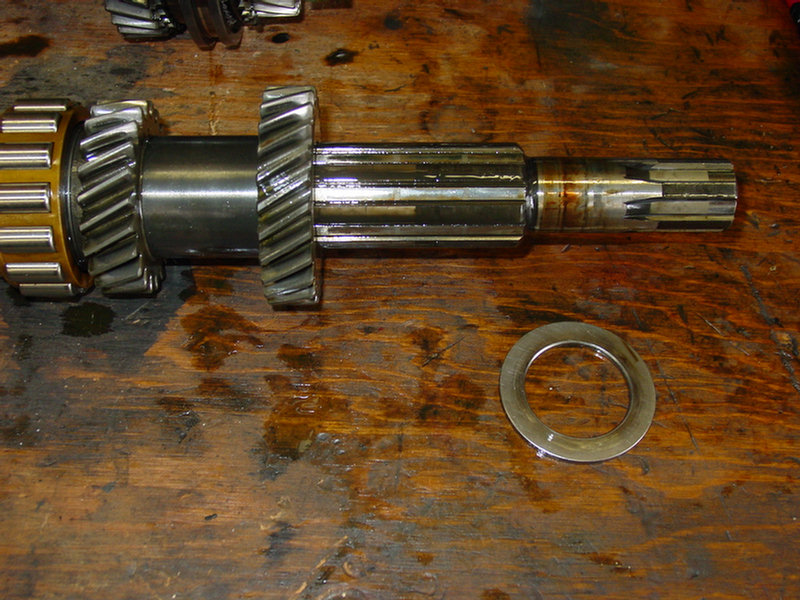
|
|
|
|
| bondo |
Oct 5 2004, 05:27 PM
Post
#27
|
|
Practicing my perpendicular parking Group: Members Posts: 4,277 Joined: 19-April 03 From: Los Osos, CA Member No.: 587 Region Association: Central California |
Next take off 4th gear. The ridge goes against the spacer.
Attached image(s) 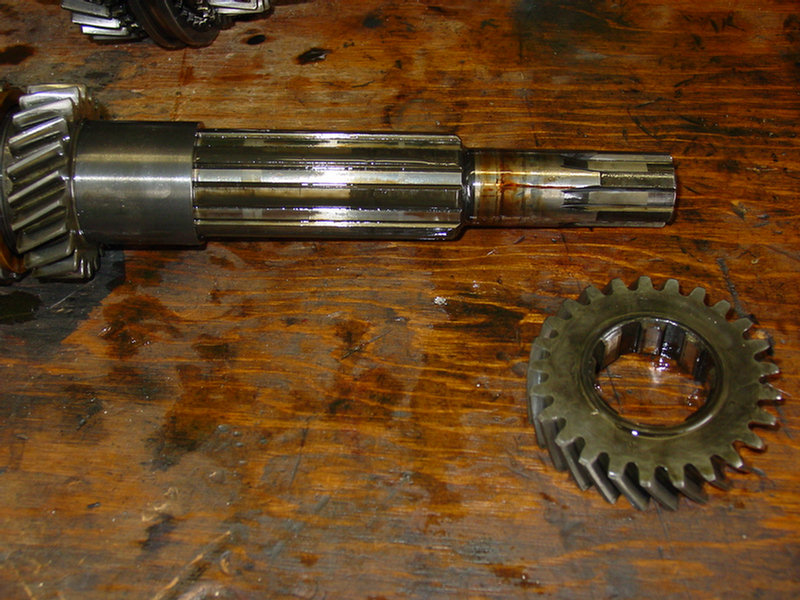
|
|
|
|
| bondo |
Oct 5 2004, 05:28 PM
Post
#28
|
|
Practicing my perpendicular parking Group: Members Posts: 4,277 Joined: 19-April 03 From: Los Osos, CA Member No.: 587 Region Association: Central California |
Now take off the spacer that's between 4th and 5th gears.
Attached image(s) 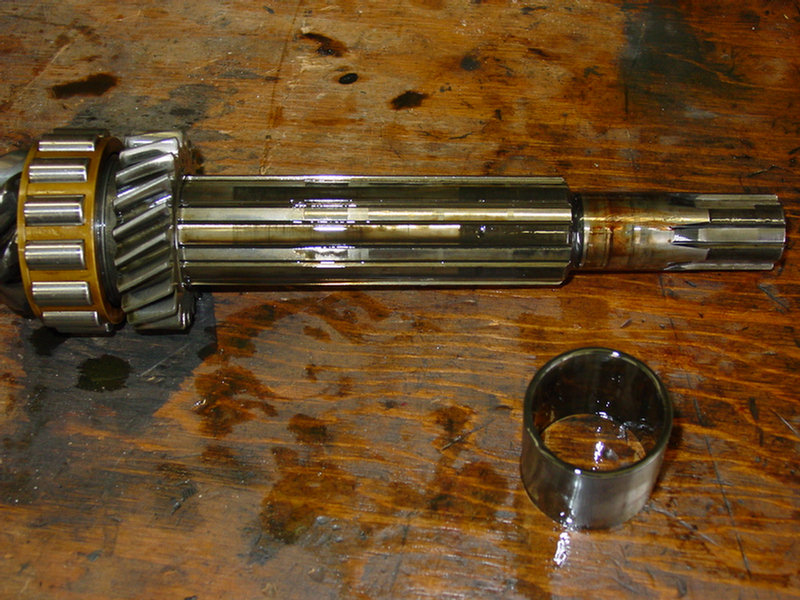
|
|
|
|
| bondo |
Oct 5 2004, 05:29 PM
Post
#29
|
|
Practicing my perpendicular parking Group: Members Posts: 4,277 Joined: 19-April 03 From: Los Osos, CA Member No.: 587 Region Association: Central California |
Then remove 5th gear (ridge goes twoards spacer)
Attached image(s) 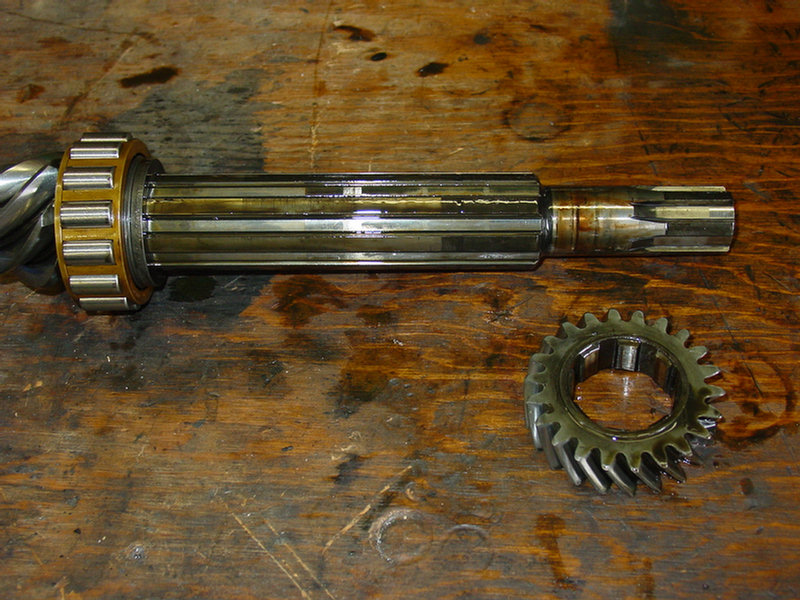
|
|
|
|
| bondo |
Oct 5 2004, 05:30 PM
Post
#30
|
|
Practicing my perpendicular parking Group: Members Posts: 4,277 Joined: 19-April 03 From: Los Osos, CA Member No.: 587 Region Association: Central California |
Now remove the 4.2mm thick flat wahser.
Attached image(s) 
|
|
|
|
| bondo |
Oct 5 2004, 05:33 PM
Post
#31
|
|
Practicing my perpendicular parking Group: Members Posts: 4,277 Joined: 19-April 03 From: Los Osos, CA Member No.: 587 Region Association: Central California |
The last thing to come off the pinion shaft is four shims, about 0.3mm thick each. The number and thickness may vary between transmissions.
Attached image(s) 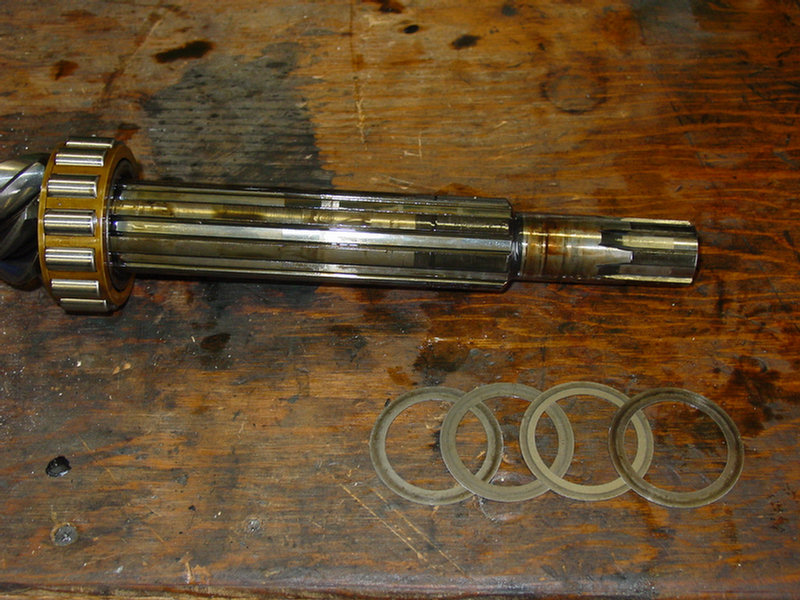
|
|
|
|
| bondo |
Oct 5 2004, 05:35 PM
Post
#32
|
|
Practicing my perpendicular parking Group: Members Posts: 4,277 Joined: 19-April 03 From: Los Osos, CA Member No.: 587 Region Association: Central California |
Now we move on to the input shaft. Clamp it in a vice like this: (make sure you grab the splines well, and don't pinch any gears anywhere.. Gently rotate it back and forth as you tighten the vice so it gets seated tight. Get the vice very tight.
Attached image(s) 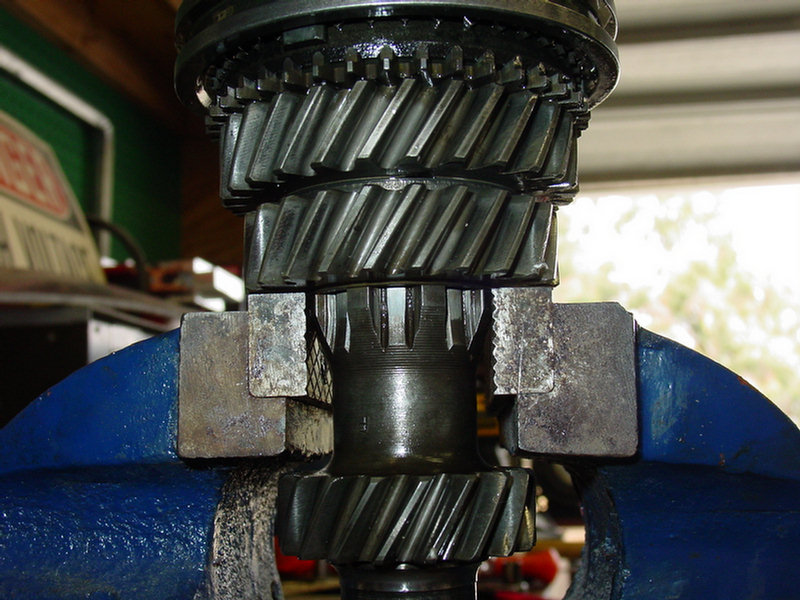
|
|
|
|
| bondo |
Oct 5 2004, 05:37 PM
Post
#33
|
|
Practicing my perpendicular parking Group: Members Posts: 4,277 Joined: 19-April 03 From: Los Osos, CA Member No.: 587 Region Association: Central California |
Now pound the locking tab with a screwdriver and a hammer until it flattens out like this:
Attached image(s) 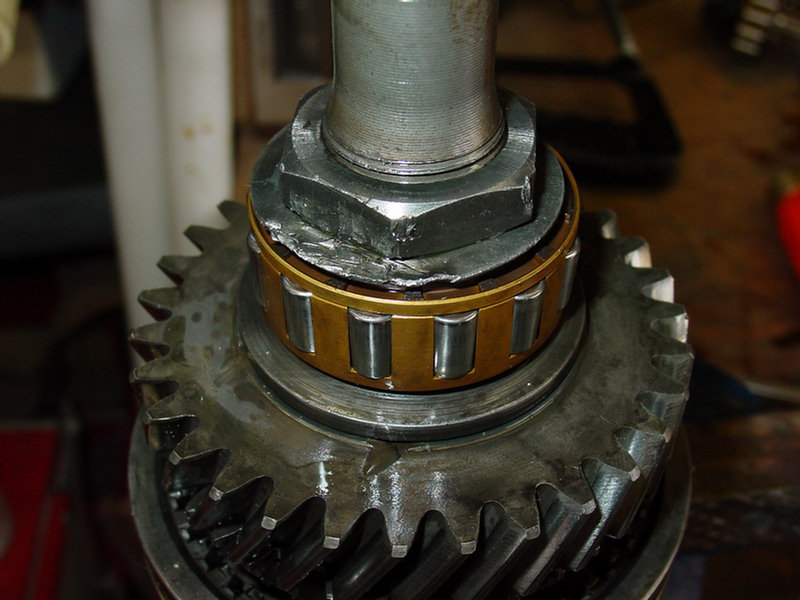
|
|
|
|
| bondo |
Oct 5 2004, 05:39 PM
Post
#34
|
|
Practicing my perpendicular parking Group: Members Posts: 4,277 Joined: 19-April 03 From: Los Osos, CA Member No.: 587 Region Association: Central California |
Here's where the big-ass crecent wrench comes in.. Put it on the nut, and pound until it comes loose. Be sure to pound in line with the vice, like this:
Attached image(s) 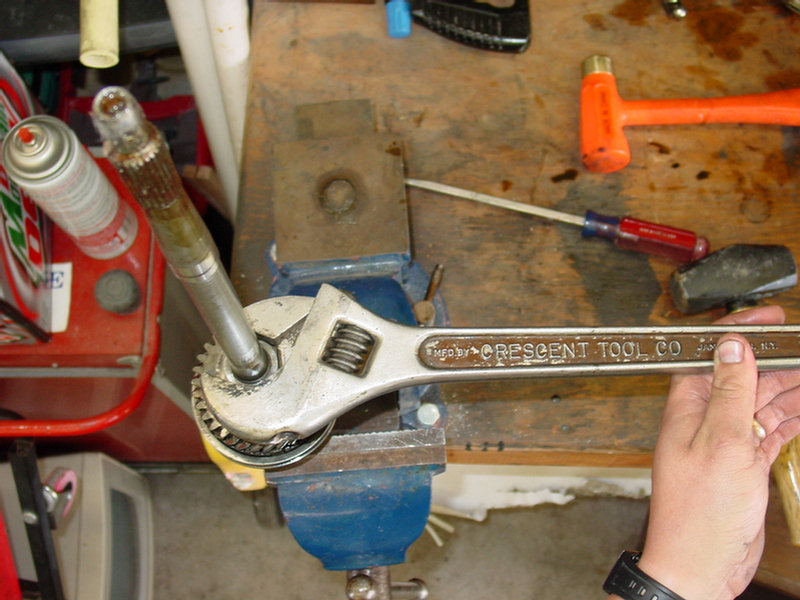
|
|
|
|
| bondo |
Oct 5 2004, 05:42 PM
Post
#35
|
|
Practicing my perpendicular parking Group: Members Posts: 4,277 Joined: 19-April 03 From: Los Osos, CA Member No.: 587 Region Association: Central California |
Once you get that nut and locking washer off, take the whole thing out of the vice and flip it over. Hold on to the gears and bearing, especially towards the bottom. Now pick up the whole shaft and lightly drop it on the anvil part of the vice like this: (being ready to catch the stack of bearings, washers and gears that will come loose)
Attached image(s) 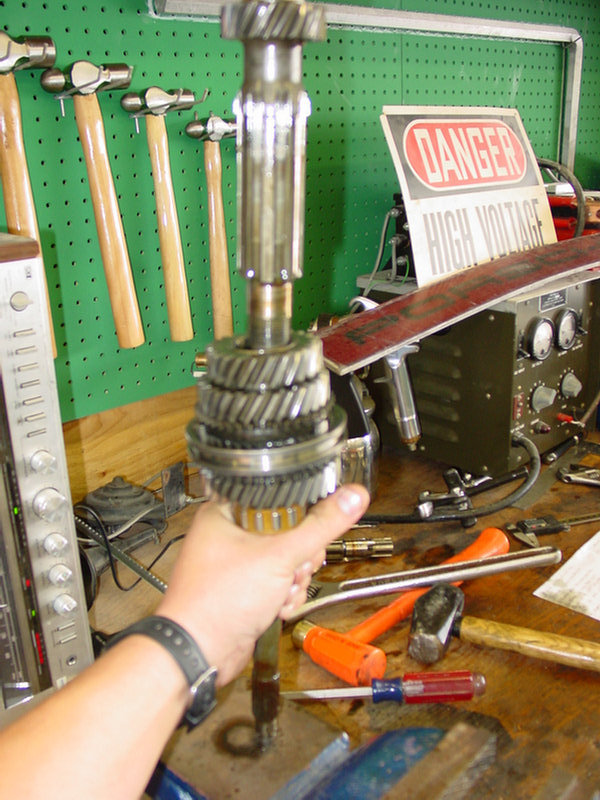
|
|
|
|
| bondo |
Oct 5 2004, 05:54 PM
Post
#36
|
|
Practicing my perpendicular parking Group: Members Posts: 4,277 Joined: 19-April 03 From: Los Osos, CA Member No.: 587 Region Association: Central California |
The input shaft parts come off in the following order:
Bearing (flatter side of the brass part towards 5th) 5.9mm thick tapered washer (flat side towards 5th) 5th gear, associated roller bearings and race 4/5 slider and hub 4th gear, associated roller bearings and race 2.5mm thick flat washer 3rd gear (flat side towards washer, ridge towards second gear) 2nd gear does not come off of the shaft, it's part of it. Attached image(s) 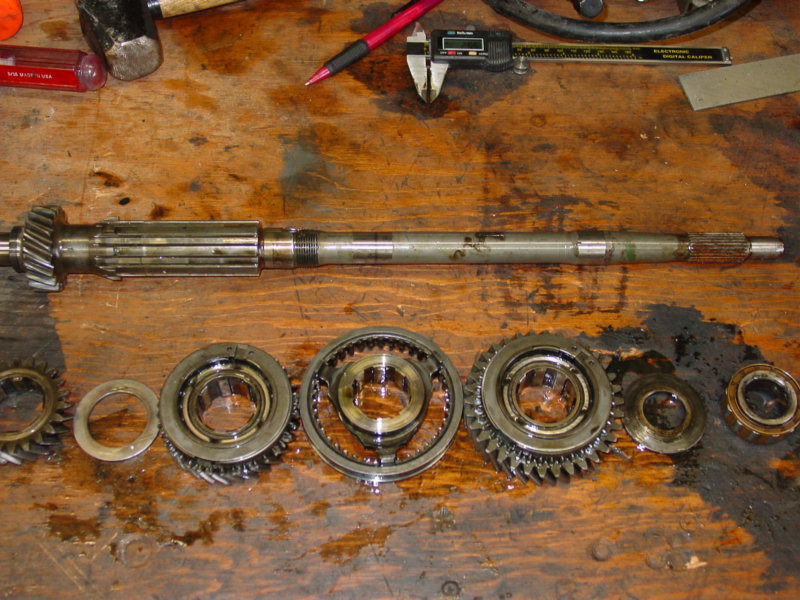
|
|
|
|
| bondo |
Oct 5 2004, 05:56 PM
Post
#37
|
|
Practicing my perpendicular parking Group: Members Posts: 4,277 Joined: 19-April 03 From: Los Osos, CA Member No.: 587 Region Association: Central California |
Whelp, there you have it. I hope this helps people take on their transmission troubles without fear. I will probably add a couple of syncro details later, but this is it for now.
|
|
|
|
| ambergris |
Oct 5 2004, 06:30 PM
Post
#38
|
|
Newbie Group: Members Posts: 22 Joined: 2-June 04 From: Mountain View, CA Member No.: 2,145 Region Association: Northern California |
(IMG:style_emoticons/default/beer.gif) (IMG:style_emoticons/default/aktion035.gif)
Holy cow! Cheers and you rock! Great article, and awesome timing, as I am just starting my own tranny disassembly. Instant classic, I say. |
|
|
|
| bondo |
Oct 5 2004, 06:46 PM
Post
#39
|
|
Practicing my perpendicular parking Group: Members Posts: 4,277 Joined: 19-April 03 From: Los Osos, CA Member No.: 587 Region Association: Central California |
Thanks! Glad to help.
|
|
|
|
| Rusty |
Oct 5 2004, 08:06 PM
Post
#40
|
|
Wanted: Engine case GA003709 Group: Admin Posts: 7,942 Joined: 24-December 02 From: North Alabama Member No.: 6 Region Association: Galt's Gulch |
Damn. That's a great article.
I nominate for Classic Thread status. Anyone second me? -Rusty (IMG:style_emoticons/default/smoke.gif) |
|
|
|
|
1 User(s) are reading this topic (1 Guests and 0 Anonymous Users)
0 Members:

|
Lo-Fi Version | Time is now: 7th June 2024 - 11:38 AM |
Invision Power Board
v9.1.4 © 2024 IPS, Inc.