|
|
|
Porsche, and the Porsche crest are registered trademarks of Dr. Ing. h.c. F. Porsche AG.
This site is not affiliated with Porsche in any way. Its only purpose is to provide an online forum for car enthusiasts. All other trademarks are property of their respective owners. |
|
|

  |

| wndsnd |
 Jun 21 2012, 10:43 AM Jun 21 2012, 10:43 AM
Post
#1
|
|
You wanted a horse, but got a goat. Nobody wants a goat....  Group: Members Posts: 2,861 Joined: 12-February 12 From: North Shore, MA Member No.: 14,124 Region Association: North East States |
(IMG:style_emoticons/default/headbang.gif)
I am really second thinking buying this car that lived in MAINE its whole life. Nothing is as it should be during dissasembly, and I am working with penetrants, heat, leverage, and will power and destroying almost everything coming off. I am now on replaceing the front struts and am at the lower ball joint. The Hayes manual calls for a hex nut or taperd thread stud. I think I have the later after removing the nut from one side. This stud I have map torched, and soaked with penetrant, and have pounded on with a mallet. looks like a little give on the other side but I don't think I am using the propers tools or technique. Any help or advise would be appreaciated... At this point it I am flatening the end of the stud. John Attached thumbnail(s) 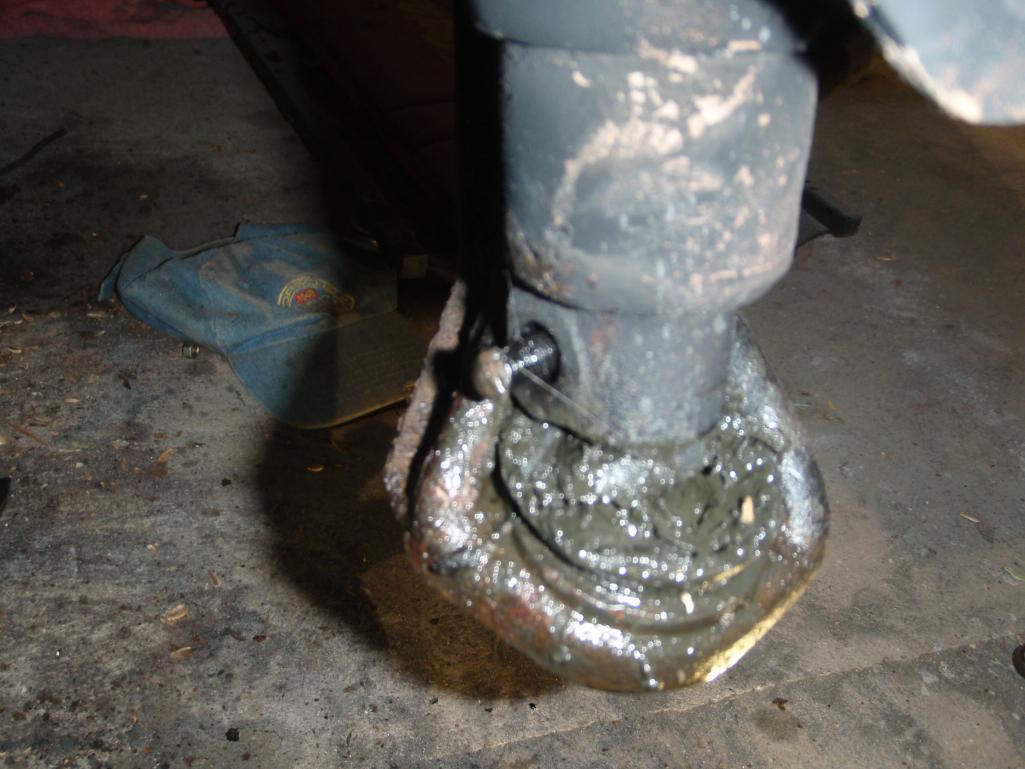 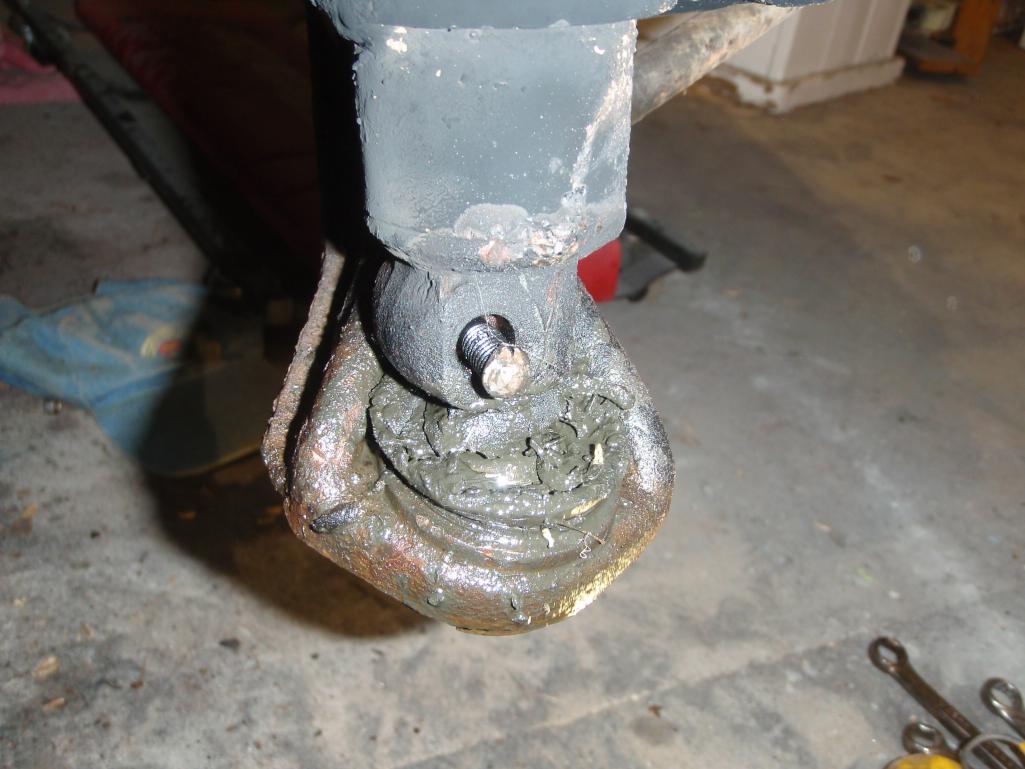 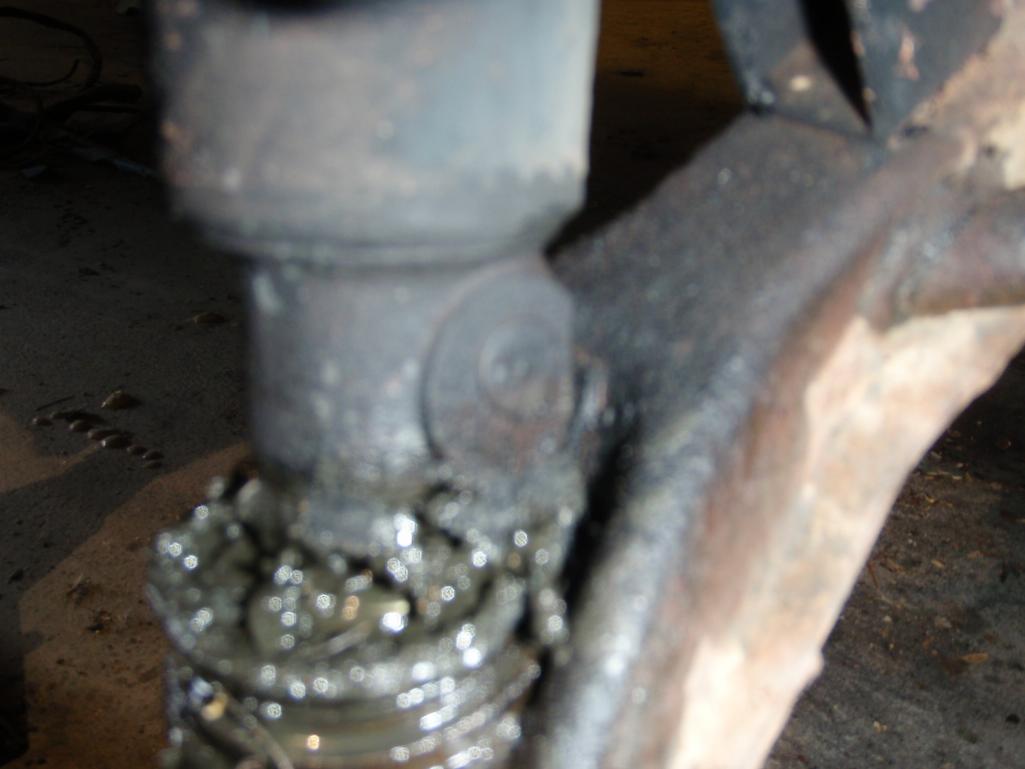
|
   |

 
|
| malaga_red75 |
Jun 21 2012, 11:22 AM
Post
#2
|
|
'74 2.5L N/A Subie Group: Members Posts: 454 Joined: 5-March 06 From: Menlo Park, CA Member No.: 5,674 Region Association: None |
John,
I just did this during my 5-lug conversion. I also had the tapered thread stud. While it is a PITA to get out, I just used a hammer (they will need to be replaced anyway) and went at it. It eventually came out. One recommendation is to put a jack underneath the ball joint and jack it up so there is just a little bit of pressure of the ball joint. This will help 'neutralize' the forces on the joint itself. Also, if you have access to a tie-rod puller (ball joint separator), it can be maneuvered (depending on the style tool) and used to press out that stud. All else fails, get a bigger hammer. -Peter |
|
|
|
| Dave_Darling |
Jun 21 2012, 11:50 AM
Post
#3
|
|
914 Idiot Group: Members Posts: 15,196 Joined: 9-January 03 From: Silicon Valley / Kailua-Kona Member No.: 121 Region Association: Northern California |
My wife's SC has the same style ball joint. I used an air hammer to drive the wedge pin (ALWAYS REPLACE) out.
Sorry, I type it that way because every time the Bentley 911 manual mentions the wedge pin (ALWAYS REPLACE) they append a note that says "(ALWAYS REPLACE)". I figured I might as well replace it, y'know? --DD |
|
|
|
| seanery |
Jun 21 2012, 11:53 AM
Post
#4
|
|
waiting to rebuild whitey! Group: Retired Admin Posts: 15,857 Joined: 7-January 03 From: Indy Member No.: 100 Region Association: None |
so let me get this straight Dave, did you reuse the wedge pin?
(IMG:style_emoticons/default/wink.gif) |
|
|
|
| FourBlades |
Jun 21 2012, 01:01 PM
Post
#5
|
|
From Wreck to Rockin Group: Members Posts: 2,056 Joined: 3-December 07 From: Brevard, FL Member No.: 8,414 Region Association: South East States |
Taking the a-arm off the car makes it easier to apply force to the pin. Using an air driven impact hammer helps a lot as well, if you or a buddy has one. John |
|
|
|
| rhodyguy |
Jun 21 2012, 01:02 PM
Post
#6
|
|
Chimp Sanctuary NW. Check it out. Group: Members Posts: 22,249 Joined: 2-March 03 From: Orion's Bell. The BELL! Member No.: 378 Region Association: Galt's Gulch |
as fugly as that strut assem looks, i think you'd be better of just starting with a pair less fugly that you can disassemble. wait until you get to the balljoint which i presume looks just as bad. that kind of rust has the castellated welded on.
k |
|
|
|
| wndsnd |
Jun 21 2012, 01:29 PM
Post
#7
|
|
You wanted a horse, but got a goat. Nobody wants a goat.... Group: Members Posts: 2,861 Joined: 12-February 12 From: North Shore, MA Member No.: 14,124 Region Association: North East States |
The ball joint will have to be replace by the time I am done. I have already set it on fire with the torch. I tried the air hammer, nothing. I tried a regulay hammer, nothing. I tried a ball joint remover, won't fit. Now it is soaking.
|
|
|
|
| r_towle |
Jun 21 2012, 02:07 PM
Post
#8
|
|
Custom Member Group: Members Posts: 24,705 Joined: 9-January 03 From: Taxachusetts Member No.: 124 Region Association: North East States |
You could take the lower nut off with a pipe wrench...its a large round nut on the bottom of the a-arm...
you need a 3 foot pipe wrench to get it moving. Pull the cotter pin out first..and the locking plate. Once that is off, you can pull the ball joint from the a-arm and pull the strut out. From there, I would suggest you are not hitting it hard enough, but you may be tapping it. One or two serious square hits will get that bolt moving. Take it out of the car...then try it when you can swing freely. or, Stand up, turn wheel out...face in such a way that you can really swing and use a large hammer...give it a really hard hit... rich |
|
|
|
| r_towle |
Jun 21 2012, 02:09 PM
Post
#9
|
|
Custom Member Group: Members Posts: 24,705 Joined: 9-January 03 From: Taxachusetts Member No.: 124 Region Association: North East States |
oh,
Once you pull it out, dunk the whole stru into PB blaster for the night. They sell it by the gallon at Autozone. USe a plastic window washing jug and cut the top off...then dunk that in PB for a night or two. rich |
|
|
|
| jmill |
Jun 21 2012, 02:58 PM
Post
#10
|
|
Green Hornet Group: Members Posts: 2,449 Joined: 9-May 08 From: Racine, Wisconsin Member No.: 9,038 Region Association: Upper MidWest |
I used an air hammer. You could also drill a hole into the opposite side of the pin to help relieve the grip the taper has. Just make sure you drill straight.
|
|
|
|
| wndsnd |
Jun 21 2012, 03:09 PM
Post
#11
|
|
You wanted a horse, but got a goat. Nobody wants a goat.... Group: Members Posts: 2,861 Joined: 12-February 12 From: North Shore, MA Member No.: 14,124 Region Association: North East States |
Not the greatest example of a person with patience (IMG:style_emoticons/default/laugh.gif) I got out the cutting wheel.
(IMG:style_emoticons/default/sawzall-smiley.gif) I will deal with the arm and ruined ball joint later. Now what I am left with. Did they send me the correct strut replacement? Look at the ends. Is the piece on the bottom actually part of the ball joint I cut off, if so, not too sure what I got here. Attached thumbnail(s) 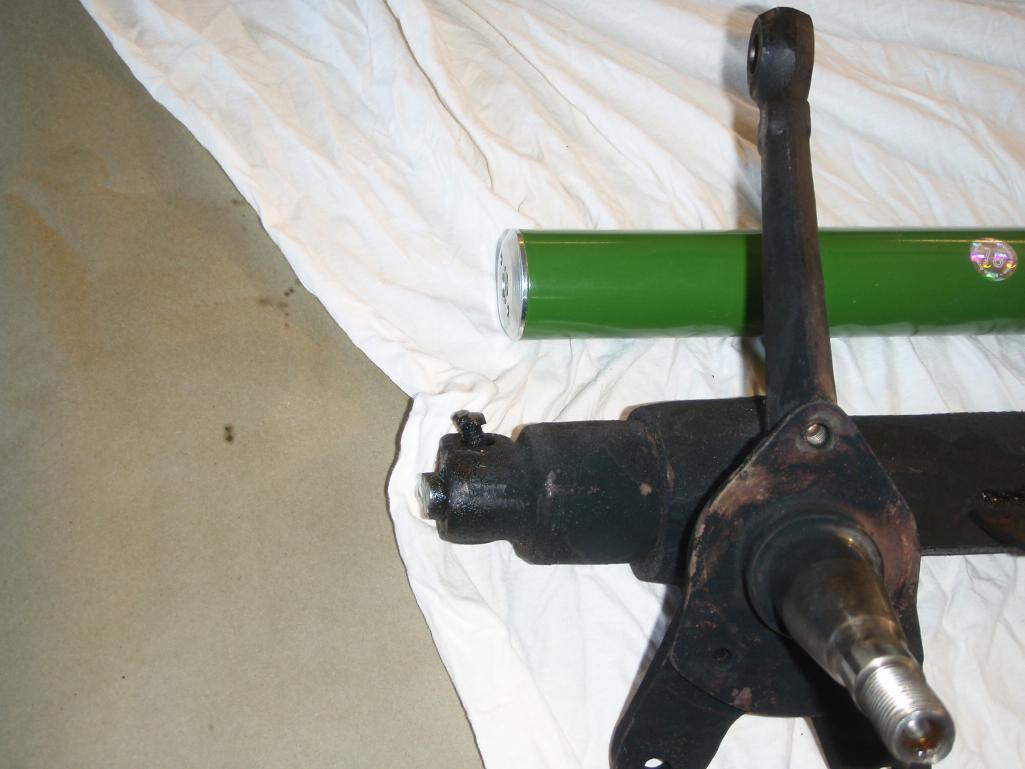 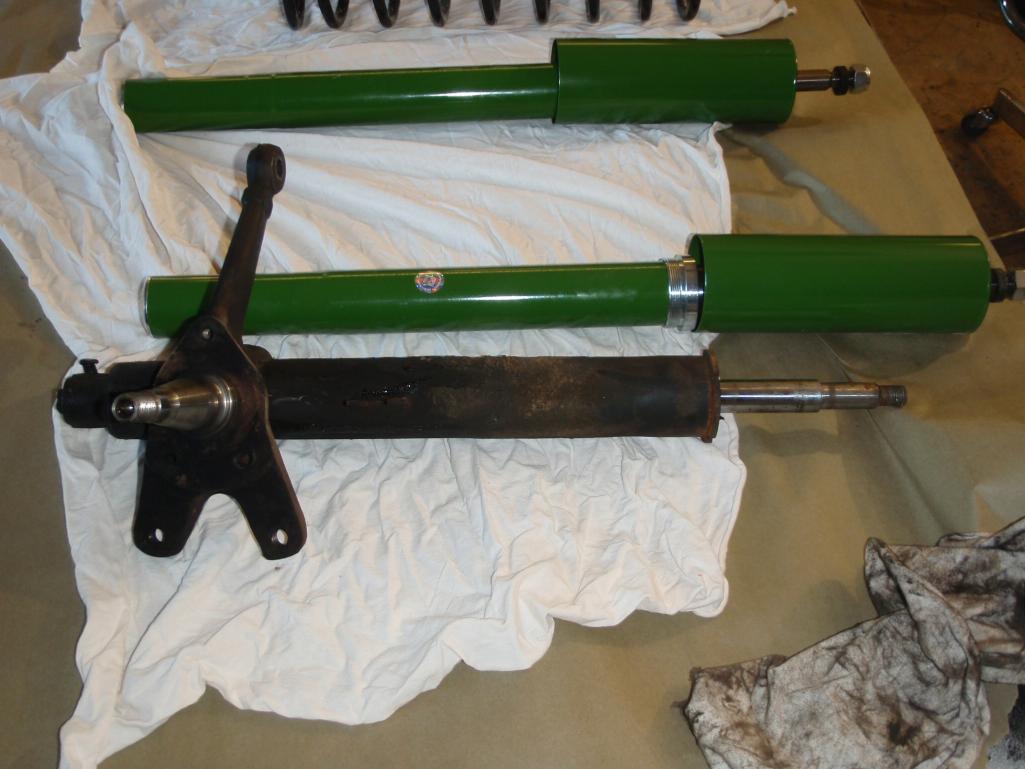
|
|
|
|
| wndsnd |
Jun 21 2012, 03:12 PM
Post
#12
|
|
You wanted a horse, but got a goat. Nobody wants a goat.... Group: Members Posts: 2,861 Joined: 12-February 12 From: North Shore, MA Member No.: 14,124 Region Association: North East States |
QUOTE(r_towle @ Jun 21 2012, 04:09 PM)  oh, Once you pull it out, dunk the whole stru into PB blaster for the night. They sell it by the gallon at Autozone. USe a plastic window washing jug and cut the top off...then dunk that in PB for a night or two. rich Got it out with a little finess ... see below, now I will soak the strut overnight. I assume that the strut now has to pull out of the arm? |
|
|
|
| r_towle |
Jun 21 2012, 03:26 PM
Post
#13
|
|
Custom Member Group: Members Posts: 24,705 Joined: 9-January 03 From: Taxachusetts Member No.: 124 Region Association: North East States |
ball joint is bolted from below the a-arm.
Its about a 2 inch round "nut" Use a pipe wrench... remove the cotter pin and locking plate. It has teeth in it so it wont turn till the nut is all the way out. once the nut is off, tap the ball joint from below, it will come out the top. If none of that makes sense...lookup the part (you need new ones anyways...so you can see a picture. Rich Rich |
|
|
|
| jmill |
Jun 21 2012, 03:54 PM
Post
#14
|
|
Green Hornet Group: Members Posts: 2,449 Joined: 9-May 08 From: Racine, Wisconsin Member No.: 9,038 Region Association: Upper MidWest |
It looks like you have the correct replacement but unfortunately you'll need a special tool to install it. BTDT. I got gouged calling Bilstein East and paid like $20 for it. If you need it try and borrow one or call Bilstein West. I hear the lady there is nice and might send it for free.
BTW - you still need to get the pin out to remove the ball joint remains from your strut. Also I had better luck cutting off the round castle nut from the ball joint. Carefully cut it without messing up the arm. Then take a chisel and split the nut. It'll thread off easy. |
|
|
|
| jmill |
Jun 21 2012, 04:02 PM
Post
#15
|
|
Green Hornet Group: Members Posts: 2,449 Joined: 9-May 08 From: Racine, Wisconsin Member No.: 9,038 Region Association: Upper MidWest |
Oh, and then you'll need the special P tool to install the ball joint nut. Apparently they're also gold plated at @ $50
|
|
|
|
| wndsnd |
Jun 21 2012, 06:19 PM
Post
#16
|
|
You wanted a horse, but got a goat. Nobody wants a goat.... Group: Members Posts: 2,861 Joined: 12-February 12 From: North Shore, MA Member No.: 14,124 Region Association: North East States |
Thanks guys,
All great information and help. (IMG:style_emoticons/default/beerchug.gif) I will call Bilsein and order the special P tool..... Now if I could only get that 19mm bolt off the rear caliper (IMG:style_emoticons/default/beer3.gif) |
|
|
|
| Eric_Shea |
Jun 21 2012, 06:39 PM
Post
#17
|
|
PMB Performance Group: Admin Posts: 19,304 Joined: 3-September 03 From: Salt Lake City, UT Member No.: 1,110 Region Association: Rocky Mountains |
Remember my email about the MAP torch. Let's talk tomorrow.
|
 |
|
| r_towle |
Jun 21 2012, 06:49 PM
Post
#18
|
|
Custom Member Group: Members Posts: 24,705 Joined: 9-January 03 From: Taxachusetts Member No.: 124 Region Association: North East States |
no special tools needed.
put the strut housing in a vice. Unscrew the nut on the top of the strut insert...look at your new part for reference. Remove old strut insert. notice the two words. Strut housing and strut insert. What you bought goes inside what you removed from the car. Ball joint tool is just a large pipe wrench. I hate to hear of people wasting money on tools that never get used again, and many many people here have used simple tools to replace the fancy expensive tools. Rich |
|
|
|
| wndsnd |
Jun 21 2012, 07:03 PM
Post
#19
|
|
You wanted a horse, but got a goat. Nobody wants a goat.... Group: Members Posts: 2,861 Joined: 12-February 12 From: North Shore, MA Member No.: 14,124 Region Association: North East States |
Rich
Now this is making sense. I thought the replacements wre too small to fit into the strut. I was anbojut to call AA and bitch. Rather not buy tools for single use. |
|
|
|
| cwpeden |
Jun 21 2012, 07:08 PM
Post
#20
|
|
Great White North, huh? Group: Members Posts: 916 Joined: 20-August 06 From: Victoria BC Member No.: 6,693 Region Association: Canada |
Ive always been a fan of the saying "Fire is your friend".
Heat the housing around the taper bolt and then revisit the hammer. You need to heat it fast with a hot torch, tryring not to soak the whole thing to much. |
|
|
|
|
1 User(s) are reading this topic (1 Guests and 0 Anonymous Users)
0 Members:

|
Lo-Fi Version | Time is now: 8th July 2025 - 04:19 PM |
Invision Power Board
v9.1.4 © 2025 IPS, Inc.