|
|
|
Porsche, and the Porsche crest are registered trademarks of Dr. Ing. h.c. F. Porsche AG.
This site is not affiliated with Porsche in any way. Its only purpose is to provide an online forum for car enthusiasts. All other trademarks are property of their respective owners. |
|
|

  |

| Mike Bellis |
 Jun 7 2014, 04:12 PM Jun 7 2014, 04:12 PM
Post
#1
|
|
Resident Electrician  Group: Members Posts: 8,345 Joined: 22-June 09 From: Midlothian TX Member No.: 10,496 Region Association: None |
So I bought the 914 rubber sail vinyl kit. Super good quality vinyl. I bought NEW sail trim from Porsche, yes it is still available new.
I cant get the vinyl to line up properly. If I use the 4 pre-punched holes to line up the vinyl, the rear corner of vinyl does not reach the trim. If I move it to reach the trim, either the pre-punched holes are visible or the front top corner has exposed paint. This vinyl is not very stretchy and I don't want to damage it. Since the trim is new, it should not be tweaked, at least not too bad or I would see it. I first lined everything up and it looked pretty good so I sprayed glue. Then the trim didn't fit right so I peeled it off. I then had to use acetone on it to get it to come off. Lucky for me my paint is shit so I don't care. But big hunks of glue and some paint stuck to the vinyl. I again used acetone on the back side of the vinyl to clean off the lumps. I noticed that when I place the trim without clips on the passenger side, the trim does not line up with the original holes. Check the curve on the trim. It does not match the curve on the vinyl. Maybe the new trim is different? Here's some pics. Anyone have any ideas? Here I have some rivets backwards just holding the vinyl on the holes, note the difference in the curve. If I remove the rivets and raise the trim, the vinyl does not reach under the trim's curve. 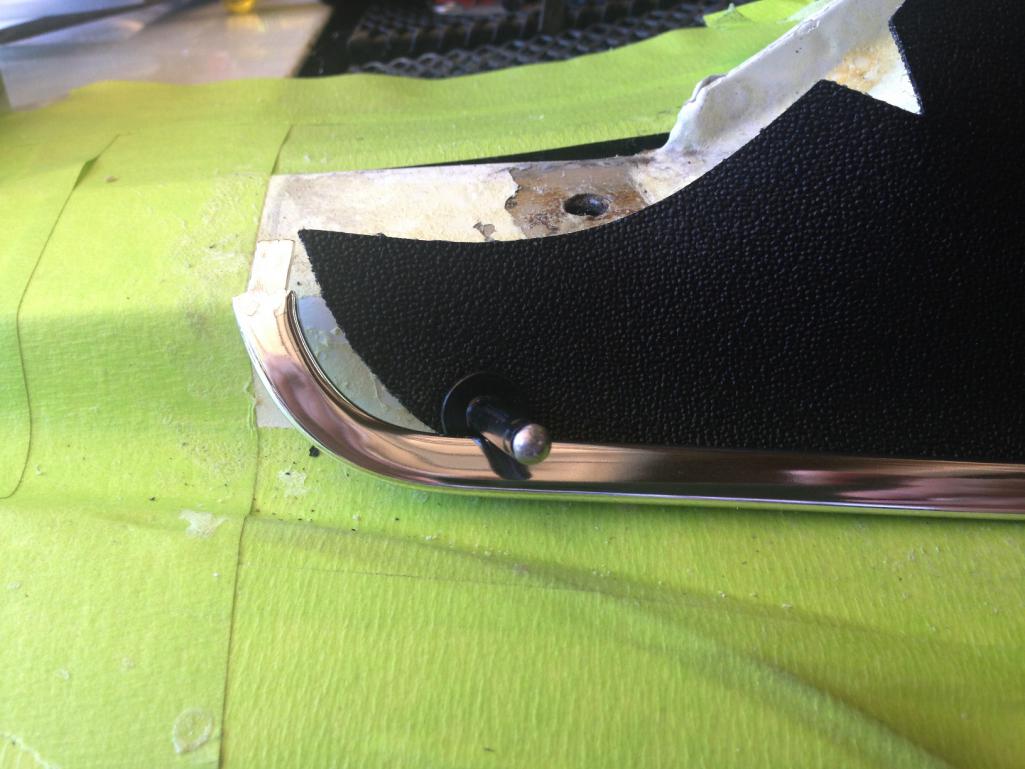 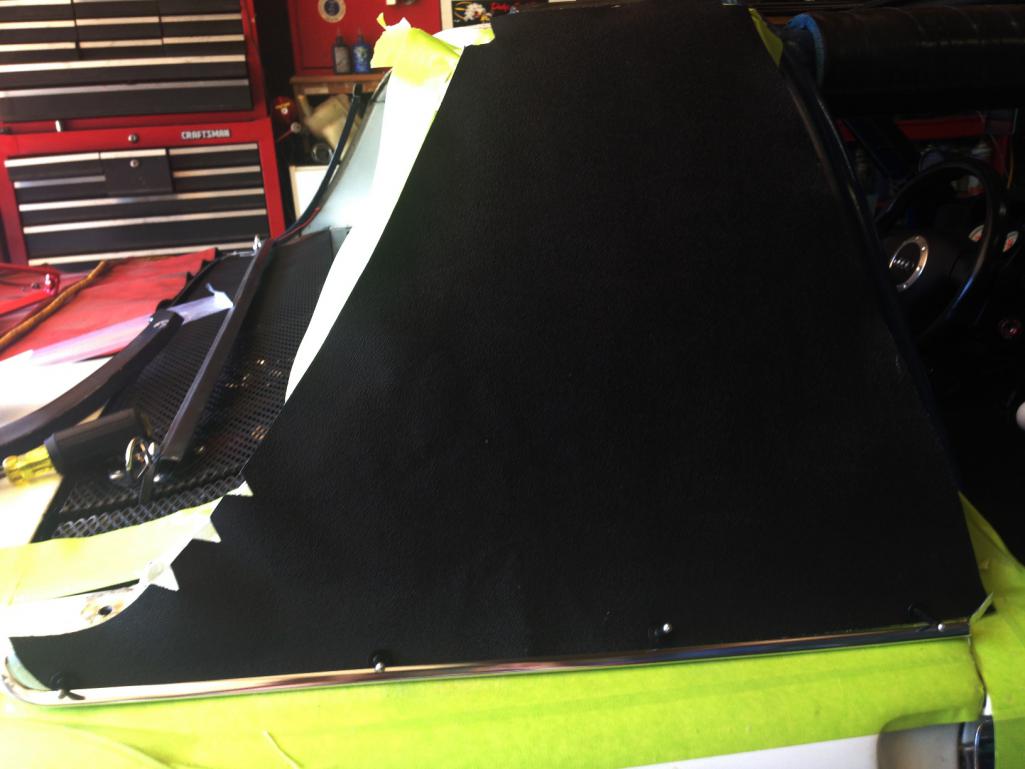 This shows the trim if lined up in place, it is way off the holes. If I raise it to the hole, I cannot reinstall the overlaping trim that goes up the rear edge. The front is off too. I most likely will re-drill the holes to work better. 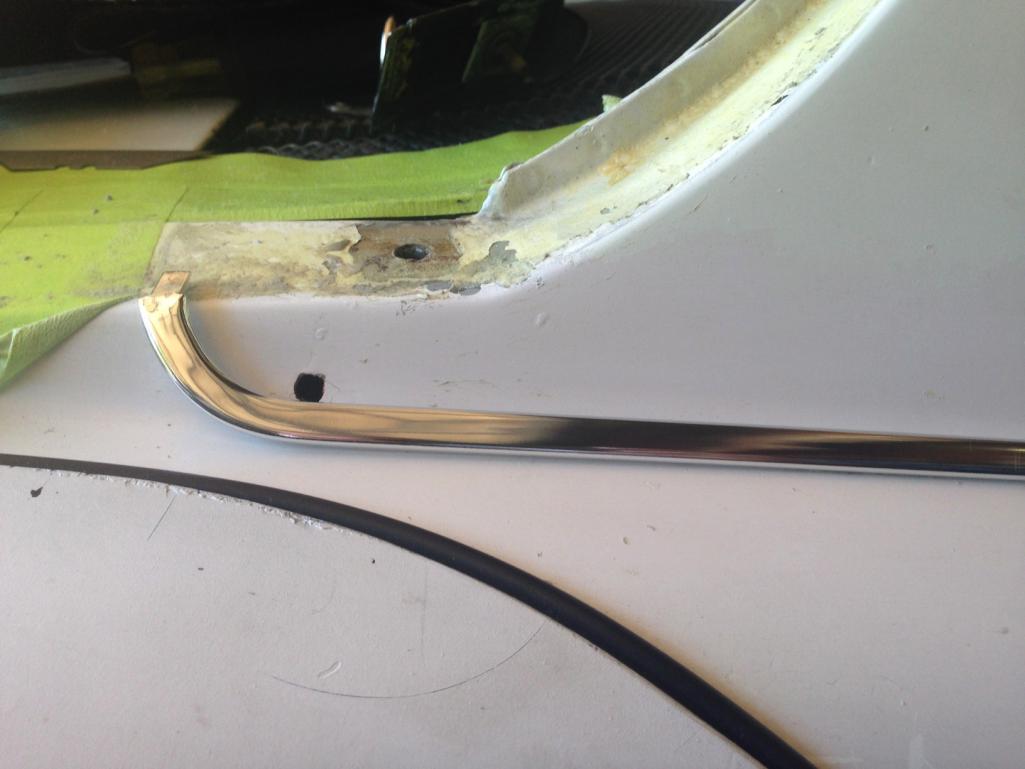 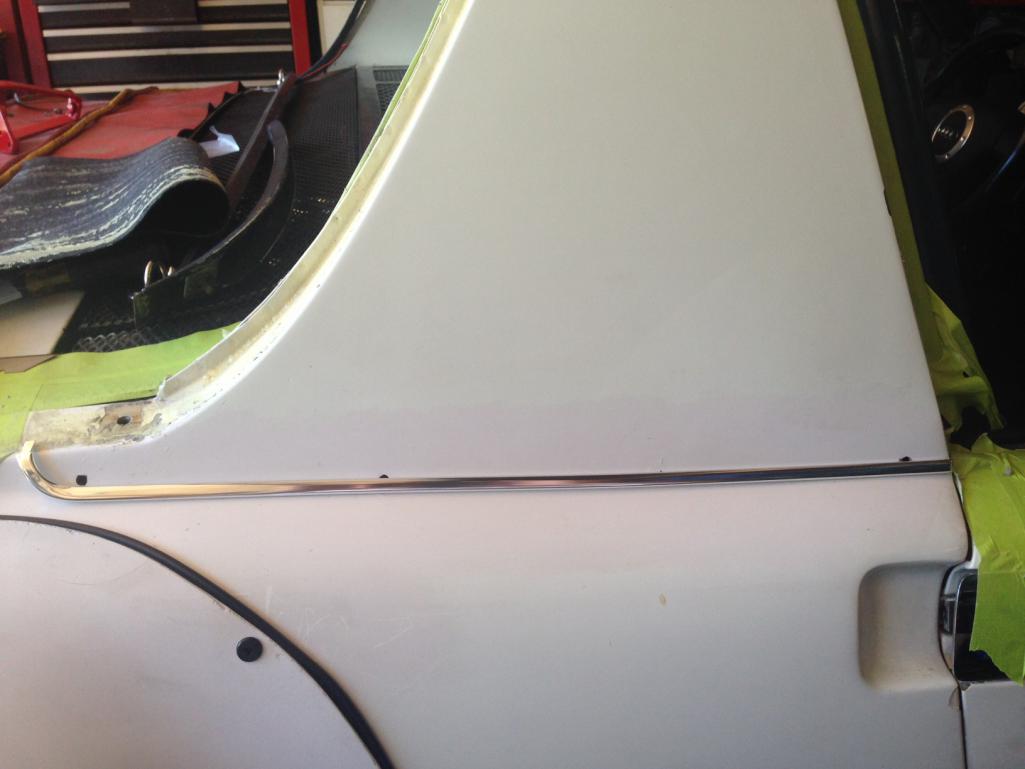 Here is the packaging from Porsche 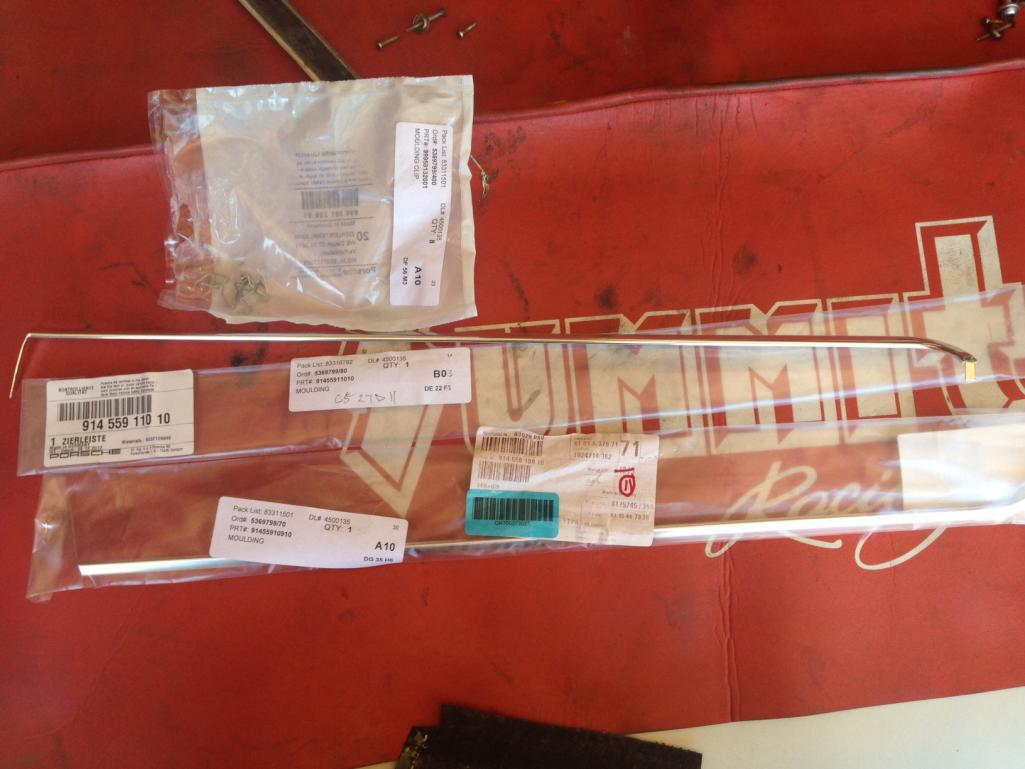 |
   |

 
|
| JawjaPorsche |
Jun 7 2014, 04:17 PM
Post
#2
|
|
Advanced Member Group: Members Posts: 3,463 Joined: 23-July 11 From: Clayton, Georgia Member No.: 13,351 Region Association: South East States |
Got my trim from 914Rubber and it fit perfectly. Contact Mikey and he will make it right.
|
|
|
|
| Mike Bellis |
Jun 7 2014, 04:20 PM
Post
#3
|
|
Resident Electrician Group: Members Posts: 8,345 Joined: 22-June 09 From: Midlothian TX Member No.: 10,496 Region Association: None |
QUOTE(JawjaPorsche @ Jun 7 2014, 03:17 PM)  Got my trim from 914Rubber and it fit perfectly. Contact Mikey and he will make it right. I did reach out to him. Waiting for an answer. I'm not sure if the vinyl is the problem or the trim or my car is bent... If the vinyl at the rear curve was longer, I could make it work. BTW, It's a PITA to get the glue back off... (IMG:style_emoticons/default/dry.gif) |
|
|
|
| billh1963 |
Jun 7 2014, 04:37 PM
Post
#4
|
|
Car Hoarder! Group: Members Posts: 3,402 Joined: 28-March 11 From: South Carolina Member No.: 12,871 Region Association: South East States |
My vinyl was a little short on the passenger side. (ScottyB can attest to that). In my case it wasn't enough to worry about since it's not a concours car. I'm sure Mikey will make it right.
|
|
|
|
| Mike Bellis |
Jun 8 2014, 01:07 PM
Post
#5
|
|
Resident Electrician Group: Members Posts: 8,345 Joined: 22-June 09 From: Midlothian TX Member No.: 10,496 Region Association: None |
Well as you all know, Mark Whitesell (Mikey914) is awesome.
He is making me a custom set of sail vinyl with a longer rear section. Mark has to be one of the best vendors out there. He truly takes care of his customers. |
|
|
|
| pdlightning |
Jun 8 2014, 09:18 PM
Post
#6
|
|
Member Group: Members Posts: 207 Joined: 4-February 11 From: Santa Clarita Member No.: 12,660 Region Association: Southern California |
QUOTE(Mike Bellis @ Jun 8 2014, 12:07 PM) Well as you all know, Mark Whitesell (Mikey914) is awesome. He is making me a custom set of sail vinyl with a longer rear section. Mark has to be one of the best vendors out there. He truly takes care of his customers. I repeatedly heard that about Mikey. That is why I just ordered a bunch more stuff from the GB list. |
|
|
|
| Mikey914 |
Jun 10 2014, 08:43 AM
Post
#7
|
|
The rubber man Group: Members Posts: 12,679 Joined: 27-December 04 From: Hillsboro, OR Member No.: 3,348 Region Association: None |
The horizontal chrome piece it technically can move forward or back. Take a look at where it should fall with the rear sail piece. I'll be doing mine this weekend I'll post a tutorial.
-Mark |
|
|
|
| Socalandy |
Jun 10 2014, 09:19 AM
Post
#8
|
|
Its got to be Yellow!!! Group: Members Posts: 2,432 Joined: 29-August 09 From: Orange Member No.: 10,742 Region Association: Southern California |
your lower trim piece looks fine. You do have four holes for the clips? I'm guessing it covered up by the trim. with the vinyl being NOS maybe there's been some shrinkage (IMG:style_emoticons/default/blink.gif) over time. you should have some wiggle room up front since the seal track for the window will cover that edge.
Attached thumbnail(s)  Attached image(s) 
|
|
|
|
| Chris Pincetich |
Jun 10 2014, 12:23 PM
Post
#9
|
|
B-) Group: Members Posts: 2,082 Joined: 3-October 05 From: Point Reyes Station, CA Member No.: 4,907 Region Association: Northern California |
QUOTE(Mikey914 @ Jun 10 2014, 07:43 AM) I'll be doing mine this weekend I'll post a tutorial. -Mark THANKS, I'm looking forward to learning a few tricks and tips from your install of the sail panel vinyl. (IMG:style_emoticons/default/beerchug.gif) The new vinyl I received from you looks sooooo "correct." (IMG:style_emoticons/default/shades.gif) Building my next GB order today, as I really need that front trunk cable (IMG:style_emoticons/default/aktion035.gif) |
|
|
|
| SirAndy |
Jun 10 2014, 12:51 PM
Post
#10
|
|
Resident German Group: Admin Posts: 41,688 Joined: 21-January 03 From: Oakland, Kalifornia Member No.: 179 Region Association: Northern California |
QUOTE(Socalandy @ Jun 10 2014, 08:19 AM) you should have some wiggle room up front since the seal track for the window will cover that edge. (IMG:style_emoticons/default/agree.gif) How much gap do you get up front if you align the back correctly? Most of the front edge is covered by the trim piece for the window rubber, so a perfect fit isn't needed there. (IMG:style_emoticons/default/popcorn[1].gif) |
 |
|
|
1 User(s) are reading this topic (1 Guests and 0 Anonymous Users)
0 Members:

|
Lo-Fi Version | Time is now: 16th June 2024 - 01:57 PM |
Invision Power Board
v9.1.4 © 2024 IPS, Inc.