|
|
|
Porsche, and the Porsche crest are registered trademarks of Dr. Ing. h.c. F. Porsche AG.
This site is not affiliated with Porsche in any way. Its only purpose is to provide an online forum for car enthusiasts. All other trademarks are property of their respective owners. |
|
|

  |

| sean_v8_914 |
 Apr 14 2015, 01:30 AM Apr 14 2015, 01:30 AM
Post
#1
|
|
Chingon 601  Group: Members Posts: 4,011 Joined: 1-February 05 From: San Diego Member No.: 3,541 |
I’m sure I have said this many times before. “I wish I hadn’t thrown that away”. I tossed much better cores than these pictures I’m about to post here.
Crack free dash is like saying rust free chassis. Early cores are even harder to come by. The cores have gotten so bad that they are not even stiff enough to handle once removed from the car. It’s like the patient is not strong enough to survive the surgery. I have had to get a little more creative to make these viable for a re-covering. They have to be stiff so I can stretch the cover. They have to be smooth cause who wants to see a lumpy dash. I tested various materials in long term sun exposure. Most shrink, crack or puff up under the vinyl when they get hot. I settled on a glass stranded polyester/epoxy resin blend. But even that is not enough. Lots of sagging gauge hoods now. Attached thumbnail(s) 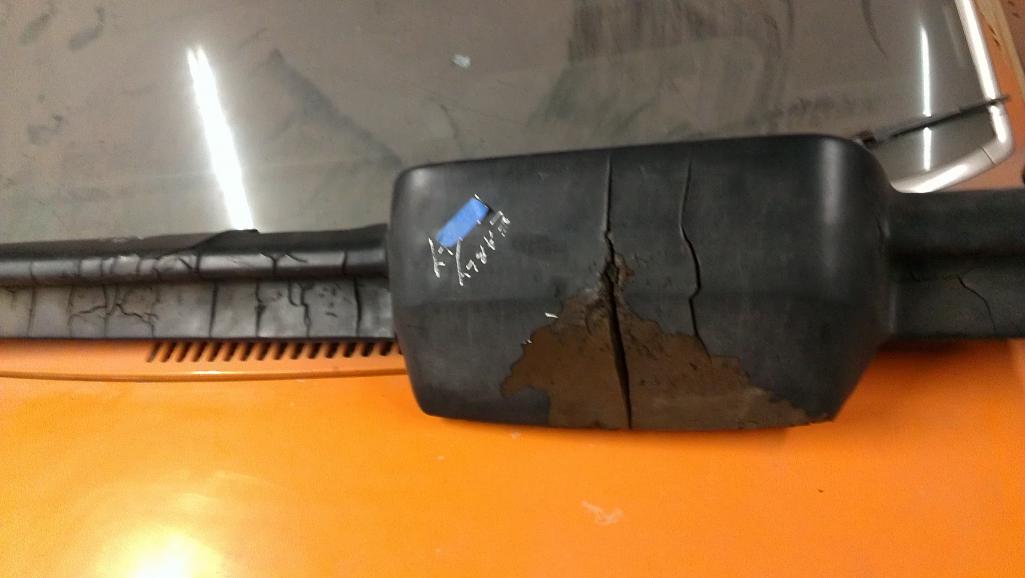 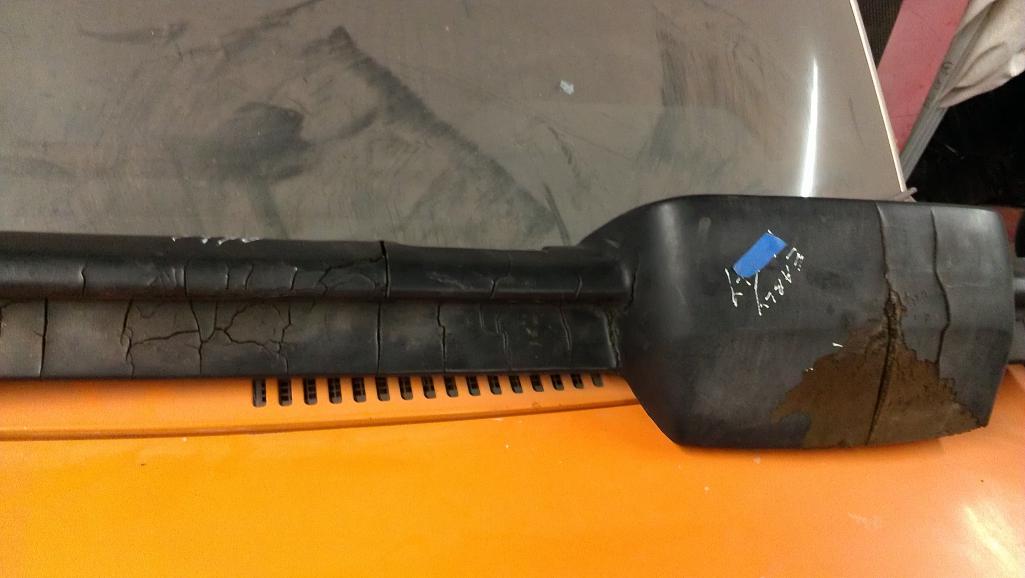 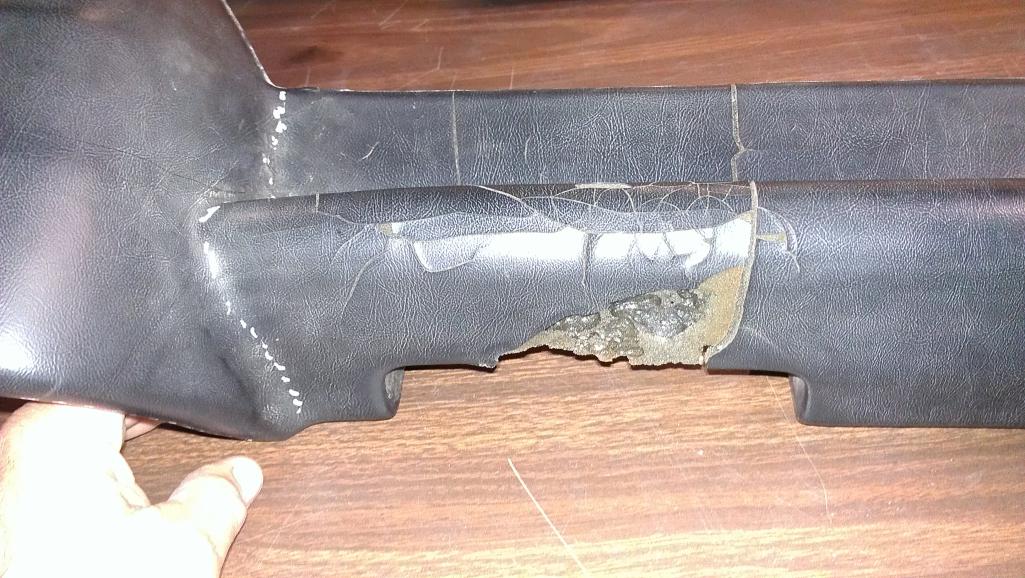
|
   |

 
|
| sean_v8_914 |
Apr 14 2015, 01:35 AM
Post
#2
|
|
Chingon 601 Group: Members Posts: 4,011 Joined: 1-February 05 From: San Diego Member No.: 3,541 |
Porsche did put some steel in there. Some dashes are experiencing a rust failure similar to the rubber bumper tops.
It’s time to put some steel in there. the corners delaminate from the rusty steel structure molded into the attachment flange Attached thumbnail(s) 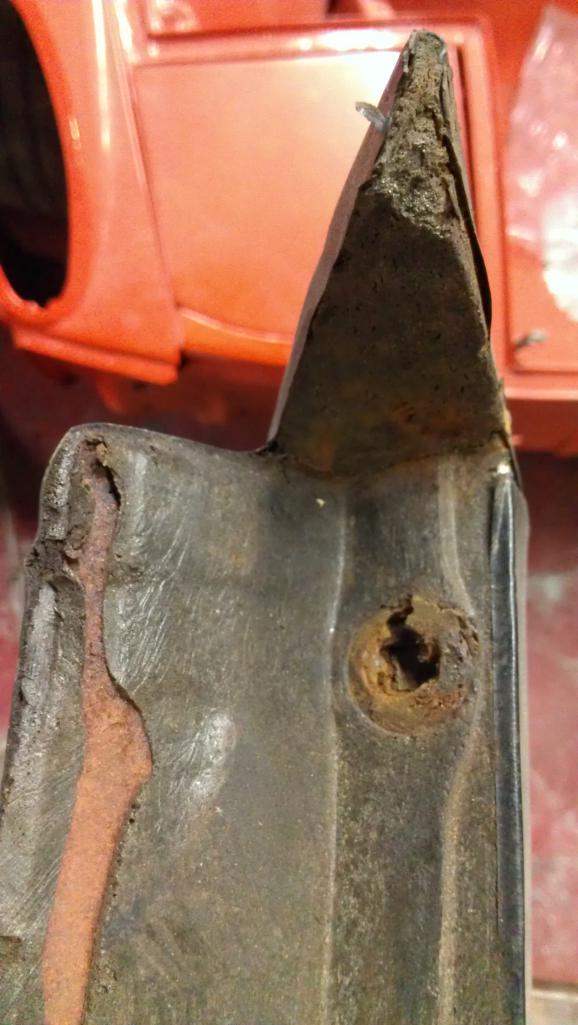 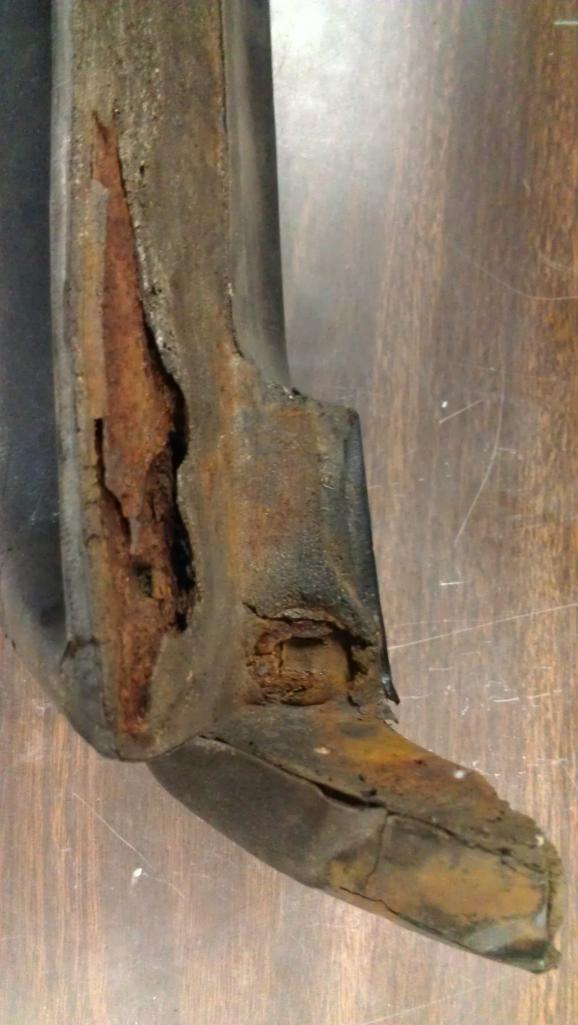 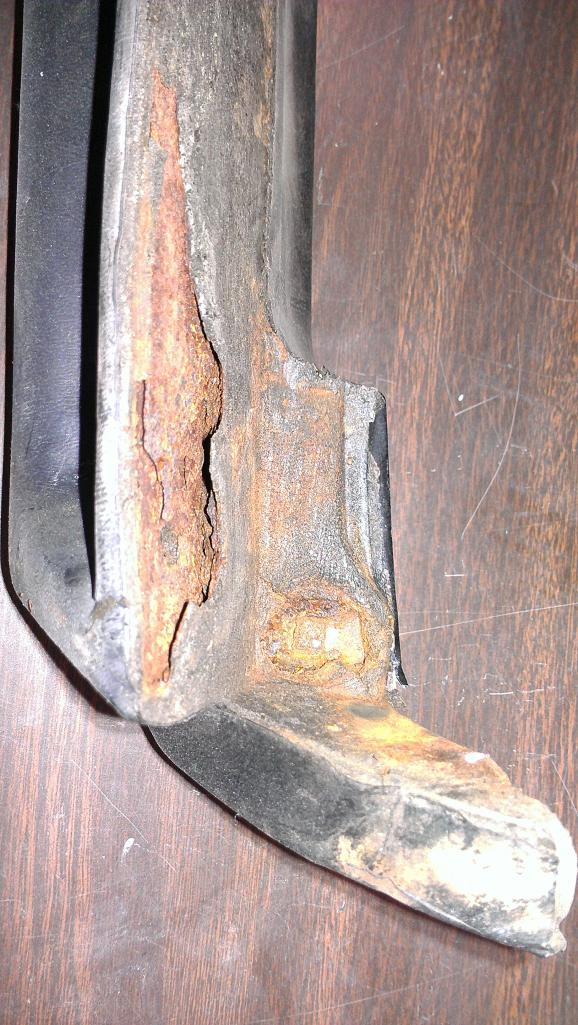
|
|
|
|
| sean_v8_914 |
Apr 14 2015, 01:47 AM
Post
#3
|
|
Chingon 601 Group: Members Posts: 4,011 Joined: 1-February 05 From: San Diego Member No.: 3,541 |
I pick the brittle sun baked vinyl crust away to find good foam for adhesion. Adhesion was a primary consideration for material selection. not every goop will stick to every plastic. Chemistry compatibility and what not.
Attached thumbnail(s) 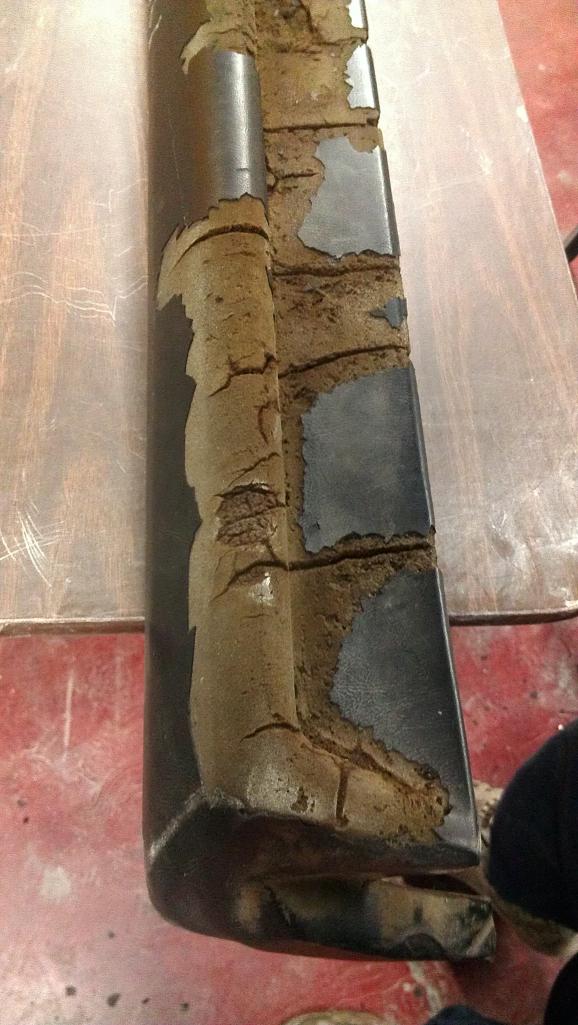 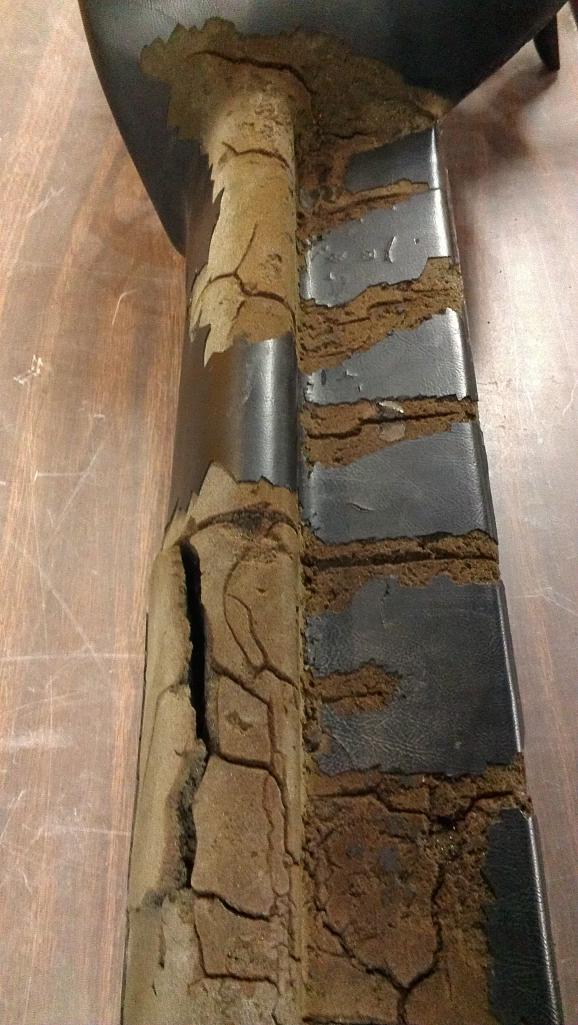
|
|
|
|
| sean_v8_914 |
Apr 14 2015, 01:53 AM
Post
#4
|
|
Chingon 601 Group: Members Posts: 4,011 Joined: 1-February 05 From: San Diego Member No.: 3,541 |
proper ash tray hole shape is toast
Attached thumbnail(s) 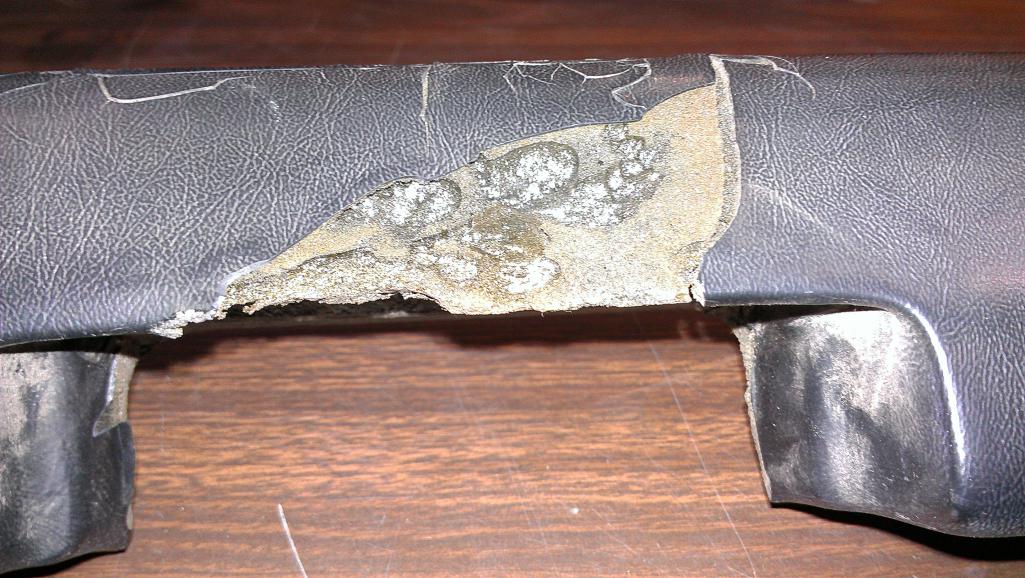 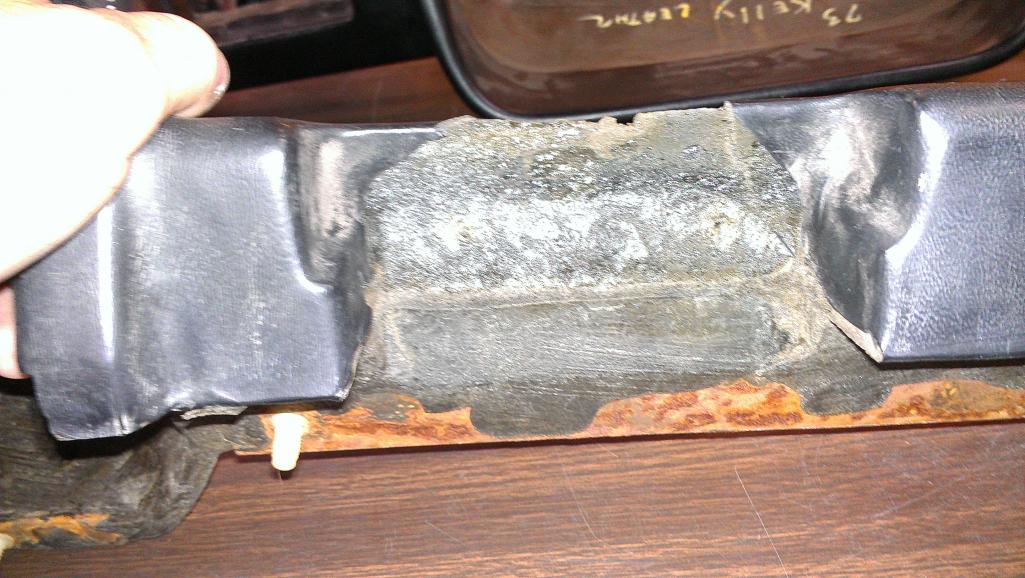
|
|
|
|
| sean_v8_914 |
Apr 14 2015, 02:01 AM
Post
#5
|
|
Chingon 601 Group: Members Posts: 4,011 Joined: 1-February 05 From: San Diego Member No.: 3,541 |
yummy
Attached thumbnail(s)  
|
|
|
|
| sean_v8_914 |
Apr 14 2015, 02:05 AM
Post
#6
|
|
Chingon 601 Group: Members Posts: 4,011 Joined: 1-February 05 From: San Diego Member No.: 3,541 |
mold
Attached thumbnail(s) 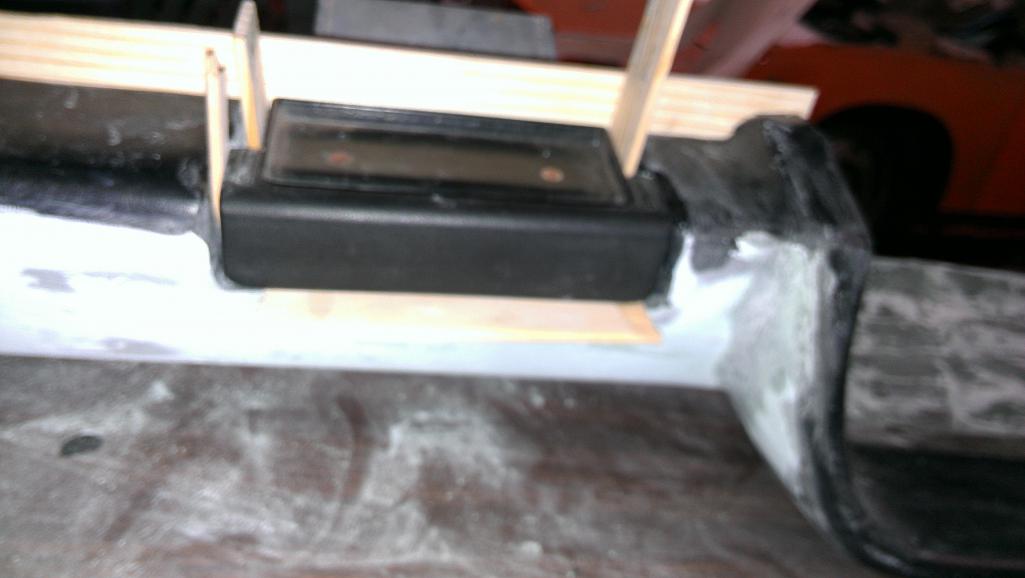 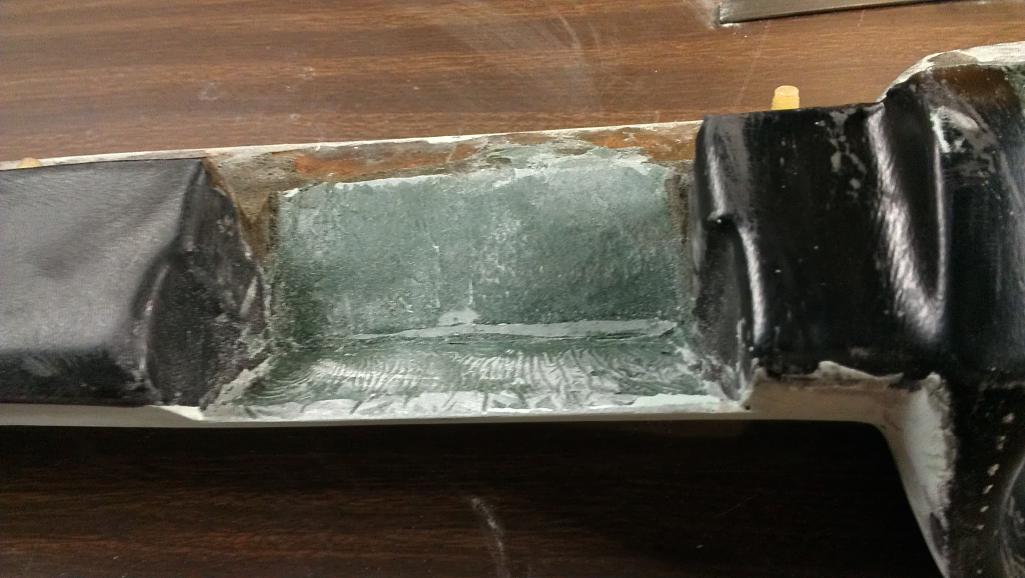
|
|
|
|
| sean_v8_914 |
Apr 14 2015, 02:17 AM
Post
#7
|
|
Chingon 601 Group: Members Posts: 4,011 Joined: 1-February 05 From: San Diego Member No.: 3,541 |
long flat sander for shaping
Attached thumbnail(s) 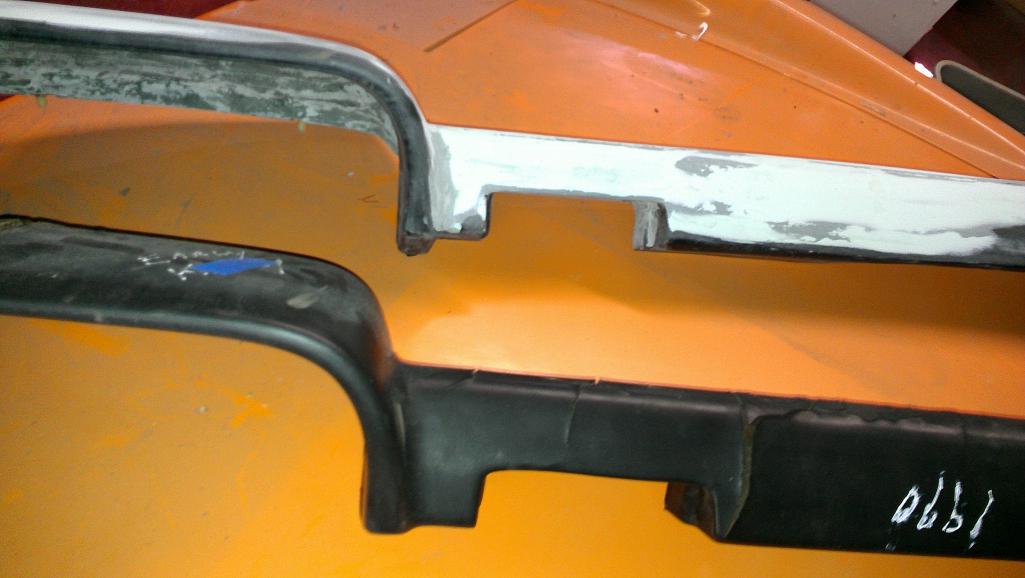 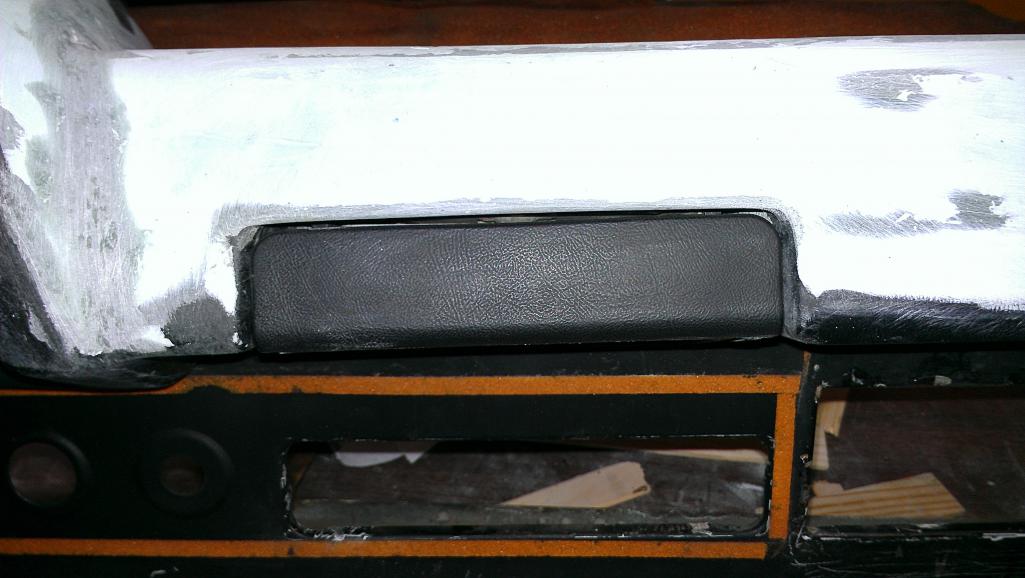
|
|
|
|
| sean_v8_914 |
Apr 14 2015, 02:27 AM
Post
#8
|
|
Chingon 601 Group: Members Posts: 4,011 Joined: 1-February 05 From: San Diego Member No.: 3,541 |
this gauge hood was very deformed but its an early dash so I gotta fix it
Attached thumbnail(s)  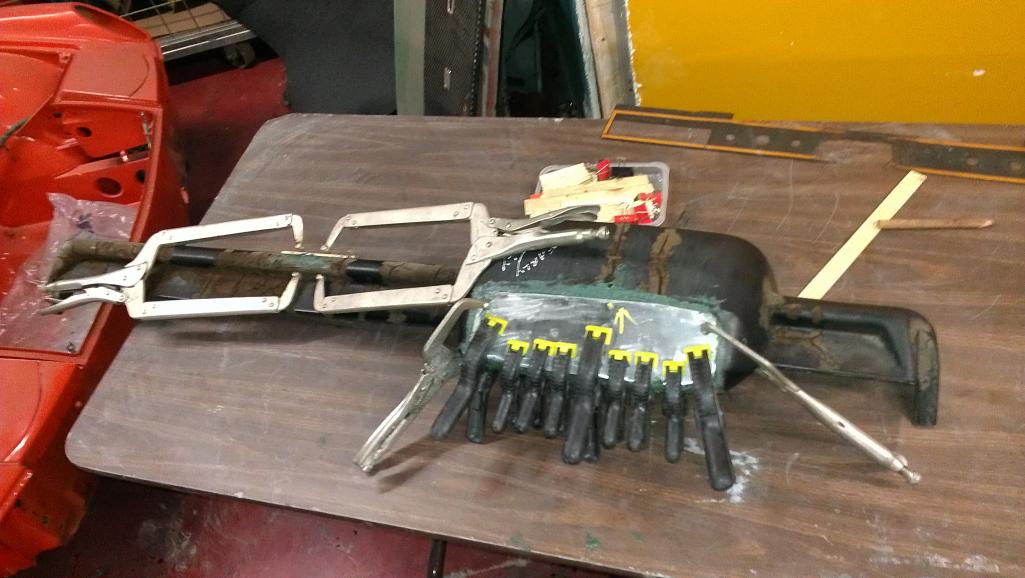
|
|
|
|
| sean_v8_914 |
Apr 14 2015, 02:47 AM
Post
#9
|
|
Chingon 601 Group: Members Posts: 4,011 Joined: 1-February 05 From: San Diego Member No.: 3,541 |
It’s time to put some steel in there and slather it up.
I forgot to mention some key prep work. This happens FIRST before plucking. Wash with 3m scrubby and degreaser. Wash with wet wipedown of acetone on a stout paper towel . sand rough 80 grit to scuff the plastic Attached thumbnail(s) 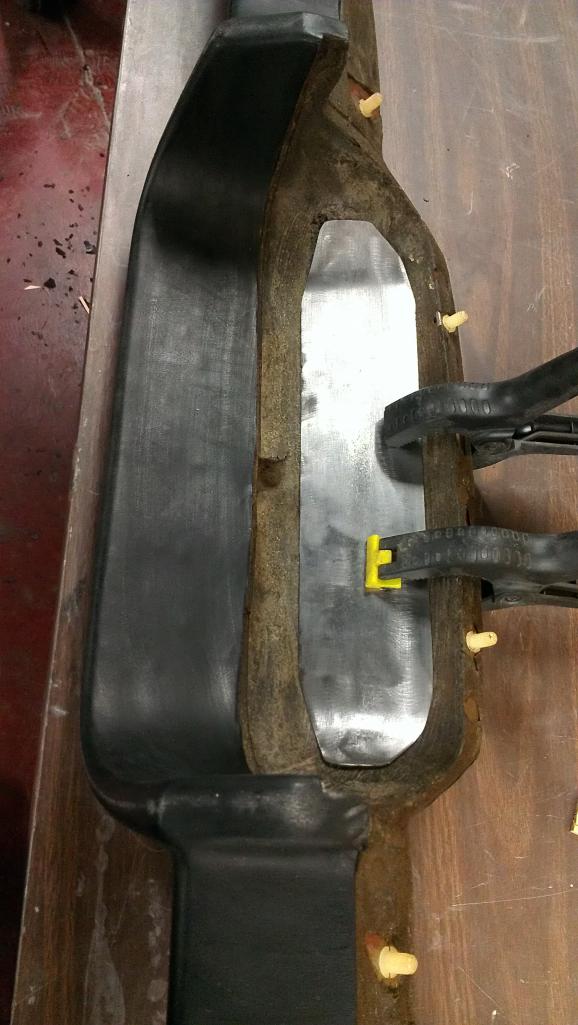 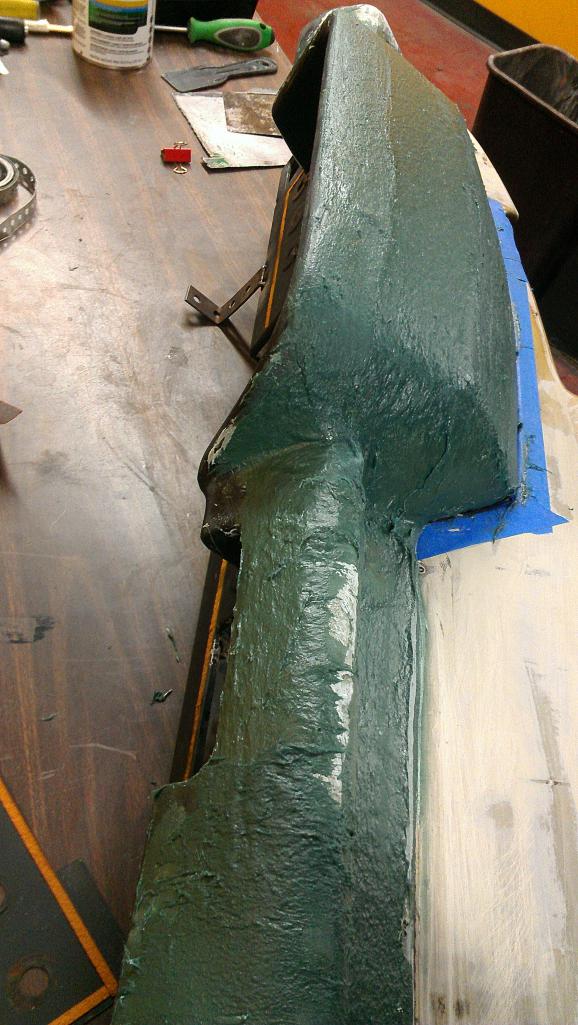
|
|
|
|
| sean_v8_914 |
Apr 14 2015, 02:51 AM
Post
#10
|
|
Chingon 601 Group: Members Posts: 4,011 Joined: 1-February 05 From: San Diego Member No.: 3,541 |
iyu
Attached thumbnail(s) 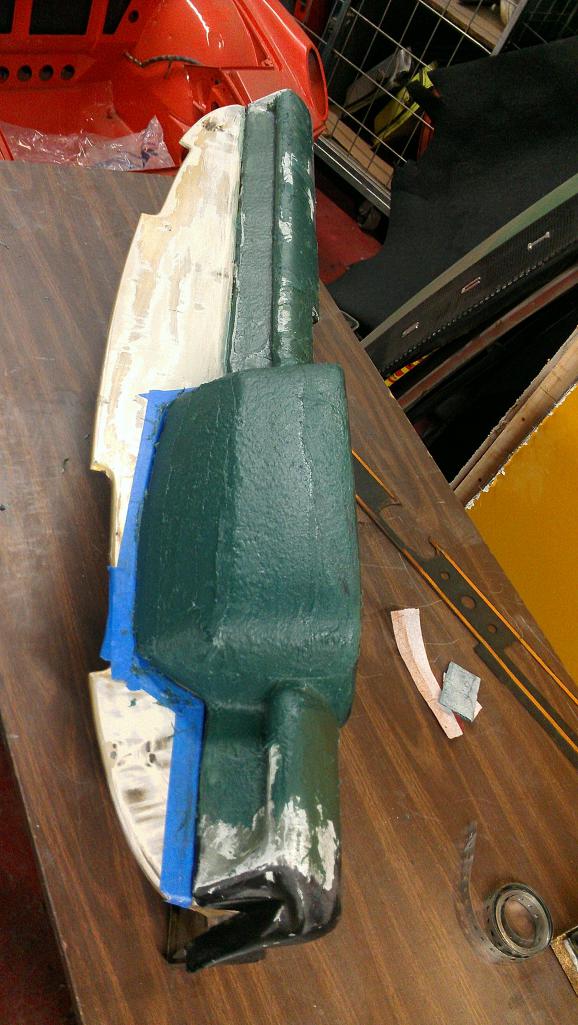 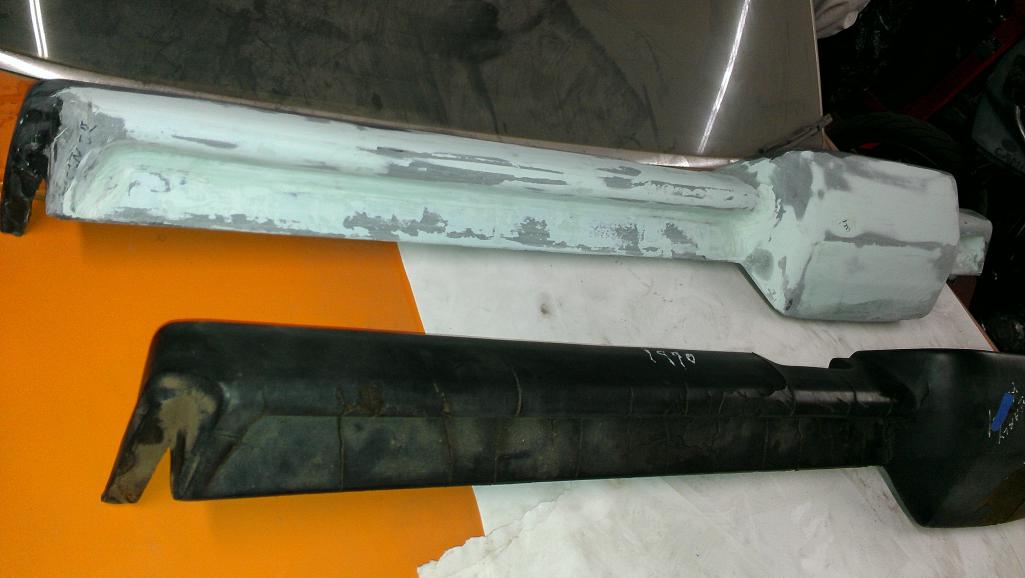
|
|
|
|
| sean_v8_914 |
Apr 14 2015, 03:08 AM
Post
#11
|
|
Chingon 601 Group: Members Posts: 4,011 Joined: 1-February 05 From: San Diego Member No.: 3,541 |
after the bodywork i have thought about paint and texture instead of foam and vinyl
anyone have an idea on how to achieve that texture? Attached thumbnail(s)  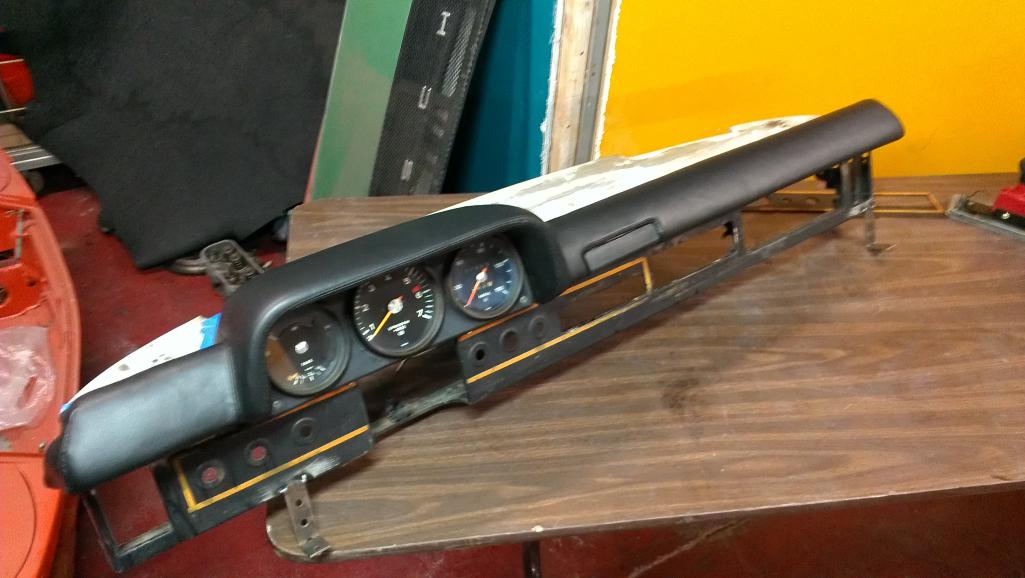
|
|
|
|
| Mikey914 |
Apr 14 2015, 05:34 AM
Post
#12
|
|
The rubber man Group: Members Posts: 12,677 Joined: 27-December 04 From: Hillsboro, OR Member No.: 3,348 Region Association: None |
The texture can only be achieved by using a vinyl to wrap. The correct texture is a thermally formable material just like factory used. There are some stretchable vinyls that are commercially available, but I thought you were already using them.
I can get you a source if you don't have one. The problem is that its difficult to work with. We had recovered these in the past, and found that the labor required to remanufacture a dash with shipping Bach and forth, left very little room for any margin. So we discontinued doing them. Let me know if I can be of any help. By the way. There is only one part number for these, I haven't seen an early vs late. Do you know the difference in measurement between them in the glove box area? Mark |
|
|
|
| echocanyons |
Apr 14 2015, 07:21 AM
Post
#13
|
|
Advanced Member Group: Benefactors Posts: 2,094 Joined: 24-December 02 From: Bay Area, CA Member No.: 7 Region Association: Central California |
Hi Sean that looks like my dash that Bruce sent you to recover for me (as is evident by early and Kelly marked on it)
Does this mean that you have recovered my dash finally ? It's been since last August when Bruce dropped it off to you and I am really looking forward to have this and my lower dash back. |
 |
|
| echocanyons |
Apr 14 2015, 07:29 AM
Post
#14
|
|
Advanced Member Group: Benefactors Posts: 2,094 Joined: 24-December 02 From: Bay Area, CA Member No.: 7 Region Association: Central California |
QUOTE(sean_v8_914 @ Apr 14 2015, 01:27 AM)  this gauge hood was very deformed but its an early dash so I gotta fix it Attached thumbnail(s) 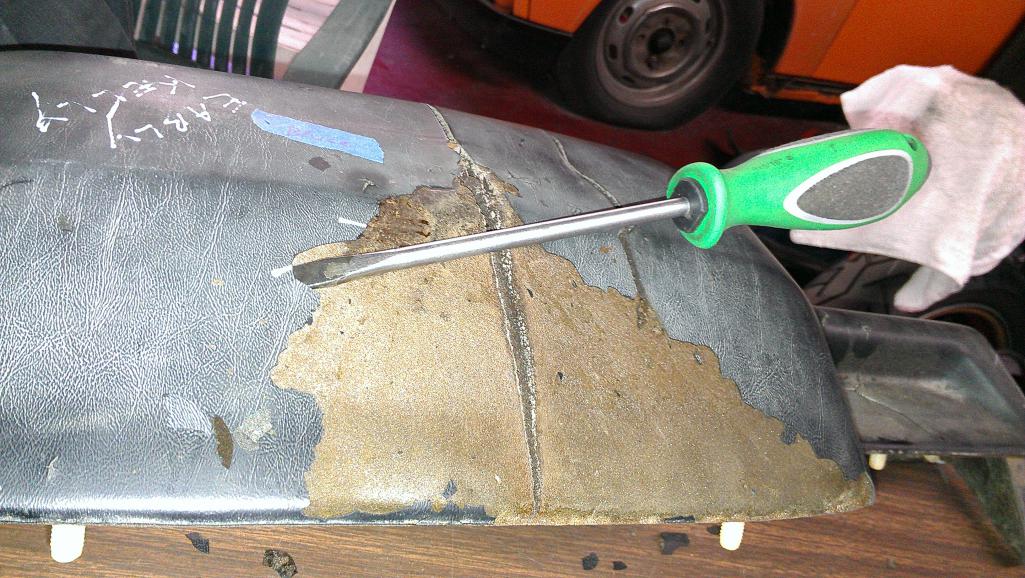
|
|
|
|
| rhodyguy |
Apr 14 2015, 07:42 AM
Post
#15
|
|
Chimp Sanctuary NW. Check it out. Group: Members Posts: 22,084 Joined: 2-March 03 From: Orion's Bell. The BELL! Member No.: 378 Region Association: Galt's Gulch |
Labor time involved in this process?
|
|
|
|
| echocanyons |
Apr 14 2015, 07:42 AM
Post
#16
|
|
Advanced Member Group: Benefactors Posts: 2,094 Joined: 24-December 02 From: Bay Area, CA Member No.: 7 Region Association: Central California |
http://www.914world.com/bbs2/index.php?sho...p;#entry2174000
In case you have forgotten Sean it was July 2014 when you cashed the check that I sent you for the leather and the cost of the repair to the upper dash. |
|
|
|
| sean_v8_914 |
Apr 14 2015, 12:51 PM
Post
#17
|
|
Chingon 601 Group: Members Posts: 4,011 Joined: 1-February 05 From: San Diego Member No.: 3,541 |
yes, that is your dash
|
|
|
|
| sean_v8_914 |
Apr 14 2015, 01:00 PM
Post
#18
|
|
Chingon 601 Group: Members Posts: 4,011 Joined: 1-February 05 From: San Diego Member No.: 3,541 |
they are going faster now that I have figured out a procedure. still more hours than i want to admit to but all the cores are showing up this rough so I had to re invent my methods to put out something that wont fall apart like a pimp my ride job.
i went thru a few cores in testing. |
|
|
|
| Mikey914 |
Apr 14 2015, 01:02 PM
Post
#19
|
|
The rubber man Group: Members Posts: 12,677 Joined: 27-December 04 From: Hillsboro, OR Member No.: 3,348 Region Association: None |
It is very large intensive to do these, main reason I got it of refurbishing these.
We sent 15-20 hrs on a dash. Not just doing the work, but cleaning up. It's really messy. Does look like you are in the home stretch, pardon the pun. |
|
|
|
| sean_v8_914 |
Apr 14 2015, 01:40 PM
Post
#20
|
|
Chingon 601 Group: Members Posts: 4,011 Joined: 1-February 05 From: San Diego Member No.: 3,541 |
bad timing for me but good for you. If i had known you were going to make these I would not have spent the time on my core resto preoceedure. i think a new dash is better. congrats on the release of another fine product. I cant wait to see one
|
|
|
|
|
1 User(s) are reading this topic (1 Guests and 0 Anonymous Users)
0 Members:

|
Lo-Fi Version | Time is now: 1st June 2024 - 02:26 PM |
Invision Power Board
v9.1.4 © 2024 IPS, Inc.