|
|
|
Porsche, and the Porsche crest are registered trademarks of Dr. Ing. h.c. F. Porsche AG.
This site is not affiliated with Porsche in any way. Its only purpose is to provide an online forum for car enthusiasts. All other trademarks are property of their respective owners. |
|
|

  |

| 914Sixer |
 Sep 8 2015, 08:03 PM Sep 8 2015, 08:03 PM
Post
#1
|
|
914 Guru  Group: Members Posts: 9,190 Joined: 17-January 05 From: San Angelo Texas Member No.: 3,457 Region Association: Southwest Region |
You will need a Temp or Volt console gauge and a early VDO cockpit gauge. The back is the same as the 914 gauges. The new gauges are plastic with the same plug type BUT I do not know if they will interchange.
Remove the trim ring on both gauges being careful not to destroy the one on the 914 gauge. Your going to need it. Using a 8mm nut driver undo the nut. Looking at the back of the gauge you will notice the the plastic post is on the right. This is important in reinstalling the assembly. Remove both assemblies, being careful not to put greasy fingers on temp gauge face. Move the temp gauge over to the 60mm 914 case. Drop the center post in middle cross hole. Hold the gauge from the front and install back plug with the post to the right looking at it from the rear of the gauge. Install 3rd post and nut. Just snug up the assembly, you may need to move it around. Drop in 914 60mm trim ring followed by the 52mm trim ring. Center the smaller ring on gauge. Install glass and trim, making sure not to move inner trim rings off center. Time to plug and test. Attached image(s) 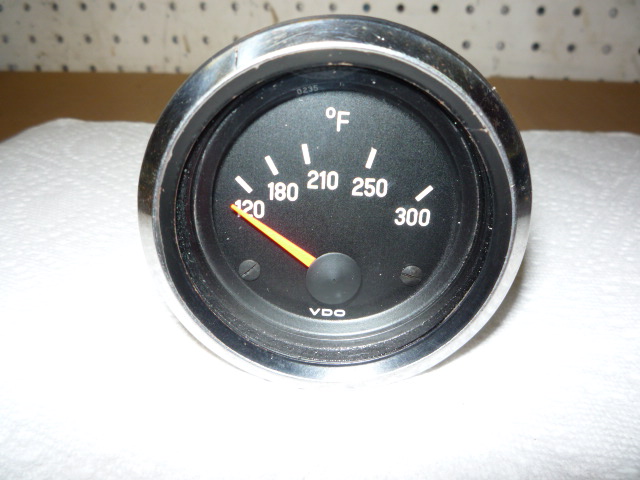 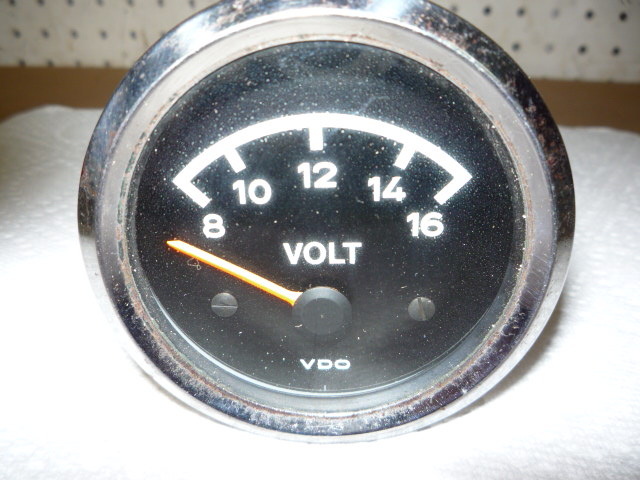 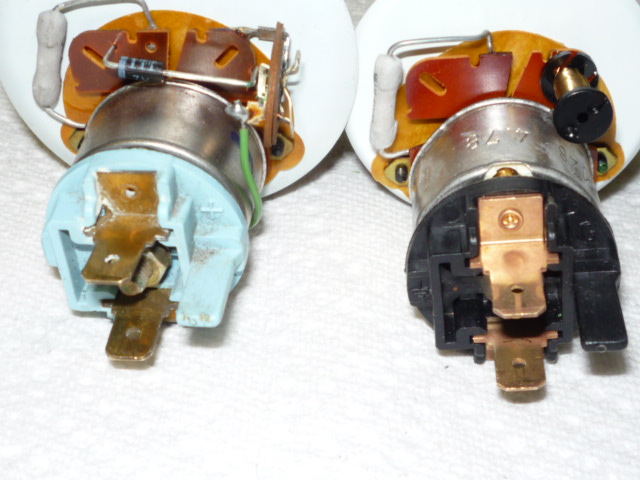 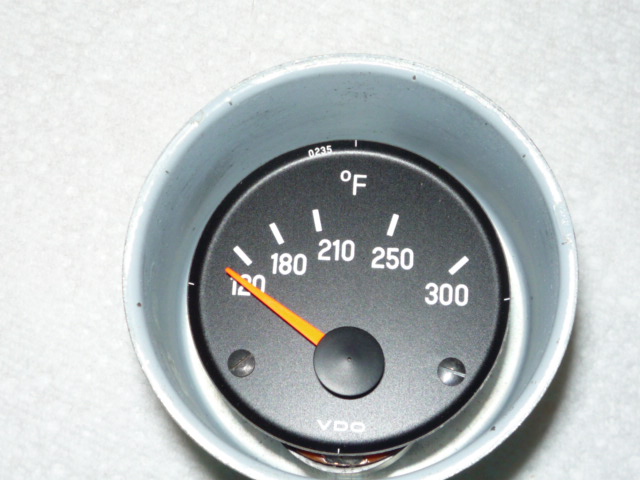 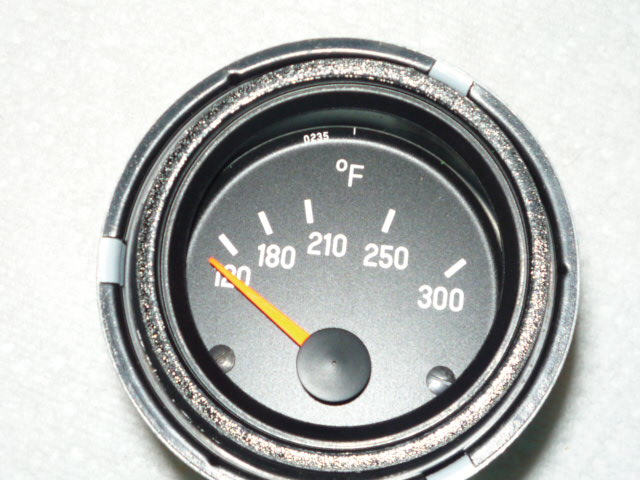 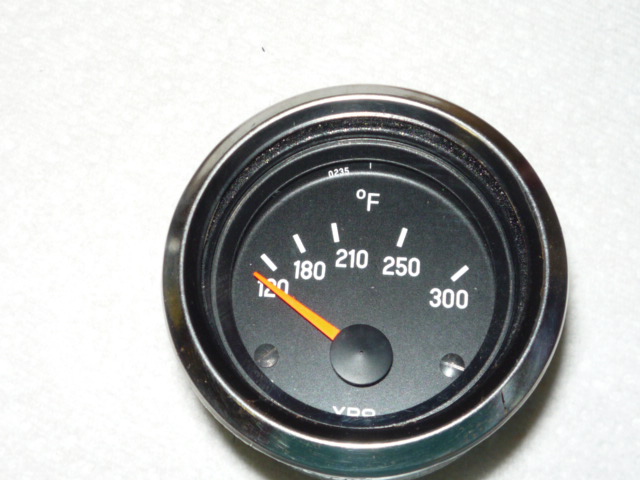 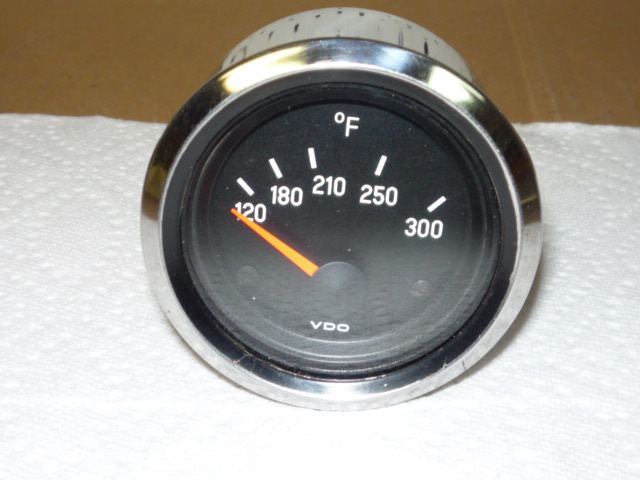
|
   |

 
|
| dug |
Sep 8 2015, 08:34 PM
Post
#2
|
|
Member Group: Members Posts: 185 Joined: 26-December 06 From: Santa Cruz, CA Member No.: 7,382 Region Association: Northern California |
Awesome work Mark!
cheers, dug |
|
|
|
| rfinegan |
Sep 9 2015, 07:04 AM
Post
#3
|
|
Senior Member Group: Members Posts: 1,083 Joined: 8-February 13 From: NC Member No.: 15,499 Region Association: MidAtlantic Region |
Great Job...was just thinking about adding a CHT gauge
-Robert |
|
|
|
| EdwardBlume |
Sep 9 2015, 07:38 AM
Post
#4
|
|
914 Wizard Group: Members Posts: 12,338 Joined: 2-January 03 From: SLO Member No.: 81 Region Association: Central California |
Nice work! Way to make those old non-working gauges useful!
|
|
|
|
| worn |
Sep 9 2015, 09:42 AM
Post
#5
|
|
Winner of the Utah Twisted Joint Award Group: Members Posts: 3,491 Joined: 3-June 11 From: Madison, WI Member No.: 13,152 Region Association: Upper MidWest |
QUOTE(914Sixer @ Sep 8 2015, 07:03 PM)  You will need a Temp or Volt console gauge and a early VDO cockpit gauge. The back is the same as the 914 gauges. The new gauges are plastic with the same plug type BUT I do not know if they will interchange. Remove the trim ring on both gauges being careful not to destroy the one on the 914 gauge. Your going to need it. Using a 8mm nut driver undo the nut. Looking at the back of the gauge you will notice the the plastic post is on the right. This is important in reinstalling the assembly. Remove both assemblies, being careful not to put greasy fingers on temp gauge face. Move the temp gauge over to the 60mm 914 case. Drop the center post in middle cross hole. Hold the gauge from the front and install back plug with the post to the right looking at it from the rear of the gauge. Install 3rd post and nut. Just snug up the assembly, you may need to move it around. Drop in 914 60mm trim ring followed by the 52mm trim ring. Center the smaller ring on gauge. Install glass and trim, making sure not to move inner trim rings off center. Time to plug and test. Very very nice. (IMG:style_emoticons/default/pray.gif) I worry about raining on your parade, but I have had extraordinarily bad luck with new VDO gauges. I like them for the style, but I had two oil pressure gauges go out, and they weren't very accurate to begin with. Better luck with their volt meter, so long as I mentally add a volt to what I see. That one can be adjusted, and I will eventually do it again. Internationalized production. I am sure you will make it work. Well done indeed! |
|
|
|
| 914Sixer |
Sep 28 2015, 06:11 PM
Post
#6
|
|
914 Guru Group: Members Posts: 9,190 Joined: 17-January 05 From: San Angelo Texas Member No.: 3,457 Region Association: Southwest Region |
Update with the 3 gauges I have made
Attached image(s) 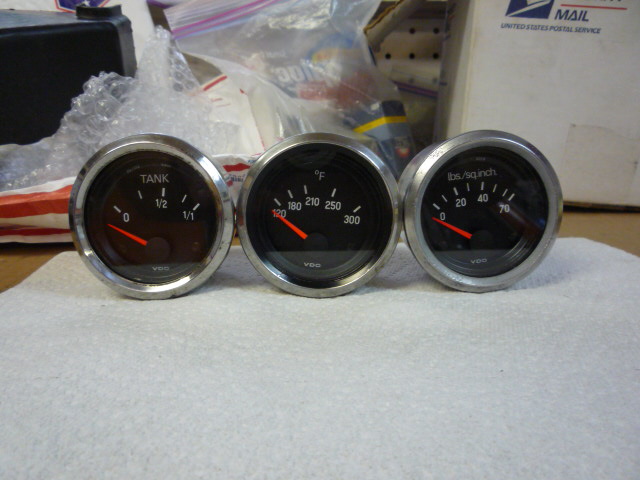
|
|
|
|
|
1 User(s) are reading this topic (1 Guests and 0 Anonymous Users)
0 Members:

|
Lo-Fi Version | Time is now: 11th July 2025 - 05:45 AM |
Invision Power Board
v9.1.4 © 2025 IPS, Inc.