|
|
|
Porsche, and the Porsche crest are registered trademarks of Dr. Ing. h.c. F. Porsche AG.
This site is not affiliated with Porsche in any way. Its only purpose is to provide an online forum for car enthusiasts. All other trademarks are property of their respective owners. |
|
|

  |

| skline |
 Apr 10 2005, 07:59 AM Apr 10 2005, 07:59 AM
Post
#1
|
|
Born to Drive  Group: Members Posts: 7,910 Joined: 26-December 02 From: Costa Mesa, CA Member No.: 17 Region Association: Southern California |
Spent the day over at Joe Buckles house yesterday. What I thought would only take me till around noon or so wound up taking 6 hours. Still, the end result is amazing. If you have any doubts as to whether your car is solid, you should get one of these kits and install it. There will be no doubt in your mind afterwards. I would suggest that you follow the directions that come with it. Jack the car up and put it on Jack stands at the 4 jack posts under the car to make it level. remove and clean the paint from the areas where you will be welding in the kit. If you are using a wirefeed welder, you want to make sure it is bare metal otherwise it will make it much more difficult when trying to get a contact for your arc. Check fit the kit and trim as needed till it fits perfect and all holes are on the existing metal. That is pretty important so check all the holes. Once the kits fits everywhere leave it in place and start welding each hole. Start with the ones on the outside edges and do one or two on each end and then one or two on each end on the bottom and then fill in all the inner ones. Then go and weld around the outside of each part. When you weld each hole, start in the center of the hole and as it fills, work a nice round circle and fill the entire hole. You want good penetration so this is important. It will be obvious where you will need to take a hammer and pound in the metal so it conforms to the body of the car. The kit is very well thought out and does fit nice. Place a soaking wet towel over the center tunnel when welding across the back. Put all pieces in the car before welding any of them into place. We started with the back piece first and then the sides. I did a lot of the welds but Joe did an equal or better part of them so he could learn how to weld. I think he picked it up quite well. An excellent student. Once it is done and you take the car down off the jacks, you should see right away that your efforts are well rewarded. Before we started, his gap on the passenger side was tight at the top of the door and his window on the drivers side hit the weatherstrip at the top. When we were done, it was perfect and we made no adjustments. No flex in the body. Here are some pictures I took of some of the process. Any questions?
Attached thumbnail(s) 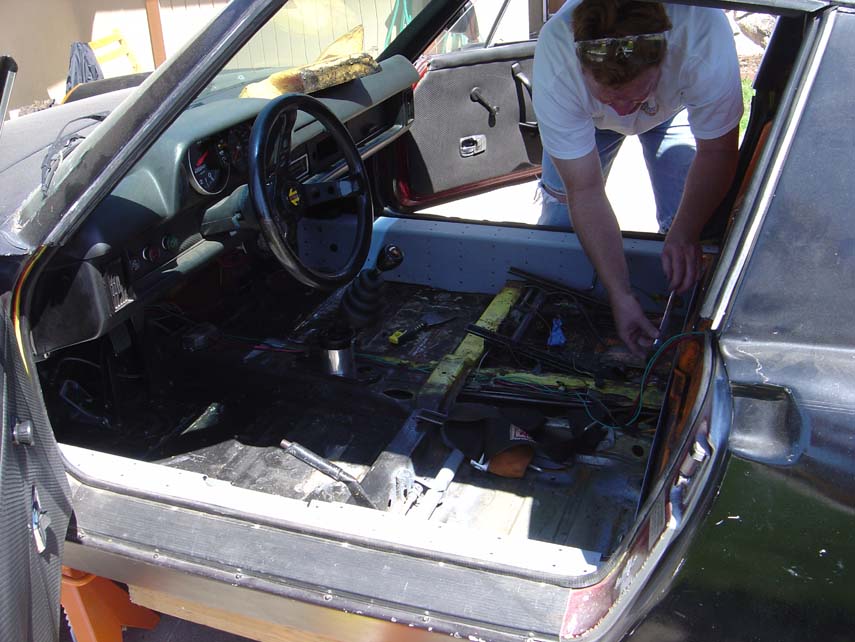
|
   |

 
|
| skline |
Apr 10 2005, 08:00 AM
Post
#2
|
|
Born to Drive Group: Members Posts: 7,910 Joined: 26-December 02 From: Costa Mesa, CA Member No.: 17 Region Association: Southern California |
Test fit
Attached thumbnail(s) 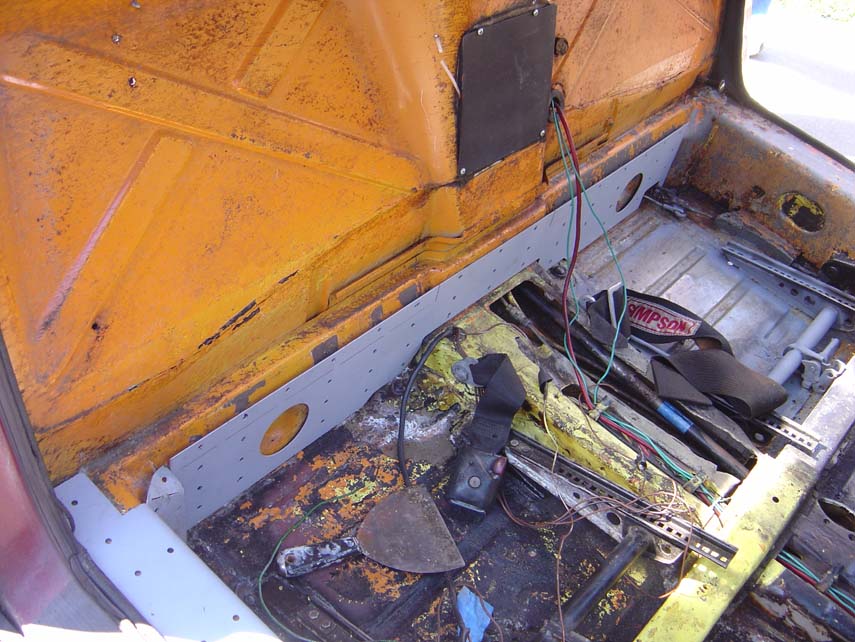
|
|
|
|
| skline |
Apr 10 2005, 08:00 AM
Post
#3
|
|
Born to Drive Group: Members Posts: 7,910 Joined: 26-December 02 From: Costa Mesa, CA Member No.: 17 Region Association: Southern California |
next
Attached thumbnail(s) 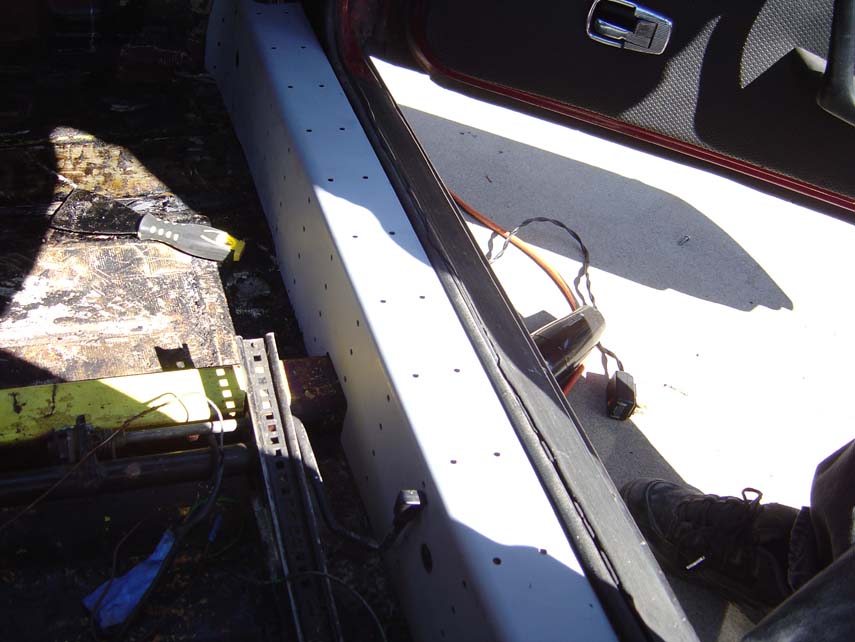
|
|
|
|
| skline |
Apr 10 2005, 08:01 AM
Post
#4
|
|
Born to Drive Group: Members Posts: 7,910 Joined: 26-December 02 From: Costa Mesa, CA Member No.: 17 Region Association: Southern California |
Another
Attached thumbnail(s) 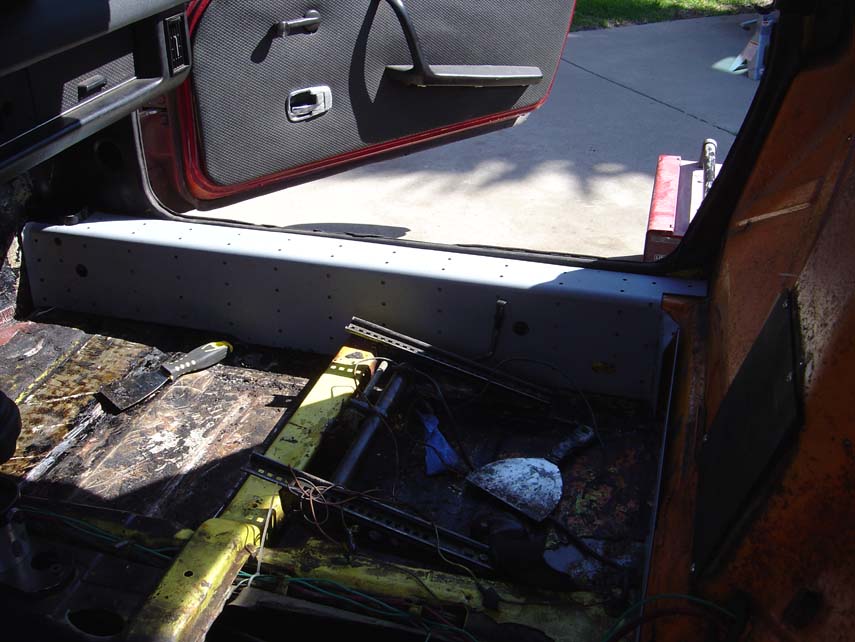
|
|
|
|
| skline |
Apr 10 2005, 08:01 AM
Post
#5
|
|
Born to Drive Group: Members Posts: 7,910 Joined: 26-December 02 From: Costa Mesa, CA Member No.: 17 Region Association: Southern California |
Driver side
Attached thumbnail(s) 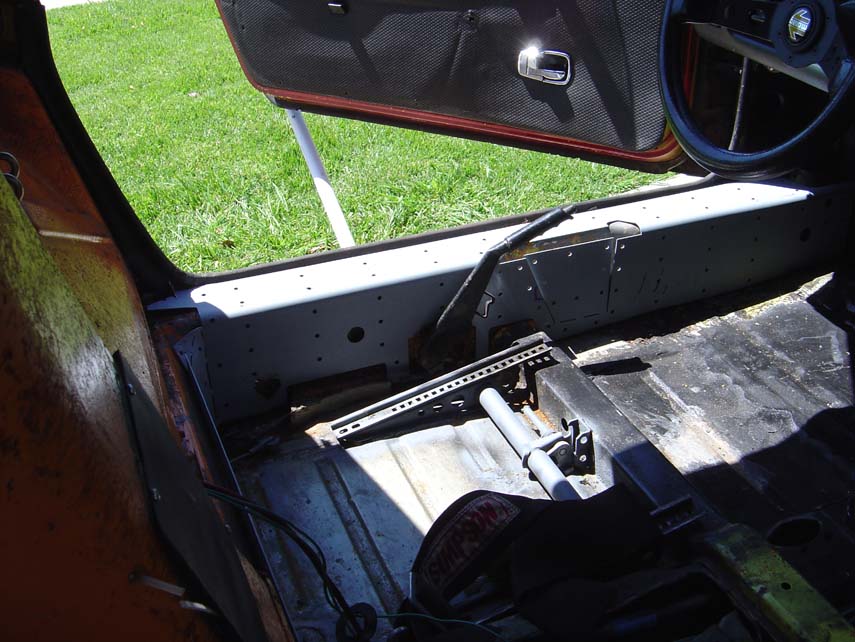
|
|
|
|
| skline |
Apr 10 2005, 08:02 AM
Post
#6
|
|
Born to Drive Group: Members Posts: 7,910 Joined: 26-December 02 From: Costa Mesa, CA Member No.: 17 Region Association: Southern California |
Joe, welding in some corners.
Attached thumbnail(s) 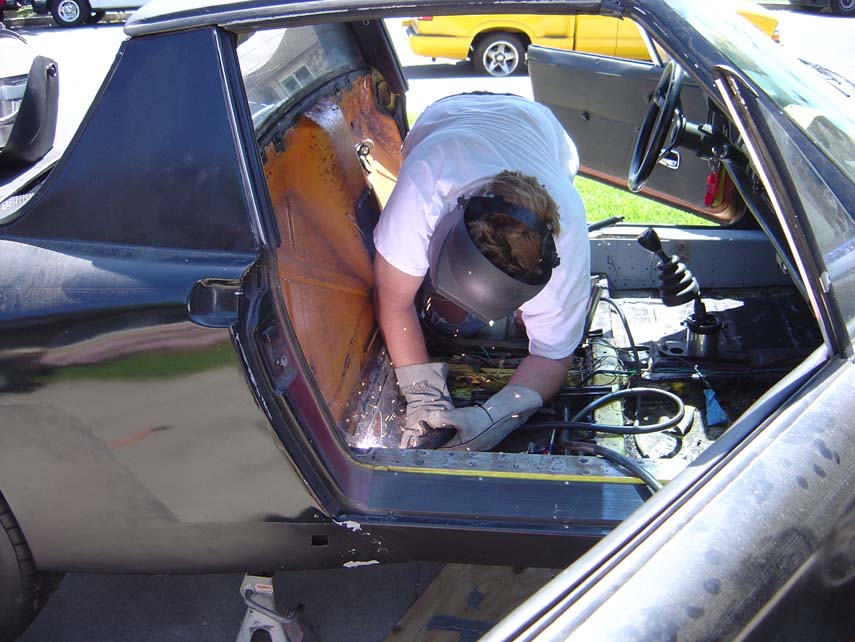
|
|
|
|
| skline |
Apr 10 2005, 08:03 AM
Post
#7
|
|
Born to Drive Group: Members Posts: 7,910 Joined: 26-December 02 From: Costa Mesa, CA Member No.: 17 Region Association: Southern California |
Yes, you have to do each and every hole
Attached thumbnail(s) 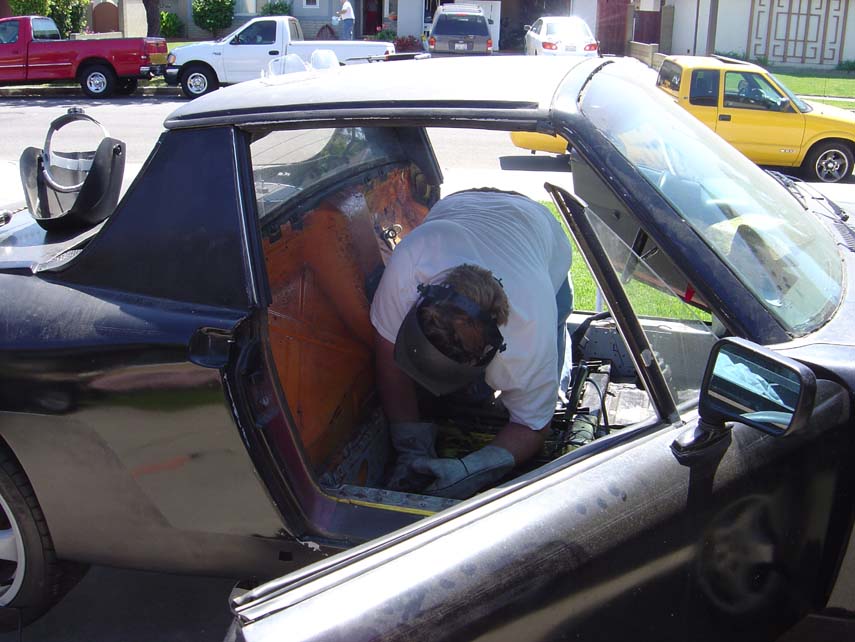
|
|
|
|
| skline |
Apr 10 2005, 08:04 AM
Post
#8
|
|
Born to Drive Group: Members Posts: 7,910 Joined: 26-December 02 From: Costa Mesa, CA Member No.: 17 Region Association: Southern California |
An auto darkening helmet is really worth the money when you do these.
Attached thumbnail(s) 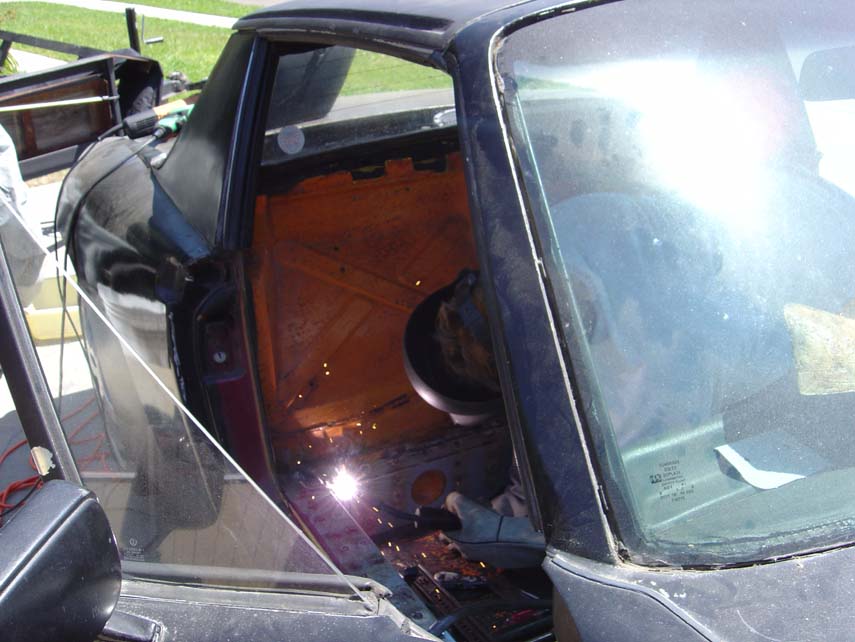
|
|
|
|
| skline |
Apr 10 2005, 08:05 AM
Post
#9
|
|
Born to Drive Group: Members Posts: 7,910 Joined: 26-December 02 From: Costa Mesa, CA Member No.: 17 Region Association: Southern California |
Almost there
Attached thumbnail(s) 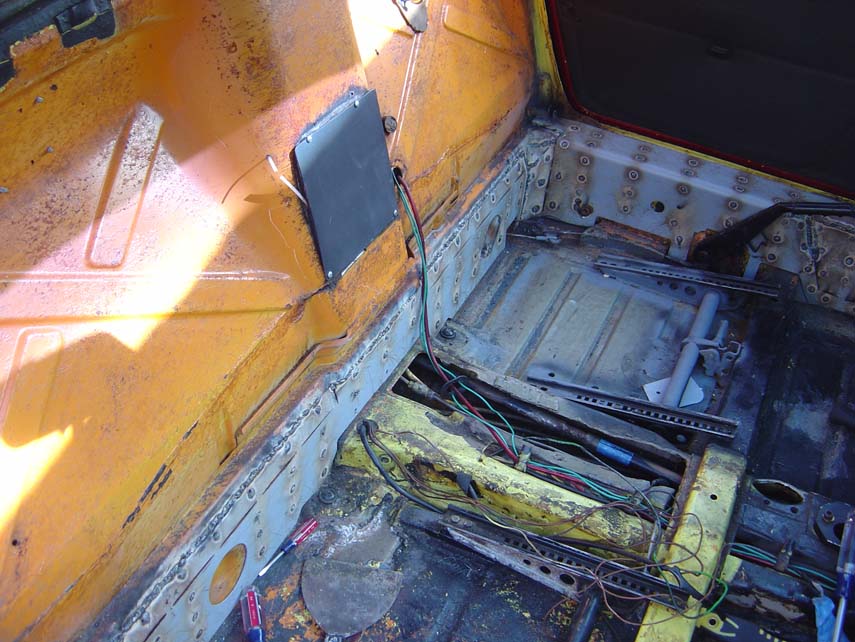
|
|
|
|
| skline |
Apr 10 2005, 08:06 AM
Post
#10
|
|
Born to Drive Group: Members Posts: 7,910 Joined: 26-December 02 From: Costa Mesa, CA Member No.: 17 Region Association: Southern California |
Obviously there will be places that you cannot get into but try to get as much of it as you can, the more the better.
Attached thumbnail(s) 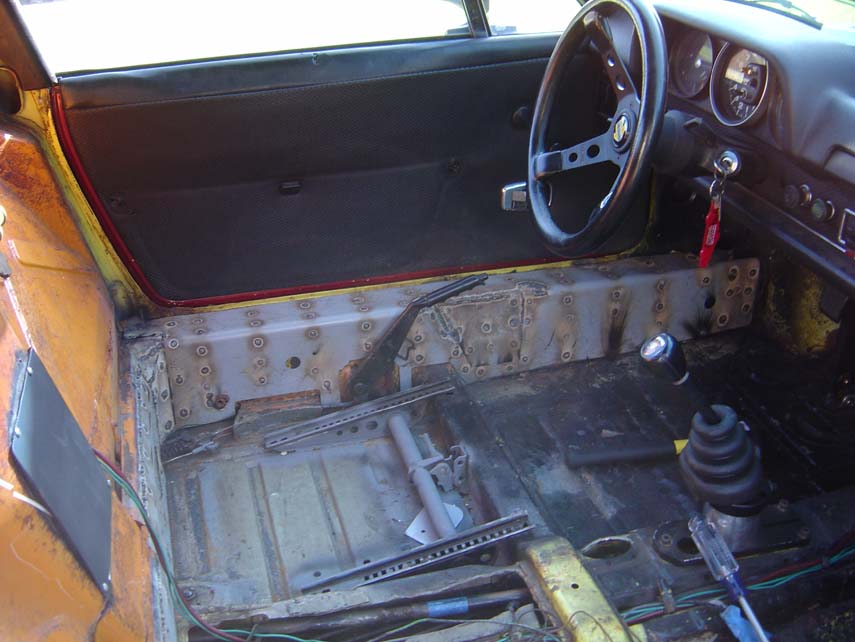
|
|
|
|
| skline |
Apr 10 2005, 08:07 AM
Post
#11
|
|
Born to Drive Group: Members Posts: 7,910 Joined: 26-December 02 From: Costa Mesa, CA Member No.: 17 Region Association: Southern California |
The little 2 pound sledge works great for this job.
Attached thumbnail(s) 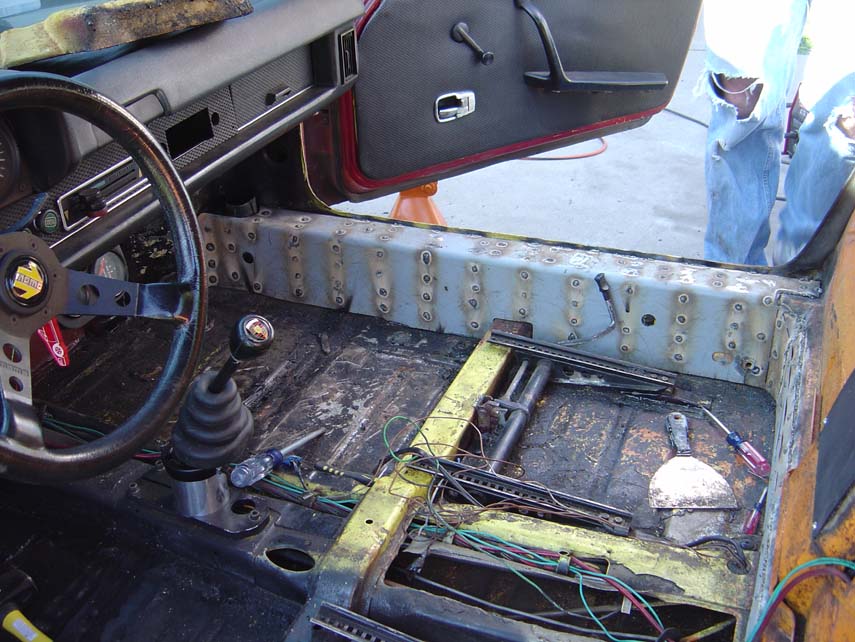
|
|
|
|
| skline |
Apr 10 2005, 08:08 AM
Post
#12
|
|
Born to Drive Group: Members Posts: 7,910 Joined: 26-December 02 From: Costa Mesa, CA Member No.: 17 Region Association: Southern California |
Last one, any questions now?
Attached thumbnail(s) 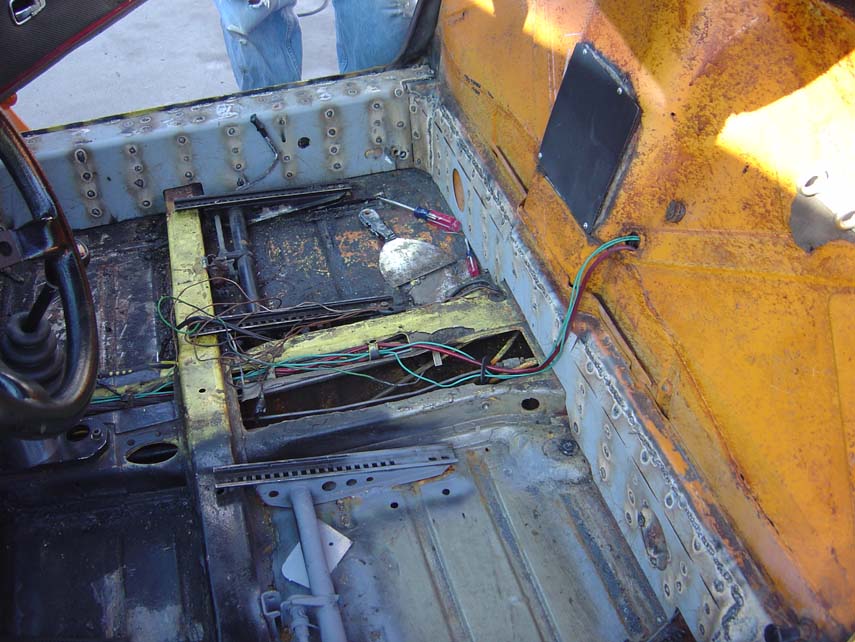
|
|
|
|
| skline |
Apr 10 2005, 08:10 AM
Post
#13
|
|
Born to Drive Group: Members Posts: 7,910 Joined: 26-December 02 From: Costa Mesa, CA Member No.: 17 Region Association: Southern California |
When you get all done, you can go back and grind the little bumps down so they dont show through the carpet. Joe will be doing that after I leave. My back in killing me after that. All in all, it wasnt that hard but some of the welds you do upside down or laying across it in some uncomfortable position. (IMG:http://www.914world.com/bbs2/html/emoticons/smash.gif) (IMG:http://www.914world.com/bbs2/html/emoticons/welder.gif)
|
|
|
|
| Elliot_Cannon |
Apr 10 2005, 08:21 AM
Post
#14
|
|
Senior Member Group: Retired Members Posts: 1,922 Joined: 26-March 03 From: Orange County Ca Member No.: 480 Region Association: None |
Nice job men. (You to Scott). LOL. This looks like a definate future project for me. Just as soon as I get that welder I have been threatening to buy. I guess I'll have to check with the Minister of Finance. If Joe welds like he cooks, he can do all my work for me!! Good job guys. (IMG:http://www.914world.com/bbs2/html/emoticons/welder.gif)
Cheers, Elliot |
|
|
|
| sgomes |
Apr 10 2005, 08:41 AM
Post
#15
|
||
|
Electric Member Group: Members Posts: 815 Joined: 6-May 04 From: Campbell, CA Member No.: 2,029 |
Just one: How bad is the sunburn oh your arms? (IMG:http://www.914world.com/bbs2/html/emoticons/laugh.gif) I just had one spot uncovered when welding yesterday and now I have a little 'sun' burn today. Other than that it looks great! I so want to do a stiffening kit on my car. You made it look easy! |
||
|
|
|
||
| Elliot_Cannon |
Apr 10 2005, 08:46 AM
Post
#16
|
|
Senior Member Group: Retired Members Posts: 1,922 Joined: 26-March 03 From: Orange County Ca Member No.: 480 Region Association: None |
So...which on of you burnt the seat belt buckle in the second pic?? Did Buckle burn the buckle? Hah! Oh man, I crack myself up.
Cheers, Elliot |
|
|
|
| skline |
Apr 10 2005, 09:30 AM
Post
#17
|
|
Born to Drive Group: Members Posts: 7,910 Joined: 26-December 02 From: Costa Mesa, CA Member No.: 17 Region Association: Southern California |
Yeah Elliot, you are a funny guy. The first picture was Joe removing the seat belts before welding. So neither of us burned the buckle. Good try though. At least you are cracking yourself up. (IMG:http://www.914world.com/bbs2/html/emoticons/laugh.gif)
|
|
|
|
| Trekkor |
Apr 10 2005, 09:39 AM
Post
#18
|
|
I do things... Group: Members Posts: 7,809 Joined: 2-December 03 From: Napa, Ca Member No.: 1,413 Region Association: Northern California |
Deja Vu?!? (IMG:http://www.914world.com/bbs2/html/emoticons/unsure.gif)
My only comments are that I found it unessesary to remove any paint as once you weld the first hole the kit will conduct for you. The arc will burn right through any paint or crud right away. How did you like the tar removal around the perimeter? And, be careful and cover the car's glass when you grind. I sprayed my windows with molten steel. (IMG:http://www.914world.com/bbs2/html/emoticons/headbang.gif) I'm still pickin' 'em off there. Nice work. This is a great kit. No doubt. KT Attached image(s) 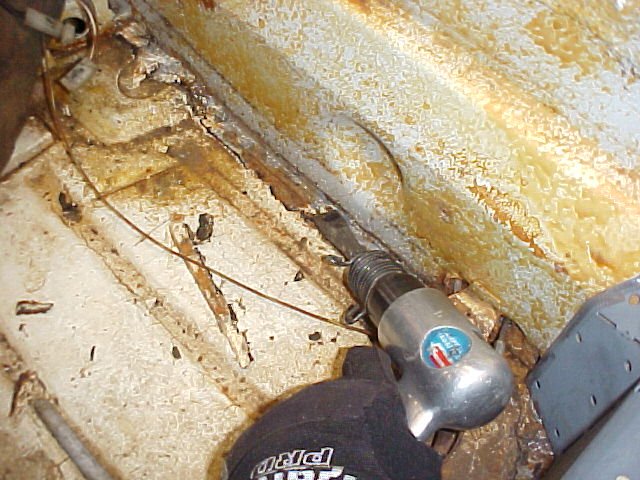
|
|
|
|
| skline |
Apr 10 2005, 09:43 AM
Post
#19
|
|
Born to Drive Group: Members Posts: 7,910 Joined: 26-December 02 From: Costa Mesa, CA Member No.: 17 Region Association: Southern California |
Joe came by and borrowed my heat gun to remove the crap from the floor and all around the edges. Seems his hair dryer just wasnt enough. He did all the prep work a day or so before. He is very ambitious. Likes to do as much of it as he can.
|
|
|
|
| Elliot_Cannon |
Apr 10 2005, 09:46 AM
Post
#20
|
||
|
Senior Member Group: Retired Members Posts: 1,922 Joined: 26-March 03 From: Orange County Ca Member No.: 480 Region Association: None |
Joe has a hair dryer? Elliot |
||
|
|
|
||
|
1 User(s) are reading this topic (1 Guests and 0 Anonymous Users)
0 Members:

|
Lo-Fi Version | Time is now: 1st June 2024 - 02:03 PM |
Invision Power Board
v9.1.4 © 2024 IPS, Inc.