|
|
|
Porsche, and the Porsche crest are registered trademarks of Dr. Ing. h.c. F. Porsche AG.
This site is not affiliated with Porsche in any way. Its only purpose is to provide an online forum for car enthusiasts. All other trademarks are property of their respective owners. |
|
|

  |

| sreyemj |
 Feb 7 2020, 04:14 PM Feb 7 2020, 04:14 PM
Post
#1
|
|
Member  Group: Members Posts: 89 Joined: 12-January 20 From: SA, TX Member No.: 23,821 Region Association: None |
This will be an attempt to document a long and sordid history of my 1974 1.8L 914. It's been with me a long time, and suffered many ills both before and during my ownership.
My initial interest in Porsches came after reading "Porsches For The Road" as a young child, I still have the book! (IMG:http://www.914world.com/bbs2/uploads_offsite/i.imgur.com-23821-1581114089.1.jpg) I really wanted a 911 or 912, but even project cars were beyond my budget of about 2k. I thought I had it made when our elderly neighbor parked a neglected yellow 1984 911 Targa under a tarp in the alley between our houses. He didn't want to sell it, but I used to keep the tarp tied down in the hopes I could one day purchase it. Unfortunately, we never made a deal and when he died several years later the car disappeared. After that, I started shopping for 914s, and this 1974 914 car popped up for $800 on craigslist. It was garaged, had awful brown paint, and the passenger door closed nicely. The seller mentioned he wasn't the original owner and that he parked it when the motor became "tired" in the mid 1990s. A deal was made, and I brought it home in a torrential downpour. I was about 15 years old at this point. First restoration efforts (2007ish): My first attempt at getting the 914 back on the road included painting it a red I picked out of the Sherwin-Williams catalog instead of the original Marathon Blue Metallic (unfortunately!). Upon further investigation, there were some pin holes in the bottom of the passenger long as well as some small holes under the battery tray. The door closed fine and it didn't look like the really ugly pictures I had seen, so I figured it was at least structurally sound. I remember pouring a rust converter into the small holes under the battery, then welding a plate over the top. There were some holes in the rear trunk, so I cut that metal out and welded sheet metal in. The bottom of the passenger long looked fine, so I left that as is. 15 year old me was not a talented welder. While removing the paint, I discovered the car had been in an accident, and that the driver's front fender/headlight cavity were not-so-artfully grafted on from another car. I also found accident damage on the passenger rear quarter panel and rear trunk. The seller did not admit to any accidents, so I assume these are from a previous owner. After painting, I never really put it back together and the car sat for about a decade. During this time I was off at college, then the military, and then more school. My younger brother wanted to use it as a getaway car at his wedding, and almost completely reassembled it with a 1.7L engine I had purchased from a guy doing a V8 swap. I sold the original 1.8L during one of several moves over the years… I drove the car exactly once with the 1.7L engine, I remember it ran poorly with high idle and leaked a fair amount of oil. Getting started, one of the only early pictures of the car: (IMG:http://www.914world.com/bbs2/uploads_offsite/i.imgur.com-23821-1587745562.1.jpg) Car after painting (side skirts never made it on): (IMG:http://www.914world.com/bbs2/uploads_offsite/i.imgur.com-23821-1581113671.1.jpg) Second attempt (2020ish): It had been almost 15 years since I bought the car. I had moved many times for school, military, more school, and then more military. The car mostly lived at my dad’s house during this time, but I now had a small garage I could park it in. I brought it home and got to work. It quickly became obvious (thanks to browsing 914world!) that the rust problems were not minor, and would require significant work to repair before anything else. I decided to move front to back. The bottom of the car was coated with a thick bed-liner type coating that I removed from the bottom of the floor pans and much of the front trunk. You can see some of the original paint in the wheel well where the coating was removed with a putty knife. As it sits today: (IMG:http://www.914world.com/bbs2/uploads_offsite/i.imgur.com-23821-1581113672.2.jpg) Passenger long, looks fairly solid from the outside. The hole is where I used a cheap endoscope to look at the inside (lots of rust). (IMG:http://www.914world.com/bbs2/uploads_offsite/i.imgur.com-23821-1581114160.1.jpg) The 1.7L motor. Not sure why it's blue, definitely needs some help. (IMG:http://www.914world.com/bbs2/uploads_offsite/i.imgur.com-23821-1581114090.3.jpg) |
   |

 
|
| sreyemj |
Feb 7 2020, 04:27 PM
Post
#2
|
|
Member Group: Members Posts: 89 Joined: 12-January 20 From: SA, TX Member No.: 23,821 Region Association: None |
Rear trunk, back is fairly lumpy and has a lot of bondo. I have the restoration design floor pan and a member here is sending me a rear section that I will replace at the same time.
(IMG:http://www.914world.com/bbs2/uploads_offsite/i.imgur.com-23821-1581114467.1.jpg) Front trunk rust hole: (IMG:http://www.914world.com/bbs2/uploads_offsite/i.imgur.com-23821-1581114467.2.jpg) Replacement piece being welded into place: (IMG:http://www.914world.com/bbs2/uploads_offsite/i.imgur.com-23821-1581114467.3.jpg) |
|
|
|
| jimkelly |
Feb 7 2020, 04:43 PM
Post
#3
|
|
Delaware USA Group: Members Posts: 4,969 Joined: 5-August 04 From: Delaware, USA Member No.: 2,460 Region Association: MidAtlantic Region |
man, find a safer way to work under that car.
be carefuller than you think you need to be !!! (IMG:style_emoticons/default/beerchug.gif) |
|
|
|
| sreyemj |
Feb 7 2020, 05:10 PM
Post
#4
|
|
Member Group: Members Posts: 89 Joined: 12-January 20 From: SA, TX Member No.: 23,821 Region Association: None |
QUOTE(jimkelly @ Feb 7 2020, 04:43 PM)  man, find a safer way to work under that car. be carefuller than you think you need to be !!! (IMG:style_emoticons/default/beerchug.gif) Good catch, I'm not working under it like this. Just raised to front to save my back while I work on the trunk. |
|
|
|
| sreyemj |
Feb 7 2020, 05:53 PM
Post
#5
|
|
Member Group: Members Posts: 89 Joined: 12-January 20 From: SA, TX Member No.: 23,821 Region Association: None |
Hell hole looks ok, this is what I welded in a long time ago with rustoleum over the top. I'll likely end up cutting most of this out and replacing it with a cleaner repair piece after I get door braces on. I'm planning on using POR 15 for the trunks, floor pans, and wheel wells. I like fluid film and will probably coat everything inside and out with it when everything is done.
(IMG:http://www.914world.com/bbs2/uploads_offsite/i.imgur.com-23821-1581119599.1.jpg) Suspension console was "repaired", but not well. I have the replacement piece to weld in: (IMG:http://www.914world.com/bbs2/uploads_offsite/i.imgur.com-23821-1581119599.2.jpg) Some of the hood seal channel is rusted out, I'm going to try making some repair sections with 18/20ga steel and a harbor freight bending brake. Fortunately it looks like only one side will need to be replaced in any given place: (IMG:http://www.914world.com/bbs2/uploads_offsite/i.imgur.com-23821-1581119599.3.jpg) Floors are very solid, you can see my failsafe support in the middle of the two jack point supports: (IMG:http://www.914world.com/bbs2/uploads_offsite/i.imgur.com-23821-1581119599.4.jpg) (IMG:http://www.914world.com/bbs2/uploads_offsite/i.imgur.com-23821-1581119600.5.jpg) |
|
|
|
| Mark Henry |
Feb 7 2020, 06:31 PM
Post
#6
|
|
that's what I do! Group: Members Posts: 20,065 Joined: 27-December 02 From: Port Hope, Ontario Member No.: 26 Region Association: Canada |
If you have the bottom that clean use epoxy paint or get some DuPont Nason black truck paint and a cheap can of urethane catalyst. It's a spray paint so it's a bit thin, but it does go on with a brush OK. It flows out so you can hardly see the brush marks, do 2+ coats.
I'd wash it with some Krud Cutter to keep it from rusting till you get the paint on. Better than Por-15 IMHO, I've seen and have Por-15 on my bug pan, couple areas came off in a whole sheet. I won't use it again. |
|
|
|
| sreyemj |
Feb 7 2020, 06:59 PM
Post
#7
|
|
Member Group: Members Posts: 89 Joined: 12-January 20 From: SA, TX Member No.: 23,821 Region Association: None |
QUOTE(Mark Henry @ Feb 7 2020, 06:31 PM) If you have the bottom that clean use epoxy paint or get some DuPont Nason black truck paint and a cheap can of urethane catalyst. It's a spray paint so it's a bit thin, but it does go on with a brush OK. It flows out so you can hardly see the brush marks, do 2+ coats. I'd wash it with some Krud Cutter to keep it from rusting till you get the paint on. Better than Por-15 IMHO, I've seen and have Por-15 on my bug pan, couple areas came off in a whole sheet. I won't use it again. Interesting, haven't heard of Por 15 coming off like that too often. wonder if the prep was bad or it just didn't like the surface? I'll probably end up using the Por-15 anyway, as I have it in my hot sweaty hands and I don't have as much experience spraying. In an ideal world I would do a full rotisserie resto, but this one is probably solid enough to not need it and I'm going to go back at some point to repaint it the factory color. This garbage bed liner crap that was on it separated and held water in a few areas. Fortunately, the factory paint/primer were well adhered so there isn't too much rust from that. The big challenge areas on this car are going to be positioning the suspension console correctly and fixing some of the monkey business in the front trunk and drivers quarter panel. I'll get some pictures up of that area later, the accident repair was less than ideal. The rear trunk is not strictly a nessesary repair, but I hate having that flat plate instead of a proper floor and the globby Bondo/fiberglass rear section between the tail lights is annoying. |
|
|
|
| IronHillRestorations |
Feb 8 2020, 08:47 AM
Post
#8
|
|
I. I. R. C. Group: Members Posts: 6,926 Joined: 18-March 03 From: West TN Member No.: 439 Region Association: None |
About a year ago I got some Kirker Enduro Prime epoxy primer, and so far I've been very pleased with the results. It's very tough and budget friendly. You can get it in quart or gallon and comes in white, gray, and black. A couple weeks ago I had a little left after spraying a section, so I brushed some on a fixture I made, no prep or clean up on it, and it's stuck amazingly well, so properly prepped metal will give great adhesion
|
|
|
|
| 914forme |
Feb 8 2020, 11:13 AM
Post
#9
|
|
Times a wastin', get wrenchin'! Group: Members Posts: 3,899 Joined: 24-July 04 From: Dayton, Ohio Member No.: 2,388 Region Association: None |
POR 15 with come off in sheets, even with the best prep work. It will not come off your skin, you will wear it as a badge of stupidity for days.
Not a fan of POR15, I would prefer you to use a can of rustolium. Or about anything else including water. Epoxy primer top coat is the way to go. Tinted U-Pol truck bed liner will work also. I want to go with something I know works today, and is easily repaired in the future. Epoxy primer, and U-Pol is the way I would do it. Wood is safe in compression, nothing wrong with it, just be careful, like with anything. Even steel and lifts have been know too fail. I for one say keep at it, your making head way in less than ideal conditions, while I can't seem to get off my butt while I figure out how to build a charging station and battery storage system for my collection of M12 tools. Stupid Garagejournal for adding nice place to work to my first world needs. When I was younger I got so much more do with out the well lite space, beautiful floors, and proper tools. Keep rocking this build..... |
|
|
|
| IronHillRestorations |
Feb 8 2020, 12:04 PM
Post
#10
|
|
I. I. R. C. Group: Members Posts: 6,926 Joined: 18-March 03 From: West TN Member No.: 439 Region Association: None |
POR 15 is good for rusty metal, but not so for clean metal
|
|
|
|
| rjames |
Feb 8 2020, 12:59 PM
Post
#11
|
|
I'm made of metal Group: Members Posts: 4,447 Joined: 24-July 05 From: Shoreline, WA Member No.: 4,467 Region Association: Pacific Northwest |
QUOTE(IronHillRestorations @ Feb 8 2020, 10:04 AM) POR 15 is good for rusty metal, but not so for clean metal The only thing hood got rusty metal is to remove it. Poor 15 needs something to bite into to adhere properly. There are applications that por15 isn’t suited for, but the durability of the product truly comes down to prep. You must clean the surface thoroughly, making sure all oils are removed and then use something to etch the metal (like their Metal Ready product) before applying. Lots of people complain about por15 coming off, but I’d be willing to bet they didn’t really prep things correctly beforehand. 10 years ago I used it on my floor pans inside and out, the outer longs, and rocker panels and it looks exactly the same as the day I applied it but I also followed the prep instructions beforehand. |
|
|
|
| sreyemj |
Feb 8 2020, 06:56 PM
Post
#12
|
|
Member Group: Members Posts: 89 Joined: 12-January 20 From: SA, TX Member No.: 23,821 Region Association: None |
I'm looking into an epoxy based solution. I'm not so concerned about the clean metal, but now that the seam sealer is off there are a lot of seams and cracks that need to be sealed by whatever I paint it with.
|
|
|
|
| sreyemj |
Feb 15 2020, 08:50 PM
Post
#13
|
|
Member Group: Members Posts: 89 Joined: 12-January 20 From: SA, TX Member No.: 23,821 Region Association: None |
Front trunk patches welded in:
(IMG:http://www.914world.com/bbs2/uploads_offsite/i.imgur.com-23821-1581821437.1.jpg) Welds ground: (IMG:http://www.914world.com/bbs2/uploads_offsite/i.imgur.com-23821-1581821437.2.jpg) |
|
|
|
| sreyemj |
Feb 15 2020, 09:07 PM
Post
#14
|
|
Member Group: Members Posts: 89 Joined: 12-January 20 From: SA, TX Member No.: 23,821 Region Association: None |
The driver's side front corner was repaired with a welding in section. Unfortunately, the repair was less than perfect and there are large areas of overlap (similar to a lap joint) that are welded on only one side and have rust in the gap. I'm starting the process of cutting through the welds, trimming the overlap, and re-welding with butt joints.
(IMG:http://www.914world.com/bbs2/uploads_offsite/i.imgur.com-23821-1581822473.1.jpg) (IMG:http://www.914world.com/bbs2/uploads_offsite/i.imgur.com-23821-1581822474.2.jpg) (IMG:http://www.914world.com/bbs2/uploads_offsite/i.imgur.com-23821-1581822580.1.jpg) |
|
|
|
| bkrantz |
Feb 15 2020, 09:13 PM
Post
#15
|
|
914 Guru Group: Members Posts: 8,646 Joined: 3-August 19 From: SW Colorado Member No.: 23,343 Region Association: Rocky Mountains |
I have a front left corner you can have for the price of shipping.
Attached thumbnail(s) 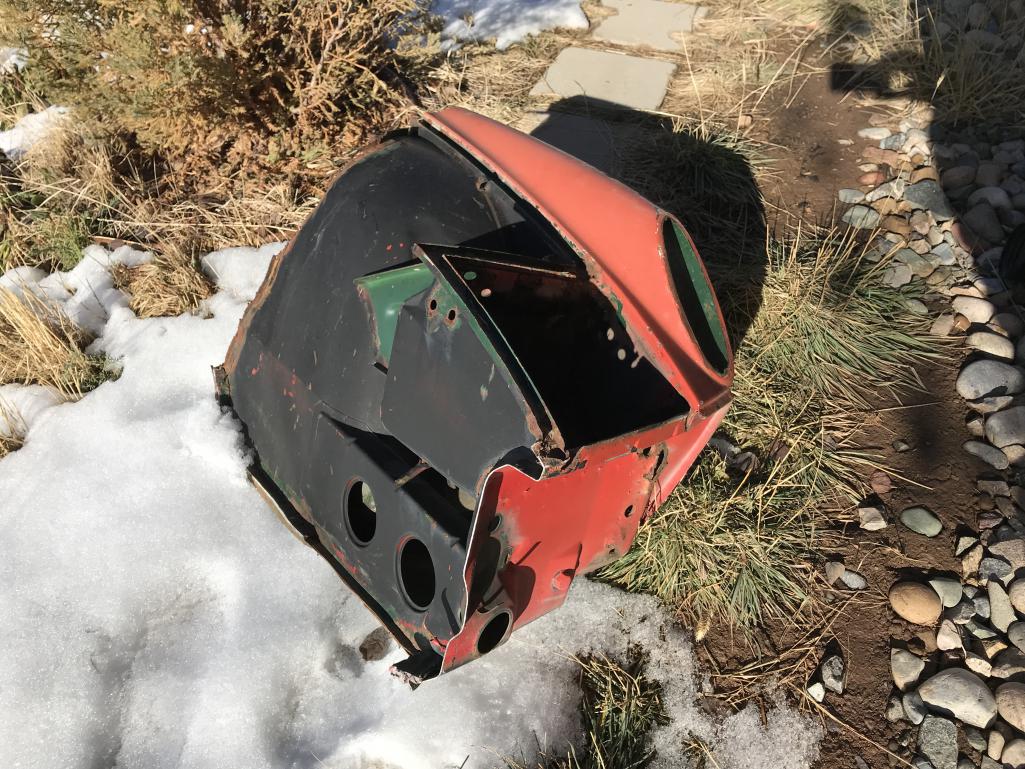
|
|
|
|
| sreyemj |
Feb 15 2020, 09:14 PM
Post
#16
|
|
Member Group: Members Posts: 89 Joined: 12-January 20 From: SA, TX Member No.: 23,821 Region Association: None |
|
|
|
|
| sreyemj |
Feb 15 2020, 09:22 PM
Post
#17
|
|
Member Group: Members Posts: 89 Joined: 12-January 20 From: SA, TX Member No.: 23,821 Region Association: None |
QUOTE(bkrantz @ Feb 15 2020, 09:13 PM) I have a front left corner you can have for the price of shipping. Thanks for the offer, I think I can save this one and preserve the paint job. For the fender portion that is under the paint, I'll just trim the loose end and wire wheel the rust off. I bought some BAR-RUST 235 epoxy primer and Devthane 379 that will be going over everything under the car and in the trunks. |
|
|
|
| iankarr |
Feb 15 2020, 09:29 PM
Post
#18
|
|
The wrencher formerly known as Cuddy_K Group: Members Posts: 2,595 Joined: 22-May 15 From: Heber City, UT Member No.: 18,749 Region Association: Intermountain Region |
One more reason to avoid POR-15...it can kill you (EDIT- make you really sick. Apparently the molecules are very volatile and if you apply it without a respirator, your lungs and bloodstream can be seriously compromised). I guess it has its place, but ALWAYS use the proper respirator...
I had a bad reaction after touching up a small area and came across some scary reading... http://forums.pelicanparts.com/porsche-911...airs-por15.html |
|
|
|
| sreyemj |
Feb 15 2020, 10:10 PM
Post
#19
|
|
Member Group: Members Posts: 89 Joined: 12-January 20 From: SA, TX Member No.: 23,821 Region Association: None |
QUOTE(cuddy_k @ Feb 15 2020, 09:29 PM) One more reason to avoid POR-15...it can kill you. Apparently the molecules are very volatile and if you apply it without a respirator, particles of the stuff can collect and harden in your lungs. Seriously dangerous stuff. I guess it has its place, but ALWAYS use the proper respirator... I read quite a bit about POR-15 after the discussion above, doesn't seem to be the right choice for this purpose. I would definitely wear a full respirator for any aerosol application as you're risking an inhalation pneumonitis or worse. I also prefer to wear a simple mask when I'm using grinders or wire wheels, it keeps the dust out and is easy to wear. The engine part of this project has been on the back burner, but I'm starting to research various configurations. My budget for engine stuff was going to be about 3-4k and I was thinking of a 1911 or 2056 and ditching the D-jetronic for duel Webers. After some more research, I noticed The Dub Shop is only about 1 hour away and now I'm thinking one of their FI systems may be worth stretching the budget for. I would appreciate any suggestions for engine builders in the Seattle/Portland area, looks like there are a few to choose from. |
|
|
|
| sreyemj |
Mar 1 2020, 10:38 PM
Post
#20
|
|
Member Group: Members Posts: 89 Joined: 12-January 20 From: SA, TX Member No.: 23,821 Region Association: None |
Slow going, but finally got to peel back some of the overlapping bit under the driver's side fender. Lots of dust and rust between the metal.
(IMG:http://www.914world.com/bbs2/uploads_offsite/i.imgur.com-23821-1583123934.1.jpg) |
|
|
|
|
1 User(s) are reading this topic (1 Guests and 0 Anonymous Users)
0 Members:

|
Lo-Fi Version | Time is now: 2nd April 2026 - 11:16 AM |
Invision Power Board
v9.1.4 © 2026 IPS, Inc.