|
|
|
Porsche, and the Porsche crest are registered trademarks of Dr. Ing. h.c. F. Porsche AG.
This site is not affiliated with Porsche in any way. Its only purpose is to provide an online forum for car enthusiasts. All other trademarks are property of their respective owners. |
|
|

  |

| RiqueMar |
 May 10 2020, 02:14 PM May 10 2020, 02:14 PM
Post
#1
|
|
Enrique Allen Mar  Group: Members Posts: 2,169 Joined: 28-August 08 From: San Diego, CA Member No.: 9,478 Region Association: Southern California |
Question for the pros:
Ordered a lot of stuff from 914rubber.com (thanks to everyone there, btw). I've laid out the front trunk main seal, but I'm not sure which side is up-or-down. Also, for those that have installed this, do I need any adhesive? My memory tells me I don't however I bought some from pep-boys, and I'm thinking to put a small bead in the corners. Thanks in advance! 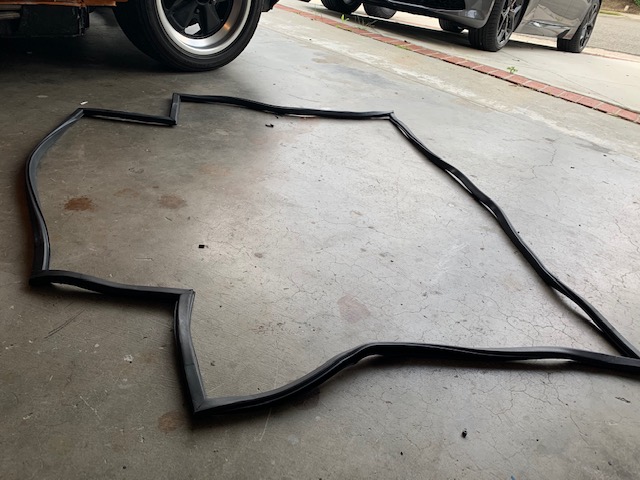 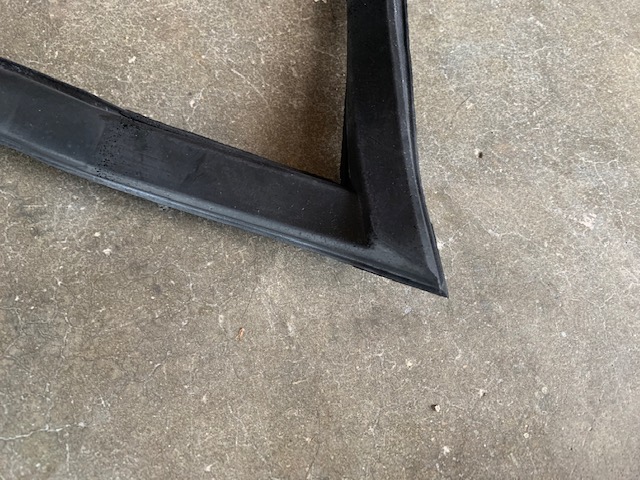 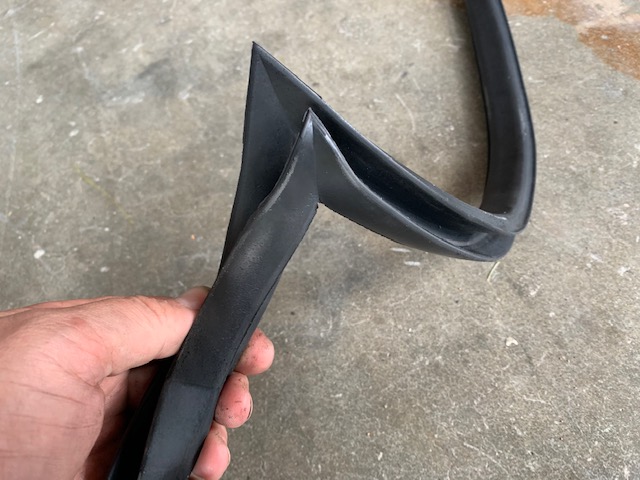 |
   |

 
|
| theer |
May 10 2020, 02:59 PM
Post
#2
|
|
Senior Member Group: Members Posts: 677 Joined: 31-July 15 From: Dover, MA Member No.: 19,014 Region Association: North East States |
Your second picture is the bottom which fits in the U-shaped channel. The last picture is the top.
I did not use adhesive, but the first time was a bit of a bear to get the seal to stay in place. Close the hood for a few days to get the seal to seat properly. Others should chime in, but I believe adhesive may tend to trap water under the seal. Good luck! |
|
|
|
| BeatNavy |
May 10 2020, 03:07 PM
Post
#3
|
|
Certified Professional Scapegoat Group: Members Posts: 2,924 Joined: 26-February 14 From: Easton, MD Member No.: 17,042 Region Association: MidAtlantic Region |
(IMG:style_emoticons/default/agree.gif) I believe the bottom part should extend further out. The idea I think is to have water get caught by that and channel out the drains in front. So you should mostly see the bottom part of it when looking down through the gap in fender / hood.
I didn't use any seal. I found mine set nicely in just by pressing it in, and it's easy to pull out for cleaning out, inspection, etc. That becomes important if your teener sees weather on a regular basis. |
|
|
|
| Aualexa1 |
May 10 2020, 04:45 PM
Post
#4
|
|
Newbie Group: Members Posts: 45 Joined: 17-June 17 From: South Jersey Member No.: 21,189 Region Association: MidAtlantic Region |
Without this thread, I would have put my seal in the wrong way!
|
|
|
|
| porschetub |
May 10 2020, 06:04 PM
Post
#5
|
|
Advanced Member Group: Members Posts: 4,703 Joined: 25-July 15 From: New Zealand Member No.: 18,995 Region Association: None |
QUOTE(BeatNavy @ May 11 2020, 09:07 AM)  (IMG:style_emoticons/default/agree.gif) I believe the bottom part should extend further out. The idea I think is to have water get caught by that and channel out the drains in front. So you should mostly see the bottom part of it when looking down through the gap in fender / hood. I didn't use any seal. I found mine set nicely in just by pressing it in, and it's easy to pull out for cleaning out, inspection, etc. That becomes important if your teener sees weather on a regular basis. Hi Rob,very true,mine as far as I know is original,after the repaint someone glued the whole thing in ,no rust underneath but the seal was really stuck in there and had split on some of the bonded joints....thing is they need to move IMO ,I purchased weatherstrip glue and intend to repair the split joints. |
|
|
|
| Mikey914 |
May 10 2020, 11:36 PM
Post
#6
|
|
The rubber man Group: Members Posts: 12,677 Joined: 27-December 04 From: Hillsboro, OR Member No.: 3,348 Region Association: None |
I'm looking for the video that we did at Okteenerfest but I can't seem to find it. The bottom has the step shown at the top of the fender cowl area to allow it to sit down in the track and make the transition in that area.
You may notice form the pictures that we made the corners out of the same material as the sides (expanded foam). We then molded them into the cavity so they were bonded together (not glued). It make a softer seal and will not separate like the OEM. I'll post it up when I find it. Mark PS 3M weatherstrip adhesive is the way to go. I demonstrated it in the video. |
|
|
|
| RiqueMar |
May 11 2020, 12:13 AM
Post
#7
|
|
Enrique Allen Mar Group: Members Posts: 2,169 Joined: 28-August 08 From: San Diego, CA Member No.: 9,478 Region Association: Southern California |
QUOTE(Mikey914 @ May 10 2020, 10:36 PM) I'm looking for the video that we did at Okteenerfest but I can't seem to find it. The bottom has the step shown at the top of the fender cowl area to allow it to sit down in the track and make the transition in that area. You may notice form the pictures that we made the corners out of the same material as the sides (expanded foam). We then molded them into the cavity so they were bonded together (not glued). It make a softer seal and will not separate like the OEM. I'll post it up when I find it. Mark PS 3M weatherstrip adhesive is the way to go. I demonstrated it in the video. Good to know, 3M adhesive. Looking forward to the video! Gracias! |
|
|
|
| Chris914n6 |
May 11 2020, 12:47 AM
Post
#8
|
|
Jackstands are my life. Group: Members Posts: 3,328 Joined: 14-March 03 From: Las Vegas, NV Member No.: 431 Region Association: Southwest Region |
I have one and it fits well enough not to glue. At least out here, dirt builds up underneath which gets wet during pressure washes and makes rust, so I leave it unglued and clean once a year.
Also now that I've started waxing, it's nice to pop it out so it doesn't get caked with residue. |
|
|
|
| StarBear |
May 11 2020, 07:46 AM
Post
#9
|
|
Senior Member Group: Members Posts: 1,906 Joined: 2-September 09 From: NJ Member No.: 10,753 Region Association: North East States |
Yep, did mine a few years ago with no glue or adhesive. Agree that best to close the hood and let it sit/compress a few days. Sets in real well.
|
|
|
|
| eric9144 |
May 11 2020, 08:36 AM
Post
#10
|
|
Advanced Member Group: Members Posts: 2,734 Joined: 30-March 11 From: San Diego, CA Member No.: 12,876 Region Association: Southern California |
I replaced them on both my 914's--no adhesive so I could pull them out and mop up water in the channels if needed.
Once they're seated well they bind in there pretty well with out the glue. |
|
|
|
|
1 User(s) are reading this topic (1 Guests and 0 Anonymous Users)
0 Members:

|
Lo-Fi Version | Time is now: 2nd June 2024 - 04:14 AM |
Invision Power Board
v9.1.4 © 2024 IPS, Inc.