|
|
|
Porsche, and the Porsche crest are registered trademarks of Dr. Ing. h.c. F. Porsche AG.
This site is not affiliated with Porsche in any way. Its only purpose is to provide an online forum for car enthusiasts. All other trademarks are property of their respective owners. |
|
|

  |

| BigDBass |
 Jan 5 2007, 10:05 PM Jan 5 2007, 10:05 PM
Post
#1
|
|
Dumb Question Champion  Group: Members Posts: 1,438 Joined: 11-January 06 From: Chicago (south 'burbs) Member No.: 5,405 Region Association: Upper MidWest |
Hi all,
I haven't been around much lately. Maddie is a few days shy of 6 months old now and slays me daily with her two-toothed smile. Hope all is well in a good new year with my 914 friends. While continuing to procrastinate 914 winter projects (ignition and exhaust) that will keep my car off the road come spring, I'm warming up by installing my Euro front turn signal lenses and Camp914's splendid Euro turn signal kit, available here in the Member Vendors forum. This is what you get in the kit:  I started by removing my nearly flawless US lenses. The seals are nice and pliable. The chrome inside the bucket has a couple blemishes but still has a nice shine. 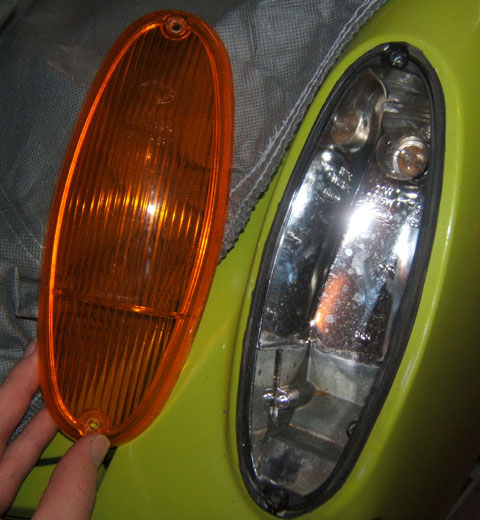 The top screw gave me a hard time and I found what looks to be solder or something near the tip. 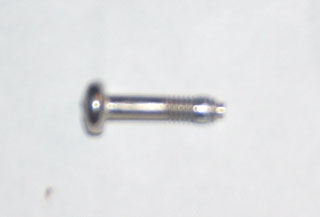 I tried to gently pull out the bucket, and to push it gently from the inside, but it didn't want to budge. Do I just need to use more force and push it out? Or maybe I'm missing something? Thanks, Dan |
   |

 
|
| Gint |
Jan 5 2007, 10:17 PM
Post
#2
|
|
Mike Ginter Group: Admin Posts: 16,083 Joined: 26-December 02 From: Denver CO. Member No.: 20 Region Association: Rocky Mountains |
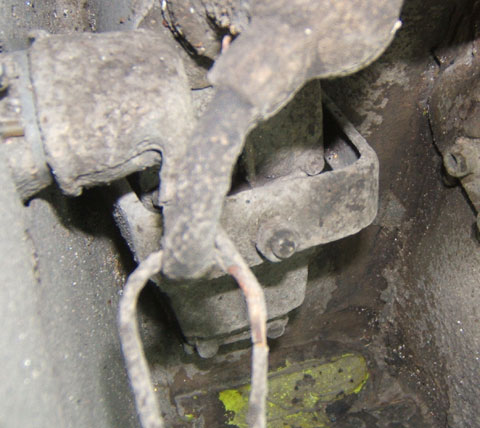
There is a strap type bracket that goes across the back of the bucket assembly. You have to remove the nuts from the bracket and then the bracket itself from inside the fender before you can remove the bucket.
|
|
|
|
| ptravnic |
Jan 5 2007, 10:19 PM
Post
#3
|
|
Senior Member Group: Members Posts: 1,231 Joined: 27-May 03 From: Chicago, IL Member No.: 747 Region Association: None |
QUOTE(BigDBass @ Jan 5 2007, 11:05 PM)  Hi all, I haven't been around much lately. Maddie is a few days shy of 6 months old now and slays me daily with her two-toothed smile. Hope all is well in a good new year with my 914 friends. While continuing to procrastinate 914 winter projects (ignition and exhaust) that will keep my car off the road come spring, I'm warming up with installing my Euro front turn signal lenses and Camp914's splendid Euro turn signal kit. I started by removing my nearly flawless US lenses. The top screw gave me a hard time and i found what looks to be solder or something near the tip. The seals are nice and pliable. The chrome inside the bucket has a couple blemishes but still has a nice shine. I tried to gently pull out the bucket, and to push it gently from the inside, but it didn't want to budge. Do I just need to use more force and push it out? Or maybe I'm missing something? Thanks, Dan There's a 10mm nut on the underside of the the bucket. It is accessed via the fender well. It's easiest to get at if you turn the wheel as far as it will go to the right (when you are removing the driver side bucket) and opposite for the passenger side. It'll be obvious to you once you peek into the wheel well. -pt |
|
|
|
| BigDBass |
Jan 5 2007, 11:09 PM
Post
#4
|
|
Dumb Question Champion Group: Members Posts: 1,438 Joined: 11-January 06 From: Chicago (south 'burbs) Member No.: 5,405 Region Association: Upper MidWest |
Great, I'll check that bracket out in the morning.
|
|
|
|
| rmital |
Jan 6 2007, 09:09 AM
Post
#5
|
|
Northeast optimist Group: Members Posts: 1,947 Joined: 12-December 05 From: Park Ridge, NJ Member No.: 5,268 |
Dan...keep posting (your warm-up project )
...with pics of course. got the kit too, haven't had the time to put them in yet. |
|
|
|
| BigDBass |
Jan 6 2007, 05:07 PM
Post
#6
|
|
Dumb Question Champion Group: Members Posts: 1,438 Joined: 11-January 06 From: Chicago (south 'burbs) Member No.: 5,405 Region Association: Upper MidWest |
Sure enough I found the bracket inside the wheelwell. (By the way, the Haynes manual has much better coverage of the turn signal buckets than Lasher/Clymmer.) I removed the 10mm nut and the bracket came out easily. There were no washers on my assembly, so I will probably stick one on there when I put it back together.
 After gently working off the rubber boot and the wires, I got the bucket out. I removed the blinker bulb and ran the longer wire of the new bulb fixture through the slit at the bottom of the blinker socket. 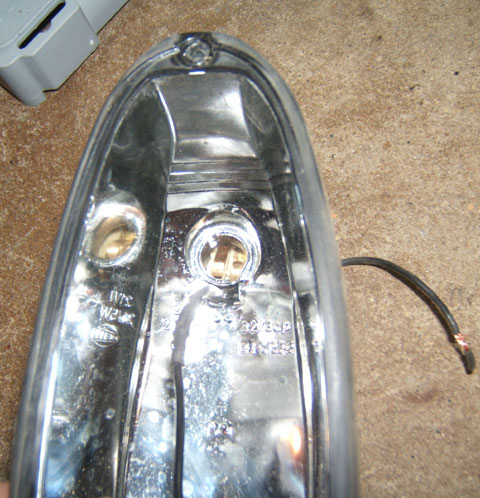 I threaded that wire out the little hole in the back near the other terminals: 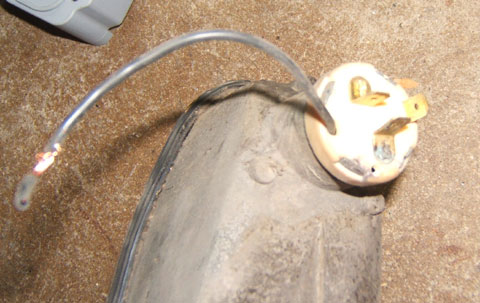 I then crimped on the blue connector. Soldering the wire on is probably a better option, but I have yet to learn how to solder. 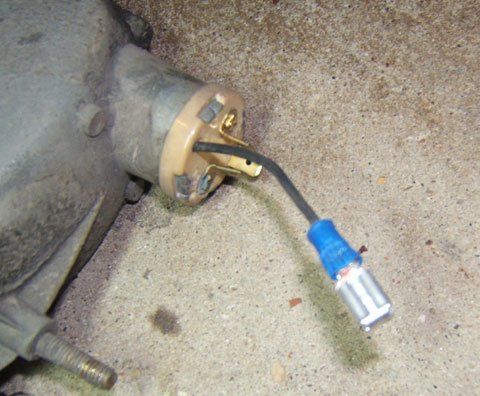 |
|
|
|
| msglaigaie |
Jan 6 2007, 05:42 PM
Post
#7
|
|
msglaigaie Group: Members Posts: 210 Joined: 14-March 05 From: Bellingham, Washington Member No.: 3,761 Region Association: Pacific Northwest |
Soldering is pretty easy once you try it a few times. Make sure everything is as clean as you can, wire to connector, heat connector. Don't heat the wire, the insulation melts. Touch solder to the connector and Voi-oh-lah, it's on. Practice a bit on scraps and you will amaze youself at your genius. It makes a better connection and it really is easy. Now if welding steel and aluminum could be as easy...... Good luck, MSG L
|
|
|
|
| BigDBass |
Jan 6 2007, 06:51 PM
Post
#8
|
|
Dumb Question Champion Group: Members Posts: 1,438 Joined: 11-January 06 From: Chicago (south 'burbs) Member No.: 5,405 Region Association: Upper MidWest |
Yeah, maybe I'll teach myself to solder and redo the connections in the future.
The wire slips between small "nubs" down the center of the bucket. I had to trim back about 1/4" of heatshrink material to get the wire to sit cleanly. 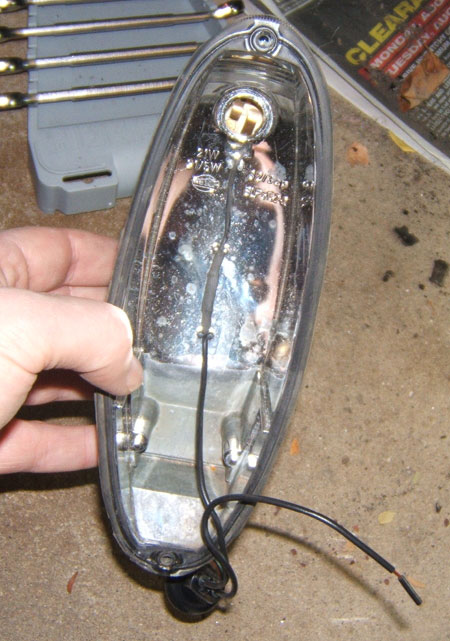 The new bulb/socket slips right into the white plastic bulb holder, then twists to lock in place. 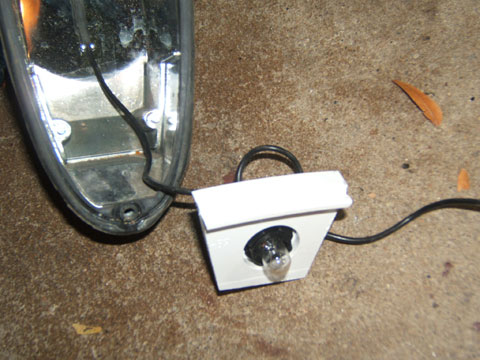 Excellence magazine suggested painting these white pieces silver in their Dec 2006 issue. I will pick up a rattle can of silver paint and do this when the weather warms up. The white plastic bulb holder slides into the bottom of the bucket with the extra wire coiled behind. I left the ground wire for the circuit sticking out under this piece. This ground wire will go into the bottom screw hole for the lens, I guess I'll stick it in behind the rubber seal. 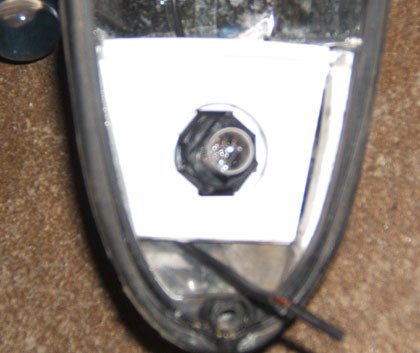 |
|
|
|
| Trevorg7 |
Jan 6 2007, 07:15 PM
Post
#9
|
|
Senior Member Group: Members Posts: 1,242 Joined: 7-December 04 From: Highland Village, TX Member No.: 3,241 Region Association: Southwest Region |
Good work. I've got this kit installed too and it is sharp.
T |
|
|
|
| BigDBass |
Jan 6 2007, 08:08 PM
Post
#10
|
|
Dumb Question Champion Group: Members Posts: 1,438 Joined: 11-January 06 From: Chicago (south 'burbs) Member No.: 5,405 Region Association: Upper MidWest |
I'm having a hard time getting the bucket reinstalled. I can't get enough of the wiring out of the hole to connect it up.
This install woulda been a bit easier if my little girl would let me have more than 5 minutes at a time to work on it. It also dawned on me that I'm not sure I will have enough room in the garage to work on the passenger side! |
|
|
|
| iamchappy |
Jan 6 2007, 08:19 PM
Post
#11
|
|
It all happens so fast! Group: Members Posts: 4,893 Joined: 5-November 03 From: minnetonka, mn Member No.: 1,315 Region Association: Upper MidWest |
Dan your are the man, juggling a baby in one arm and teener wrenching with the other.
Good luck to you and yours, enjoy her while shes still young. |
|
|
|
| Trevorg7 |
Jan 6 2007, 08:51 PM
Post
#12
|
|
Senior Member Group: Members Posts: 1,242 Joined: 7-December 04 From: Highland Village, TX Member No.: 3,241 Region Association: Southwest Region |
QUOTE(BigDBass @ Jan 6 2007, 06:08 PM) I'm having a hard time getting the bucket reinstalled. I can't get enough of the wiring out of the hole to connect it up. This install woulda been a bit easier if my little girl would let me have more than 5 minutes at a time to work on it. It also dawned on me that I'm not sure I will have enough room in the garage to work on the passenger side! Enjoy the time with your girl...they grow up fast. If I recall correctly I did not remove the bucket to install. I turn the front wheels and worked from undernieth...I think. Using the lenght of the wire to work. T |
|
|
|
| 914-8 |
Jan 6 2007, 09:34 PM
Post
#13
|
|
Senior Member Group: Members Posts: 802 Joined: 23-January 06 From: Cal Member No.: 5,461 Region Association: None |
You have the bottom piece installed wrong. Kinda defeats the purpose doing it that way.
|
|
|
|
| Andyrew |
Jan 6 2007, 09:45 PM
Post
#14
|
|
Spooling.... Please wait Group: Members Posts: 13,376 Joined: 20-January 03 From: Riverbank, Ca Member No.: 172 Region Association: Northern California |
I was gona say... Thats not how I installed my bottom piece!! I superglued it in.. werks fine.
The bottom piece needs to go perpendicular to the bottom of the housing.. Top \____I_/ Bottom Top being top of fender when installed |
|
|
|
| Trevorg7 |
Jan 6 2007, 09:55 PM
Post
#15
|
|
Senior Member Group: Members Posts: 1,242 Joined: 7-December 04 From: Highland Village, TX Member No.: 3,241 Region Association: Southwest Region |
Really? I don't think its wrong. I put mine in the same way and they work great.
Maybe Craig can chime in...CCLCHIMEINONWHICHWAYITSHOULDGO T |
|
|
|
| 914-8 |
Jan 6 2007, 09:56 PM
Post
#16
|
|
Senior Member Group: Members Posts: 802 Joined: 23-January 06 From: Cal Member No.: 5,461 Region Association: None |
LOL, if you think that's correct, what do you think the purpose of the mod is?? (IMG:style_emoticons/default/confused24.gif)
|
|
|
|
| 914-8 |
Jan 6 2007, 10:16 PM
Post
#17
|
|
Senior Member Group: Members Posts: 802 Joined: 23-January 06 From: Cal Member No.: 5,461 Region Association: None |
Here's how a euro should look lit up.
(IMG:http://www.914world.com/bbs2/uploads/post-290-1159847720.jpg) |
|
|
|
| BigDBass |
Jan 6 2007, 10:21 PM
Post
#18
|
|
Dumb Question Champion Group: Members Posts: 1,438 Joined: 11-January 06 From: Chicago (south 'burbs) Member No.: 5,405 Region Association: Upper MidWest |
To reinstall the bucket, I had to turn the rubber boot inside out in order to have enough slack on the wires to connect to the appropriate terminals.
I don't see how you could install this without removing the bucket. The blue double spade connector feeds the added bulb from the side marker light circuit. Hopefully Craig or someone else in the know will comment on the orientation of the bottom piece. I tried it in just about every position I could think of and this way had the best fit. It gives the new bulb the same outward facing orientation as the upper turn signal bulb. I definitely want to paint the plastic pieces silver. The white is quite visible through the clear part of the lens. |
|
|
|
| 914-8 |
Jan 6 2007, 10:27 PM
Post
#19
|
|
Senior Member Group: Members Posts: 802 Joined: 23-January 06 From: Cal Member No.: 5,461 Region Association: None |
QUOTE(BigDBass @ Jan 6 2007, 08:21 PM) Hopefully Craig or someone else in the know will comment on the orientation of the bottom piece. I tried it in just about every position I could think of and this way had the best fit. It gives the new bulb the same outward facing orientation as the upper turn signal bulb. Someone in the know did comment on it. Me. And Andyrew, too. This is what you are trying the emulate: (IMG:http://www.914world.com/bbs2/uploads/post-3504-1146852423.jpg) Two SEPARATE light compartments. The Euro lens is two colors for a reason. |
|
|
|
| BigDBass |
Jan 6 2007, 10:40 PM
Post
#20
|
|
Dumb Question Champion Group: Members Posts: 1,438 Joined: 11-January 06 From: Chicago (south 'burbs) Member No.: 5,405 Region Association: Upper MidWest |
Here it is finished with the parking lights off. Notice how visible the white piece is through the clear part of the lens:
 Here it is with the parking lights on. The lower bulb (and side marker) is lit. The upper bulb is lit, but dimly. When the blinker is turned on the upper bulb gets much brighter while the lower bulb stays at full brightness. 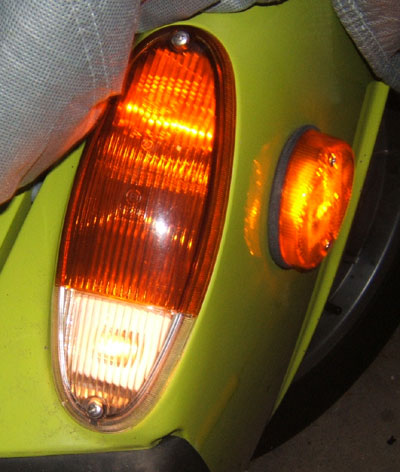 I believe this is in accord with how the mod is intended to work. (Now I need to decide if I should keep the nearly perfect original US lenses or just sell them...) |
|
|
|
|
2 User(s) are reading this topic (2 Guests and 0 Anonymous Users)
0 Members:

|
Lo-Fi Version | Time is now: 7th June 2024 - 01:54 PM |
Invision Power Board
v9.1.4 © 2024 IPS, Inc.