|
|
|
Porsche, and the Porsche crest are registered trademarks of Dr. Ing. h.c. F. Porsche AG.
This site is not affiliated with Porsche in any way. Its only purpose is to provide an online forum for car enthusiasts. All other trademarks are property of their respective owners. |
|
|

  |

| tyler |
 Feb 16 2007, 03:06 PM Feb 16 2007, 03:06 PM
Post
#1
|
|
Member  Group: Members Posts: 335 Joined: 24-September 03 From: southern california Member No.: 1,192 |
I'm trying to put in my $1200 seal which I got on Ebay awhile ago, thankfully for $180 but still I'm a nervous wreck working on it considering it's value. It's a real bear to get in. First I had to spread the seam along it at the top of the windshield to get it to snap in. Now I can't get the side pieces to fit down into the trim strip, especially at the top where it makes the sharp bend. I've even been trying to slide the side pieces in the trim off the car and maybe spread it to get the screws in afterwards but that's not going well.
I doubt if anyone's put in a new one lately, but is so can you offer any tips? Attached image(s) 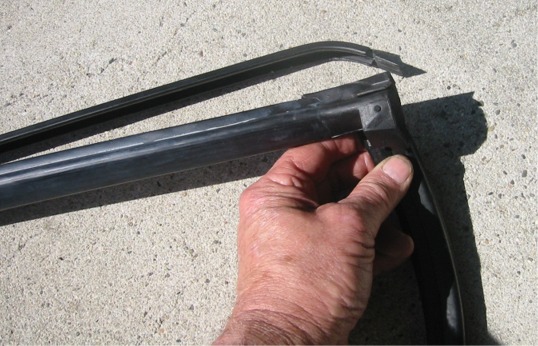
|
   |

 
|
| nomore9one4 |
Feb 16 2007, 03:27 PM
Post
#2
|
|
Member of the Eastcoast Thread Killers Club Group: Members Posts: 2,666 Joined: 26-December 02 From: Pittsburgh,Pa.15237 Member No.: 14 Region Association: None |
I sprayed mine with some silicone and it went right on. (IMG:style_emoticons/default/smile.gif)
|
|
|
|
| McMark |
Feb 16 2007, 03:31 PM
Post
#3
|
|
914 Freak! Group: Retired Admin Posts: 20,179 Joined: 13-March 03 From: Grand Rapids, MI Member No.: 419 Region Association: None |
You don't slide the seal in. You set one side into place and the carefully use a screwdriver to push in the other edge.
|
|
|
|
| Aaron Cox |
Feb 16 2007, 03:31 PM
Post
#4
|
|
Professional Lawn Dart Group: Retired Admin Posts: 24,541 Joined: 1-February 03 From: OC Member No.: 219 Region Association: Southern California |
i slid mine in with either silicone or glycerin
|
|
|
|
| dr914@autoatlanta.com |
Feb 16 2007, 03:39 PM
Post
#5
|
|
914 Guru Group: Members Posts: 7,887 Joined: 3-January 07 From: atlanta georgia Member No.: 7,418 Region Association: None |
silicone grease the heck out of the seal and the tracks, open the pinches in the left and right gutters, lightly stretch the lateral part of the seal inbetween the end caps to lengthen it a bit. Slide the seal down both sides, seat the end blocks and secure with the factory screw and washer setups, then tap the lateral home with the heal of your hand. Make sure the end caps are perfectly aligned with the two top side seals or the car will pour water into the car. The factory seals for the last five years were short so it is easy to have the end caps pointing inward
|
|
|
|
| John |
Feb 16 2007, 03:40 PM
Post
#6
|
|
member? what's a member? Group: Members Posts: 3,393 Joined: 30-January 04 From: Evansville, IN (SIRPCA) Member No.: 1,615 Region Association: None |
You need to mount the trim to the car first.
I use rubber lubricant from here: P-80 Temporary Rubber Lubricant This will not harm the rubber, and will make it slick enough to easily work into the channels. I start on one side and have a partner support the remainder of the rubber to eliminate stress at the two corner joints (which can break easily). I work one side pushing/pulling/stretching the rubber down the channel. Once it is nearly down, you must carefully work the corner onto the top of the channel. Once it is started, you can finish pushing/pulling/stretching the seal down the channel. Next work the seal part way across the top (about 1/3 of the way across) This just helps support the rubber seal. Work the second side down the channel on the opposite side the same as you did the first, being extra careful when it gets close to the corner engaging the top of the channel. When both sides are fed down the channels, work the remainder of the seal across the top of the windshield. Lastly, when the seal is in place, you may need to slightly crimp the channels (just as the factory did) to hold the seal in place. The last one I did, I didn't have to do this, but it was an old seal. I am about ready to replace an old cracked seal as well, but I have not yet had the time. Maybe this weekend....... Good luck. |
|
|
|
| tyler |
Feb 17 2007, 11:04 AM
Post
#7
|
|
Member Group: Members Posts: 335 Joined: 24-September 03 From: southern california Member No.: 1,192 |
Thanks fo rthe tips. I do usually force rubber in at the side instead of sliding it but that didn't work in this case, it just fits too tight. Must be from sitting for so many years. I've got it out in the sun and I guess I'll try to widen the slots by working a lubricated trim piece in and out. I also got a machinists burr remover to clean up the trim pieces. It looks like it should help by stripping the paint and the surface off the metal.
|
|
|
|
| boxstr |
Feb 17 2007, 11:10 AM
Post
#8
|
|
MEMBER:PACIFIC NORTHWEST REGION Group: Members Posts: 7,522 Joined: 25-December 02 From: OREGON Member No.: 12 Region Association: Pacific Northwest |
Tyler I have another seal if you need one.
CCLINSEALED |
|
|
|
| cooltimes |
Feb 17 2007, 12:25 PM
Post
#9
|
|
Advanced Member Group: Members Posts: 2,508 Joined: 18-May 04 Member No.: 2,081 Region Association: None |
QUOTE(boxstr @ Feb 17 2007, 11:10 AM)  Tyler I have another seal if you need one. CCLINSEALED Out of curosity, how much could that mistake replacement cost? $914 or BO over that is what I would want since my seal package I sent came back unopened. |
|
|
|
| boxstr |
Feb 17 2007, 03:25 PM
Post
#10
|
|
MEMBER:PACIFIC NORTHWEST REGION Group: Members Posts: 7,522 Joined: 25-December 02 From: OREGON Member No.: 12 Region Association: Pacific Northwest |
Last ebay was $1200. I would sell for $914. I have a few more left.
CCLINSEALED |
|
|
|
| Tobra |
Feb 17 2007, 04:59 PM
Post
#11
|
|
Senior Member Group: Members Posts: 1,453 Joined: 22-August 05 From: Sacramento, CA Member No.: 4,634 |
Put the seal in the sun to soften it up a bit first, it will make your life much easier. Make sure the tracks are clean and lubed, a little piece of the old seal will really piss you off if not removed.
|
|
|
|
| Michael N |
Feb 17 2007, 06:36 PM
Post
#12
|
|
Certifiable Group: Members Posts: 1,426 Joined: 6-June 04 From: San Jose, Ca Member No.: 2,164 Region Association: Northern California |
I actually used KY Jelly to install some seals on my car. Windshield, rear targa bar and window squeegee. The key is that it is water-soluble and non-greasy. It did not hurt the paint etc.
|
|
|
|
| tyler |
Feb 18 2007, 10:49 AM
Post
#13
|
|
Member Group: Members Posts: 335 Joined: 24-September 03 From: southern california Member No.: 1,192 |
Finally got it - all day job. All your tips were usefull. I think the real key was cleaning the trim slot to perfection, deburring tool & sanding. After that it wasn't too bad.
Now how do I chain it to my garage so it doesn't get stolen? Attached image(s) 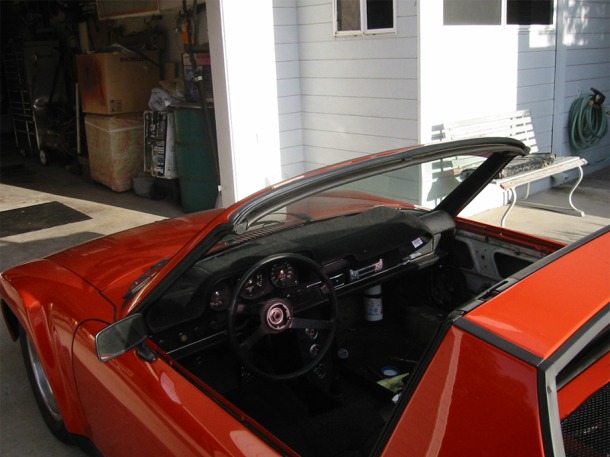 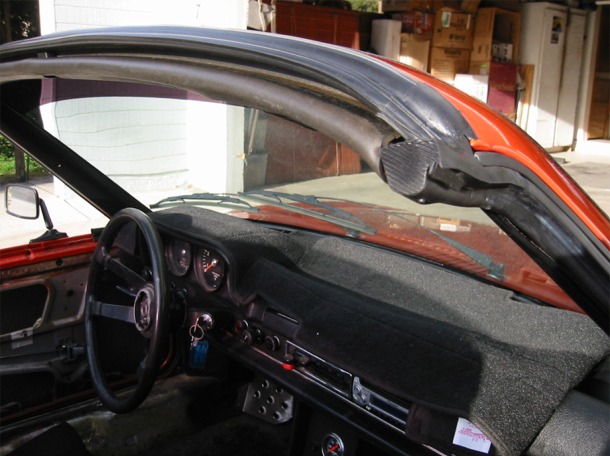 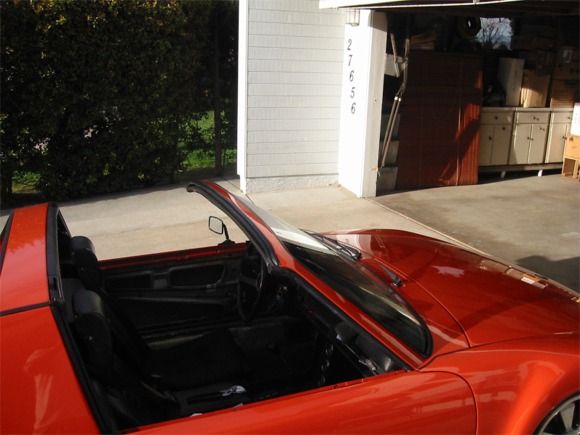
|
|
|
|
| rhodyguy |
Feb 18 2007, 11:00 AM
Post
#14
|
|
Chimp Sanctuary NW. Check it out. Group: Members Posts: 22,084 Joined: 2-March 03 From: Orion's Bell. The BELL! Member No.: 378 Region Association: Galt's Gulch |
did you have to adjust the *in and out* aspect of the window? the test will be top on, windows up and see if some of the drafts go away. 1200 clams...man-o-man!
k |
|
|
|
| cooltimes |
Feb 18 2007, 03:43 PM
Post
#15
|
|
Advanced Member Group: Members Posts: 2,508 Joined: 18-May 04 Member No.: 2,081 Region Association: None |
QUOTE(tyler @ Feb 18 2007, 10:49 AM) Finally got it - all day job. All your tips were usefull. I think the real key was cleaning the trim slot to perfection, deburring tool & sanding. After that it wasn't too bad. Now how do I chain it to my garage so it doesn't get stolen? Looks good. Door looks different without the wing type front part of the window. Where do you get a door glass for that mod or just not installed yet? |
|
|
|
| tyler |
Feb 19 2007, 11:12 AM
Post
#16
|
|
Member Group: Members Posts: 335 Joined: 24-September 03 From: southern california Member No.: 1,192 |
Just not in yet. It's out being powdercoated black along with the door handles.
Looks good. Door looks different without the wing type front part of the window. Where do you get a door glass for that mod or just not installed yet? [/quote] |
|
|
|
| Brando |
Feb 19 2007, 11:33 AM
Post
#17
|
|
BUY MY SPARE KIDNEY!!! Group: Members Posts: 3,935 Joined: 29-August 04 From: Santa Ana, CA Member No.: 2,648 Region Association: Southern California |
I slid my seal on with a little bit of silicon spray, no issues...
|
|
|
|
|
1 User(s) are reading this topic (1 Guests and 0 Anonymous Users)
0 Members:

|
Lo-Fi Version | Time is now: 1st June 2024 - 12:21 PM |
Invision Power Board
v9.1.4 © 2024 IPS, Inc.