|
|
|
Porsche, and the Porsche crest are registered trademarks of Dr. Ing. h.c. F. Porsche AG.
This site is not affiliated with Porsche in any way. Its only purpose is to provide an online forum for car enthusiasts. All other trademarks are property of their respective owners. |
|
|

  |

| BMXerror |
 Sep 17 2007, 09:42 PM Sep 17 2007, 09:42 PM
Post
#1
|
|
Senior Member  Group: Members Posts: 1,705 Joined: 8-April 06 From: Hesperia Ca Member No.: 5,842 |
Well, with all the work that I'm doing to my car lately, I might as well start my own progress thread.
Backstory I bought 4702912742 from my pops about a year and a half ago for $600 dollars, but it wasn't a steal. It had been sitting for about five years and needed a lot of work. He A couple years later he had been looking for a teener for a little while and picked this one up cheap at a dealership in Pomona Ca. He drove it for a while, but it had tons of problems, and soon he decided to sell it. However, the person who test drove it blew first gear, and out to the back yard it was sent. Fast forward five years to when I was financially ready to get a car to start racing. Long story short, after deciding that I wanted the 914 instead of an older Miata, I told him I was interested. He said that if I bought him a set of mufflers for his bike, we'd call it even. After that I spent about another 4K just getting it drivable. I replace all four rotors, rebuilt all four calipers, replace the brake lines with braided steel, replaced the hard lines that I broke, replaced the master cylinder, resealed the motor (after my socket and extension locked the motor up), bought two trannies for it (the first one was no good), put a new clutch and pilot bearing in it, put new rubber on the ground (Khumos), fixed and lubed all kinds of latches and hinges to be able to get into all the various compartments, replaced most of the vacuum lines and fuel lines.... the list goes on. These were all just stock replacements to get it running well. I further had to fight with the injection system for a few months until I figured out that I had it hooked up wrong. (IMG:style_emoticons/default/headbang.gif) Of course, this is the very abbreviated version of the story. As anyone with one of these things knows, the words it takes to describe what parts you changed don't even come close to showing the blood, sweat, and yes, sometimes tears that you put into your work. But anyways, it is running decent now (the motor is still a little tired) so it's time to do some improvements. After all, racing is what I bought the thing for. So I'll try to bring anyone who cares up to date on some of the things I've been working on. Mark D. |
   |

 
|
| BMXerror |
Sep 17 2007, 09:45 PM
Post
#2
|
|
Senior Member Group: Members Posts: 1,705 Joined: 8-April 06 From: Hesperia Ca Member No.: 5,842 |
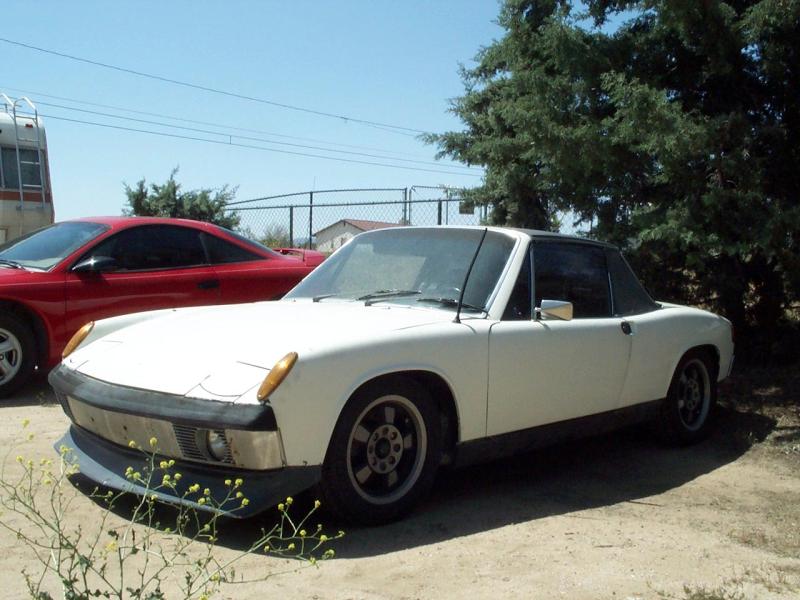
Then
 Nowish 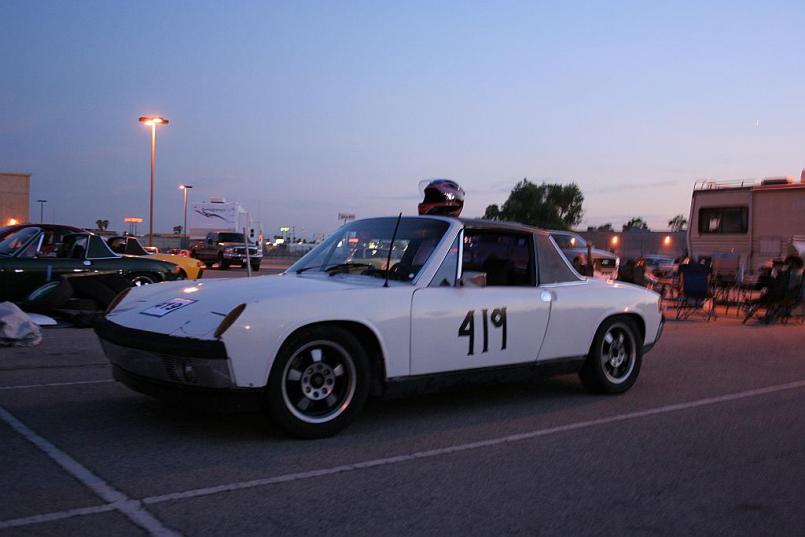 Progress pics will be uploaded soon, but not tonight. It's bed time. Mark D. |
|
|
|
| SGB |
Sep 17 2007, 09:56 PM
Post
#3
|
|
just visiting Group: Members Posts: 4,086 Joined: 8-March 03 From: Huntsville, AL Member No.: 404 Region Association: South East States |
Number 419. Ha. Or rather, Ah.
|
|
|
|
| BMXerror |
Sep 18 2007, 12:25 PM
Post
#4
|
|
Senior Member Group: Members Posts: 1,705 Joined: 8-April 06 From: Hesperia Ca Member No.: 5,842 |
Yeah... And I had NARVW on the rear trunk.
Mark D. |
|
|
|
| BMXerror |
Sep 18 2007, 12:31 PM
Post
#5
|
|
Senior Member Group: Members Posts: 1,705 Joined: 8-April 06 From: Hesperia Ca Member No.: 5,842 |
Well, let's start with the first custom fabbed piece on the car; the motor mount. When I did my side shift conversion, the mount bar that I got was bent. It looked like the car had been rear ended, because both ends were bent back, like the engine and tranny got pushed forward. So instead of finding another that may be bent, my brother talked me into letting him build a tubular one for me. I'm very happy with what resulted. It feels about 1/2-2/3 lighter, and looks way cooler than the stock one.
This part was built about a year ago and I posted pics, so some of you may remember it. I can't take any credit for the design. It was all my bro. 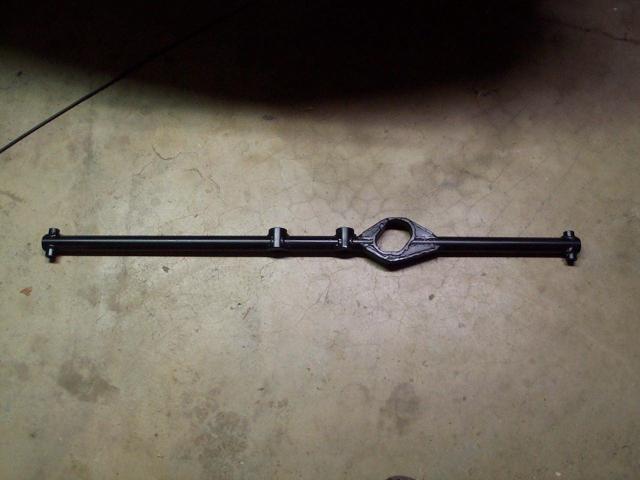 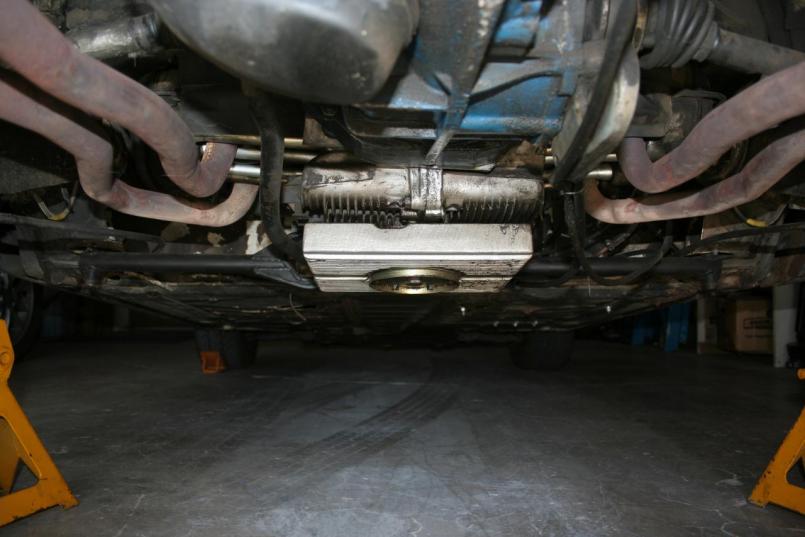 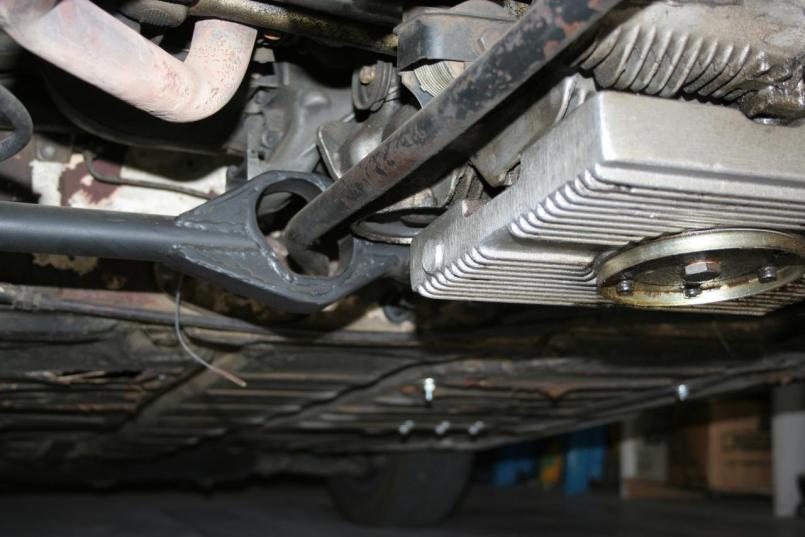 Mark D. |
|
|
|
| BMXerror |
Sep 18 2007, 12:36 PM
Post
#6
|
|
Senior Member Group: Members Posts: 1,705 Joined: 8-April 06 From: Hesperia Ca Member No.: 5,842 |
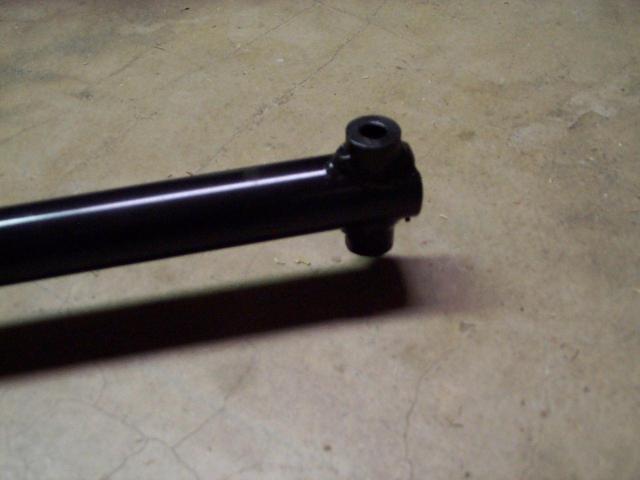
The main bar is 1 1/8" DOM steel. The ends are machined and center-drilled bar-stock that were welded in place.
 The center mounts are 1 1/4" non-DOM tubing that are capped and center drilled for the rubber mounts. The hole for the shift rod is hand bent 1/8" flat bar. My brother bent the center piece in about three minutes, and then traced that shape onto the pieces for the gussets. I'm amazed how fast he did it and how well it came out... He Rules. 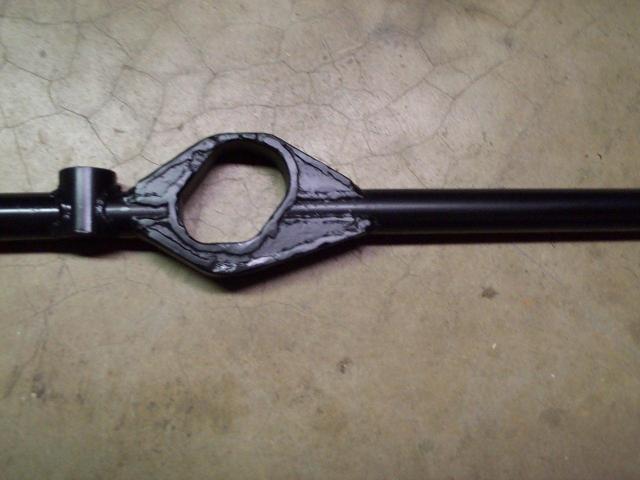 The welds don't look as good as they could, but he said his welder was acting up. I'm still very happy with it. Mark D. |
|
|
|
| BMXerror |
Sep 18 2007, 01:03 PM
Post
#7
|
|
Senior Member Group: Members Posts: 1,705 Joined: 8-April 06 From: Hesperia Ca Member No.: 5,842 |
A couple months ago, I had an electrical short under the dash that took forever to find. I thought it was the ignition switch (which has had problems), but I was wrong. I ended up taking my vacation from work to fix it, as it was the only car I had at the time. I ripped the whole dash out and found my electrical problems. It turned out there was more than one. Anyways, the stock dash was thrashed when I bought the car, and it looked even worse by the time I got it out of the car. Since I got the electrical fixed way earlier than I expected to, I decided this was a good time to do my stripped out dashboard.
All I did is take the steel frame, cut it down to a flimsy framework, and then wrap some aluminum around it. Unfortunately, I don't have a 53" sheet metal break, so all the bends are hand bent around random pieces of angle-iron and 2X4. The long bends on the top and bottom had to be relief cut to facilitate this. The look isn't as good as I'd like, but it's alright. 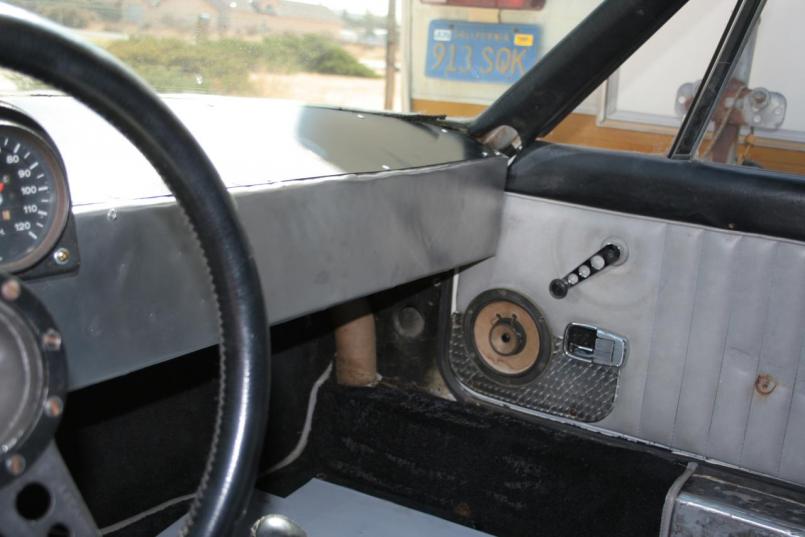 Mark D. |
|
|
|
| BMXerror |
Sep 18 2007, 01:07 PM
Post
#8
|
|
Senior Member Group: Members Posts: 1,705 Joined: 8-April 06 From: Hesperia Ca Member No.: 5,842 |
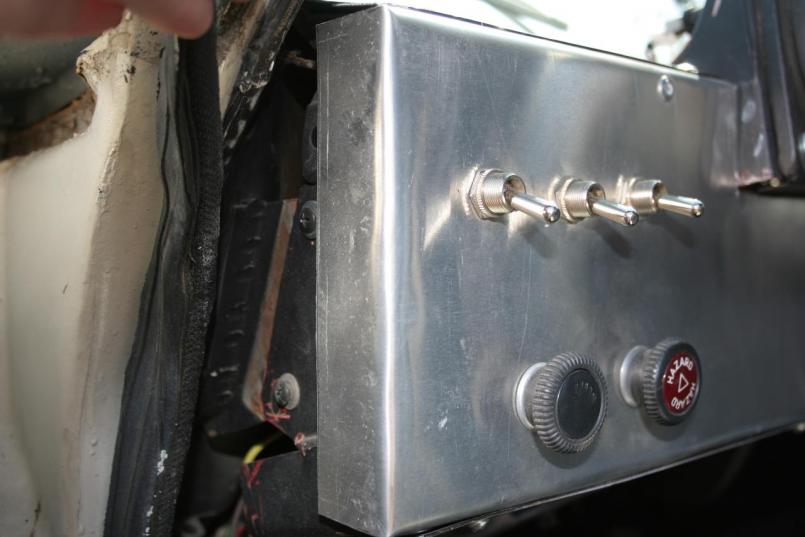
Center-punch marks for the future gauge centers. That's a project for a later date.
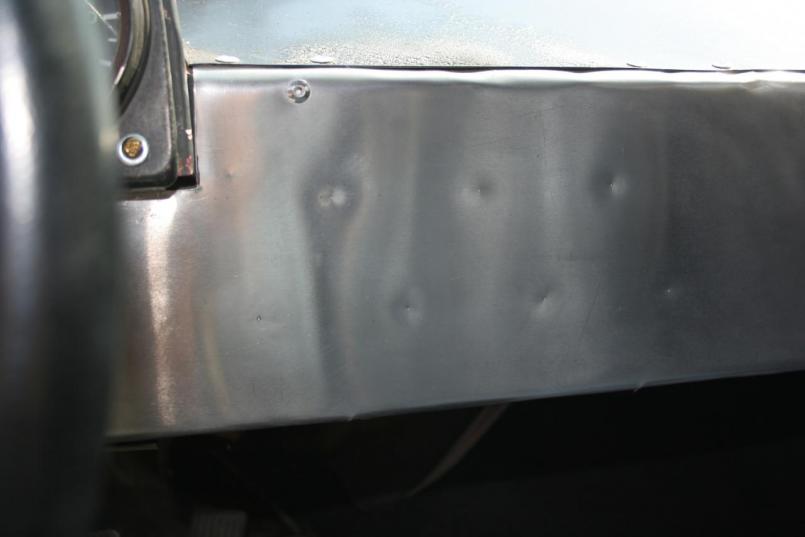 The ECU and starter are on toggle switches now, as well as the rear trunk solenoid. The headlights and flashers may be as well in the future. The top is riveted on and painted in a bad, half-assed coat of wrinkle finish black.... That's why it sucks when you need your project car for work. 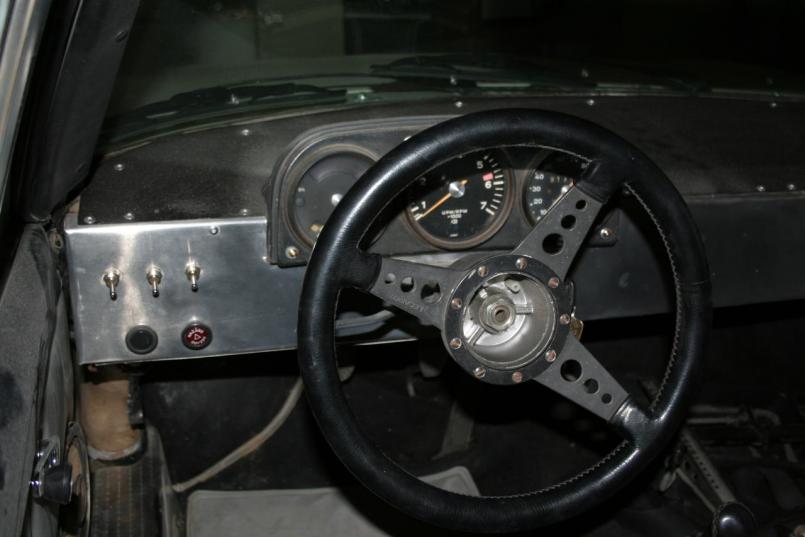 There's no cover for the main gauge cluster right now. I tried to make that piece a couple times. It was a bitch and I needed my car, so I said, "I'll do that later." That was four months ago. lol 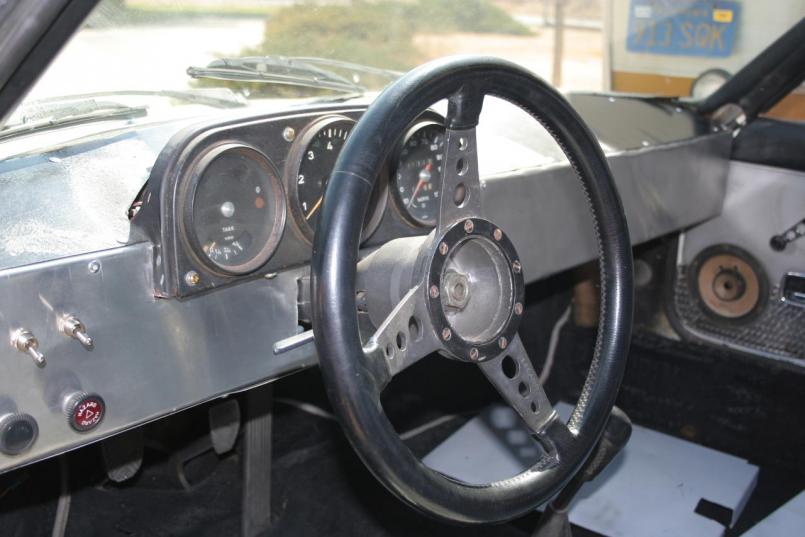 Mark D. |
|
|
|
| BMXerror |
Sep 18 2007, 01:13 PM
Post
#9
|
|
Senior Member Group: Members Posts: 1,705 Joined: 8-April 06 From: Hesperia Ca Member No.: 5,842 |
If you look closely, you can see some of the old framework in there.
 Having the lower panel removable helps a lot when it comes to working on the mess of wires above it. As you can see, the aluminum has already had it's share of scratches. I'm thinking that later I'll move the fuse block to the far right, where the glove box used to be. 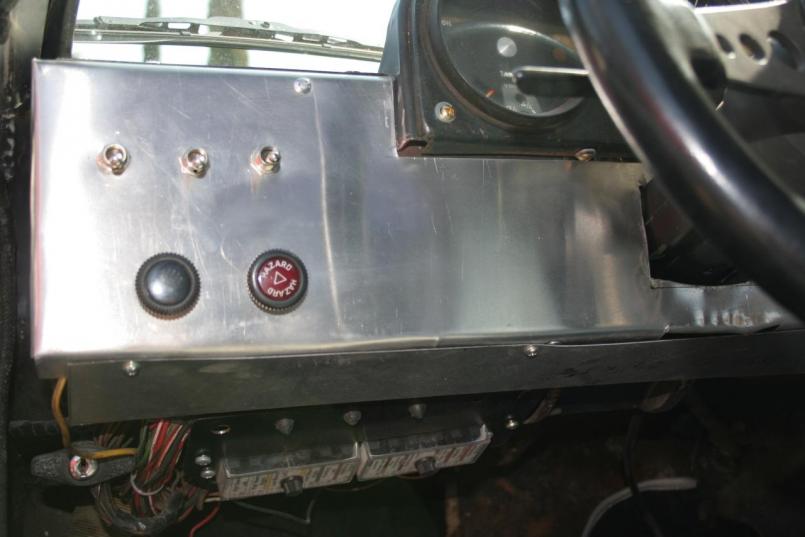 Mark D. |
|
|
|
| sww914 |
Sep 18 2007, 01:49 PM
Post
#10
|
|
Advanced Member Group: Members Posts: 2,439 Joined: 4-June 06 Member No.: 6,146 Region Association: None |
If you plan to race, read the rules of the club(s) that you plan to run with before you do too many modifications.
For instance, to run with he POC, you have to have a stock dash cover or you will have to compete with the Z classes- unlimited- categorized by engine size only, so you'd be competing with tube frame cars with 3.0 RSR engines. You can probably slap a dash cover right over your aluminum dash and fix that problem, but this kind of thing comes up all the time. |
|
|
|
| BMXerror |
Sep 18 2007, 02:13 PM
Post
#11
|
|
Senior Member Group: Members Posts: 1,705 Joined: 8-April 06 From: Hesperia Ca Member No.: 5,842 |
Agreed. I am familiar with the SCCA rules for GT and Production classes, and am fairly familiar with NASA classes. I don't plan on running in POC, but it's a possibility sometime in the future. I think I'll be running in NASA PT and TT mostly, until I get the thing to reasonable GT preparation. I'm broke, though. That'll be years from now; after I finish school, get a REAL job, get a house. ect. Thanks for the tip, though. I'll keep that in mind.
Mark D. |
|
|
|
| BMXerror |
Sep 19 2007, 12:58 PM
Post
#12
|
|
Senior Member Group: Members Posts: 1,705 Joined: 8-April 06 From: Hesperia Ca Member No.: 5,842 |
The next item is harnesses. This is the project that I'm working on right now... As you may have guessed, I'm not doing these projects in any meaningful order. I don't have the money for that. My buddy, who I build various race cars with, had a customer with some expired 5-point harnesses, and he offered them to me for free since he had no use for them anymore. They're functionally just fine, but the production dates are over 3 years. However, since I'm just doing autocrosses and weekend mountain attacks, that's fine. However, I did have to fab some harness bars and reinforce the mounting points on the firewall. I'll get all this done, and then when I'm ready to do full fledged, wheel to wheel racing, I'll just have to get new harnesses and bolt them in.
Driver's side assembly after striping the paint and glue off of the firewall. 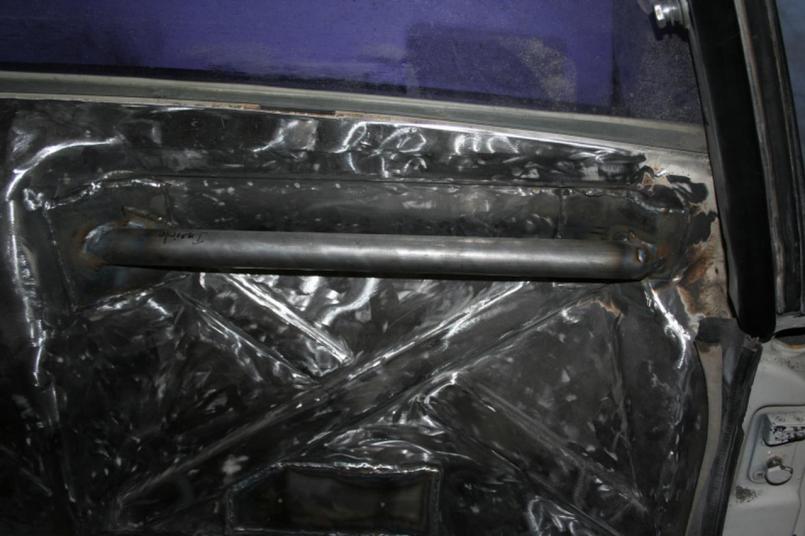 This is the reinforcement plate for the mounting point of the two shoulder belts on the passenger side. There will also be a plate on back side of the firewall when I'm done. 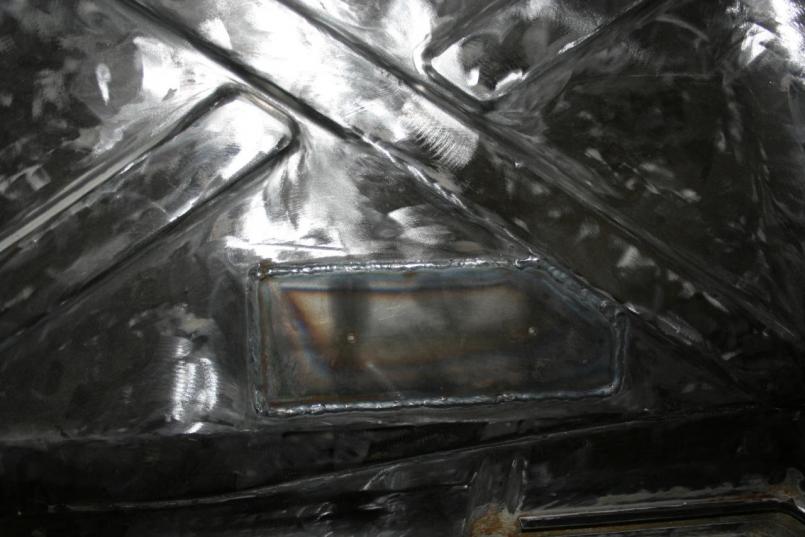 Mark D. |
|
|
|
| BMXerror |
Sep 19 2007, 01:08 PM
Post
#13
|
|
Senior Member Group: Members Posts: 1,705 Joined: 8-April 06 From: Hesperia Ca Member No.: 5,842 |
These little plates were fun to make. I made the driver's side first by taking a piece of cardboard and mapping the major folds and cuts. That way, I was able to flatten it back out to cut the flat pate before folding it. I did have to do some minor trimming to get the metal piece to fit the way I wanted. This is the passenger's side (obviously), and I just got that by mirroring it onto another piece of cardboard.
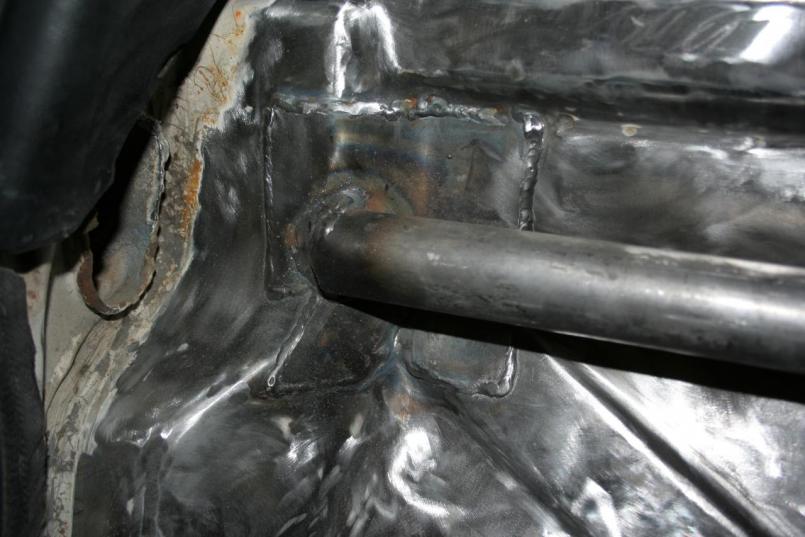 To get enough clearance for the harnesses between the bar and the firewall, the bar had to stick out in front of the angled area on the outside. To alleviate this issue, the angle for the firewall was cut through the tubing, and then the end was relief cut, bent to angle it in, and welded back together. 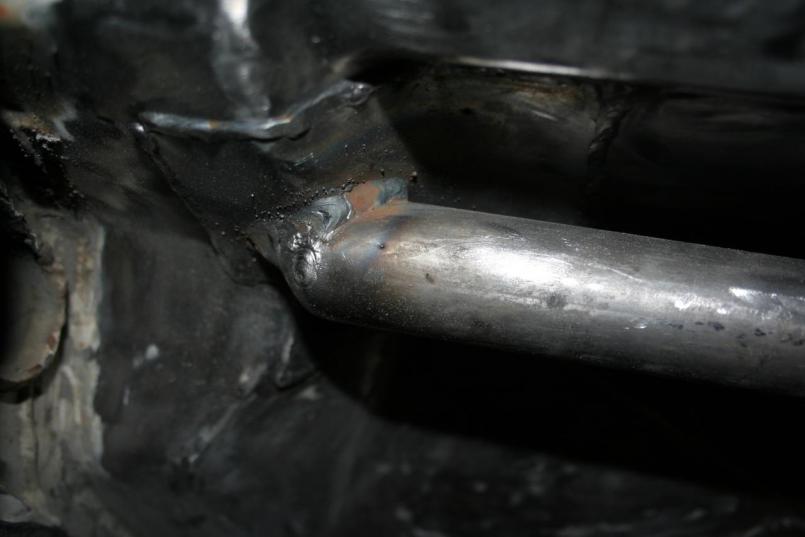 The inside was much more simple. 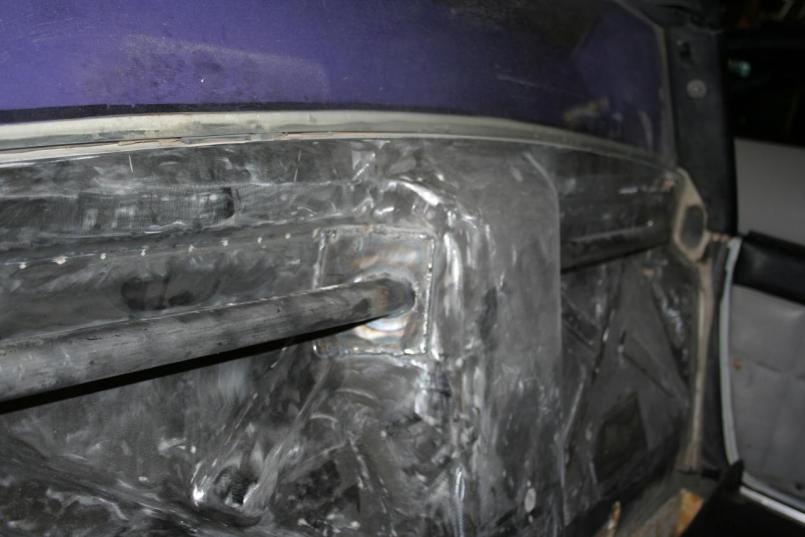 Again, all the welding was done by my bro. Mark D. |
|
|
|
| BMXerror |
Sep 20 2007, 11:34 AM
Post
#14
|
|
Senior Member Group: Members Posts: 1,705 Joined: 8-April 06 From: Hesperia Ca Member No.: 5,842 |
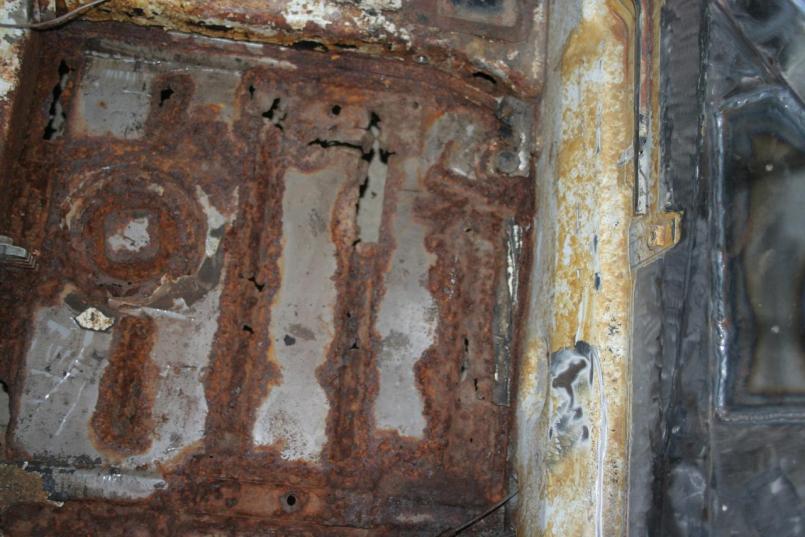
While trying to figure out how far down to paint, I decided I should look at the floor and see how bad it was. I knew there was some serious rust issues, but I wasn't sure how bad. Here's what I found.
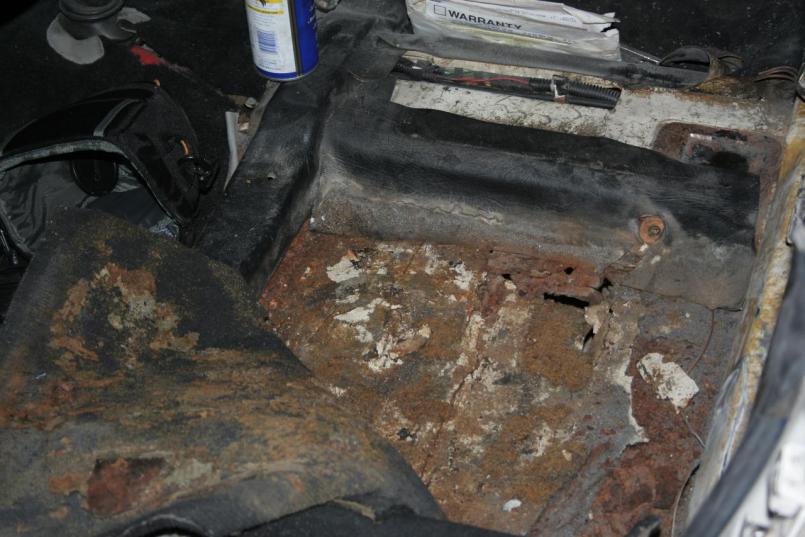 Mark D. |
|
|
|
| BMXerror |
Sep 20 2007, 11:39 AM
Post
#15
|
|
Senior Member Group: Members Posts: 1,705 Joined: 8-April 06 From: Hesperia Ca Member No.: 5,842 |
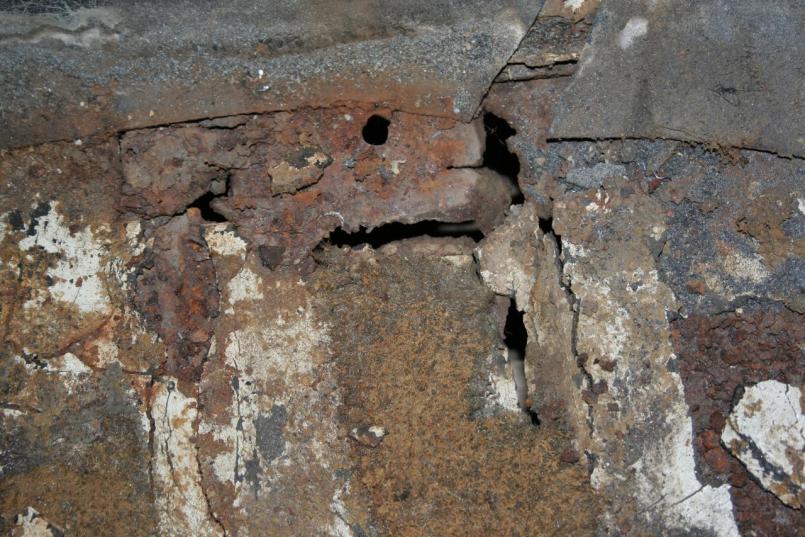
More...
 Mark D. |
|
|
|
| BMXerror |
Sep 20 2007, 11:41 AM
Post
#16
|
|
Senior Member Group: Members Posts: 1,705 Joined: 8-April 06 From: Hesperia Ca Member No.: 5,842 |
After I stripped the rubber crap off.
 I then cleaned it with a wire wheel and threw a coat of primer over the top to prevent any further rust. 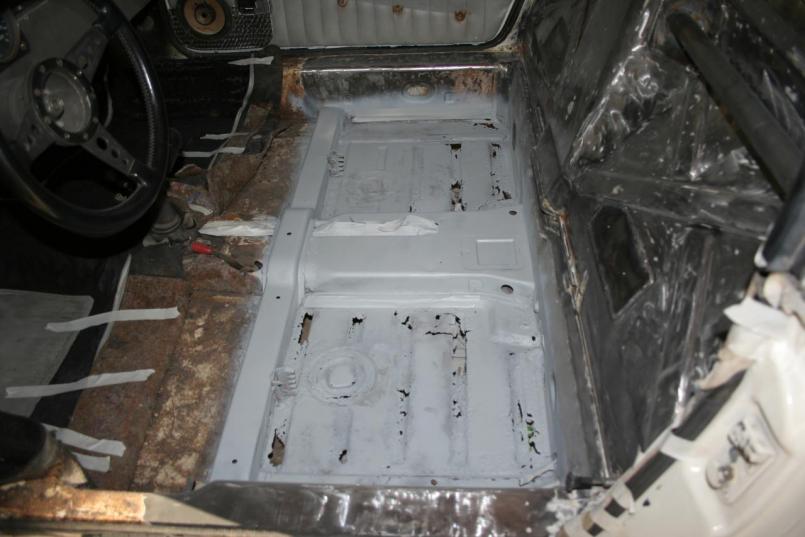 Mark D. |
|
|
|
| BMXerror |
Sep 20 2007, 11:49 AM
Post
#17
|
|
Senior Member Group: Members Posts: 1,705 Joined: 8-April 06 From: Hesperia Ca Member No.: 5,842 |
I decided to double it up by fabbing some new floorboards for now. When I do the complete tear down later, I'll probably put some of Restoration Design's floors in. However, I don't have the time or money to go into that kind of work right now, and this was a bit of an emergency. While working inside, I more than once put my foot through the passenger's side floor. These should hold for now.
Cut floor pieces waiting for the sheet metal break. 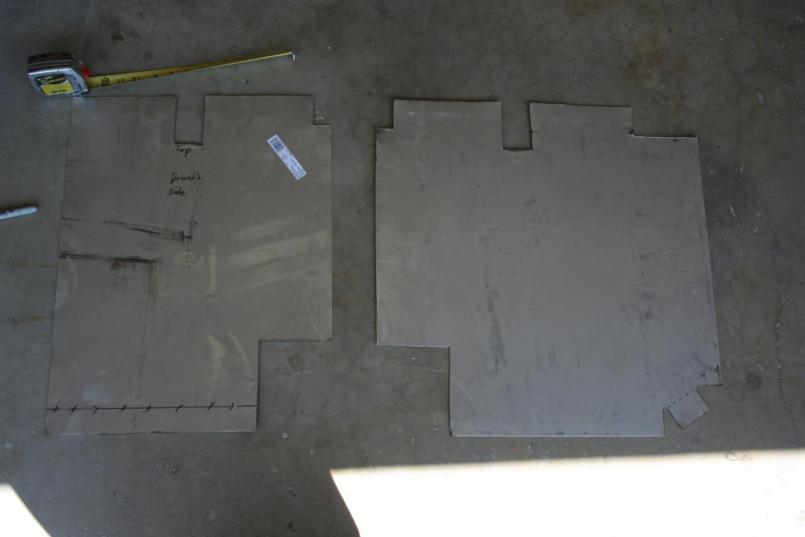 Bent and trimmed pieces with a layer of primer on the bottom. These are ready to weld in. Yes, those are my footprints on them. 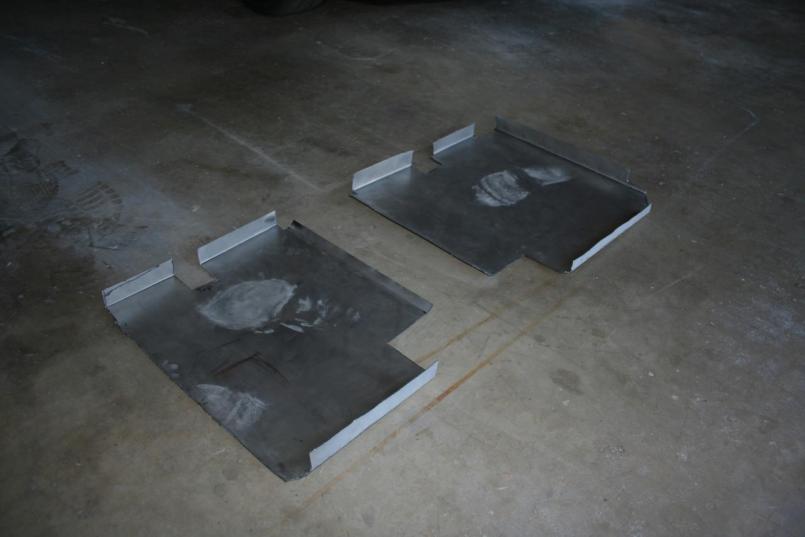 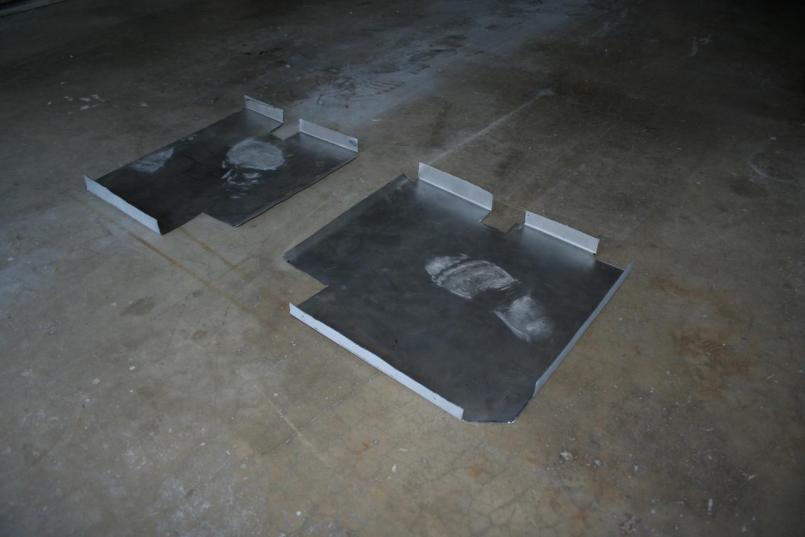 Mark D. |
|
|
|
| Bartlett 914 |
Sep 20 2007, 03:17 PM
Post
#18
|
|
Advanced Member Group: Members Posts: 2,218 Joined: 30-August 05 From: South Elgin IL Member No.: 4,707 Region Association: Upper MidWest |
You have done a lot of nice work! I know you want to keep the cost down (BTDT) but you do know that the floor pan sections are available at a pretty fair price don't you? Restoration design and AA both have them. I used pans from restoration design. Very nice fit and heavy gage metal. The stampings also make them stronger. Not too bad to replace. Lots of luck!
|
|
|
|
| BMXerror |
Sep 20 2007, 04:15 PM
Post
#19
|
|
Senior Member Group: Members Posts: 1,705 Joined: 8-April 06 From: Hesperia Ca Member No.: 5,842 |
Yeah, I'm aware of those. They look really cool, and that's probably what I'll do eventually. I'm just not ready to do that job yet. I want to completely strip down the whole car (three different paint jobs that I can find) and repaint it within the next couple years, and I'll replace what pieces I need at that time. This is just a temporary fix. I have a race in three weeks which I need to be ready AND have the money for. That's another factor.
Thanks for the compliment. I'll post pictures when I get the whole firewall and everything painted. Mark D. |
|
|
|
| Aaron Cox |
Sep 20 2007, 05:46 PM
Post
#20
|
|
Professional Lawn Dart Group: Retired Admin Posts: 24,542 Joined: 1-February 03 From: Corona, CA Member No.: 219 Region Association: Southern California |
i hope your seats have a belt hole in them.
or you are reaaaally short. Harnesses should be at your shoulder level, or a very small angle below your shoulder (10 degrees from what i recall) if they have a steep angle upward toward your shoulders... and you crash. you will compress your spine.... |
|
|
|
|
1 User(s) are reading this topic (1 Guests and 0 Anonymous Users)
0 Members:

|
Lo-Fi Version | Time is now: 8th July 2025 - 10:37 AM |
Invision Power Board
v9.1.4 © 2025 IPS, Inc.