|
|
|
Porsche, and the Porsche crest are registered trademarks of Dr. Ing. h.c. F. Porsche AG.
This site is not affiliated with Porsche in any way. Its only purpose is to provide an online forum for car enthusiasts. All other trademarks are property of their respective owners. |
|
|


| EdwardBlume |
 May 22 2010, 12:04 AM May 22 2010, 12:04 AM
Post
#1
|
|
914 Wizard  Group: Members Posts: 12,338 Joined: 2-January 03 From: SLO Member No.: 81 Region Association: Central California |
The ground was rusted good and now all I have left is a painted nub...
What should I do to re-establish a proper ground? Who cares what it looks like since its under the relay board... Attached thumbnail(s) 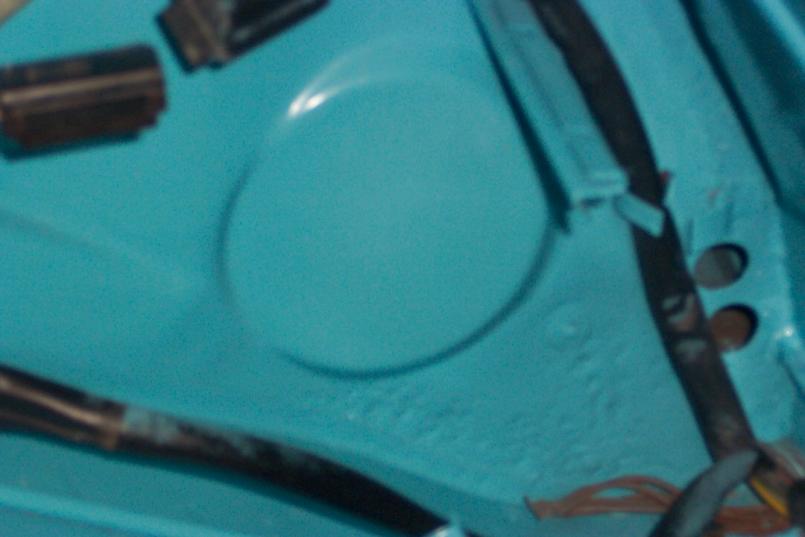
|
   |

 
|
  |
Replies(1 - 13)
| koozy |
May 22 2010, 12:31 AM
Post
#2
|
|
Senior Member Group: Members Posts: 651 Joined: 21-July 07 Member No.: 7,931 Region Association: None |
You could weld a bolt to the panel or drill a hole and put the bolt through with 2 nuts on the inside. (one to hold the bolt and the other to hold the ground wire) If you use the drill method, get some conductive grease (carbon or silver conductive grease can be found at radio shack, osh, home depot, etc... Silver is better for this application) and put some on there before tightening the first nut. This will help to keep it from rusting and help... well... conductivity.
|
|
|
|
| URY914 |
May 22 2010, 05:13 AM
Post
#3
|
|
I built the lightest 914 in the history of mankind. Group: Members Posts: 121,116 Joined: 3-February 03 From: Jacksonville, FL Member No.: 222 Region Association: None |
Drill a hole. Install a bolt.
|
|
|
|
| IronHillRestorations |
May 22 2010, 06:48 AM
Post
#4
|
|
I. I. R. C. Group: Members Posts: 6,732 Joined: 18-March 03 From: West TN Member No.: 439 Region Association: None |
I'll 2nd drilling and installing a bolt. You also want to clean the paint off that ground point too. There's a brass washer fused to the body there.
|
|
|
|
| charliew |
May 22 2010, 08:18 AM
Post
#5
|
|
Advanced Member Group: Members Posts: 2,363 Joined: 31-July 07 From: Crawford, TX. Member No.: 7,958 |
Drill the hole and clean a small area around it off to bare metal on both sides. Use the conducting grease and put a star washer on both sides and double nut the bolt then add the cable and another star washer with another nut. I would use ss fasteners but be careful and use never sieze on them or they might gall. If this was on a non finished paint job you could braze or silver solder or weld the head of the bolt on the backside. It was brazed to avoid the excess heat originally. Brazing is actually a glueing process sorta as the metals actually aren't fused together like in welding.
|
|
|
|
| rick 918-S |
May 22 2010, 09:36 AM
Post
#6
|
|
Hey nice rack! -Celette Group: Members Posts: 20,504 Joined: 30-December 02 From: Now in Superior WI Member No.: 43 Region Association: Northstar Region |
Rob, I would drill a hole through the existing spot. I second the brass lug being fused to the body there. I would also hunt down a brass bolt. Use a tap and thread the hole. Thread in the bolt from the inner panel with a star washer contacting the inner panel. Use a brass nut with a star washer as a lock nut, then attach the wires. Most anal approch of any of the suggestions but no welding involved on that new paint. (IMG:style_emoticons/default/drooley.gif)
|
|
|
|
| underthetire |
May 22 2010, 10:41 AM
Post
#7
|
|
914 Guru Group: Members Posts: 5,062 Joined: 7-October 08 From: Brentwood Member No.: 9,623 Region Association: Northern California |
I probably have a brass bolt or two you can have if you can't find it. I may even have brass nuts (IMG:style_emoticons/default/biggrin.gif) just no brass balls any more....
|
|
|
|
| Katmanken |
May 22 2010, 06:44 PM
Post
#8
|
|
You haven't seen me if anybody asks... Group: Members Posts: 4,738 Joined: 14-June 03 From: USA Member No.: 819 Region Association: Upper MidWest |
PEM stud.
Designed to be press fitted into the proper sized hole and to swage material between the stud and the hole. You can hit them with a BF hammer or, drill the precison hole, put the stud in loose and use a nut on the stud to honk the sheet metal down into place and get the swaging effect. Then loosen the tightened nut, and add the ground. The US military recommmends 3/4 diameter coppper rods pounded down into the soil for at least 15 feet for a proper ground. |
|
|
|
| EdwardBlume |
Jun 8 2010, 07:57 AM
Post
#9
|
|
914 Wizard Group: Members Posts: 12,338 Joined: 2-January 03 From: SLO Member No.: 81 Region Association: Central California |
Here's the thrilling conclusion...
I went with hardened steel. Had to use a dremmel cutting wheel to take off what was left of the bolt. Drilled the hole carefully as the ground point is thicker steel about the size of a dime. Threading the hole was a bit more challenging because of the reach.. Bolted it in, added a washer and two nuts... done! Its funny how you get hung up on stuff and then just do it and its not that bad.... Next? Attached image(s)  
|
|
|
|
| windforfun |
Jun 14 2010, 01:00 PM
Post
#10
|
|
Senior Member Group: Members Posts: 1,863 Joined: 17-December 07 From: Blackhawk, CA Member No.: 8,476 Region Association: None |
Very nice work!!! Don't forget to wrap electrical tape around the harness junction (where the individual wires don't have plastic tubing around them).
|
|
|
|
| scrz914 |
Jun 14 2010, 05:25 PM
Post
#11
|
|
Member Group: Members Posts: 398 Joined: 21-April 04 From: Santa Cruz, CA Member No.: 1,960 Region Association: Central California |
Rob, are those charcoal cannister tubes supposed to be that short or did you cut them down? Mine go all the way acrossed the engine bay, but then it was originally a 1.7.
|
|
|
|
| EdwardBlume |
Jun 15 2010, 08:24 AM
Post
#12
|
|
914 Wizard Group: Members Posts: 12,338 Joined: 2-January 03 From: SLO Member No.: 81 Region Association: Central California |
QUOTE(windforfun @ Jun 14 2010, 12:00 PM)  Very nice work!!! Don't forget to wrap electrical tape around the harness junction (where the individual wires don't have plastic tubing around them). Smart. I was wondering about that as it kind of exposes itself in the tub right there... thanks for the reminder. (IMG:style_emoticons/default/aktion035.gif) |
|
|
|
| EdwardBlume |
Jun 15 2010, 08:26 AM
Post
#13
|
|
914 Wizard Group: Members Posts: 12,338 Joined: 2-January 03 From: SLO Member No.: 81 Region Association: Central California |
QUOTE(scrz914 @ Jun 14 2010, 04:25 PM) Rob, are those charcoal cannister tubes supposed to be that short or did you cut them down? Mine go all the way acrossed the engine bay, but then it was originally a 1.7. The '74 has stub lines as pictured with braided fuel line type connections the rest of the way... no idea if its stock but definitely that way since '86 or so... |
|
|
|
| McMark |
Jun 15 2010, 09:13 AM
Post
#14
|
|
914 Freak! Group: Retired Admin Posts: 20,179 Joined: 13-March 03 From: Grand Rapids, MI Member No.: 419 Region Association: None |
The length of the plastic tubes changed over the years. Both setups are stock for different years.
|
|
|
|
|
1 User(s) are reading this topic (1 Guests and 0 Anonymous Users)
0 Members:

|
Lo-Fi Version | Time is now: 17th June 2024 - 01:10 AM |
Invision Power Board
v9.1.4 © 2024 IPS, Inc.