|
|
|
Porsche, and the Porsche crest are registered trademarks of Dr. Ing. h.c. F. Porsche AG.
This site is not affiliated with Porsche in any way. Its only purpose is to provide an online forum for car enthusiasts. All other trademarks are property of their respective owners. |
|
|


| cary |
 Mar 31 2016, 11:08 PM Mar 31 2016, 11:08 PM
Post
#1
|
|
Advanced Member  Group: Members Posts: 3,900 Joined: 26-January 04 From: Sherwood Oregon Member No.: 1,608 Region Association: Pacific Northwest |
Haven't spent much time with my 73 2.0L. But I needed to take a look at the 4-5 shift. Shifting down from 5-4 it wants to go into 2nd. Not good ...............
I did the Chris bungee and twist the shift rod clockwise procedure. No help .......... Shifter in and out 3 or 4 times and I finally figured it out. It took a mirror and a mini flashlight. I should preface. Oilite bushing at the transmission. Tangerine bushing at the firewall. Refurbished shifter. Clutch tube reattached ahead of the shifter. What I found was that the bottom half of the primary tunnel tube support let go. Which allows the clutch tube to to rise up and drag on the shift rod. (IMG:style_emoticons/default/sad.gif) 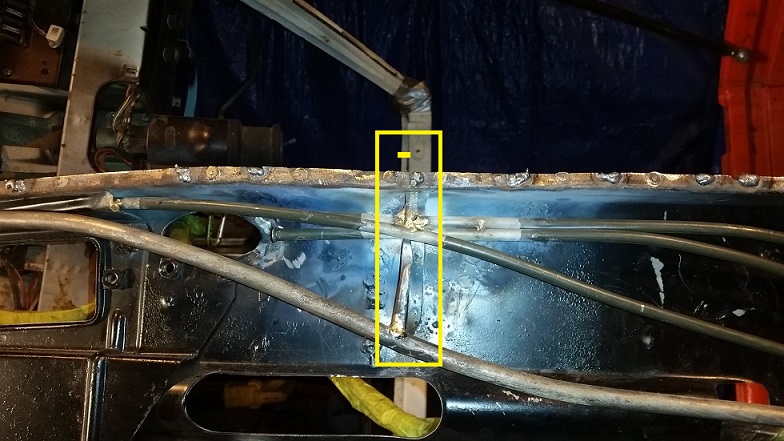 This is a shot of my rustoration project I guess the floor pan will be up for some surgery ............. With Mark's car opened up I'll be able figure how I can open it up and do the needed work with the smallest hole. |
   |

 
|
  |
Replies(1 - 11)
| sb914 |
Apr 1 2016, 05:25 AM
Post
#2
|
|
Surf Guru Group: Members Posts: 4,316 Joined: 25-November 12 From: Brookings,Oregon Member No.: 15,191 Region Association: Southern California |
|
|
|
|
| cary |
Apr 1 2016, 09:05 AM
Post
#3
|
|
Advanced Member Group: Members Posts: 3,900 Joined: 26-January 04 From: Sherwood Oregon Member No.: 1,608 Region Association: Pacific Northwest |
Won't be till the first of the week ........... Got to retrieve the open trailer from the shop.
|
|
|
|
| cary |
Apr 2 2016, 07:51 AM
Post
#4
|
|
Advanced Member Group: Members Posts: 3,900 Joined: 26-January 04 From: Sherwood Oregon Member No.: 1,608 Region Association: Pacific Northwest |
Got the trailer home. Installed the shifter so I could use 1 & R and loaded her on the trailer. Ready for Monday.
Here's a shot of the bottom of Mark's car. Looks like the bottom of his primary support has worn thru also. I guess I'll fab up a couple pieces. 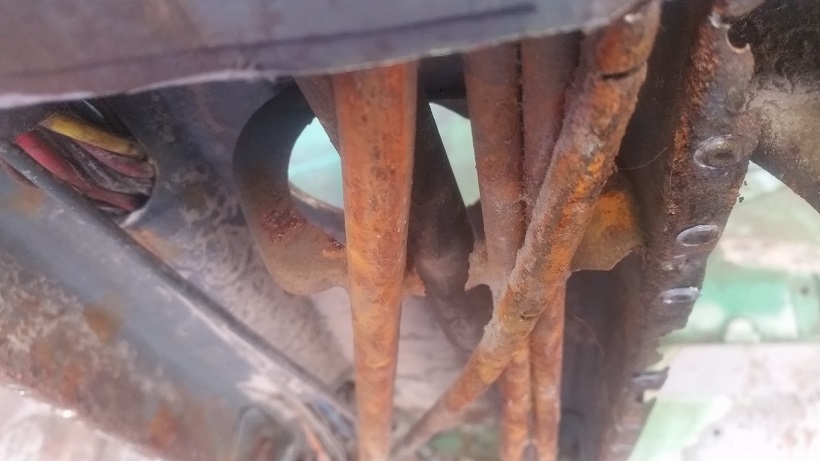 In close examination I do see a couple cutting wheel cuts on the bottom of Mark's accelerator tube. The bottom of the floor pan was still covered with some of the blasting media so I didn't examine it too closely. It must have been opened up before. Funny thing is they must not have opened up a big enough hole. For they cut a hole in the tunnel top too. Or vice versa. They opened up the top and figured out they didnt have enough space to work. 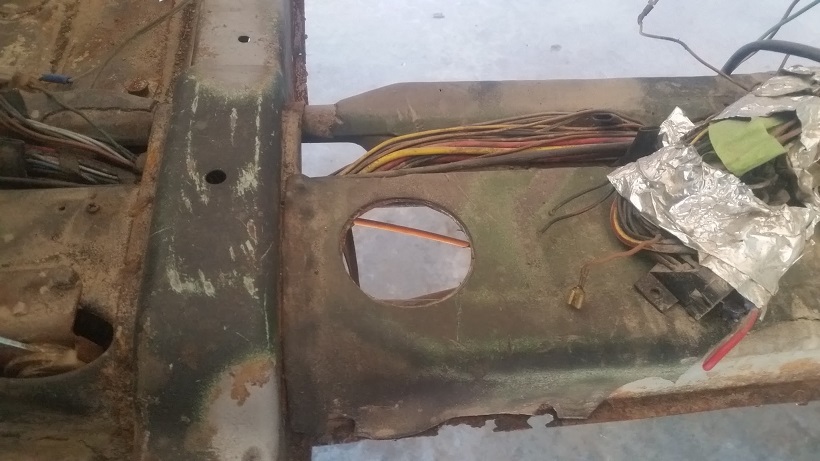 |
|
|
|
| 76-914 |
Apr 2 2016, 07:58 AM
Post
#5
|
|
Repeat Offender & Resident Subaru Antagonist Group: Members Posts: 13,509 Joined: 23-January 09 From: Temecula, CA Member No.: 9,964 Region Association: Southern California |
Great detective work! (IMG:style_emoticons/default/beerchug.gif)
|
|
|
|
| cary |
Apr 8 2016, 08:37 AM
Post
#6
|
|
Advanced Member Group: Members Posts: 3,900 Joined: 26-January 04 From: Sherwood Oregon Member No.: 1,608 Region Association: Pacific Northwest |
Hopefully I'll get to it today ..............
Get the inside of the long on Mark's car wrapped first thing. Then I can set it down on the frame bench. Then I'll have the lift opened up so I can do surgery. We're thinking a piece of bar stock. Thicker, should last longer. |
|
|
|
| rhodyguy |
Apr 8 2016, 08:55 AM
Post
#7
|
|
Chimp Sanctuary NW. Check it out. Group: Members Posts: 22,093 Joined: 2-March 03 From: Orion's Bell. The BELL! Member No.: 378 Region Association: Galt's Gulch |
Mark is going deep on this one. Are you getting close to turning the corner?
|
|
|
|
| cary |
Apr 8 2016, 09:14 AM
Post
#8
|
|
Advanced Member Group: Members Posts: 3,900 Joined: 26-January 04 From: Sherwood Oregon Member No.: 1,608 Region Association: Pacific Northwest |
The wheelhouse is the 90 degree hairpin ...........
But now he's thinking we might do a partial left quarter panel ......... Every time he comes out we add to the project list. LOL. To keep things in perspective I'm hard pressed to book 40 hours in 8-9 working days. Pretty careful on his time vs. my time. And in the back of your mind you have to remember this will be a $15,000 car when completed, not $115,000. |
|
|
|
| cary |
Apr 9 2016, 05:25 PM
Post
#9
|
|
Advanced Member Group: Members Posts: 3,900 Joined: 26-January 04 From: Sherwood Oregon Member No.: 1,608 Region Association: Pacific Northwest |
I ran out to the shop for a couple hours of ME time.
Put the DD on the lift and started the surgery measurements. Pretty easy when I have Mark's car all opened up. 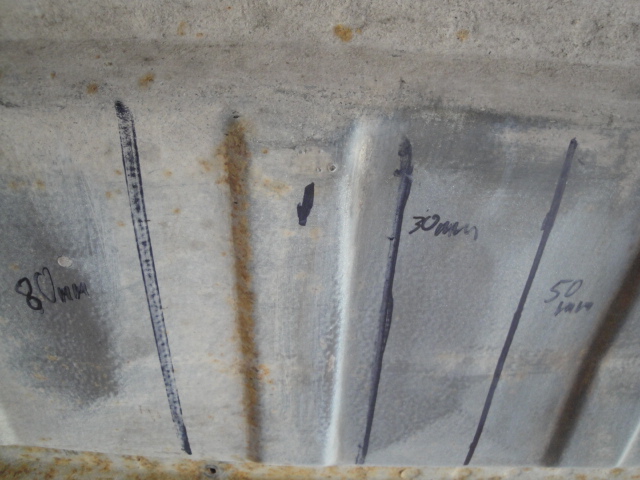 #1. 30mm is the measurement from the back cross member spot welds to the tube support. #2. 80mm is the measurement for the front cut. 80mm from the tube support. #3. 50mm is the back cut. From the tube support. Hash mark is the line for the back spot welds. No welds in the tunnel cavity. Perfect. No knicks and no cuts. 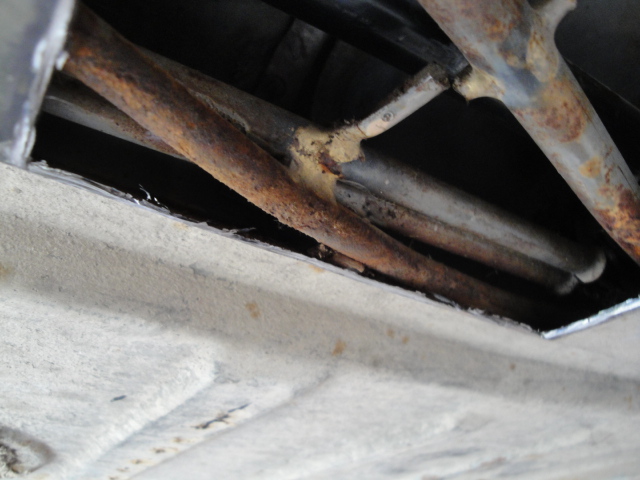 Fuel lines.  Pictures of the damage. The top of the support is torn too. 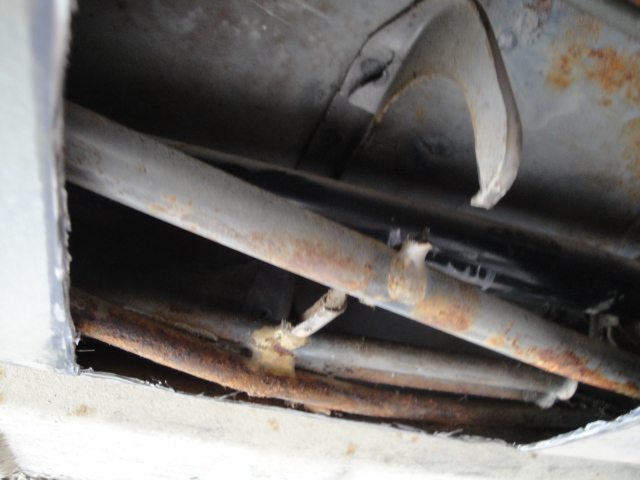  You can see the scratches on the bottom of the shift rod ................ 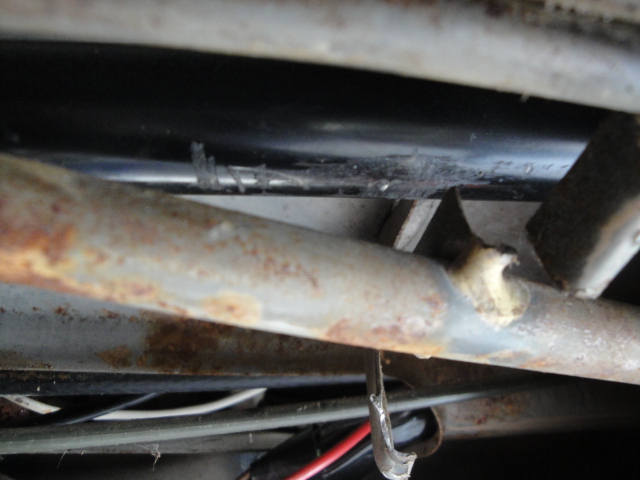 Wrapped the fuel lines in a plumbers heat shield and torched off the broken portion. Each one took maybe 15 seconds. (IMG:style_emoticons/default/smile.gif) 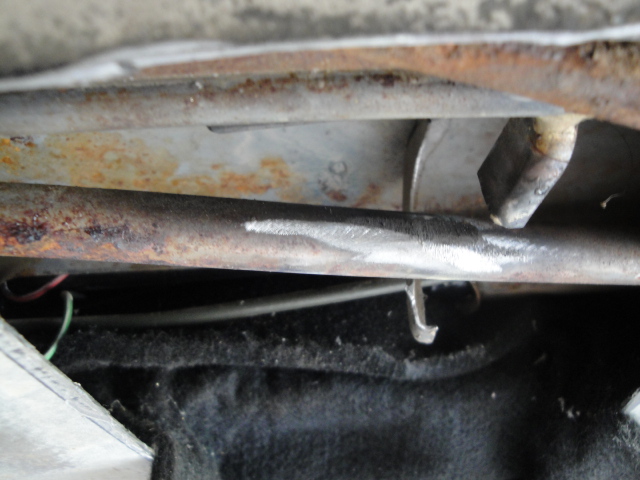 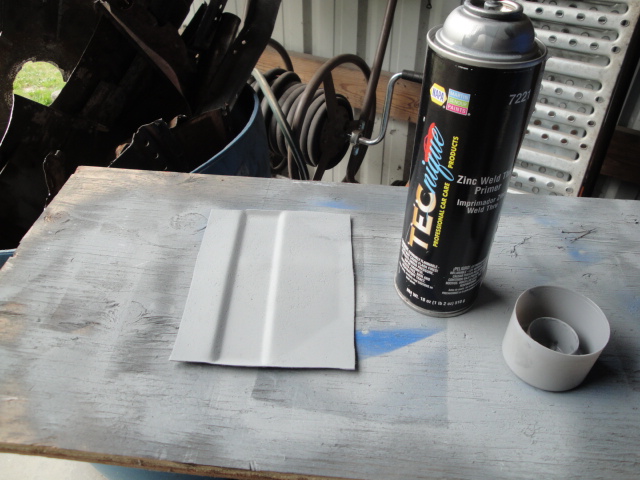 Already to go for Monday. Autocrossing tomorrow. |
|
|
|
| cary |
Apr 11 2016, 09:32 PM
Post
#10
|
|
Advanced Member Group: Members Posts: 3,900 Joined: 26-January 04 From: Sherwood Oregon Member No.: 1,608 Region Association: Pacific Northwest |
I start with removing the broken upper portion. Drilled out the one spot from the drivers seat and it fell to the floor.
 I thought I'd add that shot for everyone's orientation. Then measured and created my new Bionic center support. 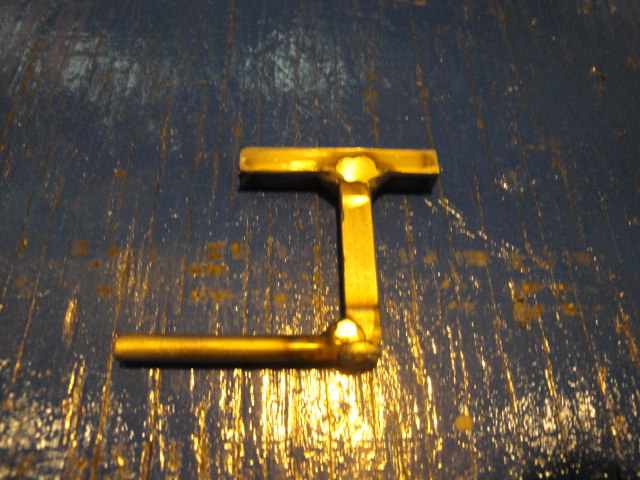 In she went ............... 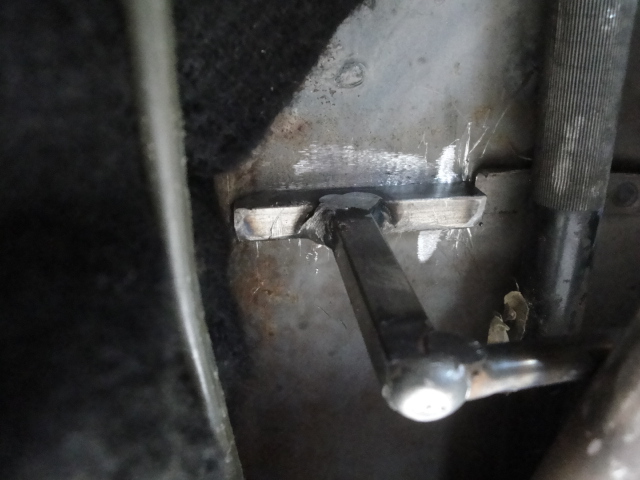  Here's shot of the abrasion on the shift rod. Cleaned it up with my mini belt sander. 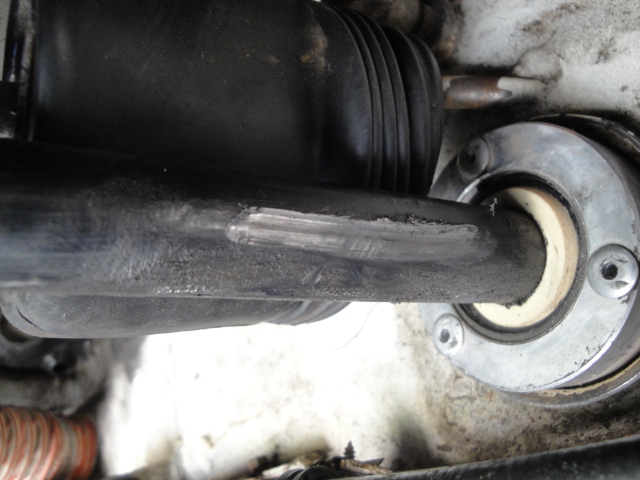 Beings that every car that I've tore down this far has a worn thru support. I decided that I'd shim up the shifter with some welded on washers. 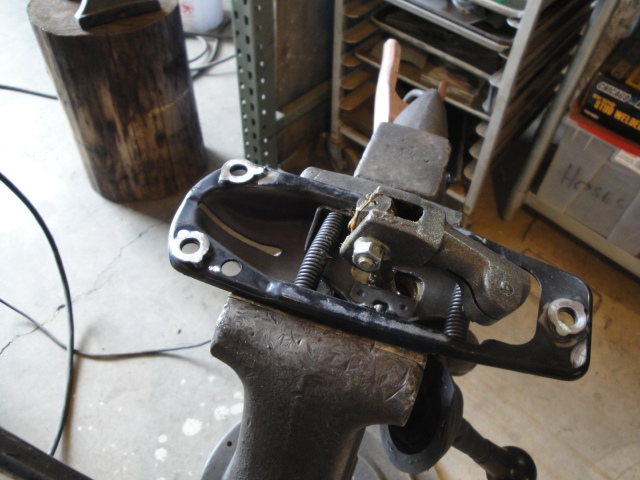 I'd like say every thing ended happy ever after. NOT. After aligning the shifter I took her for a spirited test drive. Left the shop everything was fine. By the time I got back I could barely make the 4-5 shift again. I traded out shifter, no change. (IMG:style_emoticons/default/headbang.gif) Tomorrow I'll start with pulling the shift rods and polishing the portions that go thru the bushings be. The best way to describe the feeling of the shift is binding resistance. But only the 4-5. |
|
|
|
| cary |
Apr 13 2016, 08:11 PM
Post
#11
|
|
Advanced Member Group: Members Posts: 3,900 Joined: 26-January 04 From: Sherwood Oregon Member No.: 1,608 Region Association: Pacific Northwest |
Started the day finishing a brake job in Dad's garage. All 4 on the 2002 A6.
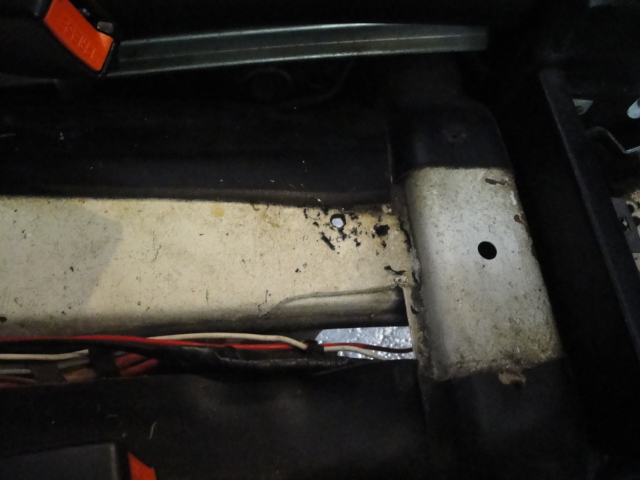
Then on to the project at hand. Pulled the shift rod and my CFR firewall bushing. Polished the end of then rod on the wire brush on the bench grinder. Cleaned and lubed the firewall bushing. I'm going order the replacement insert from Chris. The burs on the rod kind of buggered up the ceramic bearing. Put it back in and the 4-5 was still very tough and with resistance. (IMG:style_emoticons/default/hissyfit.gif) (IMG:style_emoticons/default/hissyfit.gif) DAMN IT ....................... Went to the ear method ................. Finally found it under the vinyl flap. After Christmas I bought and installed new Seatbelt Planet seat belts. Stopped at ACE and bought new bolts. They were too long and when you rolled over to the 4-5 shift, the rod dragged on the end of the bolt. 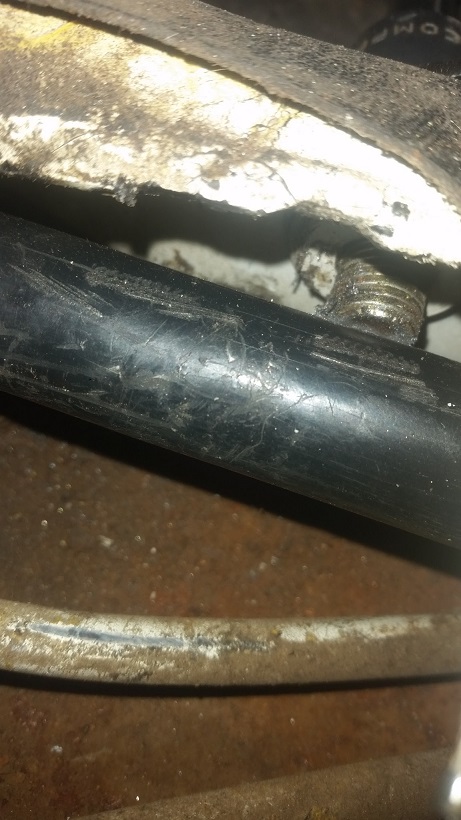 |
|
|
|
| cary |
Apr 13 2016, 08:14 PM
Post
#12
|
|
Advanced Member Group: Members Posts: 3,900 Joined: 26-January 04 From: Sherwood Oregon Member No.: 1,608 Region Association: Pacific Northwest |
Then welded the floor pan back in.
Used a flattened piece of copper tubing to protect the tube. 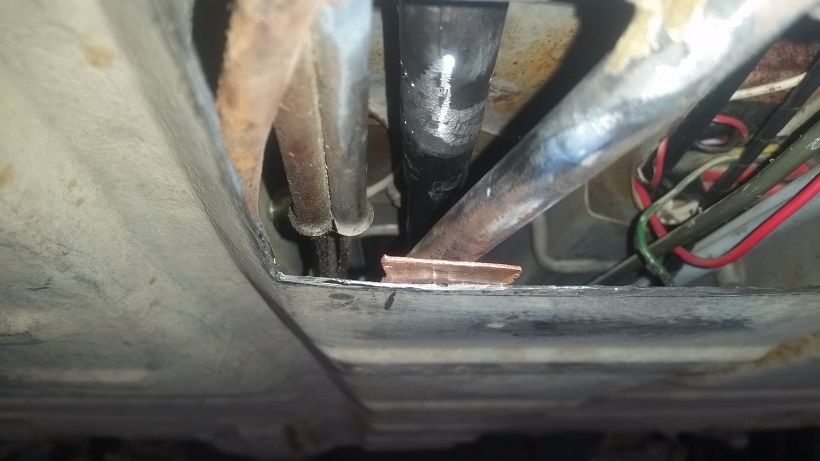 All sewed up .............. 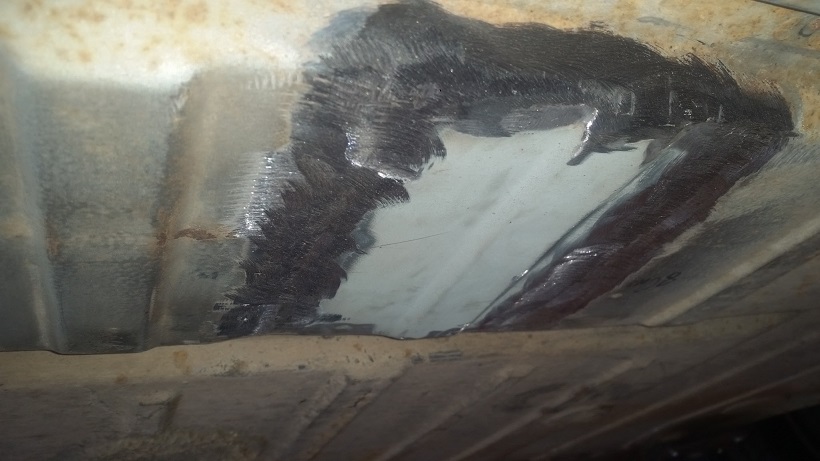 |
|
|
|
|
1 User(s) are reading this topic (1 Guests and 0 Anonymous Users)
0 Members:

|
Lo-Fi Version | Time is now: 10th June 2024 - 10:46 PM |
Invision Power Board
v9.1.4 © 2024 IPS, Inc.