|
|
|
Porsche, and the Porsche crest are registered trademarks of Dr. Ing. h.c. F. Porsche AG.
This site is not affiliated with Porsche in any way. Its only purpose is to provide an online forum for car enthusiasts. All other trademarks are property of their respective owners. |
|
|


| Tdskip |
 May 14 2020, 07:54 AM May 14 2020, 07:54 AM
Post
#1
|
|
Advanced Member  Group: Members Posts: 3,737 Joined: 1-December 17 From: soCal Member No.: 21,666 Region Association: None |
Good morning, hope it has been a good week so far.
I am going to be dropping the engine on the AZ car (one with the oil blow by) soon and will be finishing repairing all of the prior owner AC line holes with new metal etc. I will also be repairing some minor rust on the batter tray (fortunately then tray “frame” and support are in good shape. This strikes me as the right time to reapray the engine bay, and was wondering if others have done this and any tips or best practices they have to share. Obviously same paint color as exterior and same paint family/sourcing as will be used on exterior, but any prep and other tips? Thanks in advance for the ideas. |
   |

 
|
  |
Replies(1 - 16)
| Larmo63 |
May 14 2020, 08:09 AM
Post
#2
|
|
Advanced Member Group: Members Posts: 4,267 Joined: 3-March 14 From: San Clemente, Ca Member No.: 17,068 Region Association: Southern California |
It's a thankless and tedious job because of the complicated parts/surfaces. You could spend weeks in there to do it right. Lighter colors are worse than colors like black. Black hides some flaws, white or yellow doesn't.
Good luck. |
|
|
|
| BeatNavy |
May 14 2020, 08:19 AM
Post
#3
|
|
Certified Professional Scapegoat Group: Members Posts: 2,954 Joined: 26-February 14 From: Easton, MD Member No.: 17,042 Region Association: MidAtlantic Region |
QUOTE(Larmo63 @ May 14 2020, 10:09 AM)  It's a thankless and tedious job because of the complicated parts/surfaces. You could spend weeks in there to do it right. Lighter colors are worse than colors like black. Black hides some flaws, white or yellow doesn't. Good luck. (IMG:style_emoticons/default/agree.gif) It's particularly tedious and dirty if you end up taking really old undercoating off and inspecting for rust. It's also hard to determine where the engine bay stops and the rest of the car starts from a cleaning / painting perspective (scope creep). Remove as much (and bag and label) as much as you can. I didn't want to open the brake lines and rebleed, so I pushed them out of the way along with the proportioning valve. Probably should have though. Same thing with fuel lines and other components. Removing and reinstalling later is better than trying to poorly mask off components that will get hit with overspray. Either way, it's probably going to take you longer than you think. I did remove my whole rear suspension. Just unbolted the top shocks and trailing arms and dropped out of the way while I suspended the calipers somewhere. |
|
|
|
| sreyemj |
May 14 2020, 09:00 AM
Post
#4
|
|
Member Group: Members Posts: 89 Joined: 12-January 20 From: SA, TX Member No.: 23,821 Region Association: None |
I just did this. Ended up removing everything and using wire wheels followed by abrasive blaster for the corners. It was miserable.
|
|
|
|
| Tdskip |
May 14 2020, 09:06 AM
Post
#5
|
|
Advanced Member Group: Members Posts: 3,737 Joined: 1-December 17 From: soCal Member No.: 21,666 Region Association: None |
QUOTE(sreyemj @ May 14 2020, 10:00 AM) I just did this. Ended up removing everything and using wire wheels followed by abrasive blaster for the corners. It was miserable. Thanks for all of the responses. The above is pretty much what I expected, but I’m wondering if he mobile soda blasting service would be able to make short work of this and avoid the misery. I know this has come up as a topic in the past, but I’ve heard good things about people that have use this successfully. I talked to a company that does this about a year ago and I have to say it’s pretty tempting – apparently they roll up in a rig that has a generator on it and they roll the car onto a giant plastic drop cloth and when they’re done just for the drop cloth on itself and off they go. Anyone here have experience with that ? |
|
|
|
| kroelofsen |
May 14 2020, 09:10 AM
Post
#6
|
|
Member Group: Members Posts: 101 Joined: 27-June 19 From: The Netherlands Member No.: 23,255 Region Association: Europe |
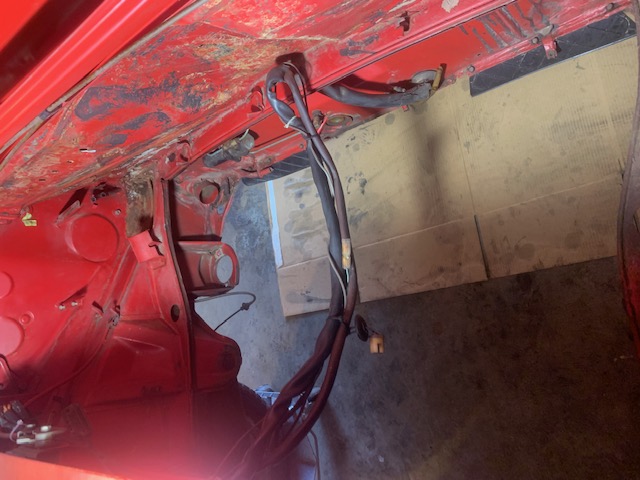
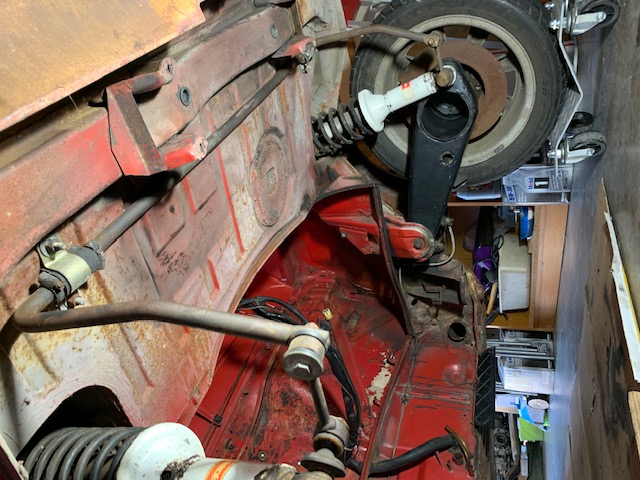
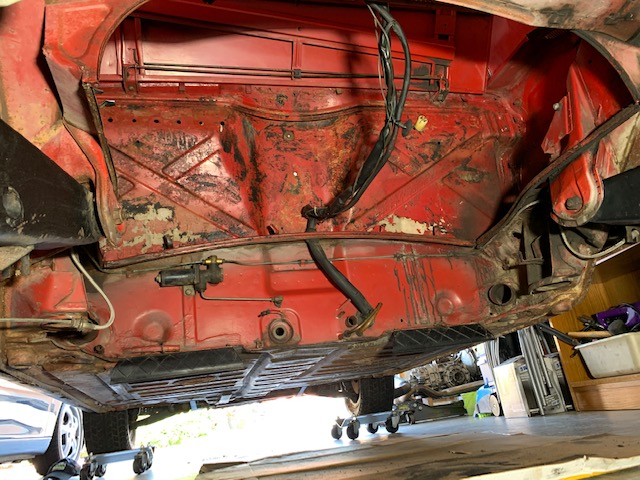
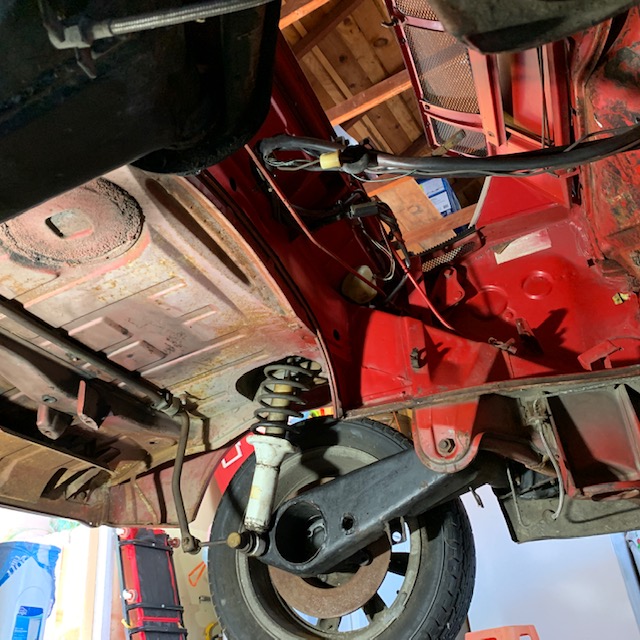
Hi, I'm in the same process right now... Lots of corners etc to work on. Also lots will be covered by equipment in the engine bay. Because I had to do welding on hell hole and jack points I stripped most of the engine bay.
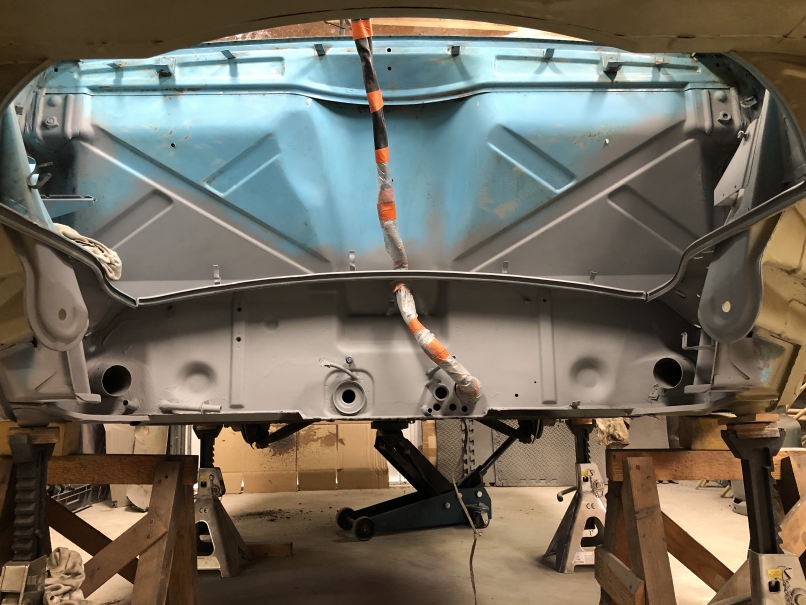 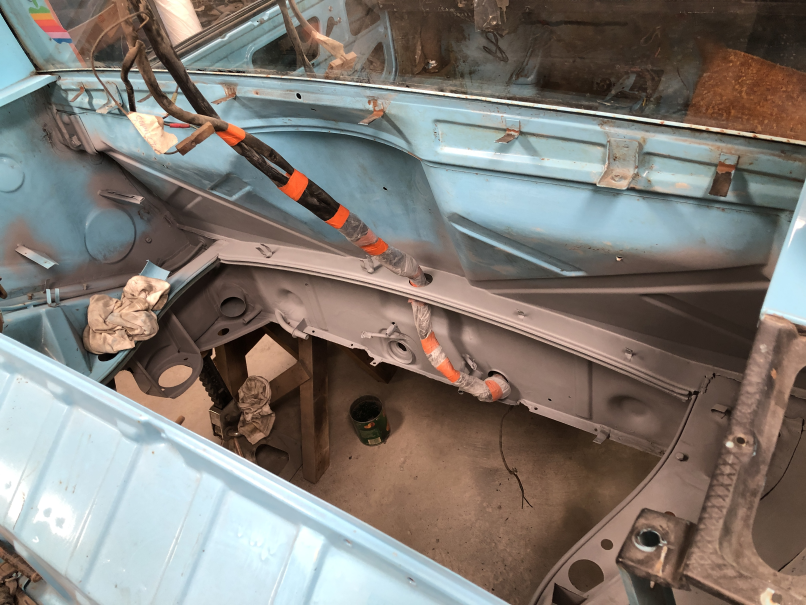 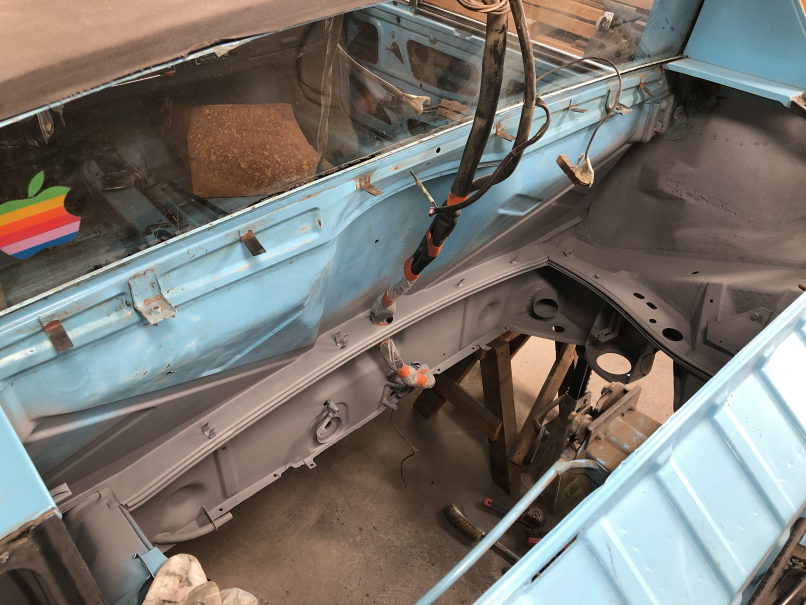 Hope this helps... I covered the wiring loom / snorkel with plastic and wrap it with tape to keep it out of the way... PS Battery tray not yet in... And before spaying I will remove the rear window... |
|
|
|
| Tdskip |
May 14 2020, 09:19 AM
Post
#7
|
|
Advanced Member Group: Members Posts: 3,737 Joined: 1-December 17 From: soCal Member No.: 21,666 Region Association: None |
Thanks @kroelofsen , you are doing nice work there!
These are the guys I spoke with, happily it looks like they’re still in business. |
|
|
|
| dakotaewing |
May 14 2020, 09:31 AM
Post
#8
|
|
Senior Member Group: Members Posts: 1,163 Joined: 8-July 03 From: DeSoto, Tx Member No.: 897 Region Association: Southwest Region |
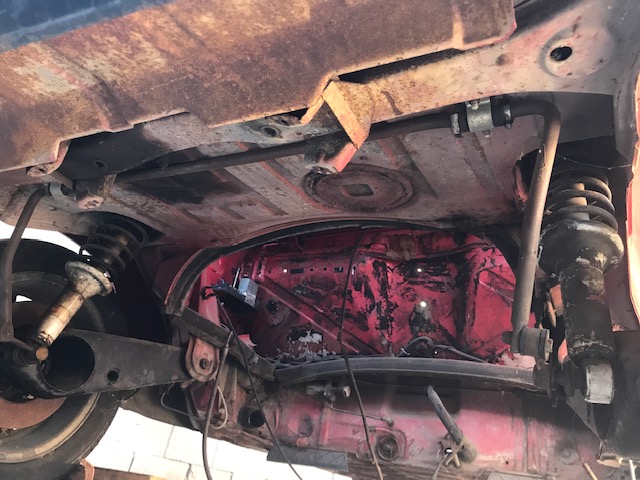
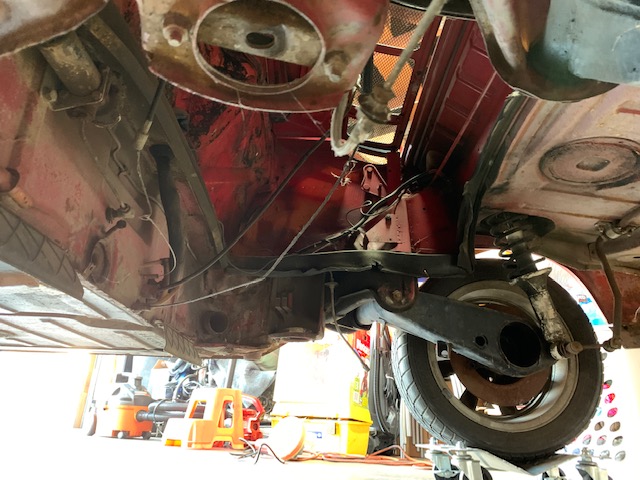
I have done this as well.
Go to HF and buy about 3 grinders for the job if you don't already have them. Get a couple of the cheap electric drills at HF for this as well. You'll need an assortment of flap disks with various grits and wire wheels, in sizes and shapes. You'll figure out what works best and choose your favorites. Having 3 grinders and 2 drills will save you significant time as you won't have to change them out each time you want a different removal method. Get an extension of some sort for the wire wheels to get into the corners using the drills.There are a lot of them and they are all hard to access. Don't use air tools or battery powered tools as these will slow you down, and just aren't the tool for the job. Add a large access hole on each side of the battery tray support for access. You may consider removing the tray support to clean up the right long, and replace the support with a new one. Dimple die the holes for strength if you have one. Remove everything now for the best job - Make sure you have a good set of gloves, a respirator and eye goggles. If you don't use these your ability to get the job will be drastically impeded by either the dust in your lungs, eyes, or the pain from your bleeding hands. I'll see if I can find a pic - 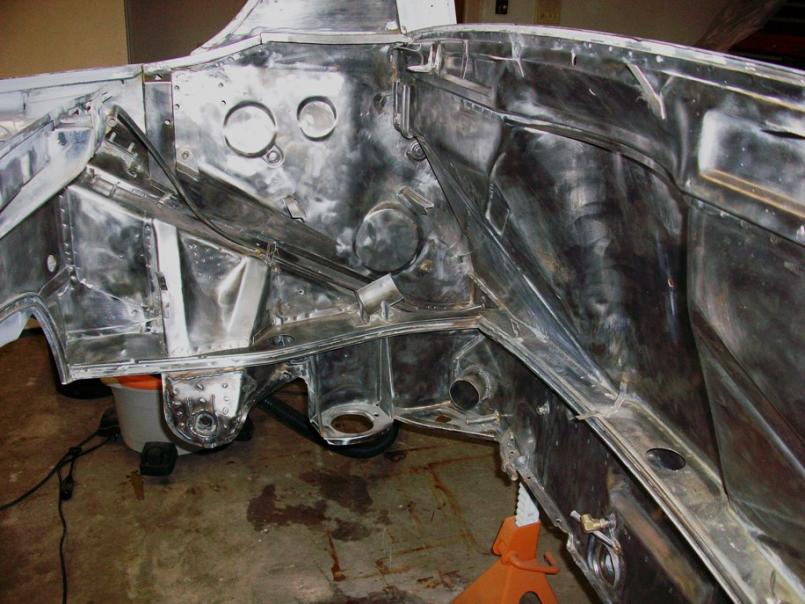 Attached image(s) 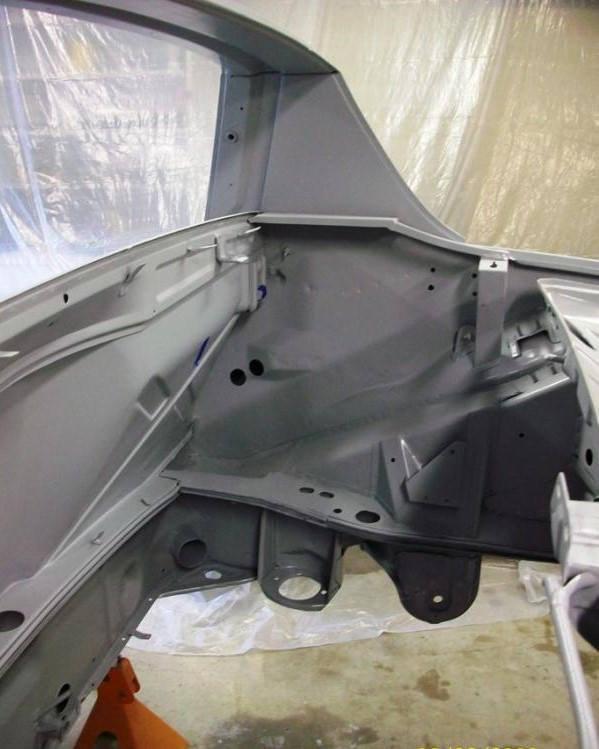 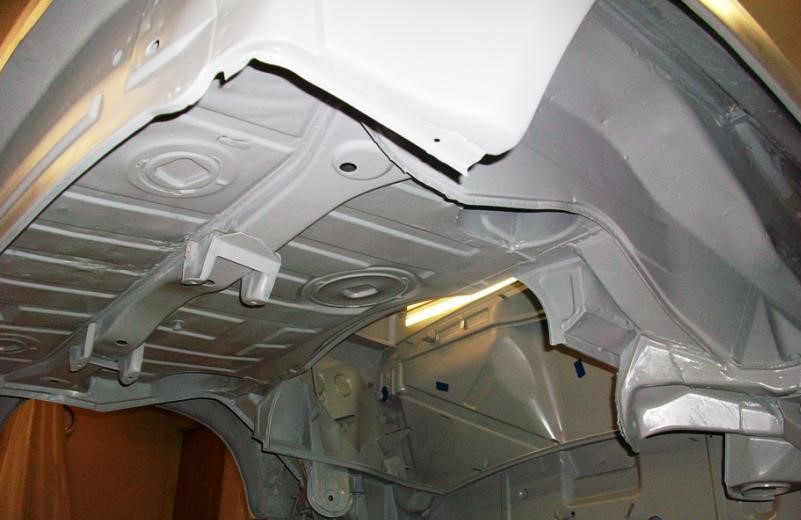
|
|
|
|
| Tdskip |
May 14 2020, 10:06 AM
Post
#9
|
|
Advanced Member Group: Members Posts: 3,737 Joined: 1-December 17 From: soCal Member No.: 21,666 Region Association: None |
Wow!
|
|
|
|
| ValcoOscar |
May 14 2020, 10:07 AM
Post
#10
|
|
Garage Life Group: Members Posts: 2,531 Joined: 19-November 13 From: SoCal Member No.: 16,669 Region Association: Southern California |
QUOTE(dakotaewing @ May 14 2020, 08:31 AM) I have done this as well. Go to HF and buy about 3 grinders for the job if you don't already have them. Get a couple of the cheap electric drills at HF for this as well. You'll need an assortment of flap disks with various grits and wire wheels, in sizes and shapes. You'll figure out what works best and choose your favorites. Having 3 grinders and 2 drills will save you significant time as you won't have to change them out each time you want a different removal method. Get an extension of some sort for the wire wheels to get into the corners using the drills.There are a lot of them and they are all hard to access. Don't use air tools or battery powered tools as these will slow you down, and just aren't the tool for the job. Add a large access hole on each side of the battery tray support for access. You may consider removing the tray support to clean up the right long, and replace the support with a new one. Dimple die the holes for strength if you have one. Remove everything now for the best job - Make sure you have a good set of gloves, a respirator and eye goggles. If you don't use these your ability to get the job will be drastically impeded by either the dust in your lungs, eyes, or the pain from your bleeding hands. I'll see if I can find a pic - AWESOME Job...Prep is 95% of the work!!!! (IMG:style_emoticons/default/beerchug.gif) Paint is easy (IMG:style_emoticons/default/smile.gif) Oscar |
|
|
|
| Cairo94507 |
May 14 2020, 10:09 AM
Post
#11
|
|
Michael Group: Members Posts: 10,385 Joined: 1-November 08 From: Auburn, CA Member No.: 9,712 Region Association: Northern California |
The end result is directly proportionate to the amount of prep work you put into it. I say take your time and remove all components you are able. Use aluminum foil and/or good quality painter's tape to wrap stuff as it is easy to contour to the items and use. Sand and clean the heck out it more times than you believe necessary. Use some air pressure to blow it all out and get all the dust and gunk out of the engine bay. Then go over it with a wax and grease remover several times. Tape tightly and then make sure that you have great lighting so you can see in all the nooks and crannies. Take your time and you will be rewarded with an engine bay that looks like it did when new. (IMG:style_emoticons/default/beerchug.gif)
|
|
|
|
| ndfrigi |
May 14 2020, 12:08 PM
Post
#12
|
|
Advanced Member Group: Members Posts: 2,967 Joined: 21-August 11 From: Orange County Member No.: 13,474 Region Association: Southern California |
Hi Tom, I’m also in the process of prioritizing the engine bay to prep it so I can install the engine then do other part of the car. Trying to clean most of it and if I can keep original paint like of the engine bay except the firewall may really need some painting after wire brushing those sticky adhesive.
      |
|
|
|
| Tdskip |
May 14 2020, 12:10 PM
Post
#13
|
|
Advanced Member Group: Members Posts: 3,737 Joined: 1-December 17 From: soCal Member No.: 21,666 Region Association: None |
Thanks again for all of the responses.
I talked to that firm this morning and sent them pictures of a 914 engine bay, they’re going to come back to me with a price estimate which I will share with everyone here. One important update – they require the car be brought to them now rather than doing mobile work, totally understand that from their point of view. |
|
|
|
| Superhawk996 |
May 14 2020, 01:29 PM
Post
#14
|
|
914 Guru Group: Members Posts: 7,221 Joined: 25-August 18 From: Woods of N. Idaho Member No.: 22,428 Region Association: Galt's Gulch |
FYI -- if you media blast that BEWARE. Holes in the upper frame by the trunk leading edge lead all the way down into the longitudinals. Likewise holes are in the rear bulkhead that resides in front of the trunk.
Personally when I've media blasted, I find residual sand coming out of everywhere. If you don't carefully clean out these hiding places, the media will blow out only when you're ready to apply the final coat of paint. (IMG:style_emoticons/default/hissyfit.gif) When it's all said and done, be sure to go back and clean out drain holes on suspension console, longs, etc. |
|
|
|
| mepstein |
May 14 2020, 01:57 PM
Post
#15
|
|
914-6 GT in waiting Group: Members Posts: 19,970 Joined: 19-September 09 From: Landenberg, PA/Wilmington, DE Member No.: 10,825 Region Association: MidAtlantic Region |
I would try to find a teenager that wants to work, set them up with all the tools and protective equipment. Blasting will makes a mess and takes a lot of time to clean up.
|
|
|
|
| Jamie |
May 14 2020, 01:58 PM
Post
#16
|
|
Senior Member Group: Members Posts: 1,129 Joined: 13-October 04 From: Georgetown,KY Member No.: 2,939 Region Association: South East States |
Removing the original glue that secured the firewall back-pad is another nasty part of the process.
|
|
|
|
| Cairo94507 |
May 14 2020, 03:13 PM
Post
#17
|
|
Michael Group: Members Posts: 10,385 Joined: 1-November 08 From: Auburn, CA Member No.: 9,712 Region Association: Northern California |
I can tell you from experience that when my chassis was blasted, it was then purportedly blown out a couple times by the guy doing the work to remove all of the remaining blasting material. I then transported that chassis across the country, 2,500 miles in the back of a truck. You might think anything still remaining would get shook out during that 4 day drive.....nope. When Kent opened up the chassis to repair it we found a lot of blasting material stuck up in the sail panels and elsewhere. I would try anything else before blasting, which would be a method of last resort. (IMG:style_emoticons/default/beerchug.gif)
|
|
|
|
|
1 User(s) are reading this topic (1 Guests and 0 Anonymous Users)
0 Members:

|
Lo-Fi Version | Time is now: 15th July 2025 - 03:41 AM |
Invision Power Board
v9.1.4 © 2025 IPS, Inc.