|
|
|
Porsche, and the Porsche crest are registered trademarks of Dr. Ing. h.c. F. Porsche AG.
This site is not affiliated with Porsche in any way. Its only purpose is to provide an online forum for car enthusiasts. All other trademarks are property of their respective owners. |
|
|


| ahdoman |
 Mar 16 2008, 08:32 PM Mar 16 2008, 08:32 PM
Post
#1
|
|
It's phonetic...Ah-D-O-Man (Audioman)  Group: Members Posts: 667 Joined: 7-November 05 From: Santa Clarita, Ca. Member No.: 5,084 Region Association: Southern California |
Due to a 5 lug conversion in process I am going to need to flare my rear fenders to fit some 225/16's on the rear. I have heard and been told by people that it has been done using all sorts of implements; from baseball bats to lead pipe to old strut cartridges! I also have yet to see the results look decent. So does anybody have and personal experience and pics to back it up or is this truely an "Urban Legend"?
|
   |

 
|
  |
Replies
| LvSteveH |
Mar 19 2008, 02:14 AM
Post
#2
|
|
I put the Poor in Porsche Group: Members Posts: 1,080 Joined: 22-April 03 From: Las Vegas, Nevada Member No.: 600 |
Good timing, I just finished up a car tonight. Lots of good advice so far. One thing I've never liked about the bat method is that you usually end up with a deformed lip that flares out to accommodate more tire. It can look decent if done well, but typically doesn't have that flat look of a stock fender.
I wanted to keep the stock contour and fit 16x7's with 205/50/16's. Rather than use a bat I mainly worked the inner lip. Any time you significantly bend the metal the paint is going to crack, it's a given. So I opted for controlled cracking. I took a razer blade and scribed the opening, where the inner lip and outside edge meet at the corner. I used blue tape on the outside to help protect the paint and give me someplace to mark where and how much to bend. I marked the center of contact, about 2" either side of that, then another 2" outside of that. The center 4" got the most severe bend, a full 90 degrees. No way to avoid cracking the paint there. Then I used a pair of sheet metal pliers that are about 3" wide and allow you to grab the inner lip and bend it up about 45 degrees. Do a little at a time and work your way across the lip. From there, I used the palm of my hand as a dolly and with a hard rubber hammer worked the inner lip up. The center to 90 degrees, and the rest of lip gradually transitions into the stock lip. Like with any method, there is a risk of cracking the paint. The car is very dirty in the photos, but the paint is pretty nice, so I took my time. There's about 3/16" of clearance, give or take, and thanks to the 914's negative camber it should never hit. You don't need miles of clearance. In the end I painted the inside black, and used red touch-up paint to seal the line scribed by the razor blade and create a smooth edge where any small chips formed. I'll color sand the lower edge in the morning to blend in the touch up paint. All in all I'm very happy with how it turned out. 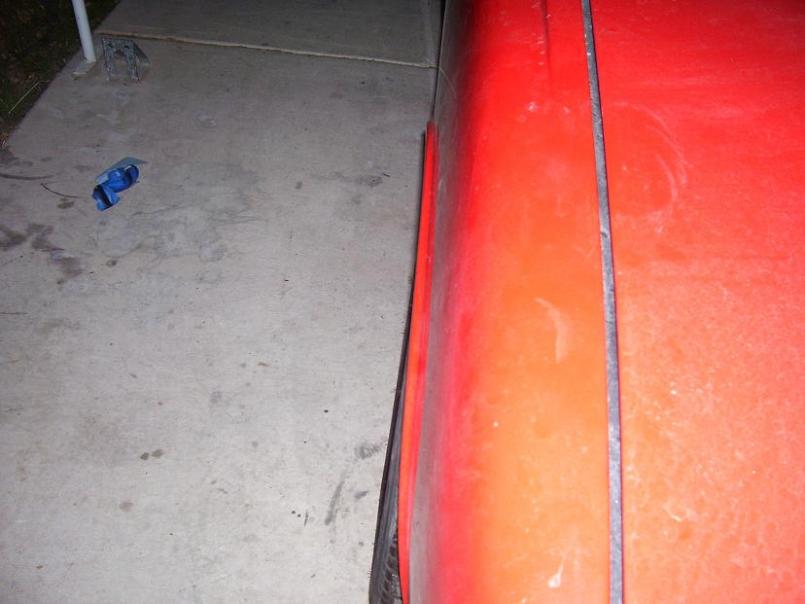 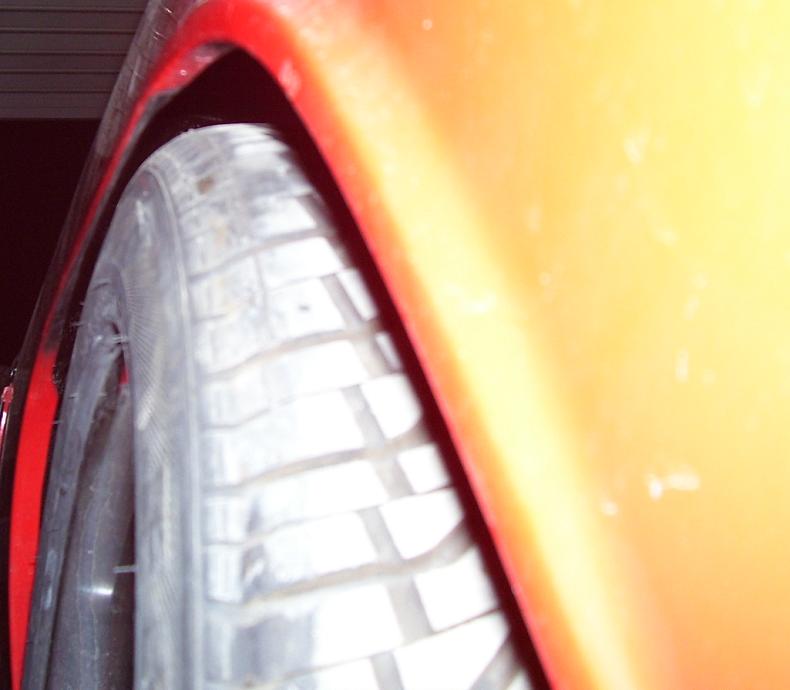 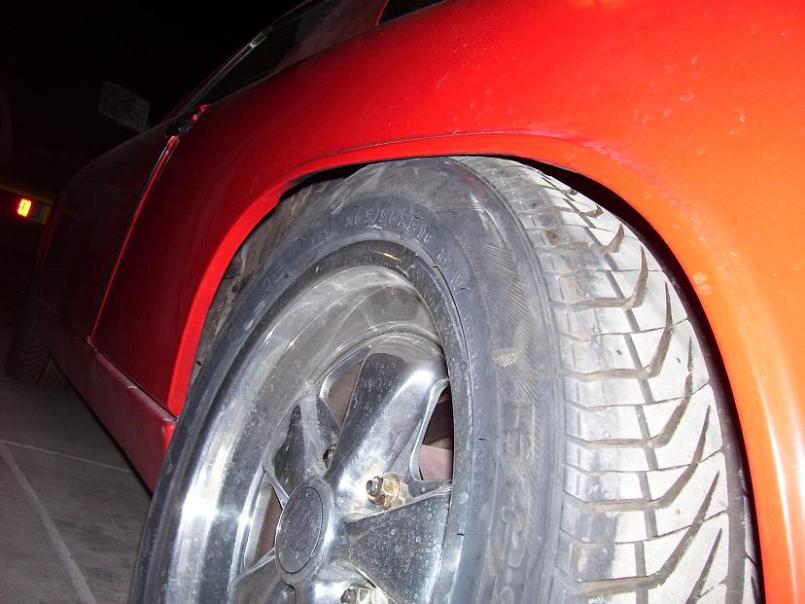 |
|
|
|
Posts in this topic
 ahdoman Flaring the rear fenders with a bat, pipe or ? Mar 16 2008, 08:32 PM
 Phoenix 914-6GT No pics at the moment, but not an urban legend. We... Mar 16 2008, 08:35 PM jim_hoyland :popcorn: Looks like a good " How To 'thr... Mar 16 2008, 08:36 PM Aaron Cox i have done it :) Mar 16 2008, 08:36 PM
 KaptKaos
i have done it :)
And you are???? :evilgrin:... Mar 16 2008, 09:00 PM jd74914 I tried stretching my fenders with the bat must no... Mar 16 2008, 08:40 PM John I did mine with a wooden dowel (probably 2").... Mar 16 2008, 08:51 PM ahdoman See, this is exacly my point; it seems like everyb... Mar 16 2008, 09:03 PM Dave_Darling It's been done for real, but I don't think... Mar 16 2008, 09:04 PM Phoenix 914-6GT You MUST do it slow or it will not look very good.... Mar 16 2008, 09:06 PM rick 918-S The term "stretched" I think gets mis-us... Mar 16 2008, 09:10 PM Phoenix 914-6GT
The term "stretched" I think gets mis-u... Mar 16 2008, 09:18 PM sww914 Evidence. Mar 16 2008, 09:14 PM jim_hoyland Did a search on " baseball bat" and look... Mar 16 2008, 09:16 PM Wanna9146 Tire Rack loans-out "fender rollers"...
... Mar 16 2008, 09:19 PM Grngoat If that's the same fender roller tool that Eas... Mar 16 2008, 10:06 PM lotus_65 i also wonder how it would do with our non-concent... Mar 17 2008, 04:03 AM John Kelly As already mentioned, it is not stretching. It is... Mar 17 2008, 05:58 AM ahdoman Thank You John, I was hoping you'd give us a l... Mar 17 2008, 08:49 AM John Kelly
Thank You John, I was hoping you'd give us a ... Mar 17 2008, 10:40 AM Elliot Cannon I jambed a 2 inch piece of PVC pipe into the forwa... Mar 17 2008, 10:55 AM Twise To get 225's to fit - you will lose the lip ov... Mar 17 2008, 11:27 AM ChrisNPDrider I've gained about 0.75 inch rollin the rear fe... Mar 19 2008, 11:04 AM
KaptKaos
i have done it :)
And you are???? :evilgrin:... Mar 16 2008, 09:00 PM jd74914 I tried stretching my fenders with the bat must no... Mar 16 2008, 08:40 PM John I did mine with a wooden dowel (probably 2").... Mar 16 2008, 08:51 PM ahdoman See, this is exacly my point; it seems like everyb... Mar 16 2008, 09:03 PM Dave_Darling It's been done for real, but I don't think... Mar 16 2008, 09:04 PM Phoenix 914-6GT You MUST do it slow or it will not look very good.... Mar 16 2008, 09:06 PM rick 918-S The term "stretched" I think gets mis-us... Mar 16 2008, 09:10 PM Phoenix 914-6GT
The term "stretched" I think gets mis-u... Mar 16 2008, 09:18 PM sww914 Evidence. Mar 16 2008, 09:14 PM jim_hoyland Did a search on " baseball bat" and look... Mar 16 2008, 09:16 PM Wanna9146 Tire Rack loans-out "fender rollers"...
... Mar 16 2008, 09:19 PM Grngoat If that's the same fender roller tool that Eas... Mar 16 2008, 10:06 PM lotus_65 i also wonder how it would do with our non-concent... Mar 17 2008, 04:03 AM John Kelly As already mentioned, it is not stretching. It is... Mar 17 2008, 05:58 AM ahdoman Thank You John, I was hoping you'd give us a l... Mar 17 2008, 08:49 AM John Kelly
Thank You John, I was hoping you'd give us a ... Mar 17 2008, 10:40 AM Elliot Cannon I jambed a 2 inch piece of PVC pipe into the forwa... Mar 17 2008, 10:55 AM Twise To get 225's to fit - you will lose the lip ov... Mar 17 2008, 11:27 AM ChrisNPDrider I've gained about 0.75 inch rollin the rear fe... Mar 19 2008, 11:04 AM |
1 User(s) are reading this topic (1 Guests and 0 Anonymous Users)
0 Members:

|
Lo-Fi Version | Time is now: 3rd June 2024 - 02:30 AM |
Invision Power Board
v9.1.4 © 2024 IPS, Inc.