|
|
|
Porsche, and the Porsche crest are registered trademarks of Dr. Ing. h.c. F. Porsche AG.
This site is not affiliated with Porsche in any way. Its only purpose is to provide an online forum for car enthusiasts. All other trademarks are property of their respective owners. |
|
|


| saigon71 |
 May 19 2010, 06:38 AM May 19 2010, 06:38 AM
Post
#1
|
|
Advanced Member  Group: Members Posts: 2,019 Joined: 1-June 09 From: Dillsburg, PA Member No.: 10,428 Region Association: MidAtlantic Region |
Disclaimer: It is clear from these pictures that I did not read the "How to buy a 914" book before before buying this car. (IMG:style_emoticons/default/mad.gif)
Dropped the engine and tranny last week, drilled out some rivets on a few sheet metal patches in the hell hole and found it to be even worse than I expected. My ultimate goal is to have a safe and reliable daily driver that can be used for the occasional autocross. Not looking for a show car. At some point, the right rear suspension ear most have rusted off so the PO had a new one welded in. Additionally, some sketchy metal work was done to the bottom of the long, the right jack post area and right engine bay area. Repair pics: 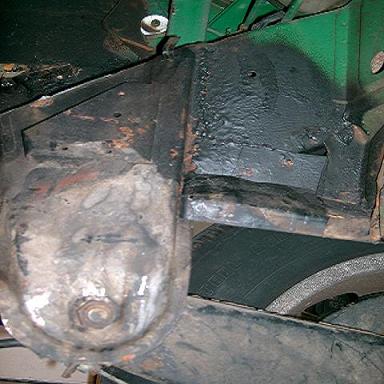 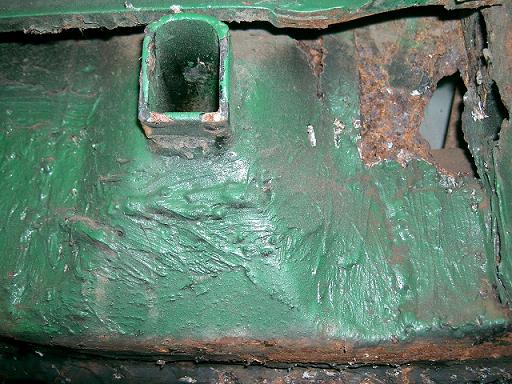 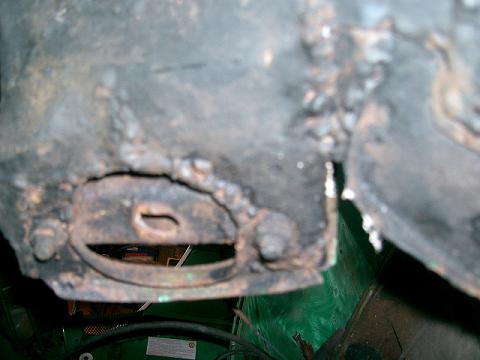 Pics of the long and hell hole: 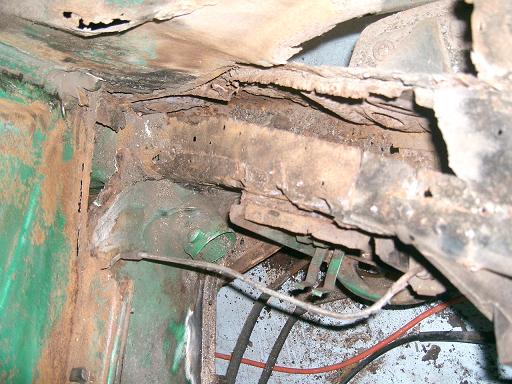 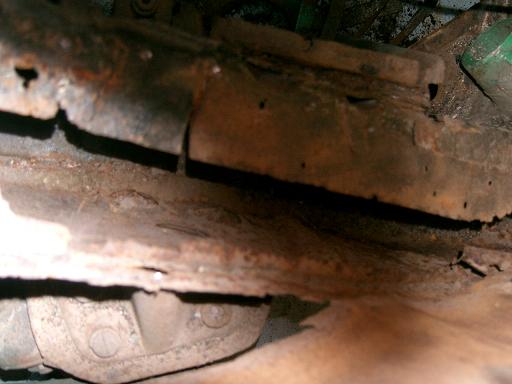 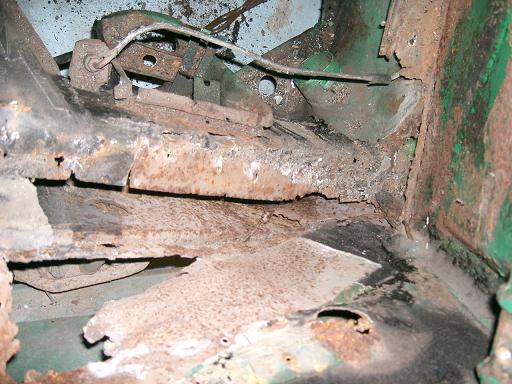 Does it make sense to try to patch the existing long up in the hell hole or am I looking at a complete replacement? The area where the engine mount bracket attaches is pretty rusty at the top. Thanks, Bob |
   |

 
|
  |
Replies
| charliew |
May 19 2010, 09:21 AM
Post
#2
|
|
Advanced Member Group: Members Posts: 2,363 Joined: 31-July 07 From: Crawford, TX. Member No.: 7,958 |
Somebody might make them but they are easy to make with a piece of square tubing with nuts welded in the ends or turnbuckles to apply a little tension on the gap. You can sheetmetal screw a bracket on the inner jamb inside at the front and go to the seat belt shoulder mount on the inside of the targa. Some guys have just welded any thing inbetween the opening and then later cut it out and sand the spot down. I would add the braces before you jack it up if you can. Actually a X crossbrace, from side to side would also keep it from twisting. Another place to measure is at the top opening but the windshield frame bends pretty easily so the door is the important place. I would raise the car and support it at the ends and center at the same places on both sides. You won't be able to use the back donuts as thats where you are working. If the door gap is good, with the braces, you need to check this as you go, jack it up under the susp and see what happens, if it stays ok then that may be the way to support it till you get supports under the long and at the front and rear. Then remove the suspension support, but be safe. You need to look at the other threads that have done this before you start. I would make a list of how far you are going in to it and the inside pieces will need to go on first. Get to know the layers before you start. There is a double layer inside the long. Try not to get any area too hot while you are welding. Metal shrinks as it cools sometimes more than you can imagine.
Buy lots of beer and get the other 914 guys to give some advice and support. |
|
|
|
| strawman |
May 19 2010, 05:58 PM
Post
#3
|
|
Senior Member Group: Members Posts: 891 Joined: 25-January 08 From: Los Osos, CA Member No.: 8,624 Region Association: Central California |
QUOTE(charliew @ May 19 2010, 08:21 AM)  ...You can sheetmetal screw a bracket on the inner jamb inside at the front and go to the seat belt shoulder mount on the inside of the targa... I wouldn't trust sheetmetal screws to hold the lower bracket in place -- you wouldn't want that connection to fail after you've cut out structural pieces, IMHO. Since you already have a MIG, just weld the brackets in the outer footwell / kick panel. See the second picture in post #17 for the upper / seat belt mount and the sole picture in post #42 in http://www.914world.com/bbs2/index.php?act...f=2&t=83031 for an example of what I did (mine is based on what welding guru Jeff Hail built for cross-bracing). You can grind off the lower bracket welds when you're done and no one will be the wiser that you've welded anything in that area... I also agree with realred914 that you should practice on junk pieces to minimize the frustration of burn-through. And be sure the weld areas are CLEAN before you strike an arc. Good luck with your project! Geoff |
|
|
|
Posts in this topic
 saigon71 My personalized hell hole May 19 2010, 06:38 AM
 dr914@autoatlanta.com With all of the patching it looks worse than it is... May 19 2010, 07:34 AM
 saigon71
With all of the patching it looks worse than it i... May 19 2010, 08:09 AM charliew If you are a diy type it's been done many time... May 19 2010, 07:56 AM saigon71
If you are a diy type it's been done many tim... May 19 2010, 08:31 AM realred914 practicew welding on scraps, get real good before ... May 19 2010, 09:40 AM mepstein There are quite a few "rustoration" thre... May 19 2010, 03:17 PM
saigon71
With all of the patching it looks worse than it i... May 19 2010, 08:09 AM charliew If you are a diy type it's been done many time... May 19 2010, 07:56 AM saigon71
If you are a diy type it's been done many tim... May 19 2010, 08:31 AM realred914 practicew welding on scraps, get real good before ... May 19 2010, 09:40 AM mepstein There are quite a few "rustoration" thre... May 19 2010, 03:17 PM |
1 User(s) are reading this topic (1 Guests and 0 Anonymous Users)
0 Members:

|
Lo-Fi Version | Time is now: 7th December 2025 - 05:28 PM |
Invision Power Board
v9.1.4 © 2025 IPS, Inc.