|
|
|
Porsche, and the Porsche crest are registered trademarks of Dr. Ing. h.c. F. Porsche AG.
This site is not affiliated with Porsche in any way. Its only purpose is to provide an online forum for car enthusiasts. All other trademarks are property of their respective owners. |
|
|


| Prospectfarms |
 Jun 30 2011, 06:34 AM Jun 30 2011, 06:34 AM
Post
#1
|
|
Member  Group: Members Posts: 495 Joined: 7-March 11 From: Louisville, KY Member No.: 12,801 Region Association: Upper MidWest |
My AAR was dead. Not only that but it shorted out and ruinined my ignition harness. The hot lead coming from underneath the unit lost its insulation. The valve and the heating element were both inoperable. Here's how I fixed it.
The AAR is a can holding a spring. The spring is really a bi-metal strip curled to resemble a watch spring. It serves as a thermostat. A valve on top of the can is regulated by that spring. The valve admits "auxillary air" to the manifold. I opened the can by first cutting slots across the top of the "lip." I used a pneumatic cut-off saw. You could use anything that cuts metal. As you can see I was not very careful and it turned out alright. Opening the can separates it from the valve and exposes the spring. Tow screws are attached to the spring. The one on the side is the adjustment. It is self-explanatory given that it controls where the opening of the valve is in relation to the spring. The other screw retains the spring to the valve shaft. It provides a handy place to put a small screw driver so you can turn the valve back and forth. I loaded the valve with penetrating oil. I had to remove the spring to really work it until the valve turned smoothly. The spring comes on and off easily. There is a tiny cotter pin holding the shaft in place, but you don't have to remove it.  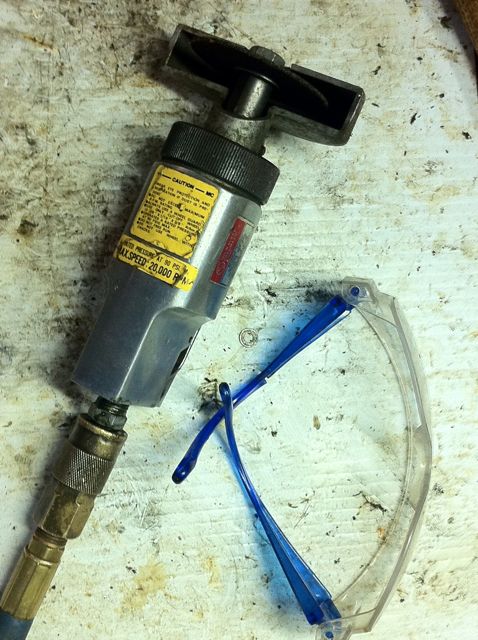 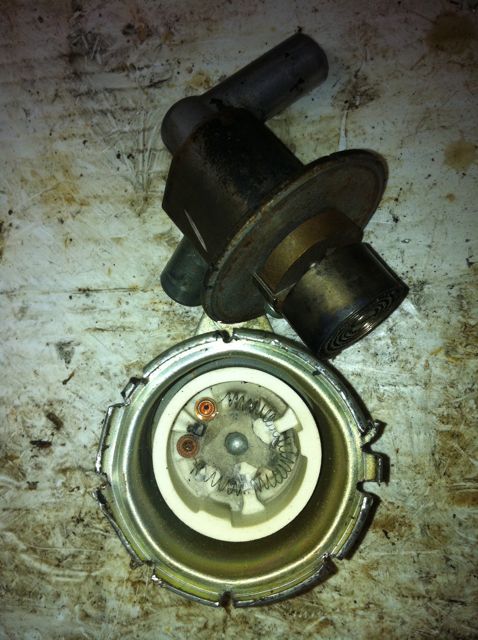 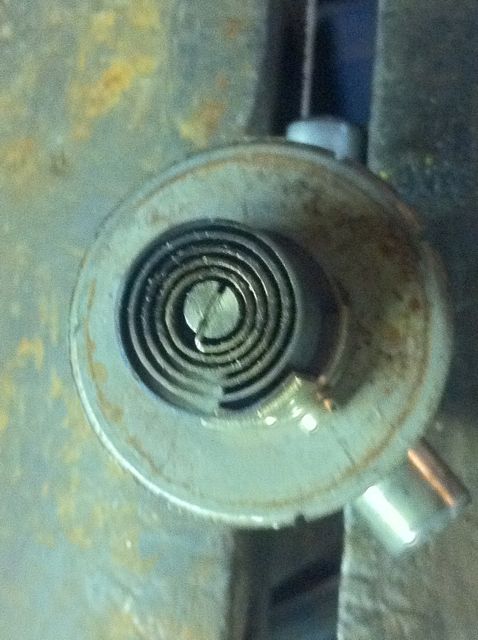 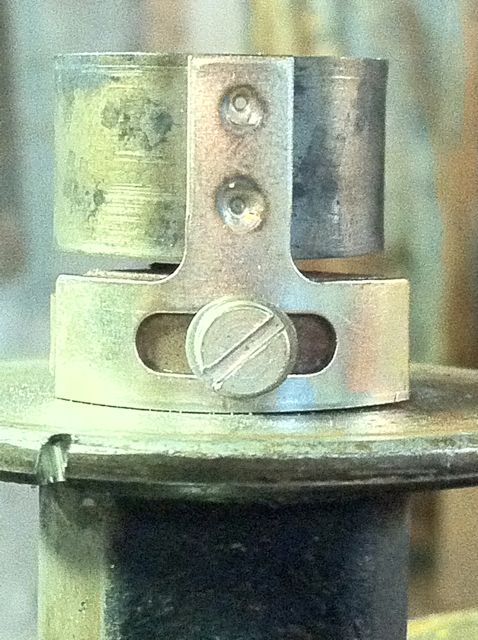 Excuse the duplicate photo. Next... Attached image(s) 
|
   |

 
|
  |
Replies
| jim_hoyland |
Jun 30 2011, 07:03 AM
Post
#2
|
|
Get that VIN ? Group: Members Posts: 9,327 Joined: 1-May 03 From: Sunset Beach, CA Member No.: 643 Region Association: Southern California |
Great write up ! (IMG:style_emoticons/default/smile.gif) Do the resisters determine how long it takes for the AAR to close ?
|
|
|
|
| Prospectfarms |
Jun 30 2011, 09:56 AM
Post
#3
|
|
Member Group: Members Posts: 495 Joined: 7-March 11 From: Louisville, KY Member No.: 12,801 Region Association: Upper MidWest |
Unintentional duplication of post. Don't know how, but sorry. QUOTE(jim_hoyland @ Jun 30 2011, 09:03 AM)  Great write up ! (IMG:style_emoticons/default/smile.gif) Do the resisters determine how long it takes for the AAR to close ? In another thread on the AAR Dave Darling posted the following info concerning choice of resistor for this kind of project: Note the parameters are ~13 ohms of resistor rated at 1-A or better. Attention to the kind of resistor is important to obtain sufficient heat and longevity. I try to pull electronic components off of old circuit boards. You can theoretically read a resistance value from the colored bands. I just guess, but I test the resistor with a multimeter and then hook it up for a couple of hours to a 4amp battery charger to make sure it won't burn out prematurely. Here's Dave's post: You can replace the resistance wire with ~13 ohms of resistor, but make sure you use resistor(s) rated at 1A or better. And check for clearance with the other parts in there. Solder them in; one end of the resistor (or of the chain of resistors if you need to use more than one) should be fastened to the housing, the other should go THROUGH the housing to have the power wire connected to it. Or run the wire (with insulation!!) through the housing to the end of the resistor. Just make sure the power wire doesn't touch the housing, or you'll get a dead short to ground again. http://www.914world.com/bbs2/index.php?s=&...t&p=1499557 I'll add that there are all kinds of resistors and they are readily available (FI radio shack) the unit cost should be less than $2. If you do this, be sure to pick up some heat sink glue/past to help conduct heat away from the Res. and into the body of the AAR. Doing so will extend the life of the resistor. I did not, but this was really more of an experiment for me. When the Res. I used goes bad, I'll replace it using something to conduct heat better. |
|
|
|
Posts in this topic
 Prospectfarms AAR restoration Jun 30 2011, 06:34 AM
 Prospectfarms II
Next I addressed the heating element in a cera... Jun 30 2011, 06:42 AM Prospectfarms III
I soldered another beefier resistor to insula... Jun 30 2011, 06:47 AM
Prospectfarms II
Next I addressed the heating element in a cera... Jun 30 2011, 06:42 AM Prospectfarms III
I soldered another beefier resistor to insula... Jun 30 2011, 06:47 AM Prospectfarms
Great write up ! :) Do the resisters determ... Jun 30 2011, 07:19 AM Prospectfarms
Great write up ! :) Do the resisters determ... Jun 30 2011, 09:55 AM
Prospectfarms
Great write up ! :) Do the resisters determ... Jun 30 2011, 07:19 AM Prospectfarms
Great write up ! :) Do the resisters determ... Jun 30 2011, 09:55 AM Dave_Darling Hey, cool! I don't remember the adjustmen... Jun 30 2011, 04:04 PM Prospectfarms
Hey, cool! I don't remember the adjustme... Jun 30 2011, 05:02 PM
Dave_Darling Hey, cool! I don't remember the adjustmen... Jun 30 2011, 04:04 PM Prospectfarms
Hey, cool! I don't remember the adjustme... Jun 30 2011, 05:02 PM |
1 User(s) are reading this topic (1 Guests and 0 Anonymous Users)
0 Members:

|
Lo-Fi Version | Time is now: 16th June 2024 - 05:45 AM |
Invision Power Board
v9.1.4 © 2024 IPS, Inc.