|
|
|
Porsche, and the Porsche crest are registered trademarks of Dr. Ing. h.c. F. Porsche AG.
This site is not affiliated with Porsche in any way. Its only purpose is to provide an online forum for car enthusiasts. All other trademarks are property of their respective owners. |
|
|


| JStroud |
 Nov 3 2011, 01:04 AM Nov 3 2011, 01:04 AM
Post
#1
|
|
Senior Member  Group: Members Posts: 1,463 Joined: 15-January 11 From: Galt, California Member No.: 12,594 Region Association: Northern California |
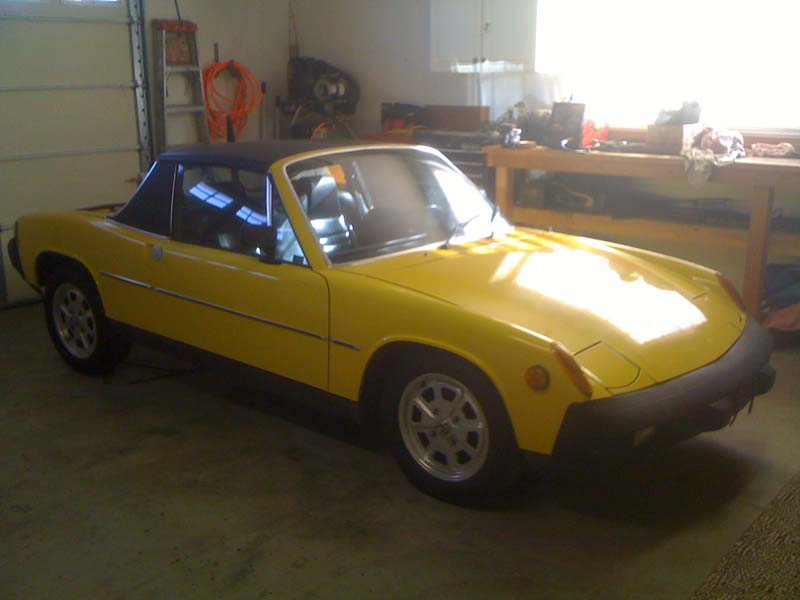
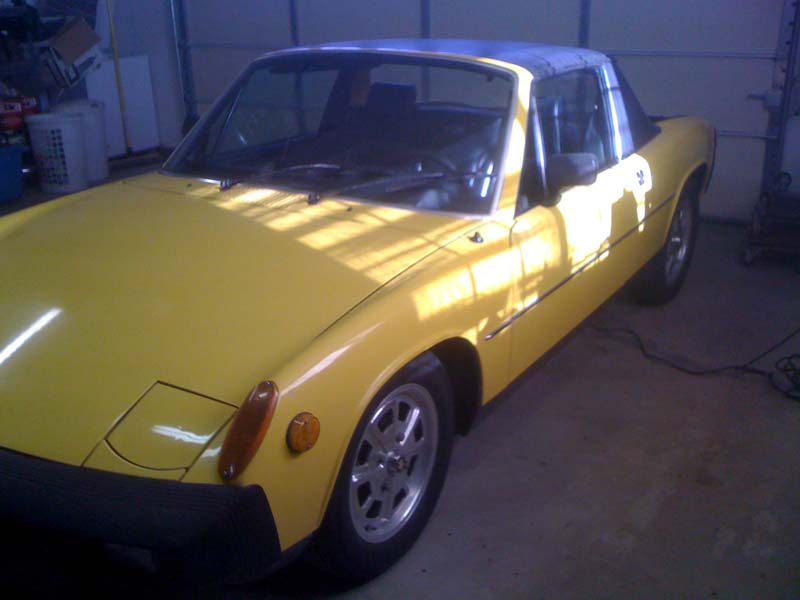
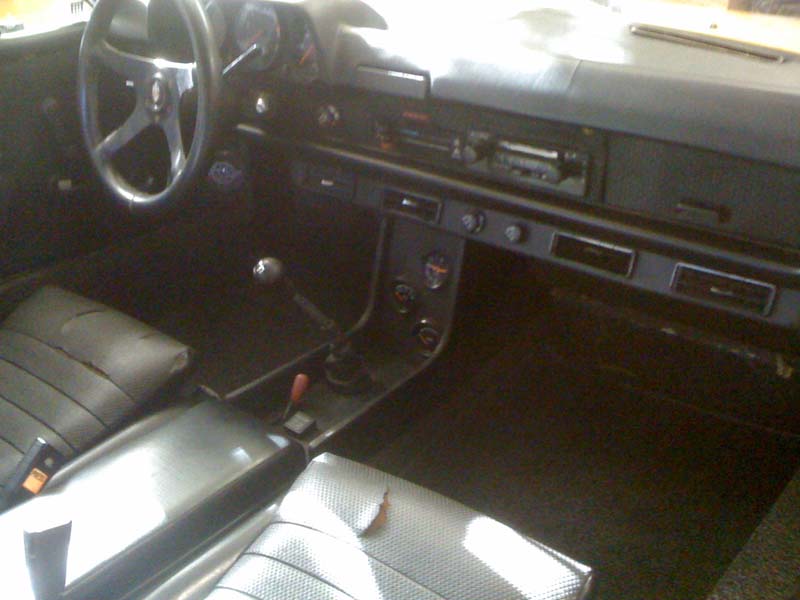
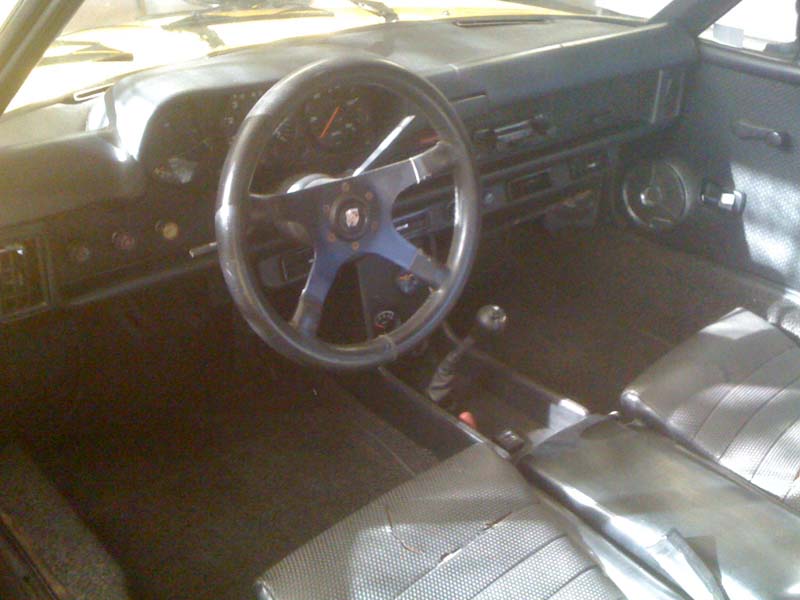
I finally got around to organizing my pictures to document my progress. I bought my car, a 75 914 2.0 in November 2010. It was originaly purchased in Sacramento Ca, the original owner sold it to his son in 1994, the son drove it until "it started running rough", and he parked it. It sat until 2008 when he sold it to his friend who was going to get it running, two years later it was still sitting, but with the engine out and pieces in boxes. So being the smart guy I am, I bought it. Here's some pics of the car when I got it home.
    The PO had pulled the engine with the intent of fixing it, then somewhere along the way he purchased a "running" 73 2.0. So I have a spare motor. 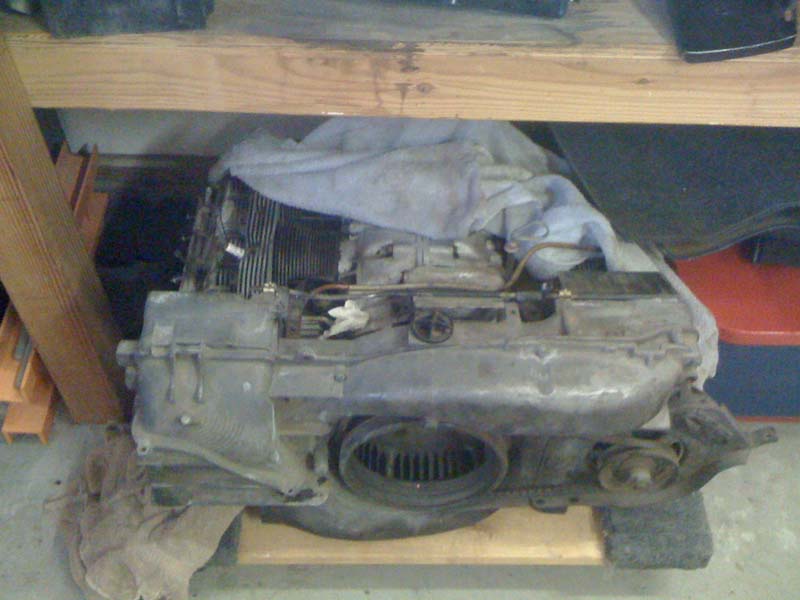 I spent a few months buying books and reading what I could find, (never worked on a 914 before) found this website! I decided to rebuild the original motor... here I go. 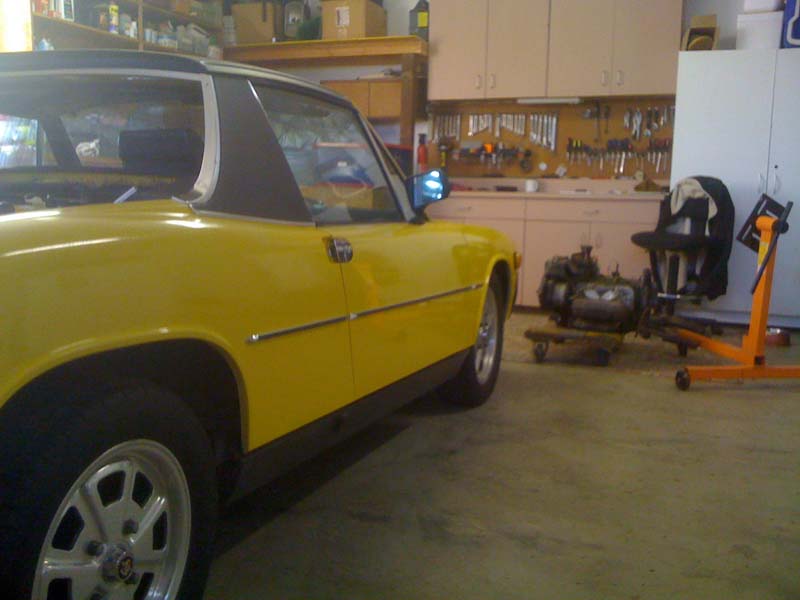 Got the engine stripped down, and the case split.  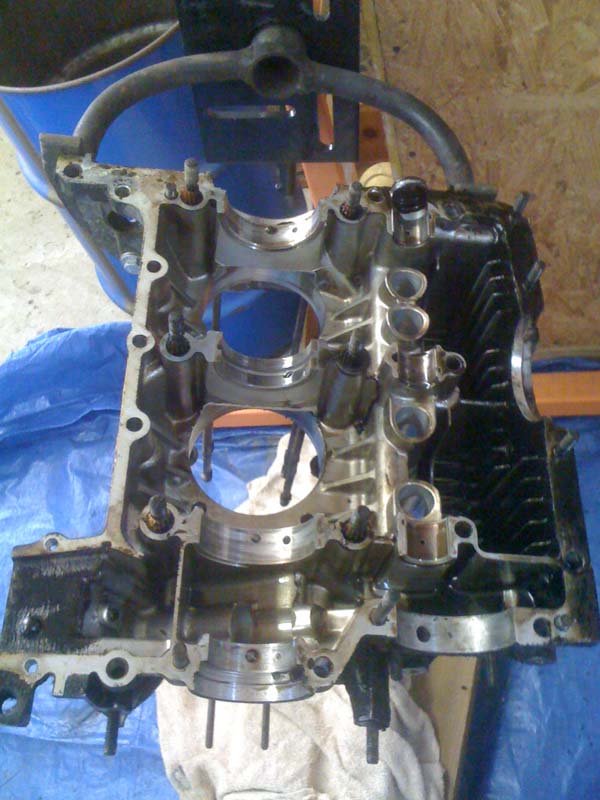 Found out why they parked it, looks like a dropped valve seat. 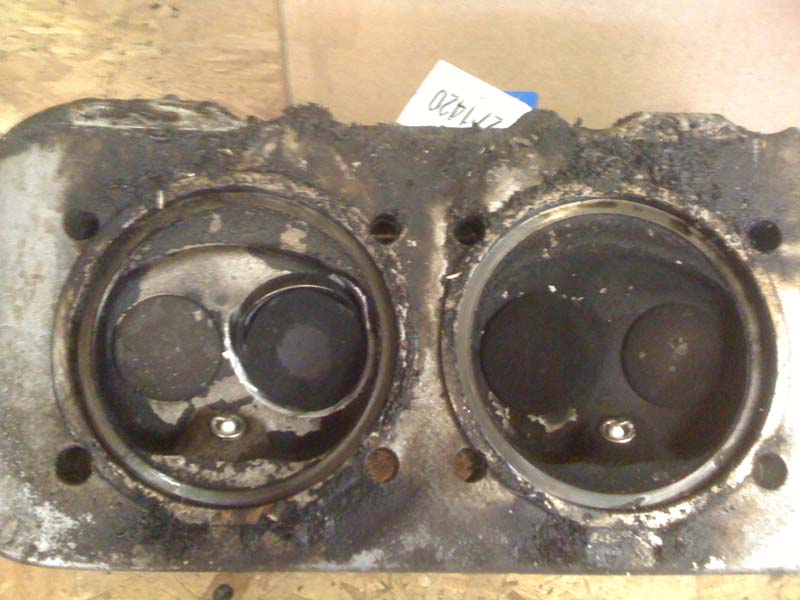 Damaged the top of the piston as well. 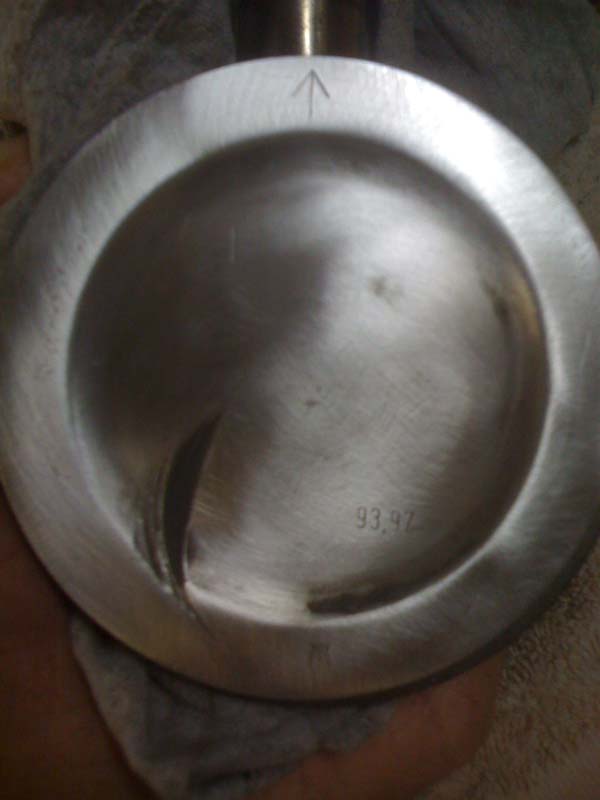 I took the case, heads, crank, and cylinders to the machine shop, Time to start some rust repair. 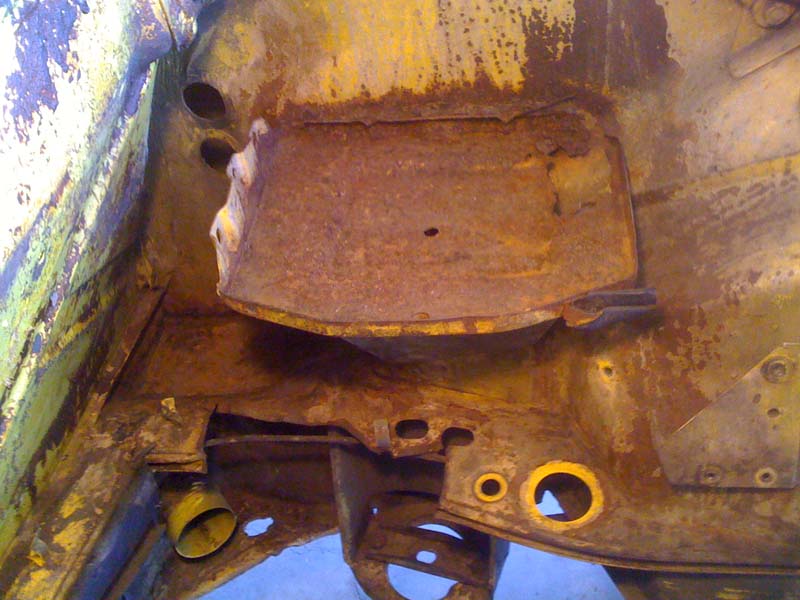 The battery tray was toast, the rest seems to be just surface rust, except the trunk it has a few rusted through pin holes.  After I finished removing the battery tray I pressure washed the engine compartment, trunk, and under the trunk. 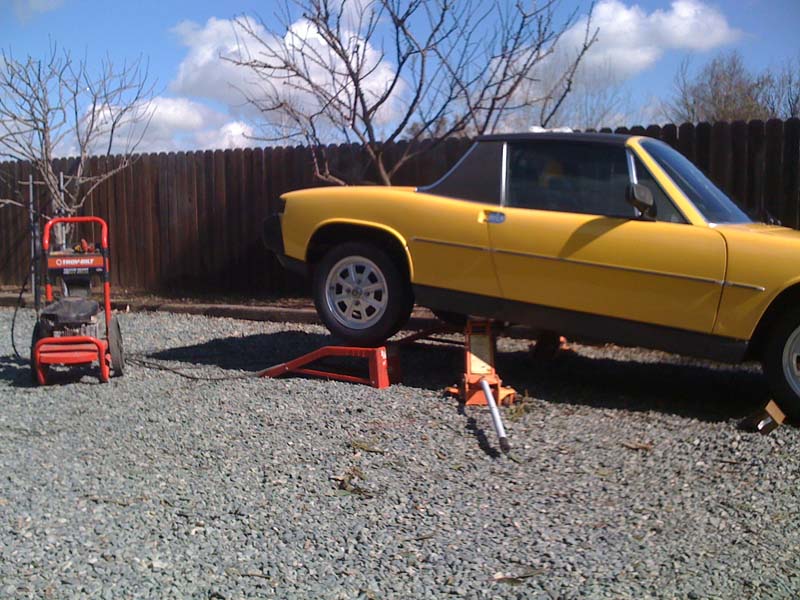 I finished all this by february, but the next step was to sand blast the rust, and EVERY weekend it would be raining, so the car sat in the garage. Then I had a major set back, My Dad was diagnosed with cancer in april, had surgery in May. So April - june are kind of a blurr, He has recovered very well, but progress on the car was slow for a while, had to get caught up on work. I went to Doc's tranny clinic in Discovery Bay in June and rebuilt my transmission. My tranny all apart.  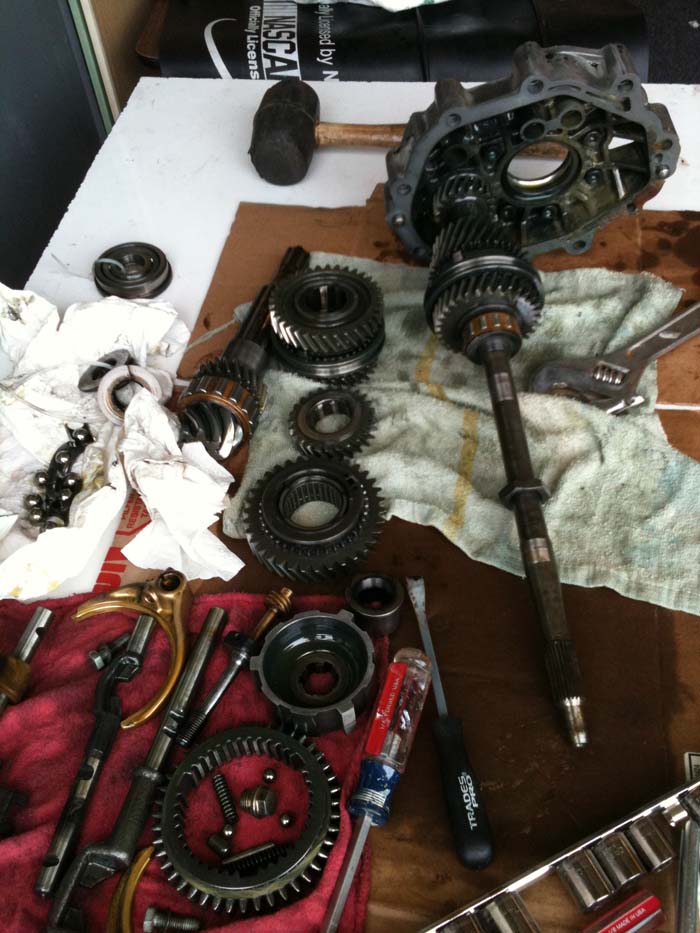 Good thing Doc talked me into going, bearing was in pieces when I took it apart. 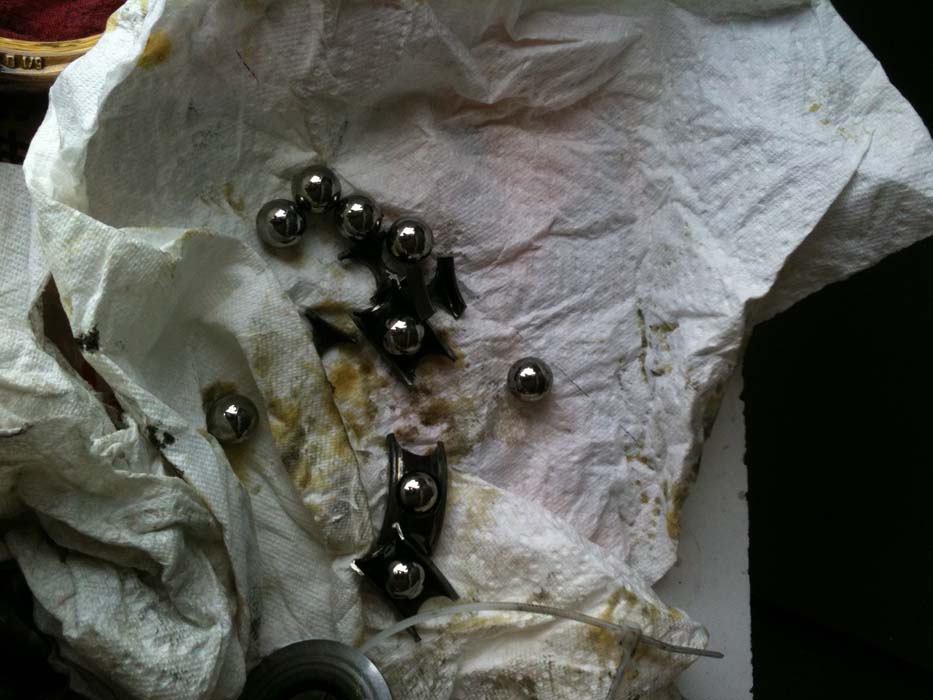 A few familiar faces. 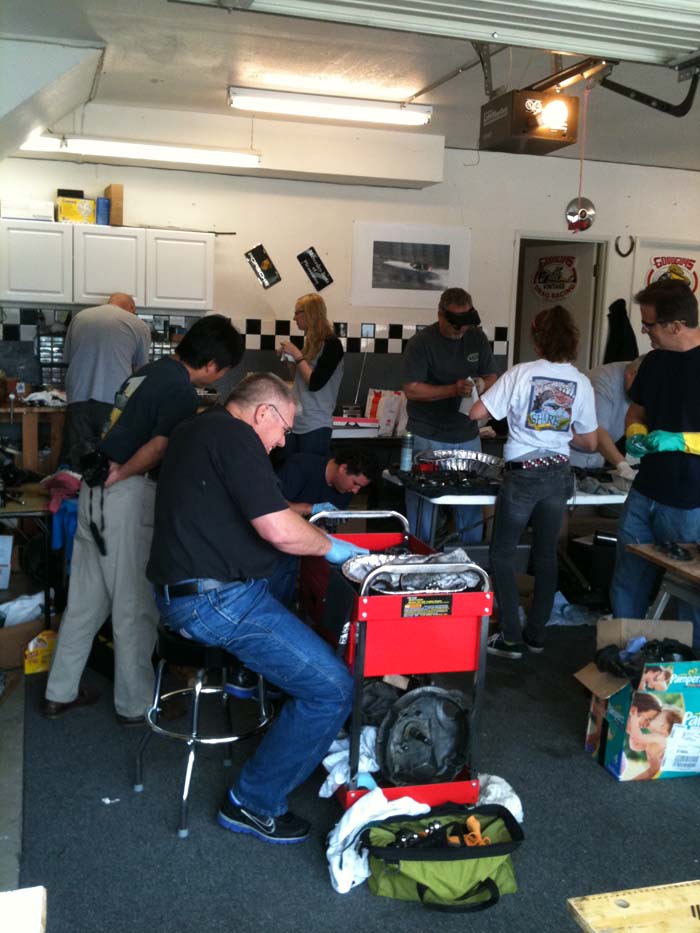 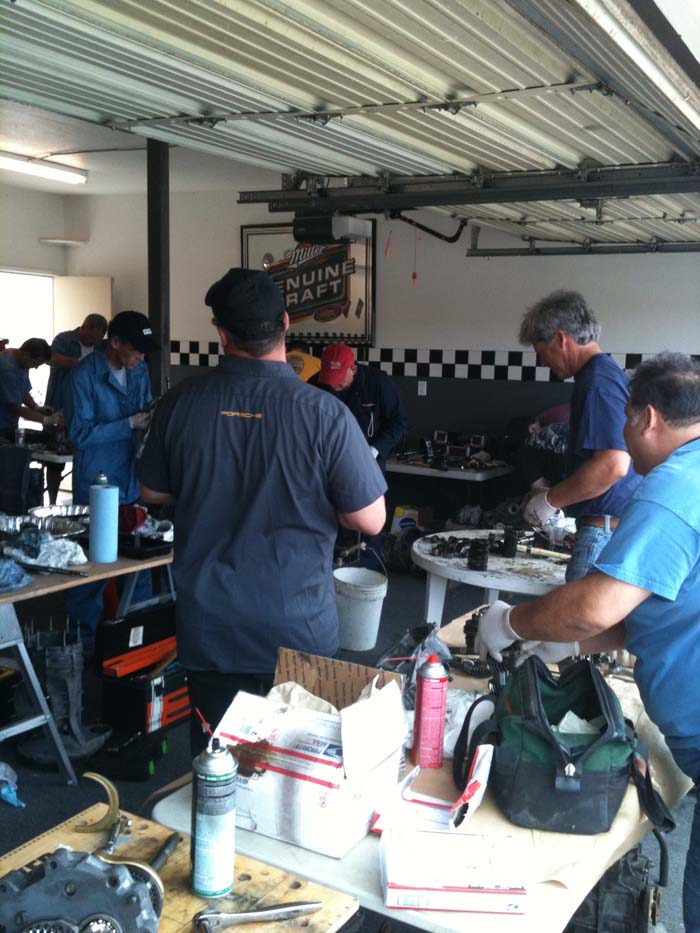 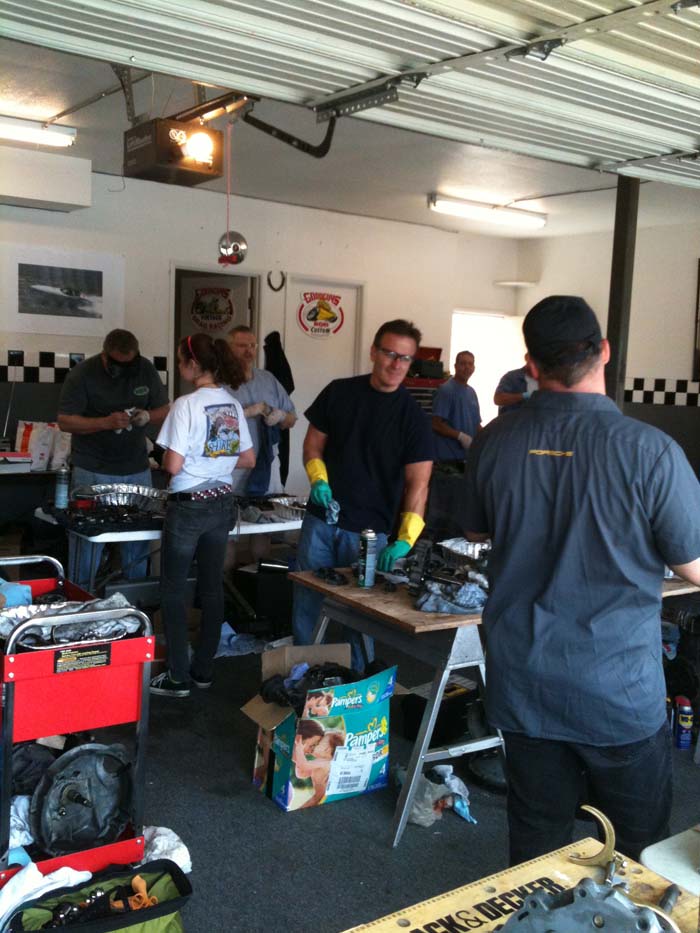 All done ready to install, wish the car was ready... 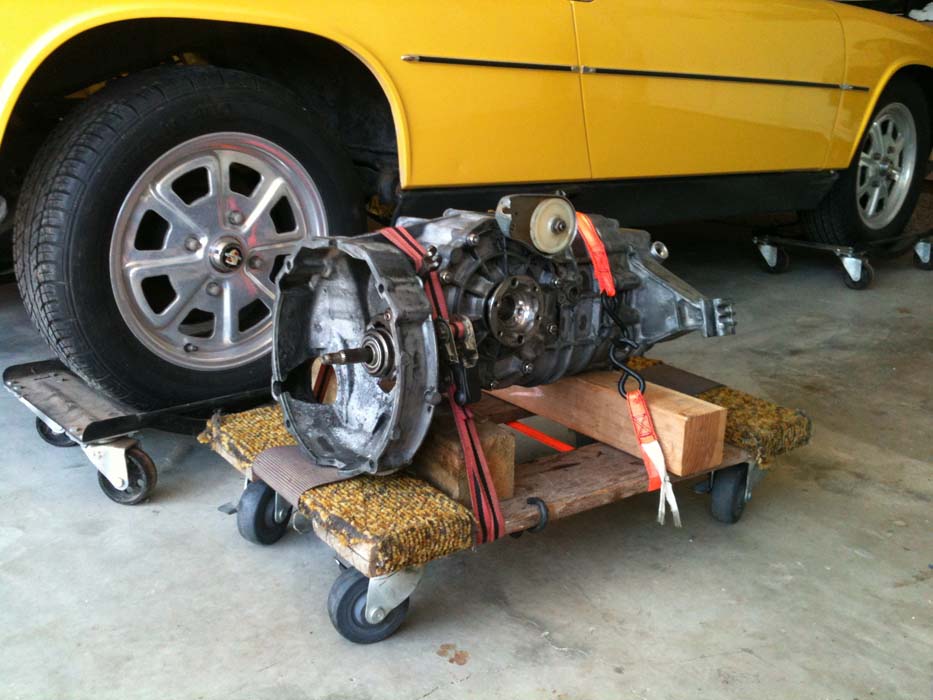 Of course in all the down time I did find time to do a little parts shopping. 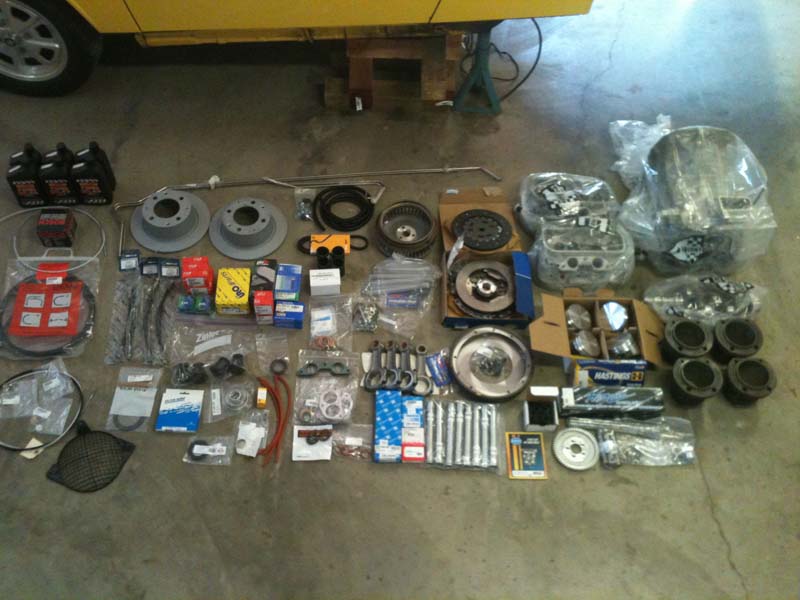  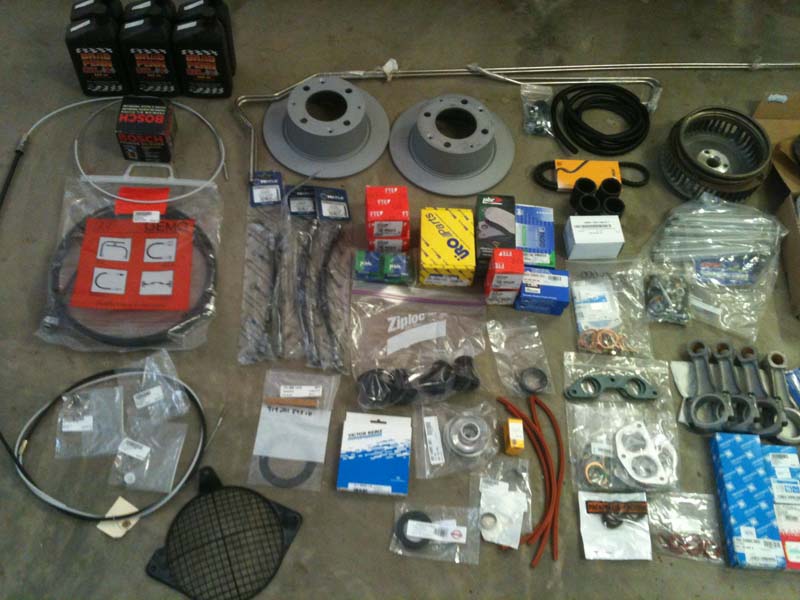 And I decided to build a blast cabinet  Almost done 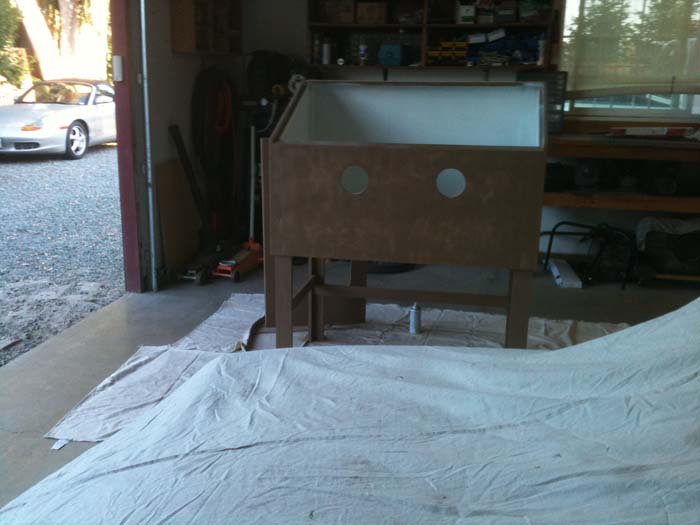 Ready for action. 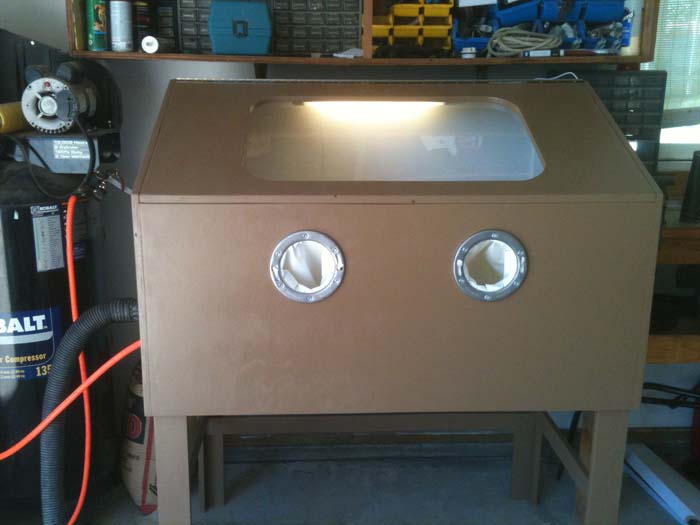 And I did a lot of reorganizing in the garage, this is the first car I've done in 20 years, oh ya, did I mention i'm old. 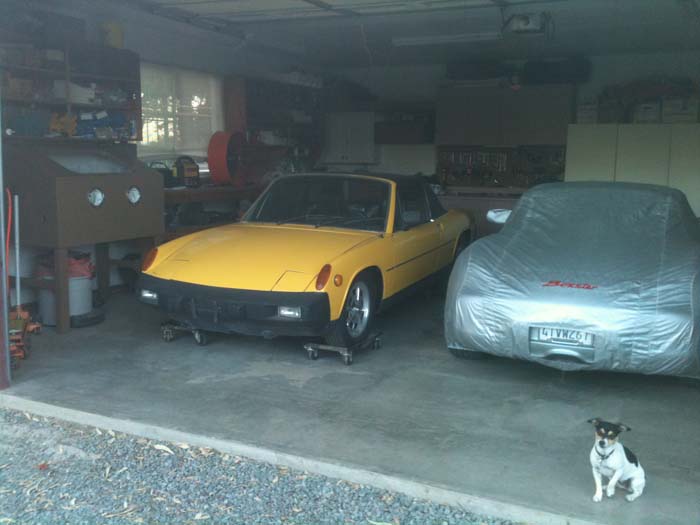 Well the weather finally got nicer, work slowed up a bit and I finally got the car out and sandblasted. 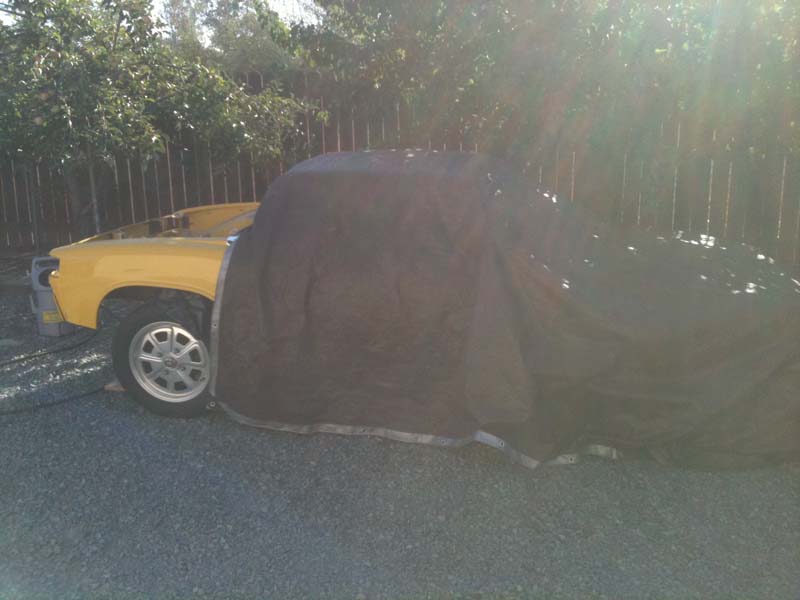 After I finished sandblasting I washed the area down with metal prep, and then back in the garage for painting. 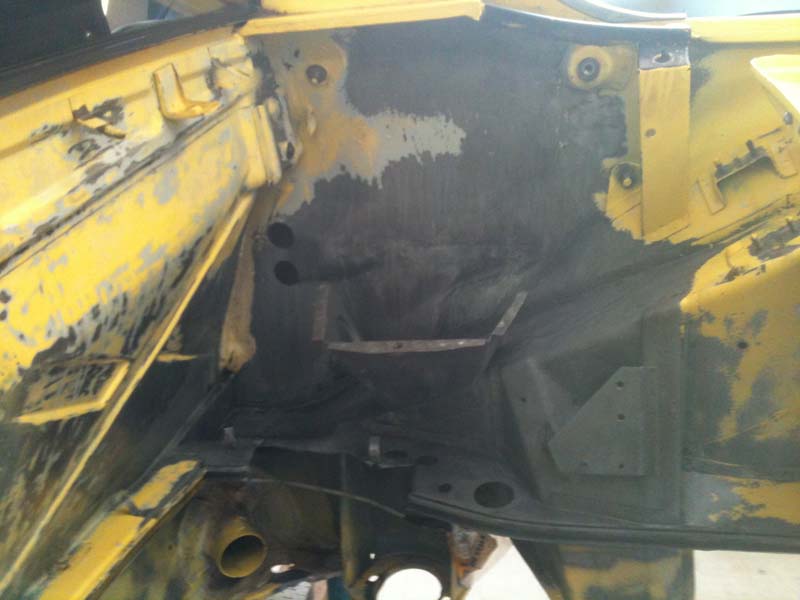 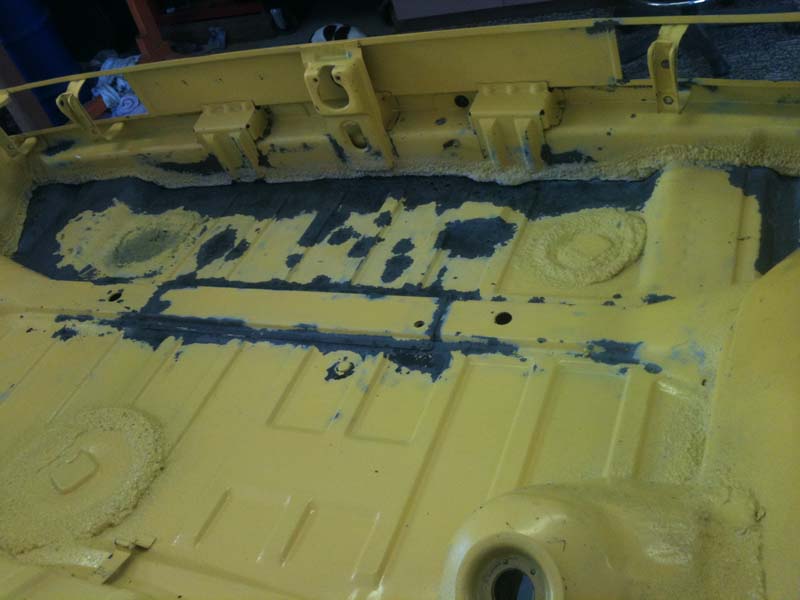 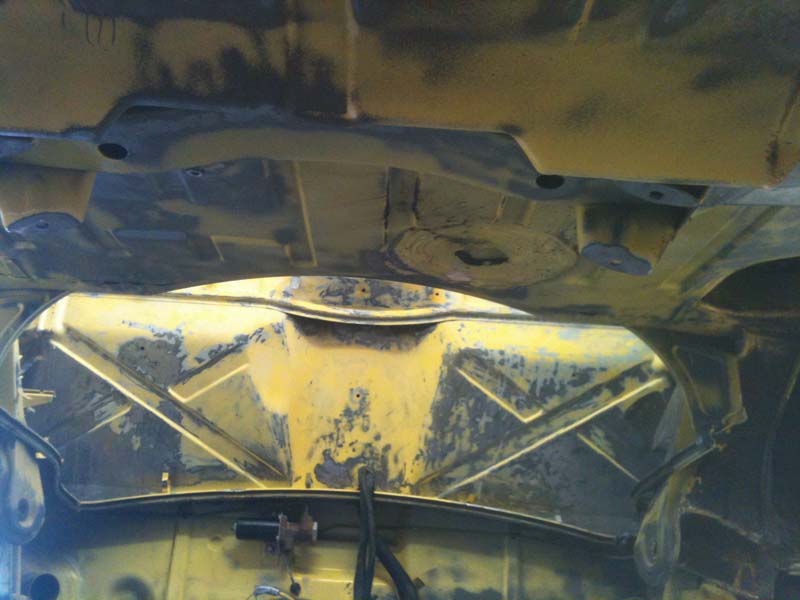 Almost ready to primer 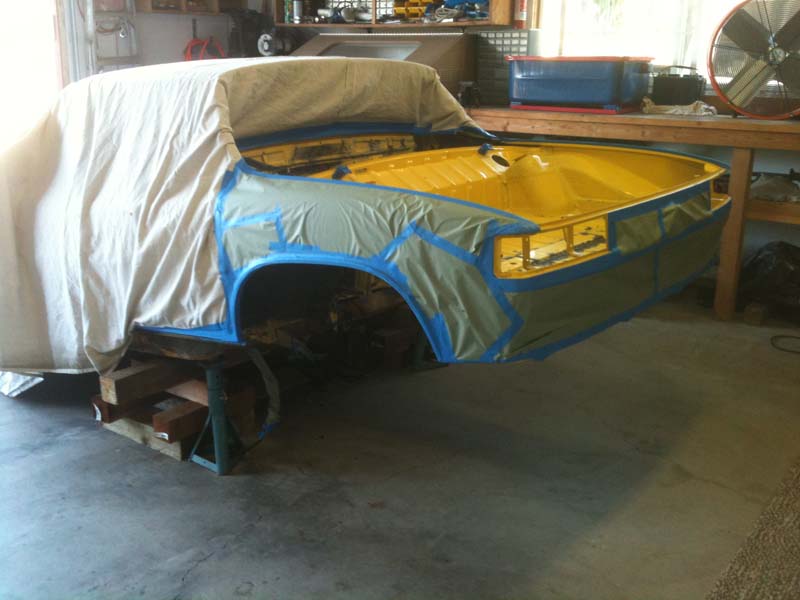 Everything got two coats primer. 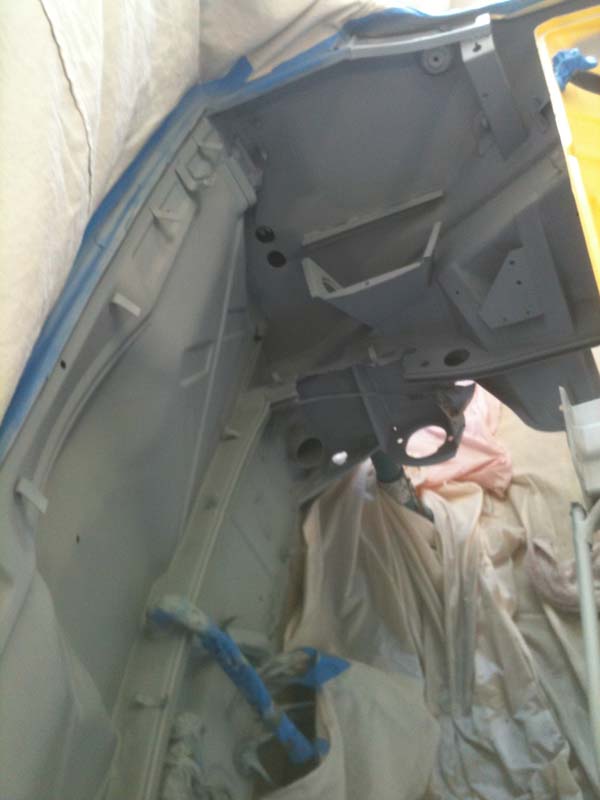 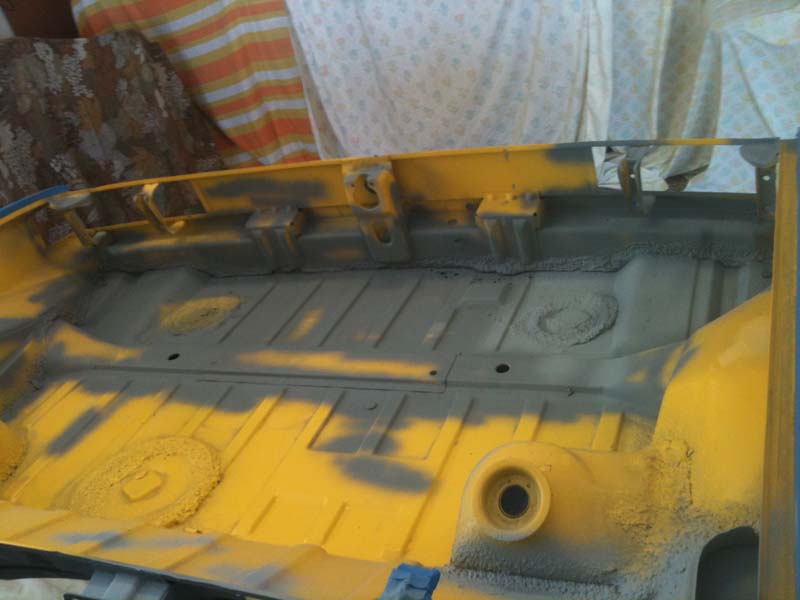 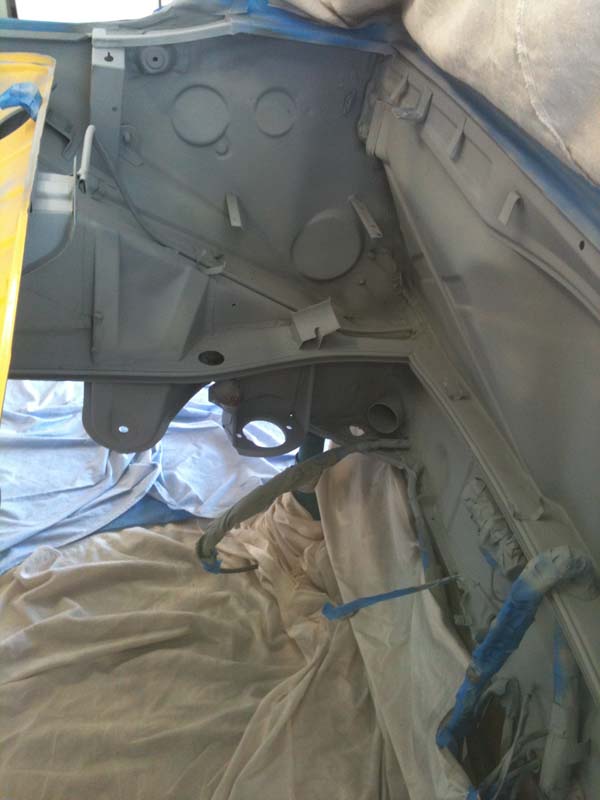 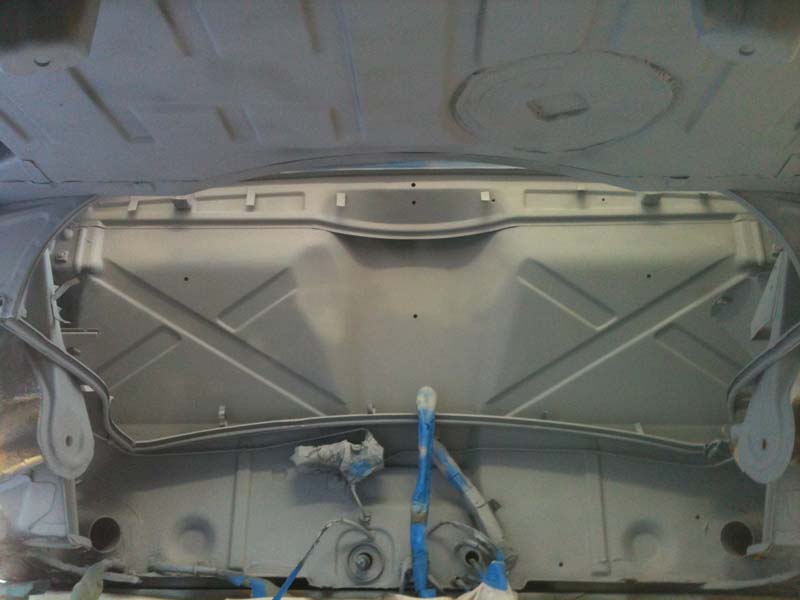 I decided to paint the engine compartment gloss black, and under the trunk and fender wells flat black. 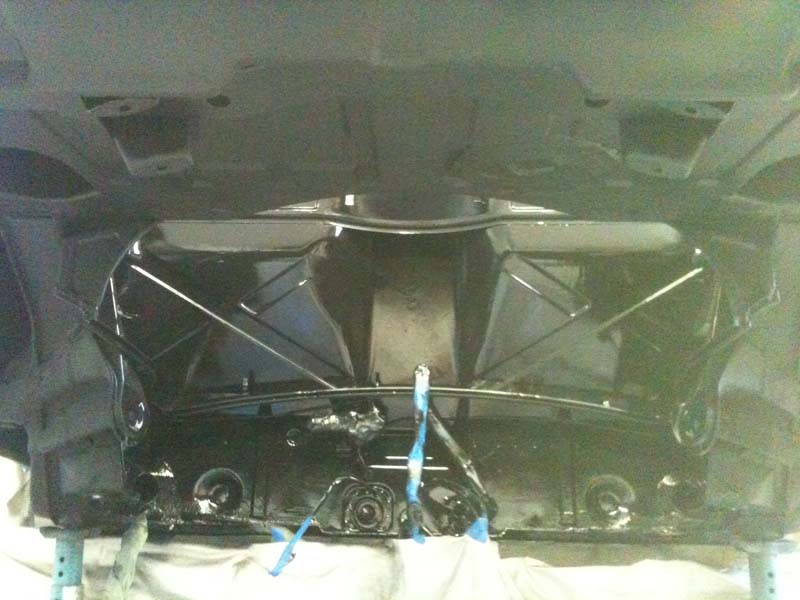 I bought cans of color match paint online to paint the trunk. 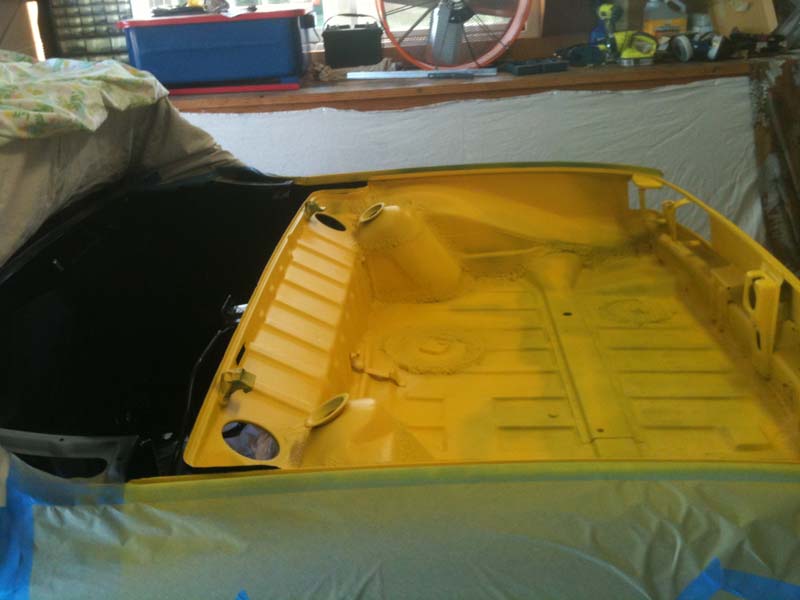 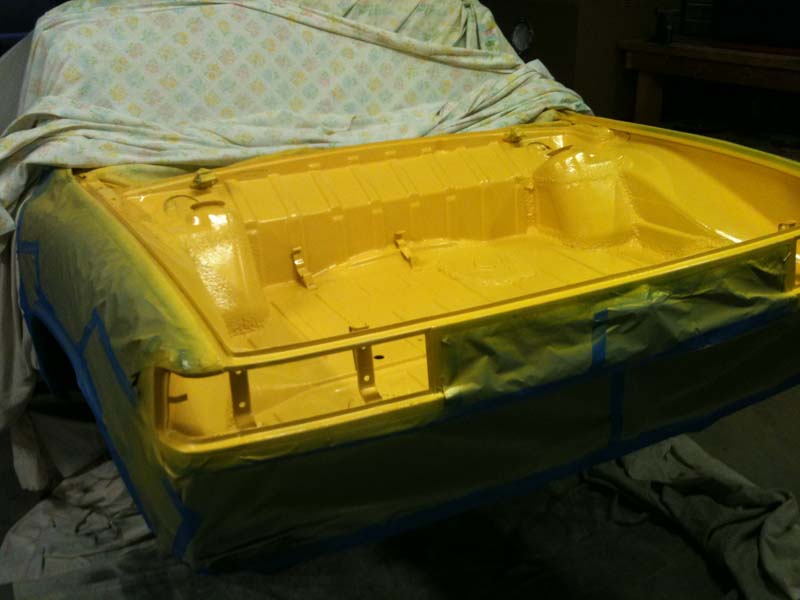 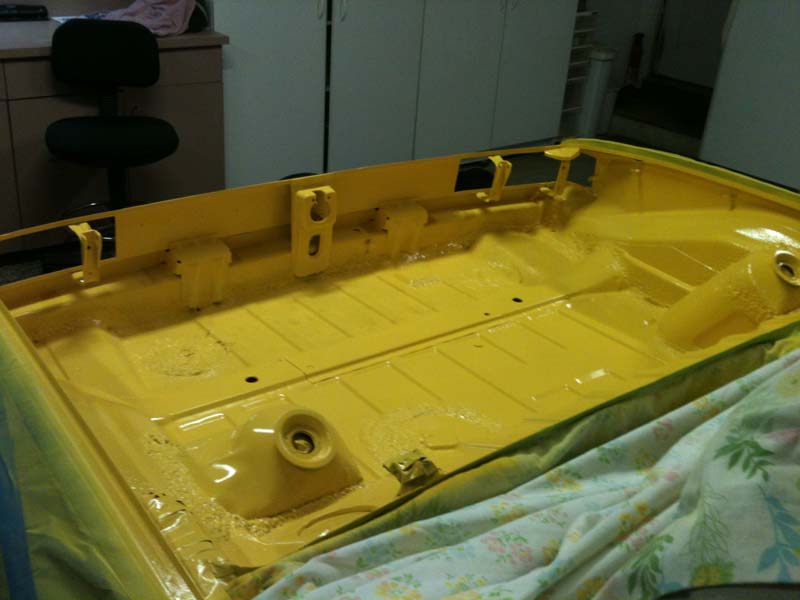 A final coat of clear and the painting is done.. for now. 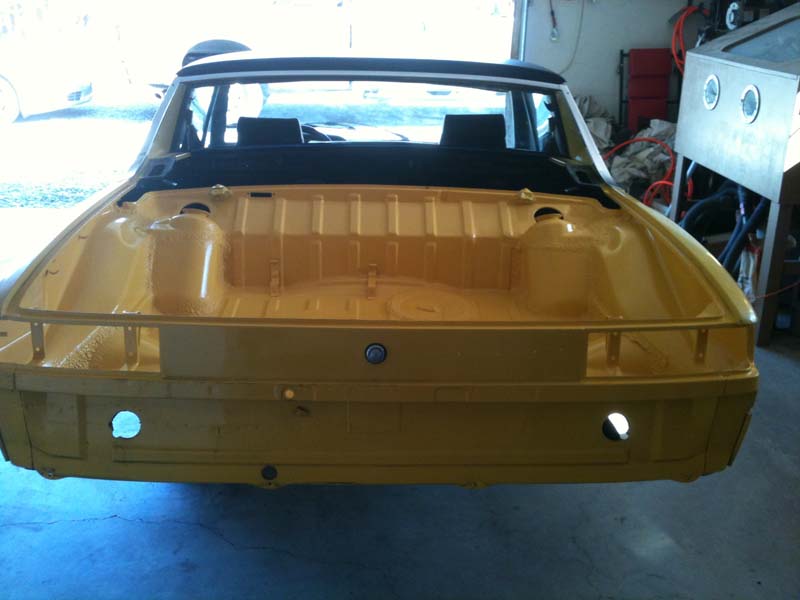 |
   |

 
|
  |
Replies
| JStroud |
Nov 5 2011, 12:39 PM
Post
#2
|
|
Senior Member Group: Members Posts: 1,463 Joined: 15-January 11 From: Galt, California Member No.: 12,594 Region Association: Northern California |
I didn't get a chance to get these pictures resized to include with my original post,
but before I took my motor to Original Customs for McMark to build it, I drilled and tapped my galley plugs. I had already bought the drill bits and taps, so why not. I decided to take alot of pictures and try to be thorough for anyone yet to attempt this. First, there are twelve press in galley plugs, here are their locations. 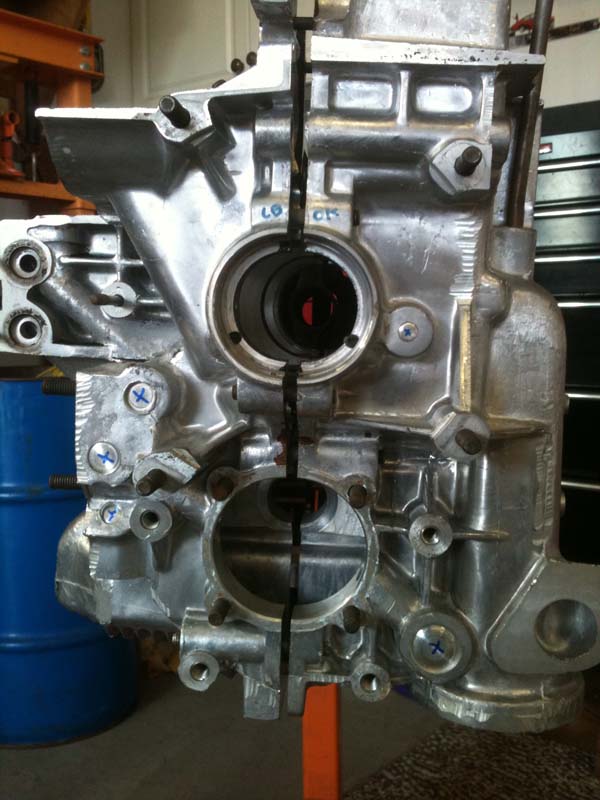 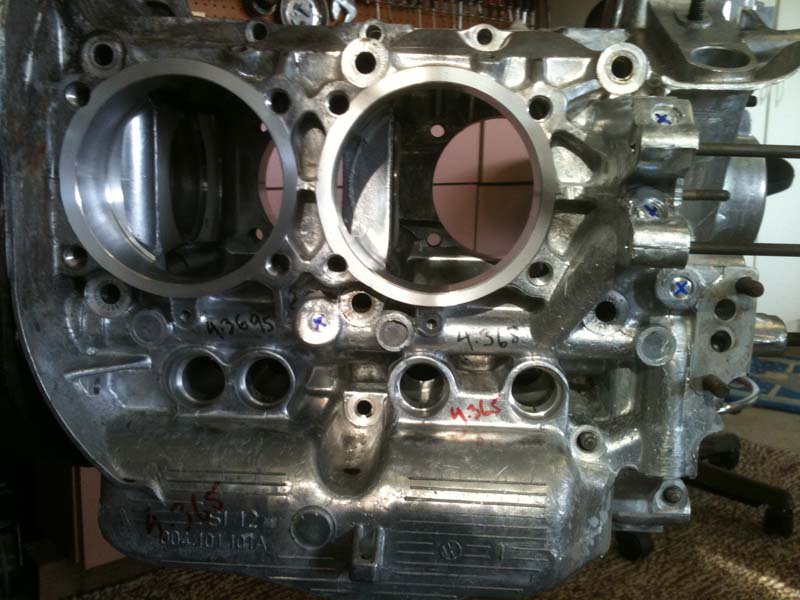 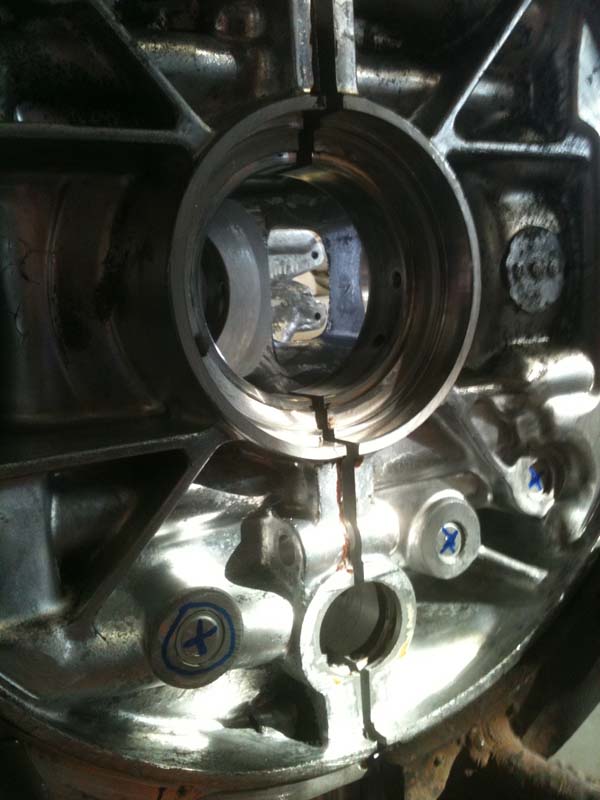 In the last picture the circled plug looks like its ready to pop. The small one in the picture below also. This is why I decided to do all twelve. 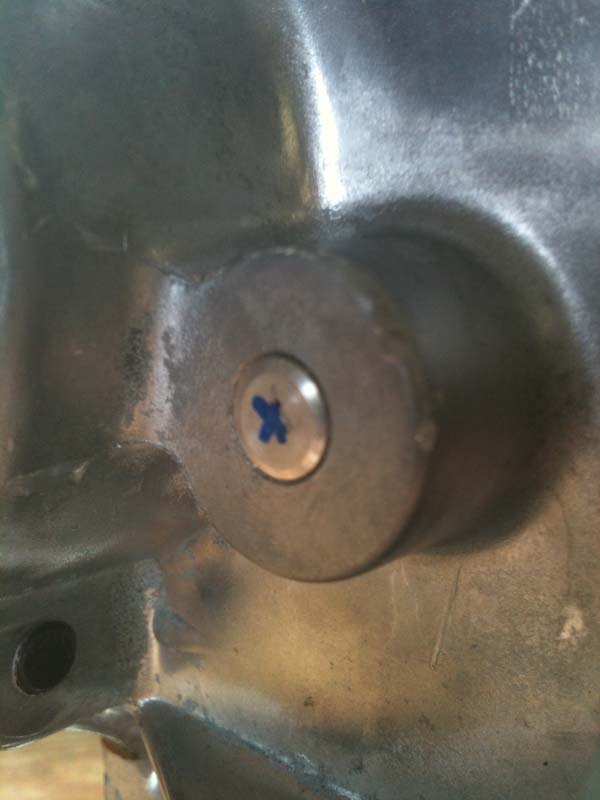 I drilled a small hole in the center of the plugs and screwed in a screw with a large head on it. 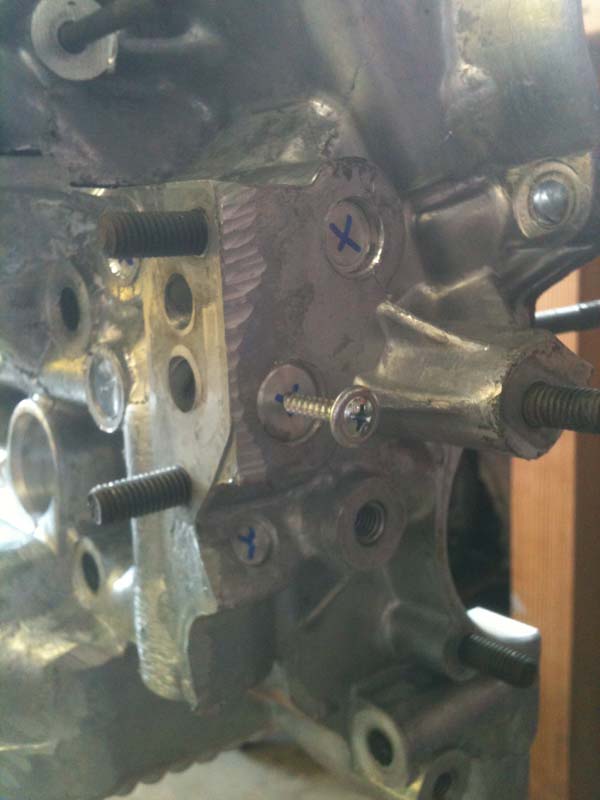 Then attached a slide hammer to the screw to pull the plugs out. Most of the plugs came out very easy, one to two TAPS with the slide hammer. Only one was a little difficult. Kinda scary how easy they popped out. But kudos to my machine shop, not one speck of dirt behind any plugs. 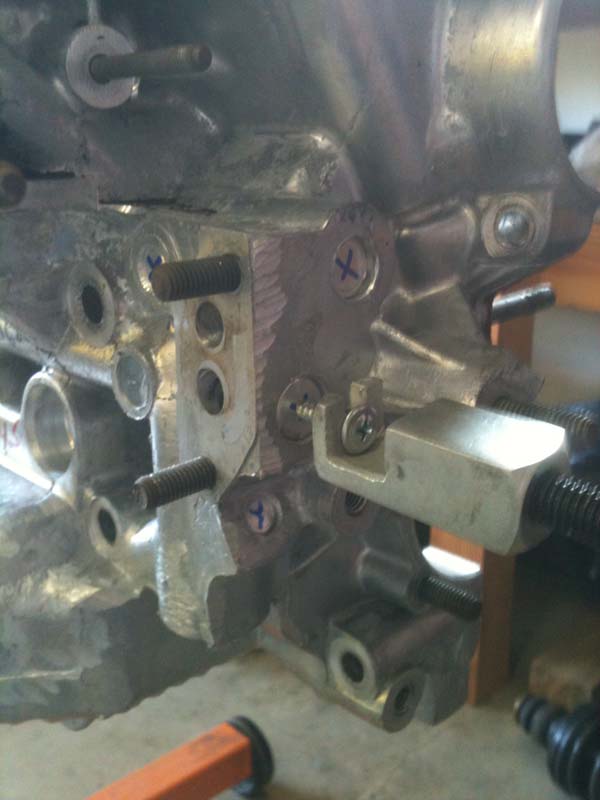 Below you can see the plug out of the hole, this plug, (can you see the second plug in the hole), is really the only hole you need to be really careful not to drill too deep, and you need the second tap ground down to get full threads. 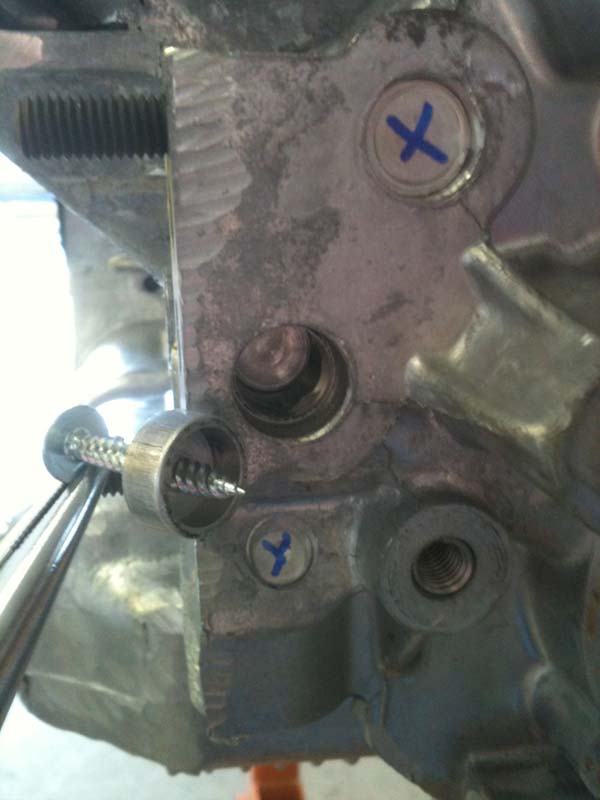 From my research( I'm somewhat search challanged) I thought you need this for all the holes, since I had already bought two of each tap, and ground one, I double tapped all of mine anyway. 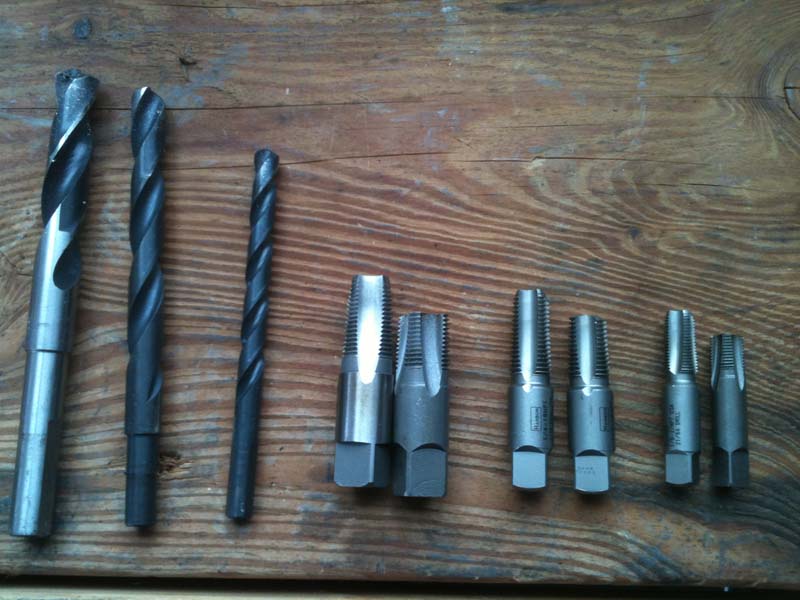 All the plugs out, anyone want to buy a NLA press in plug set, slightly used, only one small hole in the middle. (IMG:style_emoticons/default/lol-2.gif)  I had bought a "plug kit" from a vender I won't mention. But unfortunately they don't have a clue what plugs our engines need. So I had to order new ones from Jegs.  Also in my research I found mentioned having to modify the tap handle or problems with clearance issues tapping some of the holes. I solved this by using a socket and extention with a rachet wrench to tap those holes, worked great.  Thats basically it, be careful to drill straight, and not damage the second plug in the one hole. Clean up is very important, and don't close off any passage ways with a plug too deep. ( I just put mine in a couple of threads), I'll let McMark have the fun of actually installing them. Here are the new plugs, black anodized aluminum.  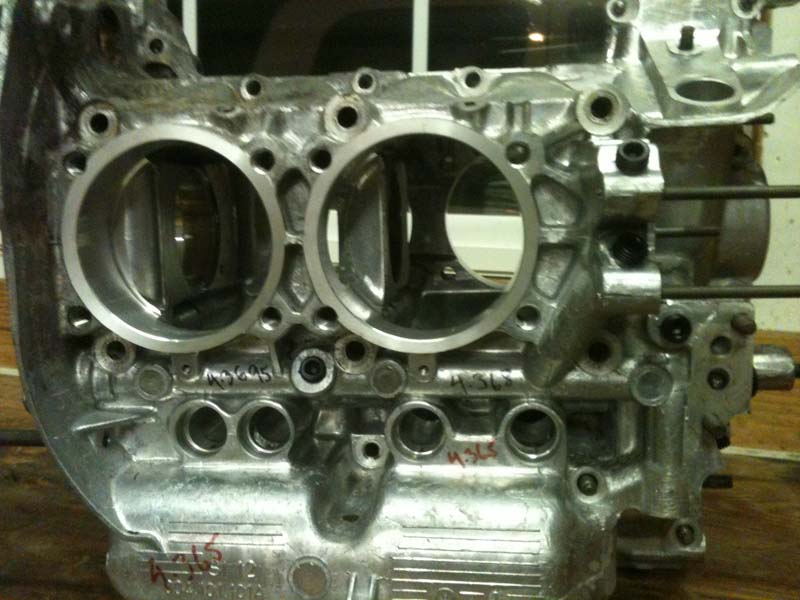 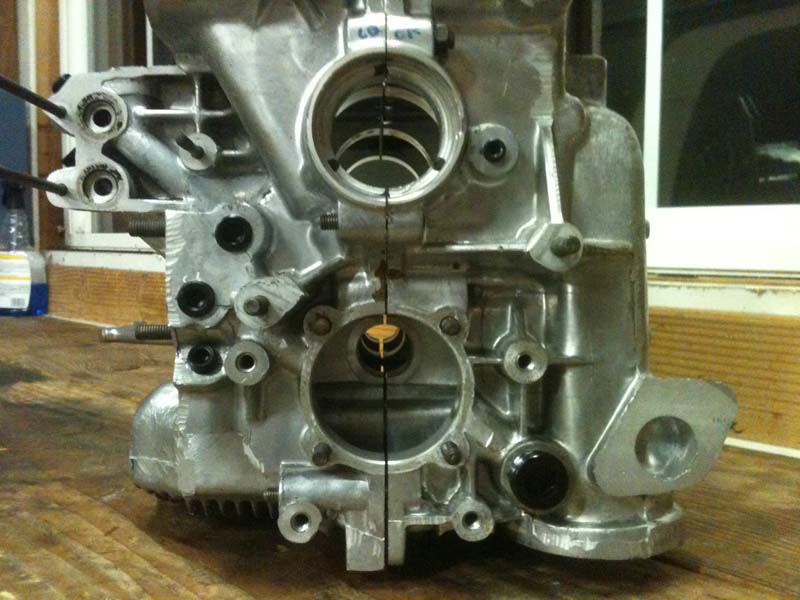 Hope that helps someone. This weekend I hope to get the other trailing arm apart, and start getting the parts cleaned up and repainted, then the calipers. Jeff |
|
|
|
Posts in this topic
 jsconst Putting a 75 back on the road Nov 3 2011, 01:04 AM
 jsconst Well I finally started putting things back togethe... Nov 3 2011, 01:28 AM
 JawjaPorsche When you said a "little parts shopping" ... Nov 3 2011, 04:04 AM jsconst Well I figured if I can't work on it might as ... Nov 3 2011, 08:48 AM Cairo94507 Terrific job of getting this car back together cor... Nov 3 2011, 06:54 AM jsconst Thanks Michael, it seems like it's taking fore... Nov 3 2011, 08:53 AM pt_700 is anyone else impressed at how much jeff put on 1... Nov 3 2011, 09:55 AM StratPlayer Impressive :first: Nov 3 2011, 10:22 AM Cap'n Krusty Nice!
Whatever is in the bright yellow box th... Nov 3 2011, 10:51 AM jsconst Cap'n, those are the front rubber control arm ... Nov 3 2011, 08:14 PM Tom Great work, :trophy: keep it going and you will h... Nov 3 2011, 06:00 PM ConeDodger I've seen this car in person and it is going t... Nov 3 2011, 06:25 PM jsconst Thanks everyone, and Rob no its not a stock rebuil... Nov 3 2011, 08:30 PM Drums66 ....Yeah, cool story....keep on! :flag1: :sha... Nov 3 2011, 07:10 PM jsconst My son came over yesterday while I was taking the ... Nov 6 2011, 09:06 AM jsconst Well progress slowed up a bit on the 75, mainly be... Dec 8 2011, 01:43 PM bohalrantipol Did you pick up those ARP head bolts from LN engin... Dec 9 2011, 10:47 AM jsconst
Did you pick up those ARP head bolts from LN engi... Dec 9 2011, 03:17 PM bohalrantipol What was your logic in using them? Did you run a ... Dec 9 2011, 05:34 PM jsconst While researching my engine combination they were ... Dec 9 2011, 08:02 PM underdog Looks really great. I see from the photo your 75 h... Dec 8 2011, 03:31 PM PBC914
Looks really great. I see from the photo your 75 ... Dec 8 2011, 03:40 PM jsconst
Looks really great. I see from the photo your 75... Dec 8 2011, 04:48 PM Lennies914 Looking great Jeff. You've been busy.
My son... Dec 9 2011, 10:30 PM jsconst Thanks Lennie, Mark has made more progress on my p... Dec 9 2011, 11:01 PM kg6dxn
Looking great Jeff. You've been busy.
My so... Dec 11 2011, 01:11 AM mrbubblehead great thread jeff, do you happen to remember what ... Dec 11 2011, 12:33 AM jsconst 5 - 3/8" plugs tap size 3/8 - 18 NPT drill 37... Dec 11 2011, 01:34 AM jsconst I went to Sonoma today and picked up my new motor ... Dec 15 2011, 11:29 PM ConeDodger Judging from his posts on Facebook Jeff, Mark is j... Dec 15 2011, 11:34 PM jsconst
Judging from his posts on Facebook Jeff, Mark is ... Dec 15 2011, 11:49 PM McMark Yeah, Jeff broke my parts washer. :P Just kiddin... Dec 16 2011, 09:04 PM jsconst
The motor went together relatively smoothly and ... Dec 17 2011, 07:46 PM jsconst Its been a while since I updated this, but I have ... Feb 25 2012, 08:30 PM Socalandy Nice work!!! Feb 25 2012, 08:33 PM rfuerst911sc If you could outline the general spec's on the... Feb 26 2012, 05:07 AM Lennies914 I think those little meet-n-greets give everybody ... Feb 26 2012, 09:36 AM Prospectfarms
:agree:
Interesting thread with some helpful ... Feb 26 2012, 09:44 AM jsconst Thanks everyone, seeing other 914s, and talking ab... Feb 26 2012, 11:08 AM jsconst well I decided to stay home and work in the garage... Feb 26 2012, 05:34 PM Prospectfarms :) :) :) Feb 26 2012, 05:45 PM McMark Awesome! I can't wait to try it out! ... Mar 12 2012, 10:25 PM
JawjaPorsche When you said a "little parts shopping" ... Nov 3 2011, 04:04 AM jsconst Well I figured if I can't work on it might as ... Nov 3 2011, 08:48 AM Cairo94507 Terrific job of getting this car back together cor... Nov 3 2011, 06:54 AM jsconst Thanks Michael, it seems like it's taking fore... Nov 3 2011, 08:53 AM pt_700 is anyone else impressed at how much jeff put on 1... Nov 3 2011, 09:55 AM StratPlayer Impressive :first: Nov 3 2011, 10:22 AM Cap'n Krusty Nice!
Whatever is in the bright yellow box th... Nov 3 2011, 10:51 AM jsconst Cap'n, those are the front rubber control arm ... Nov 3 2011, 08:14 PM Tom Great work, :trophy: keep it going and you will h... Nov 3 2011, 06:00 PM ConeDodger I've seen this car in person and it is going t... Nov 3 2011, 06:25 PM jsconst Thanks everyone, and Rob no its not a stock rebuil... Nov 3 2011, 08:30 PM Drums66 ....Yeah, cool story....keep on! :flag1: :sha... Nov 3 2011, 07:10 PM jsconst My son came over yesterday while I was taking the ... Nov 6 2011, 09:06 AM jsconst Well progress slowed up a bit on the 75, mainly be... Dec 8 2011, 01:43 PM bohalrantipol Did you pick up those ARP head bolts from LN engin... Dec 9 2011, 10:47 AM jsconst
Did you pick up those ARP head bolts from LN engi... Dec 9 2011, 03:17 PM bohalrantipol What was your logic in using them? Did you run a ... Dec 9 2011, 05:34 PM jsconst While researching my engine combination they were ... Dec 9 2011, 08:02 PM underdog Looks really great. I see from the photo your 75 h... Dec 8 2011, 03:31 PM PBC914
Looks really great. I see from the photo your 75 ... Dec 8 2011, 03:40 PM jsconst
Looks really great. I see from the photo your 75... Dec 8 2011, 04:48 PM Lennies914 Looking great Jeff. You've been busy.
My son... Dec 9 2011, 10:30 PM jsconst Thanks Lennie, Mark has made more progress on my p... Dec 9 2011, 11:01 PM kg6dxn
Looking great Jeff. You've been busy.
My so... Dec 11 2011, 01:11 AM mrbubblehead great thread jeff, do you happen to remember what ... Dec 11 2011, 12:33 AM jsconst 5 - 3/8" plugs tap size 3/8 - 18 NPT drill 37... Dec 11 2011, 01:34 AM jsconst I went to Sonoma today and picked up my new motor ... Dec 15 2011, 11:29 PM ConeDodger Judging from his posts on Facebook Jeff, Mark is j... Dec 15 2011, 11:34 PM jsconst
Judging from his posts on Facebook Jeff, Mark is ... Dec 15 2011, 11:49 PM McMark Yeah, Jeff broke my parts washer. :P Just kiddin... Dec 16 2011, 09:04 PM jsconst
The motor went together relatively smoothly and ... Dec 17 2011, 07:46 PM jsconst Its been a while since I updated this, but I have ... Feb 25 2012, 08:30 PM Socalandy Nice work!!! Feb 25 2012, 08:33 PM rfuerst911sc If you could outline the general spec's on the... Feb 26 2012, 05:07 AM Lennies914 I think those little meet-n-greets give everybody ... Feb 26 2012, 09:36 AM Prospectfarms
:agree:
Interesting thread with some helpful ... Feb 26 2012, 09:44 AM jsconst Thanks everyone, seeing other 914s, and talking ab... Feb 26 2012, 11:08 AM jsconst well I decided to stay home and work in the garage... Feb 26 2012, 05:34 PM Prospectfarms :) :) :) Feb 26 2012, 05:45 PM McMark Awesome! I can't wait to try it out! ... Mar 12 2012, 10:25 PM |
1 User(s) are reading this topic (1 Guests and 0 Anonymous Users)
0 Members:

|
Lo-Fi Version | Time is now: 10th June 2024 - 07:42 AM |
Invision Power Board
v9.1.4 © 2024 IPS, Inc.