|
|
|
Porsche, and the Porsche crest are registered trademarks of Dr. Ing. h.c. F. Porsche AG.
This site is not affiliated with Porsche in any way. Its only purpose is to provide an online forum for car enthusiasts. All other trademarks are property of their respective owners. |
|
|


| partwerks |
 Dec 3 2011, 09:12 PM Dec 3 2011, 09:12 PM
Post
#1
|
|
Senior Member  Group: Members Posts: 1,593 Joined: 7-September 06 From: Grand Island, NE Member No.: 6,787 |
While I was there I asked my mechanic if he would be interested in installing that longitudinal kit and he quoted me $750.00. Does that price sound about right or is he too high again?
I can always stop by a body shop for an estimate also, but if worse comes to worse, I would rather pay more and have it done right as opposed to cheaper and screw it up for me. |
   |

 
|
  |
Replies
| McMark |
Dec 4 2011, 11:17 AM
Post
#2
|
|
914 Freak! Group: Retired Admin Posts: 20,179 Joined: 13-March 03 From: Grand Rapids, MI Member No.: 419 Region Association: None |
$750 is not way too much if you want it done right. You're talking about a serious installation that can result in a bent chassis if done incorrectly. Remove interior, clean and prep, careful installation, post welding cleanup and paint, reinstall interior. Definitely 10 hours of work.
I don't like installing bracing when installing these kits because I feel like it's a crutch that makes people feel like they're safe. I've installed quite a few of them. I've never used bracing, and I've never had a problem. I place a floor jack in the middle of the long and lift enough to relieve any pressure to bend. Then I weld slowly, taking time between each rosette weld. I modified two drill bits to help in prepping each weld. I have one with a step in it to clean the e-coat off just around the circle. Then I have another that I've dulled completely flat to remove the paint from the existing long. This way I have clean metal to weld, and I do this one hole at a time, in order to take up more time between welds. QUOTE I must say I'm not super impressed with these. It's going to take some work to get mine right. Then you're misunderstanding something or your car is messed up. They drop right in once you've cleaned everything correctly. You don't need to remove the E-Brake pieces. Just take 2minutes and cut out the notch you're thinking of (as long as your car is early). You need to make sure your floor pan isn't buckled upwards. MOST cars have wrinkled floor pans. Sorry if I sound defensive, but Mark (Engman) spent a lot of time getting these right and has gone through a bunch of changes from the first design. All in the name of making sure they fit cars as well as possible out of the box. All aftermarket products must be approached with an eye for what needs to be modified to make it work on your car. Some companys build better aftermarket parts than others. And you obviously haven't installed many, because Mark's stuff fits GREAT compared to most others. Once you do your job right, as the installer, you'll see how well it fits. If the top and the sides aren't sitting absolutely flat, you're doing something wrong. |
|
|
|
| nathansnathan |
Dec 4 2011, 12:12 PM
Post
#3
|
|
Senior Member Group: Members Posts: 1,052 Joined: 31-May 10 From: Laguna Beach, CA Member No.: 11,782 Region Association: None |
QUOTE(McMark @ Dec 4 2011, 09:17 AM)  $750 is not way too much if you want it done right. You're talking about a serious installation that can result in a bent chassis if done incorrectly. Remove interior, clean and prep, careful installation, post welding cleanup and paint, reinstall interior. Definitely 10 hours of work. I don't like installing bracing when installing these kits because I feel like it's a crutch that makes people feel like they're safe. I've installed quite a few of them. I've never used bracing, and I've never had a problem. I place a floor jack in the middle of the long and lift enough to relieve any pressure to bend. Then I weld slowly, taking time between each rosette weld. I modified two drill bits to help in prepping each weld. I have one with a step in it to clean the e-coat off just around the circle. Then I have another that I've dulled completely flat to remove the paint from the existing long. This way I have clean metal to weld, and I do this one hole at a time, in order to take up more time between welds. QUOTE I must say I'm not super impressed with these. It's going to take some work to get mine right. Then you're misunderstanding something or your car is messed up. They drop right in once you've cleaned everything correctly. You don't need to remove the E-Brake pieces. Just take 2minutes and cut out the notch you're thinking of (as long as your car is early). You need to make sure your floor pan isn't buckled upwards. MOST cars have wrinkled floor pans. Sorry if I sound defensive, but Mark (Engman) spent a lot of time getting these right and has gone through a bunch of changes from the first design. All in the name of making sure they fit cars as well as possible out of the box. All aftermarket products must be approached with an eye for what needs to be modified to make it work on your car. Some companys build better aftermarket parts than others. And you obviously haven't installed many, because Mark's stuff fits GREAT compared to most others. Once you do your job right, as the installer, you'll see how well it fits. If the top and the sides aren't sitting absolutely flat, you're doing something wrong. I am not judging these by the same standards as replacement panels as they're not. Being all laser cut and flat, I'd hoped they'd be a better fit. Parking brake recess looks all wrong, maybe these should be late car only? 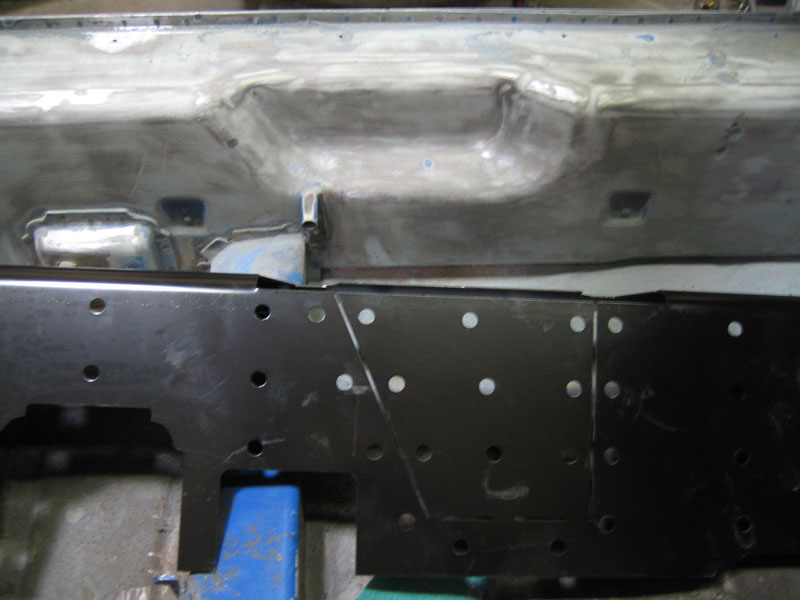 It's all the way down on top but needs a quarter inch further down on the seatbelt hole. 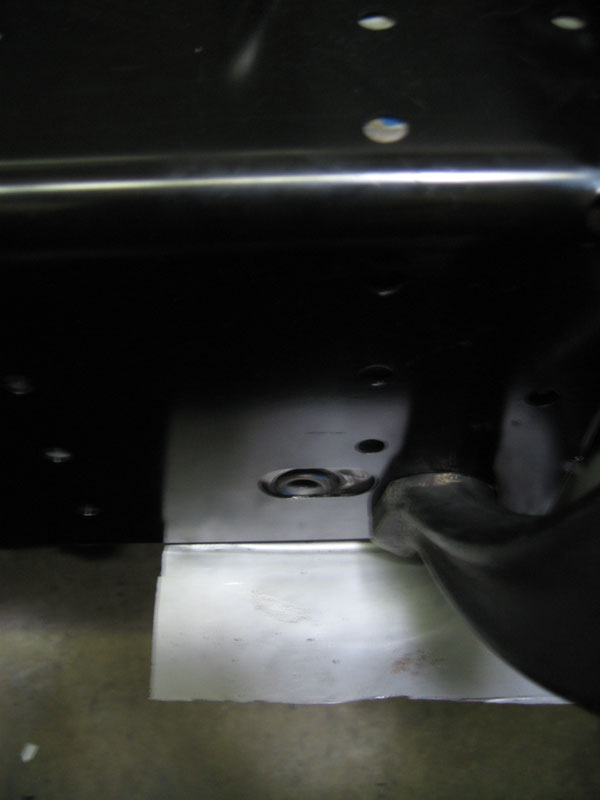 The radius, what i meant is it's too small a radius, I guess better that than too large. You can see the tricky bit to hammer down at the rear there.ddd 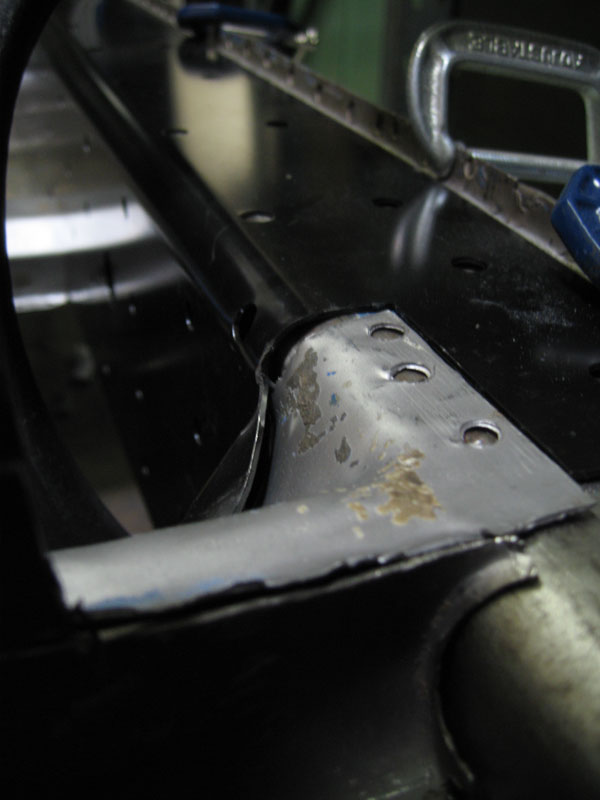 And the overhang at the bottom, seen from below outside, the floor part cut out. I don't think since that has nothing to attach to that it's going to be doing much. And it will make it difficult to apply seam sealer 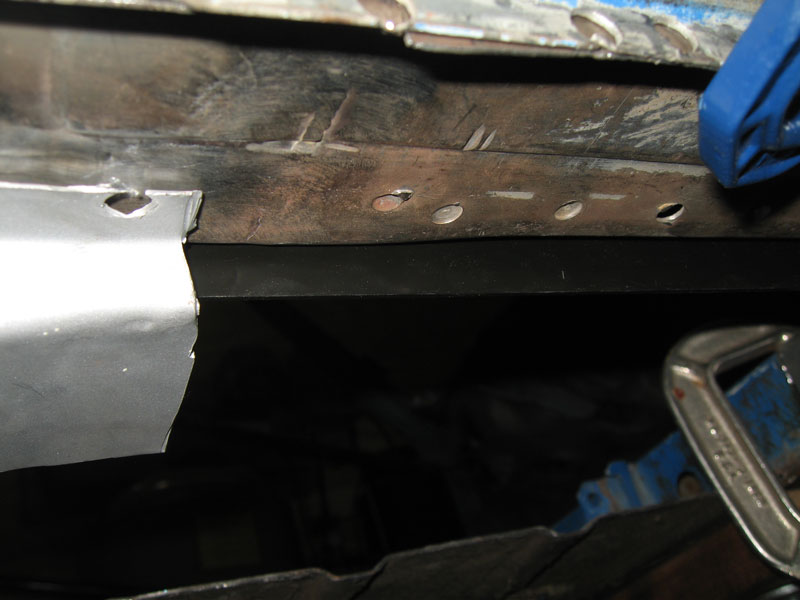 |
|
|
|
Posts in this topic
 partwerks Longitudinal kit Dec 3 2011, 09:12 PM
 carr914 If it's an Engman Kit it is Too Much, but then... Dec 3 2011, 09:22 PM partwerks It's the Engman kit. What should be a more rea... Dec 3 2011, 09:40 PM sean_v8_914 a quick hack job with little attention to detail c... Dec 4 2011, 02:32 AM rfuerst911sc How handy are you ? If you are not able to do the ... Dec 4 2011, 05:23 AM r_towle
While I was there I asked my mechanic if he would... Dec 4 2011, 08:57 AM
carr914 If it's an Engman Kit it is Too Much, but then... Dec 3 2011, 09:22 PM partwerks It's the Engman kit. What should be a more rea... Dec 3 2011, 09:40 PM sean_v8_914 a quick hack job with little attention to detail c... Dec 4 2011, 02:32 AM rfuerst911sc How handy are you ? If you are not able to do the ... Dec 4 2011, 05:23 AM r_towle
While I was there I asked my mechanic if he would... Dec 4 2011, 08:57 AM
 hydroliftin
It depends on a few things.
How much of the inter... Dec 5 2011, 02:33 PM Vacca Rabite And you need to make sure that your guy knows to b... Dec 4 2011, 09:41 AM nathansnathan My Engmanm kit just came in and it's not as st... Dec 4 2011, 10:09 AM 3d914 I have good factory primer and paint on my longs, ... Dec 4 2011, 10:34 AM mepstein
While I was there I asked my mechanic if he would... Dec 4 2011, 11:53 AM 3d914 Mark, thanks for the tips. I hadn't decided ho... Dec 4 2011, 11:56 AM McMark It doesn't need to be cleaned off. But I figu... Dec 4 2011, 12:00 PM sean_v8_914 do yourself a favor and search this forum. there a... Dec 4 2011, 12:17 PM sean_v8_914 I have installed over a dozen Engman kits, none we... Dec 4 2011, 12:21 PM sean_v8_914 is that a baddog kit? Dec 4 2011, 12:22 PM nathansnathan I just got it through the engmann group buy here, ... Dec 4 2011, 12:31 PM Jerry75914 I installed an earlier version of the Engman kit, ... Dec 4 2011, 02:14 PM Randal My biggest concern would be installing the kit on ... Dec 5 2011, 02:56 PM SirAndy Someone must have thought about this and made up a... Dec 5 2011, 03:22 PM Randal
Someone must have thought about this and made up ... Dec 5 2011, 06:56 PM SirAndy I was there that day and even bought lunch. :che... Dec 5 2011, 07:18 PM McMark
Yup. Porsche. :lol:
Andy posted the links. :t... Dec 5 2011, 03:42 PM scotty b If you think 750.00 is high, then do the job yours... Dec 5 2011, 07:40 PM sean_v8_914 I remember reading guys post here that they did on... Dec 6 2011, 09:26 AM
hydroliftin
It depends on a few things.
How much of the inter... Dec 5 2011, 02:33 PM Vacca Rabite And you need to make sure that your guy knows to b... Dec 4 2011, 09:41 AM nathansnathan My Engmanm kit just came in and it's not as st... Dec 4 2011, 10:09 AM 3d914 I have good factory primer and paint on my longs, ... Dec 4 2011, 10:34 AM mepstein
While I was there I asked my mechanic if he would... Dec 4 2011, 11:53 AM 3d914 Mark, thanks for the tips. I hadn't decided ho... Dec 4 2011, 11:56 AM McMark It doesn't need to be cleaned off. But I figu... Dec 4 2011, 12:00 PM sean_v8_914 do yourself a favor and search this forum. there a... Dec 4 2011, 12:17 PM sean_v8_914 I have installed over a dozen Engman kits, none we... Dec 4 2011, 12:21 PM sean_v8_914 is that a baddog kit? Dec 4 2011, 12:22 PM nathansnathan I just got it through the engmann group buy here, ... Dec 4 2011, 12:31 PM Jerry75914 I installed an earlier version of the Engman kit, ... Dec 4 2011, 02:14 PM Randal My biggest concern would be installing the kit on ... Dec 5 2011, 02:56 PM SirAndy Someone must have thought about this and made up a... Dec 5 2011, 03:22 PM Randal
Someone must have thought about this and made up ... Dec 5 2011, 06:56 PM SirAndy I was there that day and even bought lunch. :che... Dec 5 2011, 07:18 PM McMark
Yup. Porsche. :lol:
Andy posted the links. :t... Dec 5 2011, 03:42 PM scotty b If you think 750.00 is high, then do the job yours... Dec 5 2011, 07:40 PM sean_v8_914 I remember reading guys post here that they did on... Dec 6 2011, 09:26 AM |
1 User(s) are reading this topic (1 Guests and 0 Anonymous Users)
0 Members:

|
Lo-Fi Version | Time is now: 8th June 2024 - 11:27 AM |
Invision Power Board
v9.1.4 © 2024 IPS, Inc.