|
|
|
Porsche, and the Porsche crest are registered trademarks of Dr. Ing. h.c. F. Porsche AG.
This site is not affiliated with Porsche in any way. Its only purpose is to provide an online forum for car enthusiasts. All other trademarks are property of their respective owners. |
|
|


| TargaToy |
 Mar 3 2012, 08:13 AM Mar 3 2012, 08:13 AM
Post
#1
|
|
-NONSOLIS RADIOS SEDIOUIS FULMINA MITTO-  Group: Members Posts: 714 Joined: 26-March 10 From: DelMarVa Peninsula Member No.: 11,509 Region Association: MidAtlantic Region |
Rick's recent posts where he expertly repaired a previously filled dent in his green car's fender prompted me to post this question. I'm working on the same part of my car but didn't want to hijack his post.
Speaking of beating down the hight spots, this is what was under the filler: 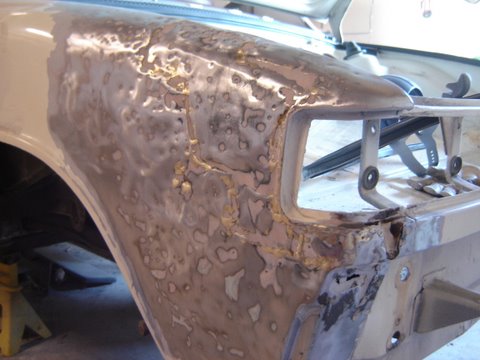 I cut out the whole bad section and reworked the same section I had in a salvaged fender. 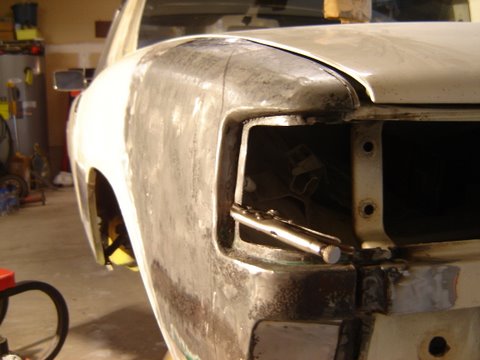 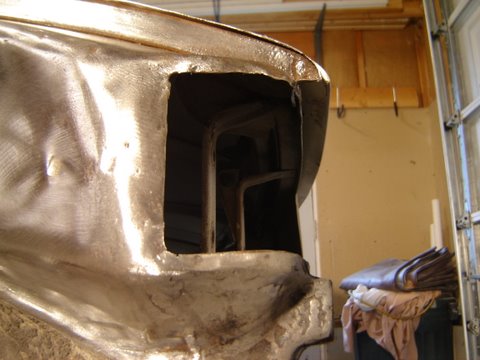 As you can see, I cut out the old section right along the top edge of the quarter panel. The cut line was only about 3/16" from the channel for the trunk weather-stripping. 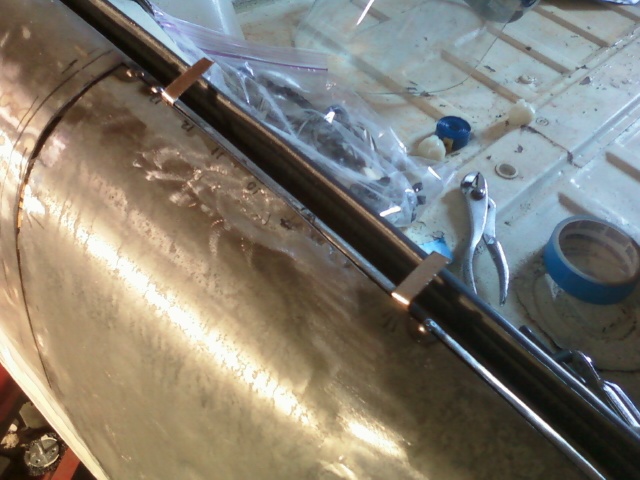  In retrospect, I may have made a booboo here. I thought I took my sweet time welding in this panel but now that everything's said and done (and cooled off), the shrinkage in the panel has pulled the trunk lid gap a bit. 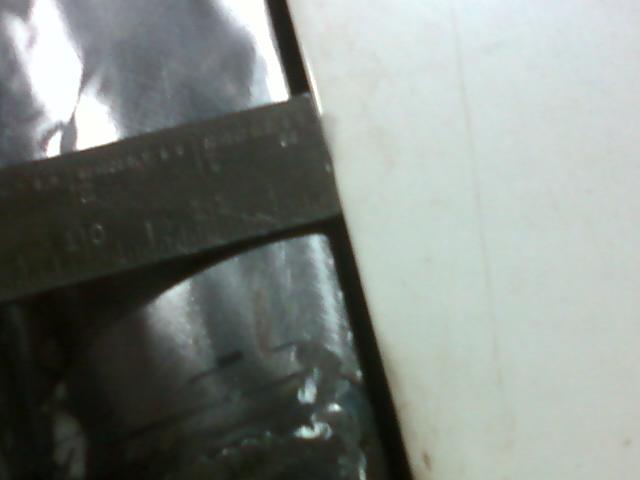 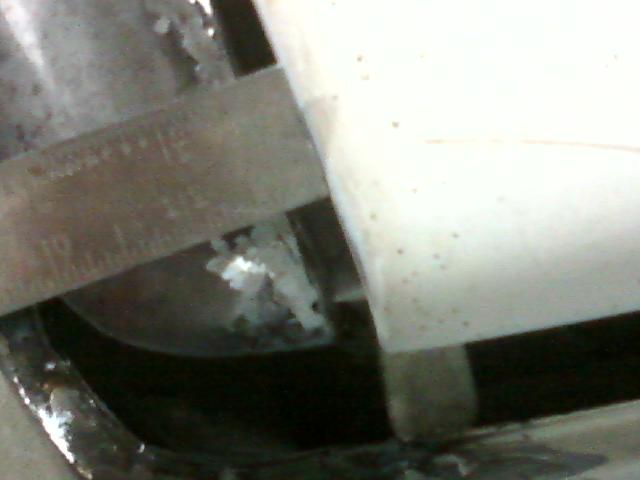 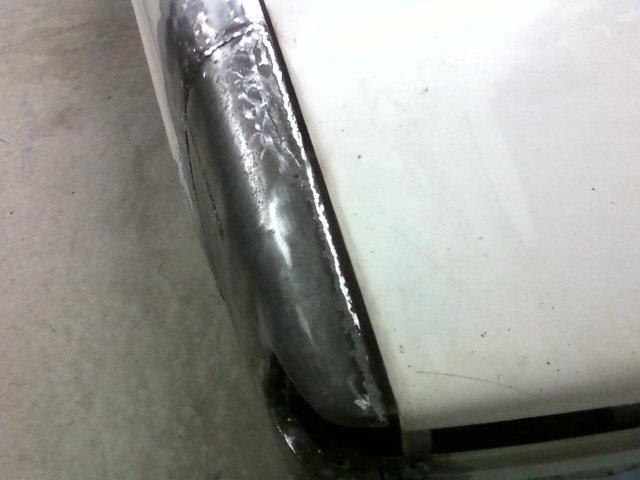 Rick, you once told me that if the gaps were within 3mm (3 dimes) not to stress as the bodies were hand built. However, I'm not thrilled with the trunk gap now and and my finish grinding is not even done yet which means there'll be more heat introduced. Can this be corrected? Also, my vertical weld where the two panels join also shrank a bit. Can I use some dolly work and bumping to bring the area out once I do my finish grinding and minimize the amount of filler that'll be needed? |
   |

 
|
  |
Replies
| rick 918-S |
Mar 3 2012, 09:59 AM
Post
#2
|
|
Hey nice rack! -Celette Group: Members Posts: 21,263 Joined: 30-December 02 From: Now in Superior WI Member No.: 43 Region Association: Northstar Region |
No no.. The 3mm tolerance I was refering to is for acceptable chassis repair diamensions ( strut tower locations, suspension pickup points, diagonal measurements like windsheild post to targa bar etc.) Best to be right on the money for these, but if your within 3mm your fine.
Average door gaps should be around 5+mm. Front lids align from the cowl edge then check your side measurements. Rear trunk lids are never that accurate. There always seems to be some hang over at the corners and the gaps never seem to be perfect. But what you have there is way out of spec. Here's what I would do: Align the lid to the engine lid and passanger side quarter panel. The goal is to be able to open the lid without catching the engine lid. Depending on the rear trunk hinges and the angle they lift, your gap to the engine lid will very. Now heres where it gets dicey. I just measured the Alien. I had 5mm on the drivers side and 8mm on the passanger side. The lid closes good and just clears my engine lid so I'm good with that. (IMG:style_emoticons/default/confused24.gif) (IMG:style_emoticons/default/biggrin.gif) So, if your anywhere near 5-8mm and the lid latches and the corners aren't too far out of whack You should be fine. Now check the gap about mid way up the left side of the lid. This should be past the area you cut out. It sux but take your die grinder or panel saw or what ever you want to use and slice the panel back open along your weld line. Once it's opened up you can push the lip back over and line it up to the gap you measured half way up the lid. Use something wide like a flat spoon dolly of something that will allow you to move it gradually. Your going to have a sizeable gap. There are a couple ways to fill it. One of them is NOT to try to fill it with mig welding wire. If you can get the gap free of bumps from your last weld job that would be great. I mean under the quarter panel. This may require cutting part or all of the upper weld seam away. Don't worry about it. Just do it. Tape some tag board or poster board or cereal box over the gap you made. TIP OF THE DAY: If you have a print shop near you stop in and ask them to sell you some tag board. This is the stuff that they use as the heavy cardboard for desk top size calendars. It cuts nice and shapes good for pattern making. Ok, Back to the issue at hand. Once you have the above done take some weld through primer and spray lightly over the gap. This will make your pattern. Cut this out, mark a piece of sheetmetal cut it, shape it and fit it. Tight but nice! Now dig into your scrape metal pile and find a piece of old copper tubing. 3/4" works really good. Cut a section, hammer it flat. This will be used as a backer and will help hold the panelfrom pulling again. Shape it to fit the inside contour of the panel. You don't have to do the whole length at once. Infact shaping a backer that long may be a real pain in the ass. I usually try to back about 6" at a time. Then move the backer. If I were you I would fit the backer and either cleco it to the panel or use a couple sheetmetal screws to hold it. I wouldn't try to clamp it as the weight of the clamp may lift the panel and cause mis-alignment. Work slowly and tack the piece in place. Grind your tacks and check it as you go. Once your done welding you can grind everything and plug weld your cleco or sheetmetal screw holes. You not upside down. You just learned what not to do. Oh, BTW: you did the right thing replacing that nasty cracker jack surprise! |
|
|
|
Posts in this topic
 TargaToy Shrinkage. (no pool content) Mar 3 2012, 08:13 AM
 GeorgeRud Does anyone use lead anymore to do final fitting o... Mar 3 2012, 10:04 AM
 rick 918-S
Does anyone use lead anymore to do final fitting ... Mar 3 2012, 10:13 AM rudedude Rick,
Kind of off this topic but closely related, ... Mar 3 2012, 10:41 AM rick 918-S
Rick,
Kind of off this topic but closely related,... Mar 3 2012, 11:42 AM TargaToy Hey, Rick. Thanks as always for the (free) expert... Mar 4 2012, 08:49 PM rick 918-S I think my rear lid is like that. Is the passenger... Mar 4 2012, 09:04 PM TargaToy
I think my rear lid is like that. Is the passenge... Mar 4 2012, 09:16 PM rick 918-S
I think my rear lid is like that. Is the passeng... Mar 4 2012, 09:37 PM TargaToy
Examine the inner panel on the driver side and b... Mar 6 2012, 08:50 PM rick 918-S
Examine the inner panel on the driver side and ... Mar 6 2012, 09:41 PM 914itis
I think my rear lid is like that. Is the passenge... Jun 11 2012, 09:24 PM rick 918-S Make sure your tail light fits also. Mar 4 2012, 09:07 PM TargaToy Here's an update...and I'd like to add tha... Jun 9 2012, 06:58 AM FourBlades Nice save! :Qarl:
Thanks for posting the wh... Jun 9 2012, 07:05 AM kg6dxn Have you test fit the tail lamp yet? Jun 9 2012, 08:01 AM TargaToy
Have you test fit the tail lamp yet?
Yes. I ha... Jun 9 2012, 10:31 AM rick 918-S Review this thread again.
http://www.914world.co... Jun 11 2012, 08:47 PM TargaToy Thanks, Rick.
So when I'm working the dolly u... Jun 11 2012, 09:11 PM rick 918-S
Thanks, Rick.
So when I'm working the dolly ... Jun 11 2012, 09:20 PM TargaToy Got it. Thanks again. Jun 11 2012, 09:24 PM rick 918-S Send me a pm when you post progress photos again. ... Jun 11 2012, 09:43 PM
rick 918-S
Does anyone use lead anymore to do final fitting ... Mar 3 2012, 10:13 AM rudedude Rick,
Kind of off this topic but closely related, ... Mar 3 2012, 10:41 AM rick 918-S
Rick,
Kind of off this topic but closely related,... Mar 3 2012, 11:42 AM TargaToy Hey, Rick. Thanks as always for the (free) expert... Mar 4 2012, 08:49 PM rick 918-S I think my rear lid is like that. Is the passenger... Mar 4 2012, 09:04 PM TargaToy
I think my rear lid is like that. Is the passenge... Mar 4 2012, 09:16 PM rick 918-S
I think my rear lid is like that. Is the passeng... Mar 4 2012, 09:37 PM TargaToy
Examine the inner panel on the driver side and b... Mar 6 2012, 08:50 PM rick 918-S
Examine the inner panel on the driver side and ... Mar 6 2012, 09:41 PM 914itis
I think my rear lid is like that. Is the passenge... Jun 11 2012, 09:24 PM rick 918-S Make sure your tail light fits also. Mar 4 2012, 09:07 PM TargaToy Here's an update...and I'd like to add tha... Jun 9 2012, 06:58 AM FourBlades Nice save! :Qarl:
Thanks for posting the wh... Jun 9 2012, 07:05 AM kg6dxn Have you test fit the tail lamp yet? Jun 9 2012, 08:01 AM TargaToy
Have you test fit the tail lamp yet?
Yes. I ha... Jun 9 2012, 10:31 AM rick 918-S Review this thread again.
http://www.914world.co... Jun 11 2012, 08:47 PM TargaToy Thanks, Rick.
So when I'm working the dolly u... Jun 11 2012, 09:11 PM rick 918-S
Thanks, Rick.
So when I'm working the dolly ... Jun 11 2012, 09:20 PM TargaToy Got it. Thanks again. Jun 11 2012, 09:24 PM rick 918-S Send me a pm when you post progress photos again. ... Jun 11 2012, 09:43 PM |
1 User(s) are reading this topic (1 Guests and 0 Anonymous Users)
0 Members:

|
Lo-Fi Version | Time is now: 8th May 2026 - 09:37 PM |
Invision Power Board
v9.1.4 © 2026 IPS, Inc.